Archives January 2024

Unraveling The "No Such Interface Supported" Error In Windows 11 Photos

Unraveling the "No Such Interface Supported" Error in Windows 11 Photos

Introduction

With great pleasure, we will explore the intriguing topic related to Unraveling the "No Such Interface Supported" Error in Windows 11 Photos. Let’s weave interesting information and offer fresh perspectives to the readers.

Unraveling the "No Such Interface Supported" Error in Windows 11 Photos

Fix "No such interface supported" When Opening png & jpg in windows 11 / 10  FIX CANT OPEN

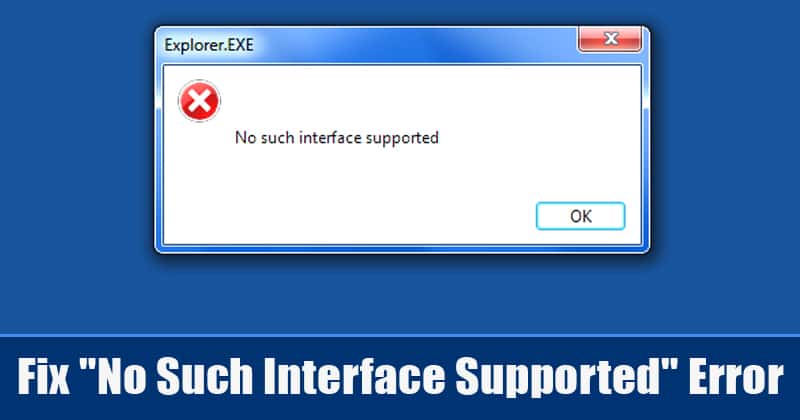
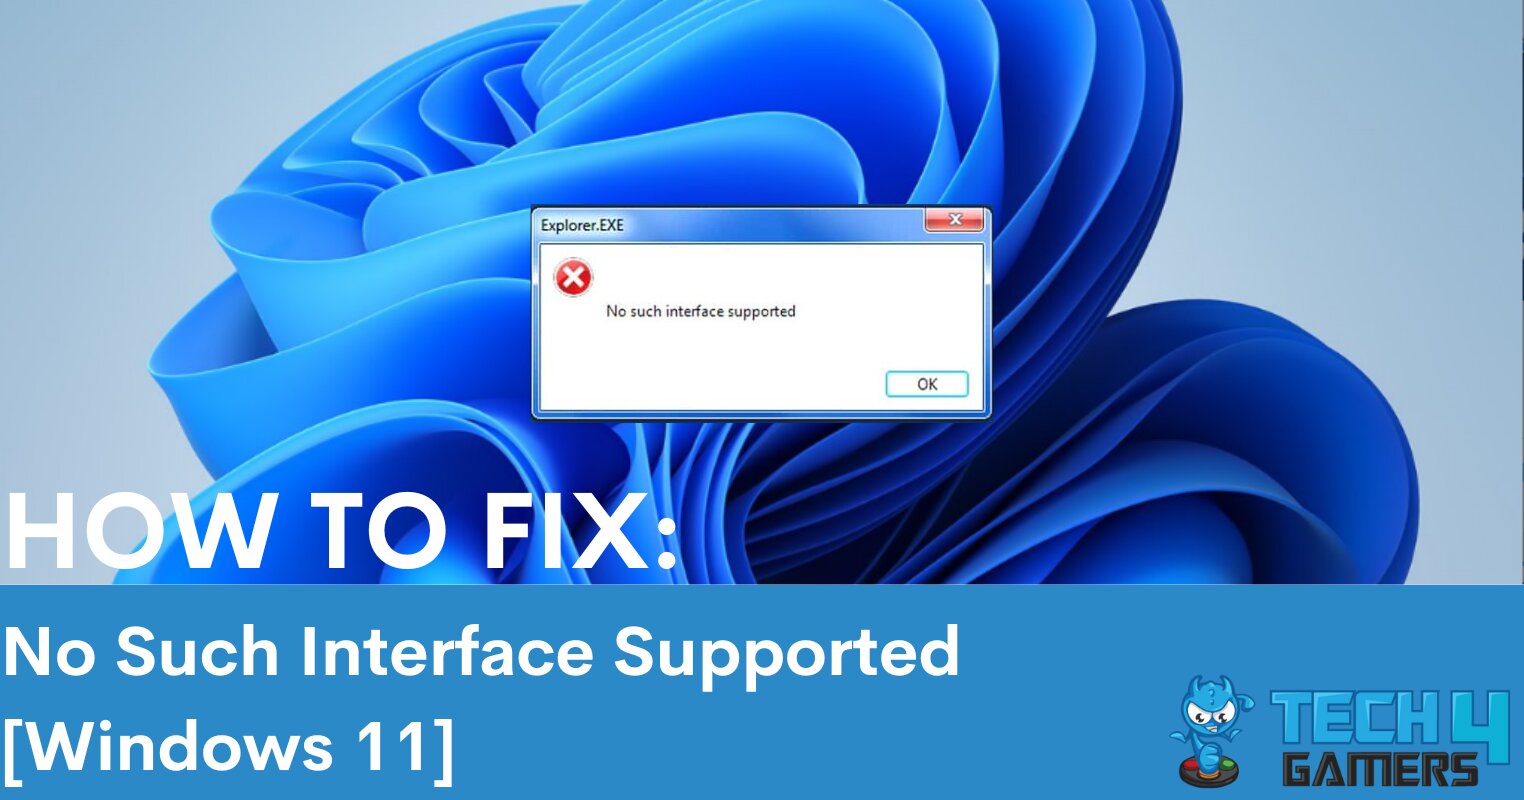
The "No Such Interface Supported" error message in Windows 11 Photos can be a frustrating experience, leaving users unable to access or manipulate their images. This error typically arises when the Photos app encounters a problem with the underlying system components responsible for image handling. While the exact cause can vary, understanding the common culprits and troubleshooting techniques can help resolve the issue.

Understanding the Error’s Context:

The "No Such Interface Supported" message signals a fundamental incompatibility between the Photos app and the system’s image handling capabilities. This incompatibility can stem from several factors, including:

  • Corrupted System Files: Essential system files, crucial for the Photos app’s functionality, might be damaged or missing. This could result in the app failing to communicate with the necessary components.
  • Outdated Drivers: The drivers responsible for managing the system’s hardware, including graphics cards and display adapters, might be outdated or incompatible with the Photos app.
  • Software Conflicts: Other installed applications or software updates might interfere with the Photos app’s operation, creating a conflict that prevents proper image handling.
  • File System Errors: Issues within the file system, where images are stored, can lead to the Photos app being unable to access or process them.
  • Permissions Issues: The Photos app might lack the necessary permissions to access specific folders or files, leading to the error message.
  • Hardware Malfunctions: Although less common, hardware issues, such as a faulty hard drive or graphics card, could contribute to the error.

Troubleshooting the "No Such Interface Supported" Error:

To effectively troubleshoot the "No Such Interface Supported" error, a systematic approach is recommended:

1. Basic Troubleshooting Steps:

  • Restart the Computer: A simple restart can often resolve temporary glitches that might be causing the error.
  • Run the Photos App as Administrator: Right-click the Photos app icon, select "Run as administrator," and try accessing the image again. This grants the app elevated privileges, potentially resolving permission-related issues.
  • Reinstall the Photos App: Uninstall the Photos app from the "Apps & features" section in Settings and reinstall it from the Microsoft Store. This ensures a fresh installation, eliminating potential issues with corrupted files.

2. Advanced Troubleshooting Techniques:

  • Check for System File Corruption: Utilize the System File Checker (SFC) tool by typing "cmd" in the search bar, running it as administrator, and entering "sfc /scannow." This tool scans for and repairs corrupted system files, potentially resolving the error.
  • Update Graphics Drivers: Navigate to the manufacturer’s website for your graphics card (e.g., NVIDIA, AMD) and download the latest compatible drivers. Install them to ensure your graphics card is fully functional with the Photos app.
  • Run a Disk Check: Use the "chkdsk" command in the Command Prompt to check for and repair file system errors. Type "chkdsk /f /r" and press Enter. This might resolve issues preventing the Photos app from accessing images.
  • Temporarily Disable Antivirus Software: Antivirus software can sometimes interfere with applications, including the Photos app. Temporarily disable your antivirus and try accessing the image again. If the error disappears, consider adding the Photos app as an exception in your antivirus settings.
  • Check for Software Conflicts: Uninstall recently installed software or updates that might be interfering with the Photos app. Reinstall them after resolving the error to determine if they were the root cause.
  • Perform a Clean Boot: A clean boot starts Windows with only essential services and drivers, minimizing the possibility of software conflicts. This can help isolate the cause of the error. Follow these steps:
    • Search for "msconfig" in the search bar and open the System Configuration window.
    • Go to the "Services" tab and check the box for "Hide all Microsoft services."
    • Click "Disable all" and then go to the "Startup" tab.
    • Click "Open Task Manager" and disable any startup programs that are not essential.
    • Restart your computer and try accessing the image. If the error is resolved, enable services and startup programs one by one to identify the culprit.

3. Advanced Solutions (If Troubleshooting Fails):

  • Reset Windows 11: If the above solutions fail, consider resetting Windows 11 to its factory settings. This will erase all data, so make sure to back up important files beforehand.
  • Contact Microsoft Support: If the error persists despite all troubleshooting efforts, contacting Microsoft Support for assistance is recommended. They can provide tailored guidance and potentially identify more advanced solutions.

FAQs: "No Such Interface Supported" Error in Windows 11 Photos

Q: Can I fix this error without reinstalling Windows 11?

A: Yes, in most cases, the error can be resolved through troubleshooting techniques outlined above. Reinstalling Windows 11 should be considered as a last resort.

Q: What if I’m unable to open any images in the Photos app?

A: This suggests a more widespread issue, possibly related to system files or drivers. Try the advanced troubleshooting techniques, particularly the System File Checker and driver updates.

Q: My antivirus software is not causing the issue. What else could be interfering?

A: Other installed applications or recent updates might be creating conflicts. Temporarily disabling them or uninstalling recent updates can help identify the culprit.

Q: Is there a way to prevent this error in the future?

A: Keeping your system updated, including Windows updates and driver updates, can minimize the risk of encountering this error. Additionally, regularly performing disk checks and using the System File Checker can help maintain system health.

Tips for Preventing the "No Such Interface Supported" Error:

  • Regularly Update Windows: Windows updates often include bug fixes and security patches that can improve system stability and prevent compatibility issues.
  • Keep Drivers Up-to-Date: Regularly check for and install the latest drivers for your graphics card and other hardware components.
  • Use a Reliable Antivirus: A robust antivirus can help prevent malware infections that could corrupt system files or cause software conflicts.
  • Perform Regular Disk Checks: Regularly check your hard drive for errors using the "chkdsk" command. This can prevent file system issues that might affect the Photos app.
  • Avoid Installing Unnecessary Software: Only install software that you need and trust. Unnecessary applications can increase the risk of conflicts and system instability.

Conclusion:

The "No Such Interface Supported" error in Windows 11 Photos can be a challenging issue, but with a systematic approach and the right troubleshooting techniques, it can be resolved. Understanding the underlying causes and employing the appropriate methods can effectively restore image handling functionality. By adhering to best practices, such as regular system updates and responsible software installation, users can minimize the risk of encountering this error in the future and enjoy a seamless image viewing and editing experience.

5 Fix "No Such Interface Supported" in Windows 11 - YouTube Fix Windows 11 Can't Open JPG Photos  No Such Interface Supported [Solved] - YouTube No Such Interface Supported Windows 11
Top 5 Ways to Fix No Such Interface Supported Error in Windows 11 - Guiding Tech No Such Interface Supported Windows 11 No Such Interface Supported Windows 11
FIXED: Windows 11 Error "No Such Interface Supported" How To Fix "No Such Interface Supported" on Windows 11 - YouTube

Closure

Thus, we hope this article has provided valuable insights into Unraveling the "No Such Interface Supported" Error in Windows 11 Photos. We appreciate your attention to our article. See you in our next article!

The Windows 11 Experience: A Comprehensive Exploration

The Windows 11 Experience: A Comprehensive Exploration

Introduction

With enthusiasm, let’s navigate through the intriguing topic related to The Windows 11 Experience: A Comprehensive Exploration. Let’s weave interesting information and offer fresh perspectives to the readers.

The Windows 11 Experience: A Comprehensive Exploration

Windows 11: The Experience So Far - Tech Emblem

Windows 11, the latest iteration of Microsoft’s flagship operating system, represents a significant evolution in the way users interact with their computers. This comprehensive exploration delves into the key features, benefits, and considerations associated with Windows 11, providing a detailed understanding of its impact on the modern computing landscape.

A New Visual Identity:

Windows 11 introduces a refined aesthetic that emphasizes clean lines, rounded corners, and a visually appealing interface. The Start menu, a cornerstone of Windows functionality, has undergone a significant transformation, adopting a centered layout and offering quick access to frequently used applications and pinned files. The taskbar, too, has been redesigned, showcasing a streamlined approach with a more prominent focus on open windows and applications. This contemporary visual language enhances user experience by promoting intuitive navigation and visual clarity.

Enhanced Performance and Security:

Windows 11 prioritizes performance and security, incorporating features designed to optimize system resources and protect user data. The operating system leverages the latest advancements in hardware technology, such as support for 12th Generation Intel Core processors and AMD Ryzen processors, to deliver a smoother and more responsive user experience. Additionally, Windows 11 integrates robust security measures, including Windows Defender Antivirus, Microsoft Defender SmartScreen, and Windows Hello, to safeguard against evolving cyber threats. These advancements ensure a secure and efficient computing environment.

A Focus on Productivity and Creativity:

Windows 11 empowers users to enhance their productivity and unleash their creativity through a range of innovative features. The operating system introduces Snap Layouts, a feature that allows users to arrange multiple windows in a visually appealing and efficient manner, maximizing screen real estate for multitasking. Windows 11 also offers improved support for touchscreens, pens, and voice input, enabling users to interact with their devices in a more natural and intuitive way. These features cater to the needs of diverse users, from professionals working on complex projects to individuals seeking a more engaging and productive computing experience.

The Power of Integration:

Windows 11 seamlessly integrates with Microsoft’s ecosystem of products and services, creating a cohesive and connected computing experience. The operating system leverages the power of cloud services, such as OneDrive and Microsoft 365, to enable users to access their files, applications, and data from any device. Windows 11 also supports features like Microsoft Teams and Xbox Cloud Gaming, allowing users to collaborate with colleagues and enjoy a wide range of games across their devices. This interconnectedness fosters a unified and efficient digital environment.

A Platform for Innovation:

Windows 11 serves as a platform for innovation, providing developers with the tools and resources to create cutting-edge applications and experiences. The operating system incorporates the latest technologies, such as support for DirectX 12 Ultimate and the Windows Subsystem for Android, enabling developers to create visually stunning graphics and leverage the power of Android apps. This commitment to innovation ensures that Windows 11 remains a dynamic and evolving platform, driving the advancement of computing technology.

Considerations for Upgrading:

While Windows 11 offers a compelling set of features and benefits, it is crucial to consider certain aspects before upgrading. The minimum system requirements for Windows 11 are more stringent than those for previous versions, requiring users to have a compatible processor, sufficient RAM, and a secure boot-enabled system. Additionally, users should ensure that their applications and drivers are compatible with Windows 11 to avoid potential issues. It is essential to conduct thorough research and assess system compatibility before embarking on an upgrade.

FAQs about Windows 11:

Q: What are the minimum system requirements for Windows 11?

A: Windows 11 requires a 1 GHz or faster processor with at least 2 cores, 4 GB of RAM, 64 GB of storage space, a compatible graphics card, and a UEFI firmware with Secure Boot enabled.

Q: Is Windows 11 compatible with my existing hardware?

A: To determine compatibility, visit the Windows 11 Compatibility Checker on the Microsoft website. This tool will analyze your system and provide information about whether your device meets the minimum requirements.

Q: Can I upgrade from Windows 10 to Windows 11 for free?

A: While Windows 11 was initially offered as a free upgrade for eligible Windows 10 users, this offer has expired. Users who have not yet upgraded to Windows 11 will need to purchase a license.

Q: What are the key differences between Windows 10 and Windows 11?

A: Windows 11 introduces a redesigned user interface, enhanced performance, improved security features, and a range of new productivity and creativity tools. It also features a more streamlined Start menu, a redesigned taskbar, and improved support for touchscreens, pens, and voice input.

Q: How can I troubleshoot common Windows 11 issues?

A: Microsoft provides comprehensive troubleshooting resources on its website, including articles, forums, and support channels. You can also consult online communities and forums for assistance from other users.

Tips for Using Windows 11:

1. Optimize System Performance: Regularly clean up your system by deleting temporary files, removing unnecessary programs, and defragmenting your hard drive.

2. Enhance Security: Enable Windows Defender Antivirus, Microsoft Defender SmartScreen, and Windows Hello to protect your device against malware and unauthorized access.

3. Customize Your Experience: Personalize your desktop with themes, wallpapers, and color schemes to create a visually appealing and comfortable environment.

4. Leverage Cloud Storage: Utilize OneDrive to store and access your files from any device, ensuring data backup and synchronization across your devices.

5. Explore New Features: Experiment with Snap Layouts, Widgets, and other innovative features to enhance your productivity and creativity.

Conclusion:

Windows 11 represents a significant advancement in the world of operating systems, offering a compelling blend of visual appeal, enhanced performance, robust security, and innovative features. By embracing the power of integration, Windows 11 fosters a cohesive and connected computing experience, empowering users to work, create, and play with greater efficiency and ease. As technology continues to evolve, Windows 11 remains at the forefront, driving innovation and shaping the future of computing.

Microsoft unveils Windows 11, a new user experience that brings you closer to what you love Windows 11: A Comprehensive Guide about Features and Updates Perunity - Latest Business Story Microsoft announces refreshed File Explorer experience coming to Windows 11  BigTechWire
How to check Windows 11 Experience Index  HiTech Service The first preview of Windows 11 is now available  TechCrunch Windows 11 New File Explorer Experience New Features Design Details HTMD Blog
Windows 11! (Exploration) - YouTube Making the everyday easier with new experiences available in Windows 11  Windows Experience Blog

Closure

Thus, we hope this article has provided valuable insights into The Windows 11 Experience: A Comprehensive Exploration. We hope you find this article informative and beneficial. See you in our next article!

Understanding PC Health At A Glance In Windows: A Comprehensive Guide

Understanding PC Health at a Glance in Windows: A Comprehensive Guide

Introduction

In this auspicious occasion, we are delighted to delve into the intriguing topic related to Understanding PC Health at a Glance in Windows: A Comprehensive Guide. Let’s weave interesting information and offer fresh perspectives to the readers.

Understanding PC Health at a Glance in Windows: A Comprehensive Guide

Pc Health At A Glance

The modern computer user, accustomed to the seamless operation of their devices, often takes for granted the intricate workings that ensure a smooth experience. However, the reality is that a PC, like any complex machine, requires regular maintenance and attention to remain in peak condition. This is where PC health monitoring tools come into play, providing users with a crucial window into the well-being of their system.

The Importance of PC Health Monitoring

Monitoring the health of a PC is not merely an optional task but a vital practice that offers numerous benefits:

  • Early Detection of Issues: Proactive monitoring allows users to identify potential problems before they escalate into major malfunctions. This can range from detecting failing hardware components to identifying software conflicts that could lead to system instability.
  • Optimized Performance: A healthy PC performs at its best, delivering smooth and efficient operation. Regular monitoring helps identify resource bottlenecks, software conflicts, and other factors that may hinder performance, allowing for timely intervention and optimization.
  • Enhanced Security: A well-maintained PC is less susceptible to security threats. Monitoring can reveal suspicious activity, identify vulnerabilities, and ensure necessary security updates are installed, bolstering the system’s defenses.
  • Extended Lifespan: By addressing issues early and maintaining a clean and efficient operating environment, users can significantly extend the lifespan of their PC, maximizing its value and reducing the need for premature replacements.
  • Reduced Downtime: Promptly identifying and resolving issues minimizes downtime, ensuring users can continue their work or enjoy their entertainment without interruption.

PC Health at a Glance: A Windows Feature

Windows, being the dominant operating system for personal computers, offers a suite of built-in tools designed to help users assess and manage their PC’s health. These tools, collectively known as "PC Health Check," provide a centralized hub for monitoring various aspects of the system’s well-being.

Key Components of PC Health Check:

  • System Information: This section provides a detailed overview of the PC’s hardware specifications, including processor, memory, storage, and graphics capabilities. It also displays the current operating system version and build number.
  • Storage Space: The storage section presents a visual representation of disk usage, highlighting the space occupied by different files and applications. It also provides tools for managing storage, allowing users to identify and remove unnecessary files or relocate data to optimize disk space.
  • Battery Health (For Laptops): Laptops equipped with batteries can monitor their health and charging status. This section provides an estimated battery life, charging cycles, and overall battery health, allowing users to assess the need for replacement.
  • Security Status: This section displays the current security status of the PC, including the presence of active antivirus protection, firewall settings, and recent security updates. Users can access tools to configure security settings and ensure the system is adequately protected.
  • Updates: Windows Update is integrated into the PC Health Check, allowing users to easily check for and install available updates for the operating system and installed applications. Regular updates are crucial for security, performance, and stability.
  • Performance: This section provides a performance overview of the PC, highlighting CPU usage, memory utilization, and disk activity. It allows users to identify potential bottlenecks and resource-intensive applications that may impact performance.
  • Troubleshooting: The PC Health Check includes tools for troubleshooting common issues, such as slow performance, network connectivity problems, or device malfunctions. These tools provide guided solutions and steps to resolve specific issues.

Beyond the Basics: Advanced Monitoring Tools

While Windows offers a comprehensive suite of built-in tools, users seeking deeper insights and more advanced monitoring capabilities can explore third-party applications. These applications often provide a more granular level of detail, offering features such as:

  • Hardware Monitoring: Advanced tools can monitor hardware components such as CPU temperature, fan speed, and hard drive health, providing real-time data and alerts for potential issues.
  • System Stability: These tools can track system stability, identifying crashes, freezes, and other instability issues, helping users pinpoint the root cause of problems.
  • Performance Benchmarking: Advanced tools can perform benchmark tests to measure the overall performance of the PC, comparing it to industry standards and identifying potential bottlenecks.
  • Detailed Event Logs: These tools provide access to detailed system event logs, allowing users to analyze system activity and diagnose issues based on recorded events.

FAQs About PC Health at a Glance

Q: Is PC Health Check a replacement for professional IT support?

A: While PC Health Check provides valuable insights into system health, it should not be considered a substitute for professional IT support. Complex issues or hardware failures may require the expertise of a qualified technician.

Q: How often should I check my PC’s health?

A: Ideally, users should check their PC’s health at least once a month to ensure it is running smoothly. However, the frequency may vary based on individual usage patterns and system stability.

Q: Can I use PC Health Check on older versions of Windows?

A: PC Health Check is primarily available on Windows 10 and later versions. However, older versions of Windows may offer similar features through their built-in system tools.

Q: What should I do if I discover an issue through PC Health Check?

A: If you identify an issue through PC Health Check, it is important to consult the provided troubleshooting information or seek assistance from a qualified IT professional.

Tips for Maintaining PC Health

  • Regular Updates: Ensure that your operating system, applications, and drivers are regularly updated to receive security patches and performance enhancements.
  • Disk Cleanup: Regularly clean your hard drive by removing unnecessary files, temporary files, and downloaded files to free up space and improve performance.
  • Defragmentation: Defragment your hard drive periodically to optimize file organization and improve read/write speeds.
  • Virus Protection: Install and maintain a reliable antivirus program to protect your system from malware and viruses.
  • Firewall: Enable and configure your firewall to prevent unauthorized access to your system.
  • Software Management: Uninstall unused applications and remove unnecessary programs to reduce clutter and improve performance.
  • Hardware Maintenance: Clean dust and debris from your PC’s internal components to improve airflow and prevent overheating.
  • Backup: Regularly back up your important data to protect it from loss in case of hardware failure or system corruption.

Conclusion

PC health monitoring is an essential practice for every computer user. By utilizing the tools provided by Windows and exploring advanced monitoring options, users can gain a comprehensive understanding of their system’s well-being. Proactive maintenance, coupled with timely issue resolution, ensures a smooth and efficient computing experience, extending the lifespan of your PC and minimizing downtime. Remember, a healthy PC is a happy PC, and a happy PC empowers you to achieve your digital goals without interruption.

How to use the PC Health Check app - Microsoft Support  Check in app, Health check, App PC Health Check PC Health At A Glance Introducing Windows 11 Let's check if this PC meets the Pc Health At A Glance
Microsoft releases new and updated Windows 11 PC Health Check app again - YouTube PC Health Check App Windows 11 Download [Official Microsoft] Pc Health At A Glance
Pc Health At A Glance The Windows PC Health Check App Explained

Closure

Thus, we hope this article has provided valuable insights into Understanding PC Health at a Glance in Windows: A Comprehensive Guide. We hope you find this article informative and beneficial. See you in our next article!

A Comprehensive Guide To Nero 7: Compatibility, Features, And Alternatives In The Modern Era

A Comprehensive Guide to Nero 7: Compatibility, Features, and Alternatives in the Modern Era

Introduction

With great pleasure, we will explore the intriguing topic related to A Comprehensive Guide to Nero 7: Compatibility, Features, and Alternatives in the Modern Era. Let’s weave interesting information and offer fresh perspectives to the readers.

A Comprehensive Guide to Nero 7: Compatibility, Features, and Alternatives in the Modern Era

Nero 7 essentials downloads - roomjuja

Nero 7, a popular burning and multimedia software suite released in 2006, has left a lasting mark on the world of computing. While its original release predates the widespread adoption of Windows 10 and 64-bit computing, the software’s legacy continues to attract users seeking reliable tools for disc burning, media management, and data backup. This article delves into the intricacies of using Nero 7 on a modern Windows 10 64-bit system, addressing its compatibility, functionality, and potential limitations.

Understanding Nero 7’s Compatibility with Windows 10 64-bit

The compatibility of Nero 7 with Windows 10 64-bit is a complex issue. While the software was designed for older operating systems, it can be installed on newer platforms through a process known as "compatibility mode." This feature allows Windows 10 to emulate the environment of older operating systems, potentially enabling legacy software to function.

However, compatibility mode is not a guaranteed solution. Several factors can influence the success of running Nero 7 on Windows 10, including:

  • Hardware limitations: Nero 7 might encounter difficulties running on newer hardware configurations. Its design predates modern processors, graphics cards, and memory capacities.
  • Driver compatibility: The software might rely on drivers designed for older operating systems, which may not be fully compatible with Windows 10.
  • Software dependencies: Nero 7 could depend on other legacy software or system components that may not function correctly on Windows 10.

Installing and Running Nero 7 on Windows 10

Assuming you possess a valid license for Nero 7, the installation process on Windows 10 typically involves the following steps:

  1. Obtain the installation files: Locate the original installation media or download the software from a trusted source.
  2. Run the setup program: Execute the installation file and follow the on-screen prompts.
  3. Enable compatibility mode: Right-click on the Nero 7 executable file, select "Properties," and navigate to the "Compatibility" tab. Check the box labeled "Run this program in compatibility mode for:" and select an earlier operating system from the dropdown menu, such as Windows XP or Windows Vista.
  4. Install necessary drivers: If the software requires specific drivers, ensure you have them installed. You may need to locate and download compatible drivers from the manufacturer’s website.

Exploring Nero 7’s Features and Limitations

While Nero 7 might not boast the latest features found in modern burning software, it offers a robust set of functionalities for users seeking reliable and straightforward solutions. Some key features include:

  • CD/DVD/Blu-ray burning: Nero 7 provides comprehensive tools for burning data, music, and video to various disc formats, including CD-R/RW, DVD-R/RW, and Blu-ray.
  • Disc copying and ripping: The software enables users to create copies of existing discs or extract audio tracks from CDs.
  • Image creation and burning: Nero 7 allows users to create disc images (ISO files) and burn them to discs.
  • Media management: The software provides tools for organizing and managing media files, including audio, video, and images.
  • Data backup and recovery: Nero 7 offers basic backup and recovery features to protect important data.

However, it’s important to acknowledge the limitations of using Nero 7 on Windows 10:

  • Lack of modern features: The software lacks features commonly found in newer burning software, such as support for high-resolution video formats, advanced disc encryption, and cloud integration.
  • Compatibility issues: As mentioned earlier, compatibility issues with Windows 10 and modern hardware can hinder the software’s performance and stability.
  • Security concerns: Using outdated software can expose users to security vulnerabilities, as developers often stop providing security updates for older versions.

Exploring Modern Alternatives to Nero 7

Given the challenges of using Nero 7 on Windows 10, exploring modern alternatives can be a wise decision. Numerous contemporary burning and multimedia software options offer advanced features, improved compatibility, and enhanced security:

  • BurnAware: A free and user-friendly burning software offering a comprehensive set of features, including data, music, and video burning, disc copying, and image creation.
  • Ashampoo Burning Studio: A paid software with a user-friendly interface and a wide range of features, including disc burning, image creation, and data backup.
  • CDBurnerXP: A free and open-source burning software with a simple interface and support for various disc formats.
  • ImgBurn: A free and powerful burning software that supports a wide range of disc formats, including Blu-ray and HD DVD.

FAQs on Using Nero 7 on Windows 10

Q: Is it safe to use Nero 7 on Windows 10?

A: While Nero 7 may function on Windows 10, using outdated software can expose you to security vulnerabilities. Consider upgrading to a newer version or exploring modern alternatives for enhanced security and stability.

Q: Can I use Nero 7 to burn Blu-ray discs on Windows 10?

A: Nero 7 supports Blu-ray burning, but its compatibility with Windows 10 and modern hardware might pose challenges. It’s advisable to test the software’s functionality thoroughly before relying on it for critical tasks.

Q: What are the minimum system requirements for running Nero 7 on Windows 10?

A: Nero 7’s official system requirements are designed for older operating systems. While compatibility mode can help, it’s difficult to provide accurate system requirements for Windows 10. It’s recommended to refer to the software’s documentation or seek support from the manufacturer.

Q: Is it possible to update Nero 7 to a newer version?

A: Nero 7 is an older version of the software. While updates were available during its active development phase, it’s unlikely that newer updates are available for this specific version.

Tips for Using Nero 7 on Windows 10

  • Test thoroughly: Before using Nero 7 for critical tasks, test its functionality and compatibility with your system configuration.
  • Keep your system updated: Ensure your Windows 10 operating system and other system components are up-to-date to minimize potential compatibility issues.
  • Consider alternatives: If you encounter significant compatibility problems or security concerns, explore modern burning software alternatives.

Conclusion

While Nero 7 might hold a nostalgic place in the hearts of some users, its compatibility with Windows 10 and modern hardware can be a significant challenge. The software’s outdated design and lack of modern features might not meet the needs of contemporary users. While it might function through compatibility mode, potential issues with drivers, hardware, and security vulnerabilities make it a risky choice for critical tasks. Exploring modern alternatives that offer advanced features, improved compatibility, and enhanced security is a more sensible approach for users seeking reliable burning and multimedia software solutions in the modern era.

Nero 7 essentials - iheartlena NERO 7  D-D The Aquarium Solution Nero 7 review  TechRadar
Nero 7 Essentials Lightscribe - dashboardmultifiles Nero 7 premium - energybilla Nero 7 Ultra Edition Instructions
ELECTRO::: V 2.0: NERO 7 PREMIUM RELOADED (COMPATIBLE-VISTA) Nero 7 Essentials - Startupware: Managing Startups

Closure

Thus, we hope this article has provided valuable insights into A Comprehensive Guide to Nero 7: Compatibility, Features, and Alternatives in the Modern Era. We appreciate your attention to our article. See you in our next article!

Safeguarding Your Windows 10: A Comprehensive Guide To Ransomware Protection

Safeguarding Your Windows 10: A Comprehensive Guide to Ransomware Protection

Introduction

With enthusiasm, let’s navigate through the intriguing topic related to Safeguarding Your Windows 10: A Comprehensive Guide to Ransomware Protection. Let’s weave interesting information and offer fresh perspectives to the readers.

Safeguarding Your Windows 10: A Comprehensive Guide to Ransomware Protection

Complete Guide to Ransomware Protection on Windows 10

In the digital age, where information is paramount and data reigns supreme, the threat of ransomware looms large. This malicious software, designed to encrypt and hold your valuable data hostage until a ransom is paid, poses a significant risk to individuals and organizations alike. Windows 10, despite its robust security features, is not immune to these attacks. Therefore, understanding and implementing effective ransomware protection strategies is crucial for ensuring the safety and integrity of your digital assets.

This comprehensive guide explores the multifaceted world of ransomware protection on Windows 10, providing a detailed understanding of the threats, the vulnerabilities, and the comprehensive strategies for mitigating risks. We delve into the intricacies of preventative measures, proactive security practices, and recovery strategies, empowering you with the knowledge and tools to safeguard your digital environment.

Understanding the Ransomware Threat

Ransomware operates on a simple yet devastating principle: it infiltrates your system, encrypts your files, and demands payment for their decryption. This encryption is often sophisticated, rendering your data inaccessible without the decryption key held by the attackers. The consequences can be dire, ranging from personal inconvenience to crippling business disruptions.

Types of Ransomware Attacks

Ransomware attacks can be broadly categorized into two main types:

  • Crypto-Ransomware: This is the most common type, utilizing strong encryption algorithms to render your files unusable. The attackers demand payment, usually in cryptocurrency, to provide the decryption key.
  • Locker Ransomware: This type blocks access to your entire system, often by locking the screen or taking control of your mouse and keyboard. The attackers demand payment to unlock your system and restore access.

Common Entry Points for Ransomware

Ransomware can infiltrate your Windows 10 system through various methods:

  • Phishing Emails: These emails often contain malicious attachments or links that, when clicked, download the ransomware onto your computer.
  • Malicious Websites: Visiting compromised or untrusted websites can expose your system to ransomware infections.
  • Exploited Vulnerabilities: Outdated software or operating systems can harbor security vulnerabilities that ransomware can exploit.
  • USB Drives and External Devices: Connecting infected external devices to your computer can introduce ransomware.
  • Software Downloads: Downloading software from untrusted sources can expose your system to ransomware.

The Importance of Proactive Protection

Proactive measures are the cornerstone of effective ransomware protection. These measures aim to prevent ransomware from ever gaining access to your system, minimizing the risk of infection and data loss.

Key Proactive Measures:

  • Regular Software Updates: Keeping your operating system, antivirus software, and other applications updated is essential. Updates often include security patches that address known vulnerabilities exploited by ransomware.
  • Strong Passwords: Use complex and unique passwords for all your accounts, including your Windows 10 login. Consider using a password manager to securely store and manage your passwords.
  • Enable Two-Factor Authentication: This adds an extra layer of security by requiring a second verification step, such as a code sent to your phone, when logging into accounts.
  • Be Wary of Phishing Attempts: Never click on suspicious links or open attachments from unknown senders. Verify the sender’s identity and the legitimacy of the email before taking any action.
  • Use a Reputable Antivirus Software: Install and maintain a reliable antivirus program that can detect and remove ransomware threats.
  • Enable Windows Defender: Windows 10 comes equipped with built-in antivirus protection called Windows Defender. Ensure it is enabled and regularly updated.
  • Back Up Your Data Regularly: Creating regular backups of your important data is essential. Store backups in a separate location, such as an external hard drive or cloud storage, to ensure they are not affected by ransomware attacks.
  • Limit User Account Privileges: Restrict user accounts to standard privileges whenever possible. This limits the ability of ransomware to make changes to your system.
  • Implement Network Security Measures: Secure your network with a firewall and use strong passwords for all network devices.
  • Train Employees: If you are in a business environment, educate employees about ransomware threats and best practices for safe online behavior.

Reacting to a Ransomware Attack

Even with the best preventative measures in place, there is always a chance of a ransomware attack. It is essential to have a plan in place to respond effectively to such an event.

Steps to Take in Case of a Ransomware Attack:

  • Disconnect from the Network: Immediately disconnect your infected device from the network to prevent the ransomware from spreading to other devices.
  • Isolate the Affected Device: If possible, isolate the infected device from other devices on the network to prevent further contamination.
  • Run a Full System Scan: Use your antivirus software to run a full system scan to identify and remove any malicious files.
  • Restore from Backup: If you have a recent backup of your data, restore your system from the backup. This will restore your files to their pre-infection state, effectively eliminating the ransomware.
  • Contact Your IT Department or Security Professionals: If you are unable to remove the ransomware or restore your system, contact your IT department or cybersecurity professionals for assistance.
  • Do Not Pay the Ransom: Paying the ransom does not guarantee that you will get your files back. It may also encourage further attacks and contribute to the ransomware economy.
  • Report the Incident: Report the ransomware attack to the authorities, such as your local police department or the FBI.

FAQs About Ransomware Protection

Q: What are the most common signs of a ransomware infection?

A: Common signs include:

  • Unusually slow performance: Your computer may become sluggish or unresponsive.
  • Missing files: You may notice that some of your files have disappeared or been replaced with empty files.
  • Encrypted files: Your files may have unusual file extensions, such as ".locked" or ".encrypted."
  • Ransomware demands: You may receive a message demanding payment to unlock your files.

Q: What are the best free antivirus software options for Windows 10?

A: Some highly-rated free antivirus options include:

  • Windows Defender: Built-in to Windows 10, it offers basic protection against ransomware and other malware threats.
  • Avast Free Antivirus: Provides comprehensive protection, including real-time threat detection and a firewall.
  • AVG AntiVirus Free: Offers a good balance of features and performance.
  • Bitdefender Antivirus Plus: Provides advanced ransomware protection and a user-friendly interface.

Q: How can I prevent ransomware from spreading to other devices on my network?

A: Implement network security measures such as a firewall and strong passwords for all network devices. Use network segmentation to isolate critical systems and data. Keep your network devices updated with the latest security patches.

Q: How can I recover my files if I have not backed them up?

A: If you have not backed up your files, recovering them after a ransomware attack can be challenging. However, there are specialized data recovery tools and services that may be able to help. Consult with cybersecurity professionals for expert assistance.

Tips for Enhanced Ransomware Protection

  • Use a Strong Password Manager: A password manager can securely store and manage your passwords, reducing the risk of using weak or reused passwords.
  • Enable File History: Windows 10’s File History feature automatically creates regular backups of your files, allowing you to restore them to a previous state.
  • Implement a Zero Trust Security Model: Treat all users and devices as potentially untrusted and enforce strict access controls.
  • Educate Yourself and Others: Stay informed about the latest ransomware threats and best practices for preventing attacks. Educate your family, friends, and colleagues about ransomware dangers and how to protect themselves.

Conclusion

Ransomware poses a significant threat to individuals and organizations, demanding a proactive and comprehensive approach to protection. By understanding the vulnerabilities, implementing preventative measures, and developing a robust response plan, you can significantly reduce the risk of falling victim to these attacks. Remember, vigilance, awareness, and proactive security practices are the key to safeguarding your digital assets and ensuring the safety and integrity of your data in the face of evolving cyber threats.

Complete Guide To Ransomware Protection On Windows 10 - vrogue.co Ransomware: How to Protection from Ransomware In Windows 10  Windows 10  [January 2020] - YouTube How to Enable Ransomware Protection in Windows 10 - Tech Advisor
Windows 10 Your Guide To Ransomware - vrogue.co Windows Ransomware Protection?  Sensitive Protection How to Turn on Ransomware Protection in Windows 10 & 11
How to Enable Ransomware Protection on Windows 10 How to Turn Off Ransomware Protection in Windows 10?

Closure

Thus, we hope this article has provided valuable insights into Safeguarding Your Windows 10: A Comprehensive Guide to Ransomware Protection. We hope you find this article informative and beneficial. See you in our next article!

Navigating The Realm Of Prolific USB To Serial Drivers In Windows 11

Navigating the Realm of Prolific USB to Serial Drivers in Windows 11

Introduction

With great pleasure, we will explore the intriguing topic related to Navigating the Realm of Prolific USB to Serial Drivers in Windows 11. Let’s weave interesting information and offer fresh perspectives to the readers.

Download Prolific USB To Serial Driver (PL2303 Driver) On Windows 11/10

The ubiquitous presence of USB ports and the enduring legacy of serial communication have fostered a critical need for effective bridges between these two technologies. This is where Prolific USB to Serial drivers step in, enabling seamless data exchange between devices utilizing serial protocols and modern computers equipped with USB ports. This article delves into the intricacies of Prolific USB to Serial drivers in Windows 11, exploring their importance, benefits, and potential challenges.

Understanding the Essence of Prolific USB to Serial Drivers

Prolific USB to Serial drivers act as essential software intermediaries, facilitating communication between a computer and devices employing serial protocols like RS-232, RS-485, and RS-422. These drivers translate data packets from the USB interface into the serial format understood by the connected device and vice versa. This translation process ensures that data flows smoothly between the computer and the serial device, enabling a wide range of applications.

A Deep Dive into the Benefits of Prolific USB to Serial Drivers

The implementation of Prolific USB to Serial drivers unlocks a multitude of benefits, empowering users to seamlessly integrate legacy serial devices with modern computing systems. These benefits include:

1. Enhanced Compatibility and Versatility: Prolific drivers bridge the gap between the USB interface prevalent in modern computers and the serial communication protocols employed by older devices, such as modems, barcode scanners, industrial equipment, and scientific instruments. This compatibility ensures that these devices can continue to function effectively alongside newer technologies.

2. Simplified Connectivity: The use of Prolific drivers eliminates the need for separate serial ports, simplifying the connection process. Instead of searching for available serial ports, users can simply plug the serial device into a readily available USB port. This streamlined approach reduces setup complexity and enhances user convenience.

3. Improved Data Transfer Efficiency: Prolific drivers ensure efficient data transfer between the computer and the serial device. These drivers optimize communication processes, minimizing data loss and ensuring accurate transmission. This efficiency translates into reliable data exchange for critical applications, such as industrial automation or scientific research.

4. Cost-Effective Solution: The use of Prolific drivers provides a cost-effective solution for integrating serial devices with modern computers. Compared to purchasing new devices with built-in USB connectivity, utilizing Prolific drivers allows users to retain their existing serial devices, minimizing investment costs.

5. Wide Range of Applications: Prolific drivers find widespread applications across various industries and sectors. Their ability to connect a diverse range of serial devices to computers makes them indispensable for tasks such as:

  • Industrial Automation: Connecting Programmable Logic Controllers (PLCs), sensors, and actuators for controlling and monitoring industrial processes.
  • Scientific Research: Interfacing with laboratory instruments like spectrometers, oscilloscopes, and data loggers.
  • Retail and Point-of-Sale (POS) Systems: Integrating barcode scanners, receipt printers, and cash drawers for efficient transaction processing.
  • Telecommunications: Connecting modems, routers, and other network devices.
  • Robotics and Embedded Systems: Controlling and monitoring robots, drones, and other embedded systems.

While Prolific drivers offer numerous advantages, certain challenges can arise during their implementation and use. These challenges include:

1. Compatibility Issues: Different versions of Prolific drivers may not be compatible with all operating systems or serial devices. Users must ensure that the specific driver version they install is compatible with their operating system and the connected device.

2. Driver Installation and Configuration: Installing and configuring Prolific drivers can be a complex process for some users, requiring specific knowledge about operating system settings and driver installation procedures.

3. Device Recognition and Conflict: In certain situations, the operating system may not recognize the connected serial device or experience conflicts with other drivers, requiring troubleshooting and driver updates.

4. Security Concerns: As with any software, Prolific drivers may pose security risks if they are outdated or compromised. It is crucial to use only trusted drivers from reputable sources and keep them updated regularly to mitigate potential security vulnerabilities.

Addressing Common FAQs Regarding Prolific USB to Serial Drivers

1. How do I find the correct driver for my Prolific USB to Serial adapter?

The correct driver for your Prolific adapter can be found on the manufacturer’s website or through a comprehensive driver search tool. When searching for the driver, provide details about your operating system (Windows 11 in this case) and the specific model of your Prolific adapter.

2. What are the common symptoms of a missing or corrupted Prolific driver?

If your Prolific driver is missing or corrupted, you may encounter various symptoms, including:

  • The serial device is not recognized by the computer.
  • You cannot communicate with the serial device.
  • You experience error messages related to the serial port.
  • The device manager shows an exclamation mark next to the Prolific adapter.

3. How can I troubleshoot problems with my Prolific USB to Serial driver?

Troubleshooting Prolific driver issues can involve steps like:

  • Reinstalling the driver: This involves uninstalling the existing driver and installing the latest version from the manufacturer’s website.
  • Updating the driver: Check for driver updates from the manufacturer’s website or through the Windows Update service.
  • Checking for device conflicts: In the Device Manager, check if there are any conflicts with other devices connected to your computer.
  • Running the hardware troubleshooter: Windows provides a built-in hardware troubleshooter that can identify and resolve common issues with hardware devices.

4. Is it safe to download Prolific drivers from third-party websites?

Downloading drivers from third-party websites can introduce security risks, as these websites may contain malware or corrupted drivers. It is highly recommended to obtain drivers directly from the manufacturer’s website or trusted sources like the Microsoft Store.

5. How do I ensure that my Prolific driver is up to date?

To ensure that your Prolific driver is up to date, regularly check the manufacturer’s website for newer versions. You can also configure Windows Update to automatically download and install driver updates for your devices.

Tips for Optimizing Prolific USB to Serial Driver Performance

1. Use the Latest Driver Version: Download and install the latest driver version from the manufacturer’s website to ensure optimal compatibility and performance.

2. Check for Driver Conflicts: In the Device Manager, check for any conflicts with other devices connected to your computer. Resolve any conflicts by updating or reinstalling the conflicting drivers.

3. Configure the Serial Port Settings: Optimize the serial port settings, including baud rate, data bits, parity, and stop bits, to match the requirements of the connected device.

4. Use a Dedicated USB Port: Avoid connecting the Prolific adapter to a USB hub or a port that is frequently used by other devices. Instead, use a dedicated USB port for optimal performance.

5. Consider Using a USB to Serial Converter: If you encounter persistent issues with your Prolific driver, consider using a dedicated USB to serial converter, which may offer better compatibility and performance.

Conclusion: The Enduring Relevance of Prolific USB to Serial Drivers

Prolific USB to Serial drivers play a vital role in bridging the gap between legacy serial devices and modern computing systems. Their ability to facilitate seamless communication between these technologies ensures the continued functionality of essential devices in various industries and sectors. While certain challenges may arise during driver implementation and use, addressing these challenges through proper troubleshooting and driver management ensures the reliable and efficient operation of Prolific USB to Serial drivers. As technology evolves, the demand for these drivers will likely persist, ensuring the continued integration of serial devices into the modern computing landscape.

Windows 11 Prolific USB-to-Seria [Fixed] Prolific PL2303TA USB to Serial Windows 11 Problem Prolific USB to Serial Driver Download and Update [Easily]  TechPout
[Fixed] Prolific PL2303TA USB to Serial Windows 11 Problem How to install the PL2303 (Prolific) driver in Windows 11 in 2022  Newsletter software Usb To Serial Adapter Windows 11 Driver
Prolific usb to serial comm port driver - spajza Prolific USB to Serial Driver Not Working on Windows 10/11

Closure

Thus, we hope this article has provided valuable insights into Navigating the Realm of Prolific USB to Serial Drivers in Windows 11. We hope you find this article informative and beneficial. See you in our next article!

Navigating The Software Landscape: A Look At PC Magazine’s Reviews

Navigating the Software Landscape: A Look at PC Magazine’s Reviews

Introduction

With enthusiasm, let’s navigate through the intriguing topic related to Navigating the Software Landscape: A Look at PC Magazine’s Reviews. Let’s weave interesting information and offer fresh perspectives to the readers.

PPT - Navigating the Ever-Evolving Landscape of Software Development PowerPoint Presentation

In the ever-evolving world of technology, software plays a crucial role, empowering users to accomplish tasks, enhance productivity, and engage with the digital realm. Choosing the right software can be a daunting task, given the vast array of options available. This is where reputable software reviews come into play, offering valuable insights and guidance to navigate this complex landscape. PC Magazine, a leading technology publication, has long been a trusted source for software reviews, providing comprehensive and objective evaluations to help readers make informed decisions.

PC Magazine’s Approach to Software Reviews

PC Magazine’s software reviews are known for their depth and thoroughness. The editorial team employs a rigorous methodology, encompassing multiple aspects of the software’s functionality, performance, and user experience. This approach ensures that readers receive a holistic understanding of the product’s strengths and weaknesses.

Key Elements of PC Magazine Software Reviews:

  1. Functionality: The review meticulously examines the software’s core features and capabilities, evaluating their effectiveness in addressing specific user needs. This includes analyzing the software’s design, ease of use, and overall functionality.

  2. Performance: Performance is a critical aspect of any software. PC Magazine reviews assess the software’s speed, efficiency, and stability, analyzing its resource consumption and impact on system performance.

  3. User Interface and Experience: The review considers the software’s interface, including its design, intuitiveness, and ease of navigation. A positive user experience is crucial for software adoption and satisfaction.

  4. Security and Stability: In today’s digital landscape, security is paramount. PC Magazine reviews evaluate the software’s security measures, including its vulnerability to threats and its ability to protect user data.

  5. Compatibility and Integration: The review assesses the software’s compatibility with different operating systems, hardware, and other software applications, ensuring seamless integration into existing workflows.

  6. Value for Money: PC Magazine reviews consider the software’s pricing and licensing models, evaluating its value proposition in relation to its features and functionality.

The Importance of PC Magazine Software Reviews

PC Magazine’s software reviews serve a vital purpose for both individual users and businesses. By providing unbiased and comprehensive assessments, they empower readers to:

  • Make Informed Purchase Decisions: The reviews help users identify the software that best suits their specific needs and requirements, avoiding costly mistakes and wasted time.

  • Compare and Contrast Options: PC Magazine reviews facilitate side-by-side comparisons of competing software products, allowing users to evaluate their strengths and weaknesses objectively.

  • Discover Hidden Gems: Reviews often highlight lesser-known but high-quality software options, expanding users’ horizons and offering alternative solutions.

  • Gain Technical Insights: The reviews provide detailed technical analyses, offering insights into the software’s underlying technology and its impact on performance.

  • Stay Up-to-Date: PC Magazine’s reviews keep readers informed about the latest software releases and advancements, ensuring they have access to the most relevant and up-to-date information.

Frequently Asked Questions (FAQs)

Q: What criteria does PC Magazine use to evaluate software?

A: PC Magazine uses a comprehensive set of criteria, including functionality, performance, user interface, security, compatibility, and value for money.

Q: Are PC Magazine software reviews biased?

A: PC Magazine strives for objectivity in its reviews. The editorial team adheres to strict ethical guidelines and does not accept paid endorsements or influence from software vendors.

Q: How can I find specific software reviews on PC Magazine’s website?

A: PC Magazine’s website features a searchable database of software reviews. Users can search by software name, category, or other criteria.

Q: What is the difference between a "Recommended" and "Editor’s Choice" rating?

A: "Recommended" indicates that a software product meets or exceeds PC Magazine’s minimum standards for quality. "Editor’s Choice" signifies that a product is considered to be among the best in its category, demonstrating exceptional performance and user experience.

Tips for Utilizing PC Magazine Software Reviews

  • Identify Your Needs: Before consulting PC Magazine reviews, clearly define your specific software requirements and the tasks you intend to accomplish.

  • Read Multiple Reviews: It’s advisable to read multiple reviews from different sources, including PC Magazine, to gain a well-rounded perspective on a particular software product.

  • Pay Attention to Ratings and Awards: PC Magazine’s "Recommended" and "Editor’s Choice" ratings, along with any awards or accolades, can serve as valuable indicators of quality.

  • Consider User Comments: User comments and reviews can provide valuable insights into real-world experiences with the software, complementing PC Magazine’s professional assessments.

  • Download Trial Versions: Whenever possible, download and try out trial versions of the software before making a purchase. This allows you to experience the software firsthand and assess its suitability for your needs.

Conclusion

PC Magazine’s software reviews play a crucial role in guiding users through the complex world of software options. By providing comprehensive, objective, and insightful evaluations, they empower individuals and businesses to make informed decisions, ensuring they select software that meets their needs and enhances their productivity. Whether you are a seasoned tech enthusiast or a first-time software buyer, PC Magazine’s reviews serve as a valuable resource, offering a trusted path towards finding the right software solutions for your needs.

PC Magazine 2009 03  The Best Free Software: 173 Killer Appโ€ฆ  Flickr Download PC Magazine Free Software - April 2011 Torrent - kickasstorrents PPT - Navigating the Evolving Landscape of Software Companies Trends, Challenges, and
Navigating the Technology Landscape: A Guide for Software Engineers Think the martech landscape is big? Here's the size of the software industry overall - Chief Best Landscape Design Software of 2023
Application landscape 2011  Landscape diagram, Schematic design, Free landscape design Mapping The Maritime Software Landscape In 2020

Closure

Thus, we hope this article has provided valuable insights into Navigating the Software Landscape: A Look at PC Magazine’s Reviews. We appreciate your attention to our article. See you in our next article!

Making Your Documents Easily Accessible: Exploring The Benefits Of Placing The "Documents" Folder On Your Windows 10 Desktop

Making Your Documents Easily Accessible: Exploring the Benefits of Placing the "Documents" Folder on Your Windows 10 Desktop

Introduction

With great pleasure, we will explore the intriguing topic related to Making Your Documents Easily Accessible: Exploring the Benefits of Placing the "Documents" Folder on Your Windows 10 Desktop. Let’s weave interesting information and offer fresh perspectives to the readers.

Making Your Documents Easily Accessible: Exploring the Benefits of Placing the "Documents" Folder on Your Windows 10 Desktop

How to make your documents more accessible - Alison LaMantia

The Windows 10 operating system, by default, stores user documents in a dedicated "Documents" folder, located within the user’s profile directory. While this arrangement offers a structured approach to file organization, many users find it beneficial to have direct, visual access to their documents. This can be achieved by placing a shortcut to the "Documents" folder on the desktop, providing a convenient and readily accessible entry point for frequently accessed files.

Understanding the Advantages:

Placing a "Documents" folder shortcut on the desktop offers several advantages:

  • Enhanced Accessibility: The desktop serves as a central hub for user interaction, making it the most frequently accessed location on the system. A shortcut to the "Documents" folder on the desktop eliminates the need to navigate through multiple menus or folders to access files. This streamlined access fosters efficiency and reduces the time required to locate and open documents.

  • Improved Organization: Having a visible "Documents" folder on the desktop encourages users to maintain a structured approach to file management. It provides a designated location for storing important documents, making it easier to keep track of their files and ensuring they are readily available when needed.

  • Simplified Sharing and Collaboration: When collaborating on projects or sharing documents with others, a desktop shortcut to the "Documents" folder simplifies the process. Users can easily drag and drop files from the shortcut onto other applications or platforms, facilitating seamless information exchange.

  • Personalized Workspace: The desktop serves as a personalized workspace, reflecting the user’s preferences and workflow. By placing a "Documents" folder shortcut on the desktop, users can tailor their environment to prioritize their most important files, enhancing productivity and streamlining their daily operations.

Exploring the Steps:

Placing a "Documents" folder shortcut on the desktop is a straightforward process. Here’s a step-by-step guide:

  1. Locate the "Documents" Folder: Navigate to the "Documents" folder within your user profile directory. You can access it by opening "File Explorer" and navigating to "This PC" > "Documents."

  2. Right-Click on the "Documents" Folder: Right-click on the "Documents" folder to access a context menu.

  3. Select "Create Shortcut": From the context menu, choose the option "Create Shortcut." This action will initiate the process of creating a shortcut to the selected folder.

  4. Confirm Shortcut Location: Windows will prompt you to confirm the location for the shortcut. By default, the shortcut will be created on the desktop. Confirm this location by clicking "Yes."

  5. Shortcut Appearance: A shortcut to the "Documents" folder will now appear on your desktop. You can customize the appearance of the shortcut by right-clicking on it and selecting "Properties." This allows you to modify the icon, name, and other attributes of the shortcut.

FAQs Regarding Placing a "Documents" Folder Shortcut on the Desktop:

Q: Can I move the "Documents" folder itself to the desktop instead of creating a shortcut?

A: While it is technically possible to move the "Documents" folder to the desktop, it is strongly discouraged. This can disrupt the default file system structure and potentially lead to compatibility issues with applications that rely on the standard "Documents" folder location.

Q: Is there a way to automatically place a "Documents" folder shortcut on the desktop for all users?

A: This can be achieved using Group Policy settings for managed environments. However, for individual users, creating a shortcut manually remains the most straightforward method.

Q: Can I customize the shortcut’s appearance to match my desktop theme?

A: Yes, you can customize the shortcut’s icon and other attributes by right-clicking on the shortcut and selecting "Properties." This allows you to tailor the shortcut’s appearance to align with your desktop theme.

Tips for Optimizing Your "Documents" Folder Shortcut:

  • Organize Your Files: Regularly sort and organize your files within the "Documents" folder to maintain a structured and efficient file management system.

  • Use Subfolders: Create subfolders within the "Documents" folder to categorize files by project, topic, or other relevant criteria.

  • Consider File Naming Conventions: Implement consistent file naming conventions to facilitate easy identification and retrieval of documents.

  • Utilize Search Functions: Leverage Windows’ built-in search functionality to quickly locate specific files within the "Documents" folder.

Conclusion:

Placing a shortcut to the "Documents" folder on your Windows 10 desktop offers a simple yet effective way to enhance file accessibility, streamline workflow, and foster a more personalized desktop environment. By taking advantage of this readily available feature, users can significantly improve their productivity and efficiency while navigating their digital files. Remember, a well-organized and accessible file system is a crucial foundation for efficient and effective work processes.

How to access Public Documents in Windows 10 About Us - Document Accessibility Simplified - 247 Accessible Documents - Accessible PDF Create a Folder in Windows 10 - Instructions and Video Lesson
How to create a folder in documents windows - lasopamorning Making Documents Accessible - YouTube How To Open File Explorer Folder Options In Windows 10  winbuzzer
Creating Accessible Documents  AccessComputing AEM Center: Creating Accessible Documents

Closure

Thus, we hope this article has provided valuable insights into Making Your Documents Easily Accessible: Exploring the Benefits of Placing the "Documents" Folder on Your Windows 10 Desktop. We thank you for taking the time to read this article. See you in our next article!

Renting A Laptop: A Cost-Effective Solution For Computing Needs

Renting a Laptop: A Cost-Effective Solution for Computing Needs

Introduction

In this auspicious occasion, we are delighted to delve into the intriguing topic related to Renting a Laptop: A Cost-Effective Solution for Computing Needs. Let’s weave interesting information and offer fresh perspectives to the readers.

Renting a Laptop: A Cost-Effective Solution for Computing Needs

Laptops on Rent Rs 499  Affordable Laptop Rental Service  laptop for rent

In today’s digital age, access to a reliable computer is essential for various tasks, from work and school to entertainment and communication. However, purchasing a new laptop can be a significant financial investment. For individuals seeking a cost-effective solution, renting a laptop presents a viable alternative.

This article explores the advantages of renting a laptop, particularly those running Windows 10, and provides a comprehensive guide to navigating this option.

The Appeal of Renting a Laptop

Renting a laptop offers several benefits, making it an attractive choice for various situations:

  • Cost-Effectiveness: Renting a laptop eliminates the upfront expense of purchasing a new device. This is particularly advantageous for individuals with limited budgets or those who require a laptop for a short period.
  • Flexibility: Renting provides flexibility in terms of duration and device selection. Renters can choose a laptop that meets their specific needs for the required timeframe, avoiding long-term commitments.
  • Access to Latest Technology: Renting allows access to the latest models and technology without the financial burden of purchasing new devices every few years. This is especially beneficial for individuals who require cutting-edge hardware for specific applications.
  • Reduced Maintenance Costs: Renters are typically not responsible for maintenance and repairs, saving them potential expenses associated with hardware issues.
  • Environmental Sustainability: Renting promotes a circular economy by extending the lifespan of existing devices, reducing electronic waste.

Windows 10: A Popular Choice for Laptops

Windows 10 is a widely used operating system known for its user-friendly interface, compatibility with a wide range of software, and robust security features. Its popularity makes it a common choice for rented laptops, ensuring compatibility with most applications and programs.

Factors to Consider When Renting a Laptop

When considering renting a laptop, several factors should be carefully assessed:

  • Rental Duration: Determine the length of time you require the laptop. Short-term rentals are ideal for temporary needs, while long-term rentals are suitable for extended projects or travel.
  • Laptop Specifications: Identify the necessary specifications, such as processor, RAM, storage, and screen size, based on your intended use.
  • Rental Cost: Compare rental prices from different providers and consider any additional fees, such as insurance or shipping costs.
  • Rental Agreement: Review the rental agreement carefully, paying attention to terms and conditions regarding damage, late fees, and return policies.
  • Technical Support: Inquire about the level of technical support provided by the rental company.

Finding a Reliable Rental Provider

Several reputable companies offer laptop rentals. When choosing a provider, consider the following:

  • Reputation: Research the company’s reputation by reading customer reviews and testimonials.
  • Selection: Ensure the provider offers a wide range of laptops to meet various needs.
  • Pricing: Compare rental rates and consider any additional fees.
  • Customer Service: Evaluate the provider’s customer service responsiveness and helpfulness.

Tips for Renting a Laptop

To ensure a smooth and successful rental experience, follow these tips:

  • Plan Ahead: Determine your rental needs in advance, including the duration, specifications, and budget.
  • Compare Providers: Research and compare rental options from multiple providers to find the best deal.
  • Read the Rental Agreement: Carefully review the terms and conditions of the rental agreement before signing.
  • Backup Data: Back up your essential data before using the rented laptop to avoid potential loss.
  • Return the Laptop on Time: Return the laptop promptly to avoid late fees.

FAQs: Renting a Laptop with Windows 10

1. What are the typical rental costs for laptops with Windows 10?

Rental costs vary based on the laptop’s specifications, duration of the rental, and the rental provider. Generally, expect to pay between $20 and $100 per day for a laptop with Windows 10.

2. What are the common specifications for rented laptops with Windows 10?

Rented laptops with Windows 10 typically come with processors such as Intel Core i5 or i7, 8GB or 16GB of RAM, and 256GB or 512GB of SSD storage. Screen sizes range from 13.3 inches to 15.6 inches.

3. Can I customize the software on a rented laptop?

While you can install additional software on a rented laptop, it is generally recommended to avoid making permanent changes to the operating system or installing software that may violate the rental agreement.

4. What happens if I damage the rented laptop?

Rental agreements typically include damage coverage, but there may be a deductible or a higher rental fee if damage occurs.

5. Is there a minimum rental duration?

Rental durations vary depending on the provider. Some offer short-term rentals for a few days, while others require longer commitments.

Conclusion

Renting a laptop with Windows 10 presents a cost-effective and flexible solution for individuals seeking temporary or short-term access to computing power. By carefully considering factors such as rental duration, laptop specifications, and provider reputation, individuals can make informed decisions and enjoy the benefits of renting a laptop for their specific needs. As technology continues to evolve, renting offers a practical and sustainable approach to accessing the latest devices without significant financial burdens.

Laptop Rental Services: Top 4 Helpful Benefits of Renting! Rent a Laptop  Long Term & Short Term  Smart Laptop Rental Rent a Laptop - CTechITSolution
Laptop Rental Philippines And Its Advantages - I-Tech Digital Productions Philippines Sunshine Kelly  Beauty . Fashion . Lifestyle . Travel . Fitness: SmartRental Laptop & Computer Cost-Effective Solutions for Growing Businesses: Renting Laptops for SMEs - Indiaโ€™s First
Laptops on Rent,Laptop Rental,Laptops Renting, Laptops hiring solutions,  Laptop rental, Best Sunshine Kelly  Beauty . Fashion . Lifestyle . Travel . Fitness: SmartRental Laptop & Computer

Closure

Thus, we hope this article has provided valuable insights into Renting a Laptop: A Cost-Effective Solution for Computing Needs. We appreciate your attention to our article. See you in our next article!

A Comprehensive Guide To Installing Windows 10

A Comprehensive Guide to Installing Windows 10

Introduction

With enthusiasm, let’s navigate through the intriguing topic related to A Comprehensive Guide to Installing Windows 10. Let’s weave interesting information and offer fresh perspectives to the readers.

A Comprehensive Guide to Installing Windows 10

How to Install Windows 10: a Simple Step-by-Step Guide with Pictures

Installing Windows 10 is a fundamental process for computer users, enabling them to access a robust operating system with a wealth of features and applications. Whether you are setting up a new computer or reinstalling Windows on an existing one, understanding the steps involved is crucial for a smooth and successful installation. This guide provides a comprehensive breakdown of the installation process, addressing various scenarios and offering valuable tips to ensure a seamless experience.

Prerequisites for Installation

Before embarking on the installation journey, ensuring you have the necessary prerequisites is paramount. These include:

  • A bootable USB drive or DVD: This will contain the Windows 10 installation files. Microsoft provides a tool for creating a bootable USB drive from an ISO file, which can be downloaded from their official website.
  • A computer with sufficient hardware: Windows 10 has specific system requirements, including a minimum processor speed, RAM, and storage space. Refer to Microsoft’s official documentation for the latest specifications.
  • A product key: This is required for activating Windows 10. You can obtain a product key during the purchase of a new computer or through a separate purchase.
  • An internet connection: While not strictly necessary for the initial installation, an internet connection is required for downloading updates and activating Windows 10.

Step-by-Step Installation Guide

1. Boot from the Installation Media:

  • Connect the bootable USB drive or DVD to your computer.
  • Restart your computer and access the BIOS setup by pressing the appropriate key (usually F2, F10, or Delete) during the boot sequence.
  • Navigate to the "Boot" section in the BIOS setup and select the bootable USB drive or DVD as the primary boot device.
  • Save the changes and exit the BIOS setup. Your computer will now boot from the installation media.

2. Select Language and Keyboard Layout:

  • The Windows 10 setup screen will appear. Select your preferred language, time and currency format, and keyboard layout. Click "Next" to proceed.

3. Begin Installation:

  • Click "Install Now" to initiate the installation process.

4. Enter Product Key:

  • If you have a product key, enter it in the provided field. If you are upgrading from a previous version of Windows, you may be able to skip this step.

5. Accept License Terms:

  • Read and accept the Windows 10 license terms. Click "Next" to continue.

6. Choose Installation Type:

  • Select the type of installation you want to perform.
    • Custom: Advanced: This option allows you to choose a specific partition for installing Windows 10 or create new partitions. This is recommended for experienced users or those who need to perform a clean installation.
    • Upgrade: This option installs Windows 10 over your existing operating system, preserving your files and settings.

7. Select Partition:

  • If you chose the "Custom" installation type, you will be presented with a list of partitions on your hard drive. Select the partition where you want to install Windows 10.
  • You can format the selected partition or create new partitions if necessary.

8. Commence Installation:

  • Once you have selected the partition, the installation process will begin. This may take some time, depending on your computer’s hardware and the chosen installation type.

9. Configure Windows 10:

  • After the installation is complete, you will be prompted to set up your Windows 10 account.
  • Create a user account, choose a password, and configure your desired settings.

10. Activation and Updates:

  • Windows 10 will automatically attempt to activate itself using your product key. If you have an internet connection, it will also download and install the latest updates.

Troubleshooting Common Installation Issues

  • Error during boot from installation media: Ensure the bootable USB drive or DVD is properly connected and the BIOS settings are configured correctly.
  • Missing product key: If you do not have a product key, you may be able to activate Windows 10 later using a digital license.
  • Installation error: Check for potential hardware issues, ensure sufficient storage space, and refer to Microsoft’s troubleshooting resources for specific error codes.
  • Activation issues: Ensure your internet connection is stable, and try re-entering your product key or using a different activation method.

FAQs about Windows 10 Installation

1. Can I install Windows 10 on a Mac?

No, Windows 10 is designed for PCs running on Intel or AMD processors. It cannot be installed directly on a Mac. However, you can use virtualization software like Parallels Desktop or VMware Fusion to run Windows 10 on a Mac.

2. Can I upgrade from Windows 7 or 8 to Windows 10?

Yes, Microsoft previously offered a free upgrade path from Windows 7 and 8 to Windows 10. However, this offer has expired. You can still upgrade to Windows 10 by purchasing a license and performing a clean installation or upgrade.

3. Can I install Windows 10 on a USB drive?

Yes, you can install Windows 10 on a USB drive. This is known as a "bootable USB drive." It allows you to boot your computer from the USB drive and access the Windows 10 installation files.

4. What happens to my data during a clean installation?

A clean installation will erase all data on the selected partition. Make sure to back up your important files before proceeding with a clean installation.

5. What are the system requirements for Windows 10?

Windows 10 has specific system requirements, including a minimum processor speed, RAM, and storage space. Refer to Microsoft’s official documentation for the latest specifications.

Tips for a Successful Installation

  • Back up your data: Always create backups of your important files before performing any major system changes, including reinstalling Windows.
  • Disable unnecessary startup programs: This can help improve the installation speed and prevent conflicts.
  • Ensure a stable internet connection: A stable internet connection is crucial for downloading updates and activating Windows 10.
  • Check for driver updates: After installing Windows 10, update your device drivers for optimal performance.
  • Use a bootable USB drive: Creating a bootable USB drive is generally recommended for a cleaner and more reliable installation.

Conclusion

Installing Windows 10 can be a straightforward process with the right guidance and preparation. This guide has provided a detailed walkthrough of the installation steps, addressing common issues and offering valuable tips to ensure a successful experience. By following these instructions and taking necessary precautions, users can confidently install and utilize the power and versatility of Windows 10 on their computers. Remember to consult Microsoft’s official documentation for the latest information and troubleshooting resources.

How to Install Windows 10 full step by step guide PPT - A Comprehensive Guide to Installing Windows 10_ Step-by-Step Tutorial PowerPoint How to install Windows 10 (Step by Step Instructions). - YouTube
How to Install Windows 10: a Simple Step-by-Step Guide with Pictures How to Install Windows 10 on Your PC [Step by Step Guide] Install Windows 10 The Complete Guide - Riset
Here's a step-by-step guide to installing Windows 10 - HardwareZone.com.my How to Install Windows 10 Step by Step Process - YouTube

Closure

Thus, we hope this article has provided valuable insights into A Comprehensive Guide to Installing Windows 10. We hope you find this article informative and beneficial. See you in our next article!