Archives January 2024

Windows 11: A Look Ahead At The Next Major Update

Windows 11: A Look Ahead at the Next Major Update

Introduction

With enthusiasm, let’s navigate through the intriguing topic related to Windows 11: A Look Ahead at the Next Major Update. Let’s weave interesting information and offer fresh perspectives to the readers.

Windows 11: A Look Ahead at the Next Major Update

Windows 11's next major update is due out next month. It will include Start menus folders as

Microsoft’s Windows operating system has long been the dominant force in the personal computing landscape. With each major update, Windows evolves, incorporating new features, enhancing performance, and addressing user feedback. As we look towards the future, anticipation for the next significant update to Windows 11 is growing. While Microsoft has not yet officially announced a specific release date or detailed feature set, the company has hinted at several key areas of focus, providing insights into the direction of the operating system’s evolution.

The Evolution of Windows 11: Building on a Solid Foundation

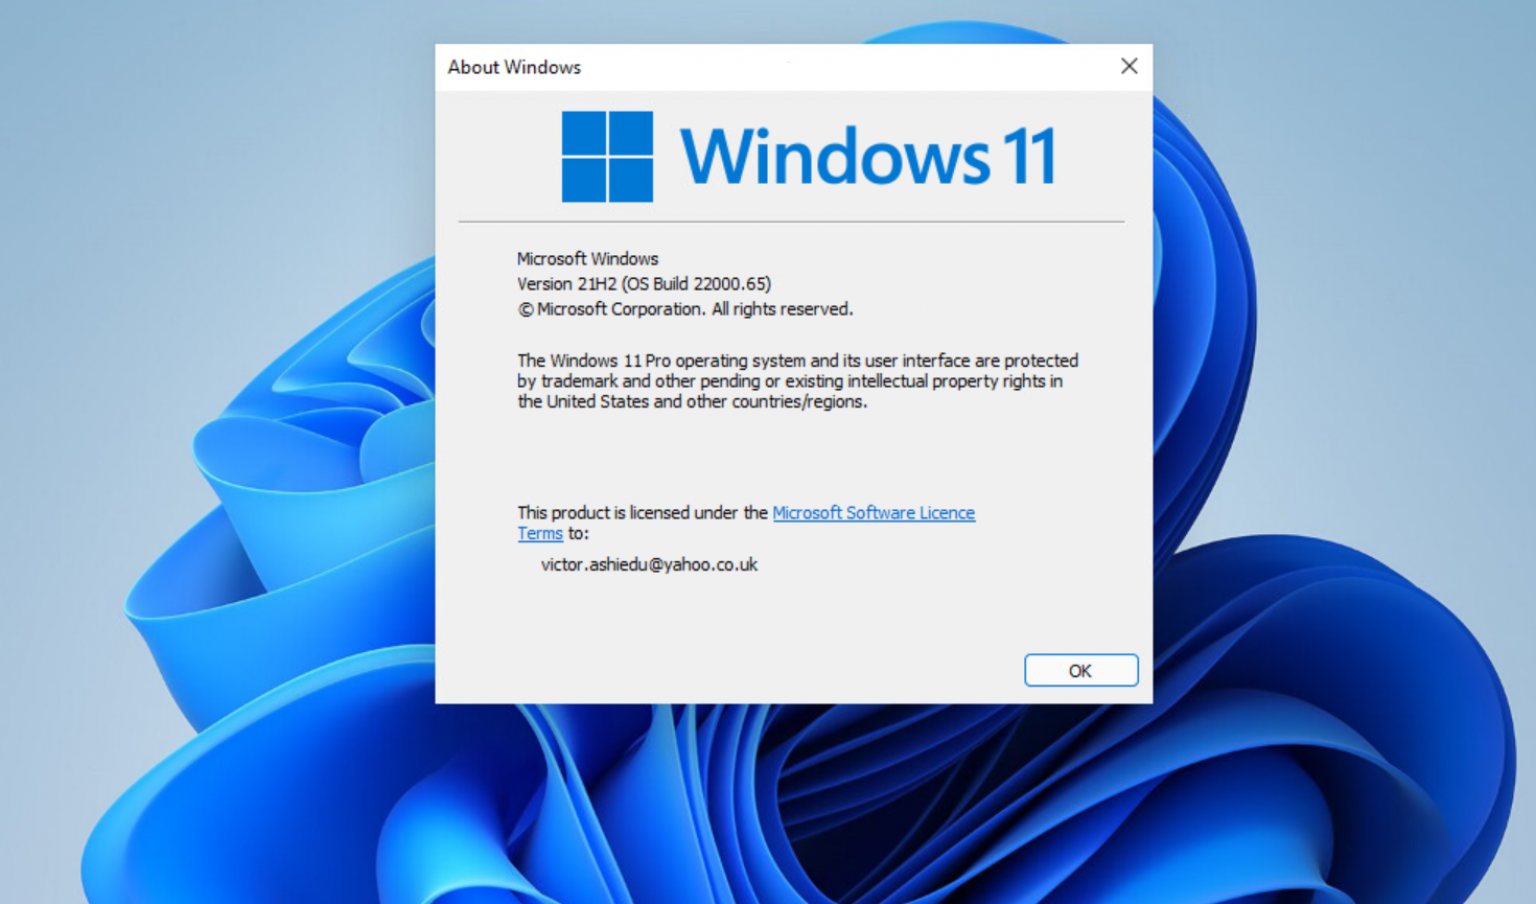
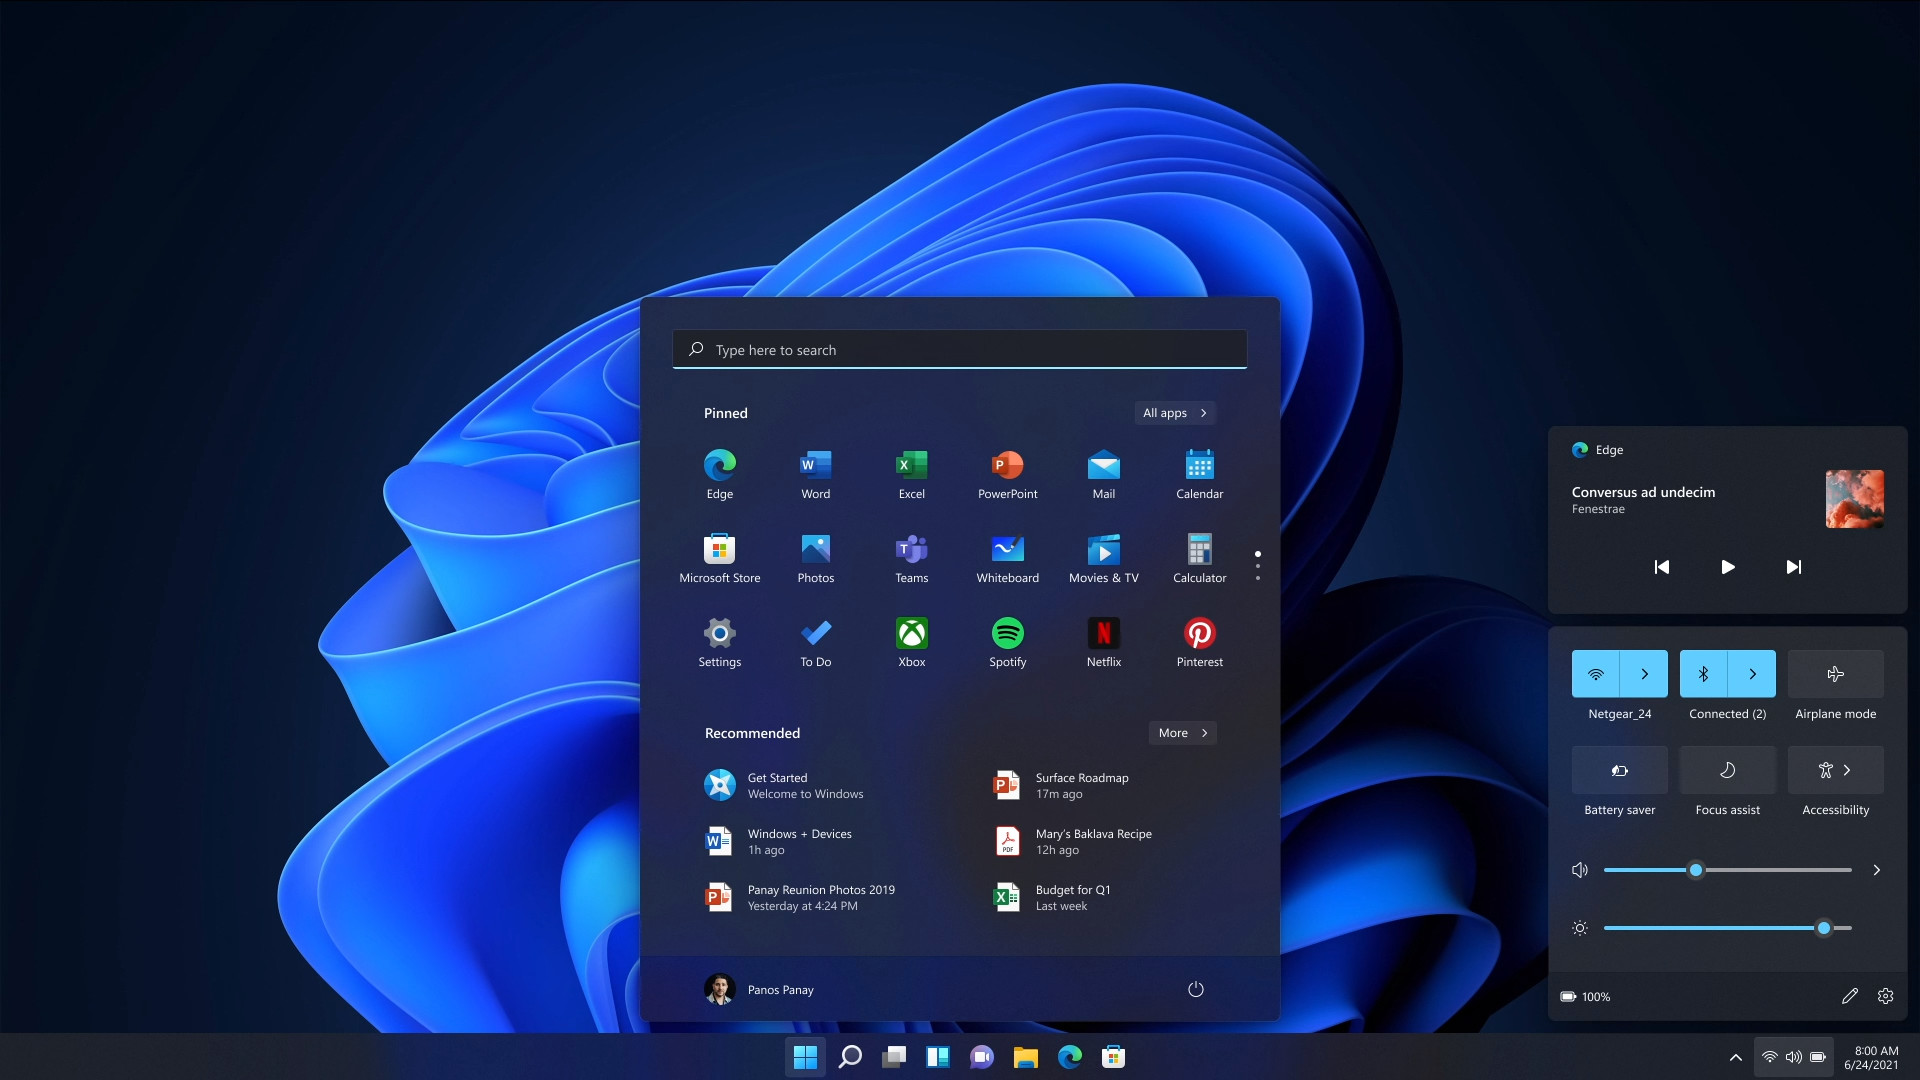
Windows 11, released in October 2021, marked a substantial shift in the user experience. The update introduced a redesigned interface, emphasizing clean lines and a modern aesthetic. It also brought significant improvements to multitasking, gaming, and security. However, the journey of Windows 11 is far from over. Microsoft continues to refine the operating system, addressing user feedback and introducing new features to enhance its capabilities.

A Glimpse into the Future: Key Areas of Focus

While the exact specifics remain under wraps, several key areas are expected to be at the forefront of the next major update. These include:

1. Enhanced AI Integration: Artificial intelligence (AI) is rapidly transforming various aspects of our lives, and Windows 11 is poised to embrace this evolution. The next update is likely to see deeper AI integration, leading to:

  • Improved Search Functionality: AI-powered search will deliver more relevant and accurate results, allowing users to quickly find the information they need.
  • Personalized Recommendations: AI will analyze user behavior and preferences to provide personalized recommendations for applications, settings, and content.
  • Enhanced Accessibility: AI-powered features will enhance accessibility for users with disabilities, making Windows more inclusive.

2. Refined User Experience: Microsoft is committed to delivering a seamless and intuitive user experience. The next update is likely to focus on:

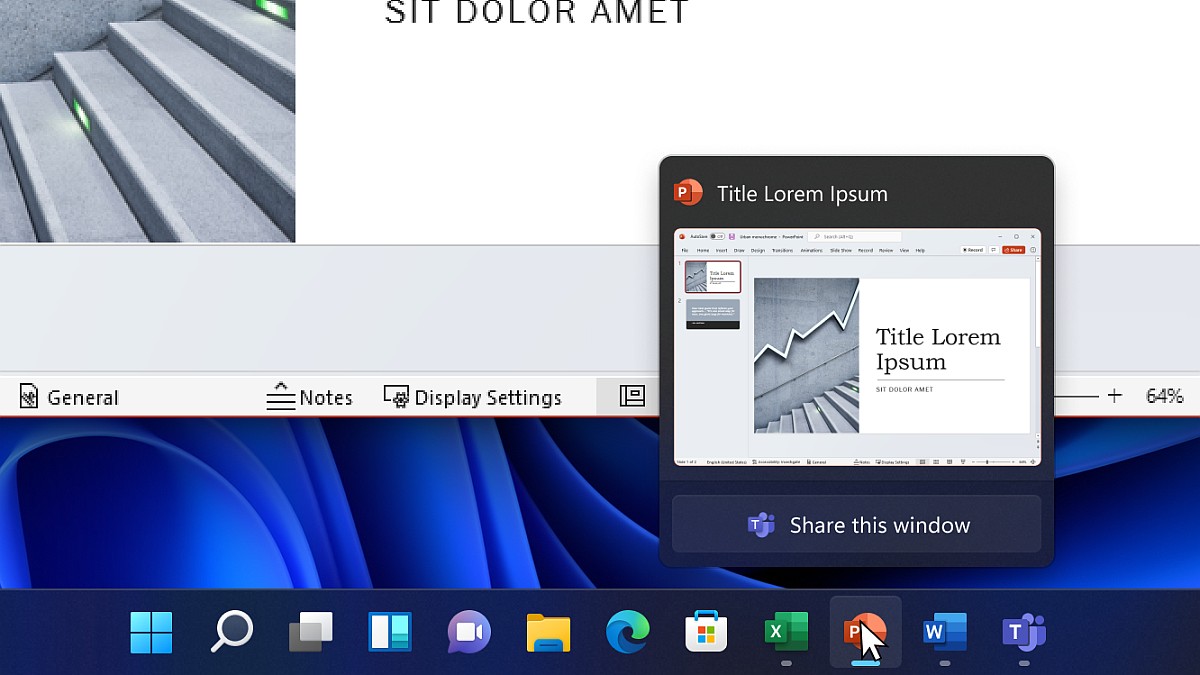
  • Streamlined Taskbar: The taskbar will be further refined, potentially with new features to enhance organization and efficiency.
  • Improved Multitasking: Windows 11 already boasts powerful multitasking capabilities, and the next update could introduce new features to further optimize workflow.
  • Enhanced Widgets: The widgets panel, introduced in Windows 11, is expected to see further development, offering more customization and useful information at a glance.

3. Focus on Gaming: Windows 11 has already proven to be a strong platform for gaming, and the next update is likely to further enhance its capabilities:

  • DirectX 12 Ultimate Support: The next update may introduce support for the latest version of DirectX, offering improved graphics performance and visual fidelity.
  • Game Mode Enhancements: Potential enhancements to Game Mode could further optimize system resources for smoother gameplay.
  • Cloud Gaming Integration: The next update might see deeper integration with cloud gaming services, offering a seamless experience for streaming games.

4. Security and Privacy: Security and privacy remain paramount for Microsoft. The next update is likely to introduce:

  • Enhanced Security Features: New security features might be implemented to further protect user data and devices.
  • Improved Privacy Controls: Users will likely have more granular control over their privacy settings, enabling them to customize data sharing preferences.
  • Enhanced Threat Detection: Advanced threat detection capabilities will be integrated to protect against evolving cyber threats.

5. Cross-Device Integration: Microsoft is committed to creating a seamless experience across devices. The next update may focus on:

  • Improved Synchronization: Enhanced synchronization features will ensure that user data and settings are seamlessly shared across devices.
  • Cross-Device Collaboration: New features will facilitate smoother collaboration between different devices, enhancing productivity and communication.
  • Integration with Other Microsoft Services: The next update might see deeper integration with other Microsoft services, such as Microsoft 365 and Xbox, creating a more unified ecosystem.

FAQs about the Next Major Update of Windows 11

Q: When can we expect the next major update of Windows 11?

A: Microsoft has not yet announced a specific release date for the next major update. However, based on historical release patterns, it is likely to arrive in the latter half of 2023 or early 2024.

Q: Will the next update be free?

A: Microsoft typically releases major updates to Windows as free upgrades for users running the current version. Therefore, it is highly likely that the next major update will also be free.

Q: What are the system requirements for the next update?

A: While specific system requirements may vary slightly, it is safe to assume that the next update will require the same minimum specifications as Windows 11. These include:

  • Processor: 1 GHz or faster with 2 or more cores
  • RAM: 4 GB or more
  • Storage: 64 GB or more
  • Graphics: Compatible with DirectX 12 or later
  • Display: 9 inches or larger with a resolution of 720p or greater

Q: Will the next update change the user interface significantly?

A: While the next update is likely to refine the user interface, it is unlikely to introduce major visual changes. The focus will likely be on enhancing existing features and introducing subtle refinements to improve usability.

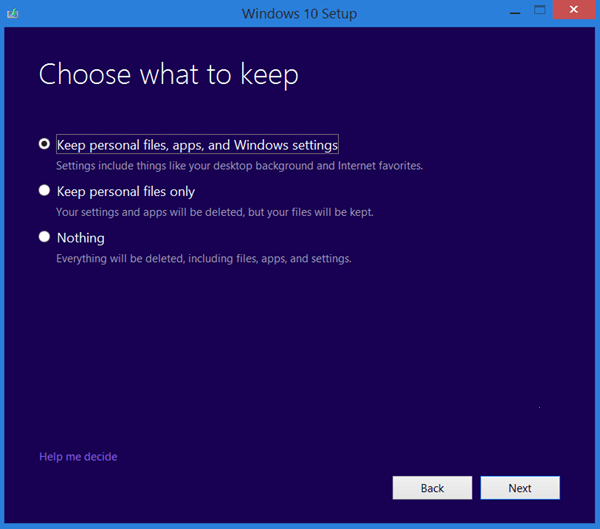
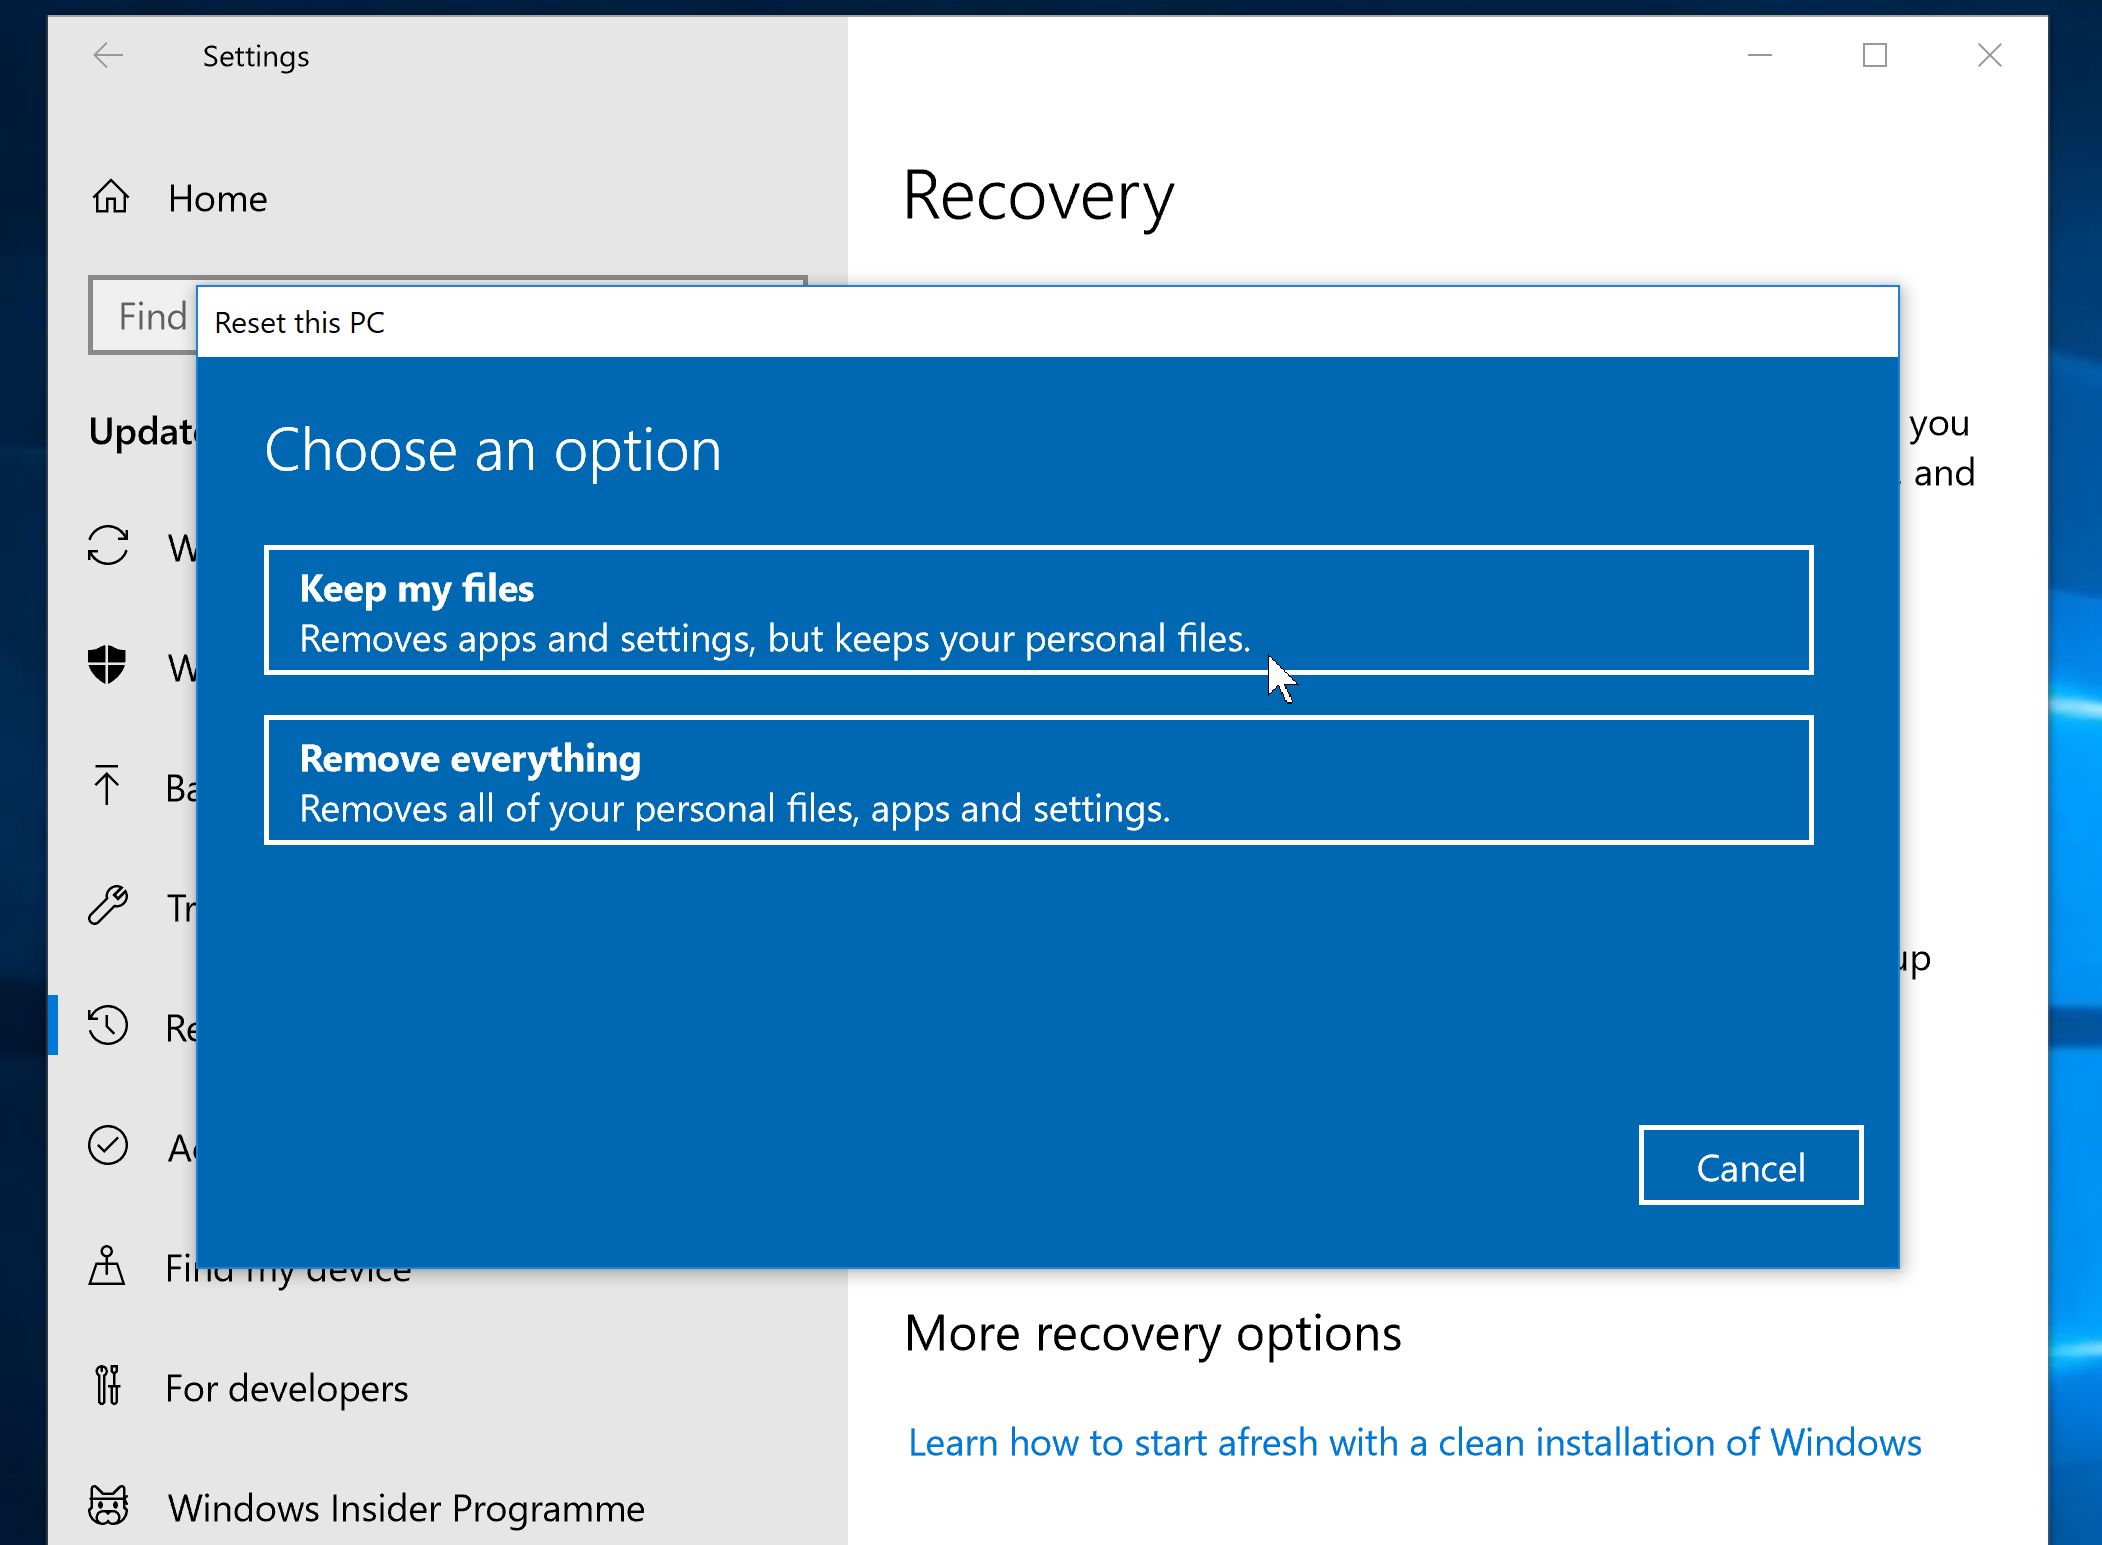
Q: Will the next update require a clean install?

A: Typically, major updates to Windows can be installed as upgrades over existing installations. However, it is always recommended to back up your data before installing any major updates.

Tips for Preparing for the Next Major Update

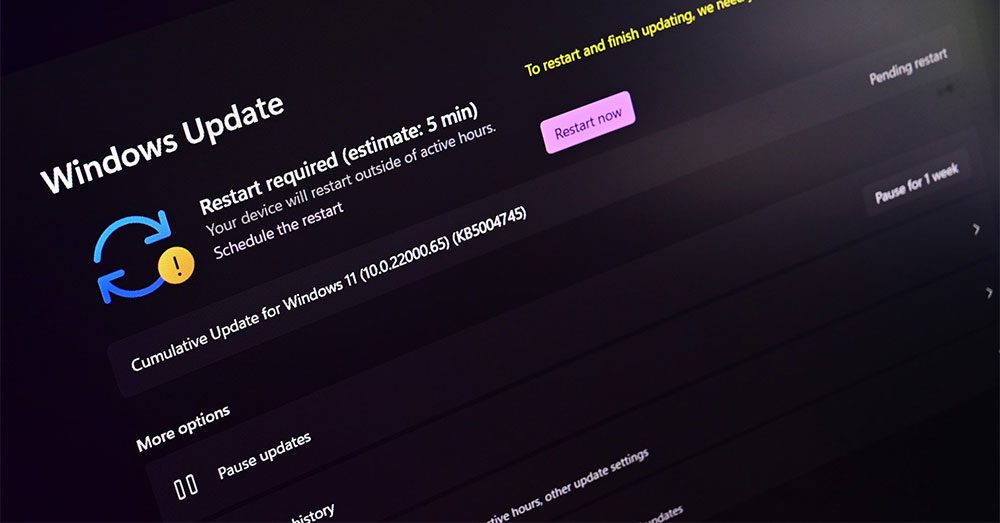
  • Keep your system updated: Ensure your system is running the latest version of Windows 11 to receive the next update smoothly.
  • Back up your data: Regularly back up your important data to prevent loss in case of unforeseen issues during the update process.
  • Check system requirements: Verify that your device meets the minimum system requirements for the next update.
  • Review privacy settings: Before installing the update, review your privacy settings and ensure they are configured according to your preferences.
  • Stay informed: Keep an eye on official Microsoft announcements and news sources to stay updated on the release date and features of the next update.

Conclusion

The next major update to Windows 11 is poised to be a significant milestone in the evolution of the operating system. With a focus on AI integration, refined user experience, enhanced gaming capabilities, improved security, and cross-device integration, the update is set to further enhance the way we interact with our devices and access information. While the specifics remain to be seen, the direction of the update suggests a future where Windows 11 becomes even more powerful, personalized, and secure, paving the way for a more seamless and engaging digital experience.

Windows 11 Taskbar Improvements Spotted on Release Preview Ahead of Major February Update Windows 11 "Moment 1", "Moment 2" are the next major updates with new features - DigiKar Windows 11 is receiving its first major update. Here's a look inside  tecrounder
Windows 11 Feature Updates to Be Released Every 12 Months - Itechguides Windows 11 Just Got a Major Update - Here's What's New - YouTube Windows 11 Leaks Ahead Of Microsoft Announcement; Showcases New UI, Start Menu - Lowyat.NET
Microsoft officially announces Windows 11, the next major Windows version - Neowin Windows 11 is receiving its first major update. Here's a look inside  tecrounder

Closure

Thus, we hope this article has provided valuable insights into Windows 11: A Look Ahead at the Next Major Update. We hope you find this article informative and beneficial. See you in our next article!

Navigating The Realm Of Naza M V2 Windows 10 Drivers: A Comprehensive Guide

Navigating the Realm of Naza M V2 Windows 10 Drivers: A Comprehensive Guide

Introduction

With great pleasure, we will explore the intriguing topic related to Navigating the Realm of Naza M V2 Windows 10 Drivers: A Comprehensive Guide. Let’s weave interesting information and offer fresh perspectives to the readers.

DJI NAZA M V2 Software download and Installation In windows 10 - YouTube

The Naza M V2, a versatile flight controller renowned for its stability and feature-rich capabilities, thrives in the realm of multi-rotor drones and other aerial applications. To harness its full potential, a crucial component comes into play: the Windows 10 driver. This software bridge facilitates communication between the Naza M V2 and your computer, enabling configuration, firmware updates, and data analysis. Understanding its function and proper installation is essential for a seamless and successful flight experience.

Understanding the Importance of Windows 10 Drivers

Drivers serve as the language interpreters between hardware and software. In the case of the Naza M V2, the Windows 10 driver allows your computer to recognize and interact with the flight controller. Without it, your computer will not be able to communicate with the Naza M V2, rendering it unusable for configuration, data logging, or firmware updates.

The driver acts as a translator, converting data from the Naza M V2’s language into a language your computer understands. This enables a smooth flow of information, allowing you to:

  • Configure the Naza M V2: Set parameters like flight modes, GPS settings, and sensor calibration.
  • Update Firmware: Ensure your Naza M V2 is running the latest software, improving performance and adding new features.
  • Analyze Flight Data: Access recorded flight logs, providing valuable insights into your drone’s performance and helping you troubleshoot issues.
  • Control the Naza M V2: Utilize software tools like Mission Planner to plan and execute autonomous flight missions.

Obtaining and Installing the Naza M V2 Windows 10 Driver

The official Naza M V2 driver can be found on the manufacturer’s website, usually within the download section of the product page. Ensure you are downloading the correct driver for your operating system.

Installation Process:

  1. Download the driver: Locate the driver file on the manufacturer’s website and download it to your computer.
  2. Run the installer: Double-click the downloaded file to launch the driver installation process.
  3. Follow the on-screen instructions: The installer will guide you through the installation process, typically involving accepting the terms and conditions and selecting the destination folder.
  4. Connect the Naza M V2: After the installation is complete, connect the Naza M V2 to your computer using the provided USB cable.
  5. Verify driver installation: Check your device manager for a new entry related to the Naza M V2. If the device is listed without any error messages, the driver installation was successful.

Troubleshooting Driver Installation Issues

While the installation process is usually straightforward, you may encounter issues. Here are some common problems and solutions:

  • Driver incompatibility: Ensure you are downloading the driver specifically designed for Windows 10. Older drivers may not be compatible.
  • Driver conflicts: If other drivers are interfering with the Naza M V2 driver, try temporarily disabling other USB devices or restarting your computer.
  • Corrupted driver files: Re-download the driver from the manufacturer’s website and reinstall it.
  • Outdated operating system: Ensure your Windows 10 operating system is up-to-date. Outdated systems may not support the latest drivers.
  • USB port issues: Try connecting the Naza M V2 to a different USB port.

If you continue to experience difficulties, consult the manufacturer’s documentation or contact their technical support team for assistance.

Frequently Asked Questions (FAQs)

Q1: What happens if I don’t install the Naza M V2 driver?

A: Without the driver, your computer will not be able to recognize or communicate with the Naza M V2. This means you won’t be able to configure, update, or use the flight controller.

Q2: Is it necessary to install the driver every time I connect the Naza M V2?

A: Once the driver is installed, it should remain active unless you uninstall it manually. You don’t need to reinstall it every time you connect the Naza M V2.

Q3: Can I use the Naza M V2 without a computer?

A: While the Naza M V2 can operate independently, you will need a computer to configure it initially and perform firmware updates.

Q4: What if I’m using a different operating system?

A: The Naza M V2 typically comes with drivers for various operating systems, including Windows, macOS, and Linux. Refer to the manufacturer’s documentation for the appropriate driver for your specific operating system.

Q5: Are there any risks associated with installing the driver?

A: Installing drivers from reputable sources like the manufacturer’s website is generally safe. However, downloading drivers from unofficial sources can introduce security risks. Always download drivers from trusted sources.

Tips for a Smooth Driver Installation

  • Back up your computer: Before installing any new software, create a system backup to ensure you can restore your computer to its previous state if necessary.
  • Disconnect unnecessary devices: Disconnect any other USB devices that you are not actively using to minimize potential driver conflicts.
  • Restart your computer: After installing the driver, restart your computer to ensure the changes take effect properly.
  • Verify driver installation: Check your device manager to ensure the Naza M V2 is listed without any errors.
  • Consult the manufacturer’s documentation: If you encounter any issues, refer to the manufacturer’s documentation for troubleshooting steps or contact their technical support team.

Conclusion

The Naza M V2 Windows 10 driver plays a critical role in unlocking the full potential of this versatile flight controller. By facilitating communication between the Naza M V2 and your computer, it enables configuration, firmware updates, data analysis, and control. Understanding the importance of the driver and its proper installation is crucial for a seamless and successful flight experience. By following the guidelines and troubleshooting tips provided, you can ensure that your Naza M V2 is properly integrated into your Windows 10 environment, allowing you to explore the exciting world of drone technology with confidence.

Dji Naza M V2 User Manual Dji Naza M V2 User Manual Naza M V2 Manual
DJI NAZA M-V2 FLIGHT CONTROLLER REVIEW AND SETUP FULL TUTORIAL  DJI ASSISTANT SOFTWARE OVER Dji Naza M V2 User Manual Naza M V2 Manual
Naza M V2 Gps Manual DJI NAZA-M V2 Assistant Software Setup - YouTube

Closure

Thus, we hope this article has provided valuable insights into Navigating the Realm of Naza M V2 Windows 10 Drivers: A Comprehensive Guide. We thank you for taking the time to read this article. See you in our next article!

The "Documents" Folder: A Central Hub For Your Digital Life On Windows 10

The "Documents" Folder: A Central Hub for Your Digital Life on Windows 10

Introduction

With enthusiasm, let’s navigate through the intriguing topic related to The "Documents" Folder: A Central Hub for Your Digital Life on Windows 10. Let’s weave interesting information and offer fresh perspectives to the readers.

The "Documents" Folder: A Central Hub for Your Digital Life on Windows 10

How to Move Documents Folder in Windows 10 - MustBeGeekMustBeGeek

The "Documents" folder, a familiar fixture on Windows 10 operating systems, serves as a central repository for a wide range of digital content. This folder, often found within the "Users" directory, acts as a designated space for users to store, organize, and access their personal files, fostering a streamlined and efficient approach to digital file management.

A Foundation for Digital Organization

The "Documents" folder is designed to be a foundational element in a user’s digital organizational structure. It provides a readily accessible location for storing a variety of file types, including:

  • Text Documents: Word processing files, spreadsheets, presentations, and other text-based documents can be stored and readily accessed within the "Documents" folder.
  • Images: Digital photographs, graphics, and other image files can be organized within subfolders within the "Documents" folder, facilitating easy retrieval.
  • Audio and Video Files: Music files, podcasts, video recordings, and other media can be conveniently stored within the "Documents" folder, ensuring easy access for playback and sharing.
  • Project Files: Documents related to specific projects, including research papers, presentations, and design files, can be organized within dedicated subfolders within the "Documents" folder, promoting project-based organization.

Benefits of Utilizing the "Documents" Folder

The "Documents" folder offers several benefits for users, contributing to a more organized and efficient digital experience:

  • Centralized File Access: The "Documents" folder provides a single location for accessing all personal files, eliminating the need to search through multiple directories or drives.
  • Simplified Organization: The ability to create subfolders within the "Documents" folder allows users to categorize files based on type, project, or any other desired criteria, enhancing file organization and retrieval.
  • Improved File Management: The "Documents" folder facilitates efficient file management through features like file searching, sorting, and filtering, making it easy to locate and manage files.
  • Enhanced Collaboration: By storing documents in the "Documents" folder, users can easily share files with others, enabling collaboration on projects and facilitating seamless information exchange.
  • Backup and Recovery: The "Documents" folder is often included in backup routines, ensuring that important files are protected against data loss due to hardware failure or accidental deletion.

Navigating the "Documents" Folder: A User-Friendly Interface

The "Documents" folder is designed with user-friendliness in mind, offering a familiar and intuitive interface:

  • File Explorer: The "Documents" folder is accessed through the Windows File Explorer, a well-established and familiar interface for navigating files and folders.
  • Context Menu: The "Documents" folder utilizes a context menu that provides quick access to common actions, such as creating new folders, copying files, moving files, and deleting files.
  • Search Functionality: The Windows search bar can be used to quickly locate files within the "Documents" folder, based on file name, content, or other criteria.
  • Sorting and Filtering: Files within the "Documents" folder can be sorted by name, date modified, size, or other criteria, and can be filtered to display only specific file types.

Beyond the Basics: Customizing Your "Documents" Folder

While the "Documents" folder provides a solid foundation for file organization, users can further customize the folder to suit their individual needs:

  • Subfolder Creation: Creating subfolders within the "Documents" folder allows users to organize files based on categories, projects, or other criteria, fostering a more structured file management system.
  • File Naming Conventions: Adopting consistent file naming conventions, such as using dates, project names, or descriptive keywords, can significantly enhance file organization and retrieval.
  • Cloud Storage Integration: Integrating cloud storage services like OneDrive or Google Drive with the "Documents" folder allows for automatic file syncing and backup, ensuring that files are accessible from multiple devices and protected against data loss.

FAQs: Addressing Common Questions about the "Documents" Folder

Q: Can I change the location of the "Documents" folder?
A: While it is possible to change the default location of the "Documents" folder, it is generally not recommended, as it can disrupt existing file paths and potentially lead to compatibility issues with applications.

Q: How do I protect my files in the "Documents" folder?
A: Windows 10 offers several built-in security features, including password protection, encryption, and file permissions, which can be used to protect files stored in the "Documents" folder.

Q: What are the best practices for organizing files in the "Documents" folder?
A: Adopt a hierarchical structure, using subfolders to categorize files based on type, project, or other criteria. Use consistent file naming conventions and consider using cloud storage for automatic backup and syncing.

Q: What happens to my "Documents" folder if I reinstall Windows 10?
A: Reinstalling Windows 10 typically does not affect the "Documents" folder, but it is always advisable to back up important files before performing any major system updates or installations.

Tips for Maximizing the "Documents" Folder’s Potential

  • Regularly Clean Up: Delete unnecessary files and empty the Recycle Bin to free up disk space and maintain a streamlined file system.
  • Utilize Search Functionality: Become familiar with the Windows search bar and its advanced features to quickly locate files within the "Documents" folder.
  • Implement a Backup Strategy: Regularly back up important files stored in the "Documents" folder to protect against data loss due to hardware failure, accidental deletion, or other unforeseen circumstances.
  • Consider Cloud Storage: Integrate cloud storage services with the "Documents" folder to ensure that files are automatically synced and backed up, providing access from multiple devices and mitigating the risk of data loss.

Conclusion: A Foundation for Digital Organization and Efficiency

The "Documents" folder serves as a cornerstone of digital organization on Windows 10, providing a readily accessible location for storing, organizing, and accessing personal files. By embracing its features and adopting best practices for file management, users can streamline their digital workflows, enhance file organization, and ensure the security and accessibility of their important files. The "Documents" folder, though seemingly simple, is a powerful tool that empowers users to manage their digital lives with greater efficiency and control.

Documents And Settings Win 10 Dell Document Hub for Windows 10 Digital life windows 10 aio - lasopasalsa
How to Move the Documents Folder in Windows 10 Win10 File Explorer – Practical Help for Your Digital Life® Dell Document Hub for Windows 10
How to create a folder in documents windows 10 - webcampassa Windows 10 2 documents folders - moztruck

Closure

Thus, we hope this article has provided valuable insights into The "Documents" Folder: A Central Hub for Your Digital Life on Windows 10. We hope you find this article informative and beneficial. See you in our next article!

Understanding And Resolving Persistent Pins In Windows 10

Understanding and Resolving Persistent Pins in Windows 10

Introduction

With enthusiasm, let’s navigate through the intriguing topic related to Understanding and Resolving Persistent Pins in Windows 10. Let’s weave interesting information and offer fresh perspectives to the readers.

Understanding and Resolving Persistent Pins in Windows 10

How To Reset Or Change Your Windows 10 Pin  digisrun

Windows 10 offers a convenient way to access frequently used applications and files through pinning. Users can pin items to the taskbar, Start menu, or even the Action Center for quick access. However, situations arise where these pinned items become stubborn and resist removal. This article explores the reasons behind this behavior and provides a comprehensive guide to resolving the issue.

Understanding the Root of the Problem:

The inability to remove pinned items in Windows 10 can be attributed to various factors, ranging from simple user error to more complex system issues. Common causes include:

  • Corrupted System Files: Damaged or corrupted system files responsible for managing pinned items can lead to their persistence.
  • Third-Party Software Interference: Some applications, especially those with deep system integration, can interfere with the pinning mechanism.
  • Hidden System Permissions: Certain pinned items might have hidden system permissions that prevent their removal.
  • Registry Issues: Problems within the Windows Registry, which stores system settings, can lead to incorrect pinning data.
  • Conflicting User Profiles: Multiple user profiles on the same system can sometimes create conflicts, affecting pinning functionality.
  • System Updates or Rollbacks: Incomplete system updates or rollbacks can introduce inconsistencies that affect pinning behavior.

Troubleshooting Steps:

To resolve the issue of persistent pins, it is crucial to systematically address each potential cause. The following steps provide a comprehensive guide:

  1. Restart Windows Explorer: A simple restart of Windows Explorer can often resolve temporary glitches that might be preventing the removal of pinned items. To restart Windows Explorer, follow these steps:

    • Open Task Manager by pressing Ctrl + Shift + Esc.
    • Navigate to the Processes tab.
    • Locate Windows Explorer and right-click it.
    • Select Restart.
  2. Check for Third-Party Software Conflicts: Certain applications, particularly those with system-level access, can interfere with the pinning mechanism. Try temporarily disabling or uninstalling any recently installed software that might be causing conflicts.

  3. Run a System File Checker Scan: Corrupted system files can lead to various system issues, including persistent pins. Running a System File Checker (SFC) scan can repair damaged files. To run an SFC scan, open Command Prompt as administrator and execute the following command:

    sfc /scannow
  4. Verify Registry Entries: Incorrect or corrupted registry entries can also cause issues with pinning. However, modifying the registry is a delicate process and should only be attempted by experienced users. Incorrect modifications can lead to system instability.

  5. Check for Hidden System Permissions: Some pinned items might have hidden system permissions that prevent their removal. To investigate this, right-click the pinned item and select Properties. Examine the Security tab for any unusual permissions.

  6. Troubleshoot User Profiles: If multiple user profiles exist on the system, try logging in with a different profile and attempting to remove the persistent pins. This can help identify if the issue is specific to a particular user profile.

  7. Run a System Update or Rollback: Incomplete system updates or rollbacks can cause pinning issues. Ensure your system is running the latest updates and consider rolling back to a previous version if the problem arose after an update.

FAQs:

Q: Why can’t I remove a pinned item from the Start menu?

A: The inability to remove a pinned item from the Start menu can be due to corrupted system files, interference from third-party software, or incorrect registry entries. Following the troubleshooting steps outlined above can help resolve this issue.

Q: I have tried all the troubleshooting steps, but the pinned item still persists. What should I do?

A: If the issue persists after trying all the troubleshooting steps, consider seeking professional assistance. A qualified technician can diagnose the problem more thoroughly and provide appropriate solutions.

Q: Is there a way to prevent pinned items from becoming persistent?

A: While there is no guaranteed method to prevent persistent pins, maintaining a clean system, running regular system file checks, and avoiding unnecessary third-party software can minimize the risk.

Tips:

  • Regularly check for system updates: Keeping your system updated with the latest patches and security updates can help prevent many issues, including pinning problems.
  • Avoid installing unnecessary software: Limit the number of applications installed on your system, as excessive software can increase the risk of conflicts and system instability.
  • Run a system scan regularly: Regularly scanning your system for malware and viruses can help prevent corruption of system files and registry entries.
  • Back up your data: Before attempting any significant system changes, ensure your important data is backed up. This will minimize data loss in case of unforeseen issues.

Conclusion:

Persistent pins in Windows 10 can be a frustrating issue, but understanding the underlying causes and following the troubleshooting steps outlined in this article can help resolve the problem. By addressing potential issues systematically and maintaining a clean and updated system, users can minimize the likelihood of encountering persistent pins in the future. Remember, if all else fails, seeking professional assistance can provide the necessary expertise to diagnose and resolve the issue.

How to Reset or Remove Windows 10 PIN If Forgot Reset PIN for your Account in Windows 10  Tutorials How to change the PIN in Windows 10  Windows Central
How to change the PIN in Windows 10  Windows Central How to change the PIN in Windows 10  Windows Central How to Reset or Remove Pin in Windows 10 if you forgot it
How To Reset Or Change Your Windows 10 Pin  digisrun Resolving Windows 10 & 11 PIN Issues with 5 Effective Solutions in 2024  Solutions, Windows 10

Closure

Thus, we hope this article has provided valuable insights into Understanding and Resolving Persistent Pins in Windows 10. We hope you find this article informative and beneficial. See you in our next article!

Navigating The Labyrinth Of QBittorrent I/O Errors On Windows 11

Navigating the Labyrinth of qBittorrent I/O Errors on Windows 11

Introduction

In this auspicious occasion, we are delighted to delve into the intriguing topic related to Navigating the Labyrinth of qBittorrent I/O Errors on Windows 11. Let’s weave interesting information and offer fresh perspectives to the readers.

How to Fix QBitTorrent I/O Error [Ultimate Guide]

qBittorrent, a popular and versatile torrent client, often encounters challenges, particularly on Windows 11, manifesting as I/O errors. These errors, usually denoted by messages like "I/O Error", "Error writing to file", or "Connection reset by peer", can significantly disrupt download processes, leaving users frustrated and seeking solutions. This comprehensive guide delves into the intricacies of qBittorrent I/O errors on Windows 11, providing a clear understanding of their origins, common causes, and effective troubleshooting methods.

Understanding the Nature of I/O Errors

I/O, short for Input/Output, refers to the communication between a computer’s hardware components, including the hard drive, network interfaces, and operating system. When qBittorrent encounters an I/O error, it signifies a disruption in this communication flow, preventing the smooth transfer of data during torrent downloads.

Common Culprits Behind qBittorrent I/O Errors

While the exact cause of I/O errors can vary, several common culprits contribute to their occurrence:

  • Disk Space Limitations: Insufficient disk space can hinder the torrent download process. qBittorrent needs adequate space to store downloaded files and temporary data. If the available space is limited, the software may struggle to write data to the disk, leading to I/O errors.
  • Disk Corruption: A corrupted hard drive can lead to inconsistencies in data storage, causing qBittorrent to encounter errors while accessing or writing files.
  • Network Connectivity Issues: A weak or unstable internet connection can interrupt the data flow, causing qBittorrent to experience I/O errors.
  • Firewall or Antivirus Interference: Security software, like firewalls and antivirus programs, can sometimes interfere with qBittorrent’s access to network resources, leading to I/O errors.
  • Conflicting Software: Other programs running concurrently with qBittorrent might compete for resources, potentially disrupting the torrent client’s operations and causing I/O errors.
  • Incorrect Torrent File: Corrupted or incomplete torrent files can lead to download errors, including I/O issues.
  • Operating System Issues: Windows 11 itself may have underlying problems, affecting qBittorrent’s performance and causing I/O errors.
  • qBittorrent Configuration: Incorrect settings within qBittorrent, such as an overly aggressive download speed limit or an insufficient buffer size, can contribute to I/O errors.

Troubleshooting Strategies for qBittorrent I/O Errors

Addressing qBittorrent I/O errors requires a systematic approach, focusing on identifying and resolving the underlying cause. Here are effective troubleshooting strategies:

1. Check Disk Space:

  • Identify Available Space: Check your available disk space by navigating to "This PC" or "My Computer" and right-clicking on the drive where qBittorrent downloads files. Select "Properties" and observe the "Free Space" value.
  • Free Up Space: If the available space is limited, delete unnecessary files or move them to a different storage location.
  • Consider Alternative Storage: If disk space remains an issue, consider using an external hard drive or cloud storage to store your downloads.

2. Verify Disk Integrity:

  • Use Disk Check Tool: Windows 11 provides a built-in disk check tool. Open "File Explorer", right-click on the drive where qBittorrent downloads files, select "Properties", and then "Tools". Click "Check" under "Error checking".
  • Run CHKDSK: Alternatively, use the command prompt to run the CHKDSK utility. Open "Command Prompt" as administrator and type "chkdsk /f /r [drive letter]" (replace [drive letter] with the actual drive letter).

3. Optimize Network Connectivity:

  • Check Internet Connection: Ensure a stable and reliable internet connection. Run a speed test to assess your download and upload speeds.
  • Troubleshoot Network Issues: If you suspect network problems, try restarting your modem and router.
  • Consider Network Adapter Settings: Access "Network and Internet" settings in Windows 11 and review your network adapter settings. Ensure the correct network adapter is selected and that its settings are appropriate for your internet connection.

4. Address Firewall and Antivirus Conflicts:

  • Temporarily Disable Firewall: Temporarily disable your Windows firewall or antivirus software to check if it’s interfering with qBittorrent. Remember to re-enable them after troubleshooting.
  • Add qBittorrent to Exclusions: Configure your firewall and antivirus software to exclude qBittorrent from their monitoring or blocking mechanisms.
  • Consider Alternative Security Software: If conflicts persist, consider using a different firewall or antivirus program known to be compatible with qBittorrent.

5. Manage Conflicting Software:

  • Close Unnecessary Programs: Close any unnecessary applications running in the background, as they might compete for resources and hinder qBittorrent’s performance.
  • Adjust Program Priorities: If certain programs are essential, consider adjusting their priority levels in Task Manager. Set qBittorrent to "High" priority to give it more resources.

6. Verify Torrent File Integrity:

  • Check Torrent File Source: Download torrent files from reputable sources to minimize the risk of encountering corrupted or incomplete files.
  • Use a Torrent File Validator: Use a tool like "qBittorrent Validator" to verify the integrity of the torrent file before starting the download.

7. Update qBittorrent and Operating System:

  • Install Latest qBittorrent Version: Ensure you are using the latest version of qBittorrent, as updates often include bug fixes and performance enhancements.
  • Keep Windows 11 Updated: Update your Windows 11 operating system to the latest version to benefit from bug fixes, security patches, and improved stability.

8. Adjust qBittorrent Settings:

  • Optimize Download Speed Limits: Experiment with different download speed limits to find a balance between download speed and stability. Avoid setting excessively high limits, as this can overload your internet connection and lead to errors.
  • Adjust Buffer Size: Increase the buffer size in qBittorrent’s settings to improve data handling and reduce the likelihood of I/O errors.
  • Enable DHT and Peer Exchange: Ensure that DHT (Distributed Hash Table) and peer exchange are enabled in qBittorrent’s settings. These features facilitate efficient peer discovery and data transfer.

9. Consider Reinstallation:

  • Uninstall and Reinstall qBittorrent: If the issue persists, try uninstalling and reinstalling qBittorrent. This can resolve any corrupted configuration files or software conflicts.
  • Reinstall Windows 11: In rare cases, if other troubleshooting steps fail, reinstalling Windows 11 might be necessary to eliminate underlying operating system problems.

FAQs about qBittorrent I/O Errors on Windows 11:

Q: What are the most common symptoms of qBittorrent I/O errors?

A: Common symptoms include:

  • Download speeds abruptly dropping to zero.
  • Error messages appearing in the qBittorrent interface, such as "I/O Error", "Error writing to file", or "Connection reset by peer".
  • Torrent downloads pausing or failing to start.
  • qBittorrent becoming unresponsive.

Q: Is it possible to prevent I/O errors from occurring?

A: While preventing all I/O errors might not be entirely possible, following best practices can significantly reduce their occurrence:

  • Maintain sufficient disk space.
  • Keep your operating system and qBittorrent updated.
  • Use reputable torrent sources.
  • Optimize network connectivity.
  • Regularly check your disk for errors.

Q: Are there any specific settings in qBittorrent that can help prevent I/O errors?

A: Yes, certain settings can help:

  • Buffer Size: Increasing the buffer size can improve data handling and reduce errors.
  • Download Speed Limits: Setting reasonable download speed limits can prevent overloading your internet connection and minimize errors.
  • DHT and Peer Exchange: Enabling these features can improve peer discovery and data transfer, reducing the likelihood of errors.

Tips for Avoiding qBittorrent I/O Errors on Windows 11:

  • Regularly Check Disk Space: Make it a habit to monitor your disk space and free up space as needed.
  • Schedule Disk Checks: Regularly schedule disk checks using the built-in tool or CHKDSK utility to detect and repair potential errors.
  • Use a Stable Internet Connection: Ensure a reliable and stable internet connection to avoid interruptions and errors.
  • Keep Software Updated: Update qBittorrent and Windows 11 regularly to benefit from bug fixes and performance enhancements.
  • Monitor qBittorrent Activity: Regularly check qBittorrent’s activity to identify any unusual behavior or error messages.

Conclusion:

qBittorrent I/O errors on Windows 11 can be frustrating, but understanding their causes and implementing effective troubleshooting strategies can significantly improve download stability. By addressing issues related to disk space, network connectivity, software conflicts, and other potential factors, users can mitigate the occurrence of I/O errors and enjoy a smooth torrent downloading experience. Remember that a proactive approach, involving regular maintenance and optimization, is key to preventing these errors and ensuring a seamless torrenting journey.

Fix: QBitTorrent I/O Error [Fixed Completely] - Techisours Fix: QBitTorrent I/O Error [Fixed Completely] - Techisours How to fix Qbittorrent I/O error?
How to fix Qbittorrent I/O error? qBittorrent i/o error - Gossipfunda How to Fix QBitTorrent I/O Error [Ultimate Guide] - MiniTool Partition Wizard
Fix: QBitTorrent I/O Error [Fixed Completely] - Techisours How to Fix QBitTorrent I/O Error [Ultimate Guide] - MiniTool Partition Wizard

Closure

Thus, we hope this article has provided valuable insights into Navigating the Labyrinth of qBittorrent I/O Errors on Windows 11. We hope you find this article informative and beneficial. See you in our next article!

Powering Down: A Comprehensive Guide To Shutting Down Windows 11

Powering Down: A Comprehensive Guide to Shutting Down Windows 11

Introduction

In this auspicious occasion, we are delighted to delve into the intriguing topic related to Powering Down: A Comprehensive Guide to Shutting Down Windows 11. Let’s weave interesting information and offer fresh perspectives to the readers.

Powering Down: A Comprehensive Guide to Shutting Down Windows 11

Different Ways to Shut Down Windows 11 Systems - Tutorial

In the digital realm, the act of powering down a computer, while seemingly simple, is a crucial step in maintaining system stability and ensuring data integrity. Windows 11, Microsoft’s latest operating system, offers various methods for gracefully shutting down the computer, each catering to specific user needs and scenarios. This article delves into the intricacies of these methods, outlining their functionalities and highlighting their importance in the context of a robust computing experience.

The Importance of Proper Shutdown

The act of shutting down a computer is not merely about turning off the power. It involves a series of processes that ensure all running applications are closed, data is saved, and the system is prepared for a safe restart. This meticulous sequence prevents data corruption, minimizes the risk of system instability, and ensures a smooth transition to the next use.

Methods for Powering Down Your Windows 11 Computer

1. The Start Menu Approach

The Start Menu remains the quintessential method for initiating a shutdown in Windows 11. This method is straightforward and readily accessible, making it the go-to option for most users.

  • Locate the Start Menu: The Start Menu icon is typically found at the bottom left corner of the taskbar.
  • Access the Power Options: Click on the Start Menu icon, then navigate to the "Power" button.
  • Initiate Shutdown: Select "Shut down" from the list of options.

2. The Keyboard Shortcut Method

For users who prefer a faster and more efficient approach, Windows 11 offers a keyboard shortcut for initiating a shutdown.

  • Press the Alt key and the F4 key simultaneously. This combination brings up the "Shut Down Windows" dialog box.
  • Select "Shut down" from the options.

3. The "Sign Out" Option

The "Sign Out" option, found within the Start Menu’s "Power" button, offers a more nuanced shutdown experience. This option logs the current user out of the system, leaving the computer running for other users or for background tasks.

4. The "Restart" Option

The "Restart" option, also available within the Start Menu’s "Power" button, is crucial for applying system updates, resolving software conflicts, or troubleshooting hardware issues. It shuts down the computer, restarts it, and applies the necessary changes.

5. The "Sleep" Option

The "Sleep" option, found within the Start Menu’s "Power" button, is designed for energy conservation. It puts the computer into a low-power state, preserving the current state of applications and data. This option is ideal for short breaks or when you intend to resume working quickly.

6. The "Hibernate" Option

The "Hibernate" option, found within the Start Menu’s "Power" button, is a more advanced energy-saving mode. It saves the computer’s state to the hard drive, allowing for a faster restart than a full shutdown. This option is useful when you need to leave the computer unattended for an extended period.

7. The "Power Button" Option

The "Power Button" option, available in the Start Menu’s "Power" button, allows you to configure the behavior of the physical power button on your computer. You can choose to have it initiate a shutdown, a restart, or a sleep mode.

8. The Command Prompt Method

For advanced users, the Command Prompt provides a powerful method for initiating a shutdown.

  • Open the Command Prompt: Type "cmd" in the Windows search bar and press Enter.
  • Enter the shutdown command: Type "shutdown /s /t 0" and press Enter. This command initiates an immediate shutdown.

9. The Task Manager Method

The Task Manager provides a comprehensive view of running processes and allows you to initiate a shutdown.

  • Open the Task Manager: Press Ctrl + Shift + Esc keys simultaneously.
  • Navigate to the "File" menu.
  • Select "Shut down" from the options.

Understanding the Importance of Each Method

The choice of shutdown method depends on the user’s specific needs and the intended outcome.

  • The Start Menu and Keyboard Shortcut methods are the most straightforward and widely used, suitable for everyday use.
  • The "Sign Out" option is ideal for transitioning between users or allowing background processes to continue.
  • The "Restart" option is crucial for applying system updates or troubleshooting issues.
  • The "Sleep" and "Hibernate" options are designed for energy conservation, each catering to different timeframes of inactivity.
  • The "Power Button" option provides flexibility in configuring the behavior of the physical power button.
  • The Command Prompt and Task Manager methods offer more advanced control over the shutdown process, suitable for experienced users.

Frequently Asked Questions (FAQs)

Q: What happens when I shut down my computer?

A: When you shut down your computer, the operating system performs a series of actions, including closing all running programs, saving data, and powering down the hardware components. This process ensures that data is not lost and the system is prepared for a safe restart.

Q: What is the difference between "Shut down" and "Restart"?

A: "Shut down" completely turns off the computer, while "Restart" turns off the computer and then turns it back on, allowing for system updates or troubleshooting.

Q: What is the difference between "Sleep" and "Hibernate"?

A: "Sleep" puts the computer into a low-power state, preserving the current state of applications and data, while "Hibernate" saves the computer’s state to the hard drive, allowing for a faster restart.

Q: What happens to my open files and programs when I shut down my computer?

A: When you shut down your computer, all open files and programs are closed, and any unsaved changes will be lost. It is essential to save your work before initiating a shutdown.

Q: Can I force shut down my computer?

A: While it is possible to force shut down a computer by holding down the power button, this method is not recommended. It can lead to data corruption and system instability.

Q: How do I know if my computer is properly shut down?

A: A properly shut down computer will have all lights and fans turned off, and the screen will be completely black.

Tips for a Smooth Shutdown Experience

  • Save your work before initiating a shutdown. This ensures that no data is lost and prevents potential data corruption.
  • Close all unnecessary programs before shutting down. This reduces the time it takes for the computer to shut down and can improve system stability.
  • Avoid using the physical power button to shut down the computer. This can lead to data corruption and system instability.
  • Use the "Restart" option for applying system updates or troubleshooting issues. This ensures that the necessary changes are applied properly.
  • Consider using the "Sleep" or "Hibernate" options for energy conservation. These options can help reduce energy consumption and extend the life of your computer.

Conclusion

The ability to gracefully shut down a computer is a fundamental aspect of a stable and efficient computing experience. Windows 11 offers a range of methods for powering down your computer, each catering to specific user needs and scenarios. By understanding the nuances of these methods and applying best practices for shutdown, users can ensure data integrity, minimize system instability, and enjoy a seamless transition between computing sessions.

How to Shut Down Windows 11 - Instructions - TeachUcomp, Inc. How to shut down Windows 11 (9 ways) - Digital Citizen How to Shut down or Restart Windows 11 PC? - The Microsoft Windows11
5 Simple Steps To Shut Down Windows 11 - LAPTOP MURAH KOMPUTER MALAYSIA How to Shut down or Restart Your Windows 11 Computer? - MiniTool How To Shut Down Or Restart Windows 11  groovypost
How To Shut Down Or Restart Your Windows 11 Computer - vrogue.co Shutdown Windows 11

Closure

Thus, we hope this article has provided valuable insights into Powering Down: A Comprehensive Guide to Shutting Down Windows 11. We thank you for taking the time to read this article. See you in our next article!

Understanding The R Programming Language And Its Free Download On Windows 10

Understanding the R Programming Language and its Free Download on Windows 10

Introduction

In this auspicious occasion, we are delighted to delve into the intriguing topic related to Understanding the R Programming Language and its Free Download on Windows 10. Let’s weave interesting information and offer fresh perspectives to the readers.

Understanding the R Programming Language and its Free Download on Windows 10

R Programming Language Download windows 10  Tutorial Jinni

The R programming language has emerged as a powerful tool for data analysis, statistical computing, and visualization. Its open-source nature, coupled with a vast and active community, has made it a cornerstone for researchers, data scientists, and statisticians worldwide. This article delves into the intricacies of R, its significance, and how to obtain it for free on a Windows 10 operating system.

What is R?

R is a high-level programming language and free software environment for statistical computing and graphics. It was created by Ross Ihaka and Robert Gentleman at the University of Auckland, New Zealand, and is now maintained by the R Core Team.

R’s foundation lies in the S programming language, developed at Bell Laboratories. It inherits S’s strengths in statistical analysis, data manipulation, and graphical capabilities. However, R expands upon this foundation with its own unique features, including:

  • Comprehensive Statistical Functionality: R offers a wide array of statistical functions for data analysis, including linear and non-linear modeling, time series analysis, clustering, and more.
  • Powerful Graphics Capabilities: R excels in data visualization, providing users with a wide range of tools to create informative and visually appealing plots, charts, and graphs.
  • Extensible Packages: R’s vibrant community has developed thousands of packages, extending its functionality to encompass various domains, including bioinformatics, econometrics, machine learning, and more.
  • Open-Source and Free: R is freely available for use and distribution, making it accessible to anyone, regardless of their budget or background.

The Importance of R in Today’s Data-Driven World

In the age of Big Data, R has become an indispensable tool for extracting meaningful insights from complex datasets. Its applications span diverse industries, including:

  • Academic Research: R is widely used in academic research, facilitating statistical analysis, data visualization, and model development.
  • Data Science and Machine Learning: R’s powerful data manipulation and statistical modeling capabilities make it a valuable tool for data scientists and machine learning practitioners.
  • Business Analytics: Companies leverage R to analyze customer data, optimize marketing campaigns, and make data-driven business decisions.
  • Finance and Economics: R is used extensively in finance and economics for risk analysis, portfolio management, and economic modeling.
  • Healthcare and Biotechnology: R plays a crucial role in analyzing genomic data, developing clinical trials, and improving patient care.

How to Download and Install R on Windows 10

Installing R on Windows 10 is a straightforward process. Here’s a step-by-step guide:

  1. Visit the CRAN Website: Navigate to the Comprehensive R Archive Network (CRAN) website: https://cran.r-project.org/
  2. Choose Your Mirror: Select a CRAN mirror closest to your geographical location for faster download speeds.
  3. Download the Installer: Click on the "Download R for Windows" link and choose the appropriate installer file for your system architecture (32-bit or 64-bit).
  4. Run the Installer: Once the download is complete, double-click the installer file to begin the installation process.
  5. Follow the On-Screen Instructions: The installer will guide you through the installation process. You can accept the default settings or customize them as needed.
  6. Complete the Installation: Click "Finish" to complete the installation.

Setting Up Your R Environment

After installing R, you can enhance your experience by setting up an integrated development environment (IDE) or text editor. Popular options include:

  • RStudio: RStudio is a widely used IDE for R. It provides a user-friendly interface, code completion, debugging tools, and more.
  • VS Code: Visual Studio Code (VS Code) is a versatile code editor that can be extended with plugins to support R development.
  • Notepad++: Notepad++ is a lightweight text editor that can be used to write and execute R code.

Essential R Packages

To further expand your R capabilities, you can install packages from CRAN or other repositories. Some essential packages for beginners include:

  • dplyr: A powerful package for data manipulation and transformation.
  • ggplot2: A comprehensive package for creating informative and visually appealing graphs.
  • tidyr: A package for tidying and reshaping data.
  • stringr: A package for working with strings.
  • lubridate: A package for handling dates and times.

Tips for Learning R

  • Start with the Basics: Begin by learning the fundamental concepts of R, such as data types, variables, operators, and control structures.
  • Explore Online Resources: Utilize online resources like tutorials, courses, and documentation to deepen your understanding.
  • Practice Regularly: The key to mastering R is through consistent practice. Work on projects, solve problems, and apply your knowledge to real-world scenarios.
  • Join Online Communities: Engage with the R community through forums, chat groups, and social media platforms to share knowledge, ask questions, and learn from others.

FAQs

Q: Is R a free software?

A: Yes, R is a free software environment for statistical computing and graphics. It can be downloaded and used without any cost.

Q: What is the difference between R and RStudio?

A: R is the programming language, while RStudio is an integrated development environment (IDE) that provides a user-friendly interface for writing and running R code.

Q: How can I install packages in R?

A: You can install packages in R using the install.packages() function. For example, to install the dplyr package, you would type install.packages("dplyr").

Q: Where can I find help with R?

A: You can find help with R through various resources, including the R documentation, online forums, and the R community.

Q: What are some good books for learning R?

A: Some popular books for learning R include "R for Data Science" by Garrett Grolemund and Hadley Wickham, "The R Book" by Michael J. Crawley, and "Modern Applied Statistics with S" by Venables and Ripley.

Conclusion

R’s free availability, powerful features, and vibrant community have made it an invaluable tool for data analysis and statistical computing. By understanding the fundamentals of R and exploring its vast capabilities, you can unlock a world of possibilities for data exploration, visualization, and model development. As the world becomes increasingly data-driven, mastering R can provide a competitive advantage and empower you to make informed decisions based on data-driven insights.

How to Install R programming Language on Windows 10 - YouTube R Programming Language for PC - How to Install on Windows PC, Mac Introduction to R programming language
Basic programming language for windows 10 - pofesick R Programming language  12 steps to install R Programming Language R Programming language  12 Steps to install R Programming Language
R Programming Language for PC - Free Download: Windows 7,10,11 Edition What Is R Programming Language? - DocsLib

Closure

Thus, we hope this article has provided valuable insights into Understanding the R Programming Language and its Free Download on Windows 10. We thank you for taking the time to read this article. See you in our next article!

Refreshing Your Windows 10 System: A Guide To Reinstallation Without Data Loss

Refreshing Your Windows 10 System: A Guide to Reinstallation Without Data Loss

Introduction

In this auspicious occasion, we are delighted to delve into the intriguing topic related to Refreshing Your Windows 10 System: A Guide to Reinstallation Without Data Loss. Let’s weave interesting information and offer fresh perspectives to the readers.

Refreshing Your Windows 10 System: A Guide to Reinstallation Without Data Loss

Windows 10 Reinstall Without Losing Apps

Windows 10, like any operating system, can experience performance issues over time. This can be due to accumulated temporary files, outdated drivers, or even malware infections. A clean installation of Windows 10 can often revitalize your system, restoring it to a pristine state and resolving many performance bottlenecks. However, the prospect of reinstalling Windows can be daunting, especially when considering the potential loss of personal files, applications, and settings. Fortunately, there are effective methods to refresh your Windows 10 system without sacrificing your valuable data.

Understanding the Importance of a Clean Installation

A clean installation of Windows 10 involves formatting the system drive and installing a fresh copy of the operating system. This process eliminates any existing files, programs, and settings, effectively creating a blank slate. This approach is particularly beneficial in situations where:

  • System Performance Degradation: A sluggish system, frequent crashes, or slow boot times can often be attributed to accumulated clutter, outdated drivers, or malware. A clean installation provides a clean slate, removing these performance hindrances.
  • Software Conflicts: Incompatible or outdated software can cause conflicts and system instability. A fresh installation allows for a clean slate, ensuring that only compatible and updated software is installed.
  • Malware Removal: Malicious software can be difficult to remove entirely through conventional methods. A clean installation effectively wipes the system clean, eliminating any lingering malware remnants.
  • Troubleshooting Complex Issues: When troubleshooting persistent system issues, a clean installation can be a last resort, ruling out any potential software or configuration conflicts.

Methods for Reinstalling Windows 10 Without Losing Data

There are two primary methods for reinstalling Windows 10 without losing data:

1. Resetting Your PC:

This built-in Windows 10 feature allows you to restore your computer to its factory settings while preserving your personal files. Here’s how it works:

  • Access the Reset Option: Navigate to Settings > Update & Security > Recovery.
  • Choose "Reset this PC": Select the "Reset this PC" option and choose "Keep my files".
  • Confirmation and Restart: Confirm your selection and allow Windows to restart and initiate the reset process.

This method essentially performs a clean installation of Windows 10 while retaining your personal files. It removes most applications, settings, and drivers, effectively resolving many performance issues and software conflicts.

2. Using a Backup and Clean Installation:

This method involves creating a backup of your essential data before performing a clean installation of Windows 10. Here’s a step-by-step guide:

  • Backup Your Data: Use a reliable backup solution to create a complete backup of your important files, including documents, photos, videos, and other crucial data.
  • Create a Bootable USB Drive: Download the Windows 10 installation media from Microsoft’s website and create a bootable USB drive using a tool like the Media Creation Tool.
  • Boot from the USB Drive: Restart your computer and configure the BIOS to boot from the USB drive.
  • Perform a Clean Installation: Follow the on-screen prompts to install Windows 10 on your system drive. Choose the "Custom" installation option to format the drive and install Windows from scratch.
  • Restore Your Data: After the installation is complete, restore your backed-up data to your desired location.

This method offers complete control over the installation process and allows for a completely clean slate. However, it requires a thorough backup strategy and the ability to create a bootable USB drive.

Key Considerations and Best Practices:

  • Backup Your Data: Regardless of the chosen method, always prioritize backing up your data before proceeding with any system refresh. This ensures that your valuable information is safe even in case of unforeseen issues.
  • Choose the Right Method: Consider the complexity of your system issues and your level of comfort with the installation process. Resetting your PC is a simpler and less demanding approach, while a clean installation with a backup offers greater control and flexibility.
  • Update Drivers: After reinstalling Windows 10, ensure you install the latest drivers for your hardware components. This ensures optimal performance and compatibility.
  • Install Essential Software: Reinstall your essential applications and configure your settings according to your preferences.
  • Regular Maintenance: Implement a regular maintenance routine to prevent future performance issues. This includes running system scans, updating drivers, and removing unnecessary files.

Frequently Asked Questions

Q: Will I lose all my applications during the process?

A: Yes, both methods will remove most applications. However, some applications might survive the reset process. It’s recommended to create a list of essential applications and reinstall them after the installation is complete.

Q: What happens to my personal files during a clean installation?

A: When using the "Reset this PC" option with "Keep my files", your personal files will be preserved. However, if you choose the "Custom" installation option during a clean installation, you will need to restore your data from a backup.

Q: Can I reinstall Windows 10 without a product key?

A: If you have previously activated Windows 10 on your device, you can reinstall it without a product key. The system will automatically activate after the installation.

Q: How long does the reinstallation process take?

A: The time required for reinstallation varies depending on the method used, the speed of your hardware, and the size of your data. Generally, it can take anywhere from 30 minutes to a few hours.

Q: What if something goes wrong during the process?

A: If you encounter any issues during the reinstallation process, it’s recommended to consult Microsoft’s support resources or seek assistance from a qualified technician.

Tips for a Smooth Reinstallation

  • Use a Wired Connection: Ensure a stable internet connection using a wired Ethernet cable for optimal download speeds and stability.
  • Disable Antivirus Software: Temporarily disable your antivirus software during the installation process to prevent potential conflicts.
  • Close All Programs: Close all unnecessary programs and applications before starting the reinstallation process.
  • Check for Updates: Before starting the reinstallation, ensure that you have the latest updates for Windows 10.
  • Create a Recovery Drive: Create a recovery drive using the "Create a recovery drive" option in the "Recovery" settings. This can be helpful if you encounter issues during the reinstallation process.

Conclusion

Reinstalling Windows 10 can be a powerful way to rejuvenate your system, resolving performance issues and creating a fresh start. By carefully choosing the right method and following the outlined steps, you can effectively refresh your system without losing your valuable data. Remember to prioritize data backup, follow best practices, and consult resources if you encounter any difficulties. With a little planning and preparation, you can enjoy a smoother and more efficient Windows 10 experience.

Reset or Refresh Windows 10 without Losing Programs and Data 3 Ways to Reinstall Windows 10 without Losing Data - Chrunos How to Fresh Reinstall Windows 10/11 without Losing Data FREE
Reset/Refresh Windows 10 without Losing Programs  3 Ways! [Simple Guide] How to Reinstall Windows 10 without Losing Data or Programs/Apps - Sysprobs How to Refresh Windows 10 Without Losing Apps or Data - YouTube
Windows 10 System Restore, Refresh, Reset, Fresh Start & Reinstall guide How to Reinstall Windows 10 Without Losing Programs

Closure

Thus, we hope this article has provided valuable insights into Refreshing Your Windows 10 System: A Guide to Reinstallation Without Data Loss. We appreciate your attention to our article. See you in our next article!

The Enigma Of R In Windows 10: Troubleshooting A Statistical Powerhouse

The Enigma of R in Windows 10: Troubleshooting a Statistical Powerhouse

Introduction

With great pleasure, we will explore the intriguing topic related to The Enigma of R in Windows 10: Troubleshooting a Statistical Powerhouse. Let’s weave interesting information and offer fresh perspectives to the readers.

The Enigma of R in Windows 10: Troubleshooting a Statistical Powerhouse

Solve the enigma : r/puzzles

R, a powerful open-source programming language and free software environment, has revolutionized statistical computing and data visualization. Its versatility, vast libraries, and active community have made it the go-to tool for data scientists, researchers, and analysts across various disciplines. However, the smooth operation of R in Windows 10 can be disrupted by various factors, leading to frustrating scenarios where the software refuses to launch. This article aims to shed light on the common culprits behind these issues and provide a comprehensive guide to troubleshooting and resolving them.

Understanding the Importance of R in Windows 10

R’s significance in Windows 10 stems from its ability to empower users with a wide range of statistical and graphical capabilities. It provides a platform for:

  • Data Analysis and Manipulation: R excels in cleaning, transforming, and analyzing data, allowing users to uncover hidden patterns and insights.
  • Statistical Modeling: Its robust statistical libraries facilitate building complex models, predicting future trends, and testing hypotheses.
  • Data Visualization: R offers powerful tools for creating visually appealing and informative charts, graphs, and plots, aiding in data communication and exploration.
  • Machine Learning and Artificial Intelligence: R’s libraries provide essential tools for building and deploying machine learning algorithms, enabling predictive analytics and intelligent decision-making.

Common Causes of R Not Starting in Windows 10

The inability to launch R in Windows 10 can be attributed to several factors, each requiring a specific approach to resolution. These include:

1. Installation Issues:

  • Incomplete or Corrupted Installation: An incomplete or corrupted installation of R can prevent it from starting correctly. This could arise from interruptions during the installation process or corrupted download files.
  • Missing Dependencies: R relies on various packages and libraries for its functionality. Missing or outdated dependencies can cause startup failures.
  • Incorrect Path Variables: The Windows environment variables play a crucial role in locating and executing programs. Incorrectly configured path variables can prevent R from being found by the system.

2. System Configuration Problems:

  • Conflicting Software: Certain software applications, particularly those interacting with system resources, might clash with R, leading to startup failures.
  • Insufficient System Resources: R, especially when working with large datasets, requires sufficient RAM and processing power. Insufficient system resources can lead to performance issues and even prevent the software from launching.
  • Firewall or Antivirus Interference: Firewall or antivirus software might mistakenly identify R as a threat and block its execution.

3. R Environment Issues:

  • Outdated R Version: Using an outdated version of R can lead to compatibility issues and prevent it from starting correctly.
  • Corrupted R Installation Files: Corrupted R installation files, often caused by malware or hard drive errors, can disrupt the software’s functionality.
  • Incorrect Workspace Configuration: R relies on a workspace to store user-defined variables and functions. Issues with the workspace configuration can hinder the software’s startup.

Troubleshooting and Resolution Strategies

Addressing the root cause of R not starting in Windows 10 requires a systematic approach to troubleshooting. The following steps provide a comprehensive guide to resolving the issue:

1. Verify Installation:

  • Reinstall R: Start by reinstalling R completely. Ensure a stable internet connection and avoid interruptions during the installation process.
  • Check for Corrupted Files: Use the "sfc /scannow" command in the Command Prompt to scan for and repair corrupted system files.
  • Verify Dependencies: Use the "install.packages()" function in R to install any missing or outdated dependencies.

2. Configure Environment Variables:

  • Add R to Path: Ensure the R installation directory is added to the system’s PATH environment variable. This allows Windows to locate and execute R commands.
  • Check for Conflicting Variables: Review other environment variables for potential conflicts with R’s settings.

3. Resolve Software Conflicts:

  • Identify Conflicting Software: Run R in safe mode to identify if any other software is interfering with its execution.
  • Disable Conflicting Applications: Temporarily disable any suspected conflicting applications and try launching R again.

4. Optimize System Resources:

  • Increase RAM: Consider upgrading your system’s RAM if it is insufficient for running R smoothly.
  • Close Unnecessary Applications: Close any unnecessary applications running in the background to free up system resources.

5. Address Firewall and Antivirus Issues:

  • Add R to Exclusions: Add R to the firewall’s and antivirus software’s exclusion list to prevent them from blocking its execution.
  • Temporarily Disable Security Software: Temporarily disable your firewall and antivirus software to see if they are causing the issue.

6. Update R and Packages:

  • Install the Latest Version: Update to the latest version of R to benefit from bug fixes and compatibility improvements.
  • Update R Packages: Use the "update.packages()" function in R to update all installed packages.

7. Check Workspace Configuration:

  • Reset Workspace: Reset the R workspace to its default settings.
  • Check for Errors in .Rprofile: Examine the ".Rprofile" file in the user’s home directory for any errors that might be preventing R from starting.

FAQs: Addressing Common Concerns

Q: Can I run R without installing it?

A: R requires installation on your system to function. While there are online platforms like RStudio Cloud that provide a web-based environment for running R code, they still rely on a server-side installation of R.

Q: Is there a specific version of R that works best with Windows 10?

A: R is generally compatible with various Windows versions. However, it’s recommended to use the latest stable version of R for optimal performance and compatibility.

Q: How do I know if my system has enough resources to run R effectively?

A: R’s resource requirements vary depending on the complexity of the analysis and the size of the datasets. However, a minimum of 4GB RAM and a dual-core processor is recommended for smooth operation.

Q: Can I use R with other programming languages like Python?

A: Yes, R can be integrated with other programming languages like Python using tools like the "reticulate" package in R or the "rpy2" package in Python. This allows for seamless data exchange and combined functionality.

Tips for Smooth R Operation in Windows 10:

  • Regularly Update R and Packages: Keep R and its packages updated to ensure compatibility and benefit from bug fixes and new features.
  • Manage System Resources: Close unnecessary applications and ensure sufficient RAM and processing power for optimal performance.
  • Use a Dedicated R Environment: Consider using a dedicated R environment like RStudio to enhance productivity and provide a more streamlined workflow.
  • Explore R’s Documentation and Community: Utilize R’s extensive documentation and the vibrant online community for support and guidance.

Conclusion: Empowering Data Analysis in Windows 10

Successfully resolving the issue of R not starting in Windows 10 requires a methodical approach to troubleshooting. By understanding the common causes, applying the recommended strategies, and leveraging the available resources, users can overcome these obstacles and unleash the full potential of R in their data analysis endeavors. With its power and flexibility, R remains an invaluable tool for data scientists, researchers, and analysts working on Windows 10, enabling them to unlock insights, build robust models, and visualize data effectively.

What is R? - The Statistical Computing Powerhouse  DataCamp RStudio Help: Ways To Troubleshoot R Problems How to Download R for Windows  Statistical Computing (Biostatistics 140.776)
Introduction to R statistical software, Windows version - YouTube Introduction to Statistical Computing in R 某度翻译  OddFar's Notes
The Enigma Protector latest version - Get best Windows software Troubleshooting Windows 10

Closure

Thus, we hope this article has provided valuable insights into The Enigma of R in Windows 10: Troubleshooting a Statistical Powerhouse. We hope you find this article informative and beneficial. See you in our next article!

Optimizing Windows 11: Essential Tools And Techniques For Enhanced Performance

Optimizing Windows 11: Essential Tools and Techniques for Enhanced Performance

Introduction

With great pleasure, we will explore the intriguing topic related to Optimizing Windows 11: Essential Tools and Techniques for Enhanced Performance. Let’s weave interesting information and offer fresh perspectives to the readers.

Optimizing Windows 11: Essential Tools and Techniques for Enhanced Performance

How to Optimize Windows 11 For Better Performance

Windows 11, the latest iteration of Microsoft’s operating system, brings a refined user interface and enhanced features. While it offers a smoother experience, users may encounter performance issues or wish to customize their system for optimal functionality. This article delves into essential tools and techniques for optimizing Windows 11, empowering users to maximize their system’s potential and enhance their computing experience.

Understanding Windows 11 Optimization

Optimizing Windows 11 involves a multifaceted approach encompassing various aspects of system configuration, resource management, and software optimization. The goal is to ensure efficient resource utilization, minimize system lag, and enhance overall performance. This can be achieved through a combination of built-in tools, third-party utilities, and best practices.

Built-in Windows 11 Tools for Optimization

Windows 11 offers a range of built-in tools designed to streamline system performance and enhance user experience. These tools provide a user-friendly interface for managing system resources, optimizing disk space, and troubleshooting performance issues.

1. Task Manager: A comprehensive tool for monitoring system processes, resource utilization, and network activity. Users can identify resource-intensive processes, terminate unnecessary programs, and analyze system performance metrics.

2. Storage Sense: This tool automatically manages disk space by identifying and deleting temporary files, unused applications, and system files that are no longer required. Users can configure Storage Sense settings to suit their individual needs, ensuring optimal disk space utilization.

3. Disk Cleanup: A utility that removes temporary files, system files, and other unnecessary data from the hard drive, freeing up valuable disk space. This tool can be accessed through the "System" settings or by searching for "Disk Cleanup" in the Start menu.

4. Windows Update: Regular updates ensure that the system receives the latest security patches, bug fixes, and performance enhancements. Users can schedule automatic updates or manually check for updates through the "Windows Update" settings.

5. Performance Options: Accessible through the "System" settings, Performance Options allow users to adjust system performance settings based on their priorities. Users can prioritize system responsiveness, visual effects, or background processes, tailoring the system to their specific needs.

Third-Party Tools for Windows 11 Optimization

While Windows 11 provides a suite of built-in tools, third-party utilities offer more advanced features and customization options for optimizing system performance. These tools can enhance resource management, streamline system processes, and provide insights into system health.

1. System Optimization Tools: These tools offer a comprehensive suite of features for optimizing system performance, including disk cleanup, registry optimization, and startup management. Examples include CCleaner, Advanced SystemCare, and IObit Smart Defrag.

2. Antivirus and Malware Protection: Protecting the system from malware and viruses is crucial for optimal performance. Antivirus software like Norton, McAfee, and Bitdefender scan the system for threats, remove malware, and provide real-time protection.

3. Driver Updaters: Keeping drivers up-to-date ensures optimal device performance and compatibility. Driver updaters like Driver Easy and Driver Booster scan the system for outdated drivers and automatically download and install the latest versions.

4. Disk Defragmentation Tools: Defragmenting the hard drive can improve file access speed and system performance. Defragmentation tools like Defraggler and Auslogics Disk Defrag reorganize fragmented files, optimizing disk space and reducing access time.

5. System Monitoring Tools: System monitoring tools provide detailed insights into system performance, resource utilization, and hardware health. Tools like HWMonitor, Speccy, and Open Hardware Monitor display real-time system metrics, helping users identify performance bottlenecks and troubleshoot issues.

Best Practices for Windows 11 Optimization

Beyond utilizing tools, adopting best practices can significantly enhance Windows 11 performance. These practices focus on efficient resource management, minimizing unnecessary processes, and maintaining system hygiene.

1. Regular System Maintenance: Performing regular system maintenance tasks like disk cleanup, defragmentation, and malware scans helps prevent performance degradation and ensures optimal system health.

2. Limiting Startup Programs: Unnecessary programs starting at system boot can slow down the system. Users can manage startup programs through the "Task Manager" or the "System Configuration" tool, disabling unnecessary programs to speed up boot time.

3. Optimizing Power Settings: Adjusting power settings can improve battery life and system performance. Users can choose between power-saving modes or high-performance settings based on their needs.

4. Managing Background Processes: Background processes can consume system resources and impact performance. Users can manage background processes through the "Task Manager," prioritizing essential tasks and minimizing unnecessary activity.

5. Keeping Software Up-to-Date: Updating software regularly ensures that the system receives the latest bug fixes, security patches, and performance enhancements. Users can configure automatic updates or manually check for updates through the respective software applications.

FAQs about Windows 11 Optimization

1. Does Windows 11 Need Optimization?

Windows 11 is designed for optimal performance, but like any operating system, it can benefit from optimization. Users can enhance system performance by addressing specific needs, such as freeing up disk space, managing startup programs, or optimizing power settings.

2. Is It Safe to Use Third-Party Optimization Tools?

Reputable third-party optimization tools can be beneficial, but users should exercise caution. Choose tools from trusted developers and avoid those with intrusive features or dubious claims. Always back up important data before using any optimization tool.

3. How Often Should I Optimize My Windows 11 System?

Regular system maintenance is recommended, ideally on a weekly or monthly basis. This includes tasks like disk cleanup, defragmentation, and malware scans. However, the frequency may vary based on individual usage patterns and system needs.

4. Can I Optimize My Windows 11 System for Gaming?

Yes, specific optimizations can enhance gaming performance. This includes disabling unnecessary background processes, prioritizing gaming software, and adjusting graphics settings. Users can also invest in gaming-specific hardware for optimal performance.

5. What are the Risks Associated with Windows 11 Optimization?

Improper optimization can lead to system instability, data loss, or security vulnerabilities. Avoid using untrusted tools, back up important data before making changes, and exercise caution when modifying system settings.

Tips for Windows 11 Optimization

1. Monitor System Performance: Regularly monitor system performance using the Task Manager or system monitoring tools to identify potential bottlenecks or issues.

2. Prioritize System Responsiveness: Configure Performance Options to prioritize system responsiveness, reducing lag and improving overall user experience.

3. Manage Disk Space: Regularly clean up temporary files, unused applications, and unnecessary data to optimize disk space and prevent performance degradation.

4. Update Drivers Regularly: Ensure that device drivers are up-to-date to prevent compatibility issues and optimize device performance.

5. Seek Expert Help: If encountering persistent performance issues, consult with a computer technician or seek support from Microsoft for assistance.

Conclusion

Optimizing Windows 11 involves a comprehensive approach encompassing built-in tools, third-party utilities, and best practices. By adopting these techniques, users can enhance system performance, minimize lag, and maximize their computing experience. Regular system maintenance, efficient resource management, and prudent use of optimization tools are crucial for maintaining a smooth and efficient Windows 11 environment. Remember to exercise caution when using third-party tools and always back up important data before making significant changes to the system.

How to Speed Up Windows 11 and Improve Performance Optimizing windows 11 for better Performance  Increase Windows11 performance with 5 simple The BEST Windows Optimizer For Windows 11 - YouTube
How to optimize Windows 11 for gaming to increase FPS & performance? - DigiStatement How to Optimize Windows 11 for best performance  Lifehack How to Optimize Windows 11 for Gaming and Get Better Performance
Windows 11 optimization guide: get the most out of Microsoft’s new OS 8 Tips to Optimize Your Windows 11 PC for Gaming Performance - Make Tech Easier

Closure

Thus, we hope this article has provided valuable insights into Optimizing Windows 11: Essential Tools and Techniques for Enhanced Performance. We hope you find this article informative and beneficial. See you in our next article!