Archives January 2024

Windows 11’s Enhanced Touchscreen Experience: A Deeper Dive

Windows 11’s Enhanced Touchscreen Experience: A Deeper Dive

Introduction

In this auspicious occasion, we are delighted to delve into the intriguing topic related to Windows 11’s Enhanced Touchscreen Experience: A Deeper Dive. Let’s weave interesting information and offer fresh perspectives to the readers.

Windows 11’s Enhanced Touchscreen Experience: A Deeper Dive

What is Windows 11 in S mode?  Deep Dive - YouTube

Windows 11 marks a significant step forward in Microsoft’s commitment to a seamless user experience across diverse device types. One of the key enhancements is the refined touchscreen experience, particularly the "tablet mode" which optimizes the operating system for touch-based interaction. This article delves into the intricacies of this feature, exploring its functionalities, benefits, and how it elevates the overall Windows experience.

Understanding the Essence of Tablet Mode

Tablet mode in Windows 11 is not merely a cosmetic change; it represents a fundamental shift in the operating system’s behavior. When activated, Windows 11 transforms into a touch-centric interface, prioritizing intuitive gestures and touch-friendly applications. This transformation is not simply about resizing windows or repositioning elements; it involves a complete overhaul of the user interface, making it more responsive and intuitive for touch interactions.

Key Features and Functionalities

1. Optimized UI for Touch: The most notable change in tablet mode is the transformation of the user interface. The traditional desktop layout with its focus on windows and mouse interaction is replaced by a more streamlined and touch-friendly design. Windows become larger, menus are simplified, and icons are designed for easy touch navigation. This shift ensures that every element on the screen is easily accessible and manageable with touch gestures.

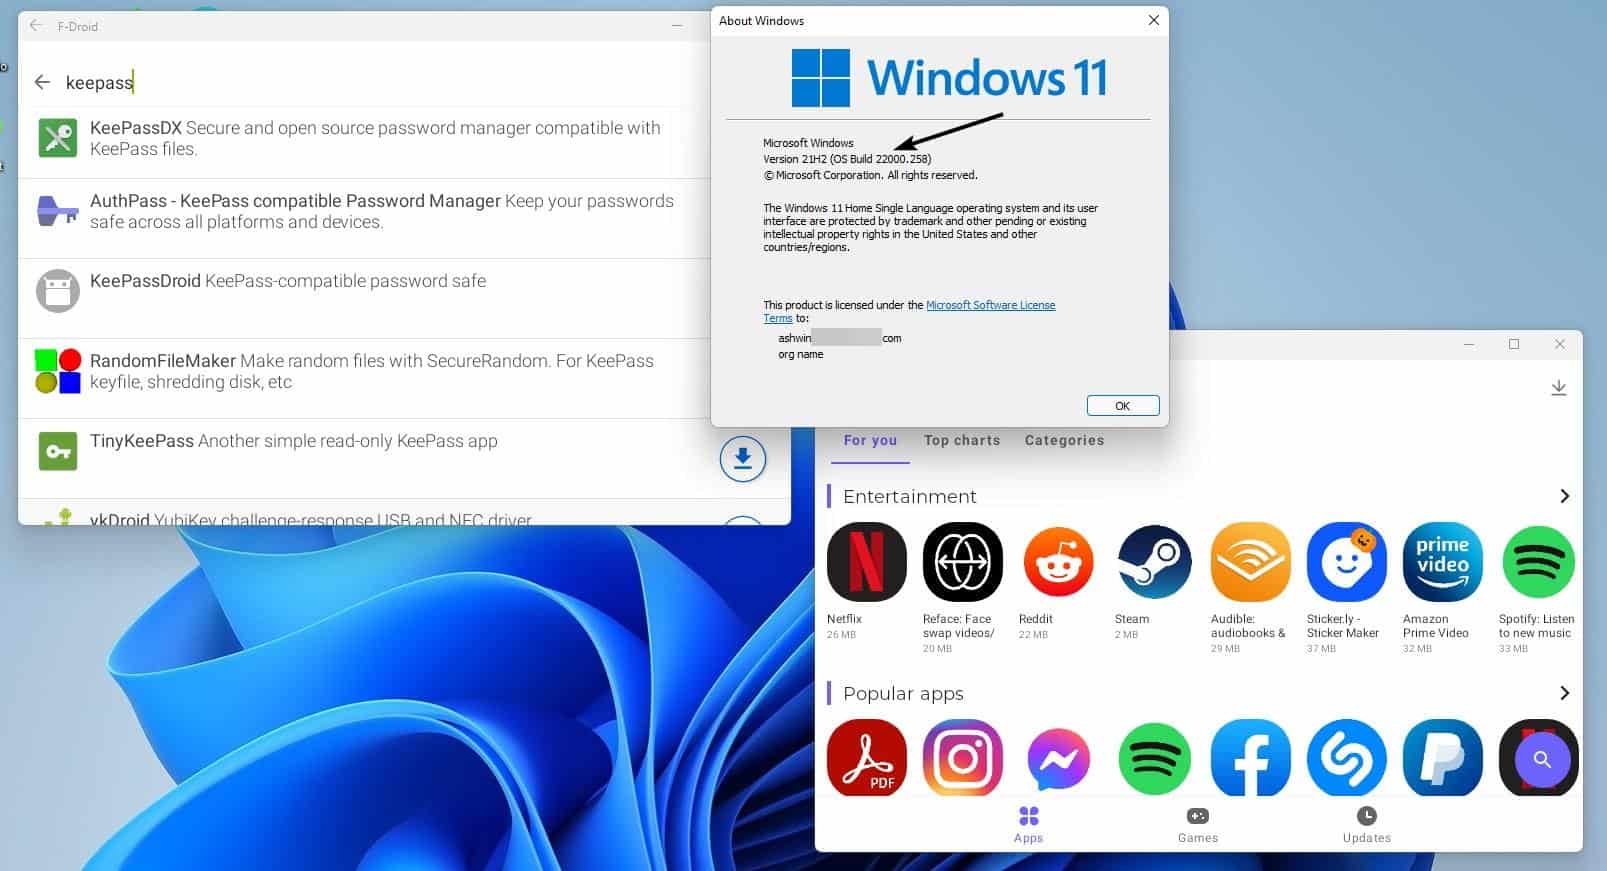
2. App Optimization: Windows 11’s tablet mode goes beyond merely adapting the desktop interface; it also optimizes the user experience within individual applications. Many popular apps, including Microsoft’s own suite, have been specifically designed to function flawlessly in tablet mode. This includes features like touch-friendly controls, gesture-based interactions, and a layout optimized for smaller screens.

3. Gesture Recognition: The core of the tablet mode experience lies in its intuitive gesture recognition system. Windows 11 recognizes a wide range of touch gestures, allowing users to navigate, interact, and manage applications with ease. From simple swipes to multi-finger gestures, the system seamlessly translates user input into actions, making the touch experience both efficient and enjoyable.

4. Keyboard and Mouse Support: While tablet mode is primarily designed for touch interactions, it does not preclude the use of traditional input devices. Users can seamlessly switch between touch and keyboard/mouse input, making it a versatile solution for various user preferences and scenarios.

Benefits of Tablet Mode

1. Enhanced User Experience: Tablet mode in Windows 11 significantly enhances the user experience for devices with touchscreens. It streamlines the interface, making it more intuitive and responsive to touch input. This translates to a more natural and engaging interaction with the operating system.

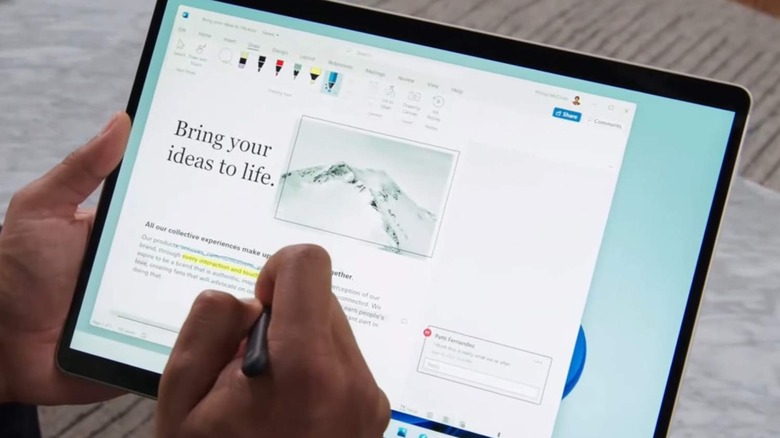
2. Improved Productivity: The optimized interface and gesture-based controls in tablet mode can lead to increased productivity, especially for tasks that are inherently suited for touch input. Tasks like note-taking, drawing, or manipulating images become significantly more efficient and enjoyable.

3. Versatile Usage: Tablet mode is not restricted to specific scenarios; it can be used for a wide range of tasks, from casual browsing and media consumption to professional workflows. This versatility makes it a valuable feature for users who utilize their devices for multiple purposes.

4. Seamless Transitions: Windows 11’s tablet mode seamlessly transitions between different input modes, allowing users to switch between touch and keyboard/mouse interactions without disruption. This smooth transition ensures a consistent and unified user experience across various input methods.

FAQs

1. How do I activate tablet mode in Windows 11?

Tablet mode can be activated through the Action Center, which can be accessed by clicking on the notification icon in the taskbar. Alternatively, you can use the keyboard shortcut "Win + A" to open the Action Center and then select the "Tablet mode" toggle.

2. Can I customize tablet mode settings?

While Windows 11’s tablet mode offers a streamlined and intuitive experience, users can customize certain aspects. For instance, you can adjust the size of the taskbar icons and enable or disable certain features like the "show keyboard" button.

3. What are the system requirements for tablet mode?

Tablet mode is available on all devices running Windows 11. However, for an optimal experience, it is recommended to have a touchscreen device with a display size suitable for touch interactions.

4. Is tablet mode compatible with all applications?

While many popular applications have been optimized for touch interactions, some applications may not function optimally in tablet mode. It is recommended to check the compatibility of individual applications before utilizing them in tablet mode.

5. Can I use a mouse in tablet mode?

Yes, you can use a mouse in tablet mode. The system seamlessly transitions between touch and mouse input, allowing you to switch between both methods based on your preference or the task at hand.

Tips for Using Tablet Mode Effectively

1. Explore Touch Gestures: Familiarize yourself with the various touch gestures supported by Windows 11. These gestures can significantly enhance your interaction with the operating system, making it faster and more efficient.

2. Optimize App Settings: Explore the settings of individual applications to ensure they are optimized for touch interaction. Many apps offer touch-specific controls and settings that can enhance the user experience.

3. Use the On-Screen Keyboard: If you prefer using the on-screen keyboard, ensure it is properly configured and optimized for your needs. You can adjust the size, layout, and other settings to improve the typing experience.

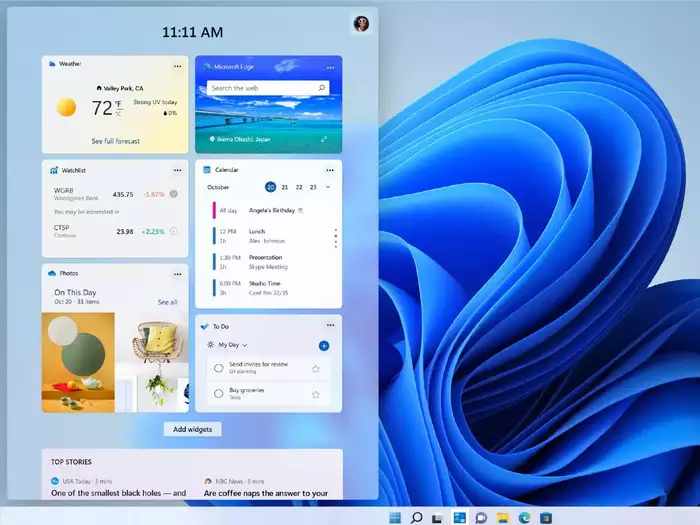
4. Utilize the Action Center: The Action Center is a valuable tool for managing tablet mode settings and other system-wide features. Use it to quickly activate or deactivate tablet mode, adjust display settings, and manage notifications.

5. Experiment with Different Input Methods: Don’t hesitate to experiment with different input methods, such as touch, mouse, and keyboard, to find the combination that best suits your workflow and preferences.

Conclusion

Windows 11’s tablet mode represents a significant step forward in Microsoft’s commitment to providing a seamless and intuitive user experience across diverse device types. By optimizing the operating system for touch interactions, Windows 11 empowers users to interact with their devices in a more natural and engaging way. The enhanced touch experience, coupled with the intuitive gesture recognition system, significantly improves productivity and elevates the overall user experience. As Windows 11 continues to evolve, the tablet mode will undoubtedly play a pivotal role in shaping the future of user interaction with the operating system.

Windows 11 on Surface Pro X Deep Dive Part 3: Gestures and Touch Navigation - YouTube Microsoft Revamps The Touch Experience On Windows 11 - Photos Windows 11 has been officially released
Windows 11 On Touchscreen Laptops My Experience Of Wi - vrogue.co Windows 11 Shows Off New Touch, Pen, And Voice Features - SlashGear Windows 11 Teased to Come With an Enhanced Touch Experience, New Sound Effects - Techno Blender
Windows 11 is built for touch, including gestures and improved snapping  Windows Central New Windows 11 Build brings enhanced Taskbar search & System tray, touch-optimized taskbar to

Closure

Thus, we hope this article has provided valuable insights into Windows 11’s Enhanced Touchscreen Experience: A Deeper Dive. We thank you for taking the time to read this article. See you in our next article!

Navigating The Windows 11 Widget Panel: A Guide To Customization And Control

Navigating the Windows 11 Widget Panel: A Guide to Customization and Control

Introduction

In this auspicious occasion, we are delighted to delve into the intriguing topic related to Navigating the Windows 11 Widget Panel: A Guide to Customization and Control. Let’s weave interesting information and offer fresh perspectives to the readers.

How to Use Widgets in Windows 11

Windows 11 introduced a new feature: the Widgets panel. This dynamic feed, accessible through a dedicated button on the taskbar, provides quick access to personalized information and content. While the concept of widgets is not new, its integration into Windows 11 has sparked debate among users. Some appreciate the convenience and the potential for enhanced productivity, while others find it intrusive and prefer a more streamlined desktop experience.

This article aims to provide a comprehensive guide to understanding and managing the Windows 11 Widgets panel. We will explore various methods for customizing its appearance and functionality, offering insights into how users can tailor their experience to their preferences.

Understanding the Windows 11 Widgets Panel

The Widgets panel is designed to be a dynamic, personalized feed that presents information relevant to the user. It draws content from various sources, including:

  • News: Headlines and updates from preferred sources, curated to reflect user interests.
  • Weather: Current conditions and forecasts for the user’s location.
  • Calendar: Upcoming events and reminders.
  • Traffic: Real-time traffic updates, including estimated travel times.
  • Stocks: Price fluctuations and news for selected stocks.
  • Sports: Scores and updates for favorite teams.
  • Social Media: Notifications and updates from preferred platforms.
  • Third-party applications: Widgets from various applications, offering specific functionalities.

The Widgets panel is intended to be a personalized hub, offering information and access to frequently used features in a centralized location.

Customizing the Widgets Panel

Windows 11 provides several options for customizing the Widgets panel, allowing users to tailor its appearance and functionality to their needs:

  • Adding and Removing Widgets: Users can add or remove widgets by clicking the "Add widgets" button at the top of the panel. This allows for selective inclusion of desired widgets, while excluding those deemed unnecessary.
  • Reordering Widgets: The order of widgets can be rearranged by dragging and dropping them into the desired position. This allows for prioritization of frequently accessed widgets.
  • Adjusting Widget Size: Some widgets offer the ability to adjust their size, enabling users to optimize the panel’s layout for their preferences.
  • Setting Widget Preferences: Many widgets offer customizable settings, allowing users to personalize the information displayed. For example, users can select preferred news sources, adjust the displayed weather information, or customize the calendar view.

Managing the Widgets Panel

While the Widgets panel can be a valuable tool for some users, others may find it distracting or unnecessary. Windows 11 offers several options for managing the Widgets panel, ensuring a personalized and efficient desktop experience:

  • Disabling the Widgets Panel: Users can completely disable the Widgets panel by navigating to the "Settings" app, selecting "Personalization," and then "Taskbar." Within the Taskbar settings, users can toggle the "Widgets" option to disable the feature.
  • Hiding the Widgets Button: Instead of completely disabling the Widgets panel, users can choose to simply hide the dedicated button on the taskbar. This allows for access to the Widgets panel when needed, while keeping it out of sight when not in use.
  • Minimizing the Widgets Panel: Users can minimize the Widgets panel by clicking the "Minimize" button at the top of the panel. This allows for a less intrusive experience, reducing the visual impact on the desktop.
  • Setting a Specific Size for the Widgets Panel: Users can customize the size of the Widgets panel by dragging its edges. This allows for a more compact or expanded view, depending on individual preferences.

Frequently Asked Questions (FAQs)

Q: Can I use the Widgets panel without an internet connection?

A: No, the Widgets panel relies on an internet connection to function. It requires access to online data sources to retrieve information and updates.

Q: Can I customize the Widgets panel’s background color or theme?

A: Currently, Windows 11 does not offer the option to customize the Widgets panel’s background color or theme. The panel’s appearance is predetermined and cannot be altered by the user.

Q: Can I add custom widgets from external sources?

A: At this time, Windows 11 does not support the addition of custom widgets from external sources. The available widgets are limited to those provided by Microsoft and its partners.

Q: Can I use the Widgets panel on multiple monitors?

A: The Widgets panel is currently only accessible from the primary monitor. It cannot be displayed or accessed on secondary monitors.

Tips for Optimizing the Widgets Panel Experience

  • Start with a minimal set of widgets: To avoid clutter and distractions, begin by adding only the most essential widgets. Gradually add more widgets as needed.
  • Prioritize frequently used widgets: Arrange the widgets in order of importance, placing those used most often at the top.
  • Customize widget settings: Take advantage of the customizable settings for each widget to tailor the displayed information to your needs.
  • Consider disabling the Widgets panel if you find it distracting: If you prefer a clean and minimalist desktop experience, consider disabling the Widgets panel altogether.

Conclusion

The Windows 11 Widgets panel offers a dynamic and personalized experience, providing quick access to relevant information and features. However, its functionality and appearance may not suit all users. By understanding the various customization and management options, users can tailor their experience to their preferences. Whether embraced as a valuable productivity tool or minimized to reduce distractions, the Widgets panel remains a customizable element of the Windows 11 desktop experience.

How to add and customize Widgets in Windows 11 Windows 11 Widgets Panel Customization— Here’s How To Do It How to Customize Windows 11 Widgets - TechPP
How to work with the Windows 11 Widget panel - The Verge How to Customize Windows 11 Widgets - TechPP A Guide to Using Widgets in Windows 11
How to Use Widgets in Windows 11  PCMag How to Use Desktop Widgets in Windows 11 - Acer Community

Closure

Thus, we hope this article has provided valuable insights into Navigating the Windows 11 Widget Panel: A Guide to Customization and Control. We hope you find this article informative and beneficial. See you in our next article!

Accessing Android Apps On Windows 11: A Comprehensive Guide

Accessing Android Apps on Windows 11: A Comprehensive Guide

Introduction

In this auspicious occasion, we are delighted to delve into the intriguing topic related to Accessing Android Apps on Windows 11: A Comprehensive Guide. Let’s weave interesting information and offer fresh perspectives to the readers.

Accessing Android Apps on Windows 11: A Comprehensive Guide

How to install Android apps on Windows 11 - gHacks Tech News

The integration of Android apps into Windows 11 has revolutionized the way users interact with their computers. While Windows has always been renowned for its robust desktop applications, the ability to seamlessly run Android apps directly on the platform unlocks a world of possibilities. This guide aims to provide a comprehensive understanding of how to access and utilize Android apps on Windows 11, exploring the benefits, methods, and considerations involved.

Understanding the Integration:

Windows 11’s Android app support is powered by the Amazon Appstore. This partnership allows users to access a vast library of Android apps, curated and optimized for the Windows environment. The integration leverages the power of Windows Subsystem for Android (WSA), a virtualized environment that enables Android apps to run smoothly alongside native Windows applications.

Benefits of Running Android Apps on Windows 11:

  1. Expanded Functionality: Windows 11 users gain access to a wider range of applications, including popular mobile games, productivity tools, social media platforms, and more. This expands the functionality of the operating system, offering users more options to suit their needs.

  2. Enhanced User Experience: The familiar Android interface and user experience are seamlessly integrated into the Windows environment. Users can easily navigate apps, utilize touch gestures, and seamlessly switch between Windows and Android apps.

  3. Cross-Platform Compatibility: The ability to run Android apps on Windows 11 promotes seamless integration and communication between different platforms. This allows users to easily share content, manage tasks, and utilize applications across their devices.

  4. Increased Productivity: Android apps often offer specialized features and functionalities that complement existing Windows applications. By leveraging both platforms, users can optimize their workflow and achieve greater productivity.

Methods for Accessing Android Apps:

  1. The Amazon Appstore: The primary method for accessing Android apps on Windows 11 is through the Amazon Appstore. This platform offers a curated selection of apps, optimized for the Windows environment. Users can download and install apps directly from the Appstore, similar to the experience on Android devices.

  2. Sideloading Apps: For advanced users, it is possible to sideload Android apps outside the Amazon Appstore. This method involves manually installing APK files, which are the installation packages for Android apps. Sideloading requires enabling developer options in Windows and may involve additional steps depending on the specific app.

Considerations for Running Android Apps:

  1. Hardware Requirements: The performance of Android apps on Windows 11 depends on the hardware capabilities of the computer. Users should ensure their system meets the minimum requirements for WSA, including sufficient RAM and storage space.

  2. Compatibility: Not all Android apps are compatible with Windows 11. Developers may need to specifically optimize their apps for the Windows environment. Users should check the compatibility information before installing an app.

  3. Security: Sideloading apps from external sources can pose security risks. Users should only download apps from trusted sources and exercise caution when installing apps from unknown developers.

FAQs:

Q: Can I use my existing Google Play account to download apps on Windows 11?

A: Currently, the Amazon Appstore does not support Google Play accounts. Users need to create an Amazon account to access the Appstore and download apps.

Q: Are all Android apps available on the Amazon Appstore?

A: The Amazon Appstore offers a curated selection of apps, but not all Android apps are available. Some developers may choose not to list their apps on the platform.

Q: Can I run Android apps on Windows 11 without the Amazon Appstore?

A: While sideloading apps is possible, it is recommended to use the Amazon Appstore for a more seamless and secure experience. Sideloading may require additional steps and may not be compatible with all apps.

Q: What are the minimum hardware requirements for running Android apps on Windows 11?

A: The minimum requirements for WSA include an Intel or AMD processor with virtualization capabilities, 8GB of RAM, and 20GB of storage space.

Q: How do I enable developer options in Windows 11 for sideloading apps?

A: To enable developer options, go to Settings > System > About, and repeatedly tap on the "Build Number" until the "Developer options" menu appears.

Tips for Optimizing Android Apps on Windows 11:

  1. Update WSA: Regularly update the Windows Subsystem for Android to ensure compatibility and optimal performance.

  2. Manage App Permissions: Review and manage app permissions to control what data apps can access.

  3. Utilize Keyboard Shortcuts: Explore keyboard shortcuts to navigate and control Android apps efficiently.

  4. Enable Mouse Support: Configure mouse support for Android apps to enhance navigation and precision.

Conclusion:

Windows 11’s integration of Android apps offers a significant advancement in the user experience. It expands the functionality of the operating system, provides access to a wider range of applications, and enhances cross-platform compatibility. By understanding the methods, benefits, and considerations involved, users can effectively leverage this feature to enhance their computing experience and access a vast library of Android apps directly on their Windows 11 devices.

How to Install Android Apps on Windows 11 - YouTube Install Android Apps on Windows 11  How to Install And Use Android Application in Windows 11 First Look: Supporting Android Apps on Windows 11 - Windows Subsystem for Android
New! How to install Android Apps on Windows 11 (Official Tutorial) - YouTube How To Install Mobile Apps In Windows 11 , This is the explanation How To Setup And Run Android Apps On Windows 11
How To Get Android Apps On Windows 11  CellularNews How To Install Android Apps On Windows 11  Robots.net

Closure

Thus, we hope this article has provided valuable insights into Accessing Android Apps on Windows 11: A Comprehensive Guide. We hope you find this article informative and beneficial. See you in our next article!

A Comprehensive Guide To OKam Pro For PC Windows 11

A Comprehensive Guide to oKam Pro for PC Windows 11

Introduction

With great pleasure, we will explore the intriguing topic related to A Comprehensive Guide to oKam Pro for PC Windows 11. Let’s weave interesting information and offer fresh perspectives to the readers.

A Comprehensive Guide to oKam Pro for PC Windows 11

O-KAM Pro UYGULAMA INDIRME KURULUM – O-KAM PRO Türkiye

The world of gaming has undergone a significant transformation, with the rise of PC gaming experiencing a resurgence. Players seek immersive experiences, demanding advanced tools and features to enhance their gameplay. Enter oKam Pro, a powerful and versatile application designed specifically for PC Windows 11, which aims to elevate the gaming experience to unprecedented heights.

This article delves into the intricacies of oKam Pro, exploring its functionalities, benefits, and potential impact on PC gaming. Through a detailed analysis, we aim to provide a comprehensive understanding of this innovative tool, empowering users to make informed decisions about its utility.

Understanding the Essence of oKam Pro

oKam Pro is a software solution that acts as a bridge between players and their games, unlocking a range of capabilities that enhance gameplay in numerous ways. It functions as a comprehensive suite of tools, encompassing features that cater to diverse gaming needs, from performance optimization to visual enhancements.

Key Features and Functionalities

oKam Pro stands out due to its diverse set of features, which can be broadly categorized into the following:

  • Performance Enhancement: oKam Pro employs a range of techniques to optimize game performance, leading to smoother gameplay and higher frame rates. This includes CPU and GPU optimization, memory management, and background process prioritization.

  • Visual Enhancement: The software introduces a suite of visual customization tools, allowing players to fine-tune graphics settings, apply visual filters, and enhance textures for a more immersive and visually stunning experience.

  • Gameplay Optimization: oKam Pro offers features designed to improve gameplay mechanics, such as macro creation, input mapping, and in-game overlay functionalities. These features allow for greater control and customization, tailoring the game to individual preferences.

  • System Monitoring and Management: The application provides detailed system monitoring capabilities, enabling users to track performance metrics like CPU usage, GPU temperature, and network activity. This insight empowers players to identify potential bottlenecks and optimize system resources for optimal gaming performance.

Benefits of Utilizing oKam Pro

oKam Pro’s diverse features translate into tangible benefits for PC gamers, elevating their gaming experience in several ways:

  • Enhanced Performance: By optimizing system resources and reducing bottlenecks, oKam Pro allows players to enjoy smoother gameplay with higher frame rates, resulting in a more responsive and enjoyable experience.

  • Immersive Visuals: The visual enhancement features empower players to customize their gaming experience, achieving breathtaking visuals that enhance the immersion and aesthetic appeal of their favorite titles.

  • Personalized Gameplay: The customization options offered by oKam Pro allow players to tailor their gameplay to their preferences, creating a more comfortable and enjoyable experience.

  • Improved Control and Efficiency: The macro creation and input mapping features streamline gameplay, allowing for faster execution of actions and improving overall efficiency.

  • System Optimization and Stability: By providing detailed system monitoring and management tools, oKam Pro empowers users to identify and address potential performance issues, ensuring a stable and optimized gaming environment.

Addressing Potential Concerns

While oKam Pro offers numerous benefits, it is crucial to address potential concerns surrounding its use:

  • System Resource Consumption: The software’s performance enhancement and visual enhancement features might require significant system resources. Users with lower-end systems should carefully consider their hardware capabilities before utilizing oKam Pro.

  • Compatibility Issues: Compatibility issues with specific games or system configurations might arise. Users are advised to consult the oKam Pro documentation or community forums for compatibility information and potential workarounds.

  • Potential for Overuse: The extensive customization options offered by oKam Pro can lead to overuse and unnecessary complexity. Users are encouraged to prioritize functionality and focus on features that genuinely enhance their gaming experience.

FAQs Regarding oKam Pro

Q: Is oKam Pro compatible with all PC games?

A: oKam Pro aims to be compatible with a wide range of PC games, but compatibility can vary depending on specific game engines and system configurations. Users are advised to consult the oKam Pro documentation or community forums for compatibility information.

Q: Does oKam Pro require a powerful PC to function effectively?

A: While oKam Pro can leverage powerful hardware for optimal performance, it is designed to work effectively on a range of systems. However, users with lower-end systems might experience reduced performance or limitations in certain features.

Q: Is oKam Pro free to use?

A: oKam Pro typically offers a free trial period, after which a subscription or purchase might be required to access all features. The pricing model and subscription options can vary depending on the specific version and provider.

Q: Is oKam Pro safe to use?

A: oKam Pro is generally considered safe for use, but users should always download the software from reputable sources and ensure their system is protected with up-to-date antivirus software.

Tips for Utilizing oKam Pro Effectively

  • Start with the Basics: Familiarize yourself with the core functionalities of oKam Pro before exploring more advanced features.

  • Prioritize Performance: Focus on optimizing game performance before delving into visual enhancements.

  • Experiment and Customize: Explore the various customization options and find settings that best suit your preferences and hardware capabilities.

  • Monitor System Resources: Regularly monitor system resource usage to identify potential bottlenecks and adjust settings accordingly.

  • Stay Updated: Ensure you are using the latest version of oKam Pro to benefit from bug fixes and new features.

Conclusion

oKam Pro presents a compelling solution for PC gamers seeking to elevate their gaming experience. Its comprehensive suite of features empowers players to optimize performance, enhance visuals, personalize gameplay, and gain deeper insight into their system. While potential concerns regarding resource consumption and compatibility exist, the benefits offered by oKam Pro outweigh these considerations for many gamers. By understanding its functionalities, benefits, and potential drawbacks, players can make informed decisions about whether oKam Pro aligns with their gaming needs and aspirations. Ultimately, the decision to utilize oKam Pro rests with the individual gamer, who must weigh the potential benefits against their specific gaming goals and system capabilities.

OKAM - Professional NDI motorized FHD camera 1080p Okam for PC / Mac / Windows 11,10,8,7 - Free Download - Napkforpc.com Buy WINDOWS 11 PRO USER GUIDE: A Comprehensive User Guide for Beginners and Seniors to Master
สอนโหลด ติดตั้ง ลงทะเบียน App OKAM PRO แบบง่ายๆ ไม่ต้องใส่ email ให้ยุ่งยาก - YouTube Okam for PC / Mac / Windows 11,10,8,7 - Free Download - Napkforpc.com OKAM Guide part 1: The Basics! - YouTube
[2024] Okam app download for PC / Mac / Windows 11,10,8,7 - Free APK Download [��Updated] ล๊อกจุดหมุน บน App OKAM PRO #กล้องวงจรปิดไร้สาย #กล้องวงจรปิด - YouTube

Closure

Thus, we hope this article has provided valuable insights into A Comprehensive Guide to oKam Pro for PC Windows 11. We hope you find this article informative and beneficial. See you in our next article!

Navigating The Digital Landscape: Understanding Recently Accessed Files In Windows 10

Navigating the Digital Landscape: Understanding Recently Accessed Files in Windows 10

Introduction

With enthusiasm, let’s navigate through the intriguing topic related to Navigating the Digital Landscape: Understanding Recently Accessed Files in Windows 10. Let’s weave interesting information and offer fresh perspectives to the readers.

How To View Recently Accessed Files In Windows 10?

Windows 10, with its user-friendly interface and comprehensive features, offers a plethora of tools to enhance productivity and streamline workflows. Among these features, the "Recently Accessed Files" functionality plays a crucial role in facilitating quick access to frequently used documents, images, and other files.

This feature, prominently displayed in various Windows 10 locations like the File Explorer’s "Quick Access" section, provides a dynamic list of files that have been accessed or modified recently. This seemingly simple feature holds significant value, enabling users to navigate their digital landscape with greater efficiency and ease.

Understanding the Mechanics:

The "Recently Accessed Files" functionality is driven by a dynamic system that tracks file activity, meticulously recording each access or modification. This tracking mechanism operates silently in the background, continuously updating the list of recently accessed files. When a user accesses or modifies a file, Windows 10 logs this activity, ensuring its inclusion in the "Recently Accessed Files" list.

Benefits of Utilizing Recently Accessed Files:

The "Recently Accessed Files" feature offers a multitude of benefits, significantly enhancing user experience and productivity:

  • Rapid Access: The primary advantage lies in its ability to provide quick and effortless access to frequently used files. Instead of navigating through folders and subfolders, users can simply access the "Recently Accessed Files" list, saving valuable time and effort.
  • Enhanced Workflow: For users working with multiple files and projects, the "Recently Accessed Files" feature acts as a digital memory, recalling the most recent files, enabling seamless transitions between tasks. This streamlines workflows, promoting efficient task management and reducing the need to constantly search for files.
  • Improved Organization: The feature can be used as a tool for organization, providing a visual representation of recently accessed files, allowing users to identify patterns in their file usage and make necessary adjustments to their organizational structure.
  • Increased Productivity: By eliminating the need for extensive file searching, the "Recently Accessed Files" feature significantly improves productivity. Users can focus on their core tasks, knowing that their frequently used files are readily available.

Customizing the Functionality:

While the "Recently Accessed Files" feature is highly beneficial, Windows 10 offers customization options to tailor it to individual preferences and needs:

  • Clearing the List: Users can clear the "Recently Accessed Files" list by navigating to the "File Explorer" and selecting "Options" from the "View" tab. Under the "Privacy" tab, users can choose to clear the list. This option is particularly useful for maintaining privacy, especially when sharing a computer with others.
  • Removing Specific Files: Individual files can be removed from the "Recently Accessed Files" list by right-clicking on the file and selecting "Remove from Quick Access." This allows for selective control over the list, ensuring only relevant files are displayed.
  • Disabling the Feature: While not recommended, users can completely disable the "Recently Accessed Files" feature by navigating to the "File Explorer" and selecting "Options" from the "View" tab. Under the "Privacy" tab, users can uncheck the "Show recently used files in Quick Access" option. This disables the feature altogether, but it’s important to note that this will also remove the ability to access recently used files through the "Quick Access" section.

Frequently Asked Questions:

Q: How does Windows 10 determine which files are displayed in the "Recently Accessed Files" list?

A: Windows 10 tracks file access and modification activity, prioritizing files that have been accessed or modified recently. The algorithm prioritizes recent activity, ensuring that the most relevant files are displayed prominently.

Q: Can I control how long files remain in the "Recently Accessed Files" list?

A: Currently, Windows 10 does not offer a direct setting to control the duration of files in the "Recently Accessed Files" list. However, users can manually clear the list or remove specific files, effectively managing the list’s contents.

Q: Is the "Recently Accessed Files" feature secure?

A: While the feature itself is secure, it is important to note that the files listed are accessible to anyone using the computer. Users should be mindful of the files they access, especially when sharing a computer with others.

Q: Can I prevent specific folders from appearing in the "Recently Accessed Files" list?

A: Currently, Windows 10 does not offer a specific setting to exclude specific folders from the "Recently Accessed Files" list. However, users can choose to remove individual files from the list, effectively excluding specific folders.

Tips for Optimizing Recently Accessed Files:

  • Regularly Clear the List: Clearing the "Recently Accessed Files" list periodically helps maintain privacy and ensures that the list reflects the most relevant files.
  • Use the "Pin" Function: Pinning frequently used files to the "Quick Access" section ensures their permanent presence, eliminating the need to rely on the "Recently Accessed Files" list.
  • Organize Your Files: Proper file organization is essential for efficient file access and management. This reduces the reliance on the "Recently Accessed Files" list, enabling quicker file retrieval.

Conclusion:

The "Recently Accessed Files" feature in Windows 10 is a valuable tool that enhances productivity and streamlines workflow. By providing quick access to frequently used files, it saves time and effort, enabling users to focus on their core tasks. While the feature offers various benefits, users should be aware of its implications for privacy and security, ensuring that the list remains relevant and tailored to their individual needs. Understanding the functionality, exploring customization options, and implementing best practices for file organization can maximize the benefits of this powerful feature, empowering users to navigate their digital landscape with greater efficiency and ease.

Quick access now lets you view recent files in windows 10 How to Find Files Quickly in Windows 10 With Star Ratings Add the Recent Items Folder to Windows 10 Quick Access  @Poremsky.com
Recent File List In Windows 1 Windows 10 How To Find And Clear The All Recent Files List  winbuzzer How Do You Find Recently Downloaded Files in Windows 10, 8, 7?
4049_how+to+view+recent+files+in+windows+10+1.jpg How to Control Quick Access and Recent Files in Windows 10

Closure

Thus, we hope this article has provided valuable insights into Navigating the Digital Landscape: Understanding Recently Accessed Files in Windows 10. We appreciate your attention to our article. See you in our next article!

Navigating The Landscape Of Windows 10 Repair Tools: A Comprehensive Guide

Navigating the Landscape of Windows 10 Repair Tools: A Comprehensive Guide

Introduction

In this auspicious occasion, we are delighted to delve into the intriguing topic related to Navigating the Landscape of Windows 10 Repair Tools: A Comprehensive Guide. Let’s weave interesting information and offer fresh perspectives to the readers.

How To Repair Windows 10 And 11 In 4 Steps Computerwo - vrogue.co

Windows 10, despite its robust design, is not immune to malfunctions. From system crashes to stubborn errors, users often find themselves seeking solutions. Thankfully, a diverse array of repair tools and programs exist, empowering individuals to troubleshoot and restore their Windows 10 experience. This guide delves into the functionalities, benefits, and considerations of these invaluable utilities, providing a comprehensive understanding of their role in maintaining a smooth and efficient Windows 10 environment.

Understanding the Importance of Repair Tools

Repair tools are indispensable for addressing a wide range of Windows 10 issues. These tools can:

  • Identify and Resolve Errors: They act as diagnostic tools, pinpointing the root cause of problems and suggesting appropriate fixes.
  • Restore System Functionality: Repair tools can often restore corrupted system files, corrupted registry entries, or other critical components, restoring normal system operations.
  • Prevent Data Loss: In cases of system crashes or malware infection, repair tools can help recover lost data or prevent further data corruption.
  • Enhance System Performance: By cleaning up temporary files, removing unnecessary programs, and optimizing system settings, repair tools can improve system speed and responsiveness.
  • Provide a User-Friendly Interface: Many repair tools offer intuitive interfaces, simplifying the repair process, even for users with limited technical expertise.

Categorizing Windows 10 Repair Tools

Windows 10 repair tools can be broadly categorized into two main groups:

1. Built-in Windows 10 Tools: These are pre-installed utilities within Windows 10, offering a basic level of repair functionality.

a) System File Checker (SFC): This tool scans for and repairs corrupted system files. It is a fundamental tool for addressing many common Windows 10 issues.

b) Deployment Image Servicing and Management (DISM): DISM is a more advanced tool used for repairing the Windows image itself. It can be used to restore corrupted system files, fix errors in the Windows image, and prepare the system for a clean installation.

c) Startup Repair: This tool attempts to automatically diagnose and repair issues that prevent Windows 10 from booting properly.

d) System Restore: System Restore allows users to revert the system to a previous state, undoing changes that may have caused problems.

e) Windows Update Troubleshooter: This tool helps resolve issues with Windows updates, ensuring the system receives the latest security patches and improvements.

2. Third-Party Repair Tools: These are external programs developed by independent software companies, offering more advanced features and capabilities.

a) System Optimization and Cleaning Tools: These tools can clean up temporary files, remove unnecessary programs, defragment hard drives, and optimize system settings for better performance. Examples include CCleaner, Advanced SystemCare, and IObit Smart Defrag.

b) Registry Cleaners: Registry cleaners scan and repair the Windows registry, which stores system settings and configurations. By removing invalid entries, they can improve system performance and stability. Examples include Wise Registry Cleaner and Reg Organizer.

c) Malware Removal Tools: These tools are designed to detect and remove malware, including viruses, spyware, and ransomware, which can significantly impact system stability and security. Examples include Malwarebytes, Avast Antivirus, and Norton AntiVirus.

d) Data Recovery Tools: Data recovery tools can help retrieve lost or deleted files from hard drives, USB drives, and other storage devices, minimizing data loss in case of system crashes or accidental deletions. Examples include Recuva, EaseUS Data Recovery Wizard, and Stellar Data Recovery.

e) Driver Updaters: Driver updaters automatically scan for and update outdated device drivers, ensuring optimal hardware performance and stability. Examples include Driver Booster, DriverEasy, and Snappy Driver Installer.

f) System Backup and Recovery Tools: These tools create backup images of the entire system, allowing users to restore the system to a previous state in case of data loss or system failure. Examples include Acronis True Image, EaseUS Todo Backup, and Macrium Reflect.

Frequently Asked Questions (FAQs)

1. Which repair tools are most effective for specific issues?

The effectiveness of a repair tool depends on the specific issue. For corrupted system files, SFC and DISM are essential. For performance optimization, system optimization and cleaning tools are beneficial. For malware removal, specialized malware removal tools are crucial.

2. Can using repair tools damage my system?

While most repair tools are designed to be safe, using certain tools incorrectly or installing untrusted software can potentially harm your system. It is crucial to download repair tools from reputable sources and use them with caution.

3. How often should I use repair tools?

Regularly running system scans and cleaning tools can help maintain system health. However, avoid using tools excessively, as this can potentially slow down your computer.

4. Are all repair tools free?

Some repair tools are free, while others offer paid versions with additional features. Choose the tool that best suits your needs and budget.

5. How can I choose the right repair tool?

Consider the specific issues you are experiencing, the level of technical expertise you possess, and your budget. Research different tools and read user reviews before making a decision.

Tips for Using Repair Tools Effectively

  • Backup Your System: Before running any repair tool, create a system backup to ensure data recovery in case of unforeseen issues.
  • Use Reputable Tools: Download repair tools from trusted sources to minimize the risk of installing malicious software.
  • Read Instructions Carefully: Follow the instructions provided by the repair tool developer to ensure correct usage.
  • Don’t Overuse Tools: Avoid running repair tools excessively, as this can potentially slow down your computer.
  • Monitor System Performance: After using a repair tool, monitor system performance to assess its effectiveness.

Conclusion

Repair tools are indispensable companions for Windows 10 users, providing essential solutions for a range of system issues. By understanding the functionalities and benefits of different tools, users can effectively troubleshoot and restore their Windows 10 experience. Whether utilizing built-in Windows tools or exploring third-party options, it is crucial to approach repair tools with caution and prioritize system safety and data integrity. With the right tools and a proactive approach, users can maintain a stable and efficient Windows 10 environment, ensuring a seamless computing experience.

7 Repair Tools to Solve Windows 10 Problems Automatically  Geekflare Windows 10 repair tools - beemeva Top 6 Ways to Repair Windows 10 Without Losing Data (Free) - EaseUS
How To Repair Windows 10 - YouTube Windows 10 Repair Tool 11 Of The Best Windows 10 Repair Tools in 2020 - Reviewed��
Windows 10 Repair Tool Windows 10 Repair Tool

Closure

Thus, we hope this article has provided valuable insights into Navigating the Landscape of Windows 10 Repair Tools: A Comprehensive Guide. We thank you for taking the time to read this article. See you in our next article!

Navigating The Network And Sharing Landscape: A Guide To Windows 11’s Network And Sharing Center

Navigating the Network and Sharing Landscape: A Guide to Windows 11’s Network and Sharing Center

Introduction

In this auspicious occasion, we are delighted to delve into the intriguing topic related to Navigating the Network and Sharing Landscape: A Guide to Windows 11’s Network and Sharing Center. Let’s weave interesting information and offer fresh perspectives to the readers.

Full Guide: Windows 11 File Sharing on Network

In the modern digital landscape, seamless connectivity and secure data sharing are paramount. Windows 11, Microsoft’s latest operating system, offers a centralized hub for managing these critical aspects: the Network and Sharing Center. This article delves into the intricacies of this essential tool, providing a comprehensive overview of its functionalities, benefits, and importance in effectively managing network connections and sharing data within a Windows 11 environment.

Understanding the Network and Sharing Center: A Foundation for Connectivity

The Network and Sharing Center serves as the central control panel for all network-related activities within Windows 11. It provides a user-friendly interface to monitor and configure network connections, manage sharing settings, and troubleshoot potential connectivity issues. This central location streamlines the process of managing network resources, ensuring a smooth and secure digital experience.

Key Features and Functionalities: Demystifying the Network and Sharing Center

The Network and Sharing Center encompasses a diverse range of features, each playing a vital role in managing network connections and data sharing. These functionalities can be broadly categorized into the following areas:

1. Network Connection Management:

  • Viewing Network Status: The Network and Sharing Center displays a clear overview of active network connections, including wired Ethernet connections, wireless Wi-Fi networks, and virtual private networks (VPNs). This provides a quick snapshot of the current connectivity status, enabling users to identify any potential issues or disconnected networks.
  • Connecting to Networks: The Network and Sharing Center simplifies the process of connecting to new networks. Users can easily scan for available Wi-Fi networks, input network passwords, and configure connection settings.
  • Managing Connection Properties: For each network connection, users can access detailed properties, including network name, signal strength, IP address, and security settings. This granular control allows for customization of connection parameters to optimize performance and security.

2. Sharing Settings and Data Transfer:

  • Sharing Options: The Network and Sharing Center provides a centralized platform for configuring sharing settings for various network resources, such as files, printers, and folders. Users can choose to enable or disable sharing for specific devices or networks, ensuring data security and controlled access.
  • Network Discovery and File Sharing: This feature enables users to discover other devices on the network and share files seamlessly. Users can choose to share specific folders or drives with other users, allowing for collaborative work and data exchange.
  • Public and Private Network Profiles: The Network and Sharing Center allows users to define different network profiles based on the level of security and sharing desired. Public networks, such as those found in coffee shops or airports, typically offer limited sharing options, while private networks, such as home networks, provide greater control and flexibility.

3. Troubleshooting Network Issues:

  • Connectivity Diagnostics: The Network and Sharing Center offers integrated tools to diagnose and troubleshoot common network issues. These tools can identify problems with network connections, network adapters, or internet service providers (ISPs), providing step-by-step guidance for resolution.
  • Network Adapter Management: Users can access and manage network adapters, including enabling or disabling adapters, configuring adapter settings, and updating drivers. This functionality is essential for maintaining optimal network performance and resolving connectivity issues.

Benefits and Importance: A Seamless and Secure Digital Experience

The Network and Sharing Center plays a pivotal role in facilitating a smooth and secure digital experience for Windows 11 users. Its comprehensive features and functionalities offer several key benefits:

  • Centralized Network Management: The Network and Sharing Center eliminates the need to navigate through multiple menus or settings to manage network connections and sharing options. This centralized location streamlines network management, saving time and effort.
  • Enhanced Security and Privacy: By allowing users to configure sharing settings and define network profiles, the Network and Sharing Center empowers users to control access to their data and devices, mitigating potential security risks.
  • Simplified Troubleshooting: The built-in diagnostic tools and network adapter management capabilities within the Network and Sharing Center enable users to quickly identify and resolve common network issues, minimizing downtime and frustration.
  • Improved Network Performance: By providing granular control over network connections, sharing settings, and adapter properties, the Network and Sharing Center empowers users to optimize network performance, ensuring faster data transfer speeds and smoother online experiences.

FAQs: Addressing Common Queries about the Network and Sharing Center

1. How do I access the Network and Sharing Center?

The Network and Sharing Center can be accessed through various methods:

  • Control Panel: Open the Control Panel and navigate to "Network and Sharing Center."
  • Search Bar: Type "Network and Sharing Center" in the Windows search bar and select the relevant result.
  • Taskbar: Right-click on the network icon in the taskbar and select "Open Network and Sharing Center."

2. How do I change my network sharing settings?

To change network sharing settings:

  • Open the Network and Sharing Center.
  • Click on "Change advanced sharing settings."
  • Select the desired network profile (Public, Private, or Guest).
  • Modify the sharing settings according to your preferences.

3. How do I troubleshoot a network connection issue?

To troubleshoot a network connection issue:

  • Open the Network and Sharing Center.
  • Click on "Troubleshoot problems" to run the built-in network diagnostics.
  • Follow the on-screen instructions to resolve the identified issues.

4. How do I share files with other devices on my network?

To share files with other devices:

  • Open the Network and Sharing Center.
  • Click on "Change advanced sharing settings."
  • Ensure that "File and printer sharing" is enabled for the desired network profile.
  • Right-click on the folder you want to share and select "Properties."
  • Navigate to the "Sharing" tab and click on "Advanced sharing."
  • Check the box to "Share this folder" and click on "Permissions."
  • Add users or groups and set the desired access levels.

5. How do I connect to a VPN?

To connect to a VPN:

  • Open the Network and Sharing Center.
  • Click on "Set up a new connection or network."
  • Select "Connect to a workplace network."
  • Choose "VPN" and enter the necessary VPN details, including server address and credentials.

Tips for Effective Network Management:

  • Regularly update network drivers: Ensure that your network adapters have the latest drivers installed for optimal performance and compatibility.
  • Enable network discovery: This allows you to easily find and connect to other devices on your network.
  • Use strong passwords: Secure your network connections with robust passwords to protect your data from unauthorized access.
  • Enable firewall protection: A firewall acts as a barrier against potential threats, safeguarding your network and devices.
  • Keep your operating system and software up to date: Updates often include security patches and bug fixes, ensuring a secure and stable network environment.

Conclusion: Mastering Network Management with the Network and Sharing Center

The Network and Sharing Center in Windows 11 empowers users to manage network connections, configure sharing settings, and troubleshoot issues effectively. Its comprehensive features and functionalities provide a centralized hub for all network-related activities, ensuring a seamless and secure digital experience. By leveraging the tools and insights provided by the Network and Sharing Center, users can optimize network performance, safeguard data, and navigate the digital landscape with confidence.

Windows 11 Network And Sharing Center Windows 11 Network And Sharing Center Network Sharing Settings In Windows 11
Windows 11 Network Sharing Center Full Guide: Windows 11 File Sharing on Network Network and Sharing Center - Windows 11 - AdamFowlerIT.com
Full Guide: Windows 11 File Sharing on Network Windows 11 Network Sharing Center

Closure

Thus, we hope this article has provided valuable insights into Navigating the Network and Sharing Landscape: A Guide to Windows 11’s Network and Sharing Center. We appreciate your attention to our article. See you in our next article!

The Future Of Windows 10: Understanding Microsoft’s Support Lifecycle

The Future of Windows 10: Understanding Microsoft’s Support Lifecycle

Introduction

With great pleasure, we will explore the intriguing topic related to The Future of Windows 10: Understanding Microsoft’s Support Lifecycle. Let’s weave interesting information and offer fresh perspectives to the readers.

The Future of Windows 10: Understanding Microsoft’s Support Lifecycle

Windows 10 Build Support Lifecycle - Image to u

Windows 10, a ubiquitous operating system powering millions of computers worldwide, has been a mainstay for many users. However, like all software, its lifespan is finite. While there is no definitive "shutdown" date for Windows 10, Microsoft has outlined a clear support lifecycle, providing valuable insights into its future.

Understanding the Support Lifecycle:

Microsoft’s support lifecycle for Windows 10 involves distinct phases:

  • Mainstream Support: This phase encompasses the initial years of the operating system’s release, during which Microsoft provides regular security updates, bug fixes, and new feature releases. Windows 10’s mainstream support phase ended on October 14, 2025.
  • Extended Support: Following mainstream support, Windows 10 entered its extended support phase. During this period, Microsoft continues to provide critical security updates, addressing major vulnerabilities that could compromise system security. However, new features and non-security related updates are discontinued. This phase is expected to last until October 14, 2025.

The Significance of Support End Dates:

The end of support for Windows 10 signifies a critical juncture for users. Once extended support ends, Microsoft will no longer issue security updates or patches, leaving systems vulnerable to potential threats. This vulnerability increases the risk of data breaches, malware infections, and system instability.

Implications for Users:

The end of support for Windows 10 presents users with several options:

  • Upgrade to a newer operating system: Microsoft’s latest operating system, Windows 11, offers enhanced security features, improved performance, and modern user interface elements. Upgrading to Windows 11 would ensure continued access to security updates and new features.
  • Continue using Windows 10 with heightened security measures: Users can choose to stay on Windows 10 but must implement robust security practices to mitigate risks. This includes using reputable antivirus software, keeping software updated, and avoiding suspicious websites and downloads.
  • Migrate to a different operating system: Users may consider switching to alternative operating systems like Linux or macOS, which offer different functionalities and security landscapes.

The Importance of Planning:

It is crucial for users to plan their transition strategy well in advance of the end of support. This includes:

  • Assessing system compatibility: Ensure that your hardware meets the minimum requirements for the target operating system.
  • Back up critical data: Perform a comprehensive backup of all important files and settings to prevent data loss during the transition.
  • Familiarize yourself with the new operating system: Explore the features and functionalities of the chosen operating system to ensure a smooth transition.

FAQs about Windows 10 Support:

Q: What happens when Windows 10 support ends?

A: When extended support ends, Microsoft will no longer provide security updates or patches for Windows 10. This leaves systems vulnerable to security threats and increases the risk of malware infections.

Q: Will my computer stop working after support ends?

A: No, your computer will not automatically stop working. However, it will become increasingly vulnerable to security risks.

Q: Can I still use Windows 10 after support ends?

A: You can continue to use Windows 10, but it is not recommended. Without security updates, your system becomes a potential target for cyberattacks.

Q: Is it mandatory to upgrade to Windows 11?

A: No, upgrading to Windows 11 is not mandatory. You can choose to stay on Windows 10, but it is important to understand the associated security risks.

Tips for Preparing for the End of Windows 10 Support:

  • Assess your system’s compatibility: Check if your hardware meets the minimum requirements for Windows 11.
  • Back up your data: Create a comprehensive backup of all important files and settings.
  • Explore your options: Research alternative operating systems and upgrade paths.
  • Stay informed: Monitor Microsoft’s official announcements regarding Windows 10 support.
  • Implement robust security measures: Use antivirus software, keep software updated, and avoid suspicious websites and downloads.

Conclusion:

The end of support for Windows 10 marks a significant milestone, requiring users to proactively plan for the future. While Windows 10 has served users well, its support lifecycle is nearing its end. By understanding the implications of this change and implementing appropriate strategies, users can ensure a smooth transition to a secure and functional computing environment.

Microsoft to support Windows 10 until at least 2025 - gHacks Tech News Windows 10 Build Support Lifecycle - Image to u Windows 10 Build Support Lifecycle - Image to u
Windows 10 vs. Windows 11 Lifecycle Support - Access IT Automation Find Out Your Microsoft's Product Support Lifecycle - gHacks Tech News Windows 10 Support Dates Lifecycle - Image to u
How Much Do You Know About Windows Lifecycle Support Windows 10 Lifecycle  ZAG Technical Services  Microsoft

Closure

Thus, we hope this article has provided valuable insights into The Future of Windows 10: Understanding Microsoft’s Support Lifecycle. We appreciate your attention to our article. See you in our next article!

The Silent Struggle: Troubleshooting "No Audio Devices Installed" On Windows 10 HP Devices

The Silent Struggle: Troubleshooting "No Audio Devices Installed" on Windows 10 HP Devices

Introduction

With enthusiasm, let’s navigate through the intriguing topic related to The Silent Struggle: Troubleshooting "No Audio Devices Installed" on Windows 10 HP Devices. Let’s weave interesting information and offer fresh perspectives to the readers.

The Silent Struggle: Troubleshooting "No Audio Devices Installed" on Windows 10 HP Devices

Solved: No Audio Device installed issue in Windows 10-HP Laptop - YouTube

The absence of sound on a computer can be a frustrating experience, especially when it occurs on a newly purchased or recently updated device. The error message "No audio devices installed" on a Windows 10 HP computer signifies a deeper issue, often preventing users from enjoying multimedia content, communicating through voice calls, or even receiving system notifications. This article delves into the potential causes of this error, exploring troubleshooting steps, and offering preventative measures to ensure a seamless audio experience.

Understanding the Root of the Silence

The "No audio devices installed" message can stem from a variety of factors, ranging from simple driver issues to more complex hardware malfunctions. Here’s a breakdown of the common culprits:

1. Driver Conflicts and Incompatibilities:

  • Outdated or Missing Drivers: Audio drivers are the software that allows your computer to communicate with your sound card and speakers. If these drivers are outdated, incompatible with your operating system, or missing altogether, your computer won’t be able to recognize your audio hardware.

  • Conflicting Drivers: Sometimes, other software or driver installations can interfere with the proper functioning of your audio drivers. This can happen if a new driver update conflicts with an older one or if another program utilizes a similar audio output.

2. Hardware Malfunctions:

  • Faulty Sound Card: The sound card is the hardware component responsible for processing audio signals. A malfunctioning sound card can render your computer unable to output any sound.

  • Speaker or Headphone Issues: The speakers or headphones themselves might be damaged, disconnected, or have a faulty connection.

  • Loose or Corrupted Connections: A loose connection between the sound card and the speakers, or within the speaker system itself, can disrupt the audio signal flow. Similarly, a corrupted connection within the operating system can hinder audio communication.

3. Operating System Settings:

  • Disabled Audio Services: Windows 10 has various services that manage audio output. If these services are disabled or malfunctioning, your computer might not be able to produce sound.

  • Incorrect Audio Output Device: If the wrong output device is selected in the Windows sound settings, you might not hear any sound despite the device being connected and functioning properly.

4. Software Conflicts:

  • Audio Enhancer Software: Third-party audio enhancement software can sometimes interfere with the default audio settings, causing sound issues.

  • Antivirus or Firewall Interference: Antivirus software or firewalls can sometimes block access to audio devices, preventing sound output.

5. Windows Updates:

  • Incomplete or Corrupted Updates: Windows updates can sometimes cause audio issues, particularly if the update is incomplete or corrupted.

Troubleshooting: A Step-by-Step Guide

Navigating through these potential causes requires a systematic approach. Here’s a comprehensive troubleshooting guide to resolve the "No audio devices installed" error:

1. Restart Your Computer:

  • A simple restart can often resolve temporary glitches or software conflicts that might be affecting your audio output.

2. Check Speaker and Headphone Connections:

  • Ensure that your speakers or headphones are securely plugged into the correct audio output jack on your computer.
  • Try using a different set of speakers or headphones to rule out a hardware issue with your current devices.

3. Update Audio Drivers:

  • Device Manager: Open the Device Manager (right-click on the Start menu and select "Device Manager"). Locate "Sound, video and game controllers," expand the section, and right-click on your audio device. Select "Update driver," and follow the on-screen instructions.
  • Manufacturer Website: Visit the HP support website or the manufacturer’s website for your sound card. Download the latest drivers for your specific model and install them.

4. Troubleshoot Windows Audio Services:

  • Windows Audio Service: Open the "Run" dialog box (Windows key + R), type "services.msc," and press Enter. Locate "Windows Audio," right-click on it, and select "Properties." Ensure that the service is set to "Automatic" and is running. If not, start the service and set the startup type to "Automatic."
  • Multimedia Class Scheduler Service: Similarly, ensure that the "Multimedia Class Scheduler" service is running and set to "Automatic."

5. Check Audio Output Device Settings:

  • Windows Sound Settings: Open the Windows sound settings (right-click on the speaker icon in the taskbar and select "Open Sound settings"). Under "Output," select the correct audio output device for your speakers or headphones.
  • System Sounds: Ensure that the "System Sounds" option is enabled.

6. Disable Audio Enhancement Software:

  • Temporarily disable any audio enhancement software installed on your computer, as it might be interfering with the default audio settings.

7. Check Antivirus and Firewall Settings:

  • Ensure that your antivirus or firewall software is not blocking access to your audio devices. Temporarily disable the software to see if it resolves the issue.

8. Run Windows Audio Troubleshooter:

  • Access the Windows audio troubleshooter (type "troubleshoot" in the search bar and select "Troubleshooting"). Run the "Playing Audio" troubleshooter to automatically detect and fix any audio issues.

9. Perform a System Restore:

  • If the issue persists, consider restoring your system to a previous point in time before the audio problem began. This can help revert any changes that might have caused the issue.

10. Reinstall Audio Drivers:

  • In the Device Manager, right-click on your audio device and select "Uninstall device." Restart your computer, and Windows will automatically attempt to reinstall the drivers.

11. Contact HP Support:

  • If none of the above steps resolve the issue, contact HP support for further assistance. They may be able to provide more specific troubleshooting steps or suggest a hardware repair.

12. Consider Hardware Replacement:

  • If you’ve ruled out software issues and believe the problem lies with your sound card or speakers, consider replacing the faulty hardware.

Preventative Measures: Ensuring Audio Harmony

Preventing the "No audio devices installed" error from recurring requires proactive measures:

  • Regular Driver Updates: Keep your audio drivers up-to-date by regularly checking for updates on the HP support website or the manufacturer’s website for your sound card.

  • Careful Software Installation: Be cautious when installing new software, especially programs that modify audio settings or drivers. Always read the installation instructions carefully and consider using reputable sources for software downloads.

  • Regular System Maintenance: Perform regular system maintenance, including running disk cleanup, defragmenting your hard drive, and scanning for malware. This can help prevent software conflicts and ensure the smooth operation of your audio devices.

  • Avoid Unnecessary Software Changes: Refrain from making unnecessary changes to your system settings, especially those related to audio. Stick to the default settings unless you have a specific reason to modify them.

FAQs: Addressing Common Concerns

Q: Why is my audio device not showing up in the Device Manager?

A: If your audio device is not visible in the Device Manager, it might be due to a driver issue, hardware malfunction, or a disabled device. Try updating the audio drivers, checking for hardware issues, and ensuring the device is not disabled in the Device Manager.

Q: I’ve updated my audio drivers, but the issue persists. What should I do?

A: If updating drivers doesn’t resolve the issue, try reinstalling the drivers, checking for software conflicts, or running the Windows audio troubleshooter. If the problem persists, consider contacting HP support for further assistance.

Q: Can I use external speakers or headphones if the internal sound card is faulty?

A: Yes, you can use external speakers or headphones connected to the audio output jack on your computer, even if the internal sound card is malfunctioning. However, you might need to adjust the audio output device settings in Windows to select the external speakers or headphones as the default output device.

Q: What are some signs of a faulty sound card?

A: Signs of a faulty sound card include no audio output, distorted sound, crackling or popping noises, and intermittent sound interruptions. If you experience these symptoms, consider replacing the sound card.

Conclusion: Finding Harmony in Sound

The "No audio devices installed" error can be a frustrating obstacle, but with the right troubleshooting steps and preventative measures, it can be overcome. By understanding the potential causes, following the step-by-step guide, and implementing preventative practices, users can restore audio functionality and enjoy a seamless multimedia experience on their Windows 10 HP devices. Remember, if the problem persists, seeking professional assistance from HP support or a qualified technician can provide the necessary expertise to resolve the issue effectively.

No Audio Output Device Is Installed On Windows 10 PC (Best 10 Fixes) No Audio Output Device Is Installed In Windows 10- FIX (Working -2020) No Audio Output Device Is Installed In Windows 10- FIX (Working -2020)
No Audio Output Device Is Installed In Windows 10- FIX (Working -2020) No Audio Output Device Is Installed In Windows 10- FIX (Working -2020) FIXED] No Audio Output Device is Installed in Windows 10
How to Fix "No Audio Output Device is Installed" Error in Windows 10/11 - Driver Easy Sound Problem Windows 10 - How to fix No Audio Output Device installed - YouTube

Closure

Thus, we hope this article has provided valuable insights into The Silent Struggle: Troubleshooting "No Audio Devices Installed" on Windows 10 HP Devices. We hope you find this article informative and beneficial. See you in our next article!

Navigating The Digital Workplace: A Guide To Office 365 Login On Windows 10

Navigating the Digital Workplace: A Guide to Office 365 Login on Windows 10

Introduction

With great pleasure, we will explore the intriguing topic related to Navigating the Digital Workplace: A Guide to Office 365 Login on Windows 10. Let’s weave interesting information and offer fresh perspectives to the readers.

Microsoft Office 365 Login Tutorial Video  Office 365 Sign In - YouTube

In today’s interconnected world, seamless access to digital resources is paramount. For organizations and individuals alike, Microsoft’s Office 365 suite has become a cornerstone of productivity, providing a comprehensive set of applications and services. This article explores the process of logging into Office 365 on a Windows 10 operating system, elucidating the steps, benefits, and potential challenges involved.

Understanding the Integration

The integration of Office 365 and Windows 10 creates a cohesive and efficient digital ecosystem. This synergy streamlines access to a vast array of tools, including:

  • Microsoft Office Applications: Word, Excel, PowerPoint, Outlook, OneNote, and more, offering familiar and powerful tools for document creation, data analysis, presentation development, email management, and note-taking.
  • Cloud Storage and Collaboration: OneDrive provides secure cloud storage, enabling file sharing and real-time collaboration on documents, spreadsheets, and presentations.
  • Communication and Collaboration Tools: Teams facilitates online meetings, chat, and file sharing, fostering seamless communication and project management within teams.
  • Security and Management Features: Office 365’s robust security measures and centralized management tools ensure data protection and simplified administration.

The Login Process: A Step-by-Step Guide

  1. Opening the Office Application: Begin by launching any Office 365 application, such as Word, Excel, or Outlook.
  2. Login Prompt: The application will prompt you to sign in.
  3. Enter Credentials: In the provided fields, enter your Office 365 email address and password. This email address is typically your work or school account.
  4. Authentication: The system verifies your credentials and grants access to the application and associated services.

Alternative Login Methods

While the standard login process is straightforward, alternative methods exist to enhance convenience and security:

  • Single Sign-On (SSO): Organizations often implement SSO, allowing users to log in once and gain access to multiple applications and services with a single set of credentials.
  • Multi-Factor Authentication (MFA): This enhanced security measure requires users to provide additional authentication factors, such as a one-time code sent to their mobile device, beyond their password.
  • Azure Active Directory (Azure AD): This cloud-based identity and access management service enables organizations to manage user identities, access permissions, and security policies.

Potential Challenges and Solutions

While the login process is generally smooth, users may encounter challenges:

  • Forgotten Password: If you forget your password, follow the password recovery process provided by Office 365. This typically involves answering security questions or receiving a reset link via email.
  • Account Lockout: Multiple incorrect login attempts may result in account lockout. Contact your IT administrator or follow the account recovery procedures outlined by Office 365.
  • Network Connectivity Issues: Ensure a stable internet connection for seamless login and access to Office 365 services.
  • Synchronization Errors: Occasional synchronization issues may occur, particularly during updates or network disruptions. Patience and restarting the application or device can often resolve these issues.

Optimizing the Login Experience

  • Password Manager: Employ a password manager to securely store and manage your Office 365 credentials, reducing the risk of forgetting your password.
  • Browser Extensions: Utilize browser extensions designed for Office 365 login, providing faster and more convenient access.
  • Enable Auto-Login: If using a personal device, consider enabling auto-login for your Office 365 account, simplifying access.

FAQs: Addressing Common Queries

Q: What if I cannot remember my Office 365 password?

A: Follow the password recovery process provided by Office 365. This typically involves answering security questions or receiving a reset link via email.

Q: Why is my Office 365 account locked out?

A: Multiple incorrect login attempts may result in account lockout. Contact your IT administrator or follow the account recovery procedures outlined by Office 365.

Q: How do I ensure my Office 365 account is secure?

A: Enable multi-factor authentication (MFA) for enhanced security. Regularly update your password and avoid using the same password for multiple accounts.

Q: Can I access Office 365 on multiple devices?

A: Yes, Office 365 allows you to access your account on multiple devices, such as computers, tablets, and smartphones.

Q: What happens if I lose my device?

A: If you lose your device, immediately contact your IT administrator or follow the procedures outlined by Office 365 to secure your account and prevent unauthorized access.

Tips for a Seamless Login Experience

  • Utilize a strong and unique password.
  • Enable multi-factor authentication for enhanced security.
  • Keep your Office 365 applications and operating system updated.
  • Ensure a stable internet connection for seamless access.
  • Contact your IT administrator or Office 365 support for assistance with any issues.

Conclusion

Logging into Office 365 on Windows 10 is a fundamental step in accessing a powerful suite of productivity tools and services. The process is generally straightforward, but understanding the potential challenges and solutions, as well as implementing best practices for security and optimization, ensures a seamless and efficient experience. By mastering the intricacies of Office 365 login, users can unlock the full potential of this comprehensive digital workspace and elevate their productivity.

Office 365 Login, Overview, and Sharing - YouTube How to Login Office 365 Account? Microsoft Office 365 Login Sign In  office.com Sign In - YouTube How to login to Office 365 - YouTube
Office 365 Login Account  office 356 Sign In How Microsoft Office 365 Suite transforms the Digital Workplace Microsoft Office 365 Admin Login – User Guide - Broughted
Microsoft 365 Login Latest Guide And Tips WPS Office, 40% OFF Tips - Logging in to Office 365

Closure

Thus, we hope this article has provided valuable insights into Navigating the Digital Workplace: A Guide to Office 365 Login on Windows 10. We appreciate your attention to our article. See you in our next article!