Archives 2023

Realtek Drivers 5.1 Surround Sound Windows 11

realtek drivers 5.1 surround sound windows 11

Introduction

With great pleasure, we will explore the intriguing topic related to realtek drivers 5.1 surround sound windows 11. Let’s weave interesting information and offer fresh perspectives to the readers.

Realtek Audio Drivers: Unlocking the Full Potential of 5.1 Surround Sound on Windows 11

Realtek audio driver windows 11 download - intellicclas

In the realm of modern computing, audio fidelity plays a pivotal role in enhancing the user experience. Whether it’s immersing oneself in the captivating world of gaming, indulging in the nuances of a musical masterpiece, or engaging in a crystal-clear video conference, the quality of sound significantly impacts the overall enjoyment. Realtek, a leading provider of audio solutions, has become synonymous with delivering high-quality audio experiences through its comprehensive range of audio drivers. This article delves into the intricacies of Realtek drivers, specifically focusing on their role in enabling 5.1 surround sound on Windows 11, highlighting the importance and benefits of these drivers in delivering an immersive and captivating audio experience.

Understanding Realtek Audio Drivers and their Significance

Realtek audio drivers serve as the crucial bridge between a computer’s hardware and its operating system, enabling the communication and proper functioning of audio devices. These drivers essentially translate the instructions from the operating system into commands that the audio hardware can understand, allowing for seamless playback of audio content. In the context of 5.1 surround sound, Realtek drivers play a crucial role in configuring and managing the multiple audio channels, ensuring that each channel delivers the intended audio signal to the corresponding speaker.

5.1 Surround Sound: A Multidimensional Audio Experience

5.1 surround sound refers to a multi-channel audio system that utilizes six distinct speakers to create an immersive and realistic audio experience. This system includes a left and right front speaker, a center speaker for dialogue and vocals, a left and right rear speaker for ambient sounds, and a subwoofer for low-frequency effects. The combination of these speakers and their precise placement creates a sense of depth and spatial awareness, effectively enveloping the listener in a three-dimensional soundscape.

Realtek Drivers and 5.1 Surround Sound on Windows 11

Windows 11, the latest iteration of Microsoft’s operating system, boasts advanced audio capabilities, making it an ideal platform for experiencing the full potential of 5.1 surround sound. However, to unlock this immersive audio experience, it is essential to install and configure the appropriate Realtek audio drivers. These drivers provide the necessary software components that allow Windows 11 to recognize and properly manage the 5.1 surround sound configuration, enabling the distinct audio channels to function harmoniously.

Benefits of Using Realtek Drivers for 5.1 Surround Sound on Windows 11

Utilizing Realtek drivers for 5.1 surround sound on Windows 11 offers a myriad of benefits, significantly enhancing the audio experience:

  • Immersive Audio Experience: Realtek drivers enable the precise configuration and management of the 5.1 surround sound system, ensuring that each speaker receives the correct audio signal, resulting in a truly immersive and captivating audio experience.

  • Enhanced Audio Fidelity: Realtek drivers are known for their high-quality audio processing capabilities, resulting in clear, crisp, and detailed audio playback. This is particularly noticeable in games, movies, and music, where subtle nuances and intricate sound effects are brought to life.

  • Customizable Audio Settings: Realtek drivers offer a user-friendly interface that allows users to fine-tune audio settings to their preference. This includes adjusting speaker balance, customizing equalizer settings, and even creating personalized audio profiles for different applications and scenarios.

  • Improved Compatibility: Realtek drivers are designed to be compatible with a wide range of audio devices and motherboards, ensuring seamless integration and optimal performance. This compatibility ensures that users can enjoy the full benefits of 5.1 surround sound without encountering compatibility issues.

  • Enhanced Gaming Experience: For gamers, 5.1 surround sound can be a game-changer, providing a more immersive and realistic gaming experience. With the ability to pinpoint the location of enemy footsteps, gunfire, and other in-game sounds, gamers can gain a tactical advantage and enjoy a more engaging gameplay experience.

FAQs Regarding Realtek Drivers and 5.1 Surround Sound on Windows 11

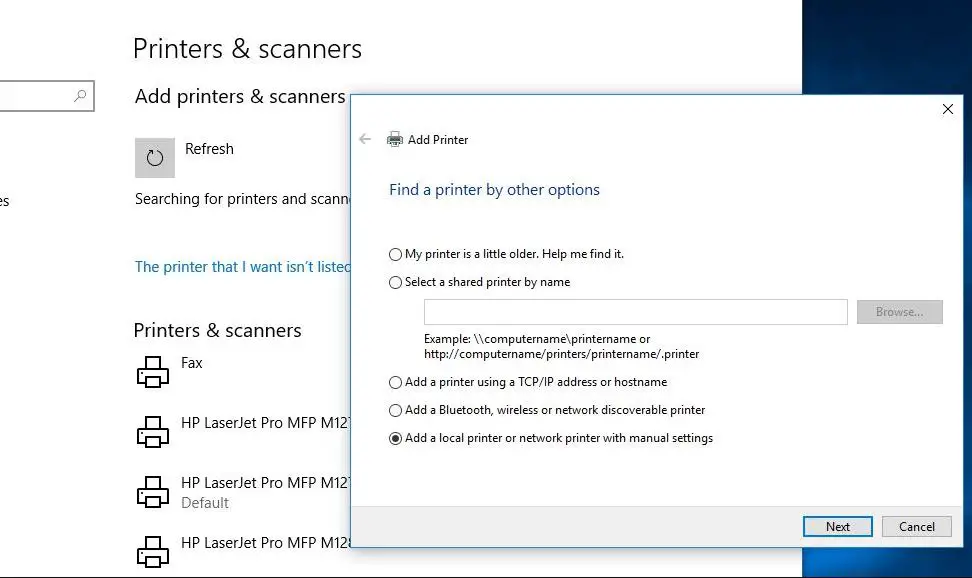
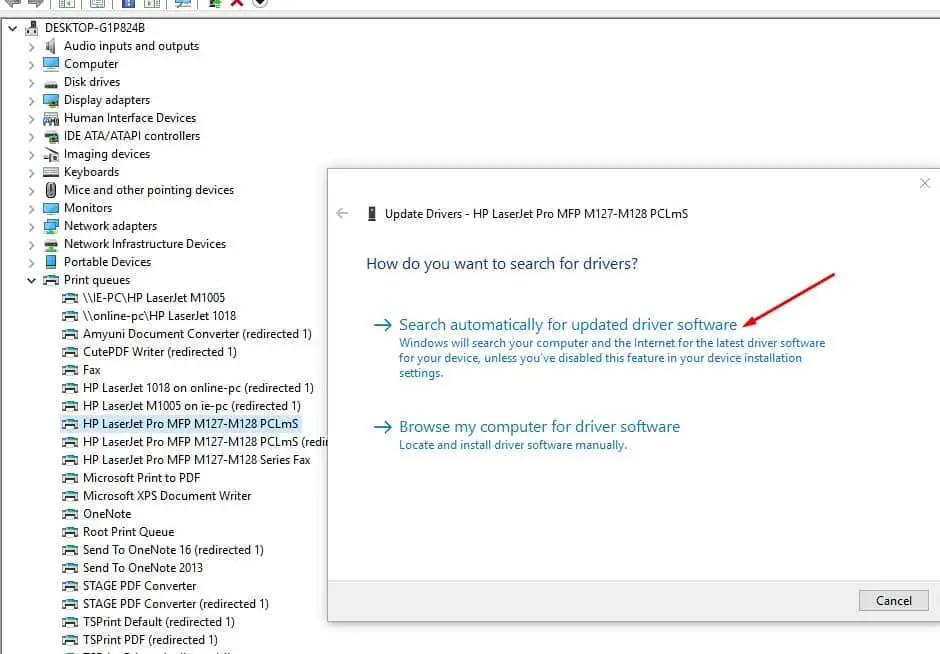
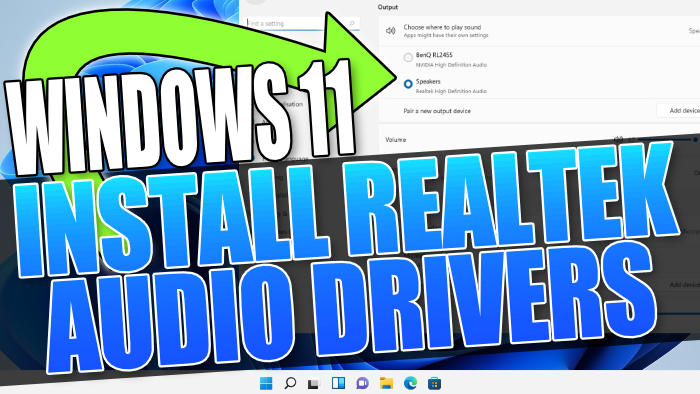
Q: How do I install Realtek audio drivers for 5.1 surround sound on Windows 11?

A: The installation process typically involves downloading the latest Realtek audio drivers from the manufacturer’s website or the motherboard manufacturer’s website. Once downloaded, the driver can be installed by following the on-screen instructions.

Q: How do I configure my 5.1 surround sound system using Realtek drivers?

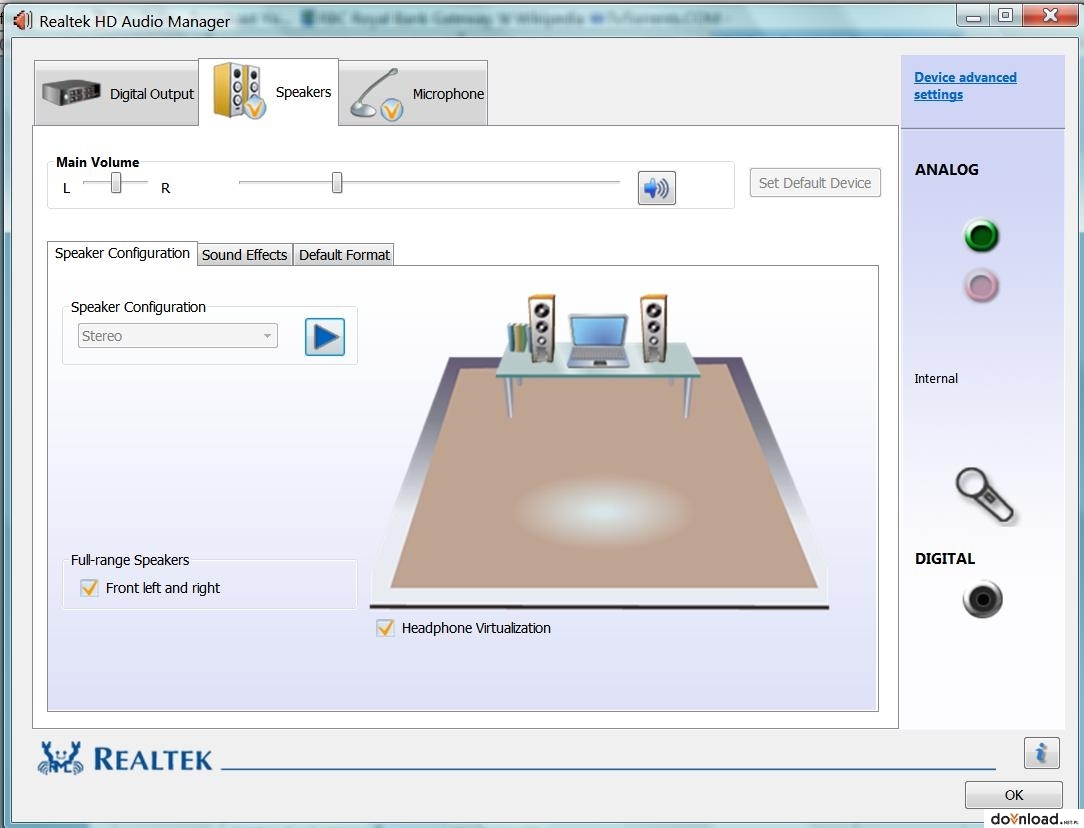
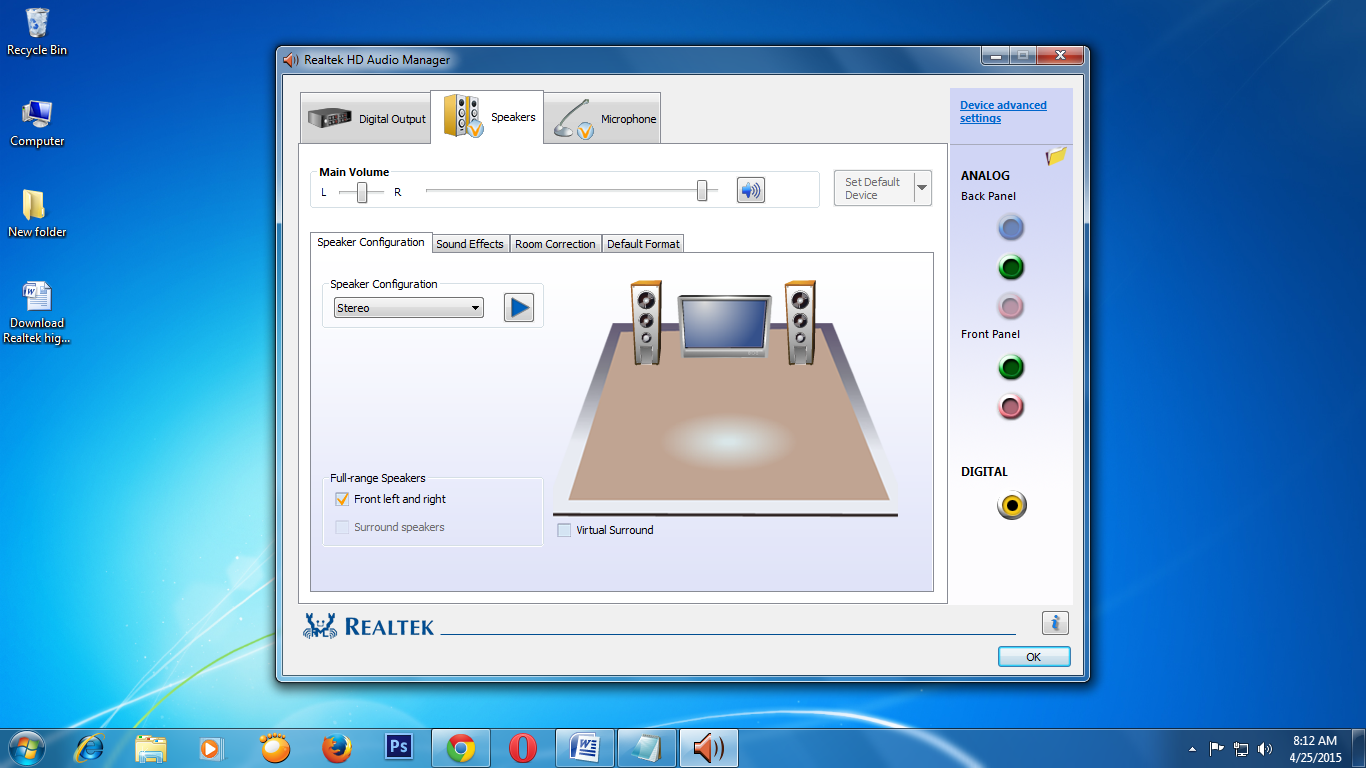
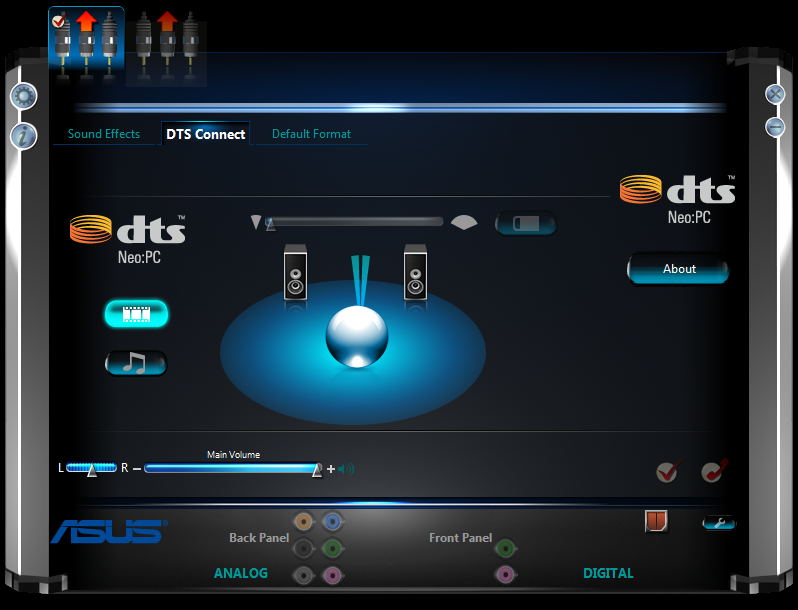
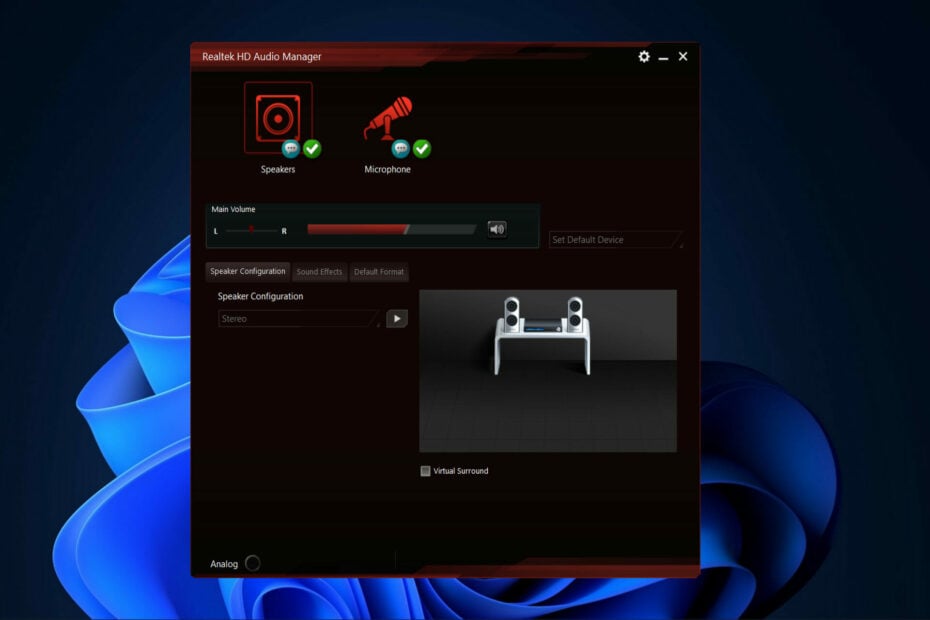
A: The configuration process typically involves accessing the Realtek Audio Manager, which is usually located in the system tray. Within the Audio Manager, users can select the desired speaker configuration (5.1 surround sound) and adjust the individual speaker levels and other audio settings to their preference.

Q: What if my 5.1 surround sound system is not detected by Windows 11?

A: If the 5.1 surround sound system is not detected, it may be necessary to update the Realtek audio drivers or check the connections between the speakers and the sound card. Ensure that the speakers are properly connected to the sound card and that the audio output is set to the correct device in Windows 11 settings.

Q: Can I use Realtek drivers for 5.1 surround sound with external speakers?

A: Yes, Realtek drivers can be used with both internal and external speakers. However, it’s essential to ensure that the external speakers are compatible with 5.1 surround sound and that they are properly connected to the sound card.

Q: How do I troubleshoot audio issues with Realtek drivers and 5.1 surround sound?

A: If you experience audio issues, start by ensuring that the Realtek audio drivers are up to date. If the issue persists, check the connections between the speakers and the sound card, and ensure that the audio output is set to the correct device in Windows 11 settings. You can also try reinstalling the Realtek audio drivers.

Tips for Optimizing Realtek Drivers and 5.1 Surround Sound on Windows 11

  • Keep Drivers Updated: Regularly update the Realtek audio drivers to ensure optimal performance and compatibility with the latest operating system and audio devices.

  • Configure Speaker Placement: Properly position the speakers according to the 5.1 surround sound configuration guidelines to maximize the immersive audio experience.

  • Utilize Audio Equalizer Settings: Experiment with the equalizer settings within the Realtek Audio Manager to tailor the audio output to your preferences and enhance the listening experience.

  • Create Personalized Audio Profiles: Create different audio profiles for specific applications or scenarios to optimize the audio experience for different tasks.

  • Troubleshoot Audio Issues: If you encounter any audio issues, consult the Realtek support website or forums for troubleshooting tips and solutions.

Conclusion

Realtek audio drivers play a crucial role in unlocking the full potential of 5.1 surround sound on Windows 11, delivering an immersive and captivating audio experience. By ensuring proper installation and configuration, users can leverage the benefits of these drivers to enhance their audio fidelity, personalize their listening experience, and immerse themselves in the world of multi-dimensional sound. Whether it’s for gaming, music, movies, or video conferencing, Realtek drivers provide the necessary foundation for a truly exceptional audio experience on Windows 11.

Windows 11 Realtek Audio Driver How to Download and Install Realtek HD Audio Driver on Windows 11 - YouTube Install Realtek HD Audio Driver In Windows 11 - ComputerSluggish
Realtek audio driver windows 11 download - barcodedast Realtek-high-definition-audio-driver Windows 11 Realtek Audio Drivers Windows 11 Amd
How to download any audio driver on Windows 11 Realtek audio driver windows 11 download - neloks

Closure

Thus, we hope this article has provided valuable insights into realtek drivers 5.1 surround sound windows 11. We thank you for taking the time to read this article. See you in our next article!

Seamless File Sharing: Exploring The Convenience Of Nearby Share On Windows 11

Seamless File Sharing: Exploring the Convenience of Nearby Share on Windows 11

Introduction

In this auspicious occasion, we are delighted to delve into the intriguing topic related to Seamless File Sharing: Exploring the Convenience of Nearby Share on Windows 11. Let’s weave interesting information and offer fresh perspectives to the readers.

Seamless File Sharing: Exploring the Convenience of Nearby Share on Windows 11

Seamless File Sharing: Google Nearby Share for Windows

In the realm of modern computing, seamless file transfer between devices has become an indispensable aspect of user experience. Windows 11, with its focus on enhancing connectivity and collaboration, introduces a powerful tool for facilitating effortless data sharing: Nearby Share. This feature leverages the power of Bluetooth and Wi-Fi to enable users to quickly and securely share files, links, and even entire folders with other compatible devices in close proximity.

Understanding the Mechanics of Nearby Share on Windows 11

Nearby Share operates on a simple yet elegant principle. It utilizes a combination of Bluetooth and Wi-Fi to establish a direct connection between two devices. This connection, known as a "peer-to-peer" network, eliminates the need for cloud storage or internet connectivity for file transfer. The process is straightforward:

  1. Discovery: When a user initiates a file sharing action using Nearby Share, the app searches for nearby devices that have Nearby Share enabled and are within range.
  2. Pairing: Once a compatible device is detected, a connection is established using Bluetooth or Wi-Fi, depending on the devices’ capabilities and proximity.
  3. Transfer: The file is then transferred directly from the sending device to the receiving device over the established connection.

Benefits of Using Nearby Share on Windows 11

The convenience and efficiency of Nearby Share make it a valuable tool for users seeking to streamline their file sharing workflows. Here are some key advantages:

  • Speed and Efficiency: Compared to traditional methods like email or cloud storage, Nearby Share offers significantly faster transfer speeds, especially for larger files. The direct connection between devices eliminates the need for uploading and downloading data, resulting in a more efficient and time-saving process.
  • Security: Nearby Share prioritizes user privacy and data security. The connection between devices is encrypted, ensuring that files are transferred securely and cannot be intercepted by unauthorized parties.
  • Simplicity and User-Friendliness: The intuitive interface of Nearby Share makes it incredibly easy to use. Users simply need to select the files they wish to share, choose the recipient device from the list of available devices, and initiate the transfer.
  • Flexibility: Nearby Share supports a wide range of file types, including images, videos, documents, and even folders. This versatility makes it a suitable solution for a wide range of sharing needs.

Exploring the Functionality of Nearby Share

Beyond its basic file transfer capabilities, Nearby Share offers a range of features designed to enhance user experience and cater to various scenarios:

  • File Selection: Users can select individual files or entire folders for sharing, providing flexibility for different transfer needs.
  • Recipient Selection: Nearby Share allows users to choose specific devices as recipients, ensuring that files are sent only to intended individuals.
  • Device Visibility: Users can control the visibility of their device to other Nearby Share users, allowing them to choose when and how they want to share files.
  • Sharing History: Nearby Share keeps a record of recent file transfers, providing users with a convenient way to track their sharing activity.

Setting Up Nearby Share on Windows 11

Enabling Nearby Share on Windows 11 is a simple process:

  1. Open Settings: Navigate to the "Settings" app on your Windows 11 device.
  2. Select "System": Click on the "System" option in the left-hand menu.
  3. Choose "Shared experiences": Scroll down to the "Shared experiences" section and click on it.
  4. Enable Nearby Share: Toggle the "Nearby Share" switch to the "On" position.
  5. Device Visibility: Configure the visibility settings to determine how your device appears to other Nearby Share users.

Tips for Optimizing Nearby Share

To maximize the effectiveness and efficiency of Nearby Share, consider these tips:

  • Ensure Bluetooth and Wi-Fi are Enabled: For optimal performance, ensure that Bluetooth and Wi-Fi are enabled on both the sending and receiving devices.
  • Keep Devices Within Range: Nearby Share relies on Bluetooth and Wi-Fi signals, so ensure that the devices are within close proximity to each other for successful file transfer.
  • Check for Updates: Keep your Windows 11 operating system and Nearby Share app updated to benefit from the latest features and bug fixes.
  • Review Privacy Settings: Familiarize yourself with the privacy settings of Nearby Share and adjust them according to your preferences.

FAQs on Nearby Share on Windows 11

Q: Can I share files with Android devices using Nearby Share on Windows 11?

A: Yes, Nearby Share allows you to share files with Android devices running Android 6.0 or later.

Q: Is Nearby Share secure?

A: Yes, Nearby Share uses encryption to protect your files during transfer.

Q: Can I use Nearby Share to share files with devices on different networks?

A: No, Nearby Share requires both devices to be on the same network or within Bluetooth range.

Q: How do I troubleshoot issues with Nearby Share?

A: If you encounter issues with Nearby Share, try restarting your devices, ensuring Bluetooth and Wi-Fi are enabled, and checking for updates.

Conclusion

Nearby Share on Windows 11 is a powerful and convenient feature that streamlines file sharing between compatible devices. Its ease of use, speed, security, and flexibility make it a valuable tool for users seeking to share files quickly and efficiently. By understanding the mechanics, benefits, and functionalities of Nearby Share, users can unlock its full potential and enhance their digital collaboration and data transfer experiences.

How To Use Nearby Sharing On Windows 11  digisrun How to Use Nearby Sharing on Windows 11?  Gear Up Windows Nearby Share Windows 11 โ€” Transfer Files Between Android to PC (2023) - YouTube
How to Use Nearby Sharing on Windows 11?  Gear Up Windows How to Use Nearby Sharing on Windows 11 Nearby share for pc  nearby share windows 11  android to pc file transfer  how to use nearby
How to share files using Nearby Devices in Windows  Nearby sharing between Windows 10 to How to Enable and Use Nearby Sharing in Windows 11? 2024��

Closure

Thus, we hope this article has provided valuable insights into Seamless File Sharing: Exploring the Convenience of Nearby Share on Windows 11. We hope you find this article informative and beneficial. See you in our next article!

R For Windows 11: A Powerful Tool For Data Analysis And Visualization

R for Windows 11: A Powerful Tool for Data Analysis and Visualization

Introduction

With enthusiasm, let’s navigate through the intriguing topic related to R for Windows 11: A Powerful Tool for Data Analysis and Visualization. Let’s weave interesting information and offer fresh perspectives to the readers.

R for Windows 11: A Powerful Tool for Data Analysis and Visualization

Install R on Windows 11  TestingDocs.com

R is a free, open-source programming language and software environment widely used for statistical computing, data visualization, and machine learning. Its versatility and extensive libraries make it a valuable tool for researchers, analysts, and developers across various fields. This article explores the capabilities of R in the context of Windows 11, highlighting its key features, benefits, and practical applications.

R’s Core Strengths:

  • Statistical Computing: R excels in statistical analysis, offering a comprehensive suite of functions for data manipulation, modeling, and hypothesis testing. Users can perform complex calculations, implement statistical tests, and build predictive models with ease.
  • Data Visualization: R boasts powerful libraries like ggplot2, enabling the creation of visually appealing and informative charts, graphs, and plots. This capability facilitates data exploration, communication, and presentation of insights.
  • Machine Learning: R supports various machine learning algorithms, including regression, classification, clustering, and deep learning. It provides tools for building predictive models, identifying patterns, and making informed decisions based on data.
  • Open Source and Community Driven: R’s open-source nature allows for collaborative development and a vibrant community of users who contribute to its growth. This fosters a rich ecosystem of packages, tutorials, and resources, making it accessible and constantly evolving.

R on Windows 11: Seamless Integration and Enhanced Performance:

Windows 11 provides a robust platform for running R. The operating system’s efficient resource management and optimized environment ensure smooth execution of R scripts and packages. Windows 11 also offers compatibility with various R development environments, such as RStudio, which provides a user-friendly interface for coding, debugging, and visualization.

Getting Started with R on Windows 11:

  • Installing R: Download the latest version of R from the Comprehensive R Archive Network (CRAN) website. Choose the appropriate installer for your Windows 11 system.
  • Installing RStudio: Download and install RStudio, a popular integrated development environment (IDE) for R. RStudio offers features like syntax highlighting, code completion, and project management, simplifying the R workflow.
  • Exploring Packages: R’s strength lies in its extensive collection of packages. Use the install.packages() function to install specific packages required for your analysis.
  • Running R Scripts: R scripts are plain text files containing R code. Open a script in RStudio or the R console and execute it using the source() function or by running individual lines of code.

Benefits of Using R on Windows 11:

  • Enhanced Productivity: R’s comprehensive functionalities and intuitive development environments streamline data analysis tasks, saving time and effort.
  • Data-Driven Insights: R’s powerful statistical and machine learning capabilities empower users to extract meaningful insights from data, driving informed decision-making.
  • Visualization for Clear Communication: R’s visualization tools enable effective communication of data findings through visually appealing and informative charts.
  • Open Source Flexibility: R’s open-source nature allows for customization and adaptation to specific needs, fostering innovation and collaboration.

Real-World Applications of R on Windows 11:

  • Business Analytics: R is widely used in business intelligence to analyze customer behavior, forecast sales, and optimize marketing campaigns.
  • Healthcare Research: Researchers use R to analyze clinical trial data, identify disease patterns, and develop new treatments.
  • Financial Modeling: R is employed in finance for risk management, portfolio optimization, and market analysis.
  • Social Science Research: R facilitates data analysis in social sciences, helping researchers understand social trends, conduct surveys, and analyze public opinion.
  • Environmental Science: R is used to analyze environmental data, model climate change impacts, and monitor biodiversity.

FAQs about R on Windows 11:

  • Q: Is R compatible with Windows 11?

    A: Yes, R is fully compatible with Windows 11. The latest versions of R are designed to run smoothly on the Windows 11 operating system.

  • Q: What is the best way to install R on Windows 11?

    A: Download the latest version of R from the CRAN website and follow the installation instructions provided.

  • Q: What are some popular R packages for data analysis?

    A: Some popular packages include dplyr for data manipulation, ggplot2 for data visualization, tidyr for data tidying, and caret for machine learning.

  • Q: How can I learn R programming?

    A: Numerous online resources, tutorials, and books are available to learn R programming. The R website, RStudio website, and online learning platforms like Coursera and edX offer excellent learning materials.

  • Q: Is there a graphical user interface for R?

    A: Yes, RStudio is a popular and highly recommended IDE for R, providing a user-friendly interface for coding, debugging, and visualization.

Tips for Using R on Windows 11:

  • Use RStudio: RStudio provides a comprehensive development environment for R, enhancing productivity and simplifying workflow.
  • Explore Packages: R’s strength lies in its vast collection of packages. Familiarize yourself with relevant packages for your specific needs.
  • Start with Basics: Begin with basic R concepts and gradually build your skills by working on practical projects.
  • Utilize Online Resources: Numerous tutorials, forums, and communities exist to assist you in learning and troubleshooting.
  • Practice Regularly: Consistent practice is key to mastering R programming. Work on projects and apply your skills to real-world data.

Conclusion:

R is a powerful and versatile tool for data analysis, visualization, and machine learning. Its compatibility with Windows 11 offers a robust platform for leveraging its capabilities. By embracing R’s functionalities, users can gain valuable insights from data, drive informed decisions, and contribute to advancements in various fields. The open-source nature of R fosters a collaborative environment, ensuring its continuous development and accessibility to users worldwide.

Intro to R Install R on Windows 11  TestingDocs.com Data Visualization and Exploration with R
Install R on Windows 11  TestingDocs.com Install R on Windows 11  TestingDocs.com Data analysis and visualization using r, rstudio by Sammaworks  Fiverr
What is Data Visualization? A Beginner's Guide in 2024 Data Visualization Tools: A Comprehensive Guide - DevOps - DevSecOps - SRE - DataOps - AIOps

Closure

Thus, we hope this article has provided valuable insights into R for Windows 11: A Powerful Tool for Data Analysis and Visualization. We appreciate your attention to our article. See you in our next article!

Net Framework 3 5 For Windows 10 Download

net framework 3 5 for windows 10 download

Introduction

In this auspicious occasion, we are delighted to delve into the intriguing topic related to net framework 3 5 for windows 10 download. Let’s weave interesting information and offer fresh perspectives to the readers.

Understanding and Installing .NET Framework 3.5 on Windows 10: A Comprehensive Guide

How to Download & Install .Net Framework 3.5 On Windows 10 - YouTube

The .NET Framework, a powerful software development platform developed by Microsoft, plays a crucial role in running various applications on Windows operating systems. While newer versions of .NET exist, .NET Framework 3.5 remains essential for compatibility with legacy applications and certain functionalities. This guide will provide a comprehensive understanding of .NET Framework 3.5, its relevance on Windows 10, and a step-by-step approach to installing it.

What is .NET Framework 3.5?

.NET Framework 3.5 is a robust software framework released in 2007. It is a collection of tools, libraries, and runtime environments that facilitate the development and execution of applications for Windows. It offers a wide range of functionalities, including:

  • Common Language Runtime (CLR): Provides a managed execution environment, ensuring code security and efficient memory management.
  • Base Class Library (BCL): A vast collection of pre-written classes and functions, simplifying application development by providing reusable code components.
  • Windows Forms and WPF: Frameworks for building graphical user interfaces (GUIs) for desktop applications.
  • ASP.NET: A framework for developing web applications and services.
  • WCF (Windows Communication Foundation): Enables communication and data exchange between different applications and systems.

Why is .NET Framework 3.5 Still Relevant on Windows 10?

Despite the availability of newer versions, .NET Framework 3.5 remains relevant on Windows 10 due to its compatibility with older applications and specific functionalities. Some reasons for its continued importance include:

  • Legacy Application Compatibility: Many applications designed for older Windows versions were built using .NET Framework 3.5. Installing it ensures these applications can run smoothly on Windows 10.
  • Specific Feature Support: Certain features and functionalities are exclusively available in .NET Framework 3.5 and not in newer versions. This includes features like Windows Workflow Foundation (WF) 3.5 and WCF 3.5.
  • Third-Party Software Dependencies: Many third-party software programs require .NET Framework 3.5 as a prerequisite for installation and operation.

Installing .NET Framework 3.5 on Windows 10

Installing .NET Framework 3.5 on Windows 10 is a straightforward process. You can achieve this through the following methods:

1. Using Windows Features:

  • Navigate to "Settings" by clicking the Start menu and selecting the gear icon.
  • Select "Apps" and then click "Apps & features" on the left pane.
  • Click "Optional features" in the right pane.
  • Click "Add a feature" and search for ".NET Framework 3.5".
  • Select ".NET Framework 3.5 (includes .NET 2.0 and 3.0)" and click "Next".
  • Follow the on-screen instructions to complete the installation.

2. Using Windows Update:

  • Open Windows Update by searching for it in the Start menu.
  • Click "Check for updates".
  • If available, select the update for .NET Framework 3.5 and install it.

3. Using an Offline Installer:

  • Download the offline installer for .NET Framework 3.5 from the Microsoft website.
  • Run the installer and follow the on-screen instructions to complete the installation.

Important Considerations:

  • Internet Connection: Installing .NET Framework 3.5 via Windows Features or Windows Update requires an active internet connection.
  • Administrative Privileges: You must have administrator privileges to install .NET Framework 3.5.
  • System Restart: You may need to restart your computer after installation for the changes to take effect.

FAQs about .NET Framework 3.5 on Windows 10

Q: Is .NET Framework 3.5 compatible with Windows 10?

A: Yes, .NET Framework 3.5 is compatible with Windows 10. Microsoft officially supports it on all Windows 10 versions.

Q: Can I uninstall .NET Framework 3.5 after installing it?

A: Yes, you can uninstall .NET Framework 3.5 from Windows 10 using the same method used for installing it (Windows Features or Windows Update). However, uninstalling it may cause issues with applications that depend on it.

Q: Is .NET Framework 3.5 secure?

A: Microsoft regularly releases security updates for .NET Framework 3.5. It’s essential to keep your system up to date with the latest security patches to ensure optimal protection.

Q: Is .NET Framework 3.5 still supported by Microsoft?

A: Microsoft continues to provide security updates and support for .NET Framework 3.5. However, it is recommended to consider migrating to newer versions of .NET for enhanced features and security.

Tips for Using .NET Framework 3.5 on Windows 10

  • Keep your system updated: Ensure you have the latest security updates and patches for .NET Framework 3.5 to maintain security and stability.
  • Check compatibility: Before installing .NET Framework 3.5, verify if it is required by your applications or software.
  • Consider alternatives: If possible, explore newer versions of .NET Framework or alternative frameworks for enhanced features and security.
  • Troubleshoot issues: If you encounter any issues with .NET Framework 3.5, refer to Microsoft’s documentation or community forums for troubleshooting guidance.

Conclusion

.NET Framework 3.5 remains an essential component for running legacy applications and specific functionalities on Windows 10. Understanding its importance and following the provided installation steps ensures seamless compatibility with older software. While newer versions of .NET offer advanced features and security enhancements, .NET Framework 3.5 continues to play a vital role in maintaining compatibility and functionality for various applications. By keeping your system updated and exploring alternative frameworks when possible, you can ensure a smooth and secure experience with .NET Framework 3.5 on Windows 10.

How to Install .NET Framework 3.5 on Windows 10 Net Framework 3.5 for Windows 10 - Download & Install Guide Netframe 3 5 For Windows 10
How to install .NET Framework (3.5, 2.0, 3.0) in Windows 10 - YouTube How To Install .Net Framework 3.5 On Windows 10 [TUTORIAL] - YouTube Cara Install Net Framework 35 Di Windows 10 Paling Mudah
How to Install Net Framework 3.5 in Windows 10 (Fast and Easy) - YouTube Install .Net Framework 3.5 on Windows 10 - YouTube

Closure

Thus, we hope this article has provided valuable insights into net framework 3 5 for windows 10 download. We thank you for taking the time to read this article. See you in our next article!

Accessing And Utilizing WordPad In Windows 10: A Comprehensive Guide

Accessing and Utilizing WordPad in Windows 10: A Comprehensive Guide

Introduction

With enthusiasm, let’s navigate through the intriguing topic related to Accessing and Utilizing WordPad in Windows 10: A Comprehensive Guide. Let’s weave interesting information and offer fresh perspectives to the readers.

Accessing and Utilizing WordPad in Windows 10: A Comprehensive Guide

Help With WordPad In Windows 10: Your Ultimate WordPad Guide

WordPad, a basic text editor included with Microsoft Windows, offers a simple yet effective platform for creating and editing documents. While it may not boast the advanced features of its counterpart, Microsoft Word, WordPad remains a valuable tool for various tasks, particularly when simplicity and efficiency are paramount. This guide will comprehensively explore the process of accessing and utilizing WordPad in Windows 10, highlighting its utility and addressing common queries.

Locating WordPad in Windows 10:

Navigating to WordPad in Windows 10 is a straightforward process. There are multiple methods to access this program:

  1. Using the Start Menu:

    • Click the Start button located in the bottom-left corner of your screen.
    • Type "WordPad" in the search bar.
    • Select the "WordPad" application from the results.
  2. Using the Run Command:

    • Press the Windows key + R to open the Run dialog box.
    • Type "wordpad" in the text box and click "OK."
  3. Accessing from the Accessories Folder:

    • Open the Start menu.
    • Navigate to "Windows Accessories."
    • Select "WordPad" from the list.

Utilizing WordPad for Basic Text Editing:

Once WordPad is launched, you can begin creating or editing text documents. The user interface is intuitive and user-friendly, featuring basic editing tools:

  • Formatting Options: WordPad provides fundamental formatting options such as font selection, font size, bold, italics, and underlining. These tools can be accessed via the "Home" tab on the ribbon.
  • Paragraph Formatting: Users can adjust paragraph alignment (left, center, right, justified), line spacing, and indentation through the "Paragraph" group on the "Home" tab.
  • Inserting Images: WordPad allows the insertion of images into your documents. Click the "Insert" tab, select "Picture," and choose the desired image from your computer.
  • Printing: To print your document, click the "File" tab, select "Print," and choose the appropriate printer and settings.
  • Saving Documents: WordPad supports saving documents in various formats, including .txt, .rtf, and .doc. Click "File," select "Save As," and choose the desired format and location.

WordPad: A Versatile Tool for Everyday Tasks:

While WordPad may lack the extensive features of Microsoft Word, its simplicity and efficiency make it a valuable tool for a range of everyday tasks:

  • Creating Simple Notes: WordPad is ideal for jotting down quick notes, reminders, or shopping lists. Its straightforward interface allows for effortless creation and editing.
  • Drafting Basic Documents: For informal letters, emails, or short reports, WordPad provides a basic platform for drafting and formatting text.
  • Editing Text Files: WordPad can be used to open and edit text files in various formats, including .txt, .rtf, and .doc.
  • Converting Text Files: WordPad allows users to convert text files between different formats, making it a handy tool for transferring data between applications.
  • Annotating Documents: WordPad can be used to annotate existing documents by adding comments, highlighting text, or inserting images.

Addressing Common Queries about WordPad:

1. Can I use WordPad for complex document formatting?

WordPad is not designed for complex document formatting. While it offers basic formatting options, it lacks advanced features like tables, headers, footers, and footnotes. For more complex documents, Microsoft Word is a more suitable option.

2. Can I share WordPad documents with others?

Yes, WordPad documents can be shared with others. You can save documents in various formats, including .txt, .rtf, and .doc, which can be opened by different applications. However, some formatting may be lost during conversion.

3. Can I use WordPad for collaborative editing?

WordPad does not offer real-time collaborative editing features. If you need to work on a document with others simultaneously, consider using cloud-based collaborative tools like Google Docs or Microsoft Word Online.

4. Can I add special characters or symbols in WordPad?

WordPad offers a limited selection of special characters and symbols. To access them, click the "Insert" tab, select "Symbol," and choose from the available options. For more extensive symbol libraries, you can use other applications like Microsoft Word or specialized symbol software.

5. Can I create PDFs using WordPad?

WordPad does not have built-in PDF creation capabilities. To create PDFs from WordPad documents, you need to use a separate PDF converter tool or save the document in a compatible format like .rtf and then convert it to PDF using a dedicated application.

Tips for Optimizing WordPad Usage:

  • Customize Toolbars: You can customize the WordPad toolbar to display only the tools you frequently use. Right-click on the toolbar, select "Customize," and drag the desired tools to the toolbar.
  • Use Keyboard Shortcuts: Familiarize yourself with keyboard shortcuts for common actions like saving, printing, and formatting text to speed up your workflow.
  • Explore Formatting Options: Experiment with the available formatting options to find the best way to present your text.
  • Save Regularly: To prevent losing your work, make sure to save your document frequently, especially when working on lengthy projects.
  • Consider Alternatives: If you require advanced features, explore other text editors or word processing applications that may better suit your needs.

Conclusion:

WordPad, despite its simplicity, remains a valuable tool for everyday tasks involving basic text editing. Its user-friendly interface and basic formatting capabilities make it a convenient option for creating notes, drafting informal documents, and editing text files. While it may not be suitable for complex document formatting or collaborative editing, WordPad effectively fills a niche in the realm of text editing, providing a straightforward and efficient solution for a range of users.

Help With WordPad In Windows 10: Your Ultimate WordPad Guide Help With WordPad In Windows 10: Your Ultimate WordPad Guide Help With WordPad In Windows 10: Your Ultimate WordPad Guide
Help With WordPad In Windows 10: Your Ultimate WordPad Guide Open Wordpad In Windows 10

Closure

Thus, we hope this article has provided valuable insights into Accessing and Utilizing WordPad in Windows 10: A Comprehensive Guide. We appreciate your attention to our article. See you in our next article!

Bluetooth In Windows 10: A Comprehensive Guide

Bluetooth in Windows 10: A Comprehensive Guide

Introduction

With enthusiasm, let’s navigate through the intriguing topic related to Bluetooth in Windows 10: A Comprehensive Guide. Let’s weave interesting information and offer fresh perspectives to the readers.

Bluetooth in Windows 10: A Comprehensive Guide

How to Turn On Bluetooth in Windows 10: A Comprehensive Guide - The Cognition Sentinel

Bluetooth technology has become ubiquitous, enabling wireless communication between a wide range of devices, including computers, smartphones, headphones, speakers, and more. Windows 10, Microsoft’s flagship operating system, seamlessly integrates Bluetooth functionality, allowing users to connect and interact with a diverse ecosystem of devices. This article provides a comprehensive overview of Bluetooth in Windows 10, exploring its features, benefits, troubleshooting tips, and common FAQs.

Understanding Bluetooth in Windows 10

Bluetooth in Windows 10 is a core component of the operating system, facilitating wireless communication between devices. It utilizes radio waves to transmit data over short distances, typically up to 30 feet. This technology empowers users to connect a variety of devices to their Windows 10 PCs, enabling a multitude of functionalities.

Key Features and Benefits

1. Seamless Device Connectivity: Bluetooth in Windows 10 enables effortless pairing and connection with a wide range of devices, including:

* **Headsets and Speakers:** Enjoy high-quality audio without the hassle of wires.
* **Printers:** Print documents wirelessly from your PC.
* **Mice and Keyboards:** Enhance your computing experience with ergonomic and wireless input devices.
* **Game Controllers:** Immerse yourself in gaming with wireless controllers.
* **Smartphones:** Transfer files, make calls, and access your phone's features from your PC.
* **Other Computers:** Share files and connect to peripherals wirelessly.

2. Enhanced Productivity: Bluetooth streamlines workflows by eliminating the need for physical connections, fostering a clutter-free environment and improving productivity.

3. Enhanced Mobility: Wireless connectivity allows for greater mobility and flexibility, enabling users to move around freely while maintaining device connections.

4. Energy Efficiency: Bluetooth devices consume significantly less power compared to wired counterparts, extending battery life and reducing environmental impact.

5. Versatile Applications: Bluetooth technology finds applications in a wide range of scenarios, including:

* **Healthcare:** Wireless medical devices for patient monitoring and data collection.
* **Automotive:** Hands-free calling and music streaming in vehicles.
* **Industrial Automation:** Wireless control and data transfer in industrial environments.

Enabling and Configuring Bluetooth in Windows 10

To enable and configure Bluetooth in Windows 10, follow these steps:

  1. Open Settings: Click the Start menu and select "Settings."
  2. Navigate to Devices: Click "Devices" in the Settings window.
  3. Select Bluetooth & other devices: Click on the "Bluetooth & other devices" option.
  4. Enable Bluetooth: Turn on the "Bluetooth" toggle switch.

Pairing Devices

Once Bluetooth is enabled, you can pair devices by following these steps:

  1. Place the device in pairing mode: Consult the device’s manual for specific instructions.
  2. Select "Add Bluetooth or other device": Click on this option in the "Bluetooth & other devices" settings.
  3. Choose "Bluetooth": Select Bluetooth from the list of device types.
  4. Select the device from the list: The available Bluetooth devices will be displayed. Choose the device you wish to pair.
  5. Enter PIN if prompted: Some devices require a PIN code to complete pairing. Refer to the device’s documentation for the PIN.

Troubleshooting Bluetooth Issues

If you encounter Bluetooth connectivity issues, consider these troubleshooting steps:

  1. Ensure Bluetooth is enabled: Verify that Bluetooth is turned on in the Windows 10 settings.
  2. Check device compatibility: Ensure that the device you are trying to connect is compatible with Bluetooth.
  3. Restart the devices: Restart both your PC and the Bluetooth device.
  4. Update drivers: Update the Bluetooth drivers for your PC and the device.
  5. Remove and re-pair devices: Remove the device from the list of paired devices and re-pair it.
  6. Check for interference: Bluetooth signals can be affected by interference from other wireless devices. Try moving the devices closer to each other or further away from potential sources of interference.
  7. Run the Bluetooth troubleshooter: Windows 10 includes a built-in troubleshooter that can diagnose and fix common Bluetooth issues.

Frequently Asked Questions (FAQs)

Q: What is the range of Bluetooth in Windows 10?

A: The typical range of Bluetooth is approximately 30 feet, but it can vary depending on factors such as obstacles and interference.

Q: Can I use Bluetooth to connect to the internet?

A: No, Bluetooth is not designed for internet connectivity. It primarily facilitates communication between devices within a limited range.

Q: How do I manage paired devices in Windows 10?

A: You can manage paired devices in the "Bluetooth & other devices" settings. From there, you can remove devices, rename them, or change their settings.

Q: What is the difference between Bluetooth 4.0 and Bluetooth 5.0?

A: Bluetooth 5.0 offers improved range, speed, and power efficiency compared to Bluetooth 4.0. It also supports new features such as Bluetooth mesh networking.

Q: How do I fix a Bluetooth connection that keeps disconnecting?

A: Try updating drivers, restarting devices, removing and re-pairing devices, or checking for interference. You can also try using a different Bluetooth adapter if available.

Tips for Optimal Bluetooth Performance

  • Keep drivers updated: Regularly update Bluetooth drivers to ensure optimal performance and compatibility.
  • Minimize interference: Avoid placing Bluetooth devices near other wireless devices or sources of electromagnetic interference.
  • Use high-quality Bluetooth adapters: Consider investing in a high-quality Bluetooth adapter for better range and reliability.
  • Check power settings: Ensure that power saving settings for Bluetooth devices are not excessively restrictive.
  • Use compatible devices: Ensure that the devices you are trying to connect are compatible with Bluetooth.

Conclusion

Bluetooth technology has revolutionized wireless communication, empowering users to connect and interact with a wide range of devices. Windows 10 seamlessly integrates Bluetooth functionality, enabling effortless device pairing, enhanced productivity, and versatile applications. By understanding the features, benefits, and troubleshooting tips outlined in this article, users can maximize the potential of Bluetooth in Windows 10, unlocking a world of wireless connectivity and convenience.

How to Turn On Bluetooth on Windows 10: A Comprehensive Guide with Tips and Tricks - The Comprehensive guide to connect Bluetooth Headphones to PC Windows 10 How to install bluetooth on windows 10 - YouTube
How to turn on Bluetooth on Windows 10 - 100% Easy Guide How To Activate Bluetooth On Windows 10 Step By Step Guide โ€“ Otosection How to turn on (and use) Bluetooth in Windows 10
Bluetooth Windows 10 How To Turn On Bluetooth Windows 10 Windows 10 Bluetooth

Closure

Thus, we hope this article has provided valuable insights into Bluetooth in Windows 10: A Comprehensive Guide. We appreciate your attention to our article. See you in our next article!

Navigating The Digital Landscape: A Comprehensive Look At PC Walkthroughs And Cheats

Navigating the Digital Landscape: A Comprehensive Look at PC Walkthroughs and Cheats

Introduction

With enthusiasm, let’s navigate through the intriguing topic related to Navigating the Digital Landscape: A Comprehensive Look at PC Walkthroughs and Cheats. Let’s weave interesting information and offer fresh perspectives to the readers.

Wondered how the digital landscape worked? Take a look hereโ€ฆ โ€“ howtododigital

The world of PC gaming is vast and complex, filled with intricate puzzles, challenging boss battles, and hidden secrets. While the thrill of overcoming these obstacles is a core part of the gaming experience, there are times when players seek assistance or shortcuts to navigate the digital landscape. This is where PC walkthroughs and cheats come into play, offering a spectrum of solutions for players of all skill levels.

Understanding the Terrain: A Look at Walkthroughs

PC walkthroughs are essentially digital guides, offering step-by-step instructions and insights to help players progress through a game. They are often presented in text, video, or image formats, and can range from concise summaries of key objectives to detailed walkthroughs covering every nook and cranny of a game.

The Benefits of Walkthroughs:

  • Overcoming Obstacles: Walkthroughs provide a lifeline for players stuck on a particularly challenging puzzle, boss fight, or hidden objective. They offer a fresh perspective and strategies that might have been missed, allowing players to progress without frustration.
  • Exploring Hidden Content: Many walkthroughs delve into the intricacies of game design, revealing hidden secrets, Easter eggs, and alternative endings that might otherwise remain undiscovered.
  • Optimizing Gameplay: Some walkthroughs focus on maximizing efficiency and effectiveness, offering tips on resource management, character builds, and optimal strategies for completing objectives.
  • Understanding the Narrative: For story-driven games, walkthroughs can provide context and deeper understanding of the narrative, exploring hidden details and character motivations that might be missed on a first playthrough.

The Different Types of Walkthroughs:

  • Text Walkthroughs: These are written guides that provide detailed instructions and descriptions of the gameplay. They are often structured chronologically, guiding players through the game step by step.
  • Video Walkthroughs: These are recordings of gameplay sessions, where players showcase their strategies and techniques for completing specific objectives. Video walkthroughs can be particularly helpful for visual learners, as they allow players to see the gameplay in action.
  • Image Walkthroughs: These guides utilize screenshots and diagrams to illustrate specific steps and locations within the game. They are particularly useful for navigating complex environments or understanding visual cues.

Beyond the Guide: The World of Cheats

While walkthroughs offer assistance and guidance, cheats are a different breed altogether. They directly modify the game’s code, allowing players to alter the gameplay experience in various ways. This can range from granting infinite health and resources to unlocking hidden features and bypassing challenges altogether.

The Rationale Behind Cheating:

  • Overcoming Difficulty: Some players use cheats to overcome challenging sections of a game, particularly when faced with frustrating obstacles or overwhelming difficulty.
  • Exploring Unconventional Gameplay: Cheats can be used to experiment with different playstyles and experience the game in ways that are not intended by the developers.
  • Unlocking Content: Some cheats unlock hidden content or features that are not accessible through normal gameplay, allowing players to explore the game’s full potential.

The Ethical Considerations of Cheating:

While the allure of cheats can be strong, it’s important to consider the ethical implications of using them. Cheats can:

  • Diminish the Sense of Achievement: Overcoming challenges through cheats can diminish the sense of satisfaction and accomplishment that comes from earning rewards and overcoming obstacles through skill and perseverance.
  • Distort the Gameplay Experience: Cheats can fundamentally alter the intended gameplay experience, making the game less challenging, rewarding, or engaging.
  • Create an Unfair Advantage: In multiplayer games, using cheats can give players an unfair advantage over others, ruining the competitive experience and undermining the integrity of the game.

A Balancing Act: Finding the Right Approach

The decision to use walkthroughs or cheats is a personal one, with no universally right or wrong answer. It depends on individual preferences, motivations, and the specific context of the gaming experience.

Tips for Utilizing Walkthroughs and Cheats Responsibly:

  • Use Walkthroughs as a Last Resort: Walkthroughs should be used as a tool to overcome specific obstacles or gain a deeper understanding of the game, not as a crutch to avoid engaging with the gameplay.
  • Be Aware of Potential Spoilers: Some walkthroughs may contain spoilers that reveal key plot points or surprises. If you prefer to experience the game organically, avoid reading or watching walkthroughs until you’ve completed certain sections.
  • Use Cheats Sparingly and Thoughtfully: Cheats can be fun for experimentation or to overcome frustrating challenges, but using them excessively can diminish the overall enjoyment of the game.
  • Respect the Game’s Integrity: When using cheats, be mindful of their impact on the gameplay experience and the potential for unfair advantage in multiplayer games.
  • Prioritize Skill Development: While walkthroughs and cheats can be helpful, they should not replace the fundamental skills and strategies needed to master a game.

Frequently Asked Questions (FAQs):

Q: Are walkthroughs and cheats legal?

A: Generally, using walkthroughs is legal and encouraged by many game developers. However, using cheats can violate the terms of service of online games and may result in account suspensions or bans.

Q: Are walkthroughs and cheats safe?

A: Walkthroughs from reputable sources are generally safe. However, downloading cheats from unknown websites can expose your computer to malware and viruses.

Q: Can I use cheats in multiplayer games?

A: Using cheats in multiplayer games is generally considered unethical and can lead to bans or other penalties.

Q: Are walkthroughs and cheats a sign of poor gaming skills?

A: Using walkthroughs or cheats does not necessarily indicate poor gaming skills. Players may use them for various reasons, including overcoming challenges, exploring hidden content, or simply for enjoyment.

Conclusion:

PC walkthroughs and cheats offer a spectrum of solutions for navigating the digital landscape of gaming. While they can be valuable tools for overcoming obstacles, exploring hidden content, and enhancing the gameplay experience, it’s crucial to use them responsibly and with awareness of their potential impact on the game’s integrity and the overall gaming experience. Ultimately, the choice of whether or not to use walkthroughs and cheats rests with the individual player, and the key lies in striking a balance between seeking assistance and embracing the inherent challenges and rewards of the gaming journey.

PPT - Navigating the Digital Landscape: A Comprehensive Guide to GDPR Compliance PowerPoint Navigating The Digital Landscape: A Comprehensive Guide To The Best Map And Directions Websites Navigating Digital Landscape: Chatbots & AI/ML Essentials 2023 - Ciente
Navigating the Digital Landscape E-Book Navigating The Digital Landscape: A Guide To Understanding And Utilizing Online Learning Webinar - How to navigate the new digital landscape  BIMobject
Navigating the Digital Landscape: Crafting Your Online Success Story โ€” Productive and Free What Is the Digital Landscape? Evaluate Your Strategy Today - yorCMO

Closure

Thus, we hope this article has provided valuable insights into Navigating the Digital Landscape: A Comprehensive Look at PC Walkthroughs and Cheats. We appreciate your attention to our article. See you in our next article!

Unlocking The Power Of The Command Prompt: A Comprehensive Guide To The Windows Command Line

Unlocking the Power of the Command Prompt: A Comprehensive Guide to the Windows Command Line

Introduction

In this auspicious occasion, we are delighted to delve into the intriguing topic related to Unlocking the Power of the Command Prompt: A Comprehensive Guide to the Windows Command Line. Let’s weave interesting information and offer fresh perspectives to the readers.

Unlocking the Power of the Command Prompt: A Comprehensive Guide to the Windows Command Line

Unlocking the Power of Windows: An Introductory Guide to Command Line - YouTube

The command prompt, often referred to as "cmd" or "Command Prompt," is a powerful tool built into Windows operating systems. It provides a text-based interface for interacting with the operating system, allowing users to execute commands, manage files, troubleshoot issues, and perform various administrative tasks. Understanding and utilizing the command prompt can significantly enhance your ability to manage and control your Windows computer.

Understanding the Command Prompt

The command prompt is essentially a terminal emulator, providing a direct line of communication with the Windows kernel. Unlike the graphical user interface (GUI), which relies on visual elements and mouse clicks, the command prompt operates solely through text-based commands. This allows for a more efficient and precise way of interacting with the system, particularly when dealing with complex tasks or automating repetitive actions.

Accessing the Command Prompt

There are several ways to access the command prompt in Windows:

  1. Search Bar: Type "cmd" in the Windows search bar and press Enter.
  2. Run Dialog Box: Press the Windows key + R, type "cmd" and press Enter.
  3. File Explorer: Navigate to the desired location in File Explorer, hold down the Shift key, and right-click in the empty space. Select "Open command window here."
  4. Task Manager: Open Task Manager (Ctrl + Shift + Esc), navigate to the "File" menu, and select "Run new task." Type "cmd" and click "OK."

Navigating the Command Prompt

Once you have opened the command prompt, you will be presented with a black window containing a blinking cursor. This is where you will type commands to interact with the system. The command prompt uses a hierarchical file system, similar to the way files and folders are organized in File Explorer.

Basic Commands:

  • cd (change directory): Used to move between directories. For example, cd C:UsersJohnDoe navigates to the "JohnDoe" user directory on the "C" drive.
  • dir (directory): Lists the contents of the current directory.
  • mkdir (make directory): Creates a new directory. For example, mkdir newfolder creates a new folder named "newfolder" in the current directory.
  • rmdir (remove directory): Deletes a directory. For example, rmdir newfolder deletes the "newfolder" directory.
  • copy: Copies files from one location to another. For example, copy file.txt C:UsersJohnDoeDesktop copies the file "file.txt" to the user’s desktop.
  • move: Moves files from one location to another. For example, move file.txt C:UsersJohnDoeDocuments moves the file "file.txt" to the user’s documents folder.
  • del (delete): Deletes files. For example, del file.txt deletes the file "file.txt."
  • exit: Exits the command prompt.

Advanced Commands and Utilities:

The command prompt offers a wide range of advanced commands and utilities that can be used for various purposes, including:

  • ipconfig: Displays network configuration information.
  • ping: Tests connectivity to a specific IP address or hostname.
  • tracert: Traces the path of network traffic to a specific destination.
  • netstat: Displays network connections and statistics.
  • tasklist: Lists all running processes.
  • taskkill: Terminates a running process.
  • regedit: Launches the Registry Editor, allowing you to edit system settings.
  • diskpart: Manages hard drives and partitions.
  • chkdsk: Checks and repairs hard drive errors.
  • sfc (System File Checker): Scans for and repairs corrupted system files.

Batch Files and Scripting:

The command prompt supports batch files, which are text files containing a series of commands that can be executed together. This allows for automation of tasks, creating scripts that perform specific functions automatically. Batch files use the .bat extension and can be created using any text editor.

Benefits of Using the Command Prompt

  • Efficiency: The command prompt allows for quick and efficient execution of tasks compared to navigating through menus and dialog boxes in the GUI.
  • Precision: Commands can be precisely formulated, ensuring accurate execution of tasks.
  • Automation: Batch files and scripting enable automation of repetitive tasks, saving time and effort.
  • Troubleshooting: The command prompt provides valuable tools for troubleshooting system issues, identifying errors, and resolving problems.
  • Administrative Control: The command prompt offers a powerful platform for managing system settings, installing software, and performing administrative tasks.

FAQs

Q: What is the difference between the command prompt and PowerShell?

A: While both are command-line interfaces, PowerShell is a more advanced and object-oriented scripting language. It offers greater flexibility and functionality compared to the traditional command prompt.

Q: How do I use wildcards in command prompt commands?

A: Wildcards can be used to match multiple files or directories. The asterisk () matches any number of characters, while the question mark (?) matches a single character. For example, `del .txt` deletes all files with the ".txt" extension in the current directory.

Q: How do I run a command as administrator?

A: Right-click on the command prompt icon and select "Run as administrator." Alternatively, you can type "cmd" in the search bar, right-click on the result, and select "Run as administrator."

Q: What are some helpful resources for learning more about the command prompt?

A: The Microsoft documentation website provides comprehensive information about command prompt commands and utilities. Online forums and communities dedicated to Windows administration also offer valuable resources and support.

Tips for Using the Command Prompt Effectively

  • Use the help command: To get information about a specific command, type help <command name> in the command prompt.
  • Use the dir command with options: The dir command can be used with various options to display specific information about files and directories. For example, dir /a lists all files and directories, while dir /w displays the output in a wide format.
  • Use the cd.. command: To navigate one level up in the directory structure, use the cd.. command.
  • Use the echo command: The echo command displays text on the command prompt. It can be used to create simple scripts or debug commands.
  • Use the pause command: The pause command pauses execution of a batch file and displays a message prompting the user to press any key to continue.

Conclusion

The command prompt is an essential tool for anyone who wants to gain a deeper understanding and control over their Windows computer. While it may seem daunting at first, mastering the command prompt can significantly enhance your ability to manage your system, troubleshoot issues, and automate tasks. By exploring the available commands and utilities, you can unlock the full potential of this powerful tool and become a more efficient and proficient Windows user.

Unlocking the Power of the Windows Command Prompt: 50 Must-Know Commands - DEV Community How to use the Microsoft Windows command line? Windows Command Line Tutorial - 1 - Introduction to the Command Prompt  command prompt windows
Windows Command Prompt: What Is It and How To Use It? The Ultimate Windows Command Prompt Cheat Sheet (2024 Edition) How to Use Command Prompt: Beginnerโ€™s Guide - Tech News Today
Command Prompt Commands: A Complete List (CMD Commands) Command Prompt Tricks You Can't Miss In 2024 (in 10 minutes) Unlock the Power of CMD - YouTube

Closure

Thus, we hope this article has provided valuable insights into Unlocking the Power of the Command Prompt: A Comprehensive Guide to the Windows Command Line. We appreciate your attention to our article. See you in our next article!

Navigating The Labyrinth: Resolving Printer Issues After Windows 11 Updates

Navigating the Labyrinth: Resolving Printer Issues After Windows 11 Updates

Introduction

With great pleasure, we will explore the intriguing topic related to Navigating the Labyrinth: Resolving Printer Issues After Windows 11 Updates. Let’s weave interesting information and offer fresh perspectives to the readers.

Windows 11 22H2 users suffer from printing issues

The allure of a fresh, updated operating system is often met with frustration when previously functional devices, like printers, suddenly become incompatible. Windows 11, despite its numerous enhancements, has occasionally presented users with this particular challenge. While the reasons behind printer malfunctions following updates can be diverse, understanding the underlying causes and employing appropriate troubleshooting techniques can effectively restore printing functionality.

Unraveling the Reasons Behind Printer Incompatibility

The root cause of printer issues after a Windows 11 update can often be attributed to one or a combination of the following factors:

  • Outdated or Incompatible Drivers: Windows updates sometimes introduce changes that necessitate updated drivers for peripherals, including printers. If the printer’s driver is not compatible with the new Windows version, communication between the computer and the printer may be disrupted.
  • Conflicting Services: Windows 11 may activate or deactivate specific services during updates. These changes can inadvertently interfere with the printer’s functionality, causing printing errors or preventing the printer from being recognized.
  • Connectivity Issues: Network-connected printers may experience connectivity issues after a Windows update. This could stem from changes in the network configuration, firewall settings, or even a temporary glitch in the network infrastructure.
  • Hardware Conflicts: In rare instances, the update might introduce conflicts between the printer and other hardware components within the system, leading to printing errors or malfunctions.
  • Corrupted Print Spooler: The print spooler, responsible for managing print jobs, can become corrupted due to various reasons, including update-related changes. A corrupted print spooler can hinder printing operations and prevent documents from being sent to the printer.

Troubleshooting Printer Issues: A Step-by-Step Approach

Addressing printer issues after a Windows 11 update requires a systematic and logical approach. The following steps can help pinpoint the problem and provide solutions:

1. Update the Printer Drivers:

  • Identify the Printer Model: Begin by determining the exact model of your printer. This information is typically found on the printer itself or in the user manual.
  • Download the Latest Drivers: Visit the manufacturer’s website and locate the support or downloads section. Search for the latest drivers compatible with Windows 11 and your printer model.
  • Install the New Drivers: Download and install the new drivers following the manufacturer’s instructions. Once installed, restart your computer to ensure the changes take effect.

2. Check and Configure Print Spooler:

  • Access Print Spooler Services: Open the "Run" dialog box (Windows key + R), type "services.msc" and press Enter.
  • Locate Print Spooler Service: Scroll down to find the "Print Spooler" service and check its status. If it’s stopped, right-click on the service and select "Start."
  • Reset Print Spooler: To reset the print spooler, open "Run" dialog box, type "cmd" and press Enter. In the command prompt, type "net stop spooler" and press Enter. Then type "net start spooler" and press Enter.

3. Verify Connectivity:

  • Check Network Connection: Ensure your printer is connected to the network and that the network connection is stable.
  • Check Firewall Settings: If your printer is on a network, temporarily disable your firewall to see if it resolves the issue. If it does, consider adding the printer to the firewall’s exceptions list.
  • Check Router Configuration: If the issue persists, examine the router settings to ensure the printer is correctly configured and assigned a valid IP address.

4. Troubleshoot Hardware Conflicts:

  • Disconnect Other Devices: Temporarily disconnect other USB devices or peripherals connected to your computer, leaving only the printer connected. This can help isolate potential hardware conflicts.
  • Update Device Drivers: If the issue persists, update the drivers for other connected devices to ensure they are compatible with Windows 11.

5. Reinstall Printer:

  • Remove the Printer: Open "Settings" > "Bluetooth & devices" > "Printers & scanners." Locate your printer and select "Remove device."
  • Reinstall the Printer: Reconnect your printer to your computer and follow the on-screen instructions to reinstall it. Windows 11 should automatically detect the printer and install the appropriate drivers.

6. Perform a System Restore:

If none of the above solutions work, consider performing a system restore to a point before the update was installed. This will revert your system to a previous state and may resolve the printer issue.

FAQs: Addressing Common Printer Dilemmas

Q: My printer is not showing up in the list of devices after the Windows 11 update. What should I do?

A: This is a common issue after updates. Try restarting your computer and the printer. If the printer still doesn’t appear, check if it is properly connected to your computer or network. If it’s a network printer, make sure the printer’s IP address is correctly configured in your network settings. If the problem persists, consider reinstalling the printer drivers.

Q: I can see my printer, but it’s not printing anything. What could be the issue?

A: Several factors can cause this. First, ensure the printer has enough paper and ink. Next, check the print queue. Open "Settings" > "Bluetooth & devices" > "Printers & scanners." Click on your printer and select "Open queue." If there are any pending print jobs, try canceling them and resending the document. If the issue persists, check the printer’s status lights or error messages for any indications of problems.

Q: My printer was working fine before the update, but now it’s printing blank pages. What’s going on?

A: This could be due to a driver issue or a problem with the printer itself. Try reinstalling the printer drivers and restarting the computer. If the issue persists, check the printer’s settings for any changes in the paper type or print quality. If the problem persists, consider contacting the printer manufacturer for further assistance.

Tips for Preventing Future Printer Issues:

  • Keep Drivers Updated: Regularly check for updates to your printer drivers. This ensures compatibility with the latest operating system versions and helps prevent potential issues.
  • Back Up Your System: Before installing major updates, create a system restore point. This allows you to revert your system to a previous state if any problems arise.
  • Check for Compatibility: Before installing a Windows update, verify that your printer is compatible with the new version. Consult the manufacturer’s website or the Windows update notes for compatibility information.
  • Use a Wired Connection: If possible, consider using a wired connection for your printer instead of a wireless connection. This can improve reliability and reduce the likelihood of connectivity issues.

Conclusion: A Seamless Printing Experience

Resolving printer issues after a Windows 11 update can be a frustrating experience, but with a systematic approach and the right troubleshooting techniques, it is often possible to restore printing functionality. By understanding the potential causes of incompatibility, checking drivers, verifying connectivity, and utilizing other troubleshooting methods, users can overcome these challenges and enjoy a seamless printing experience. Remember, patience and persistence are key to navigating the complexities of technology, and with a little effort, you can regain control of your printer and resume your printing tasks with ease.

Resolving Printer Error 0X8007007e on Windows HP Printers Not Working After Windows 11 Update? Here Are Some Quick Fixes Windows 11 update issues - peresworld
Resolving Printer Connection Problems Resolving Common Printer Problems and Solutions: Your Ultimate Guide - Scanse Fix Printer Problems After Windows 10 Update โ€“ UnBrick.ID
Fix Printer Problems After Windows 10 Update โ€“ UnBrick.ID Fix Printer Problems After Windows 10 Update โ€“ UnBrick.ID

Closure

Thus, we hope this article has provided valuable insights into Navigating the Labyrinth: Resolving Printer Issues After Windows 11 Updates. We appreciate your attention to our article. See you in our next article!

Navigating The Windows 10 Download: A Comprehensive Guide

Navigating the Windows 10 Download: A Comprehensive Guide

Introduction

With enthusiasm, let’s navigate through the intriguing topic related to Navigating the Windows 10 Download: A Comprehensive Guide. Let’s weave interesting information and offer fresh perspectives to the readers.

PPT - A Comprehensive Guide to Downloading Windows 10 for Mac and Windows 11 for PC PowerPoint

The decision to upgrade to Windows 10 is a significant one, demanding careful consideration of system compatibility, software requirements, and data migration. This comprehensive guide aims to provide clarity and guidance throughout the download process, demystifying the intricacies involved and empowering users to make informed choices.

Understanding the Importance of a Clean Installation

While upgrading from a previous Windows version might seem the most straightforward path, a clean installation offers numerous advantages:

  • Enhanced Performance: A fresh installation removes unnecessary files and programs accumulated over time, optimizing system performance and responsiveness.
  • Reduced Errors and Issues: A clean slate eliminates potential conflicts and errors stemming from outdated drivers or leftover software remnants.
  • Enhanced Security: A fresh installation allows for a clean security environment, free from potential vulnerabilities or malware left by previous installations.
  • Personalized Setup: A clean installation enables users to customize their system settings and preferences from the outset, creating a tailored user experience.

Choosing the Right Download Method

There are multiple avenues for acquiring the Windows 10 installation files:

  • Microsoft Website: The official Microsoft website offers the most reliable and secure source for downloading the operating system. Users can choose from various versions based on their specific needs and system requirements.
  • Media Creation Tool: Provided by Microsoft, this tool allows users to create a bootable USB drive or DVD containing the Windows 10 installation files. This method is ideal for performing clean installations or upgrading older systems.
  • ISO Files: Direct download of ISO files containing the Windows 10 installation files is also possible from the Microsoft website. This method provides greater flexibility and control over the installation process.

Essential Prerequisites for Downloading Windows 10

Before embarking on the download journey, ensure that the following prerequisites are met:

  • System Requirements: Verify that the target device meets the minimum system requirements for Windows 10. This includes processor, RAM, storage space, and graphics card specifications.
  • Internet Connection: A stable and reliable internet connection is crucial for downloading the installation files, which can be substantial in size.
  • Backup: It is essential to back up all critical data before proceeding with the download. This ensures data recovery in case of unforeseen issues during the installation process.
  • Product Key: A valid Windows 10 product key is required for activating the operating system after installation.

Step-by-Step Guide to Downloading Windows 10

  1. Choose Your Download Method: Select the preferred download method based on individual needs and system configuration.
  2. Visit the Microsoft Website: Navigate to the official Microsoft website dedicated to Windows 10 downloads.
  3. Select the Desired Version: Choose the appropriate Windows 10 edition based on system requirements and user preferences.
  4. Start the Download: Initiate the download process by clicking the appropriate button or link provided on the website.
  5. Verify the Download: After the download is complete, verify the integrity of the downloaded files by checking their size and checksum.
  6. Create Installation Media: If using the Media Creation Tool, follow the on-screen instructions to create a bootable USB drive or DVD.

FAQs Regarding Windows 10 Downloads

Q: What is the difference between Windows 10 Home and Windows 10 Pro?

A: Windows 10 Home is designed for general home users, while Windows 10 Pro offers additional features tailored for businesses and professionals, including BitLocker encryption, Remote Desktop, and domain join capabilities.

Q: Can I upgrade from Windows 7 or Windows 8.1 to Windows 10 for free?

A: The free upgrade offer for Windows 10 has ended. However, users can purchase a Windows 10 license or upgrade from a previous version at a discounted price.

Q: How much storage space is required for Windows 10?

A: The minimum storage space requirement for Windows 10 is 32GB, although 64GB or more is recommended for optimal performance and software installations.

Q: Will my existing software and drivers work with Windows 10?

A: Most existing software and drivers are compatible with Windows 10. However, it is advisable to check for updates or compatibility information before upgrading.

Tips for a Smooth Windows 10 Download and Installation

  • Check for System Compatibility: Ensure that the target device meets the minimum system requirements before attempting to download or install Windows 10.
  • Back Up Data: Create a complete backup of all important files and data before proceeding with the installation.
  • Disconnect Unnecessary Devices: Disconnect external devices, such as printers and USB drives, to avoid potential conflicts during the installation process.
  • Disable Antivirus Software: Temporarily disable antivirus software to prevent interference with the installation process.
  • Follow On-Screen Instructions: Carefully follow the instructions provided during the download and installation process.

Conclusion

Downloading and installing Windows 10 can be a smooth and rewarding experience with proper planning and preparation. By understanding the different download methods, verifying system compatibility, backing up essential data, and following the outlined steps, users can navigate the process with confidence, unlocking the benefits of this modern operating system. Remember, a clean installation often leads to a more stable and efficient system, ensuring a seamless transition to the world of Windows 10.

Navigating Windows 10: A Comprehensive Guide on How to Get to the Desktop Navigating Windows 10: The Illustrated Guide to Using Windows 10 (Navigating IT) - Wilson, Kevin PPT - A Comprehensive Guide to Installing Windows 10_ Step-by-Step Tutorial PowerPoint
How To Navigate Windows 10 - SSCSD Educational Technology How to Navigate in Windows 10 - Windows 10 User Interface Overview - YouTube Navigating Windows 10.pdf - Navigating Windows 10 1 Know your way around Here are the spots you
PPT - Navigating the Windows 10 Experience: A Comprehensive Guide to Licenses and Upgr VinBoiSoft Blog: 10 Quick Clicks: A PC Guide for Navigating Windows 10

Closure

Thus, we hope this article has provided valuable insights into Navigating the Windows 10 Download: A Comprehensive Guide. We hope you find this article informative and beneficial. See you in our next article!