Archives 2023

Windows 11: A Continuous Journey Of Enhancement

Windows 11: A Continuous Journey of Enhancement

Introduction

With enthusiasm, let’s navigate through the intriguing topic related to Windows 11: A Continuous Journey of Enhancement. Let’s weave interesting information and offer fresh perspectives to the readers.

Windows 11: A Continuous Journey of Enhancement

Microsoft wants to move Windows 11 (12) more into the Cloud - YouTube

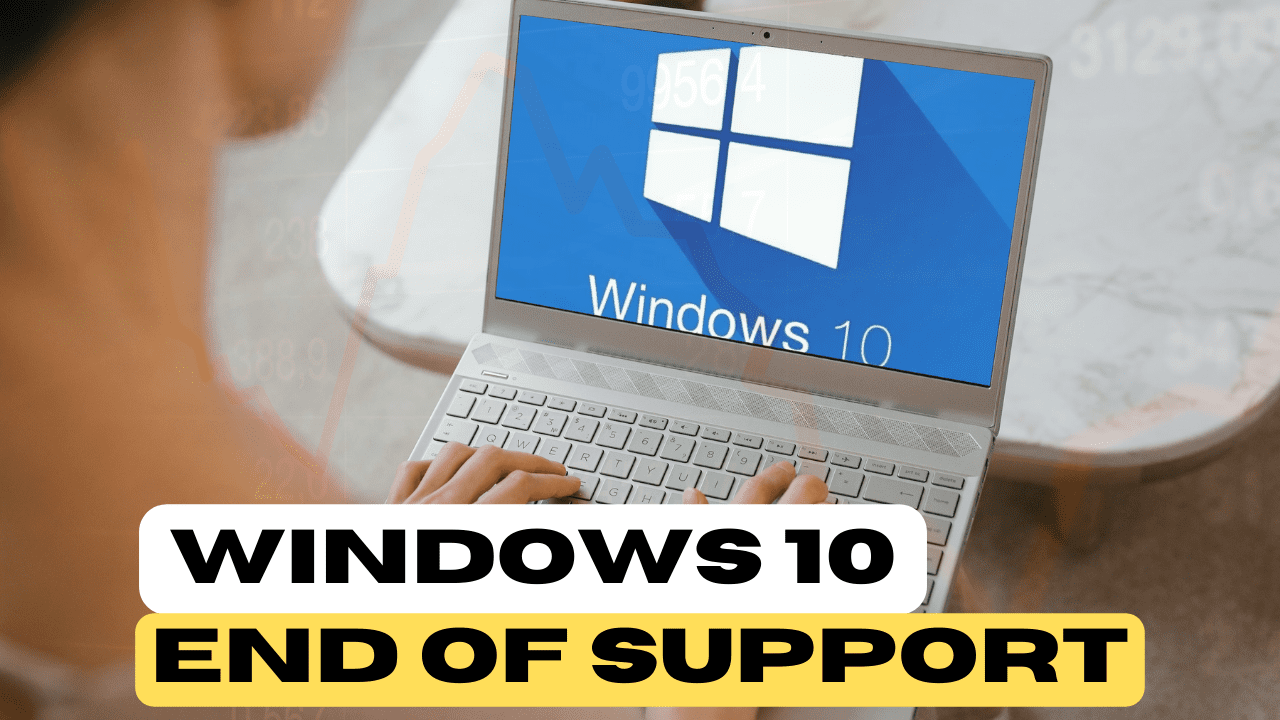
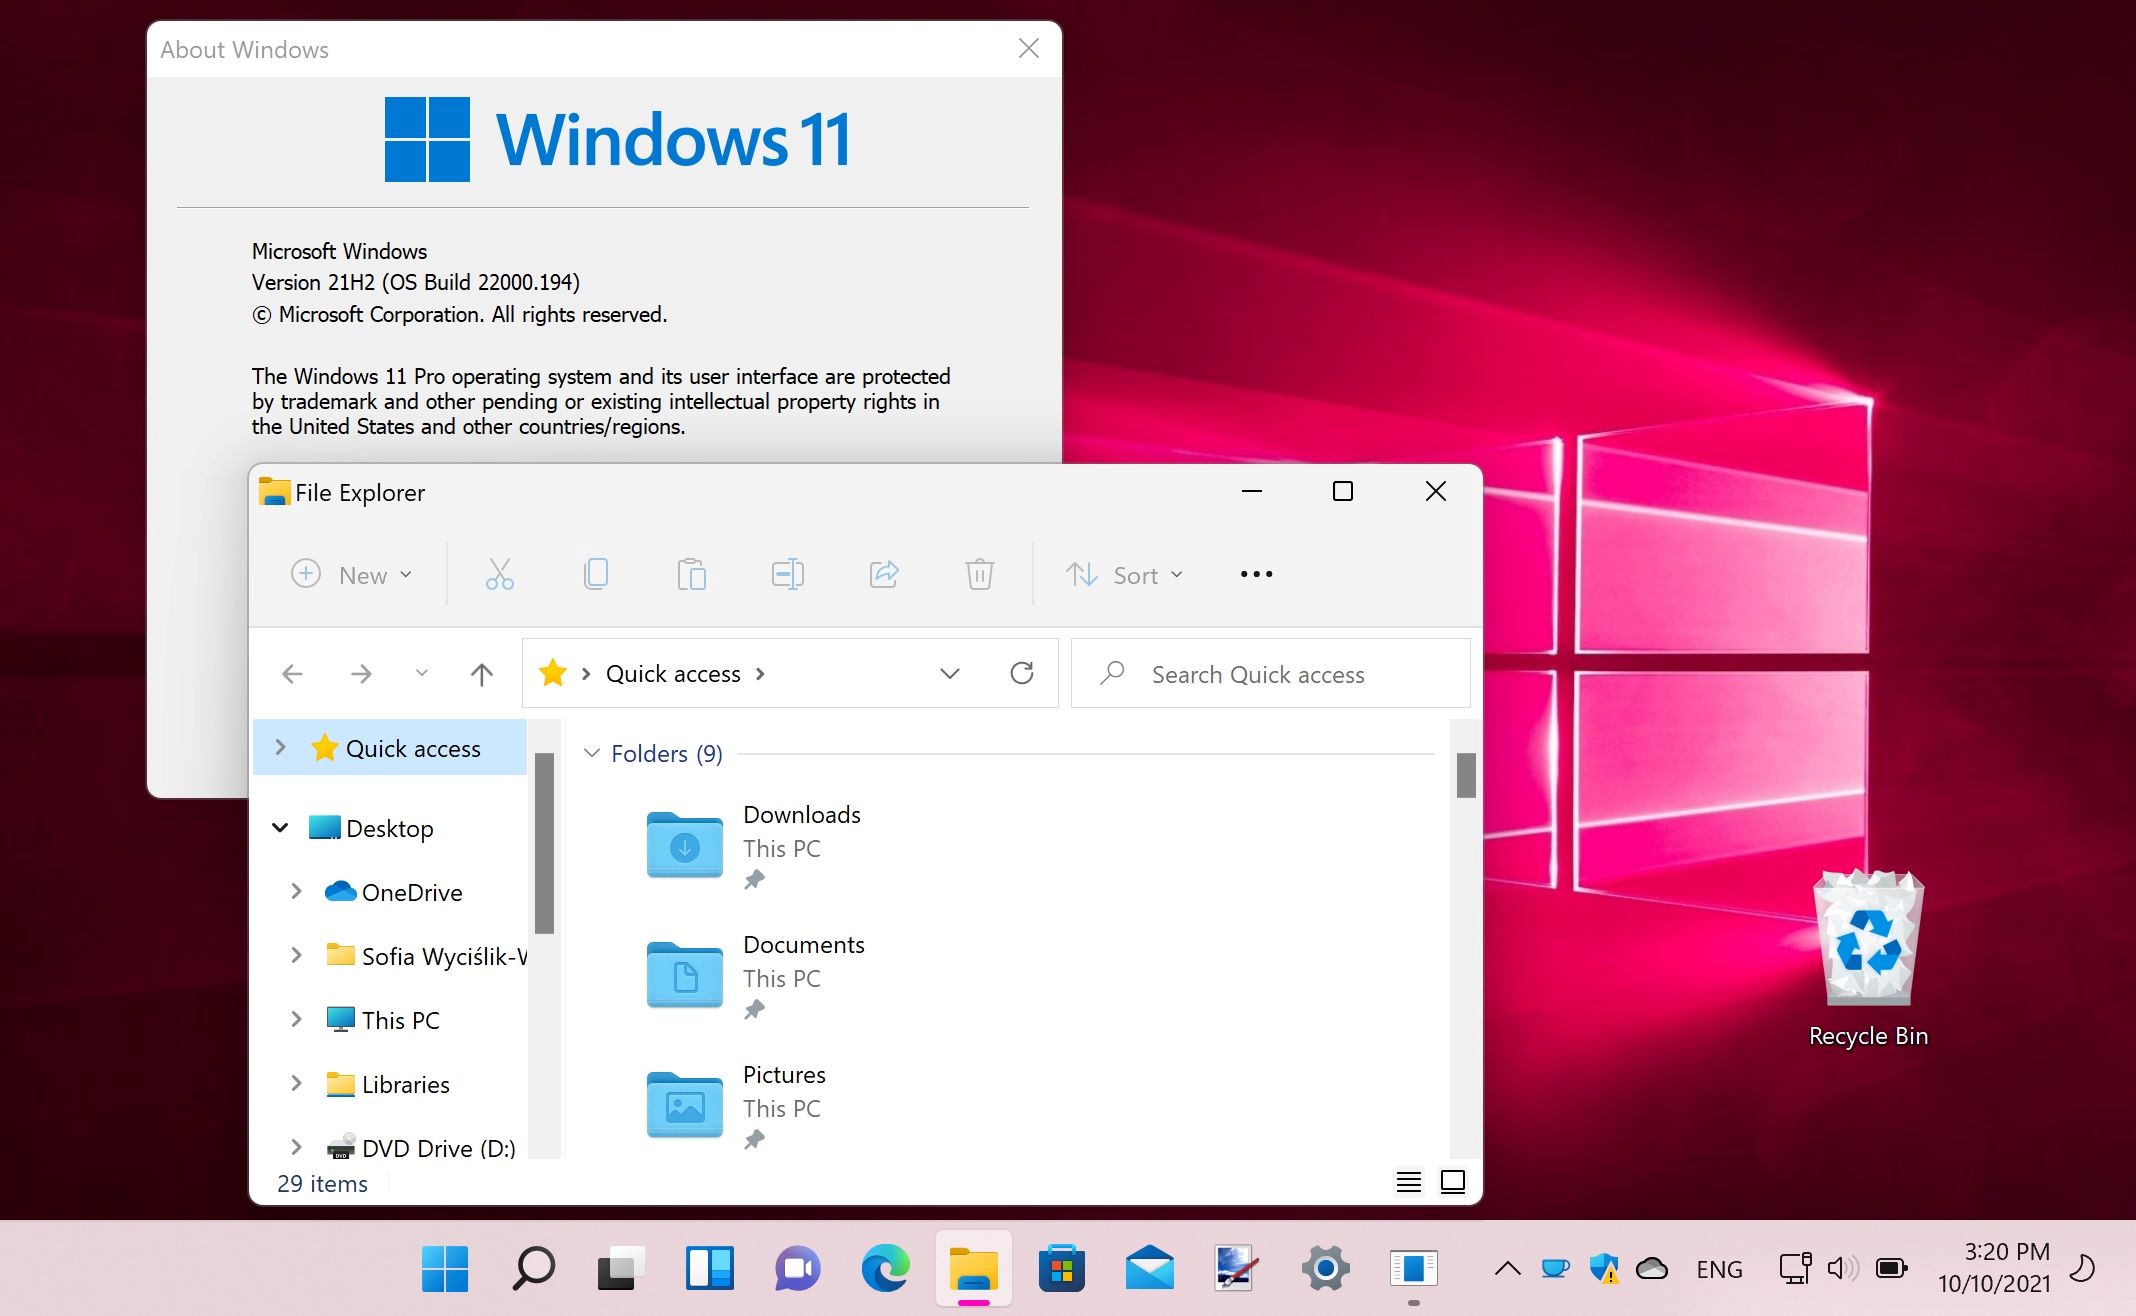
Microsoft’s Windows 11, released in October 2021, has undergone a series of updates since its inception. These updates are not merely cosmetic tweaks but rather a testament to Microsoft’s commitment to continuously improve the user experience, enhance security, and integrate new features. The updates are available for free download, ensuring accessibility to all Windows 11 users.

Understanding the Significance of Updates

Software updates are crucial for several reasons:

  • Security Patches: Updates often include security patches to address vulnerabilities that could expose systems to malware, viruses, and unauthorized access.
  • Bug Fixes: Updates frequently address bugs and glitches that can cause software crashes, slowdowns, or unexpected behavior.
  • Performance Enhancements: Updates can optimize system performance, leading to faster boot times, smoother application execution, and improved overall responsiveness.
  • New Features and Functionality: Updates often introduce new features, functionalities, and enhancements, enriching the user experience and expanding the capabilities of the operating system.

Key Features Introduced in Recent Updates

Windows 11 updates have introduced a wide range of improvements, impacting various aspects of the user experience. Some notable features include:

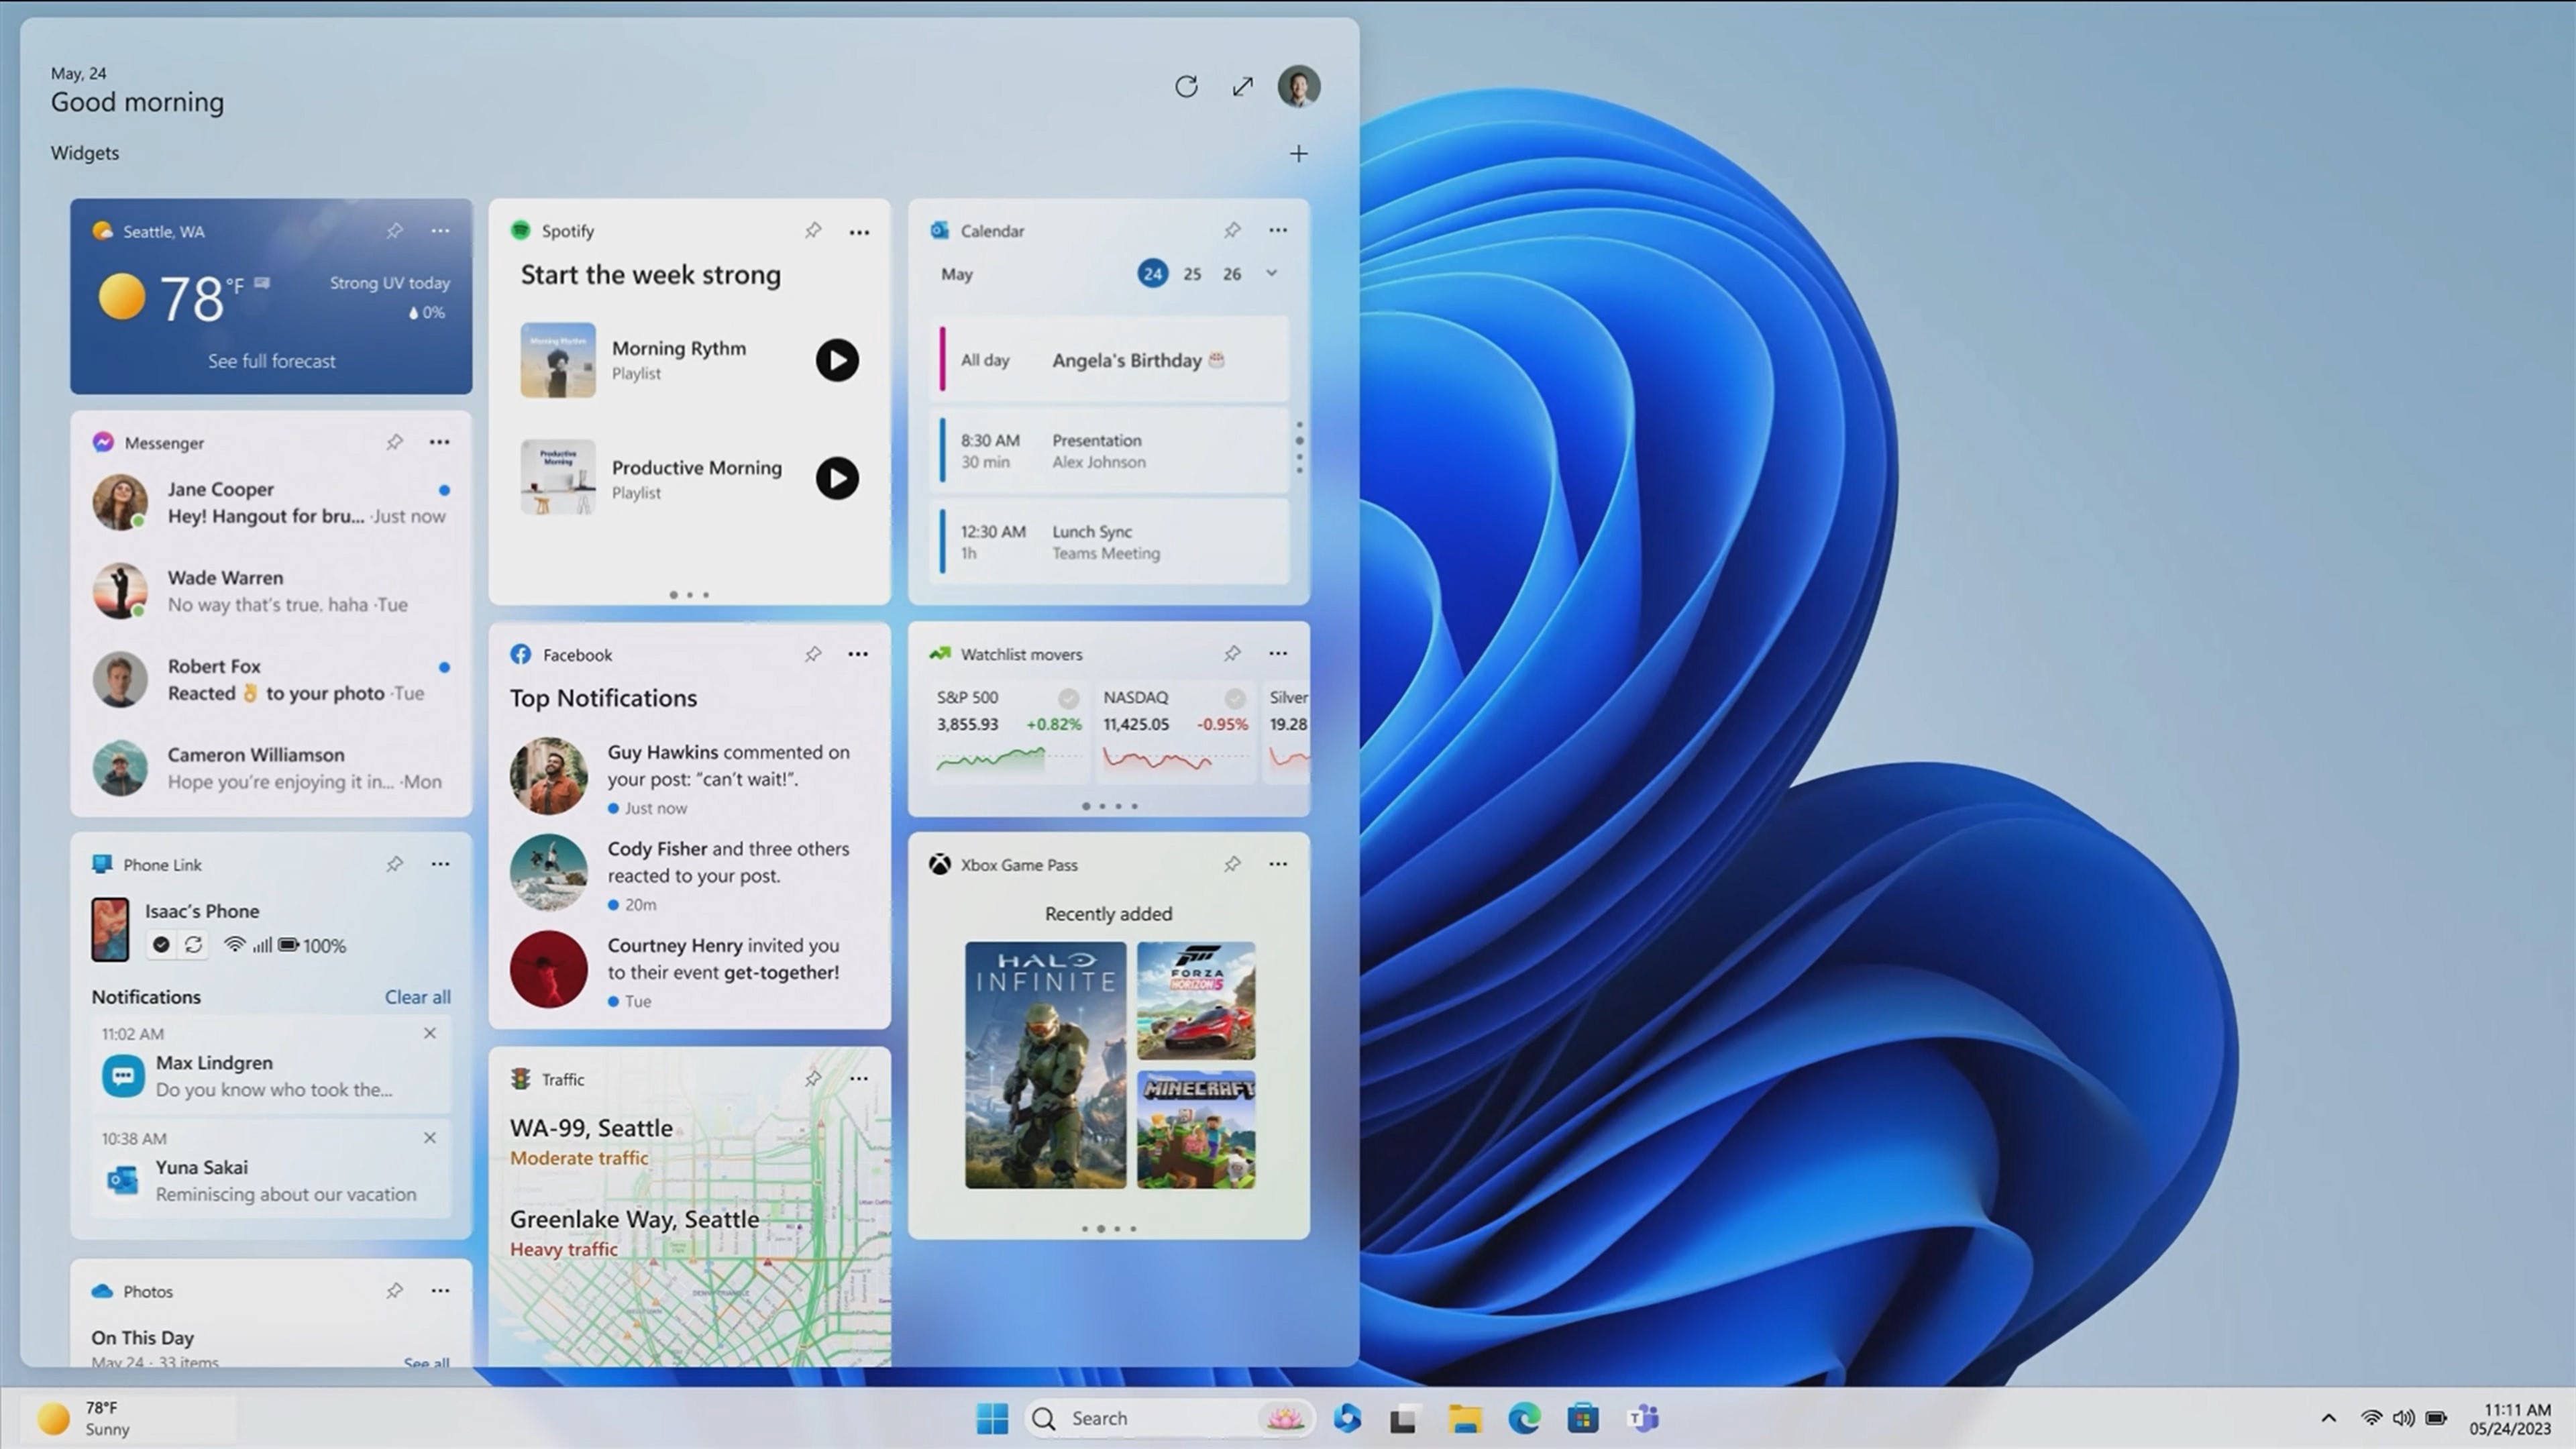
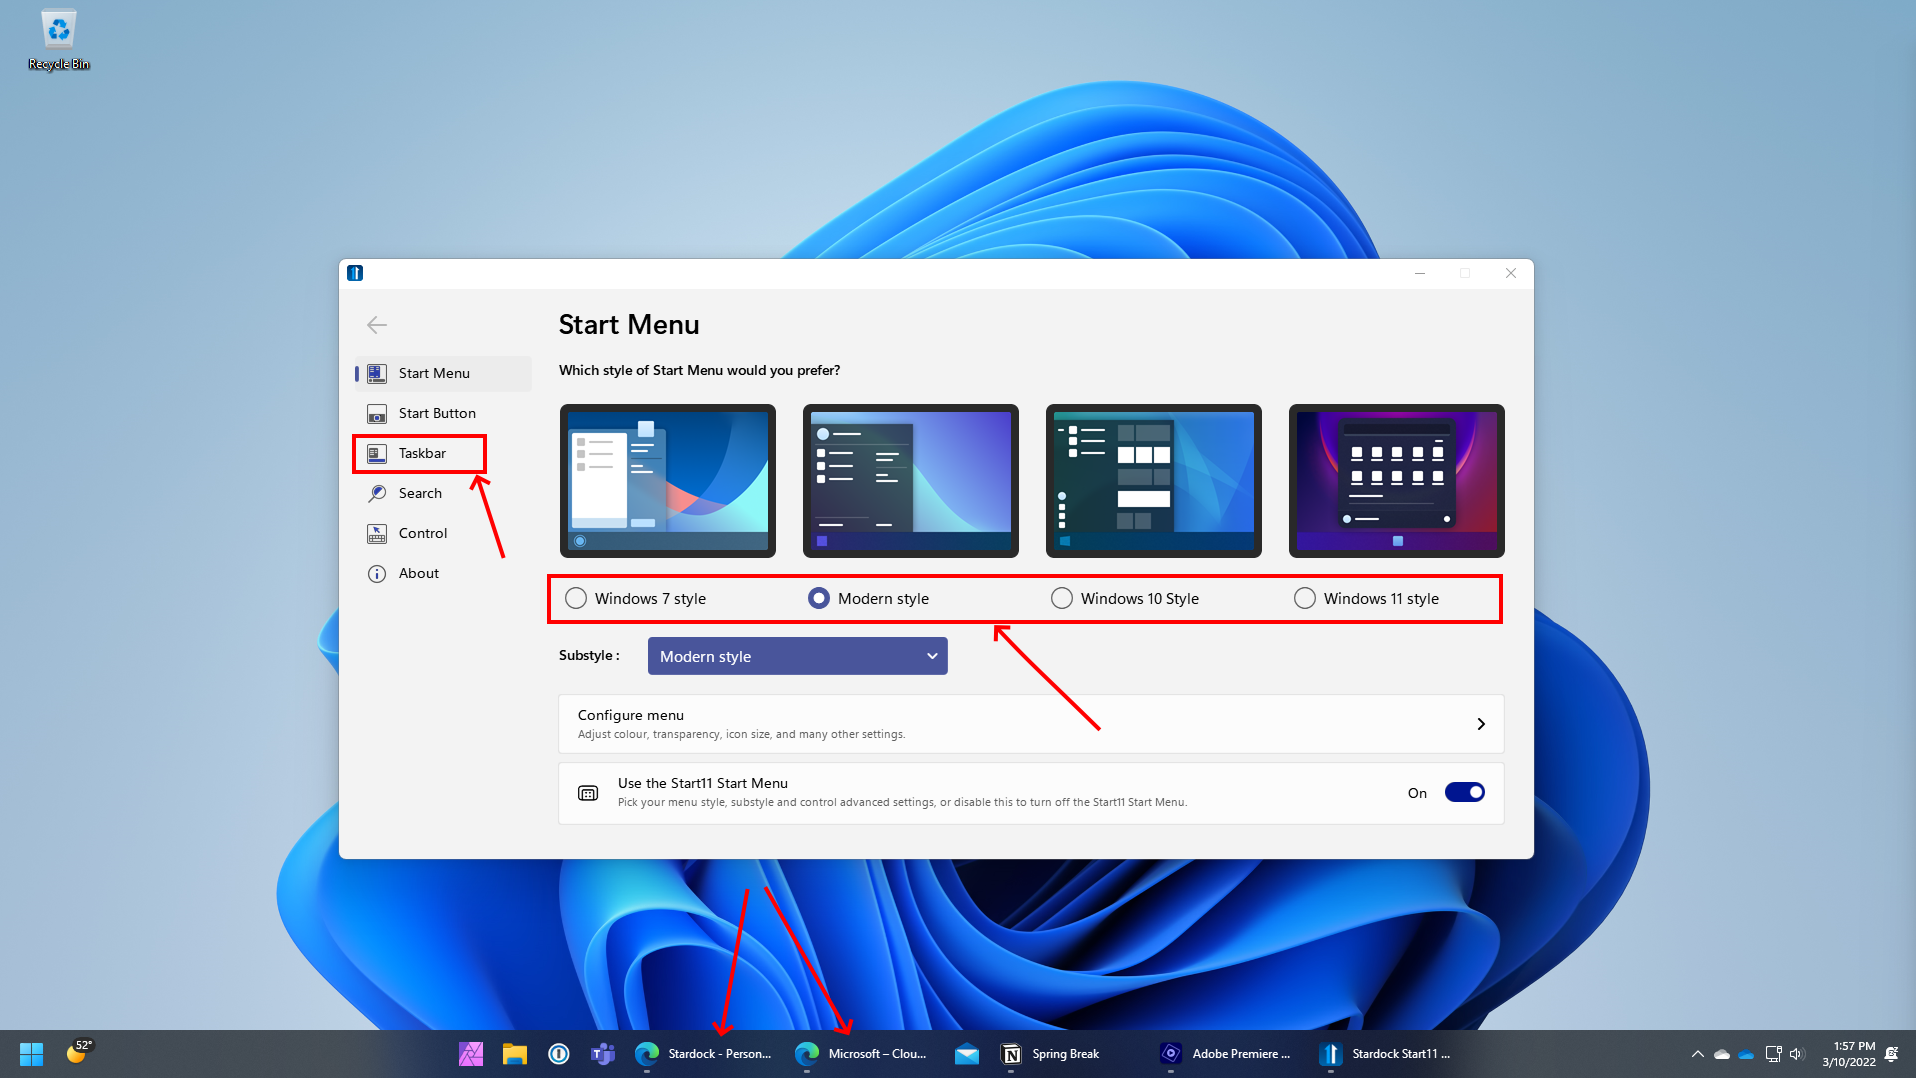
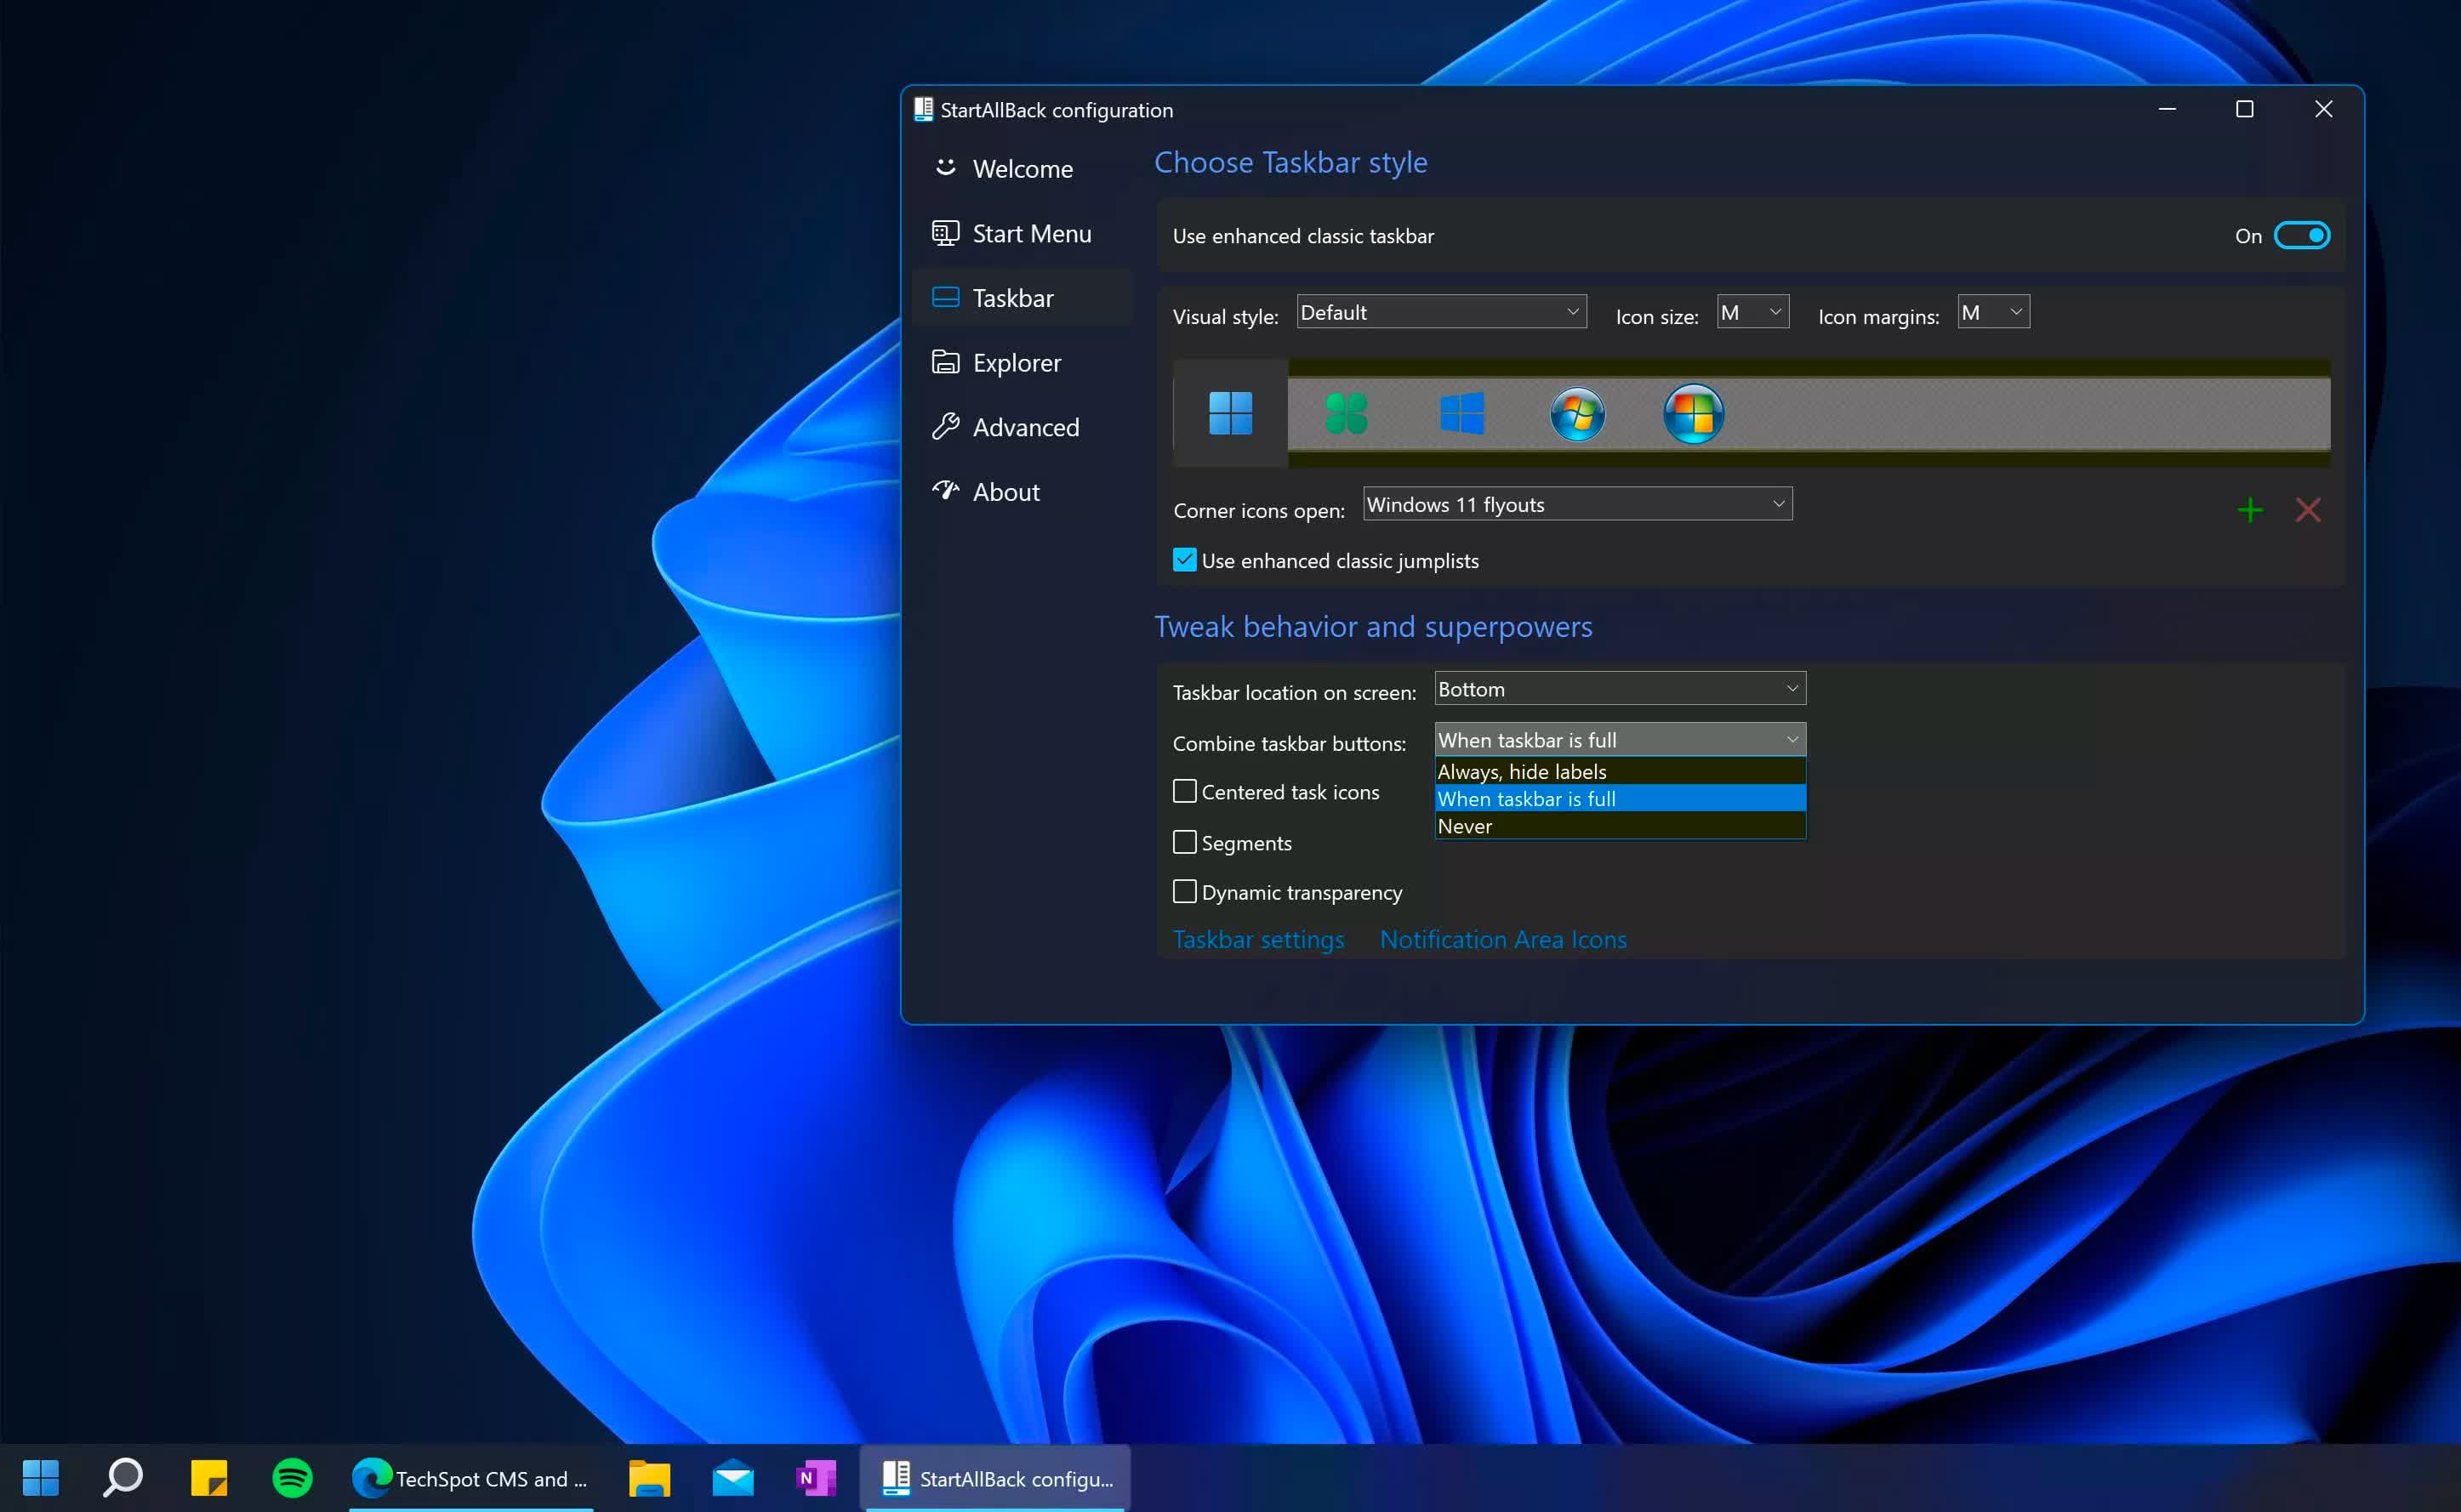
  • Enhanced Taskbar and Start Menu: Updates have refined the taskbar and start menu, offering improved navigation, customization options, and a more intuitive user interface.
  • Improved Focus Modes and Notifications: Updates have focused on enhancing focus modes and notifications, allowing users to better manage distractions and prioritize tasks.
  • Enhanced Accessibility Features: Updates have introduced new accessibility features, making Windows 11 more inclusive and accessible for users with disabilities.
  • Improved Gaming Performance: Updates have optimized gaming performance, leveraging hardware advancements and software enhancements to deliver smoother gameplay and enhanced visual fidelity.
  • Enhanced Security Measures: Updates have strengthened security measures, including improved malware detection, data encryption, and system hardening techniques.

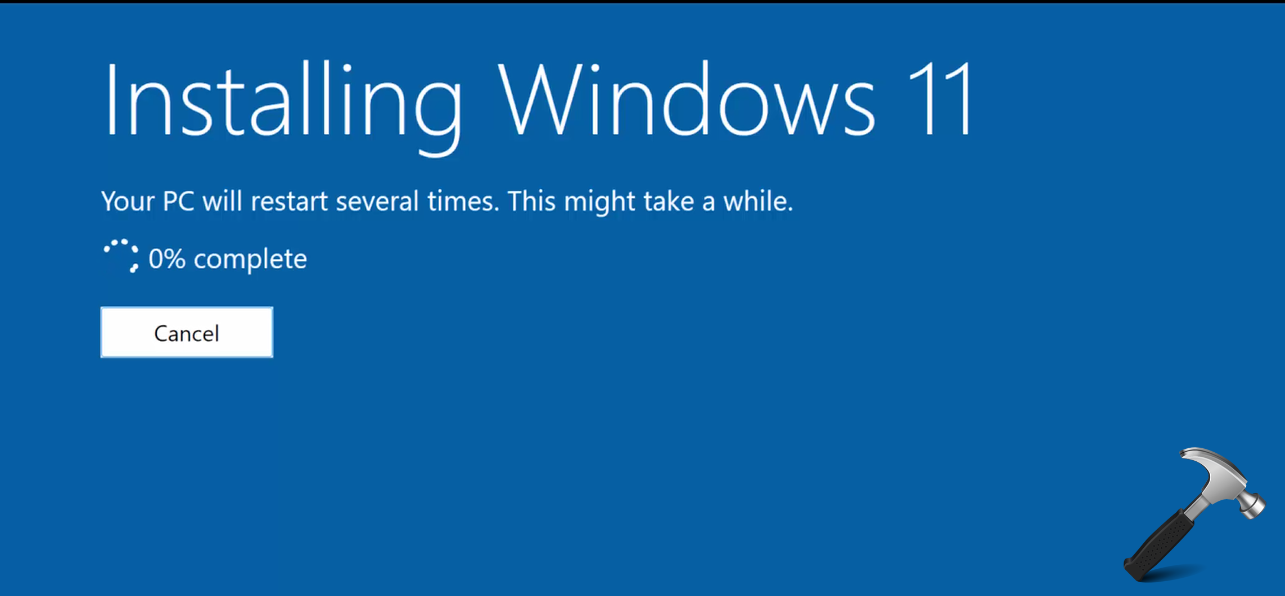
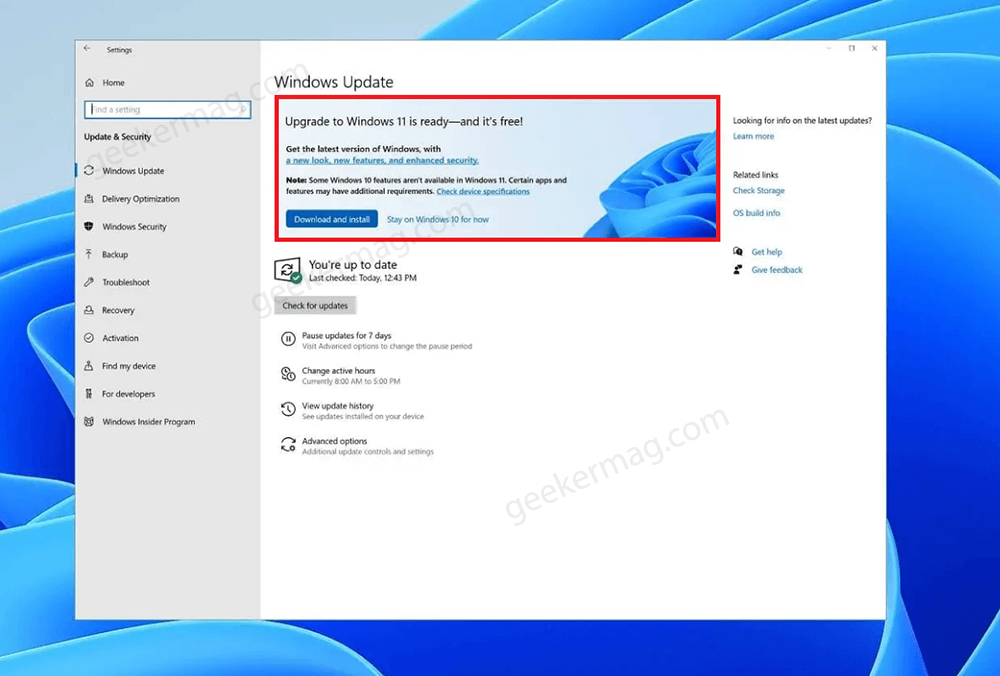
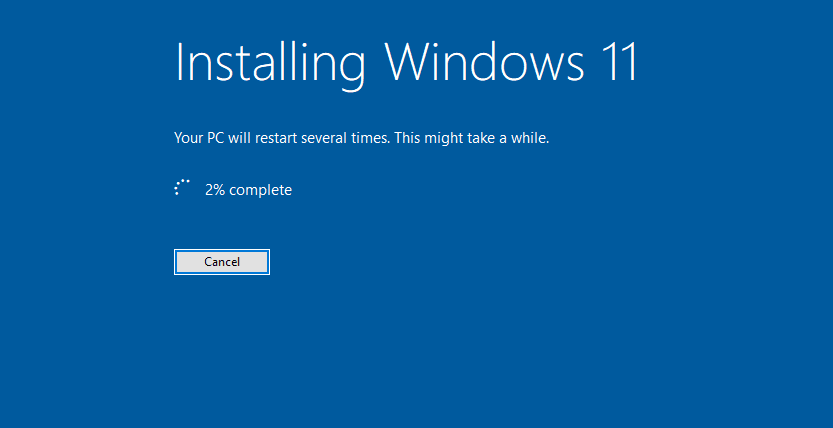
How to Download and Install Updates

Downloading and installing updates on Windows 11 is a straightforward process:

  1. Check for Updates: Go to "Settings" > "Windows Update" and click on "Check for updates."
  2. Download and Install: If updates are available, they will be downloaded and installed automatically.
  3. Restart: After the installation is complete, your computer may require a restart to apply the updates effectively.

Frequently Asked Questions (FAQs)

Q: Are Windows 11 updates free?

A: Yes, all Windows 11 updates are free of charge.

Q: How often are updates released?

A: Updates are typically released on a regular schedule, with major feature updates released twice a year.

Q: Are updates mandatory?

A: While updates are highly recommended for security and performance reasons, they are not mandatory. However, it is strongly advised to install updates as soon as they are available.

Q: Can I choose which updates to install?

A: You can typically choose to install only essential updates, such as security patches, while deferring feature updates. However, it is generally recommended to install all updates for optimal system performance and security.

Q: What if I encounter problems after installing an update?

A: If you experience any issues after installing an update, you can try restarting your computer or reverting to a previous version of Windows. You can also seek support from Microsoft’s website or contact their customer support.

Tips for Managing Windows 11 Updates

  • Schedule Updates: You can schedule updates to install at a convenient time, minimizing disruptions to your workflow.
  • Use Metered Connections: If you are on a metered connection, you can choose to download updates only when connected to Wi-Fi.
  • Check for Updates Regularly: Regularly checking for updates ensures you are always running the latest version of Windows 11.
  • Keep Your Drivers Updated: Updating drivers can also enhance system performance and compatibility with new hardware.
  • Backup Your Data: It is always a good practice to back up your data before installing major updates, just in case something goes wrong.

Conclusion

Windows 11 is an evolving operating system, continuously improving through regular updates. These updates are essential for maintaining security, enhancing performance, and introducing new features. By staying up-to-date with the latest updates, users can enjoy a smoother, more secure, and feature-rich Windows 11 experience. Understanding the benefits and processes associated with updates empowers users to make informed decisions about their system’s maintenance and optimization.

Journey of Windows Phone Application Development  Webxloo Microsoft Loop and the Future of Collaborative Experiences  by Microsoft Design  Microsoft Journey Through the Evolution of Microsoft Operating System
Continuous Prompt Asking to Enter A1B2C3 to Login on Windows 11 Fix Fix Windows 11/10 Keeps Asking To Enter A1B2C3 To Login, Fix Continuous Prompt To Enter A1B2C3 20 Powerful Continuous Improvement Methods for Success
Fix windows 11/10 keeps asking to enter A1B2C3 To Login;Fix continuous prompt to enter A1B2CB#yo Three Months Roadmap To Business Process Continuous Enhancement Microsoft

Closure

Thus, we hope this article has provided valuable insights into Windows 11: A Continuous Journey of Enhancement. We hope you find this article informative and beneficial. See you in our next article!

Disabling The News Feed In Windows 11 Widgets

Disabling the News Feed in Windows 11 Widgets

Introduction

With great pleasure, we will explore the intriguing topic related to Disabling the News Feed in Windows 11 Widgets. Let’s weave interesting information and offer fresh perspectives to the readers.

Disabling the News Feed in Windows 11 Widgets

How to Disable the News and Interests Taskbar Widget in Windows 11

Windows 11’s Widgets panel, designed to provide quick access to information and applications, includes a prominent news feed curated by Microsoft. While this feature aims to keep users informed, some users may prefer to disable it for various reasons, including privacy concerns, a desire for a cleaner interface, or a preference for alternative news sources. This article provides a comprehensive guide on how to remove the news feed from Windows 11 Widgets, exploring its implications and offering alternative solutions.

Understanding the News Feed in Windows 11 Widgets

The news feed, prominently displayed at the top of the Widgets panel, aggregates news stories from various sources, including Microsoft’s own news service and external publications. While this can be a convenient way to stay updated on current events, it comes with potential drawbacks:

  • Privacy Concerns: The news feed may collect data about your interests and browsing habits, potentially impacting your online privacy.
  • Algorithmic Bias: The news feed’s selection of stories can be influenced by algorithms, potentially leading to a biased or limited view of current events.
  • Cluttered Interface: The prominent display of the news feed can make the Widgets panel feel cluttered, especially for users who prefer a cleaner interface.
  • Limited Customization: The news feed’s content is largely pre-determined, offering limited options for personalization.

Methods to Disable the News Feed

While Windows 11 does not offer a direct option to completely disable the news feed, there are several methods to minimize its presence or replace it with alternative content:

1. Hiding the News Feed:

  • Using the Widgets Panel: Clicking the "X" button in the top right corner of the news feed will temporarily hide it. However, it will reappear the next time the Widgets panel is opened.
  • Using the Settings App:
    • Open the "Settings" app by pressing "Windows key + I".
    • Navigate to "Personalization" > "Widgets".
    • Toggle the "Show recommendations and news from Microsoft" option to "Off". This will disable the news feed and replace it with a blank space at the top of the Widgets panel.

2. Replacing the News Feed with Other Content:

  • Adding Custom Widgets: Windows 11 allows users to add various widgets to the panel, including weather, calendar, to-do lists, and more. Adding these widgets can effectively push the news feed further down the panel, minimizing its prominence.
  • Using Third-Party Applications: Several third-party applications, such as "Start11" or "Win11 Widgets," offer alternative widgets and customization options, allowing users to completely replace the default Widgets panel with a more personalized experience.

3. Disabling the Widgets Panel Entirely:

  • Using the Taskbar: Right-click on the taskbar and select "Taskbar settings".
  • Toggle the "Show Widgets button" option to "Off". This will remove the Widgets button from the taskbar, effectively disabling access to the Widgets panel.

Benefits of Disabling the News Feed

Disabling the news feed in Windows 11 Widgets can offer several benefits:

  • Enhanced Privacy: By removing the news feed, users can minimize the amount of data collected about their online activity.
  • Cleaner Interface: Disabling the news feed can create a less cluttered and more visually appealing Widgets panel.
  • Improved Focus: Without the constant stream of news updates, users can focus on the widgets they use most frequently.
  • Personalized Experience: Disabling the news feed allows users to customize the Widgets panel with their preferred content and applications.

FAQs

Q: Will disabling the news feed affect other features of Windows 11?

A: No, disabling the news feed will not affect other features of Windows 11. It only removes the news feed from the Widgets panel.

Q: Can I customize the news feed’s content?

A: While Windows 11 allows users to select preferred news sources, the overall content of the news feed is largely predetermined by Microsoft’s algorithms.

Q: Are there any privacy implications to disabling the news feed?

A: Disabling the news feed can reduce the amount of data collected by Microsoft about your online activity, potentially enhancing your privacy.

Q: Can I use alternative news sources in the Widgets panel?

A: Currently, Windows 11 does not offer a direct option to integrate alternative news sources into the Widgets panel. However, third-party applications may provide such functionality.

Q: Is it possible to completely remove the Widgets panel?

A: While Windows 11 does not offer a direct option to remove the Widgets panel, disabling the Widgets button on the taskbar effectively hides the panel from view.

Tips

  • Experiment with different widgets: Explore the various widgets available in the Windows 11 Widgets panel to find those that best suit your needs and interests.
  • Consider third-party solutions: Explore third-party applications that offer alternative widgets and customization options for a more personalized experience.
  • Regularly review your privacy settings: Ensure that your privacy settings are aligned with your preferences, especially regarding data collection and sharing.
  • Stay informed about updates: Microsoft regularly updates Windows 11, potentially introducing new features or changes to the Widgets panel. Stay informed about these updates to ensure your experience remains optimal.

Conclusion

Disabling the news feed in Windows 11 Widgets is a simple yet effective way to customize the user experience, prioritize privacy, and enhance the overall aesthetic of the Widgets panel. By exploring the various methods outlined in this article, users can effectively minimize or replace the news feed with their preferred content and applications. Ultimately, the decision to disable the news feed rests with individual users based on their preferences and priorities. By understanding the implications and exploring available options, users can tailor their Windows 11 experience to their unique needs and preferences.

How to Disable News in Windows 11 Widgets How to Disable News in Windows 11 Widgets How to Disable News in Windows 11 Widgets - All Things How
How to remove news feed in Windows 11 widgets panel  how to manage widgets in windows 11 - YouTube Turn Off News Feed In Windows 11 Widgets How to disable News in Widgets on Windows 11
Microsoft will FINALLY let users disable the MSN feed in Windows 11's widgets board later this How to remove news from Windows Widgets in Windows 11? - Neowin

Closure

Thus, we hope this article has provided valuable insights into Disabling the News Feed in Windows 11 Widgets. We thank you for taking the time to read this article. See you in our next article!

R Programming On Windows 11: A Comprehensive Guide

R Programming on Windows 11: A Comprehensive Guide

Introduction

With great pleasure, we will explore the intriguing topic related to R Programming on Windows 11: A Comprehensive Guide. Let’s weave interesting information and offer fresh perspectives to the readers.

R Programming on Windows 11: A Comprehensive Guide

How to download R and install RStudio on Windows 11 - TechDecode Tutorials

R, a powerful and versatile programming language, has become a cornerstone for statistical computing, data analysis, and visualization. Its open-source nature, extensive libraries, and active community make it a valuable tool for professionals across diverse fields. This article provides a comprehensive guide to setting up and utilizing R on Windows 11, exploring its capabilities and highlighting its significance in the modern data-driven landscape.

Setting Up R on Windows 11

1. Download and Install R:

  • The primary step involves acquiring the latest version of R from the official Comprehensive R Archive Network (CRAN) website (https://cran.r-project.org/).
  • Select the appropriate installer for Windows 11, ensuring compatibility with your system architecture (32-bit or 64-bit).
  • Run the installer and follow the on-screen instructions to complete the installation.

2. Install RStudio:

  • RStudio is an integrated development environment (IDE) specifically designed for R. It provides a user-friendly interface, facilitating code writing, execution, and visualization.
  • Download the latest RStudio Desktop version from the official website (https://www.rstudio.com/products/rstudio/download/).
  • Choose the installer suitable for your Windows 11 system and proceed with the installation as instructed.

3. Verify Installation:

  • Open RStudio and confirm that it can access the installed R version.
  • Execute a simple command, such as print("Hello, World!"), to verify the setup and ensure R is functioning correctly.

Understanding R Basics

R’s syntax is intuitive and resembles mathematical notation. It primarily operates on objects, which can be vectors, matrices, data frames, lists, and functions.

1. Data Structures:

  • Vectors: One-dimensional arrays containing elements of the same data type.
  • Matrices: Two-dimensional arrays with rows and columns.
  • Data Frames: Tabular data structures with rows representing observations and columns representing variables.
  • Lists: Heterogeneous collections of objects, allowing for different data types within a single structure.
  • Functions: Reusable code blocks that perform specific tasks.

2. Operators:

  • Arithmetic Operators: Perform basic mathematical operations like addition, subtraction, multiplication, and division.
  • Relational Operators: Compare values using operators like == (equal to), != (not equal to), < (less than), > (greater than), <= (less than or equal to), and >= (greater than or equal to).
  • Logical Operators: Combine logical statements using & (AND), | (OR), and ! (NOT).

3. Control Flow:

  • Conditional Statements: Use if, else if, and else statements to execute code based on specific conditions.
  • Loops: Use for and while loops to repeat code blocks multiple times.

Working with Packages

R’s strength lies in its extensive collection of packages, which extend its functionality.

1. Installing Packages:

  • Use the install.packages() function to install packages from CRAN or other repositories.
  • Specify the package name within the function, for example, install.packages("ggplot2").

2. Loading Packages:

  • Once installed, load packages using the library() function.
  • For example, library(ggplot2) loads the ggplot2 package for data visualization.

3. Exploring Packages:

  • Use the help() function to access documentation for a specific package.
  • Use the search() function to list currently loaded packages.

Data Analysis with R

R excels in data analysis, offering a vast array of functions and packages for diverse tasks.

1. Data Import and Manipulation:

  • Import data from various formats like CSV, Excel, and text files using functions like read.csv(), read.xlsx(), and read.table().
  • Manipulate data using functions like subset(), merge(), transform(), and aggregate().

2. Statistical Analysis:

  • Perform descriptive statistics using functions like mean(), median(), sd(), and summary().
  • Conduct hypothesis testing using functions like t.test(), anova(), and chisq.test().
  • Perform regression analysis using functions like lm() and glm().

3. Data Visualization:

  • Create various types of plots using the ggplot2 package, including scatter plots, bar charts, histograms, and box plots.
  • Customize plots with labels, titles, legends, and themes.
  • Explore interactive visualizations with packages like plotly and shiny.

Benefits of R Programming

  • Open-Source and Free: R is freely available for download and use, eliminating licensing costs.
  • Powerful Statistical Capabilities: R provides comprehensive tools for statistical analysis, covering a wide range of techniques.
  • Extensive Libraries: The R community has developed a vast ecosystem of packages, catering to diverse data analysis needs.
  • Active Community: A vibrant and supportive community provides resources, tutorials, and assistance.
  • Visualization Power: R offers powerful visualization capabilities, enabling clear and insightful data representation.
  • Platform Independence: R runs on various operating systems, including Windows, macOS, and Linux.

FAQs

Q: What are the minimum system requirements for running R on Windows 11?

A: R is relatively lightweight and can run on most modern computers. The minimum requirements typically include:

  • Operating System: Windows 11
  • Processor: Intel or AMD processor with at least 2 cores
  • Memory: 4 GB RAM
  • Hard Disk Space: 2 GB free space

Q: Is R suitable for beginners?

A: R is a powerful tool, but its learning curve can be steep for absolute beginners. However, resources like online tutorials, courses, and documentation make it accessible for those willing to invest time and effort.

Q: Can I use R for machine learning?

A: Yes, R has become a popular choice for machine learning tasks. Packages like caret, randomForest, and xgboost provide tools for building and evaluating machine learning models.

Q: What are some popular R packages for data analysis and visualization?

A: Here are some widely used packages:

  • ggplot2: For creating high-quality, customizable plots.
  • dplyr: For data manipulation and transformation.
  • tidyr: For data tidying and reshaping.
  • stringr: For working with strings and text data.
  • lubridate: For handling dates and times.
  • caret: For machine learning model training and evaluation.

Q: How can I get help with R programming?

A: You can find assistance through various channels:

  • R Documentation: Use the help() function or search for documentation online.
  • Stack Overflow: A popular question-and-answer platform for programmers.
  • R Community Forums: Engage with other R users on forums like R-help or R-sig-*** (specific interest groups).

Tips for Learning R

  • Start with Basics: Begin by understanding fundamental concepts like data structures, operators, and control flow.
  • Practice Regularly: Regular coding exercises are crucial for developing proficiency.
  • Explore Packages: Experiment with different packages to expand your knowledge and capabilities.
  • Seek Online Resources: Utilize online tutorials, courses, and documentation to enhance your learning.
  • Join the Community: Connect with other R users through forums, meetups, and online communities.

Conclusion

R programming on Windows 11 empowers users with a versatile tool for data analysis, visualization, and statistical computing. Its open-source nature, extensive libraries, and active community make it a valuable asset for professionals across various domains. By embracing R, individuals can leverage its capabilities to extract insights from data, make informed decisions, and drive innovation in a data-driven world.

R Programming Download For Windows 11 2024 - Win 11 Home Upgrade 2024 Install R on Windows 11  TestingDocs.com Tools of R Programming  A Complete Guide with Best Practices
R programming language - Introduction and basics Data Science with R Programming: A Comprehensive Guide - Brainalyst R Software For Windows 11 2024 - Win 11 Home Upgrade 2024
Mastering Data Manipulation in R Programming: A Comprehensive Guide  R Programming Assignment Help R Programming-Basics - YouTube

Closure

Thus, we hope this article has provided valuable insights into R Programming on Windows 11: A Comprehensive Guide. We thank you for taking the time to read this article. See you in our next article!

Reclaiming Lost Data: Strategies For Recovering Files After A Windows 10 Factory Reset

Reclaiming Lost Data: Strategies for Recovering Files After a Windows 10 Factory Reset

Introduction

With great pleasure, we will explore the intriguing topic related to Reclaiming Lost Data: Strategies for Recovering Files After a Windows 10 Factory Reset. Let’s weave interesting information and offer fresh perspectives to the readers.

Reclaiming Lost Data: Strategies for Recovering Files After a Windows 10 Factory Reset

2 Methods to Recover Data After Factory Reset on Windows 10

A factory reset on a Windows 10 device can be a powerful tool for resolving software issues, removing malware, or preparing a device for sale or donation. However, this process often results in the deletion of all user data, including personal files, applications, and system settings. This can be a daunting prospect for users who have not taken proper precautions to back up their data.

While the factory reset process aims to permanently erase data, the reality is that deleted data is often not entirely removed. Instead, it remains on the device’s storage, marked as available space for new data. This provides a window of opportunity for data recovery tools to potentially retrieve lost files.

Understanding the Importance of Data Recovery

Recovering data after a factory reset can be crucial for several reasons:

  • Preserving Personal Memories: Digital photos, videos, and documents hold irreplaceable memories and are often irreplaceable.
  • Restoring Critical Work Files: Losing important documents, spreadsheets, or presentations can significantly disrupt productivity and potentially lead to financial loss.
  • Recovering Valuable Software Licenses: Certain software programs require license keys that may be difficult to retrieve after a factory reset.
  • Protecting Intellectual Property: Recovering files containing sensitive information, such as business plans or creative projects, is essential for protecting intellectual property.

Factors Influencing Data Recovery Success

The success of data recovery efforts after a factory reset is influenced by several factors:

  • Time Elapsed Since the Reset: The longer the time between the reset and the recovery attempt, the higher the likelihood of data being overwritten by new information, making recovery more difficult.
  • Type of Data Storage: Data stored on a traditional hard disk drive (HDD) is generally easier to recover than data stored on a solid-state drive (SSD), which employs a different technology that can overwrite data more quickly.
  • The Quality of Data Recovery Software: Specialized data recovery software can significantly impact the success rate. Choosing a reputable and effective program is crucial.
  • The Extent of Data Overwriting: If the device has been used extensively after the factory reset, the chances of data recovery decrease as new data overwrites the old data.

Strategies for Data Recovery After a Factory Reset

Several strategies can be employed to attempt data recovery after a factory reset:

1. Data Recovery Software

Specialized data recovery software is the most common approach for retrieving lost files. These programs work by scanning the device’s storage for deleted file signatures and attempting to reconstruct the original data. Some popular data recovery software options include:

  • Recuva: Free and easy-to-use software with a high success rate for recovering various file types.
  • EaseUS Data Recovery Wizard: Offers both free and paid versions with advanced features for recovering lost partitions and more complex data loss scenarios.
  • Stellar Data Recovery: A comprehensive tool with features for recovering data from various storage devices, including hard drives, SSDs, and external drives.
  • R-Studio: A professional-grade data recovery software designed for advanced users with powerful features for recovering complex data loss situations.

2. Data Recovery Services

If attempts to recover data using software fail or if the data loss is complex, seeking professional data recovery services is an option. These services employ specialized equipment and expertise to recover data from damaged or corrupted storage devices.

3. Using Previous Backups

The most reliable method for protecting data is to create regular backups. This ensures that even if data is lost, a copy is available for restoration. Common backup methods include:

  • Cloud Storage: Services like Google Drive, Dropbox, and OneDrive automatically back up files to the cloud, providing easy access to data from any device.
  • External Hard Drives: Physical hard drives offer a reliable way to store backups locally.
  • Networked Attached Storage (NAS): NAS devices provide dedicated storage for backups and can be accessed from multiple devices on a network.
  • System Image Backups: Windows 10 allows creating system image backups, which capture an entire snapshot of the operating system and data, enabling a complete restoration.

Important Considerations for Data Recovery

  • Data Recovery is Not Guaranteed: It’s essential to understand that data recovery is not always possible, especially if the data has been overwritten extensively.
  • Avoid Further Writing to the Drive: After a factory reset, it’s crucial to minimize writing new data to the device to increase the chances of successful data recovery.
  • Professional Help: If you’re unsure about data recovery processes or if the data loss is complex, seeking professional help from a reputable data recovery service is recommended.

Frequently Asked Questions (FAQs)

Q: Can I recover data after a factory reset if I’ve already installed new programs and files?

A: Yes, but the chances of successful recovery decrease as new data is written to the device. It’s advisable to stop using the device after the factory reset and immediately start the data recovery process.

Q: Is data recovery after a factory reset the same as recovering data after a hard drive failure?

A: While both involve recovering lost data, the methods and challenges may differ. Data recovery after a hard drive failure often requires specialized equipment and expertise, while data recovery after a factory reset can be attempted with software.

Q: Can I recover deleted files from the Recycle Bin after a factory reset?

A: The Recycle Bin is emptied during a factory reset, so recovering files from it is not possible.

Q: What if I didn’t back up my data before the factory reset?

A: Data recovery software and professional data recovery services offer potential solutions for retrieving lost files. However, the chances of successful recovery are lower without a backup.

Tips for Data Recovery After a Factory Reset

  • Act Quickly: The sooner you attempt data recovery, the higher the chances of success.
  • Use Reputable Software: Choose reliable and well-reviewed data recovery software.
  • Avoid Overwriting Data: Minimize using the device after the factory reset to prevent data overwriting.
  • Consider Professional Help: If the data loss is complex or you’re unsure about the process, consult a professional data recovery service.
  • Prioritize Data Backup: Implement a regular data backup strategy to prevent future data loss scenarios.

Conclusion

Data recovery after a factory reset can be a challenging but achievable endeavor. Understanding the factors influencing recovery success, utilizing appropriate data recovery tools, and taking proactive steps to protect data through regular backups are essential for reclaiming lost files. While complete data recovery is not guaranteed, employing the right strategies and seeking professional assistance when needed can significantly increase the chances of retrieving valuable information. Remember, data loss can be a significant inconvenience, and taking steps to prevent it through regular backups is crucial for peace of mind and data security.

How to Recover Files After Factory Reset on Windows 10/11 Recover Files after Windows 10 reset - EaseUS How to Recover Files After Factory Reset on Windows OS?
How to Recover Files After Factory Reset Windows 10 (2024) How Can I Recover Files after Factory Reset Windows 10 How to restore windows 10 lost files - skinnystashok
How to Recover Files After Factory Reset Windows 10 (2024) Recover Files After Factory Reset Windows with Two Methods

Closure

Thus, we hope this article has provided valuable insights into Reclaiming Lost Data: Strategies for Recovering Files After a Windows 10 Factory Reset. We hope you find this article informative and beneficial. See you in our next article!

Picasa 3: A Legacy Of Photo Management For Windows 11 (64-bit)

Picasa 3: A Legacy of Photo Management for Windows 11 (64-bit)

Introduction

In this auspicious occasion, we are delighted to delve into the intriguing topic related to Picasa 3: A Legacy of Photo Management for Windows 11 (64-bit). Let’s weave interesting information and offer fresh perspectives to the readers.

Picasa 3: A Legacy of Photo Management for Windows 11 (64-bit)

Picasa 3 Download - Latest (2022) For Windows/Android/Mac

Picasa 3, while discontinued in 2016, remains a popular choice for many users seeking a straightforward and intuitive photo management solution. Despite its age, it remains compatible with Windows 11 (64-bit), offering a valuable alternative to more modern photo editors and organizers. This article explores the features, benefits, and considerations of using Picasa 3 on a contemporary operating system.

Understanding Picasa 3’s Strengths

Picasa 3’s enduring appeal lies in its user-friendly interface and powerful yet accessible features. Unlike many modern photo editing programs that prioritize complex tools and advanced functionality, Picasa 3 prioritizes ease of use and efficiency.

  • Simple Organization: Picasa 3 automatically organizes photos into folders based on date and location, simplifying the process of finding specific images. It also allows users to create custom albums for specific events or themes.
  • Basic Editing Tools: While not a professional-grade editor, Picasa 3 provides essential editing tools for basic adjustments like cropping, resizing, red-eye removal, and color correction. These tools are sufficient for most casual users seeking to enhance their photos without diving into complex settings.
  • Photo Sharing: Picasa 3 integrates seamlessly with popular social media platforms, enabling users to effortlessly share their edited photos with friends and family.
  • Online Storage: Picasa 3 offers a limited amount of free online storage, allowing users to back up their photos and access them from any device.

Compatibility and Installation

While officially discontinued, Picasa 3 remains compatible with Windows 11 (64-bit). However, users need to download the software from third-party sources as Google no longer offers it on their website.

  • Download and Installation: Download the Picasa 3 installer from a reputable source and run the installation process. Ensure your system meets the minimum requirements.
  • Compatibility Check: Picasa 3 is designed for older operating systems and may require compatibility adjustments for smooth operation on Windows 11.
  • Potential Issues: Older software may face compatibility issues with newer operating systems, resulting in glitches or performance problems.

Exploring Picasa 3’s Features

Let’s delve deeper into Picasa 3’s features and explore their relevance in a modern context:

  • Photo Import and Organization: Picasa 3 automatically imports photos from cameras, memory cards, and other storage devices. Its intuitive folder structure based on date and location simplifies photo organization. Users can also create custom albums for specific events or themes, further enhancing organization.
  • Basic Editing Tools: Picasa 3 provides a selection of basic editing tools, including cropping, resizing, red-eye removal, and color correction. These tools are sufficient for casual users who want to enhance their photos without delving into complex settings.
  • Photo Effects and Filters: Picasa 3 includes a variety of built-in effects and filters, allowing users to add creative flair to their photos. These effects range from simple adjustments like sepia toning to more elaborate filters that mimic different film types or artistic styles.
  • Photo Sharing and Social Media Integration: Picasa 3 seamlessly integrates with popular social media platforms like Facebook, Flickr, and Picasa Web Albums. Users can easily share their edited photos with friends and family directly from the program.
  • Online Storage: Picasa 3 offers a limited amount of free online storage, allowing users to back up their photos and access them from any device. This feature is particularly useful for users who want to ensure their photos are safe and accessible even if their computer fails.

The Importance of Picasa 3 in 2023

While Picasa 3 is a discontinued product, it remains relevant for several reasons:

  • Simplicity and Ease of Use: Picasa 3’s intuitive interface and straightforward features make it an excellent choice for users who want a simple and efficient photo management solution.
  • Accessibility: Picasa 3’s basic editing tools and photo sharing features are sufficient for many casual users. It provides a user-friendly entry point into photo editing without overwhelming users with complex tools.
  • Nostalgia and Familiarity: For users who have been using Picasa 3 for years, it offers a sense of familiarity and comfort. The program’s simple design and straightforward features make it easy to navigate and use.

FAQs about Picasa 3 on Windows 11 (64-bit)

Q: Is Picasa 3 compatible with Windows 11 (64-bit)?
A: Yes, Picasa 3 is compatible with Windows 11 (64-bit). However, it is important to download the software from a reputable third-party source as Google no longer offers it on their website.

Q: Will Picasa 3 work seamlessly on Windows 11?
A: While Picasa 3 is compatible, it may require compatibility adjustments for smooth operation on Windows 11. Some features may not function as expected, and you might encounter occasional glitches or performance issues.

Q: Are there any security concerns associated with using Picasa 3?
A: As a discontinued product, Picasa 3 may not receive regular security updates. It is crucial to download the software from a trustworthy source and ensure your antivirus software is up-to-date.

Q: What are the alternatives to Picasa 3?
A: Several alternative photo management and editing solutions are available, including Adobe Photoshop Lightroom, Google Photos, and Apple Photos. These programs offer more advanced features and better compatibility with modern operating systems.

Tips for Using Picasa 3 on Windows 11 (64-bit)

  • Download from a Reputable Source: Ensure you download Picasa 3 from a trusted website to avoid malware or viruses.
  • Check System Requirements: Verify that your Windows 11 system meets the minimum requirements for Picasa 3.
  • Run as Administrator: Running Picasa 3 as administrator can resolve compatibility issues and improve performance.
  • Consider Alternatives: If you encounter significant problems with Picasa 3, consider exploring alternative photo management and editing software.

Conclusion

Picasa 3 remains a viable option for users seeking a simple and straightforward photo management solution. Its user-friendly interface and basic editing tools cater to casual users who want to organize, edit, and share their photos without the complexity of more advanced software. However, it is crucial to be aware of its discontinued status and potential compatibility issues with Windows 11. Ultimately, the decision to use Picasa 3 depends on individual needs and preferences. While modern alternatives offer more advanced features and better compatibility, Picasa 3 continues to hold its own for those who value simplicity and ease of use.

Download Picasa 3 Photo Viewer & Editor For All Windows (2022) Picasa 3 Software - consultnewline picasa 3 - Photo's Manager - YouTube
Picasa 3 Download For Windows 10 - goodsitespot Download picasa 3 - talesnimfa Picasa'yฤฑ (2022) รผcretsiz Windows (11/7/10/8), 32/64-bit indirin
Picasa 3 ัะบะฐั‡ะฐั‚ัŒ ะฑะตัะฟะปะฐั‚ะฝะพ ะฝะฐ ั€ัƒััะบะพะผ Descargas Internet y PC: Descarga Picasa 3

Closure

Thus, we hope this article has provided valuable insights into Picasa 3: A Legacy of Photo Management for Windows 11 (64-bit). We thank you for taking the time to read this article. See you in our next article!

Navigating The Upgrade: Understanding The Removal Of Windows 10 After Installing Windows 11

Navigating the Upgrade: Understanding the Removal of Windows 10 After Installing Windows 11

Introduction

With great pleasure, we will explore the intriguing topic related to Navigating the Upgrade: Understanding the Removal of Windows 10 After Installing Windows 11. Let’s weave interesting information and offer fresh perspectives to the readers.

How to Remove Windows 10 after installing Windows 11 - YouTube

The transition to Windows 11 often involves a decision regarding the fate of the previous Windows 10 installation. While the upgrade process itself might seem straightforward, the question of whether to retain or remove the older operating system requires careful consideration. This article delves into the intricacies of this choice, outlining the advantages and disadvantages of each path, and providing a comprehensive guide to managing the removal process effectively.

Understanding the Decision: Retain or Remove?

The choice between retaining or removing Windows 10 after upgrading to Windows 11 hinges on a variety of factors, including individual needs, system resources, and future upgrade plans.

Retaining Windows 10: A Dual Boot Environment

Opting to retain Windows 10 creates a dual boot environment, allowing users to seamlessly switch between both operating systems. This approach offers several advantages:

  • Reverting to Windows 10: Retaining the previous installation serves as a safety net, enabling users to revert back to Windows 10 if they encounter issues with Windows 11 or simply prefer the older operating system.
  • Dual Operating System Functionality: A dual boot setup allows users to leverage the strengths of both operating systems. For instance, users can utilize Windows 11 for its newer features while relying on Windows 10 for specific applications or tasks that may not be fully compatible with the newer operating system.
  • Testing Windows 11: Retaining Windows 10 allows for a gradual transition, enabling users to test Windows 11 alongside their existing system before committing to a complete switch.

However, retaining Windows 10 also comes with potential drawbacks:

  • Increased Storage Consumption: Maintaining both operating systems consumes significant disk space, potentially leading to storage constraints, especially on systems with limited storage capacity.
  • System Resource Competition: Running two operating systems simultaneously can strain system resources, leading to slower performance and potential instability.
  • Potential for Compatibility Issues: While dual booting allows for flexibility, it also introduces the possibility of compatibility issues between the two operating systems, potentially affecting application performance or system stability.

Removing Windows 10: A Clean Slate

Removing Windows 10 after upgrading to Windows 11 provides a clean slate, freeing up valuable disk space and simplifying system management. This approach offers the following benefits:

  • Increased Storage Space: Removing Windows 10 frees up significant disk space, allowing for greater storage capacity for applications, files, and other data.
  • Optimized Performance: A single operating system environment generally leads to improved system performance due to reduced resource contention and streamlined system processes.
  • Streamlined System Management: Managing a single operating system simplifies system maintenance and troubleshooting, as users only need to focus on the installed version of Windows.

However, removing Windows 10 also carries certain risks:

  • Irreversible Decision: Once removed, Windows 10 cannot be easily recovered without a backup. Users should ensure they have a complete backup of their data before proceeding with the removal.
  • Limited Reverting Options: While Windows 11 offers a rollback feature, it is limited in its scope and may not be suitable for all situations. Removing Windows 10 eliminates this option entirely.
  • Potential for Data Loss: Improper removal of Windows 10 can potentially lead to data loss, especially if the removal process is interrupted or not performed correctly.

The Removal Process: A Step-by-Step Guide

The process of removing Windows 10 after upgrading to Windows 11 involves several steps, each requiring careful attention to ensure a smooth and successful removal.

  1. Backup Data: Before proceeding with the removal, it is crucial to create a complete backup of all important data. This backup should include all personal files, applications, and system settings.
  2. Disable BitLocker: If BitLocker encryption is enabled on the drive containing Windows 10, it must be disabled before proceeding with the removal process. Failure to do so can result in data loss.
  3. Prepare the Windows 11 Installation: Ensure that Windows 11 is installed and functioning properly. It is advisable to perform any necessary updates and ensure all critical applications are installed.
  4. Access Recovery Options: Open the Settings app in Windows 11 and navigate to "System" > "Recovery." Click "Advanced Startup" and then "Restart now."
  5. Troubleshoot Options: On the recovery screen, select "Troubleshoot" > "Advanced options" > "Command Prompt."
  6. Clean Installation: In the command prompt window, type diskpart and press Enter. Then, type list disk to list all connected disks. Identify the disk containing Windows 10 and note its number. Type select disk <disk number> to select the disk.
  7. Clean the Partition: Type clean to erase all data on the disk. This step is irreversible and will permanently delete all data on the selected disk.
  8. Create a New Partition: Type create partition primary to create a new primary partition on the disk. This partition will be used to install Windows 11.
  9. Format the Partition: Type format fs=ntfs quick to format the newly created partition as NTFS. This process will prepare the partition for Windows 11 installation.
  10. Assign a Drive Letter: Type assign letter=<drive letter> to assign a drive letter to the newly formatted partition. This letter will be used to access the partition during the Windows 11 installation.
  11. Exit DiskPart: Type exit to exit DiskPart.
  12. Exit Command Prompt: Close the command prompt window.
  13. Install Windows 11: Restart the computer and start the Windows 11 installation process. The installation will proceed normally, using the newly created partition as the target installation location.

FAQs: Addressing Common Questions

Q: Can I remove Windows 10 after upgrading to Windows 11 without reinstalling Windows 11?

A: No, removing Windows 10 after upgrading to Windows 11 requires a clean installation of Windows 11. This is because the upgrade process modifies the existing Windows 10 installation, making it incompatible with a direct removal.

Q: Is it safe to remove Windows 10 after upgrading to Windows 11?

A: Removing Windows 10 after upgrading to Windows 11 is generally safe if performed correctly. However, it is crucial to follow the steps outlined above and ensure a complete backup of all important data before proceeding.

Q: What happens to my data when I remove Windows 10?

A: Removing Windows 10 will delete all data located on the partition containing the Windows 10 installation. This includes all applications, settings, and personal files. It is essential to have a complete backup of all important data before proceeding with the removal process.

Q: Can I revert back to Windows 10 after removing it?

A: Once Windows 10 is removed, it cannot be easily recovered without a backup. However, users can create a system image backup before removing Windows 10, which can be used to restore the system to its previous state.

Tips for Success: Maximizing the Removal Process

  • Thorough Backup: Ensure a complete backup of all critical data before proceeding with the removal process.
  • Verify Disk Space: Check available disk space before removing Windows 10. Ensure sufficient space is available for the Windows 11 installation and other data.
  • System Updates: Keep both Windows 10 and Windows 11 updated with the latest patches and drivers to ensure compatibility and stability.
  • Test Windows 11: Thoroughly test Windows 11 before removing Windows 10 to ensure that all necessary applications and drivers are working correctly.

Conclusion: A Strategic Choice for System Optimization

The decision to retain or remove Windows 10 after upgrading to Windows 11 is a strategic one that requires careful consideration. While retaining Windows 10 offers flexibility and a safety net, it comes with potential drawbacks in terms of resource consumption and system complexity. Removing Windows 10, on the other hand, provides a clean slate, optimizing system performance and streamlining management. Ultimately, the best approach depends on individual needs, system resources, and future upgrade plans. By understanding the implications of each option and following the provided guidance, users can navigate the removal process effectively and ensure a smooth transition to Windows 11.

How do I remove Windows 10 after installing Windows 11? โ€“ Depot Catalog Remove Windows 10 After Windows 11 Upgrade - IMAGESEE How to Upgrade Or Downgrade To Any Windows 10/11 Version - Other Setups / Troubleshooting - Howl
How to perform repair upgrade in Windows 11 - Pirated Land Fix Windows 11 Update Disappeared Or Not Showing On Windows 10 Pc  itechguide How To Return To Windows 10 After Installing Windows 11 On A PC - Bullfrag
How to Download, Install, and Setup Windows 11 (2 Cases) How to Roll Back to Windows 10 After Installing Windows 11

Closure

Thus, we hope this article has provided valuable insights into Navigating the Upgrade: Understanding the Removal of Windows 10 After Installing Windows 11. We hope you find this article informative and beneficial. See you in our next article!

The Power Of Proximity: Exploring Windows 10’s Nearby Sharing Feature

The Power of Proximity: Exploring Windows 10’s Nearby Sharing Feature

Introduction

In this auspicious occasion, we are delighted to delve into the intriguing topic related to The Power of Proximity: Exploring Windows 10’s Nearby Sharing Feature. Let’s weave interesting information and offer fresh perspectives to the readers.

The Power of Proximity: Exploring Windows 10’s Nearby Sharing Feature

How to Use Nearby Sharing in Windows 10

In the digital landscape, seamlessly sharing content between devices has become a fundamental necessity. Windows 10, recognizing this need, introduced a robust feature known as "Nearby Sharing," enabling users to effortlessly transfer files, links, and even entire folders between compatible devices within close proximity.

This feature, built upon the foundation of Bluetooth and Wi-Fi Direct, allows for a secure and convenient method of sharing data without relying on the internet or cloud services. This empowers users to share content privately and quickly, eliminating the need for cumbersome cable connections or complex file-sharing platforms.

Understanding the Mechanics of Nearby Sharing

At its core, Nearby Sharing operates on the principle of proximity and peer-to-peer communication. When enabled, devices within a close range, typically within a few meters, can discover each other and initiate file transfers. The process leverages Bluetooth for initial device discovery, followed by a secure Wi-Fi Direct connection for the actual data transfer.

To ensure data security, Nearby Sharing utilizes encryption, ensuring that shared content remains protected from unauthorized access during transmission. This encryption, coupled with the proximity requirement, significantly enhances data security compared to traditional methods like public Wi-Fi file sharing.

The Advantages of Using Nearby Sharing

The benefits of Nearby Sharing extend beyond its ease of use. Here are some key advantages:

  • Simplicity and Speed: The intuitive interface and quick transfer speeds make it a user-friendly solution for sharing various content.
  • Security and Privacy: Data transfers are encrypted, ensuring privacy and preventing unauthorized access.
  • Offline Capability: Sharing doesn’t rely on the internet, making it ideal for situations with limited connectivity.
  • Versatility: It supports a wide range of content, including files, links, and folders.
  • Device Compatibility: Works seamlessly across various Windows 10 devices, including PCs, tablets, and smartphones.

Setting Up and Using Nearby Sharing

Enabling Nearby Sharing is a straightforward process:

  1. Access Settings: Navigate to "Settings" on your Windows 10 device.
  2. Locate Sharing Options: Go to "System" > "Shared experiences" and select "Nearby sharing."
  3. Enable Nearby Sharing: Toggle the switch to "On" and choose your preferred sharing settings.
  4. Discover Devices: Ensure both devices have Nearby Sharing enabled, and they will automatically discover each other within range.
  5. Initiate Sharing: Select the content you wish to share, and choose the receiving device from the list of available options.

Exploring the Diverse Applications of Nearby Sharing

Nearby Sharing finds its application in a wide array of scenarios, making it a versatile tool for both personal and professional use.

  • Collaborative Work: Share documents, presentations, or project files seamlessly with colleagues in a meeting or workspace.
  • Sharing Memories: Quickly transfer photos and videos captured on your smartphone to your PC for editing and storage.
  • Educational Purposes: Share educational materials like notes, presentations, or research papers between students and teachers.
  • Sharing Creative Projects: Collaborate on design projects, music production, or other creative endeavors by sharing files and assets.
  • Transferring Large Files: Share large files like movies, music, or software without the need for cloud storage or external drives.

Addressing Common Queries Regarding Nearby Sharing

Q: What devices are compatible with Nearby Sharing?

A: Nearby Sharing is compatible with Windows 10 devices, including PCs, laptops, tablets, and smartphones.

Q: How secure is Nearby Sharing?

A: Nearby Sharing utilizes encryption to protect data during transfer, ensuring privacy and security.

Q: Can I share files with devices other than Windows 10?

A: Currently, Nearby Sharing is primarily designed for sharing between Windows 10 devices.

Q: What is the maximum file size I can share via Nearby Sharing?

A: There is no defined maximum file size limit for Nearby Sharing. However, the transfer speed and time may vary depending on the file size and device capabilities.

Q: How can I troubleshoot Nearby Sharing issues?

A: If you encounter issues with Nearby Sharing, ensure both devices have Bluetooth and Wi-Fi Direct enabled, and check for software updates. You can also try restarting both devices and ensuring they are within range.

Enhancing Your Nearby Sharing Experience

Tips to Optimize Nearby Sharing:

  • Maintain Proximity: Ensure both devices are within close range for optimal performance.
  • Enable Bluetooth and Wi-Fi Direct: Ensure both devices have these features activated.
  • Update Software: Keep both devices updated with the latest software versions for improved compatibility and security.
  • Check for Network Interference: Avoid sharing in areas with strong Wi-Fi signals or other potential interference.
  • Monitor Battery Levels: Ensure both devices have sufficient battery power for successful transfers.

Conclusion: A Modern Approach to Sharing

Windows 10’s Nearby Sharing feature revolutionizes the way we share content, offering a simple, secure, and efficient method for exchanging files, links, and folders between compatible devices. Its versatility, privacy-focused approach, and offline capabilities make it a powerful tool for personal, professional, and educational use. As technology continues to evolve, Nearby Sharing remains a testament to the power of proximity and the importance of seamless data transfer in today’s interconnected world.

How to Use Nearby Sharing in Windows 10 How Windows 10's Near Share feature wirelessly beams files to nearby PCs  PCWorld How to Use Nearby Sharing on Windows 10
How to Use Nearby Sharing on Windows 10 How to Enable Nearby Sharing in Windows 10 PC How to use Nearby Sharing feature on Windows 10
How Windows 10's Near Share feature wirelessly beams files to nearby PCs  PCWorld Use Nearby sharing in Windows 10  HUAWEI Support Global

Closure

Thus, we hope this article has provided valuable insights into The Power of Proximity: Exploring Windows 10’s Nearby Sharing Feature. We thank you for taking the time to read this article. See you in our next article!

Seamless Sharing: Exploring The Advantages Of Nearby Share In Windows 11

Seamless Sharing: Exploring the Advantages of Nearby Share in Windows 11

Introduction

In this auspicious occasion, we are delighted to delve into the intriguing topic related to Seamless Sharing: Exploring the Advantages of Nearby Share in Windows 11. Let’s weave interesting information and offer fresh perspectives to the readers.

Seamless Sharing: Exploring the Advantages of Nearby Share in Windows 11

How To Use Nearby Sharing On Windows 11  digisrun

In today’s interconnected world, the need for efficient and convenient file sharing has become paramount. Windows 11, with its innovative features, introduces a new paradigm for data transfer: Nearby Share. This feature, inspired by similar functionalities on other platforms, allows users to share files and content effortlessly between nearby Windows 11 devices. This article delves into the intricacies of Nearby Share, exploring its benefits, functionality, and potential applications.

Unlocking the Potential of Nearby Share

At its core, Nearby Share is a technology that simplifies the process of transferring files between devices. It leverages Bluetooth and Wi-Fi to establish a secure connection between two compatible devices, enabling the transfer of various data types, including documents, images, videos, and even web links. Unlike traditional methods that often involve cumbersome steps like email attachments or cloud storage services, Nearby Share offers a streamlined and intuitive experience.

The Advantages of Nearby Share:

  • Simplicity: The user interface is designed for ease of use, requiring minimal configuration or technical expertise.
  • Speed: Transfers are significantly faster compared to traditional methods, especially for larger files.
  • Security: Nearby Share utilizes Bluetooth and Wi-Fi, both of which offer robust security protocols, ensuring data privacy during transfers.
  • Versatility: The technology supports a wide range of file types, catering to diverse sharing needs.
  • Convenience: It eliminates the need for external storage devices or cloud services, providing a direct and efficient sharing experience.

Understanding the Mechanics of Nearby Share

To effectively utilize Nearby Share, a basic understanding of its underlying mechanisms is essential. The process involves the following steps:

  1. Enabling Nearby Share: On a Windows 11 device, Nearby Share can be enabled through the "Bluetooth and other devices" settings.
  2. Device Visibility: Once enabled, the device becomes discoverable to other Nearby Share-enabled devices within range.
  3. Initiating a Transfer: The user selects the file or content they wish to share and chooses the target device from the Nearby Share interface.
  4. Confirmation and Transfer: The recipient device receives a notification requesting permission to accept the transfer. Upon confirmation, the data is securely transmitted.

Exploring the Diverse Applications of Nearby Share

The versatility of Nearby Share extends beyond basic file sharing, offering a range of potential applications in various scenarios:

  • Collaboration: Teams can easily share documents, presentations, and other project-related files for efficient collaboration.
  • Personal Sharing: Friends and family can quickly share photos, videos, and other personal content without the need for external services.
  • Sharing with Printers: Nearby Share enables the seamless transfer of documents to compatible printers within range, simplifying printing tasks.
  • Content Transfer: Transferring content between devices during device upgrades or replacements becomes effortless with Nearby Share.
  • Quick Data Transfer: Sharing small files like web links, contact information, or notes becomes instantaneous, eliminating the need for manual typing or copying.

Addressing Common Concerns and FAQs

While Nearby Share offers a compelling solution for data transfer, certain questions and concerns may arise. Here, we address some frequently asked questions:

Q: What is the range of Nearby Share?

A: The range of Nearby Share is typically limited to the Bluetooth range, which is approximately 30 feet. However, the actual range may vary depending on factors like environmental conditions and device specifications.

Q: Can I share files with devices that do not support Nearby Share?

A: Currently, Nearby Share is primarily designed for communication between Windows 11 devices. Sharing with devices running other operating systems is not supported.

Q: Is Nearby Share secure?

A: Nearby Share utilizes Bluetooth and Wi-Fi, which both incorporate robust security protocols to protect data during transmission. However, it is essential to be aware of potential risks associated with any wireless technology and to exercise caution when sharing sensitive information.

Q: Can I limit the visibility of my device on Nearby Share?

A: Yes, users can customize the visibility of their devices on Nearby Share. They can choose to make their device visible to everyone, only to contacts, or to specific devices.

Q: What happens if the recipient device does not accept the transfer?

A: If the recipient device does not accept the transfer, the transfer will be canceled, and the data will not be shared.

Q: Can I use Nearby Share to share files with devices on different networks?

A: Currently, Nearby Share requires both devices to be on the same network for successful transfers.

Optimizing Nearby Share for Enhanced Efficiency

To ensure optimal performance and efficiency when using Nearby Share, consider the following tips:

  • Ensure Device Compatibility: Verify that both devices support Nearby Share and are running the latest software updates.
  • Optimize Bluetooth and Wi-Fi Connectivity: Ensure strong Bluetooth and Wi-Fi signals for reliable transfers.
  • Limit Background Activities: Minimize other network-intensive activities on both devices during transfers to avoid potential interference.
  • Manage Device Visibility: Carefully configure device visibility settings to ensure data is shared only with authorized devices.
  • Monitor Transfer Progress: Keep an eye on the transfer progress to ensure successful completion and troubleshoot any issues promptly.

Conclusion: Embracing the Future of File Sharing

Nearby Share in Windows 11 represents a significant advancement in file sharing technology, offering a seamless, efficient, and secure method for transferring data between compatible devices. Its user-friendly interface, versatility, and speed make it a valuable tool for individuals, professionals, and teams alike. By understanding its capabilities and implementing best practices, users can harness the full potential of Nearby Share to streamline data transfer and enhance productivity in a connected world. As technology continues to evolve, we can expect further improvements and refinements to Nearby Share, solidifying its position as a cornerstone of modern file sharing solutions.

Seamless File Sharing: Google Nearby Share for Windows How to Use Nearby Sharing on Windows 11?  Gear Up Windows How To Use Nearby Sharing On Windows 11  digisrun
How to Use Nearby Sharing on Windows 11?  Gear Up Windows What Is Nearby Sharing And How To Enable It On Windows 11  yorketech Nearby share for pc  nearby share windows 11  android to pc file transfer  how to use nearby
How To Use Nearby Share In Windows 11_best Methods - Rayabaan How To Use Nearby Sharing On Windows 11  midargus

Closure

Thus, we hope this article has provided valuable insights into Seamless Sharing: Exploring the Advantages of Nearby Share in Windows 11. We hope you find this article informative and beneficial. See you in our next article!

Unlocking The Network: Understanding Ports In Windows 10

Unlocking the Network: Understanding Ports in Windows 10

Introduction

In this auspicious occasion, we are delighted to delve into the intriguing topic related to Unlocking the Network: Understanding Ports in Windows 10. Let’s weave interesting information and offer fresh perspectives to the readers.

Unlocking the Network: Understanding Ports in Windows 10

Unlocking the Power of Ports: A Guide to Understanding and Forwarding Port Connections - C01E12

The intricate web of communication that powers our digital world relies heavily on a concept known as ports. These virtual gateways, acting as entry points within a computer’s network interface, facilitate the flow of data between applications and external services. In the context of Windows 10, understanding ports becomes crucial for optimizing network performance, ensuring security, and troubleshooting potential issues.

Defining Ports: A Gateway to Communication

Imagine a bustling airport with numerous gates, each designated for specific airlines and destinations. Ports function similarly, acting as designated channels within a computer’s network interface. Each port is assigned a unique number, ranging from 0 to 65,535, allowing applications to communicate with specific services or programs on other devices.

For instance, a web browser uses port 80 to connect to web servers, while email clients utilize port 25 to send and receive messages. This system ensures organized traffic flow, preventing congestion and facilitating efficient communication.

Types of Ports: A Categorical Overview

Ports are broadly categorized into two types:

  • Well-Known Ports (0-1023): These ports are reserved for standard system services and applications, often assigned by the Internet Assigned Numbers Authority (IANA). Examples include port 21 for FTP (File Transfer Protocol), port 22 for SSH (Secure Shell), and port 80 for HTTP (Hypertext Transfer Protocol).
  • Registered Ports (1024-49151): These ports are allocated for user-defined applications and services. Developers can assign specific ports to their applications, allowing for customized communication protocols.

Windows 10 Port Management: A User’s Guide

Windows 10 provides a robust mechanism for managing ports, enabling users to configure, monitor, and troubleshoot network connections. These tools include:

  • Network and Sharing Center: This built-in tool provides a comprehensive overview of network connections, including active ports and their associated services. Users can access this tool by navigating to "Settings" -> "Network & Internet" -> "Network and Sharing Center."
  • Windows Firewall: This essential security feature allows users to control incoming and outgoing network traffic. By configuring specific ports, users can restrict access to certain applications or services, enhancing system security.
  • Command Prompt (CMD): This powerful tool allows for advanced port management using commands such as "netstat" and "netsh." These commands provide detailed information about active connections, listening ports, and network configuration.
  • Third-Party Tools: Various third-party applications offer enhanced port management capabilities, providing advanced monitoring, analysis, and configuration options.

The Importance of Port Management: A Multifaceted Perspective

Effective port management in Windows 10 offers several key benefits:

  • Enhanced Security: By controlling port access, users can minimize the risk of unauthorized connections and potential security breaches. This is crucial for protecting sensitive data and preventing malware infiltration.
  • Optimized Performance: By prioritizing specific ports for critical applications, users can ensure smooth and efficient data transfer, minimizing network latency and improving overall system performance.
  • Troubleshooting Network Issues: Identifying and analyzing port usage patterns can help pinpoint and resolve network connectivity problems, leading to quicker troubleshooting and resolution.
  • Customization and Flexibility: Managing ports allows users to tailor network settings to specific needs, enabling custom configurations for applications and services.

Frequently Asked Questions: Unraveling Port Management Mysteries

1. How do I find out which ports are in use on my Windows 10 computer?

To determine which ports are in use, you can utilize the "netstat" command in Command Prompt. This command displays a list of active network connections, including the ports involved. For instance, the command "netstat -a" will list all active connections and listening ports.

2. Can I block specific ports in Windows 10?

Yes, you can block specific ports using the Windows Firewall. Navigate to "Control Panel" -> "System and Security" -> "Windows Firewall" and select "Advanced Settings." From there, you can create inbound or outbound rules to block specific ports.

3. What are the risks associated with leaving ports open?

Leaving ports open without proper security measures can expose your system to various risks, including:

  • Unauthorized Access: Hackers can exploit open ports to gain access to your computer and steal sensitive data.
  • Malware Infections: Malicious software can exploit open ports to infiltrate your system and cause damage.
  • DoS Attacks: Attackers can overload your system with requests, disrupting network connectivity and causing system instability.

4. How can I determine the purpose of a specific port?

You can use online resources like IANA’s Port Number Registry to find information about the purpose and associated applications of specific ports.

5. What are some common port numbers and their associated services?

  • Port 20/21: FTP (File Transfer Protocol)
  • Port 22: SSH (Secure Shell)
  • Port 25: SMTP (Simple Mail Transfer Protocol)
  • Port 53: DNS (Domain Name System)
  • Port 80: HTTP (Hypertext Transfer Protocol)
  • Port 443: HTTPS (Hypertext Transfer Protocol Secure)
  • Port 3389: RDP (Remote Desktop Protocol)

Tips for Effective Port Management: A Practical Guide

  • Keep Only Necessary Ports Open: Minimize the number of open ports to reduce security risks and improve system performance.
  • Utilize Firewall Rules: Configure firewall rules to block unwanted traffic and restrict access to specific ports.
  • Use Strong Passwords: Protect your system with strong passwords and two-factor authentication to prevent unauthorized access.
  • Keep Software Updated: Regularly update your operating system and applications to patch security vulnerabilities and improve system resilience.
  • Monitor Port Activity: Use monitoring tools to track port usage patterns and identify potential anomalies.
  • Consult Online Resources: Utilize online resources like IANA’s Port Number Registry and security forums to learn about port management best practices.

Conclusion: Navigating the Network with Confidence

Understanding ports in Windows 10 is crucial for managing network connections, optimizing system performance, and ensuring security. By effectively managing ports, users can navigate the complex world of network communication with confidence, minimizing security risks and maximizing system efficiency. Remember to implement sound port management practices, leverage available tools, and stay informed about potential threats to maintain a secure and efficient network environment.

What is a Port? Types of Ports in Computer Networking  Modem Friendly How to Check What Ports are Being used in Windows 10/8/7 Computer Ports - Name and Location Of Connections On Computer
Open Port in Windows Firewall in Windows 10 Unlocking Containerized Applications: A Comprehensive Guide To Port Mapping In Docker - Best Map How To Open Firewall Ports In Windows 10  Tom's Hardware
The all you need to know about all computer ports and connectors How to Unlock Usb Port in Windows 10 โ€“ UnBrick.ID

Closure

Thus, we hope this article has provided valuable insights into Unlocking the Network: Understanding Ports in Windows 10. We appreciate your attention to our article. See you in our next article!

Navigating The Transition: From Windows 11 To Windows 10

Navigating the Transition: From Windows 11 to Windows 10

Introduction

With enthusiasm, let’s navigate through the intriguing topic related to Navigating the Transition: From Windows 11 to Windows 10. Let’s weave interesting information and offer fresh perspectives to the readers.

How To Change From Windows 11 To Windows 10  Images and Photos finder

While Windows 11 boasts a fresh aesthetic and new features, some users may find themselves drawn back to the familiarity and stability of Windows 10. This shift, while potentially counterintuitive, can be motivated by various factors, including hardware limitations, software compatibility issues, or simply a preference for the previous operating system’s design and functionality.

This article provides a comprehensive guide for users considering a return to Windows 10, outlining the process, potential benefits, and key considerations.

Understanding the Motivations for Transitioning

The decision to move from Windows 11 to Windows 10 is often driven by a combination of factors:

  • Hardware Compatibility: Windows 11 has stricter system requirements, potentially excluding older computers. Users with systems that do not meet these requirements may find themselves unable to upgrade to Windows 11 or experience performance issues.
  • Software Compatibility: Certain software applications may not be fully compatible with Windows 11, causing unexpected behavior or functionality limitations. This can be particularly problematic for users reliant on specialized software for work or personal use.
  • User Interface Preferences: The redesigned user interface in Windows 11, while modern and visually appealing, may not resonate with all users. Some may find the changes disruptive or prefer the familiar layout of Windows 10.
  • Performance and Stability: Windows 11, being a newer operating system, is still under development and may experience occasional performance issues or instability. Users seeking a more mature and stable operating system may find Windows 10 a better choice.
  • Security Concerns: Although Windows 11 boasts enhanced security features, some users may prefer the established security protocols and known vulnerabilities of Windows 10, especially in environments where security is paramount.

The Process of Transitioning: A Step-by-Step Guide

Transitioning from Windows 11 to Windows 10 involves several steps, each requiring careful consideration:

  1. Backup Data: Before initiating any changes, it is crucial to create a complete backup of all important data. This includes files, documents, photos, videos, and any other critical information stored on the computer. This backup should be stored on an external drive or cloud storage service for safekeeping.
  2. Check System Requirements: Verify that the computer meets the minimum system requirements for Windows 10. These requirements are generally less stringent than those for Windows 11, but it’s essential to ensure compatibility.
  3. Obtain a Windows 10 Installation Media: Download the Windows 10 installation media from Microsoft’s official website. This can be either a bootable USB drive or a DVD.
  4. Choose Installation Method: There are two primary methods for installing Windows 10:
    • Clean Installation: This involves formatting the hard drive and installing Windows 10 from scratch. This method is recommended for a fresh start and to eliminate any potential issues from previous installations.
    • Upgrade Installation: This method allows users to upgrade their existing Windows 11 installation to Windows 10. This method retains existing user data and settings, but may not be suitable if encountering compatibility issues.
  5. Perform the Installation: Follow the on-screen instructions provided by the Windows 10 installation media. This process may take some time, depending on the installation method and computer specifications.
  6. Install Drivers: After the installation is complete, it is crucial to install the necessary drivers for all hardware components. These drivers can be downloaded from the manufacturer’s website or obtained through Windows Update.
  7. Restore Data: Once the system is stable and all drivers are installed, restore the backed-up data to the newly installed Windows 10 system.

Benefits of Transitioning to Windows 10

While the transition may seem like a step back, moving to Windows 10 can offer several benefits:

  • Enhanced Hardware Compatibility: Windows 10 supports a wider range of older hardware, allowing users with older computers to continue using their systems.
  • Improved Software Compatibility: Many software applications may run more smoothly and reliably on Windows 10, particularly those not yet fully optimized for Windows 11.
  • Familiar User Interface: Windows 10’s user interface, while still evolving, is more familiar to users who have been using Windows for years, providing a more seamless transition.
  • Improved Stability: Windows 10 is a mature operating system with a proven track record of stability, offering a more reliable and predictable user experience.
  • Security Enhancements: While Windows 11 boasts new security features, Windows 10 continues to receive security updates and patches, ensuring a secure computing environment.

Key Considerations Before Transitioning

While transitioning to Windows 10 can be beneficial, it is essential to consider several factors before making the decision:

  • Windows 11 Features: Evaluate if the features unique to Windows 11, such as the redesigned Start menu, Android app support, and improved gaming features, are crucial for your needs.
  • Software Updates: Windows 10 will continue to receive security updates and bug fixes for several years, but eventually, support will end. Consider this timeframe and whether it aligns with your long-term computing plans.
  • Hardware Upgrade: If the primary motivation for transitioning is hardware compatibility, consider whether upgrading the computer to meet Windows 11 requirements is a more viable option.
  • Data Transfer: Be prepared for potential data loss during the transition process. While backup and restore options exist, there is always a risk of encountering errors or data corruption.
  • Time Commitment: Transitioning to Windows 10 can be a time-consuming process, requiring careful planning, data backup, and software installation.

Frequently Asked Questions

Q: Can I downgrade from Windows 11 to Windows 10 without losing data?

A: Downgrading from Windows 11 to Windows 10 is possible, but it is not guaranteed to preserve all data. It is highly recommended to create a complete backup of all important data before attempting the downgrade.

Q: Will I lose my Windows 11 license after downgrading to Windows 10?

A: No, your Windows 11 license will remain valid. However, you may need to reactivate your Windows 10 license after the downgrade.

Q: How long will Microsoft support Windows 10?

A: Microsoft has announced that Windows 10 will receive security updates and bug fixes until October 14, 2025.

Q: Can I upgrade back to Windows 11 after downgrading to Windows 10?

A: Yes, you can upgrade back to Windows 11 after downgrading to Windows 10. However, you will need to ensure that your computer meets the minimum system requirements for Windows 11.

Tips for a Smooth Transition

  • Plan Ahead: Before initiating the transition, carefully plan the process, including data backup, software installation, and driver updates.
  • Research and Prepare: Research the specific steps involved in the downgrade process and gather all necessary information, such as driver downloads and product keys.
  • Utilize Resources: Microsoft provides comprehensive resources and support documentation for transitioning between Windows versions.
  • Seek Professional Assistance: If you are unsure about any aspect of the transition process, consider seeking professional assistance from a qualified IT technician.

Conclusion

The decision to transition from Windows 11 to Windows 10 is a personal one, influenced by individual needs and preferences. This article has provided a comprehensive guide to the process, outlining the motivations, benefits, and considerations involved. By carefully planning, understanding the potential risks, and utilizing available resources, users can successfully navigate this transition and enjoy the benefits of Windows 10. Ultimately, the choice between Windows 11 and Windows 10 depends on individual priorities and the specific requirements of each user.

Windows 10 End of Support: Navigating the Transition to Windows 11 and Beyond - SAH Tech Advisor Turn Windows 11 into Windows 10 - YouTube Analysis  Windows 11 !!! a decent transition from windows 10 #Windows11 - YouTube
How To Downgrade From Windows 11 To Windows 10  Robots.net Windows 11  How to get back the taskbar to Windows 10, Windows 8 and Windows 7 - Recensioni Ready to Upgrade? Navigating the Windows 11 Transition for Corporations: What Should You Do and
Microsoft Windows 11: Transition from Windows 10 How to Make Windows 11 Look and Feel More Like Windows 10  TechSpot

Closure

Thus, we hope this article has provided valuable insights into Navigating the Transition: From Windows 11 to Windows 10. We thank you for taking the time to read this article. See you in our next article!