Archives 2023

Mastering Microsoft 365 Deployment: A Comprehensive Guide To Streamlined Installation

Mastering Microsoft 365 Deployment: A Comprehensive Guide to Streamlined Installation

Introduction

In this auspicious occasion, we are delighted to delve into the intriguing topic related to Mastering Microsoft 365 Deployment: A Comprehensive Guide to Streamlined Installation. Let’s weave interesting information and offer fresh perspectives to the readers.

Mastering Microsoft 365 Deployment: A Comprehensive Guide to Streamlined Installation

Streamline Your Office 365 Deployment with Valto

The modern workplace thrives on efficiency and seamless integration of technology. Microsoft 365, a comprehensive suite of productivity tools, plays a pivotal role in achieving this goal. However, the process of deploying Microsoft 365 across an organization can be complex and time-consuming without the right tools and strategies. This is where the Office Deployment Tool (ODT) emerges as a powerful solution, offering a streamlined approach to deploying Microsoft 365 applications.

Understanding the Office Deployment Tool (ODT)

The Office Deployment Tool (ODT) is a command-line utility provided by Microsoft that simplifies the process of deploying Microsoft 365 applications. It empowers administrators to customize installations, control the deployment process, and ensure consistency across the entire organization.

Key Features and Benefits of the ODT:

  • Customization: The ODT enables administrators to tailor installations to specific user needs. This includes selecting desired applications, customizing language settings, configuring user interface options, and even incorporating specific features.
  • Centralized Deployment: The ODT allows for centralized deployment of Microsoft 365 applications, ensuring consistency and reducing administrative overhead. This centralized approach simplifies the management of updates and patches, ensuring all users are on the same version.
  • Streamlined Installation: The ODT automates the installation process, eliminating the need for manual intervention and reducing the potential for errors. This streamlined approach significantly reduces the time and effort required for deployment.
  • Offline Installation: The ODT supports offline installations, allowing for deployments in environments with limited or no internet connectivity. This is particularly beneficial for organizations with geographically dispersed offices or limited network infrastructure.
  • Scalability: The ODT is designed for scalability, enabling the deployment of Microsoft 365 applications to hundreds or even thousands of users with minimal effort. This scalability is crucial for large organizations with a distributed workforce.

Steps for Implementing the ODT:

  1. Download the ODT: Begin by downloading the Office Deployment Tool from the Microsoft website. Choose the appropriate version based on the desired Microsoft 365 applications and the operating system of the target devices.
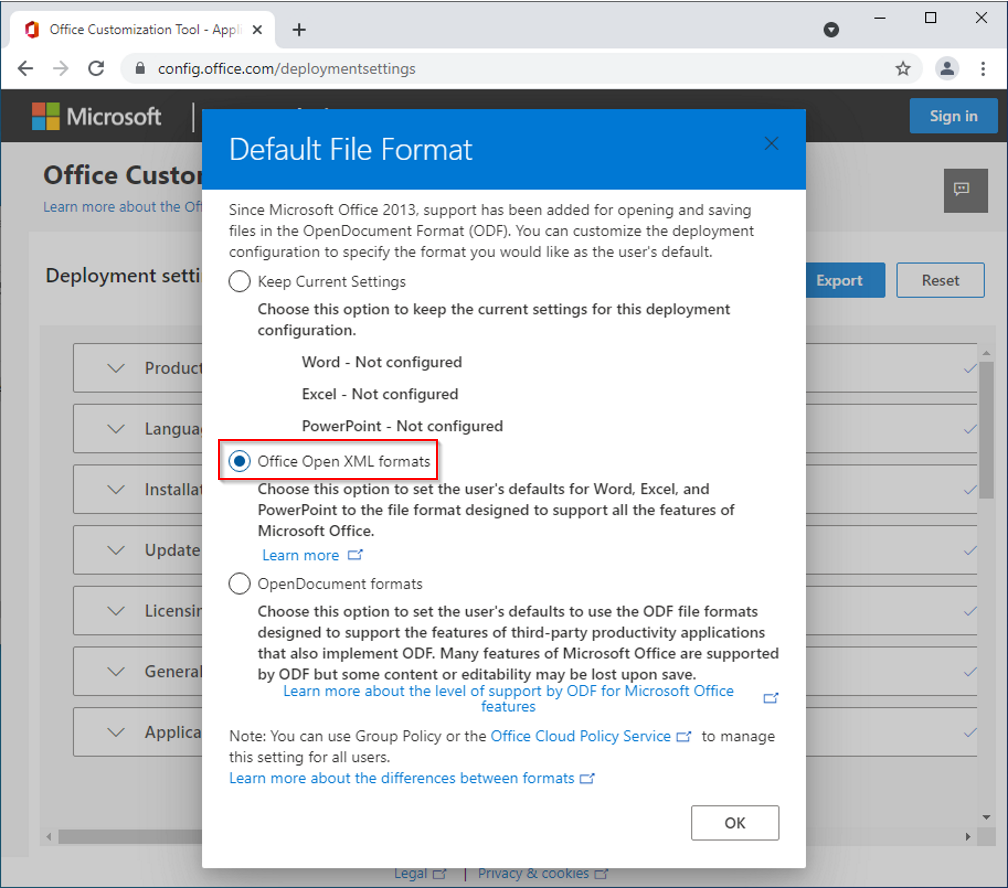
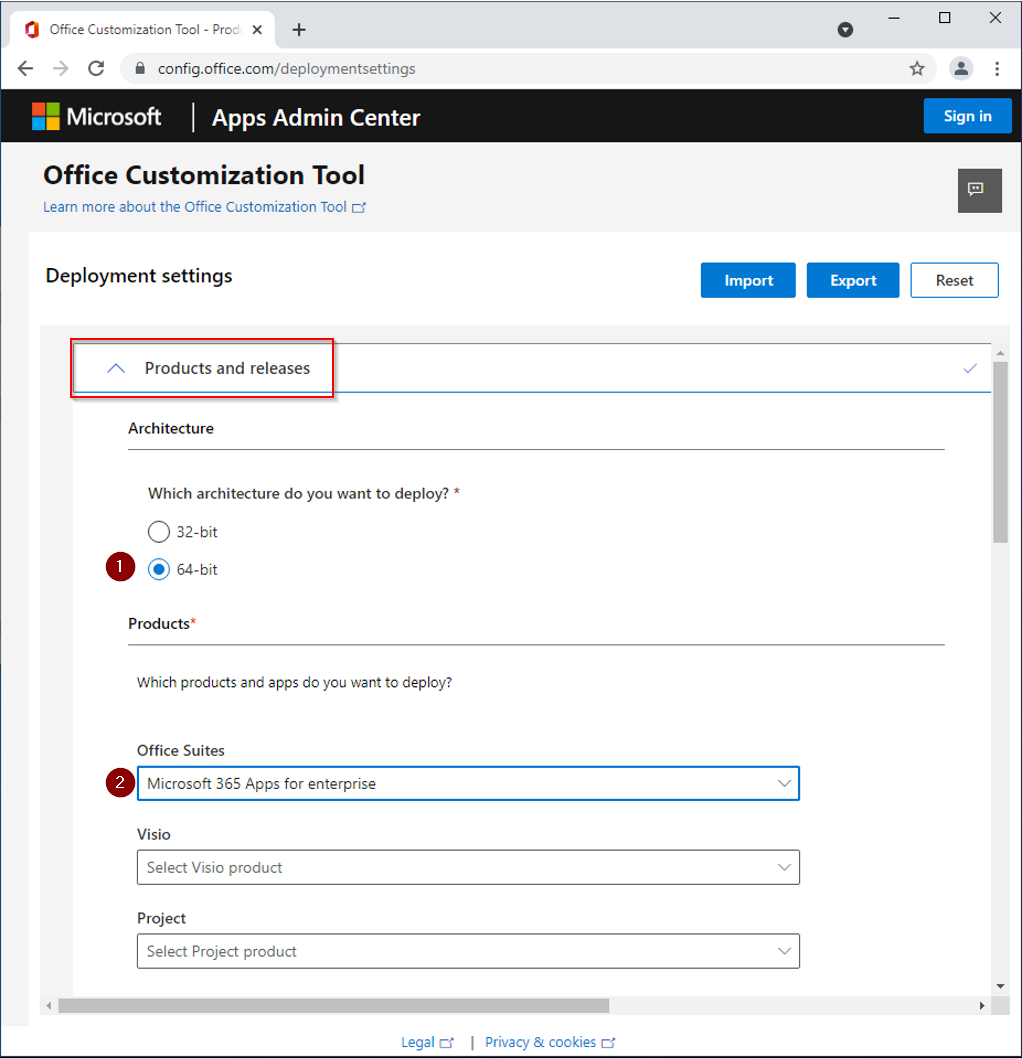
  2. Create a Configuration File: The ODT utilizes configuration files (XML format) to define the desired installation parameters. These files specify the applications to be installed, language settings, user interface options, and other customizations.
  3. Deploy the Applications: Once the configuration file is created, use the ODT command-line utility to deploy the applications. The ODT will leverage the configuration file to install the specified applications on the target devices.
  4. Monitor and Troubleshoot: After deployment, it is essential to monitor the installation process and troubleshoot any issues that may arise. The ODT provides detailed logs that can be used to identify and resolve problems.

Beyond the Basics: Advanced ODT Techniques

The ODT offers a wide range of advanced features and techniques for experienced administrators:

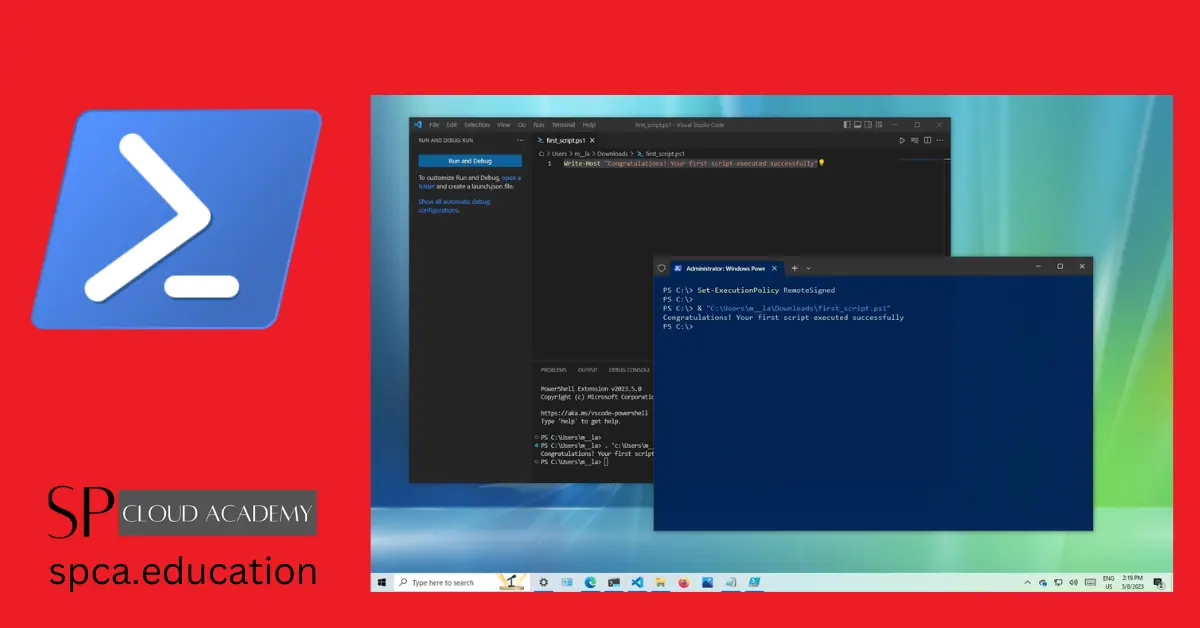
  • Automated Deployment with Scripts: The ODT can be integrated with scripting languages like PowerShell to automate the entire deployment process. This allows for seamless integration with existing IT infrastructure and simplifies large-scale deployments.
  • Group Policy Integration: The ODT can be integrated with Group Policy to enforce consistent deployments across the organization. This ensures that all users receive the same applications and configurations, regardless of their location or device.
  • Custom Branding: The ODT allows for custom branding of the Office applications, enabling organizations to personalize the user experience and enhance brand recognition.
  • Conditional Installation: The ODT supports conditional installation, allowing administrators to deploy specific applications based on user roles, device type, or other criteria. This ensures that only the necessary applications are installed, optimizing performance and reducing storage space.

FAQs Regarding the Office Deployment Tool:

Q: What is the difference between the Office Deployment Tool and the Click-to-Run installer?

A: The Click-to-Run installer is a user-friendly interface that allows users to download and install Office applications individually. The ODT, on the other hand, is a command-line utility designed for administrators to deploy applications to multiple users and devices.

Q: Can I use the ODT to deploy Office 2019 or older versions?

A: The ODT primarily focuses on deploying Microsoft 365 applications, which are subscription-based services. However, it can also be used to deploy perpetual versions of Office, including Office 2019 and older versions.

Q: How do I troubleshoot installation issues using the ODT?

A: The ODT provides detailed logs that can be used to troubleshoot installation issues. These logs contain information about the installation process, any errors encountered, and the actions taken by the ODT.

Q: Can I use the ODT to deploy Office applications to mobile devices?

A: The ODT is primarily designed for deploying Office applications to Windows devices. However, Microsoft 365 applications are available on various platforms, including iOS and Android. These applications can be deployed through other methods, such as app stores or mobile device management solutions.

Tips for Successful ODT Deployment:

  • Thorough Planning: Before deploying the ODT, it is essential to plan the deployment process carefully. This includes defining the target devices, selecting the desired applications, configuring language settings, and addressing any specific requirements.
  • Testing and Validation: Before deploying the ODT to the entire organization, it is crucial to test and validate the installation process in a pilot environment. This ensures that the chosen configuration works as expected and identifies any potential issues.
  • Documentation: Maintaining detailed documentation of the deployment process, including the configuration files used, is crucial for troubleshooting and future deployments.
  • Regular Updates: Microsoft regularly releases updates for Microsoft 365 applications. It is important to keep the ODT and the configuration files updated to ensure compatibility and security.

Conclusion:

The Office Deployment Tool (ODT) is an indispensable tool for administrators looking to streamline the deployment of Microsoft 365 applications. Its ability to customize installations, centralize deployments, and automate the process significantly reduces administrative overhead and ensures consistency across the organization. By leveraging the advanced features and techniques of the ODT, organizations can optimize their Microsoft 365 deployments, enhancing productivity and user satisfaction.

eBook: Microsoft 365 Deployment Guide - Infotechtion Office 365 Deployment Guide Mastering Microsoft 365 program
Install Office 365 using the Office Deployment Tool - TechLabs Install Office 365 using the Office Deployment Tool - TechLabs How to Deploy and Install Office 365 Software Updates with SCCM CB ADR - anoopcnair.com
Choose how to deploy Office 365 ProPlus - Office Support Deploy Office 365 Pro Plus Suite To Windows 11 Using Intune HTMD Blog

Closure

Thus, we hope this article has provided valuable insights into Mastering Microsoft 365 Deployment: A Comprehensive Guide to Streamlined Installation. We hope you find this article informative and beneficial. See you in our next article!

Transitioning To A New PC: A Comprehensive Guide

Transitioning to a New PC: A Comprehensive Guide

Introduction

With great pleasure, we will explore the intriguing topic related to Transitioning to a New PC: A Comprehensive Guide. Let’s weave interesting information and offer fresh perspectives to the readers.

Transitioning to a New PC: A Comprehensive Guide

Transitioning to a new Windows PC - Intranet - University of South Australia

The decision to acquire a new PC is often driven by a desire for enhanced performance, increased storage capacity, or the need for updated features. This transition, however, can be a daunting task, especially for those unfamiliar with the intricacies of data transfer and system configuration. This comprehensive guide aims to demystify the process of migrating to a new computer, offering a clear understanding of the steps involved, the potential benefits, and the crucial considerations to ensure a smooth and successful transfer.

Understanding the Transition Process

The process of transitioning to a new PC can be broken down into distinct phases, each with its own set of considerations and tasks:

1. Pre-Transfer Preparation:

  • Data Backup: Before initiating any transfer, it is paramount to create a comprehensive backup of all essential data from your old PC. This includes documents, photos, videos, music, software installations, and any other files you wish to retain. The backup can be stored on an external hard drive, a cloud storage service, or a network drive.
  • Software Inventory: Make a detailed list of all software programs currently installed on your old PC. This will help you identify which applications need to be reinstalled on your new PC.
  • Hardware Compatibility: Ensure that your new PC is compatible with all your existing peripherals, such as printers, scanners, and external drives. Check the specifications of the new PC and the peripherals to confirm compatibility.
  • Operating System Compatibility: If you are upgrading from an older operating system, confirm that your existing software programs are compatible with the new operating system.

2. Data Transfer:

  • Direct Transfer: For transferring large amounts of data, a direct connection between the old and new PC is often the most efficient method. This can be achieved using a USB cable, an Ethernet cable, or a network drive.
  • Cloud Storage: Cloud storage services provide a convenient way to transfer data between computers, particularly for smaller files and data that needs to be accessed from multiple devices.
  • External Hard Drives: External hard drives offer a portable and reliable method for transferring large amounts of data.
  • Data Migration Software: Specialized data migration software can automate the process of transferring data and settings from your old PC to the new one.

3. Software Installation:

  • Operating System Installation: The first step is to install the operating system on your new PC. This may involve using a bootable USB drive or DVD.
  • Software Installation: Once the operating system is installed, you can start installing the software programs you need. This can be done by using the installation discs, downloaded files, or by accessing the software from your account on the software vendor’s website.
  • Driver Installation: Ensure that the necessary drivers for your peripherals are installed. These drivers enable the operating system to communicate with your hardware.

4. Configuration and Customization:

  • Personalization: Once your software is installed, you can personalize your new PC by adjusting settings, customizing the desktop, and installing themes.
  • Network Setup: Connect your new PC to your network and configure internet access.
  • Security Setup: Set up security measures, including antivirus software, firewall, and password protection.

Benefits of Transitioning to a New PC

  • Enhanced Performance: Newer PCs often boast faster processors, more RAM, and improved graphics capabilities, resulting in a significant performance boost.
  • Increased Storage Capacity: New PCs typically come with larger hard drives or SSDs, providing ample space for storing data, applications, and multimedia files.
  • Updated Features: Newer PCs often incorporate the latest features, such as advanced security protocols, improved connectivity options, and support for newer technologies.
  • Improved Reliability: Modern PCs are built with more robust components and have undergone rigorous testing, resulting in improved reliability and longevity.
  • Enhanced Security: Newer PCs come with enhanced security features, such as built-in anti-malware software, secure boot options, and encrypted storage.

Crucial Considerations

  • Budget: Consider your budget and the features that are most important to you.
  • Operating System: Decide whether you want to stick with your current operating system or upgrade to a newer version.
  • Hardware Specifications: Research the specifications of different PCs to find one that meets your needs in terms of processing power, RAM, storage capacity, and graphics capabilities.
  • Software Compatibility: Ensure that your existing software programs are compatible with the new PC’s operating system and hardware.
  • Warranty: Check the warranty period and coverage offered by the manufacturer.

FAQs

Q: What is the best way to transfer data from my old PC to my new one?

A: The best method depends on the amount of data being transferred and your preferred level of convenience. Direct transfer via USB cable or network drive is efficient for large amounts of data. Cloud storage services are convenient for smaller files and data accessible from multiple devices. External hard drives offer portability and reliability.

Q: Do I need to reinstall all my software on my new PC?

A: Most software programs require reinstallation on a new PC. However, some programs, such as Microsoft Office, allow for transferring licenses to a new computer. Refer to the software vendor’s website for instructions.

Q: How do I ensure that my data is safe during the transfer process?

A: Always create a backup of your data before initiating any transfer. Use reputable data transfer tools and services. Ensure that your backup is stored on a separate device or in a cloud service.

Q: What should I do with my old PC after transferring my data?

A: You can either sell or donate your old PC, or securely erase all data and store it for future use.

Tips for a Smooth Transition

  • Plan Ahead: Allocate sufficient time for the transition process, especially if you have a large amount of data to transfer.
  • Backup, Backup, Backup: Create multiple backups of your essential data using different methods to ensure redundancy.
  • Test Before Transferring: Test the transfer process with a few files before transferring your entire data.
  • Seek Professional Assistance: If you are unsure about any aspect of the transition process, consider seeking professional assistance from a computer technician.

Conclusion

Transitioning to a new PC can be a rewarding experience, offering access to enhanced performance, increased storage, and the latest features. By carefully planning, understanding the steps involved, and following the tips outlined in this guide, you can ensure a smooth and successful migration, maximizing the benefits of your new computer. Remember, with proper planning and execution, the process of transitioning to a new PC can be a seamless and empowering experience, allowing you to fully embrace the advantages of your new technology.

Tips for Making the Transition to a New Computer Less Painful  Tubarks - The Musings of Stan Mastering Windows 11: Tips & Tricks Transitioning from Console to PC - YouTube
GET (️PDF️) DOWNLOAD THE NEW UPDATED GAMING PC GUIDE: A Comprehensive Guide On To Build Your Computer Parts and Components Guide for Beginners: Comprehensive Quick Guide on How to Build a Computing Transitions – Pushkar Ranade – Medium
Paper book transitioning to a computer How can I make the transition to a new computer easy and convenient?  The Seattle Times

Closure

Thus, we hope this article has provided valuable insights into Transitioning to a New PC: A Comprehensive Guide. We appreciate your attention to our article. See you in our next article!

Unlocking The Vault: A Guide To Opening Password-Protected ZIP Files In Windows 11

Unlocking the Vault: A Guide to Opening Password-Protected ZIP Files in Windows 11

Introduction

In this auspicious occasion, we are delighted to delve into the intriguing topic related to Unlocking the Vault: A Guide to Opening Password-Protected ZIP Files in Windows 11. Let’s weave interesting information and offer fresh perspectives to the readers.

Unlocking the Vault: A Guide to Opening Password-Protected ZIP Files in Windows 11

How to Password Protect ZIP files on Windows 11

In the digital age, data security is paramount. ZIP files, often used to compress and organize data, provide an additional layer of protection through password encryption. This ensures that only authorized individuals can access the contents. However, situations arise where the need to open a password-protected ZIP file becomes essential, whether for retrieving important documents, accessing project files, or recovering lost data.

This comprehensive guide explores the various methods available to open password-protected ZIP files in Windows 11. From the conventional use of built-in tools to the utilization of dedicated software, we will delve into the intricacies of each approach, providing a clear understanding of the process and its associated considerations.

Understanding the Challenge:

Before embarking on the journey of unlocking password-protected ZIP files, it is crucial to grasp the nature of the challenge. The encryption employed in these files transforms the data into an unreadable format, rendering it inaccessible without the correct password. This encryption serves as a robust safeguard against unauthorized access, but it also presents a hurdle when the password is forgotten or unavailable.

Methods for Opening Password-Protected ZIP Files:

1. Utilizing the Built-in Windows 11 Tool:

Windows 11 incorporates a native ZIP file handling capability, allowing users to extract the contents of a ZIP archive. However, this functionality does not extend to password-protected files. If you know the password, you can simply enter it when prompted by the system during the extraction process.

2. Employing Third-Party Software:

A plethora of third-party software applications are specifically designed to handle password-protected ZIP files. These programs employ advanced algorithms and techniques to attempt to crack the password, providing a potential solution when the original password is unknown.

Popular Options:

  • 7-Zip: A widely-used open-source file archiver known for its efficiency and support for various archive formats, including ZIP.
  • WinRAR: A commercial archiver with a long-standing reputation for its robust features and comprehensive support for password-protected archives.
  • PeaZip: A free and open-source archiver that offers a user-friendly interface and advanced password recovery capabilities.

3. Password Recovery Techniques:

When the password is completely forgotten, recovering it can be a daunting task. Several methods exist, each with its own level of complexity and success rate:

  • Brute Force Attack: This technique involves systematically testing every possible password combination until the correct one is found. However, it can be extremely time-consuming and resource-intensive, particularly for longer and complex passwords.
  • Dictionary Attack: This method utilizes a predefined list of common passwords and phrases to attempt to match the password used for the ZIP file. While faster than brute force, its effectiveness depends on the complexity of the password and the comprehensiveness of the dictionary.
  • Password Cracking Tools: Specialized software applications are designed to exploit vulnerabilities in encryption algorithms and attempt to crack passwords. These tools often employ a combination of brute force, dictionary attacks, and advanced techniques to increase their chances of success.

Considerations and Risks:

It is crucial to acknowledge the inherent risks associated with attempting to unlock password-protected ZIP files. Using third-party software or password recovery tools can expose your system to potential security threats if the software is not reputable or if it is infected with malware.

Furthermore, attempting to crack passwords without authorization can be considered illegal in many jurisdictions. It is essential to ensure that you have the legal right to access the contents of the ZIP file before employing any password recovery techniques.

Tips for Safe and Effective Password Recovery:

  • Use reputable software: Download software from trusted sources and ensure that it is updated regularly to mitigate security risks.
  • Be aware of potential scams: Beware of websites or software that claim to offer guaranteed password recovery, as these are often scams designed to steal your personal information.
  • Consider the ethical implications: Ensure that you have the legal right to access the contents of the ZIP file before attempting to crack the password.

FAQs:

Q: Can I open a password-protected ZIP file without the password?

A: While it is possible to attempt to recover the password using specialized software, there is no guaranteed method to open a password-protected ZIP file without the correct password.

Q: Is it safe to use third-party software to open password-protected ZIP files?

A: Using third-party software carries inherent security risks. It is essential to download software from reputable sources and ensure that it is updated regularly to mitigate potential threats.

Q: What are the legal implications of attempting to crack a password-protected ZIP file?

A: Attempting to crack passwords without authorization can be considered illegal in many jurisdictions. It is crucial to ensure that you have the legal right to access the contents of the ZIP file before employing any password recovery techniques.

Conclusion:

Opening password-protected ZIP files in Windows 11 presents a multifaceted challenge, requiring a combination of technical knowledge, caution, and ethical considerations. While the built-in tools offer basic functionality, third-party software and password recovery techniques provide more comprehensive solutions, albeit with inherent risks. Ultimately, the decision of whether to attempt to unlock a password-protected ZIP file should be made with a clear understanding of the available methods, associated risks, and legal implications. Remember, protecting your data is paramount, and employing strong passwords and secure storage methods can help mitigate the need for password recovery in the future.

How do you password protect a zip file in Windows 11? How to Password Protect ZIP files on Windows 11 How To Password Protect Zip Files On Windows 11  techviral
How to Password Protect Files and Folders in Windows 11 (2022)  Beebom How to Password Protect ZIP files on Windows 11  LaptrinhX How To Unlock Password Protected ZIP File - Tech Strange
How to Password Protect Zip Files in Windows 11 [3 Tips] How to Password Protect ZIP files on Windows 11

Closure

Thus, we hope this article has provided valuable insights into Unlocking the Vault: A Guide to Opening Password-Protected ZIP Files in Windows 11. We appreciate your attention to our article. See you in our next article!

Troubleshooting Printer Connectivity Issues In Windows 11: A Comprehensive Guide

Troubleshooting Printer Connectivity Issues in Windows 11: A Comprehensive Guide

Introduction

In this auspicious occasion, we are delighted to delve into the intriguing topic related to Troubleshooting Printer Connectivity Issues in Windows 11: A Comprehensive Guide. Let’s weave interesting information and offer fresh perspectives to the readers.

Troubleshooting Printer Connectivity Issues in Windows 11: A Comprehensive Guide

Fix Printer Connection and Printing problems in Windows 11/10

The inability to print from a laptop running Windows 11 can be a frustrating and productivity-hampering experience. This guide delves into the common reasons behind printer connectivity problems and provides a structured approach to troubleshooting and resolving them.

Understanding the Problem:

Printer connectivity issues in Windows 11 can arise from various factors, including:

  • Driver incompatibility: Outdated or incompatible printer drivers can prevent the operating system from recognizing and communicating with the printer.
  • Network connectivity issues: Problems with the network connection, either between the printer and the laptop or within the network itself, can hinder communication.
  • Firewall or security software interference: Security measures may block the printer’s access to the network or the laptop’s access to the printer.
  • Hardware malfunctions: Issues with the printer’s USB port, network card, or other components can lead to connectivity problems.
  • Software glitches: Occasionally, software errors within Windows 11 or the printer’s software can disrupt communication.

Troubleshooting Steps:

  1. Verify the Printer is Powered On and Ready: Begin by ensuring the printer is switched on and ready to print. Check for any error messages on the printer’s display.

  2. Confirm Network Connection: If the printer connects wirelessly, verify that the laptop and printer are on the same network. Check the router’s status lights and ensure a stable connection.

  3. Check the USB Connection (if applicable): If using a USB connection, ensure the cable is securely connected to both the printer and the laptop. Try a different USB port or cable if necessary.

  4. Update Printer Drivers: Outdated drivers can be a significant source of connectivity issues. Visit the printer manufacturer’s website and download the latest drivers for your printer model and Windows 11.

  5. Run the Printer Troubleshooter: Windows 11 includes a built-in troubleshooter that can identify and resolve common printer problems. Access it by searching for "troubleshoot" in the Start menu and selecting "Printer" from the list of options.

  6. Restart the Printer and Laptop: A simple restart can often resolve temporary software glitches affecting connectivity.

  7. Check Firewall and Security Settings: Temporarily disable your firewall or antivirus software to see if it’s interfering with the printer connection. If the issue resolves, adjust the firewall or antivirus settings to allow the printer through.

  8. Remove and Re-add the Printer: In the Windows 11 settings, navigate to "Devices" and then "Printers & scanners." Select your printer and choose "Remove device." Then, add the printer again by following the on-screen instructions.

  9. Reset the Printer to Factory Defaults: If the problem persists, resetting the printer to factory defaults can resolve software-related issues. Consult the printer’s manual for instructions on how to perform a factory reset.

  10. Contact Printer Manufacturer Support: If all else fails, contact the printer manufacturer’s technical support for assistance. They may have specific troubleshooting steps or identify a hardware issue requiring repair.

Frequently Asked Questions:

Q: Why is my printer not printing anything?

A: This could be due to various reasons, including paper jams, out-of-ink cartridges, incorrect paper settings, or even a corrupted print queue.

Q: My printer is connected to the network, but my laptop can’t find it. What should I do?

A: Ensure the printer is properly configured for network printing and that the laptop is on the same network. Check the printer’s network settings and restart the printer and router if necessary.

Q: How do I know if my printer driver is compatible with Windows 11?

A: Check the printer manufacturer’s website for compatibility information. Look for drivers specifically designed for Windows 11.

Q: I’ve tried everything, but my printer still won’t connect. What’s next?

A: If you’ve exhausted all troubleshooting steps, consider contacting the printer manufacturer’s support for further assistance. They may have specialized tools or insights to diagnose the issue.

Tips for Preventing Printer Connectivity Issues:

  • Keep drivers updated: Regularly check for updates from the printer manufacturer.
  • Ensure a stable network connection: Maintain a strong and reliable Wi-Fi or Ethernet connection.
  • Periodically restart the printer and router: This can help prevent software glitches.
  • Avoid using outdated software: Keep Windows 11 and all other software up-to-date.

Conclusion:

Printer connectivity issues can be frustrating, but with a systematic approach to troubleshooting, most problems can be resolved. By following the steps outlined in this guide, users can identify the cause of the problem and implement the appropriate solution. Regularly updating drivers, maintaining a stable network connection, and performing periodic restarts can help prevent future connectivity issues and ensure seamless printing experiences in Windows 11.

Mastering Windows 11 Printer Connection Troubleshooting: 8 Easy Methods To Fix The Error Troubleshooting Printer Connectivity Issues in Windows 11 - Click This Blog Brother Confirms Windows 11 Printer Problems – Hardware Specs
Windows 11 22H2 users suffer from printing issues Troubleshooting Printer Connectivity Issues in Windows 11 - Click This Blog How do I troubleshoot printer connectivity issues? ~ Blogging Pinay
Printer sharing not working in Windows 11? Here’s what to do! - YouTube How to Troubleshoot Printer Problems on a Windows PC

Closure

Thus, we hope this article has provided valuable insights into Troubleshooting Printer Connectivity Issues in Windows 11: A Comprehensive Guide. We appreciate your attention to our article. See you in our next article!

The Power Of PowerShell On Windows 10: A Comprehensive Guide

The Power of PowerShell on Windows 10: A Comprehensive Guide

Introduction

With great pleasure, we will explore the intriguing topic related to The Power of PowerShell on Windows 10: A Comprehensive Guide. Let’s weave interesting information and offer fresh perspectives to the readers.

The Power of PowerShell on Windows 10: A Comprehensive Guide

PowerShell: A Comprehensive Guide to Windows PowerShell » Let Me Read

PowerShell, a powerful scripting language and automation engine, has become an integral part of the Windows operating system. Its versatility extends beyond simple command-line tasks, offering a robust platform for system administration, automation, and even software development. This article delves into the intricacies of PowerShell on Windows 10, exploring its capabilities, benefits, and practical applications.

Understanding PowerShell: A Deeper Dive

PowerShell is not merely a replacement for the traditional command prompt. It is a full-fledged scripting language built on the .NET Framework, allowing for complex operations, object manipulation, and integration with various Windows components. Its core strength lies in its ability to automate repetitive tasks, manage system resources, and interact with software applications.

Key Features of PowerShell on Windows 10:

  • Object-Oriented Approach: PowerShell treats everything as objects, providing a consistent and structured way to interact with system components. This enables complex operations and manipulation of data.
  • Scripting Capabilities: PowerShell scripts allow for automating tasks, simplifying repetitive processes, and ensuring consistency in system management.
  • Remote Execution: PowerShell enables remote administration, allowing users to manage multiple systems from a single location.
  • Extensive Cmdlets: PowerShell comes with a vast library of built-in cmdlets (commands) covering a wide range of functionalities, from basic file management to complex system configuration.
  • Modules and Extensions: PowerShell supports modules and extensions, expanding its capabilities by adding new functionalities and integrating with third-party tools.

The Benefits of Using PowerShell on Windows 10:

  • Increased Efficiency: Automating tasks through PowerShell scripts saves time and reduces human error.
  • Improved System Management: PowerShell provides a powerful toolset for managing system configurations, installing software, and monitoring system health.
  • Centralized Control: PowerShell allows for managing multiple systems from a single location, simplifying administration.
  • Enhanced Security: PowerShell can be used to implement security policies, automate security audits, and manage user accounts.
  • Flexibility and Customization: PowerShell’s scripting capabilities allow for customization and tailoring to specific needs.

Practical Applications of PowerShell on Windows 10:

  • System Administration: Automating system maintenance tasks, managing user accounts, configuring network settings, and deploying software updates.
  • Software Development: Automating build processes, testing, and deployment of applications.
  • Data Management: Managing data in databases, manipulating files, and automating data processing tasks.
  • Security Management: Implementing security policies, automating security audits, and managing security events.
  • Troubleshooting: Diagnosing and resolving system issues, analyzing system logs, and identifying performance bottlenecks.

FAQs about PowerShell on Windows 10:

Q: What is the difference between PowerShell and Command Prompt?

A: PowerShell is a scripting language built on the .NET Framework, offering more advanced features and object-oriented capabilities compared to the traditional Command Prompt.

Q: How do I access PowerShell on Windows 10?

A: PowerShell can be accessed through the Start menu by searching for "PowerShell" or by opening the Windows PowerShell console.

Q: What are some basic PowerShell commands?

A: Some basic commands include Get-ChildItem (lists files and folders), Get-Process (lists running processes), and Stop-Process (stops a process).

Q: Can I use PowerShell to manage remote computers?

A: Yes, PowerShell allows for remote administration through the Invoke-Command cmdlet.

Q: How do I learn more about PowerShell?

A: Microsoft provides extensive documentation, tutorials, and learning resources on the official PowerShell website.

Tips for Using PowerShell on Windows 10:

  • Start with basic commands: Familiarize yourself with fundamental cmdlets before venturing into more complex scripts.
  • Use the Get-Help cmdlet: This cmdlet provides detailed information about specific cmdlets.
  • Experiment with scripts: Create simple scripts to automate tasks and gradually increase complexity.
  • Leverage online resources: Explore online forums, communities, and tutorials for guidance and support.
  • Practice regularly: Consistent practice is key to mastering PowerShell.

Conclusion:

PowerShell on Windows 10 is a powerful tool for system administrators, developers, and anyone seeking to automate tasks and manage systems efficiently. Its object-oriented approach, scripting capabilities, and vast library of cmdlets provide a robust platform for managing various aspects of the Windows environment. By leveraging PowerShell’s capabilities, users can streamline processes, enhance security, and optimize system performance, ultimately increasing productivity and efficiency.

Windows PowerShell Exploring the Power of PowerShell: A Comprehensive Guide - SoftArchive All ways to open PowerShell in Windows 10
Exploring the Power of PowerShell A Comprehensive Guide Windows Powershell and Scripting Made Easy For Sysadmins_ A Comprehensive Beginners Guide To Running Batch Files With Powershell: A Comprehensive Guide
How To Update Windows 10 Using PowerShell Commands - YouTube How to Check the PowerShell Version in Windows 10

Closure

Thus, we hope this article has provided valuable insights into The Power of PowerShell on Windows 10: A Comprehensive Guide. We thank you for taking the time to read this article. See you in our next article!

QBittorrent: A Comprehensive Guide To Torrenting On Windows 11

qBittorrent: A Comprehensive Guide to Torrenting on Windows 11

Introduction

With great pleasure, we will explore the intriguing topic related to qBittorrent: A Comprehensive Guide to Torrenting on Windows 11. Let’s weave interesting information and offer fresh perspectives to the readers.

qBittorrent: A Comprehensive Guide to Torrenting on Windows 11

how to install qbittorrent on windows 11  how to install the qbittorrent on windows 10 - YouTube

In the digital landscape, file sharing plays a crucial role, and torrenting remains a popular method for accessing and distributing large files. While various torrent clients exist, qBittorrent stands out as a robust, free, and open-source option for Windows 11 users. This comprehensive guide delves into the intricacies of qBittorrent, exploring its features, benefits, and how it facilitates a seamless torrenting experience.

Understanding the Fundamentals of Torrenting

Before diving into the specifics of qBittorrent, it’s essential to understand the fundamental principles of torrenting. Torrenting leverages peer-to-peer (P2P) technology, enabling users to download files from multiple sources simultaneously. This decentralized approach enhances download speeds and reduces the burden on a single server.

qBittorrent: A User-Friendly and Feature-Rich Torrent Client

qBittorrent distinguishes itself as a user-friendly torrent client with an intuitive interface and a comprehensive set of features. Its open-source nature guarantees transparency, security, and continuous development. Here’s a breakdown of its key attributes:

1. Intuitive User Interface:

qBittorrent boasts a clean and intuitive interface that caters to both novice and experienced users. Its straightforward layout simplifies navigation, allowing users to easily manage downloads, prioritize tasks, and monitor progress.

2. Comprehensive Feature Set:

qBittorrent is equipped with a range of features that enhance the torrenting experience:

  • Download Scheduling: Users can schedule downloads to occur at specific times, optimizing network usage and minimizing disruptions.
  • Bandwidth Management: qBittorrent offers granular bandwidth control, allowing users to prioritize downloads based on their needs and network conditions.
  • Magnet Link Support: qBittorrent seamlessly integrates with magnet links, facilitating effortless file sharing and download initiation.
  • RSS Feed Support: Users can subscribe to RSS feeds to automatically download new torrents as they become available.
  • Encryption and Security: qBittorrent supports encryption protocols, ensuring the privacy and security of downloads.
  • IP Filtering: Users can configure IP filters to block unwanted connections and enhance security.
  • Remote Control: qBittorrent offers remote control capabilities, allowing users to manage downloads from any device with a web browser.

3. Open-Source and Free:

qBittorrent is an open-source software, meaning its code is freely available for inspection and modification. This transparency fosters trust and security, as users can verify the software’s integrity. Additionally, qBittorrent is completely free to use, eliminating any subscription or licensing fees.

4. Cross-Platform Compatibility:

qBittorrent is available for various operating systems, including Windows, macOS, Linux, and FreeBSD. This cross-platform compatibility ensures a consistent experience across different devices.

5. Active Development and Community Support:

qBittorrent enjoys an active development community, constantly improving the software and addressing user feedback. This ensures ongoing updates, bug fixes, and feature enhancements.

Benefits of Using qBittorrent on Windows 11

qBittorrent offers a compelling set of benefits for Windows 11 users:

1. Enhanced Download Speeds:

qBittorrent’s decentralized P2P technology enables faster downloads by leveraging multiple sources simultaneously. This significantly reduces download times, especially for large files.

2. Enhanced Security and Privacy:

qBittorrent’s open-source nature, encryption protocols, and IP filtering capabilities contribute to a secure and private torrenting experience. Users can confidently download files without compromising their privacy.

3. User-Friendly and Efficient:

qBittorrent’s intuitive interface and comprehensive feature set simplify the torrenting process, making it accessible to users of all levels of experience. Its efficient resource management ensures minimal impact on system performance.

4. Cost-Effective and Free:

qBittorrent is completely free to use, eliminating any subscription or licensing fees. This makes it a cost-effective and accessible option for torrenting on Windows 11.

5. Active Community Support:

qBittorrent’s active development community ensures ongoing updates, bug fixes, and feature enhancements. Users can access support and resources through forums, documentation, and online communities.

FAQs: Addressing Common Questions

1. Is qBittorrent legal to use?

The legality of torrenting depends on the specific content being downloaded. Downloading copyrighted material without permission is illegal in most jurisdictions. However, torrenting itself is not inherently illegal.

2. Is qBittorrent safe to use?

qBittorrent is generally considered safe to use, especially compared to some other torrent clients. Its open-source nature allows for independent verification of its code, and its encryption protocols enhance security.

3. How can I protect my privacy while using qBittorrent?

To protect your privacy, use a VPN service while torrenting. A VPN encrypts your internet traffic, making it difficult for third parties to monitor your activity.

4. What are the best settings for qBittorrent?

The optimal settings for qBittorrent depend on your network conditions and download preferences. Experiment with different settings to find the best configuration for your needs.

5. How do I use qBittorrent on Windows 11?

Downloading and installing qBittorrent on Windows 11 is straightforward. Visit the official website, download the installer, and follow the on-screen instructions.

Tips for Optimizing qBittorrent on Windows 11

1. Prioritize Downloads:

Use qBittorrent’s download prioritization feature to allocate more bandwidth to important downloads.

2. Configure Bandwidth Settings:

Adjust qBittorrent’s bandwidth settings to optimize download speeds based on your network conditions.

3. Use a VPN:

Enhance your privacy and security by using a VPN service while torrenting.

4. Keep qBittorrent Updated:

Regularly update qBittorrent to benefit from new features, security patches, and bug fixes.

5. Explore Advanced Settings:

Experiment with qBittorrent’s advanced settings to fine-tune its performance and customize its behavior.

Conclusion: qBittorrent – A Powerful Tool for Torrenting on Windows 11

qBittorrent emerges as a powerful and user-friendly torrent client for Windows 11 users. Its intuitive interface, comprehensive feature set, and open-source nature make it a reliable and secure choice for downloading files. By leveraging qBittorrent’s capabilities and adhering to best practices, users can enjoy a seamless and efficient torrenting experience on Windows 11. Remember to exercise caution and respect copyright laws while torrenting, ensuring a responsible and ethical approach to file sharing.

10 Best Torrent Clients for Windows 11 Download qBittorrent for Windows 11/10/8/7 (Latest version 2023) - Downloads Guru Qbittorrent windows - acakit
What is Torrenting and How Do Torrents Work? A Comprehensive Guide qBittorrent Free Download for Windows 10, 11, 7 (32 / 64-bit) This will Change Your Way of Using Internet  How To Install qBittorrent On Windows 11/10/8/7
Qbittorrent downloads  Best BitTorrent Clients for Windows 11  Windows Mode qBittorrent Review: A Torrenting Client for the Modern Age

Closure

Thus, we hope this article has provided valuable insights into qBittorrent: A Comprehensive Guide to Torrenting on Windows 11. We hope you find this article informative and beneficial. See you in our next article!

Project IGI 3: A Comprehensive Look At The Elusive Sequel

Project IGI 3: A Comprehensive Look at the Elusive Sequel

Introduction

With enthusiasm, let’s navigate through the intriguing topic related to Project IGI 3: A Comprehensive Look at the Elusive Sequel. Let’s weave interesting information and offer fresh perspectives to the readers.

Project IGI 3: A Comprehensive Look at the Elusive Sequel

Шутер от первого лица Project I.G.I. 3 показали в новом видео с геймплеем  Gamebomb.ru

The "Project IGI" series, renowned for its stealth-action gameplay, has captivated gamers for over two decades. While the first two installments, "I.G.I.: I’m Going In" and "I.G.I. 2: Covert Strike," achieved cult status, the anticipation for a third entry, "Project IGI 3," has been a source of both excitement and frustration. Despite persistent rumors and speculation, the official release of a third installment remains elusive, leaving fans to navigate the complexities of unofficial downloads and emulators.

The Legacy of Project IGI: A Look Back

Before delving into the intricacies of "Project IGI 3," it’s essential to understand the franchise’s origins and impact. Developed by Innerloop Studios and published by Codemasters, the first game, "I.G.I.: I’m Going In," debuted in 2000, quickly becoming a critical and commercial success.

The game’s immersive gameplay, featuring a compelling narrative, realistic environments, and innovative stealth mechanics, set a new standard for the genre. Players assumed the role of Agent David Jones, a highly skilled operative tasked with completing covert missions for the Institute for Geotactical Intelligence (IGI). The game’s success was further amplified by its accessibility and intuitive controls, making it appealing to a broad spectrum of gamers.

"I.G.I. 2: Covert Strike," released in 2003, built upon the foundation laid by its predecessor, refining gameplay mechanics and introducing new features. While the sequel faced criticism for its bugs and technical glitches, it retained the essence of the first game, solidifying the "Project IGI" franchise as a significant player in the stealth-action landscape.

The Enigma of Project IGI 3

Despite the popularity of the first two games, the development of "Project IGI 3" has been shrouded in mystery. Rumors of its existence began circulating in the early 2000s, with reports suggesting that Innerloop Studios was working on a third installment. However, the project was met with numerous delays and setbacks, ultimately leading to its cancellation.

Over the years, various unofficial "Project IGI 3" builds and mods have emerged, created by passionate fans attempting to fill the void left by the official game’s absence. These unofficial projects, while offering glimpses into what a third installment could have been, lack the official backing and quality assurance of a legitimate release.

The Quest for Project IGI 3: Navigating the Unofficial Landscape

For those eager to experience the world of "Project IGI 3," the path is fraught with challenges and potential risks. Downloading unofficial builds or mods from untrusted sources exposes users to the possibility of malware, viruses, or other security threats. Additionally, the quality and stability of these unofficial releases vary greatly, often resulting in gameplay issues, bugs, and compatibility problems.

Understanding the Risks and Exploring Alternatives

Before venturing into the realm of unofficial "Project IGI 3" downloads, it’s crucial to prioritize safety and understand the potential risks involved.

  • Malware and Security Threats: Downloading from untrusted sources increases the risk of malware infection, potentially compromising your system’s security.
  • Compatibility Issues: Unofficial builds may not be compatible with your operating system, leading to crashes or performance issues.
  • Quality and Stability: Unofficial releases often lack the polish and stability of official games, leading to bugs, glitches, and gameplay inconsistencies.

Instead of pursuing unofficial downloads, consider exploring alternative options that offer a safer and more enjoyable experience.

  • Revisit the Original Games: "I.G.I.: I’m Going In" and "I.G.I. 2: Covert Strike" remain highly enjoyable experiences, offering the core stealth-action gameplay that defined the series.
  • Explore Similar Games: The gaming landscape is filled with excellent stealth-action titles that capture the spirit of "Project IGI." Games like "Hitman," "Splinter Cell," and "Metal Gear Solid" offer engaging narratives, diverse gameplay mechanics, and immersive environments.

FAQs: Addressing Common Concerns

Q: Is there an official release date for "Project IGI 3"?

A: No, there is no official release date for "Project IGI 3." The project has been cancelled, and there are no current plans for its revival.

Q: Are there any reliable sources for downloading "Project IGI 3"?

A: Downloading "Project IGI 3" from unofficial sources is not recommended due to the risks involved. Stick to official sources for game downloads.

Q: Can I play "Project IGI 3" on Windows 10?

A: The original "Project IGI" games are compatible with Windows 10. However, unofficial "Project IGI 3" builds may or may not be compatible, depending on the source and build.

Q: What are the system requirements for "Project IGI 3"?

A: Since "Project IGI 3" is not officially released, there are no official system requirements. However, unofficial builds likely require a modern PC with adequate processing power and graphics capabilities.

Tips: Staying Safe and Informed

  • Always download from trusted sources: Stick to official game platforms and reputable websites for game downloads.
  • Be cautious of suspicious links: Avoid clicking on links from unknown or untrusted sources, especially those offering free downloads of "Project IGI 3."
  • Use a reputable antivirus software: Ensure your system is protected with a reliable antivirus solution to mitigate the risk of malware infections.
  • Check for reviews and feedback: Before downloading any unofficial "Project IGI 3" builds, research their reputation and read reviews from other users.

Conclusion: A Legacy Lives On

While the official release of "Project IGI 3" remains a distant dream, the legacy of the franchise continues to inspire and entertain. The original games continue to be enjoyed by a dedicated community, and the spirit of stealth-action gameplay lives on in various other titles. By embracing the official releases and exploring the wealth of alternative options available, fans can continue to experience the thrill and excitement of the "Project IGI" universe without compromising their safety or system security.

Project IGI 3 image - IndieDB Project IGI 3 Official PC Game Free Download Here - GDV IGI 3 Wallpapers - Wallpaper Cave
Project IGI 3-Trailer (2018) - YouTube Project IGI Remake Mission 3 [4k] - YouTube Project IGI 3 The Plan PC Game - san gamer
Project IGI 3 image - IndieDB Project IGI 3 PC Game Download Free Full Version ISO Official  Pc games download, Game download

Closure

Thus, we hope this article has provided valuable insights into Project IGI 3: A Comprehensive Look at the Elusive Sequel. We thank you for taking the time to read this article. See you in our next article!

Understanding Open Files In Windows 10: A Comprehensive Guide

Understanding Open Files in Windows 10: A Comprehensive Guide

Introduction

With enthusiasm, let’s navigate through the intriguing topic related to Understanding Open Files in Windows 10: A Comprehensive Guide. Let’s weave interesting information and offer fresh perspectives to the readers.

Understanding Open Files in Windows 10: A Comprehensive Guide

How To Open And Configure Folder Options In Windows 10

Windows 10, like any operating system, relies on files to store and manage data. These files can be documents, images, videos, programs, or any other digital content. When a user interacts with these files, they are essentially "opening" them, allowing the operating system to access and display their content. This process involves the file being loaded into memory, where the computer can process and display it.

Understanding the concept of open files in Windows 10 is crucial for several reasons. It helps users understand how their computer manages resources, troubleshoot potential issues, and optimize their system’s performance. This guide aims to provide a comprehensive overview of open files in Windows 10, exploring their significance, benefits, and management strategies.

The Importance of Open Files

Open files are at the heart of how users interact with their computer. They enable a seamless experience, allowing users to:

  • Access and manipulate data: Users can open documents, edit images, view videos, and run programs.
  • Collaborate and share information: Open files facilitate the sharing of documents and projects with others.
  • Run applications: Programs require access to various files, including executable files, configuration files, and libraries.
  • Save progress: Opening files allows users to save their work and continue it later.

Understanding the File System

Windows 10 utilizes a hierarchical file system, organizing files and folders in a tree-like structure. Each file and folder has a unique path, which is its location within the file system. For example, a document named "report.docx" located in the "Documents" folder on the "C" drive would have the following path: "C:UsersUserNameDocumentsreport.docx".

This hierarchical structure is essential for navigating and managing files effectively. When a user opens a file, Windows 10 locates it using its path and loads it into memory.

Types of Open Files

Windows 10 distinguishes between different types of open files based on their purpose and usage:

  • User-opened files: These are files that users explicitly open through applications or the file explorer.
  • System files: These are files essential for the operating system’s functioning and are often opened automatically during startup.
  • Application files: These are files associated with specific applications and are opened when the application is running.
  • Temporary files: These are temporary files created by applications for temporary storage, often deleted after use.

Managing Open Files

While open files enable seamless user experiences, it is important to manage them effectively to avoid potential issues. Here are some key aspects of open file management:

  • Closing files: When a file is no longer needed, it should be closed to free up resources. This can be done by clicking the "Close" button or using the "File" menu in most applications.
  • Minimizing open files: Opening too many files simultaneously can strain system resources, leading to slow performance. It is advisable to minimize the number of open files, closing those that are not actively used.
  • Monitoring open files: Users can monitor open files using the Task Manager (accessible by pressing Ctrl+Shift+Esc). This provides information about the files currently in use, their associated applications, and their resource consumption.
  • Using file locking mechanisms: Some applications utilize file locking mechanisms to prevent multiple users from modifying the same file simultaneously. This ensures data integrity and avoids conflicts.

Troubleshooting Open File Issues

Occasionally, users may encounter issues with open files, such as:

  • Unable to open a file: This could be due to file corruption, missing dependencies, or insufficient permissions.
  • File access errors: These errors can occur when multiple users try to access the same file simultaneously or when the file is locked by another application.
  • Slow file access: Slow file access can be caused by insufficient RAM, hard drive bottlenecks, or malware infections.

Troubleshooting these issues requires a systematic approach, which might involve:

  • Restarting the computer: This can resolve temporary glitches and free up resources.
  • Checking for file corruption: Using file repair tools can identify and fix corrupted files.
  • Updating drivers: Outdated drivers can cause file access issues.
  • Scanning for malware: Malware can interfere with file access and performance.
  • Adjusting file sharing settings: Ensuring proper file sharing settings can resolve access conflicts.

Tips for Effective File Management

  • Regularly close unused files: Free up system resources by closing files that are not actively used.
  • Organize files into folders: This helps maintain a structured file system and makes finding files easier.
  • Use file compression tools: Compressing files can save disk space and reduce file transfer times.
  • Backup important files: Regularly backing up important files protects data from loss due to hardware failure or software issues.
  • Monitor system resources: Regularly check the Task Manager to monitor open files and their resource consumption.

Conclusion

Open files are an integral part of the Windows 10 operating system, enabling users to interact with their computer and manage digital content effectively. Understanding the concept of open files, their types, and their management strategies is essential for optimizing system performance and troubleshooting potential issues. By implementing best practices for file management and monitoring system resources, users can ensure a smooth and efficient computing experience.

Frequently Asked Questions (FAQs)

Q1: What happens when a file is opened in Windows 10?

A: When a file is opened, the operating system locates the file on the hard drive using its path. The file’s contents are then loaded into memory, where the computer can process and display them. The specific actions taken depend on the file type and the associated application. For example, opening a text document will display the text in a text editor, while opening a video file will launch a media player and play the video.

Q2: How can I see what files are currently open in Windows 10?

A: The Task Manager provides a list of open files and their associated applications. To access the Task Manager, press Ctrl+Shift+Esc. In the "Processes" tab, you can view the applications running and the files they are accessing. You can also use the "Details" tab for a more detailed view of open files and their resource consumption.

Q3: What happens when a file is closed in Windows 10?

A: Closing a file releases the resources it was using, such as memory and CPU time. The file is no longer actively accessed by the computer, and its contents are removed from memory. However, the file itself remains on the hard drive, and users can open it again at any time.

Q4: Can I open multiple files simultaneously in Windows 10?

A: Yes, you can open multiple files simultaneously. This is a common practice, especially when working on multiple documents or projects. However, opening too many files at once can strain system resources and lead to slow performance. It is advisable to close files that are not actively used to free up resources.

Q5: How can I prevent files from being opened by others in Windows 10?

A: You can use file permissions to control who can access and modify files. By default, the owner of a file has full control over it. You can adjust these permissions to grant or deny access to specific users or groups. To change file permissions, right-click the file, select "Properties", and navigate to the "Security" tab.

Q6: What are the potential risks of leaving files open in Windows 10?

A: Leaving files open unnecessarily can lead to several risks:

  • Resource consumption: Open files consume system resources, which can slow down the computer.
  • Data corruption: If the computer crashes or loses power while a file is open, the file may become corrupted.
  • Security risks: Open files can expose sensitive information to unauthorized access if the computer is compromised.

Q7: How can I troubleshoot issues with open files in Windows 10?

A: If you encounter issues with open files, such as being unable to open a file or experiencing file access errors, try the following:

  • Restart the computer: This can resolve temporary glitches and free up resources.
  • Check for file corruption: Use file repair tools to identify and fix corrupted files.
  • Update drivers: Outdated drivers can cause file access issues.
  • Scan for malware: Malware can interfere with file access and performance.
  • Adjust file sharing settings: Ensure proper file sharing settings to resolve access conflicts.

Q8: What are some best practices for managing open files in Windows 10?

A: Here are some best practices for managing open files:

  • Regularly close unused files: Free up system resources by closing files that are not actively used.
  • Organize files into folders: This helps maintain a structured file system and makes finding files easier.
  • Use file compression tools: Compressing files can save disk space and reduce file transfer times.
  • Backup important files: Regularly backing up important files protects data from loss due to hardware failure or software issues.
  • Monitor system resources: Regularly check the Task Manager to monitor open files and their resource consumption.

How to open my files from any device of windows 10 - YouTube How To Zip Files With Windows 10 Comprehensive Guide - vrogue.co How To Open File Explorer Folder Options In Windows 10  winbuzzer
4 Ways to Open File Properties in Windows 10 How to Open Files and Folders with Single Click in Windows 10 - StackHowTo How To Open File Explorer Folder Options In Windows 10  winbuzzer
How To Open File Explorer Folder Options In Windows 10  winbuzzer Enable Single Click To Open Files Windows 10 - Single Click Setting

Closure

Thus, we hope this article has provided valuable insights into Understanding Open Files in Windows 10: A Comprehensive Guide. We thank you for taking the time to read this article. See you in our next article!

Fortifying Your Windows 10 Bastion: A Comprehensive Guide To Malware Protection

Fortifying Your Windows 10 Bastion: A Comprehensive Guide to Malware Protection

Introduction

With great pleasure, we will explore the intriguing topic related to Fortifying Your Windows 10 Bastion: A Comprehensive Guide to Malware Protection. Let’s weave interesting information and offer fresh perspectives to the readers.

Fortifying Your Windows 10 Bastion: A Comprehensive Guide to Malware Protection

How to Use Windows Defender Malware Protection on Windows 10

In the digital landscape, where data flows freely and connectivity is ubiquitous, Windows 10 users face a constant threat: malware. These malicious programs, designed to infiltrate and exploit systems, pose a significant risk to personal and professional data, privacy, and even financial security. This article delves into the multifaceted world of malware protection, providing a comprehensive guide to safeguarding your Windows 10 environment.

Understanding the Malware Landscape

Malware, encompassing viruses, worms, Trojans, ransomware, spyware, and adware, operates through various methods to achieve its nefarious goals. They can:

  • Steal sensitive data: Financial details, login credentials, and personal information are prime targets for malware, potentially leading to identity theft and financial fraud.
  • Disrupt system operations: Malware can crash applications, corrupt files, and render your computer unusable, impacting productivity and causing data loss.
  • Spread to other devices: Malware can propagate through networks, infecting multiple devices and creating a cascading effect.
  • Compromise privacy: Spyware can track your online activities, monitor your keystrokes, and even record your webcam footage, violating your privacy.
  • Hold your data hostage: Ransomware encrypts your files, demanding payment for their decryption, leaving you with no access to your valuable data.

The Importance of Proactive Defense

While the consequences of malware infection are severe, proactive measures can significantly reduce the risk. A multi-layered approach, encompassing software, hardware, and user behavior, is crucial for comprehensive protection.

1. Software Security: The First Line of Defense

  • Windows Defender: Windows 10 comes equipped with Windows Defender, a robust built-in antivirus solution that provides real-time protection against malware threats. Regularly updating Windows Defender ensures access to the latest virus definitions and security patches.
  • Third-party Antivirus Solutions: Complementing Windows Defender with a reputable third-party antivirus software can enhance protection by offering additional features like firewall management, anti-phishing capabilities, and advanced threat detection. Choose a solution known for its effectiveness and low system impact.
  • Anti-malware Software: Dedicated anti-malware software specializes in detecting and removing specific malware types, such as rootkits and ransomware. These tools often employ advanced heuristics and behavioral analysis to identify malicious activity.
  • Firewall: A firewall acts as a barrier between your computer and the internet, controlling incoming and outgoing network traffic. Windows 10’s built-in firewall can be customized to block unauthorized access and prevent malware from entering your system.

2. Hardware Security: A Physical Barrier

  • Secure Boot: This feature ensures that only trusted operating systems and software can boot on your computer, preventing malware from loading before the operating system is fully functional.
  • UEFI BIOS: Modern computers use Unified Extensible Firmware Interface (UEFI) BIOS, which offers enhanced security features, including Secure Boot and improved malware resistance.
  • Hard Drive Encryption: Encrypting your hard drive using tools like BitLocker (for Windows 10) or third-party solutions safeguards your data even if your computer is stolen or compromised.

3. User Behavior: The Human Factor

  • Phishing Awareness: Phishing scams often lure users into clicking malicious links or downloading infected files disguised as legitimate communications. Be wary of suspicious emails, links, and attachments, and verify their authenticity before interacting with them.
  • Strong Passwords: Use strong, unique passwords for all your online accounts, and avoid using the same password across multiple platforms. Consider a password manager to securely store and manage your passwords.
  • Software Updates: Regularly updating your operating system, applications, and security software is essential to patch vulnerabilities and receive the latest security enhancements.
  • Careful Downloading: Download software only from trusted sources, such as official websites or reputable app stores. Avoid downloading from unknown or suspicious websites.
  • Limiting User Permissions: Restricting user permissions can limit the impact of malware. If a user account is compromised, it can only access the files and applications it is authorized to use.
  • Data Backups: Regularly back up your important data to an external drive or cloud storage service. This ensures that you can recover your files even if your computer is infected and data is lost.

4. Additional Security Measures

  • Sandboxing: Use sandboxing software to create isolated environments for running untrusted programs. This prevents malware from accessing your system files and data.
  • Anti-exploit Software: Anti-exploit software identifies and blocks known vulnerabilities that malware exploits to gain access to your system.
  • Two-factor Authentication: Enable two-factor authentication (2FA) for sensitive accounts, requiring an additional verification step beyond a password, such as a code sent to your phone.
  • Anti-ransomware Software: Dedicated anti-ransomware software monitors your system for suspicious behavior and can prevent ransomware from encrypting your files.

FAQs: Addressing Common Concerns

Q: Is Windows Defender enough to protect my computer from malware?

A: While Windows Defender provides a strong baseline of protection, it is recommended to complement it with a reputable third-party antivirus solution for enhanced security.

Q: How often should I update my antivirus software?

A: Antivirus software should be updated regularly, ideally daily, to receive the latest virus definitions and security patches.

Q: What should I do if I suspect my computer is infected with malware?

A: Disconnect your computer from the internet, run a full system scan with your antivirus software, and consider using a dedicated anti-malware tool. If the issue persists, seek help from a professional IT security expert.

Q: How can I avoid phishing scams?

A: Be wary of suspicious emails, links, and attachments, especially those requesting personal information or asking you to click on unfamiliar links. Verify the sender’s identity and the website’s authenticity before interacting with them.

Q: What are some tips for creating strong passwords?

A: Use a combination of uppercase and lowercase letters, numbers, and symbols. Avoid using common words or phrases, and ensure your password is at least 12 characters long. Consider using a password manager to generate and store strong passwords securely.

Tips for Safeguarding Your Windows 10 Environment

  • Stay Informed: Keep abreast of the latest malware threats and security best practices by subscribing to security blogs, newsletters, and online resources.
  • Be Vigilant: Maintain a healthy skepticism when browsing the internet and downloading files. Avoid clicking on suspicious links or opening attachments from unknown senders.
  • Regularly Back Up Your Data: Implement a regular data backup routine to ensure you can recover your files in case of a malware attack or system failure.
  • Use Secure Browsing Practices: Avoid visiting untrusted websites, use a reputable VPN when connecting to public Wi-Fi networks, and keep your browser updated with the latest security patches.
  • Educate Yourself and Others: Share your knowledge about malware threats and security best practices with family, friends, and colleagues to promote a safer online environment.

Conclusion

Protecting your Windows 10 computer from malware requires a comprehensive approach that encompasses software security, hardware security, user behavior, and continuous vigilance. By implementing the strategies outlined in this article, you can significantly reduce your risk of malware infection and safeguard your data, privacy, and online security. Remember, staying informed, practicing caution, and proactively protecting your system are essential for navigating the evolving landscape of cyber threats.

Infographic: How To Prevent Malware - The Security Buddy [How To] Disable Early Launch Anti-Malware Protection In Windows 10 Malware Protection Against Malware Vulnerabilities-InfoGuardTech
How To Prevent Malware Attacks? Best malware protection - canadavse The Five Core Controls of Cyber Essentials - Malware Protection - Iasme
Top Antivirus 2020  Protegent Antivirus  Antivirus protection, Antivirus, Antivirus software Configure Secure RDP using a Windows Bastion Host  Qwiklabs GSP303 - YouTube

Closure

Thus, we hope this article has provided valuable insights into Fortifying Your Windows 10 Bastion: A Comprehensive Guide to Malware Protection. We hope you find this article informative and beneficial. See you in our next article!

Navigating The Visual Landscape: A Comprehensive Guide To Windows 11’s Display Settings

Navigating the Visual Landscape: A Comprehensive Guide to Windows 11’s Display Settings

Introduction

In this auspicious occasion, we are delighted to delve into the intriguing topic related to Navigating the Visual Landscape: A Comprehensive Guide to Windows 11’s Display Settings. Let’s weave interesting information and offer fresh perspectives to the readers.

How To Select Visual Effects Settings That Adjust Windows 11 For Best Performance - YouTube

Windows 11, with its modern design and enhanced user experience, offers a plethora of customization options, including the ability to tailor the display to individual preferences. This comprehensive guide delves into the intricacies of Windows 11’s display settings, exploring their functionality and highlighting their significance in optimizing the visual experience.

Understanding the Display Settings:

The display settings in Windows 11, accessible through the Settings app, provide a central hub for managing various aspects of the visual output on your device. This includes everything from screen resolution and brightness to color calibration and multiple display configurations.

Navigating the Display Settings:

  1. Access the Settings App: Open the Settings app by clicking the Windows key and selecting Settings from the start menu.

  2. Locate the System Section: In the left-hand pane, navigate to System.

  3. Select Display: Click on Display to access the display settings.

Key Features of Windows 11’s Display Settings:

1. Resolution and Scaling:

The resolution determines the sharpness and clarity of the image displayed on your screen. Higher resolutions result in a sharper image, but may require a more powerful graphics card. Windows 11 allows users to select the optimal resolution for their display, taking into account the screen size and device capabilities.

Scaling adjusts the size of text and elements on the screen to improve readability. It is particularly beneficial for high-resolution displays, ensuring elements remain legible without appearing excessively small.

2. Brightness and Night Light:

Brightness controls the overall illumination of the display. This setting allows users to adjust the screen’s brightness to suit their environment and personal preferences.

Night Light filters out blue light emitted from the screen, reducing eye strain and promoting better sleep. This feature is particularly useful during nighttime usage when exposure to blue light can disrupt sleep patterns.

3. Color Profile and Calibration:

Color profiles define the color space and gamma values used for displaying images and videos. Windows 11 provides several pre-defined profiles, including sRGB and DCI-P3, catering to different usage scenarios.

Color calibration allows users to fine-tune the display’s color accuracy, ensuring colors are displayed faithfully. This is particularly important for professional users working with graphics, photography, or video editing.

4. Multiple Display Management:

Windows 11 seamlessly supports multiple displays, allowing users to extend their desktop across multiple monitors. The display settings allow users to configure the arrangement, resolution, and orientation of each connected display. This feature is ideal for productivity, allowing users to work on multiple tasks simultaneously or enjoy a wider viewing area for entertainment.

5. Advanced Display Settings:

Advanced display settings provide further customization options for advanced users. These settings allow users to adjust the refresh rate, color depth, and other parameters, potentially improving the overall visual experience.

6. Accessibility Features:

Windows 11 includes several accessibility features designed to enhance the user experience for individuals with visual impairments. These features include:

  • High Contrast Mode: This mode increases the contrast between text and background colors, improving readability for users with low vision.
  • Magnifier: This feature enlarges a portion of the screen, making it easier to read text and interact with elements.
  • Narrator: This screen reader reads aloud text and other elements on the screen, providing an auditory alternative for visually impaired users.

Benefits of Optimizing Display Settings:

  • Improved User Experience: Properly configured display settings enhance the overall user experience by ensuring optimal readability, clarity, and visual comfort.
  • Enhanced Productivity: By customizing the display settings to suit individual needs, users can improve their productivity by optimizing the visual environment for specific tasks.
  • Reduced Eye Strain: Features like Night Light and high contrast mode can significantly reduce eye strain and fatigue, particularly during extended screen time.
  • Professional Accuracy: For users working with graphics, photography, or video editing, accurate color calibration is crucial for ensuring professional-grade results.

FAQs on Windows 11’s Display Settings:

Q: How do I change the screen resolution in Windows 11?

A: Navigate to Settings > System > Display and select the desired resolution from the dropdown menu under Scale and layout.

Q: Can I use multiple displays with Windows 11?

A: Yes, Windows 11 supports multiple displays. You can configure the arrangement, resolution, and orientation of each display in the Settings > System > Display menu.

Q: How do I enable Night Light in Windows 11?

A: Navigate to Settings > System > Display and toggle the Night Light switch to "On". You can also customize the schedule and color temperature of Night Light.

Q: What are the different color profiles available in Windows 11?

A: Windows 11 offers several pre-defined color profiles, including sRGB, DCI-P3, and custom profiles. You can choose the profile that best suits your usage scenario.

Q: How do I calibrate the display colors in Windows 11?

A: Windows 11 does not have a built-in color calibration tool. However, you can use third-party software to calibrate your display colors for professional accuracy.

Tips for Optimizing Display Settings:

  • Regularly check your display settings: Ensure your display settings are optimized for your current usage scenario and environment.
  • Consider using Night Light during evening hours: This can reduce eye strain and promote better sleep.
  • Experiment with different color profiles: Find the profile that best suits your needs and preferences.
  • Calibrate your display colors for professional accuracy: If you work with graphics, photography, or video editing, consider using a color calibration tool for accurate results.

Conclusion:

Windows 11’s display settings provide a powerful tool for customizing the visual experience, ensuring optimal clarity, readability, and comfort. By understanding and utilizing these settings effectively, users can enhance their productivity, reduce eye strain, and achieve professional-grade results. Whether you are a casual user or a professional, taking the time to explore and configure the display settings can significantly improve your overall experience with Windows 11.

List of All Windows 11 Editions: Mixed Reality Enters the Stage Windows 11 Landscape Scenery [1920x1080] : r/wallpaper Windows 11 will bring multi-monitor improvements - MSPoweruser
Windows 11 Landscape Scenery 4K #1310h Wallpaper PC Desktop Landscape windows 11 lake forest day time Windows 11 Landscape Scenery 4K #1300h Wallpaper PC Desktop
Wallpaper : windows 11, digital art, landscape 3840x2160 - 2908667850 - 2230512 - HD Wallpapers Windows 11 Visual Styles

Closure

Thus, we hope this article has provided valuable insights into Navigating the Visual Landscape: A Comprehensive Guide to Windows 11’s Display Settings. We appreciate your attention to our article. See you in our next article!