Archives 2023

Windows 10 Home: A Comprehensive Exploration Of The Popular Operating System

Windows 10 Home: A Comprehensive Exploration of the Popular Operating System

Introduction

With enthusiasm, let’s navigate through the intriguing topic related to Windows 10 Home: A Comprehensive Exploration of the Popular Operating System. Let’s weave interesting information and offer fresh perspectives to the readers.

Windows 10: An Overview of the Popular Operating System

Windows 10 Home, a widely adopted operating system for personal computers, has become a mainstay in the digital landscape. Its user-friendly interface, robust security features, and comprehensive functionality cater to a broad range of computing needs. This article delves into the intricacies of Windows 10 Home, highlighting its key features, benefits, and potential applications.

A Look at the Core Features

Windows 10 Home is built upon a foundation of core features designed to enhance user experience and productivity. These include:

  • Modern User Interface: Windows 10 Home boasts a sleek and intuitive user interface, known as the Start Menu. This menu provides easy access to applications, settings, and files, simplifying navigation and enhancing user efficiency.
  • Cortana, the Digital Assistant: Cortana, Microsoft’s intelligent personal assistant, is integrated into Windows 10 Home. Users can interact with Cortana through voice commands or text input to perform tasks such as setting reminders, scheduling appointments, searching the web, and controlling smart home devices.
  • Microsoft Edge, the Modern Browser: Windows 10 Home includes Microsoft Edge, a modern web browser designed for speed, security, and compatibility. Edge offers features like reading view, tab management, and integration with Cortana, enhancing the web browsing experience.
  • Windows Store, the App Marketplace: The Windows Store provides access to a vast library of applications, games, and software. Users can easily download and install apps tailored to their specific needs, expanding the functionality of their devices.
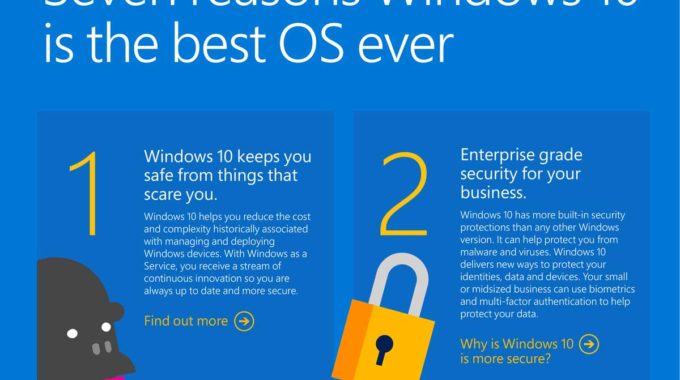
  • Security Features: Windows 10 Home prioritizes user security with features like Windows Defender, a built-in antivirus program, and SmartScreen, which helps prevent malicious websites and downloads. These features work together to protect devices from malware and online threats.
  • Built-in Apps: Windows 10 Home comes pre-installed with a suite of useful applications, including Photos, Movies & TV, Mail, Calendar, and more. These apps provide basic functionality for common tasks, eliminating the need for separate downloads.

Benefits of Windows 10 Home

The features of Windows 10 Home translate into tangible benefits for users, enhancing their computing experience and productivity. These benefits include:

  • User-Friendly Interface: The intuitive user interface makes Windows 10 Home accessible to users of all skill levels. The Start Menu and other navigation elements are designed to be easy to understand and use, even for those new to the operating system.
  • Enhanced Security: The robust security features, including Windows Defender and SmartScreen, provide peace of mind for users concerned about online threats. These features help protect devices from malware, phishing attacks, and other cyber security risks.
  • Productivity Tools: Windows 10 Home offers a range of productivity tools, such as Microsoft Office integration, built-in apps, and features like virtual desktops. These tools streamline workflows and enhance overall productivity.
  • Gaming Experience: Windows 10 Home is optimized for gaming, offering features like DirectX 12, Xbox Live integration, and Game Mode. These features enhance performance and provide a seamless gaming experience.
  • Regular Updates: Microsoft provides regular updates for Windows 10 Home, ensuring that users have access to the latest security patches, bug fixes, and feature enhancements. These updates help maintain system stability and security.
  • Compatibility: Windows 10 Home is compatible with a wide range of hardware and software, making it a versatile operating system. Users can choose from a variety of devices and applications to meet their individual needs.

Applications of Windows 10 Home

Windows 10 Home is a versatile operating system suitable for a range of applications, including:

  • Personal Computing: Windows 10 Home is the ideal operating system for personal computers used for tasks such as web browsing, email, document creation, and entertainment.
  • Home Entertainment: With its support for multimedia playback, streaming services, and gaming, Windows 10 Home provides a comprehensive entertainment experience.
  • Education: Windows 10 Home is widely used in educational settings, providing students with a platform for learning, research, and creative projects.
  • Small Businesses: Windows 10 Home is suitable for small businesses with basic computing needs, offering a cost-effective solution for tasks like email, accounting, and document management.

FAQs about Windows 10 Home

Q: What are the system requirements for Windows 10 Home?

A: Windows 10 Home requires a processor with a clock speed of 1 GHz or faster, at least 1 GB of RAM for 32-bit systems or 2 GB of RAM for 64-bit systems, and 16 GB of available hard disk space. It also requires a graphics card that supports DirectX 9 or later.

Q: Can I upgrade from a previous version of Windows to Windows 10 Home?

A: Yes, you can upgrade from Windows 7 or Windows 8.1 to Windows 10 Home. Microsoft offers a free upgrade path for eligible users.

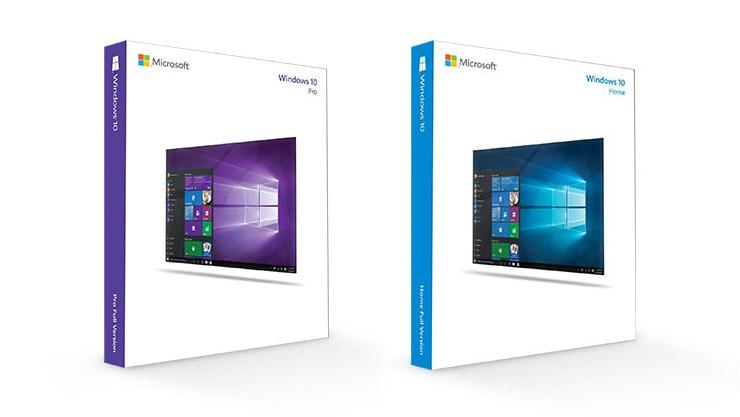
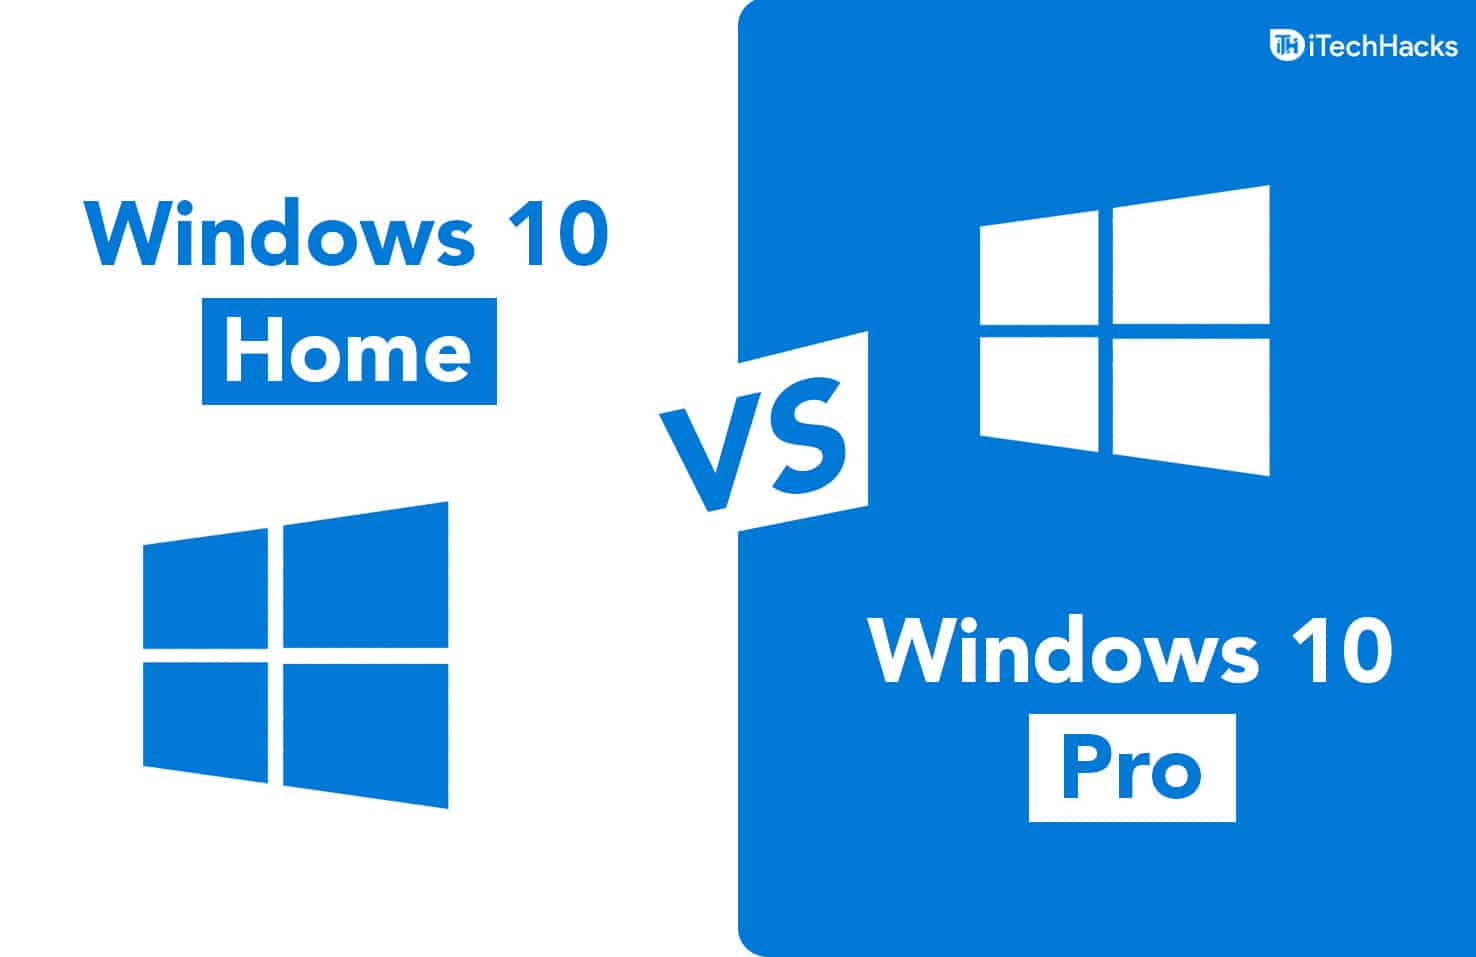
Q: What are the differences between Windows 10 Home and Windows 10 Pro?

A: Windows 10 Pro offers additional features designed for businesses and power users, such as domain join, BitLocker encryption, and remote desktop access. Windows 10 Home is geared towards personal use.

Q: How do I update Windows 10 Home?

A: Windows 10 Home automatically updates in the background. You can also manually check for updates by going to Settings > Update & Security > Windows Update.

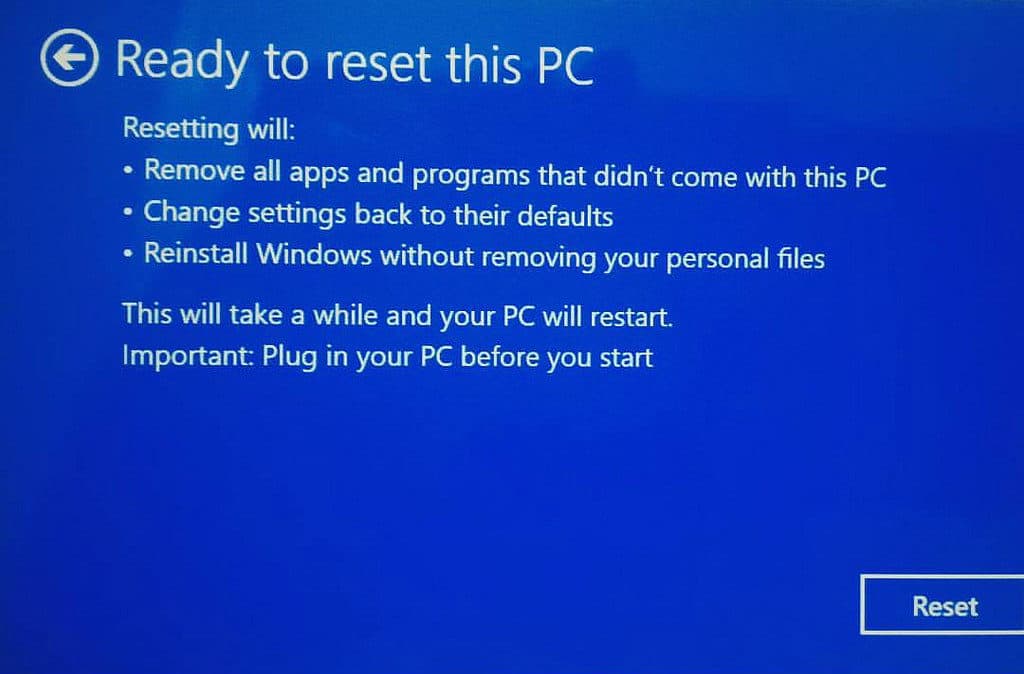
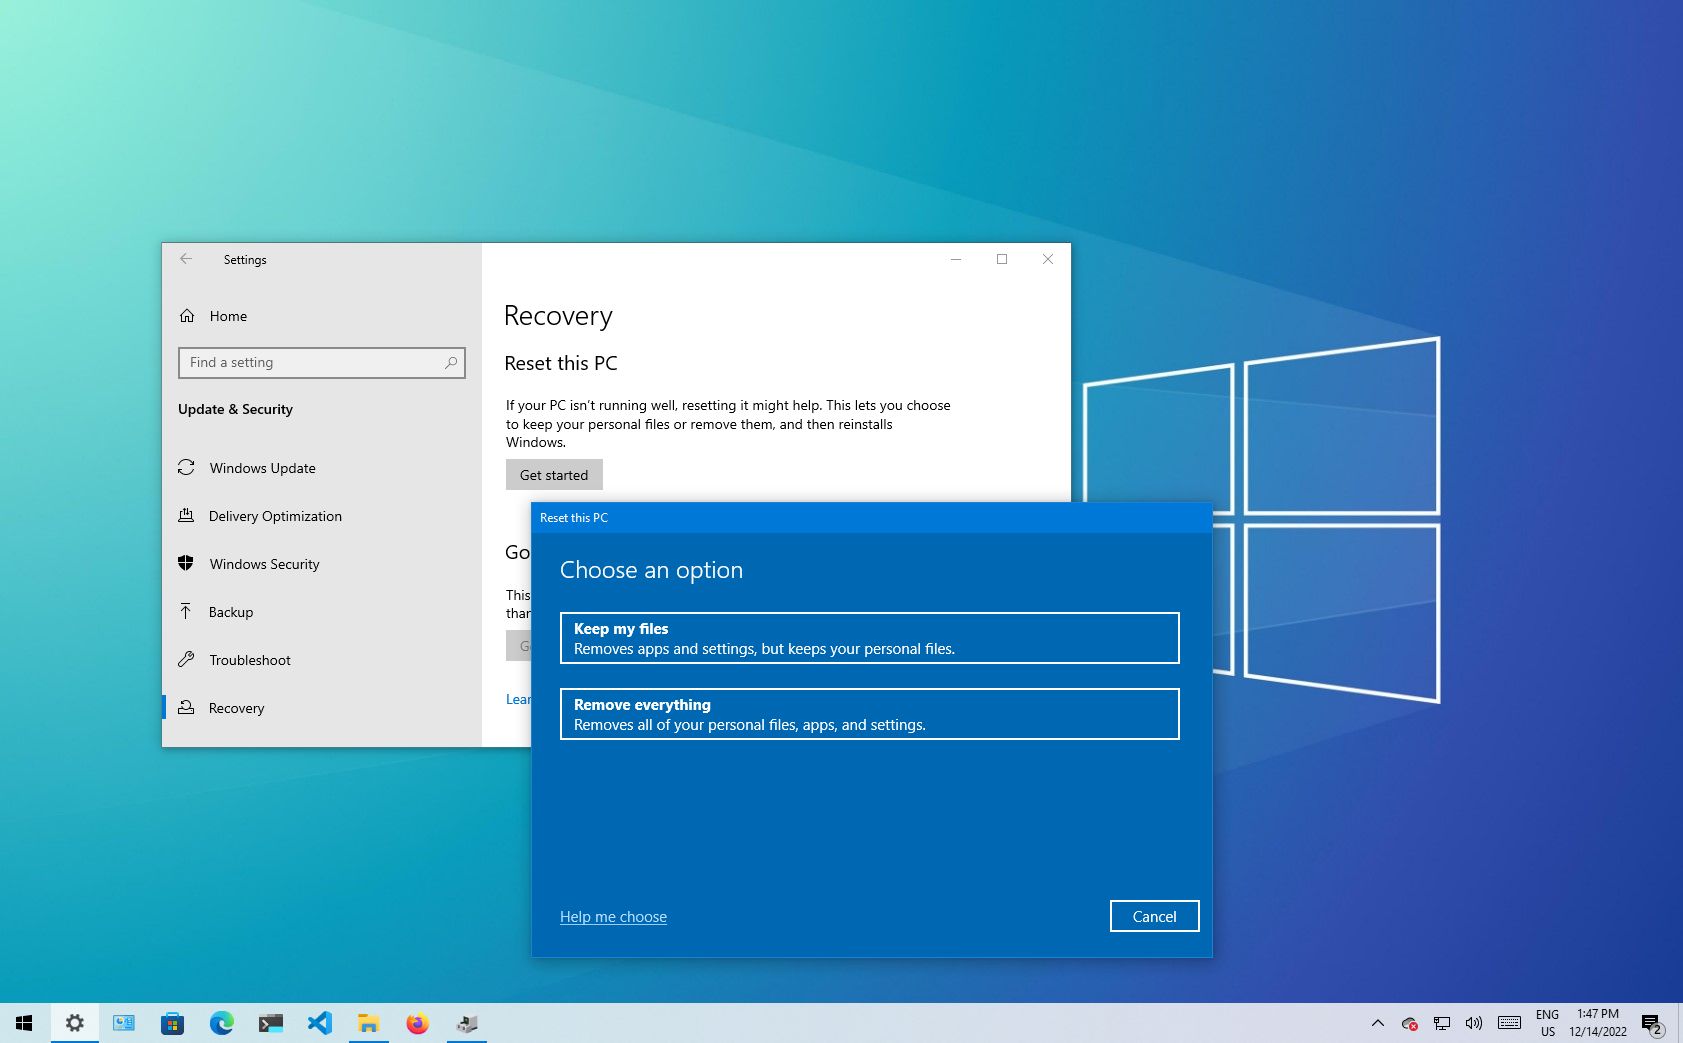
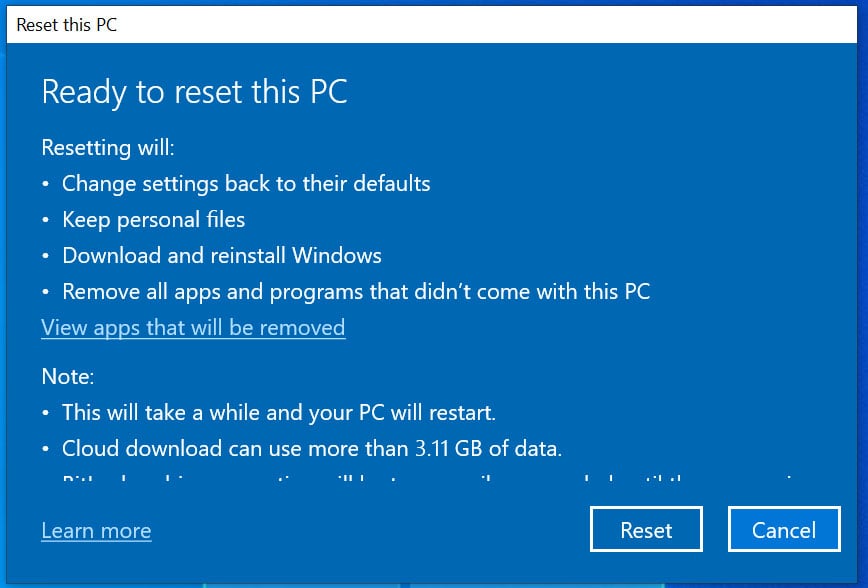
Q: How do I troubleshoot problems with Windows 10 Home?

A: You can troubleshoot common problems by checking the Microsoft support website, running the Windows Troubleshooter, or contacting Microsoft support.

Tips for Using Windows 10 Home

  • Use the Start Menu Effectively: The Start Menu is your gateway to applications, settings, and files. Familiarize yourself with its layout and features to improve navigation.
  • Explore Cortana’s Capabilities: Cortana can significantly enhance your productivity and convenience. Experiment with voice commands and text input to discover its full potential.
  • Keep Your System Updated: Regular updates ensure that your system is secure and runs smoothly. Enable automatic updates to receive the latest security patches and feature enhancements.
  • Use the Windows Store: The Windows Store offers a vast library of applications and games. Explore the store to discover apps that meet your specific needs and interests.
  • Customize Your Settings: Windows 10 Home allows you to customize your settings to tailor the operating system to your preferences. Explore the Settings app to personalize your experience.

Conclusion

Windows 10 Home is a powerful and versatile operating system designed for personal computing needs. Its user-friendly interface, robust security features, and comprehensive functionality make it an ideal choice for a wide range of users. Whether you are a casual user or a power user, Windows 10 Home offers a seamless and efficient computing experience. By understanding its features, benefits, and applications, users can maximize their productivity and enjoy the full potential of this popular operating system.

Basic Exploration of Windows 10 - YouTube Why Windows 10 Is the Best Operating System for Your Desktop  DesktopNinja History of Windows: The Most Popular Operating System
Windows 10 is officially the most popular Windows operating system Worldwide (2024) Installation Guide for Windows 10 Operating System Free Download with Key Windows 10 is the Best OS Ever  PC Solutions
Windows 10: Exploration of the newest Microsoft operating system - Bohner, Michael Windows Operating System: An Overview of Its Features, History, and Popularity โ€“ NetcronTechBlog

Closure

Thus, we hope this article has provided valuable insights into Windows 10 Home: A Comprehensive Exploration of the Popular Operating System. We thank you for taking the time to read this article. See you in our next article!

Rejuvenating Your PC: A Comprehensive Guide To Windows 10 Reset

Rejuvenating Your PC: A Comprehensive Guide to Windows 10 Reset

Introduction

With great pleasure, we will explore the intriguing topic related to Rejuvenating Your PC: A Comprehensive Guide to Windows 10 Reset. Let’s weave interesting information and offer fresh perspectives to the readers.

Rejuvenating Your PC: A Comprehensive Guide to Windows 10 Reset

Windows 10 System Restore, Refresh, Reset, Fresh Start & Reinstall guide

A computer, like any complex machine, can experience a decline in performance over time. This can be due to various factors, including accumulated software clutter, corrupted files, or even malicious software infections. When your Windows 10 PC starts exhibiting sluggishness, frequent crashes, or unexpected errors, it may be time to consider a fresh start. This process, often referred to as a "reset," involves restoring your computer to its factory settings, effectively erasing all data and reinstalling the operating system.

Why Consider a Reset?

A reset offers a potent solution for numerous issues plaguing a Windows 10 PC:

  • Performance Enhancement: Accumulated files, programs, and temporary data can bog down your system’s performance. A reset removes these unnecessary elements, freeing up valuable resources and boosting speed.
  • Troubleshooting Software Problems: If your PC suffers from persistent software glitches or conflicts, a reset can eliminate these issues by reinstalling a clean version of Windows 10.
  • Removing Malware: Malware can infiltrate your computer, compromising security and potentially corrupting files. A reset provides a thorough solution by removing all existing data, including any malicious software.
  • Selling or Donating Your PC: Before selling or donating your computer, a reset ensures the removal of all personal data and restores the device to a pristine state.
  • Starting Fresh: If you wish to begin using your computer with a blank slate, a reset allows you to customize your settings and software preferences from scratch.

Understanding the Two Reset Options

Windows 10 offers two primary reset options:

  • "Keep My Files": This option reinstalls Windows 10 while preserving your personal files, such as documents, photos, and music. However, it removes all installed applications and settings, effectively returning your PC to a near-factory state.
  • "Remove Everything": This option completely erases all data from your hard drive, including your personal files, applications, and settings. This is the most thorough option, leaving your PC in a factory-fresh condition.

Preparing for the Reset

Before proceeding with a reset, it is crucial to take the following preparatory steps:

  • Backup Essential Data: Regardless of the reset option chosen, ensure you have a complete backup of all important files, including documents, photos, videos, and any other data you wish to preserve. Consider using cloud storage services, external hard drives, or USB drives for backup purposes.
  • Gather Product Keys: If you have purchased software with product keys, note them down or store them securely. These keys will be necessary for reinstalling the software after the reset.
  • Disconnect External Devices: Detach all external devices, including printers, scanners, and external hard drives, as these might interfere with the reset process.
  • Charge Your Battery: Ensure your laptop has sufficient battery charge or is connected to a power source throughout the reset process.

Initiating the Reset Process

The reset process can be initiated in two ways:

  • Through Settings:
    1. Open the "Settings" app (Windows key + I).
    2. Navigate to "Update & Security" > "Recovery."
    3. Under "Reset this PC," click "Get started."
    4. Choose your preferred reset option ("Keep My Files" or "Remove Everything").
    5. Follow the on-screen instructions to complete the reset.
  • Through Windows Recovery Environment:
    1. Restart your computer and press F11 or Shift + F10 during startup to access the Windows Recovery Environment.
    2. Select "Troubleshoot" > "Reset this PC."
    3. Choose your preferred reset option and follow the on-screen instructions.

Post-Reset Configuration

Once the reset is complete, you will be greeted with a fresh installation of Windows 10. You will need to configure your PC with the following steps:

  • Set Up Your Account: Create a new user account or sign in with an existing Microsoft account.
  • Connect to Wi-Fi or Ethernet: Connect to your internet network to download necessary updates and software.
  • Install Required Software: Reinstall all essential software, such as antivirus, productivity applications, and any other programs you require.
  • Restore Data (if applicable): If you chose the "Keep My Files" option, you can restore your backed-up data to your PC.

FAQs

Q: Will a reset delete my personal files?

A: The "Keep My Files" option preserves your personal files, while the "Remove Everything" option completely erases all data.

Q: What happens to my installed applications?

A: All installed applications are removed during the reset process, regardless of the chosen option.

Q: Can I undo a reset?

A: Once the reset is completed, it cannot be undone. Therefore, ensuring a comprehensive backup before the reset is essential.

Q: How long does a reset take?

A: The duration of a reset varies depending on the size of your hard drive and the chosen option. It can take anywhere from 30 minutes to several hours.

Tips for a Smooth Reset

  • Choose the appropriate reset option based on your needs.
  • Ensure a complete backup of all essential data before proceeding.
  • Disconnect all external devices during the reset process.
  • Be patient, as the reset process can take time.
  • Install necessary software after the reset is complete.

Conclusion

A reset is a powerful tool for revitalizing your Windows 10 PC, addressing various performance and software issues. It can be an effective solution for restoring your computer to a clean and efficient state. However, it is crucial to understand the implications of each reset option and take necessary precautions, such as backing up your data, before proceeding. By following the steps outlined in this guide, you can confidently perform a reset and rejuvenate your PC for optimal performance.

How to reset a Windows 10 PC to factory settings  Windows Central What does reset pc do windows 10 - nimfano windows 10 reset pc โ€“ reset factory windows 10 โ€“ Brapp
HOW TO RESET WINDOWS 10 GUIDE! - YouTube Windows 10 Reset VS Clean Install VS Fresh Start, Detailed Guide! - MiniTool Reset windows settings windows 10
Windows 10 Reset VS Clean Install VS Fresh Start, Detailed Guide! - MiniTool How to Reset Your Windows 10 Laptop, PC - ICTfix

Closure

Thus, we hope this article has provided valuable insights into Rejuvenating Your PC: A Comprehensive Guide to Windows 10 Reset. We hope you find this article informative and beneficial. See you in our next article!

Removing A Microsoft Account From A Windows 11 PC: A Comprehensive Guide

Removing a Microsoft Account from a Windows 11 PC: A Comprehensive Guide

Introduction

With enthusiasm, let’s navigate through the intriguing topic related to Removing a Microsoft Account from a Windows 11 PC: A Comprehensive Guide. Let’s weave interesting information and offer fresh perspectives to the readers.

Removing a Microsoft Account from a Windows 11 PC: A Comprehensive Guide

How To Remove Microsoft Account From Windows 11 Guide  yorketech

While Microsoft accounts offer numerous benefits, such as cloud storage, application synchronization, and seamless device integration, there are instances where users may desire to remove a Microsoft account from their Windows 11 PC. This might be due to privacy concerns, the need for a local account, or simply a preference for a different account management approach. This article aims to provide a comprehensive guide on removing a Microsoft account from a Windows 11 PC, explaining the process clearly and comprehensively.

Understanding the Implications

Before embarking on the process of removing a Microsoft account, it is crucial to understand the implications. Removing a Microsoft account from a Windows 11 PC will result in the following changes:

  • Loss of Cloud Synchronization: Data stored in OneDrive, including documents, pictures, and other files, will no longer be automatically synchronized with the PC.
  • Loss of App Access: Apps purchased or downloaded using the Microsoft account will become inaccessible.
  • Loss of Settings and Personalization: Customized settings, themes, and other personalization options will be reset to default values.
  • No Access to Microsoft Services: Features like Windows Update, the Microsoft Store, and other Microsoft services will require a different Microsoft account or a local account.

Methods for Removing a Microsoft Account

There are two primary methods for removing a Microsoft account from a Windows 11 PC:

1. Using the Settings App

This is the most straightforward method for removing a Microsoft account from a Windows 11 PC.

  • Step 1: Open the Settings App: Navigate to the "Start" menu and click on the "Settings" icon, or use the keyboard shortcut "Windows key + I".
  • Step 2: Access Accounts Settings: Select "Accounts" from the left-hand menu.
  • Step 3: Choose Your Account: Click on the "Your info" option under the "Your account" section.
  • Step 4: Sign Out of the Account: Click on the "Sign out" button.
  • Step 5: Confirm Your Decision: A confirmation dialog will appear; confirm your decision to sign out.

2. Using the Control Panel

This method involves using the traditional Control Panel interface, which is still available in Windows 11.

  • Step 1: Open the Control Panel: Search for "Control Panel" in the Windows search bar and select the best match.
  • Step 2: Access User Accounts: Click on "User Accounts" in the Control Panel window.
  • Step 3: Manage Your Account: Select "Manage another account" from the left-hand menu.
  • Step 4: Choose Your Account: Select the Microsoft account you wish to remove from the list.
  • Step 5: Remove the Account: Click on the "Remove the account" option.
  • Step 6: Confirm Your Decision: A confirmation dialog will appear; confirm your decision to remove the account.

Important Considerations

  • Backup Data: Before removing a Microsoft account, it is highly recommended to back up any important data stored on the PC, especially if it is not synchronized with OneDrive.
  • Local Account Creation: After removing a Microsoft account, you will need to create a local account to continue using the PC. This can be done by following the on-screen instructions during the account removal process or by manually creating a local account in the "Settings" app.
  • Reinstall Apps: Apps purchased or downloaded using the removed Microsoft account will need to be reinstalled using a different account or by using the offline installation method.

FAQs

Q: What happens to my files when I remove my Microsoft account?

A: Files stored in OneDrive will remain in your OneDrive cloud storage. However, they will no longer be automatically synchronized with your PC. Local files stored on your PC will remain unaffected.

Q: Can I restore my Microsoft account after removing it?

A: Yes, you can restore your Microsoft account by signing in again using the same credentials. However, you may need to reinstall apps and reconfigure settings.

Q: Can I remove a Microsoft account from a shared PC?

A: Yes, you can remove a Microsoft account from a shared PC. However, it is important to understand that removing an account from a shared PC may affect other users’ access to files, settings, and applications.

Q: What are the benefits of using a local account instead of a Microsoft account?

A: Local accounts offer enhanced privacy and security, as they are not directly linked to a cloud-based service. They also provide greater control over user permissions and data access.

Tips

  • Consider a Backup: Before removing a Microsoft account, back up all important data to ensure you don’t lose anything critical.
  • Review App Licenses: Check the licensing terms of apps associated with the Microsoft account to understand their limitations after account removal.
  • Create a Local Account: Create a new local account before removing the Microsoft account to avoid being locked out of your PC.
  • Manage OneDrive Files: Ensure you have access to all important files stored in OneDrive before removing the account.
  • Utilize Offline Installers: If possible, use offline installers for applications to avoid relying on the Microsoft Store after removing the account.

Conclusion

Removing a Microsoft account from a Windows 11 PC is a straightforward process that can be accomplished using the Settings app or the Control Panel. However, it is essential to understand the implications of this action and take necessary precautions to ensure data preservation and continued access to essential features. By following the steps outlined in this guide and considering the important considerations, users can seamlessly remove a Microsoft account from their Windows 11 PC while maintaining a functional and secure computing environment.

How to remove Microsoft account in Windows 11 How to Remove a Microsoft Account from Windows 11 How to Completely Delete a Microsoft Account and Remove It from Windows 11 - WinBuzzer
How to Remove Microsoft Account from Windows 11 [Guide]  Beebom How to Remove a Microsoft Account from Windows 11 How To Remove Microsoft Account From Windows 11 Guide  beebom
How to Remove Microsoft Account from Windows 11 [Guide]  Beebom How To Remove Microsoft Account From Windows 11 Guide  beebom

Closure

Thus, we hope this article has provided valuable insights into Removing a Microsoft Account from a Windows 11 PC: A Comprehensive Guide. We thank you for taking the time to read this article. See you in our next article!

Mastering Your Graphics: A Comprehensive Guide To The NVIDIA Control Panel On Windows 11

Mastering Your Graphics: A Comprehensive Guide to the NVIDIA Control Panel on Windows 11

Introduction

In this auspicious occasion, we are delighted to delve into the intriguing topic related to Mastering Your Graphics: A Comprehensive Guide to the NVIDIA Control Panel on Windows 11. Let’s weave interesting information and offer fresh perspectives to the readers.

Mastering Your Graphics: A Comprehensive Guide to the NVIDIA Control Panel on Windows 11

NVIDIA Control Panel Windows 11

In the realm of modern computing, graphics processing units (GPUs) play a pivotal role in delivering immersive experiences, from gaming to video editing and beyond. NVIDIA, a leading manufacturer of GPUs, provides a powerful tool to unlock the full potential of their hardware: the NVIDIA Control Panel. This software suite, accessible on Windows 11, serves as a central hub for managing and optimizing graphics settings, enhancing performance, and customizing visual experiences.

This comprehensive guide delves into the depths of the NVIDIA Control Panel, unraveling its features, functionalities, and the benefits it offers to users. We will explore the various sections within the control panel, demonstrating how they empower users to tailor their graphics settings to specific needs and preferences.

Navigating the NVIDIA Control Panel: A Visual Journey

Upon launching the NVIDIA Control Panel, users are greeted with a user-friendly interface. The main window features a left-hand navigation pane, allowing users to access different sections:

  • 3D Settings: This section is the cornerstone of the NVIDIA Control Panel, offering a plethora of options for optimizing graphics performance and visual quality. Here, users can manage global 3D settings, which apply to all applications, or customize settings on a per-program basis.
  • Display: This section focuses on managing display settings, including resolution, refresh rate, and color adjustments. Users can also configure multiple displays, adjust scaling options, and even enable NVIDIA’s advanced features like G-SYNC and HDR.
  • Video: This section provides tools for configuring video playback settings, including video scaling, color adjustments, and the ability to select the desired video output device.
  • Manage 3D Settings: This section offers a detailed overview of the 3D settings, allowing users to fine-tune individual parameters like texture filtering, anti-aliasing, and shadow quality.
  • Program Settings: This section allows users to create custom profiles for specific applications, enabling fine-grained control over graphics settings for individual games or software.
  • Help: This section provides access to NVIDIA’s online documentation and support resources, including troubleshooting guides and FAQs.

Optimizing Performance: Unleashing the Power of Your GPU

The NVIDIA Control Panel empowers users to maximize the performance of their GPU by adjusting various settings:

  • Global 3D Settings: This section allows users to apply default settings for all applications. Users can choose between "High Performance" for prioritizing performance, "Power Saving" for optimizing battery life, or "Balanced" for a middle ground.
  • Manage 3D Settings: This section offers a granular level of control over individual 3D settings. Users can adjust parameters like:
    • Anti-aliasing: Reduces jagged edges in graphics, improving visual fidelity.
    • Anisotropic Filtering: Improves the sharpness and clarity of textures at oblique angles.
    • Texture Filtering: Determines how textures are sampled, impacting their overall quality and sharpness.
    • Ambient Occlusion: Creates more realistic lighting by simulating the way light is blocked by objects.
    • Shadow Quality: Controls the quality and detail of shadows, impacting visual realism.
    • VSync: Synchronizes the refresh rate of the display with the frame rate of the application, reducing screen tearing.

Customizing Visual Experiences: Tailoring Your Graphics to Perfection

The NVIDIA Control Panel offers extensive customization options, enabling users to tailor their visual experience to their preferences:

  • Display Settings: Users can adjust the resolution and refresh rate of their display, optimize scaling options for multiple monitors, and configure HDR settings.
  • Color Settings: The NVIDIA Control Panel allows users to adjust color temperature, gamma, and saturation, ensuring accurate and vibrant colors on their displays.
  • NVIDIA Surround: This feature allows users to create a multi-monitor setup, spanning across multiple displays for an immersive gaming experience.
  • NVIDIA G-SYNC: This technology synchronizes the refresh rate of the display with the frame rate of the application, eliminating screen tearing and stuttering.
  • NVIDIA Freestyle: This feature allows users to apply real-time filters to games, enhancing their visual style.
  • NVIDIA Ansel: This feature enables users to capture high-resolution screenshots of their games, offering a more immersive and artistic way to document their gaming experiences.

Enhancing Productivity: Leveraging NVIDIA’s Features for Work

Beyond gaming, the NVIDIA Control Panel provides features that enhance productivity for professionals:

  • NVIDIA Optimus: This technology automatically switches between the integrated graphics of the CPU and the dedicated GPU, optimizing power consumption and performance based on the application in use.
  • NVIDIA Broadcast: This feature enhances video conferencing and streaming experiences by providing features like noise reduction, virtual background, and auto-framing.
  • NVIDIA Canvas: This tool allows users to create realistic paintings using AI-powered tools, simplifying the artistic process.

Troubleshooting and Optimizing: Addressing Common Issues

The NVIDIA Control Panel offers tools to troubleshoot and optimize graphics performance:

  • Driver Updates: Users can easily access the latest NVIDIA drivers directly from the control panel, ensuring optimal compatibility and performance.
  • Performance Monitoring: The NVIDIA Control Panel provides tools to monitor GPU utilization, frame rates, and temperature, helping users identify performance bottlenecks.
  • Troubleshooting Guides: NVIDIA’s online documentation and support resources provide comprehensive troubleshooting guides for common issues, ensuring a smooth user experience.

FAQs about the NVIDIA Control Panel on Windows 11

Q: What is the NVIDIA Control Panel, and why is it important?

A: The NVIDIA Control Panel is a software suite designed to manage and optimize graphics settings for NVIDIA GPUs. It allows users to customize visual experiences, enhance performance, and troubleshoot common issues, ensuring a seamless and enjoyable user experience.

Q: How do I access the NVIDIA Control Panel on Windows 11?

A: The NVIDIA Control Panel can be accessed through the Windows Search bar by typing "NVIDIA Control Panel" or by right-clicking the desktop and selecting "NVIDIA Control Panel" from the context menu.

Q: Can I customize graphics settings for individual applications?

A: Yes, the NVIDIA Control Panel allows users to create custom profiles for specific applications, enabling fine-grained control over graphics settings for individual games or software.

Q: What are the benefits of using the NVIDIA Control Panel?

A: The NVIDIA Control Panel offers a multitude of benefits, including improved graphics performance, enhanced visual quality, customized display settings, and comprehensive troubleshooting tools.

Q: How do I update my NVIDIA drivers?

A: You can update your NVIDIA drivers directly from the NVIDIA Control Panel by navigating to the "System Tray" section and selecting "Check for Updates."

Tips for Optimizing the NVIDIA Control Panel

  • Prioritize Performance: For demanding applications like gaming, choose "High Performance" in the Global 3D Settings for optimal performance.
  • Customize Settings: Experiment with different settings in the Manage 3D Settings section to find the optimal balance between visual quality and performance.
  • Create Custom Profiles: Create custom profiles for specific applications to ensure optimal settings for individual games or software.
  • Monitor Performance: Use the performance monitoring tools to identify bottlenecks and optimize settings accordingly.
  • Update Drivers Regularly: Keep your NVIDIA drivers up-to-date to ensure compatibility and optimal performance.

Conclusion

The NVIDIA Control Panel is an indispensable tool for users of NVIDIA GPUs, offering a wealth of features and functionalities to enhance graphics performance, customize visual experiences, and optimize overall user experience. By understanding the various sections within the control panel and utilizing its powerful tools, users can unlock the full potential of their NVIDIA GPUs, ensuring a seamless and immersive computing experience.

NVIDIA Control Panel Windows 11 How To Open Nvidia Control Panel And Geforce Experience On Windows 11  Images and Photos finder NVIDIA Control Panel Windows 11
NVIDIA Control Panel Windows 11 NVIDIA Control Panel Windows 11 Nvidia Control Panel Windows 11
NVidia Control Panel Display Settings Missing [Windows 11 Fix] How to Open Nvidia Control Panel & GeForce Experience on Windows 11

Closure

Thus, we hope this article has provided valuable insights into Mastering Your Graphics: A Comprehensive Guide to the NVIDIA Control Panel on Windows 11. We hope you find this article informative and beneficial. See you in our next article!

Windows 11: A Deep Dive Into The 64-Bit Operating System

Windows 11: A Deep Dive into the 64-Bit Operating System

Introduction

With great pleasure, we will explore the intriguing topic related to Windows 11: A Deep Dive into the 64-Bit Operating System. Let’s weave interesting information and offer fresh perspectives to the readers.

Windows 11: A Deep Dive into the 64-Bit Operating System

Windows 11 on the Surface Pro X Deep Dive Part 2: Store, Apps, TikTok, and 64-bit Emulation

Windows 11, Microsoft’s latest operating system, represents a significant leap forward in computing technology. While the user interface may seem familiar, beneath the surface lies a powerful 64-bit architecture that unlocks enhanced performance, security, and capabilities. This article delves into the intricacies of Windows 11’s 64-bit foundation, exploring its advantages and providing a comprehensive understanding of its impact on the modern computing landscape.

The Power of 64-Bit Computing

At its core, the 64-bit architecture empowers Windows 11 to process information more efficiently and handle larger amounts of data. Here’s a breakdown of its key benefits:

  • Enhanced Memory Management: 64-bit systems can access significantly more RAM than their 32-bit counterparts. This allows for smoother multitasking, improved application performance, and the ability to run resource-intensive programs like video editing software and high-end games without encountering memory limitations.

  • Increased Address Space: The 64-bit architecture provides a vast address space, enabling the system to manage a significantly larger number of memory addresses. This translates to better performance for applications that require access to extensive data sets, such as databases and scientific simulations.

  • Improved Security: 64-bit systems offer enhanced security features, making them less susceptible to malware and other security threats. This is due to the increased memory space and the ability to implement more robust security protocols.

  • Support for Larger Files and Applications: 64-bit systems can handle significantly larger files and applications, exceeding the limitations of their 32-bit predecessors. This is crucial for working with high-resolution images, video editing projects, and large databases.

  • Future-Proofing: As technology advances, the need for greater processing power and memory capacity will only increase. 64-bit systems are designed to accommodate these future demands, ensuring that your computer remains relevant and capable of handling demanding tasks.

The Advantages of Windows 11’s 64-Bit Architecture

Windows 11, built upon a 64-bit foundation, leverages these advantages to deliver a superior user experience. Here are some key benefits:

  • Enhanced Performance: Windows 11’s 64-bit architecture allows for faster processing speeds, smoother multitasking, and improved application performance, making everyday tasks more efficient and enjoyable.

  • Expanded Application Compatibility: The 64-bit architecture enables Windows 11 to run a wider range of applications, including those designed specifically for 64-bit systems. This opens up a vast library of software options, providing users with greater flexibility and choice.

  • Improved Security: Windows 11 incorporates advanced security features, leveraging the 64-bit architecture to provide a more secure computing environment. This includes features like hardware-based security, data encryption, and enhanced malware protection.

  • Enhanced Gaming Experience: The 64-bit architecture allows Windows 11 to deliver a superior gaming experience, supporting demanding graphics and game engines that require significant processing power and memory. This translates to smoother gameplay, higher frame rates, and more immersive graphics.

  • Support for Modern Hardware: Windows 11 is designed to take full advantage of the latest hardware technologies, including high-performance processors, high-resolution displays, and advanced graphics cards. This ensures that your computer can keep pace with the rapidly evolving technological landscape.

Understanding the Impact of 64-Bit Architecture

The transition from 32-bit to 64-bit computing has revolutionized the way we use computers. Here’s a deeper look at its impact:

  • Increased Productivity: The enhanced performance and memory management capabilities of 64-bit systems have significantly increased productivity for users in various fields, including business, education, and creative industries.

  • Advancements in Software Development: The 64-bit architecture has opened up new possibilities for software developers, allowing them to create more complex and resource-intensive applications. This has led to a surge in innovative software solutions, from advanced productivity tools to immersive gaming experiences.

  • Expansion of Computing Capabilities: 64-bit systems have expanded the boundaries of computing, enabling users to tackle more complex tasks, process larger datasets, and explore new frontiers in scientific research and engineering.

  • Evolution of Operating Systems: The shift to 64-bit architectures has been a driving force behind the evolution of operating systems, leading to more powerful and feature-rich platforms like Windows 11.

FAQs about Windows 11’s 64-Bit Architecture

Q: Can I run Windows 11 on a 32-bit computer?

A: No, Windows 11 requires a 64-bit processor and a compatible 64-bit system. It is not compatible with 32-bit systems.

Q: What are the minimum system requirements for Windows 11?

A: Windows 11 requires a 64-bit processor with a clock speed of 1 GHz or faster, at least 4 GB of RAM, 64 GB of storage space, and a compatible graphics card. It also requires a UEFI-compliant firmware with Secure Boot enabled.

Q: How do I know if my computer is 64-bit?

A: You can check your system’s architecture by going to "Settings" > "System" > "About." Look for the "System type" entry, which will indicate whether your system is 32-bit or 64-bit.

Q: Will my existing applications work on Windows 11?

A: Most modern applications will work on Windows 11, but older applications designed for 32-bit systems may not be compatible. You can check the application’s system requirements or contact the developer to confirm compatibility.

Q: Is it necessary to upgrade to Windows 11 if I have a 64-bit computer?

A: Upgrading to Windows 11 is not mandatory, but it offers significant advantages in terms of performance, security, and features. However, it is important to ensure that your computer meets the minimum system requirements before upgrading.

Tips for Optimizing Windows 11’s Performance

  • Ensure Adequate RAM: Windows 11 requires at least 4 GB of RAM, but for optimal performance, it is recommended to have at least 8 GB or more, depending on your usage patterns.

  • Optimize Storage Space: Regularly clean up your hard drive to free up storage space, as this can improve performance and prevent slowdowns.

  • Disable Unnecessary Startup Programs: Minimize the number of programs that start automatically when you boot your computer, as this can reduce startup time and improve performance.

  • Keep Drivers Updated: Ensure that your device drivers are up to date, as this can improve compatibility and performance.

  • Use a High-Performance Power Plan: If you are prioritizing performance, switch to the "High Performance" power plan, which will maximize processing power and reduce power-saving features.

Conclusion

Windows 11, with its 64-bit architecture, represents a significant advancement in computing technology. Its enhanced performance, security, and capabilities unlock a world of possibilities for users, empowering them to accomplish more, explore new frontiers, and enjoy a more immersive and efficient computing experience. By understanding the advantages of 64-bit computing and leveraging the features of Windows 11, users can unlock the full potential of their computers and embrace the future of technology.

Windows 11 Deep Dive: Walking Through The New OS - YouTube Microsoft HAV-00164 Windows 11 Pro 64-bit Operating System - Full Packaged Product (FPP) - Wootware Exploring The Features Of Windows 11: A Deep Dive
Feature Deep Dive โ€“ Windows 11 Readiness Microsoft HAJ-00089 Windows 11 Home 64-bit Operating System - Full Packaged Product (FPP) - Wootware Used Microsoft Windows 11 Pro Professional 64/32 Bit Operating System Install Today - UBB.threads
Windows 11 Deep-Dive: Die Neuerungen im รœberblick - WindowsUnited What is Windows 11 in S mode?  Deep Dive - YouTube

Closure

Thus, we hope this article has provided valuable insights into Windows 11: A Deep Dive into the 64-Bit Operating System. We appreciate your attention to our article. See you in our next article!

Windows 10 Home: A Comprehensive Guide

Windows 10 Home: A Comprehensive Guide

Introduction

In this auspicious occasion, we are delighted to delve into the intriguing topic related to Windows 10 Home: A Comprehensive Guide. Let’s weave interesting information and offer fresh perspectives to the readers.

Windows 10 Home: A Comprehensive Guide

Microsoft Windows 10 Comprehensive - STANZATEXTBOOKS

Windows 10 Home, a popular operating system (OS) from Microsoft, provides a user-friendly interface and a range of features for personal computing. This article aims to offer a comprehensive understanding of Windows 10 Home, exploring its key functionalities, benefits, and considerations for users.

Understanding Windows 10 Home

Windows 10 Home is designed for individual users and families, offering a balance of features and accessibility. It is a powerful and versatile OS, capable of handling a wide range of tasks, from basic web browsing and document creation to more demanding activities like gaming and video editing.

Key Features of Windows 10 Home

Windows 10 Home incorporates a diverse set of features to enhance the user experience:

  • Start Menu: The Start Menu provides a familiar and efficient way to access applications, settings, and files. It features a dynamic tile layout for frequently used programs and a search bar for quick access.
  • Cortana: This intelligent personal assistant allows users to interact with their computer using voice commands, search the web, set reminders, and manage tasks.
  • Microsoft Edge: Windows 10 Home’s default web browser, Edge, offers a streamlined and secure browsing experience with features like reading view, tab management, and integration with Cortana.
  • Windows Store: The Windows Store provides a central platform for downloading and installing apps, games, and other digital content. It offers a wide selection of free and paid apps, catering to diverse user needs.
  • Universal Apps: Windows 10 Home supports universal apps, which can run seamlessly across different devices like desktops, tablets, and smartphones. This ensures a consistent user experience and allows for easy app synchronization.
  • Xbox Integration: Windows 10 Home seamlessly integrates with Xbox Live, enabling users to play Xbox games on their PCs, stream content, and connect with friends.
  • Windows Defender: This built-in security software provides real-time protection against malware, viruses, and other online threats. It helps safeguard user data and ensures a secure computing environment.

Benefits of Windows 10 Home

Windows 10 Home offers several advantages for users:

  • User-Friendly Interface: The intuitive interface and familiar design make it easy for users to navigate and utilize the OS.
  • Performance and Stability: Windows 10 Home is known for its performance and stability, ensuring a smooth and reliable computing experience.
  • Security Features: Built-in security features like Windows Defender and automatic updates help protect against threats and maintain system security.
  • Regular Updates: Microsoft provides regular updates to enhance functionality, address security vulnerabilities, and improve the overall user experience.
  • Wide Software Compatibility: Windows 10 Home supports a vast ecosystem of software and applications, providing users with a wide range of choices.
  • Affordable Option: Compared to other editions of Windows 10, Home is a more affordable option, making it accessible to a wider user base.

Considerations for Windows 10 Home

While Windows 10 Home offers a robust set of features, it’s essential to consider certain aspects:

  • Limited Features: Compared to Windows 10 Pro, Home lacks advanced features like BitLocker encryption, remote desktop access, and group policy management.
  • System Requirements: Windows 10 Home has specific system requirements, including sufficient RAM, storage space, and processor capabilities.
  • Software Costs: Some software applications may require separate purchases, adding to the overall cost of using Windows 10 Home.

FAQs about Windows 10 Home

1. Is Windows 10 Home suitable for gaming?

Windows 10 Home is generally suitable for gaming, with support for DirectX 12 and the ability to run various games. However, for demanding games, users might need to consider upgrading to Windows 10 Pro for its enhanced features.

2. Can I upgrade from Windows 7 or 8 to Windows 10 Home?

Yes, Microsoft offered free upgrades to Windows 10 from eligible versions of Windows 7 and 8. However, this offer has since expired. Users can now purchase Windows 10 Home and perform a clean install or upgrade from a previous version.

3. How often does Windows 10 Home receive updates?

Microsoft regularly releases updates for Windows 10 Home, including security patches, bug fixes, and new features. These updates are typically delivered automatically in the background.

4. Can I customize Windows 10 Home?

Yes, Windows 10 Home allows for some degree of customization, including changing the theme, wallpaper, and taskbar settings. However, compared to Windows 10 Pro, it offers fewer customization options.

5. What are the system requirements for Windows 10 Home?

Windows 10 Home requires a minimum of 1 GB of RAM, 16 GB of storage space, and a 1 GHz processor. However, for optimal performance, it is recommended to have a more powerful system.

Tips for Using Windows 10 Home

  • Keep Your System Updated: Regularly install the latest updates to ensure security and performance.
  • Use Windows Defender: Utilize the built-in antivirus software to protect against malware and viruses.
  • Manage Storage Space: Regularly clean up your hard drive to free up storage space and improve performance.
  • Customize Your Settings: Adjust settings to suit your preferences, including display resolution, keyboard shortcuts, and notification settings.
  • Explore the Windows Store: Discover new apps, games, and digital content available in the Windows Store.

Conclusion

Windows 10 Home provides a reliable and user-friendly operating system for personal computers. Its comprehensive features, performance, and security enhancements make it a suitable choice for a wide range of users. Understanding its key features, benefits, and considerations can help users make an informed decision about whether Windows 10 Home aligns with their individual needs and preferences. By staying informed about its capabilities and utilizing its features effectively, users can maximize their experience and enjoy the benefits of a modern and versatile operating system.

Windows 10 Home โ€“ Licencias Oficiales Windows 10 Home Licence PPT - A Comprehensive Guide to Installing Windows 10_ Step-by-Step Tutorial PowerPoint
Windows 10 Home - ResolveIT Webstore Windows 10 Home vs Pro. Ultimate Guide Update 06 / 2024 Windows 10 Home
Comprehensive Guide  PDF  Windows 10  Microsoft Windows Difference Between Windows 10 Home And Pro Simple Guide 2021  itechhacks

Closure

Thus, we hope this article has provided valuable insights into Windows 10 Home: A Comprehensive Guide. We thank you for taking the time to read this article. See you in our next article!

Navigating The Latest Python Landscape: A Comprehensive Guide For Windows 11 Users

Navigating the Latest Python Landscape: A Comprehensive Guide for Windows 11 Users

Introduction

With great pleasure, we will explore the intriguing topic related to Navigating the Latest Python Landscape: A Comprehensive Guide for Windows 11 Users. Let’s weave interesting information and offer fresh perspectives to the readers.

How to Add Python Path to Environment Variable on Windows 11 - YouTube

Python, a versatile and widely-adopted programming language, continues to evolve, offering new features and enhancements with each release. For Windows 11 users, staying abreast of these advancements and ensuring access to the latest version is crucial for maximizing the language’s potential. This guide provides a comprehensive overview of the process, addressing key considerations and addressing common questions.

Understanding Python Versions and Their Significance

Python’s development follows a structured release cycle, with new versions introduced periodically. Each version typically includes bug fixes, performance improvements, and new features. While older versions might still function, utilizing the latest release offers several advantages:

  • Access to Cutting-Edge Features: Newer versions introduce innovative features, enabling developers to explore advanced functionalities and write more efficient code.
  • Improved Security: Regular updates address vulnerabilities, enhancing the overall security of Python applications.
  • Enhanced Performance: Performance optimizations implemented in newer versions can lead to faster execution speeds and improved resource utilization.
  • Community Support: The latest version benefits from active community support, providing a wider range of resources and solutions for developers.

Downloading and Installing Python on Windows 11: A Step-by-Step Guide

  1. Visiting the Official Python Website: The official website (https://www.python.org/) is the most reliable source for downloading Python. Navigate to the Downloads section, where you’ll find the latest stable release.

  2. Choosing the Right Installer: The website provides installers for both 32-bit and 64-bit Windows systems. Select the installer compatible with your operating system.

  3. Running the Installer: Double-click the downloaded installer file to initiate the installation process. Follow the on-screen instructions, ensuring to select the "Add Python to PATH" option during the setup. This step ensures that Python is accessible from any command prompt or terminal window.

  4. Verifying Installation: After the installation completes, open a command prompt or terminal window and type "python –version." The output should display the installed Python version, confirming successful installation.

Essential Considerations for Seamless Integration

  • Choosing the Right Python Version: While the latest stable release offers the most up-to-date features, older versions might be required for specific projects or compatibility reasons. Consider the project requirements before choosing a version.
  • Utilizing Virtual Environments: Virtual environments are highly recommended for managing dependencies and isolating project environments. Tools like "venv" and "virtualenv" help create isolated environments, preventing conflicts between projects using different Python versions or libraries.
  • Understanding Package Management: Python’s package management system, "pip," simplifies the process of installing and managing external libraries. Ensure "pip" is installed alongside Python, allowing developers to easily add required packages to their projects.
  • Regular Updates: It’s crucial to regularly update Python to benefit from security patches, bug fixes, and new features. Checking for updates and installing them promptly ensures a secure and efficient development environment.

Addressing Common Questions

  • What is the difference between Python 2 and Python 3? Python 3 is the latest major version of Python, offering significant improvements and introducing backward incompatible changes. While Python 2 is still used in some legacy projects, it’s no longer actively maintained and is not recommended for new projects.
  • Is it necessary to install Python for every project? While installing Python globally makes it accessible system-wide, creating virtual environments for individual projects is recommended to manage dependencies and prevent conflicts.
  • How can I switch between different Python versions? Using a virtual environment manager like "pyenv" allows switching between different Python versions on the same system.
  • Where can I find resources for learning Python? Numerous online resources, including official documentation, tutorials, and interactive platforms like Codecademy and Coursera, offer comprehensive learning materials for Python.

Tips for Efficient Python Development

  • Utilize Integrated Development Environments (IDEs): IDEs like Visual Studio Code, PyCharm, and Spyder provide a range of features for efficient coding, debugging, and testing.
  • Practice Code Style Conventions: Adhering to established code style conventions like PEP 8 enhances code readability and maintainability, promoting collaboration and code quality.
  • Leverage Python’s Standard Library: Python’s extensive standard library offers a wide range of modules for common tasks, reducing the need for external libraries and simplifying development.
  • Explore External Libraries: Python’s vibrant ecosystem boasts a vast collection of external libraries for specific tasks, from data analysis and machine learning to web development and scientific computing.
  • Engage with the Python Community: Participating in online forums, attending conferences, and contributing to open-source projects fosters learning, collaboration, and community engagement.

Conclusion

Staying up-to-date with the latest Python version is essential for Windows 11 users, enabling them to leverage the language’s full potential and benefit from its continuous evolution. By understanding the download process, considering crucial factors, and utilizing available resources, developers can ensure a smooth and efficient Python development experience on Windows 11. As Python continues to evolve, embracing its latest iterations ensures access to cutting-edge features, enhanced security, and a vibrant community of developers, propelling innovation and pushing the boundaries of what’s possible with this versatile language.

How To Download And Install Python Latest Version In Windows 11 - YouTube How to Install Python in Windows 11  Download and Install Latest Python on Windows 11 How to Install Python 3.11.2 on Windows 11 [ 2023 Update ] Complete Guide
Navigating Pythonโ€™s Landscape: Exploring The Power Of Map And List Comprehension - Idaho Navigating The Landscape: A Comprehensive Guide To Python 2D Maps - Idaho Legislative District How to Upgrade Python to Latest Version in Windows 11 Laptop Computer - YouTube
How to Add Python Installation Location to Path Environment Variable in Windows 11 - YouTube Navigating The Visual Landscape: A Comprehensive Guide To Colormap Styles In Python - Best Map

Closure

Thus, we hope this article has provided valuable insights into Navigating the Latest Python Landscape: A Comprehensive Guide for Windows 11 Users. We appreciate your attention to our article. See you in our next article!

Harnessing The Power Of Multi-Device Audio Output In Windows 11: A Comprehensive Guide

Harnessing the Power of Multi-Device Audio Output in Windows 11: A Comprehensive Guide

Introduction

In this auspicious occasion, we are delighted to delve into the intriguing topic related to Harnessing the Power of Multi-Device Audio Output in Windows 11: A Comprehensive Guide. Let’s weave interesting information and offer fresh perspectives to the readers.

Harnessing the Power of Multi-Device Audio Output in Windows 11: A Comprehensive Guide

How To Change Audio Output Device In Windows 11 The M - vrogue.co

In the realm of modern computing, the ability to seamlessly manage and distribute audio output across multiple devices has become increasingly crucial. Windows 11, with its refined audio architecture and enhanced user interface, offers a sophisticated approach to this functionality, empowering users to tailor their audio experience to suit diverse scenarios and preferences. This article delves into the intricacies of multi-device audio output in Windows 11, elucidating its functionalities, benefits, and practical applications.

Understanding the Basics of Multi-Device Audio Output

At its core, multi-device audio output refers to the capability of a computer to simultaneously send audio signals to multiple connected devices, such as speakers, headphones, and even external audio systems. This enables users to enjoy a personalized and flexible audio experience, catering to various situations.

The Importance of Multi-Device Audio Output in Windows 11

The advent of multi-device audio output has revolutionized the way users interact with their computers, offering a myriad of advantages:

  • Enhanced Productivity: Imagine working on a document while listening to music on headphones or attending a virtual meeting while having background music playing on a separate speaker system. This capability allows for a seamless blend of productivity and entertainment, maximizing user efficiency.
  • Immersive Entertainment: Multi-device audio output enables users to create immersive entertainment setups, such as surround sound systems or multi-room audio configurations. This enriches the experience of movies, music, and gaming, providing a more captivating and engaging environment.
  • Accessibility and Inclusivity: For individuals with hearing impairments, the ability to direct audio to specific devices, such as hearing aids or assistive listening systems, can significantly enhance accessibility and communication.
  • Professional Applications: Multi-device audio output finds its place in professional settings, facilitating presentations, video conferencing, and audio production workflows. This feature allows for clear and dedicated audio output for different tasks, ensuring optimal communication and collaboration.

Navigating the World of Multi-Device Audio Output in Windows 11

Windows 11 presents a user-friendly interface for managing and configuring multi-device audio output. Here’s a step-by-step guide:

  1. Accessing the Audio Settings: Begin by clicking the speaker icon in the system tray, located at the bottom right corner of the taskbar. This will open the Quick Actions menu.
  2. Selecting the Output Device: In the Quick Actions menu, you will find a list of connected audio devices. Simply click on the desired device to select it as the primary output.
  3. Configuring Device Properties: To access more advanced settings for a specific device, right-click on its name in the Quick Actions menu and choose "Open Sound settings." This will open the "Sound" settings window.
  4. Managing Multiple Devices: In the "Sound" settings window, you can find the "Output" tab. This tab allows you to manage the audio output for different applications. You can choose to direct the audio from specific applications to specific devices, ensuring a tailored audio experience for each program.

Advanced Techniques for Multi-Device Audio Output

For users seeking more granular control over their audio output, Windows 11 offers advanced features:

  • Spatial Sound: This feature allows for immersive audio experiences by simulating surround sound effects. Windows 11 supports various spatial sound formats, including Dolby Atmos and Windows Sonic, enhancing audio fidelity and creating a more captivating listening environment.
  • Audio Device Grouping: Users can group multiple audio devices together to create a unified audio output. This is particularly useful for creating surround sound systems or multi-room audio setups.
  • Audio Sharing: Windows 11 enables audio sharing through Bluetooth, allowing users to stream audio from their computer to compatible Bluetooth devices, such as speakers, headphones, and even smart home devices.

Troubleshooting Common Issues with Multi-Device Audio Output

While Windows 11 generally offers a seamless multi-device audio experience, occasional issues might arise. Here are some common troubleshooting steps:

  • Check Device Connections: Ensure all audio devices are properly connected to the computer and powered on.
  • Update Audio Drivers: Outdated audio drivers can cause compatibility issues. Check for driver updates through the Device Manager or the manufacturer’s website.
  • Restart Audio Services: Restarting the Windows Audio service can resolve temporary glitches.
  • Run Audio Troubleshooter: Windows 11 includes a built-in audio troubleshooter that can identify and resolve common audio issues.
  • Check for Software Conflicts: Certain software applications might interfere with audio output. Temporarily disabling or updating conflicting software can resolve the issue.

FAQs Regarding Multi-Device Audio Output in Windows 11

Q: Can I use multiple devices simultaneously for audio output?
A: Yes, Windows 11 allows you to simultaneously output audio to multiple devices. This enables you to listen to music on headphones while having a video playing on your speakers.

Q: Can I configure different applications to output audio to different devices?
A: Yes, you can assign specific applications to output audio to specific devices. This allows you to tailor the audio experience for each program.

Q: How do I create a surround sound system using multi-device audio output?
A: You can group multiple speakers together to create a surround sound system. Windows 11 supports various spatial sound formats, enhancing the immersive experience.

Q: Can I stream audio from my computer to Bluetooth devices?
A: Yes, Windows 11 supports audio sharing through Bluetooth, enabling you to stream audio to compatible Bluetooth devices.

Q: What are the benefits of using spatial sound with multi-device audio output?
A: Spatial sound enhances the audio experience by simulating surround sound effects, creating a more immersive and captivating listening environment.

Tips for Optimizing Multi-Device Audio Output in Windows 11

  • Use High-Quality Audio Devices: Investing in high-quality audio devices can significantly enhance the overall audio experience.
  • Configure Spatial Sound Settings: Experiment with different spatial sound formats to find the best configuration for your preferences and setup.
  • Utilize Audio Device Grouping: Group multiple devices together to create a unified audio output, especially for surround sound systems or multi-room audio setups.
  • Update Audio Drivers Regularly: Regularly updating audio drivers ensures optimal performance and compatibility.
  • Monitor Audio Output Levels: Ensure the volume levels on all connected audio devices are balanced for a harmonious audio experience.

Conclusion

Multi-device audio output in Windows 11 has transformed the way users interact with their computers, offering a level of flexibility and personalization previously unimaginable. By understanding the intricacies of this feature, users can unlock a world of enhanced productivity, immersive entertainment, and accessibility. Whether it’s enjoying a multi-room audio setup, tailoring the audio experience for different applications, or simply listening to music on headphones while working, multi-device audio output empowers users to customize their audio environment to suit their individual needs and preferences.

Set Audio Output Device For Apps Individually On Windows 11 - YouTube 5 Ways To Change Sound/Audio Output Device In Windows 11 How to Output Audio to Multiple Playback Devices in Windows 11 โ€“ GamingPH.com
How to Change Audio Output Device in Windows 11 Xbox One Audio Output Settings How To Change Audio Output Device In Windows 11 The M - vrogue.co
How To Change Audio Output Device In Windows 11 The M - vrogue.co Windows 11 Switch Audio Output Shortcut

Closure

Thus, we hope this article has provided valuable insights into Harnessing the Power of Multi-Device Audio Output in Windows 11: A Comprehensive Guide. We thank you for taking the time to read this article. See you in our next article!

A Comprehensive Guide To R For Data Science On Windows 10

A Comprehensive Guide to R for Data Science on Windows 10

Introduction

With enthusiasm, let’s navigate through the intriguing topic related to A Comprehensive Guide to R for Data Science on Windows 10. Let’s weave interesting information and offer fresh perspectives to the readers.

A Comprehensive Guide to R for Data Science on Windows 10

A Comprehensive Guide To R For Data Science  Data Science Using R  Flipboard

R, a powerful open-source programming language and free software environment, has become indispensable for data analysis, statistical computing, and graphical representation. Its flexibility, extensive libraries, and active community make it a preferred choice for researchers, data scientists, and analysts across various disciplines. This guide provides a comprehensive overview of installing and utilizing R on Windows 10, empowering users to harness its capabilities for their data-driven endeavors.

Understanding the Significance of R

R’s dominance in the data science realm stems from its versatility and adaptability. It excels in:

  • Statistical Analysis: R offers a comprehensive suite of statistical functions, enabling users to perform complex analyses, including hypothesis testing, regression modeling, and time series analysis.
  • Data Visualization: R’s graphical capabilities are unmatched, allowing for the creation of visually appealing and informative charts, plots, and graphs to communicate data insights effectively.
  • Machine Learning: R provides a wide range of machine learning algorithms, from basic linear regression to advanced deep learning techniques, facilitating predictive modeling and pattern recognition.
  • Data Manipulation and Transformation: R offers powerful data manipulation tools, enabling users to clean, transform, and reshape data for analysis and visualization.
  • Open-Source Nature: R’s open-source nature fosters collaboration and innovation, with a vibrant community contributing to its development and providing support.

Installing R on Windows 10

Installing R on Windows 10 is a straightforward process:

  1. Download the R Installer: Visit the official CRAN (Comprehensive R Archive Network) website (https://cran.r-project.org/) and download the appropriate R installer for your Windows 10 system.
  2. Run the Installer: Double-click the downloaded installer file and follow the on-screen instructions. Ensure you choose the default installation options for a seamless setup.
  3. Verify Installation: After installation, open the RGui application, which is typically located in the Start menu. The R console will appear, confirming successful installation.

Essential R Packages

R’s strength lies in its vast collection of packages, which extend its functionality and cater to specific data science needs. Some essential packages include:

  • tidyverse: A collection of packages for data manipulation, transformation, and visualization, including dplyr, ggplot2, and tidyr.
  • caret: Provides tools for machine learning model training, tuning, and evaluation.
  • data.table: Offers high-performance data manipulation and storage capabilities.
  • stringr: Facilitates efficient string manipulation and text processing.
  • lubridate: Provides tools for working with dates and times.

Installing R Packages

Installing R packages is simple:

  1. Open the R Console: Launch the RGui application.
  2. Use the install.packages() function: Type install.packages("package_name"), replacing "package_name" with the desired package name. For example, to install the tidyverse package, type install.packages("tidyverse").
  3. Confirm Installation: The package will be downloaded and installed. You can verify its presence by using the library() function, e.g., library(tidyverse).

Exploring R with RStudio

RStudio is an integrated development environment (IDE) specifically designed for R, offering a user-friendly interface for coding, debugging, and managing projects.

  1. Download and Install RStudio: Visit the official RStudio website (https://www.rstudio.com/) and download the appropriate RStudio installer for Windows 10.
  2. Launch RStudio: After installation, open RStudio. The IDE will automatically detect your R installation and provide a workspace for coding and analysis.

RStudio Features:

  • Code Editor: Provides syntax highlighting, code completion, and error detection for efficient coding.
  • Console: Displays output from R commands and provides a platform for interactive exploration.
  • Environment: Lists all objects and variables defined in your current R session.
  • Plots: Displays generated plots and charts within the IDE for easy visualization.
  • Project Management: Facilitates organization and management of R projects with multiple files and scripts.

Key Concepts in R Programming

  • Data Structures: R utilizes various data structures, including vectors, matrices, arrays, data frames, and lists, to store and manage data efficiently.
  • Operators: R supports arithmetic, logical, relational, and assignment operators for manipulating data and performing calculations.
  • Functions: R’s core functionality is built upon functions, which encapsulate reusable code blocks and enable modular programming.
  • Control Flow: R offers control flow structures like if-else, for, and while statements for controlling the execution of code blocks based on conditions.

Practical Applications of R

R’s capabilities extend to various real-world applications:

  • Data Analysis in Research: Scientists use R to analyze experimental data, generate statistical models, and draw meaningful conclusions.
  • Business Intelligence: Businesses leverage R for data exploration, customer segmentation, market analysis, and predictive modeling.
  • Finance and Risk Management: R is used for financial modeling, risk assessment, and portfolio optimization.
  • Healthcare and Medicine: R plays a vital role in analyzing medical data, identifying disease patterns, and developing personalized treatment strategies.
  • Social Sciences: Researchers utilize R for analyzing social surveys, conducting opinion polls, and understanding social trends.

FAQs on R for Data Science

1. Is R difficult to learn?

R can be learned at different levels, with a gradual learning curve. Basic concepts and syntax are relatively easy to grasp, while advanced techniques and libraries require more time and effort.

2. What are the prerequisites for learning R?

While prior programming experience is beneficial, it is not strictly necessary. A basic understanding of mathematics and statistics is helpful for understanding data analysis concepts.

3. What are the best resources for learning R?

Numerous online resources, books, and courses cater to different learning styles. Some popular options include:

  • R for Data Science: A comprehensive online book covering data manipulation, visualization, and machine learning.
  • DataCamp: An online platform offering interactive R courses for beginners and advanced learners.
  • Coursera: Provides online courses on R programming and data analysis from reputable universities.

4. Is R free to use?

Yes, R is completely free to use and distribute, making it accessible to everyone.

5. How does R compare to other data science languages like Python?

R and Python are both powerful languages for data science, each with its strengths and weaknesses. R excels in statistical analysis and visualization, while Python offers a wider range of libraries and frameworks for machine learning and web development.

Tips for Effective R Usage

  • Start with a clear goal: Define the specific data analysis task you aim to achieve before starting to code.
  • Use packages effectively: Explore and utilize relevant packages to enhance your workflow and achieve desired results.
  • Document your code: Add comments and explanations to your code to make it understandable and maintainable.
  • Practice regularly: Consistent practice is crucial for mastering R and applying its concepts effectively.
  • Engage with the community: Participate in forums, online communities, and conferences to learn from others and share your knowledge.

Conclusion

R’s versatility, powerful features, and active community make it an indispensable tool for data scientists, analysts, and researchers. By following this guide, users can successfully install, configure, and leverage R on Windows 10 to unlock its potential for data exploration, analysis, and visualization. As the field of data science continues to evolve, R’s role as a leading language is likely to grow, offering opportunities for innovation and discovery in diverse domains.

Data Science with R Programming: A Comprehensive Guide - Brainalyst R for Data Science - Installing R on Windows 10 - YouTube A Complete Tutorial to learn Data Science in R from Scratch  7wData
Data Science With R Tutorial For Beginners Data Science with R: A Step-by-Step Guide Data Science with R A Step By Step Guide With Visual Illustrations and Examples
R For Data Science A Beginner's Guide - Payhip R Cheat Sheet: Data Science Workflow With R - AI Summary

Closure

Thus, we hope this article has provided valuable insights into A Comprehensive Guide to R for Data Science on Windows 10. We appreciate your attention to our article. See you in our next article!

The Quick Launch Icon: A Legacy Feature In Windows 11

The Quick Launch Icon: A Legacy Feature in Windows 11

Introduction

With great pleasure, we will explore the intriguing topic related to The Quick Launch Icon: A Legacy Feature in Windows 11. Let’s weave interesting information and offer fresh perspectives to the readers.

The Quick Launch Icon: A Legacy Feature in Windows 11

How To Use Quick Launch Toolbar In Windows 11

The Quick Launch toolbar, a familiar element of earlier Windows operating systems, has been absent in Windows 11. This absence has sparked curiosity and questions among users who relied on this feature for quick access to frequently used applications and files. While the Quick Launch toolbar itself is not present, the functionality it provided can still be achieved through alternative methods, each offering its own advantages and considerations.

Understanding the Quick Launch Toolbar:

The Quick Launch toolbar was a dedicated area on the taskbar, typically positioned to the right of the Start button. It allowed users to pin shortcuts to frequently accessed applications, folders, and documents, facilitating rapid access without navigating through menus or searching. This convenience greatly enhanced user productivity, particularly for tasks requiring frequent access to specific files or programs.

Absence in Windows 11:

The absence of the Quick Launch toolbar in Windows 11 is attributed to the shift in design philosophy and user interface. Microsoft has focused on streamlining the user experience, emphasizing a cleaner, more modern aesthetic. The traditional taskbar has been redesigned, incorporating features like the Start menu and system icons, leaving less space for dedicated toolbars.

Alternatives to the Quick Launch Toolbar:

While the Quick Launch toolbar is no longer present, Windows 11 offers several alternative methods for achieving the same functionality:

1. Taskbar Pinning:

The taskbar remains a primary tool for quick access in Windows 11. Users can pin frequently used applications to the taskbar, similar to the Quick Launch functionality. This method offers a visually intuitive approach, keeping the pinned applications readily available for immediate launch.

2. Start Menu:

The Start menu provides a comprehensive list of installed applications and pinned items. Users can create folders within the Start menu to organize shortcuts and access them efficiently. This method offers a more structured and customizable approach to organizing frequently accessed items.

3. Desktop Shortcuts:

Creating shortcuts on the desktop remains a fundamental method for quick access to files and applications. Users can place shortcuts to frequently used items on the desktop for easy visibility and accessibility. This method offers a straightforward and customizable approach, allowing users to organize shortcuts according to their preferences.

4. Third-Party Taskbar Customization Tools:

Third-party software developers have created tools designed to customize the taskbar and add features similar to the Quick Launch toolbar. These tools offer a wider range of customization options, allowing users to create custom toolbars with specific functionalities tailored to their needs.

Advantages and Considerations:

Each alternative method offers its own advantages and considerations:

Taskbar Pinning:

  • Advantages:
    • Simple and intuitive, offering direct access to pinned applications.
    • Visually prominent, keeping frequently used applications readily available.
  • Considerations:
    • Limited to pinned applications, lacking the flexibility to pin folders or documents.
    • May clutter the taskbar if numerous applications are pinned.

Start Menu:

  • Advantages:
    • Provides a structured and customizable approach to organizing shortcuts.
    • Offers a comprehensive list of installed applications and pinned items.
  • Considerations:
    • Requires navigating through the Start menu to access shortcuts.
    • May require scrolling through the list of applications, especially with a large number of installed programs.

Desktop Shortcuts:

  • Advantages:
    • Straightforward and customizable, allowing users to organize shortcuts according to their preferences.
    • Offers direct access to files and applications from the desktop.
  • Considerations:
    • May clutter the desktop if numerous shortcuts are created.
    • Requires navigating through the desktop to access shortcuts.

Third-Party Taskbar Customization Tools:

  • Advantages:
    • Offers a wider range of customization options, allowing users to create custom toolbars with specific functionalities.
    • Provides greater flexibility and control over the taskbar.
  • Considerations:
    • Requires installing and configuring third-party software.
    • May introduce compatibility issues or security risks if not from reputable sources.

Conclusion:

While the Quick Launch toolbar is no longer a standard feature in Windows 11, the functionality it provided can still be achieved through alternative methods. The choice of approach depends on individual preferences and usage patterns. Whether users opt for taskbar pinning, Start menu organization, desktop shortcuts, or third-party tools, the essence of quick access to frequently used items remains a valuable aspect of the Windows user experience.

FAQs:

Q: Is it possible to bring back the Quick Launch toolbar in Windows 11?

A: While there is no official method to restore the Quick Launch toolbar in Windows 11, some third-party tools offer customization options that can mimic its functionality.

Q: Why did Microsoft remove the Quick Launch toolbar from Windows 11?

A: Microsoft’s decision to remove the Quick Launch toolbar is primarily attributed to the redesign of the taskbar and the emphasis on a cleaner, more modern user interface.

Q: What is the best alternative to the Quick Launch toolbar in Windows 11?

A: The best alternative depends on individual preferences and usage patterns. Taskbar pinning offers a simple and intuitive approach, while the Start menu provides a structured and customizable option. Desktop shortcuts are a straightforward method, and third-party tools offer greater flexibility and customization.

Q: Can I create a custom toolbar with similar functionality to the Quick Launch toolbar?

A: Yes, third-party taskbar customization tools allow users to create custom toolbars with specific functionalities tailored to their needs.

Tips:

  • Organize pinned applications on the taskbar according to their frequency of use.
  • Create folders within the Start menu to group related shortcuts.
  • Place desktop shortcuts in a specific area of the desktop for easy access.
  • Explore third-party taskbar customization tools to create a personalized experience.

Conclusion:

The absence of the Quick Launch toolbar in Windows 11 has prompted users to adapt to alternative methods for quick access to frequently used items. While the specific implementation may differ, the fundamental concept of efficient access remains a core principle of the Windows user experience. By utilizing the available tools and methods, users can maintain a seamless workflow and maximize their productivity.

Windows 11 : Add The Quick Launch Toolbar to the Taskbar - YouTube How to use Quick Launch Toolbar in Windows 11 Quick Launch Bar in Windows 11?
Quick Launch Bar in Windows 11? โ†—๏ธ Introducing My Quick Launch Windows 11 Widget - YouTube Add the Quick Launch Toolbar to the Taskbar in Windows 11
How to use Quick Launch Toolbar in Windows 11 Add the Quick Launch Toolbar to the Taskbar in Windows 11

Closure

Thus, we hope this article has provided valuable insights into The Quick Launch Icon: A Legacy Feature in Windows 11. We thank you for taking the time to read this article. See you in our next article!