Archives 2023

Realtek 5.1 Audio Driver Windows 11

realtek 5.1 audio driver windows 11

Introduction

With great pleasure, we will explore the intriguing topic related to realtek 5.1 audio driver windows 11. Let’s weave interesting information and offer fresh perspectives to the readers.

Realtek 5.1 Audio Driver for Windows 11: A Comprehensive Guide

Windows 11 Realtek Audio Driver Not Working

Introduction:

In the realm of modern computing, audio plays a pivotal role, enriching our digital experiences. From crystal-clear voice calls to immersive gaming soundtracks and captivating movie sound effects, the quality of audio output is paramount. Realtek, a prominent semiconductor company, provides a range of audio drivers, including the widely used Realtek 5.1 audio driver, specifically designed to deliver exceptional sound quality on Windows 11 systems. This comprehensive guide delves into the intricacies of the Realtek 5.1 audio driver, exploring its functionality, importance, benefits, and installation process.

Understanding the Realtek 5.1 Audio Driver:

The Realtek 5.1 audio driver acts as a bridge between the operating system and the audio hardware, enabling seamless communication and optimal audio performance. It facilitates the transmission of audio signals from the computer’s software to the speakers or headphones, ensuring accurate reproduction of sound. The "5.1" designation refers to a surround sound configuration, encompassing five main speakers (left, right, center, left surround, right surround) and a subwoofer. This configuration creates a more immersive and realistic audio experience, particularly beneficial for gaming, movies, and music.

Importance and Benefits of the Realtek 5.1 Audio Driver:

The Realtek 5.1 audio driver plays a critical role in unlocking the full potential of your computer’s audio capabilities. Its significance lies in its ability to:

  • Enhance Audio Quality: The driver optimizes audio processing, resulting in clearer, more detailed sound. It reduces distortion, improves the frequency response, and enhances the overall listening experience.
  • Enable Surround Sound: The driver empowers users to enjoy the immersive experience of 5.1 surround sound, creating a more realistic and engaging audio environment. This feature is particularly valuable for gamers and movie enthusiasts who seek an enhanced sense of presence and realism.
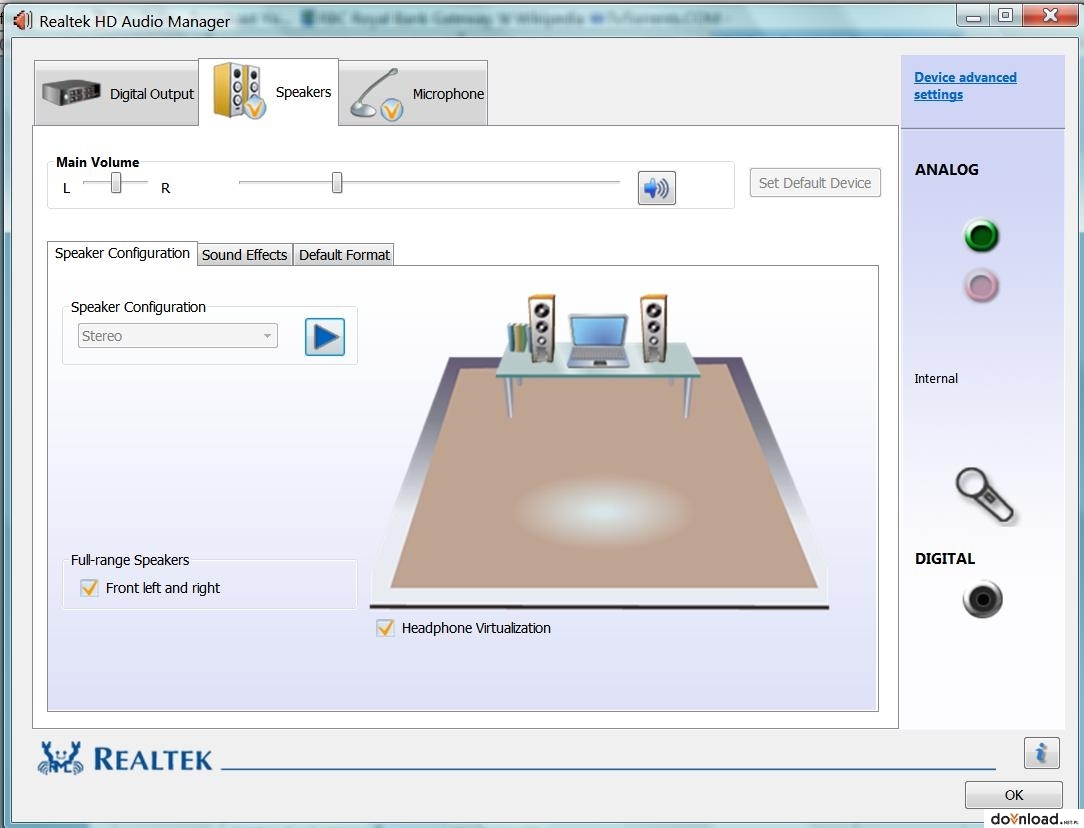
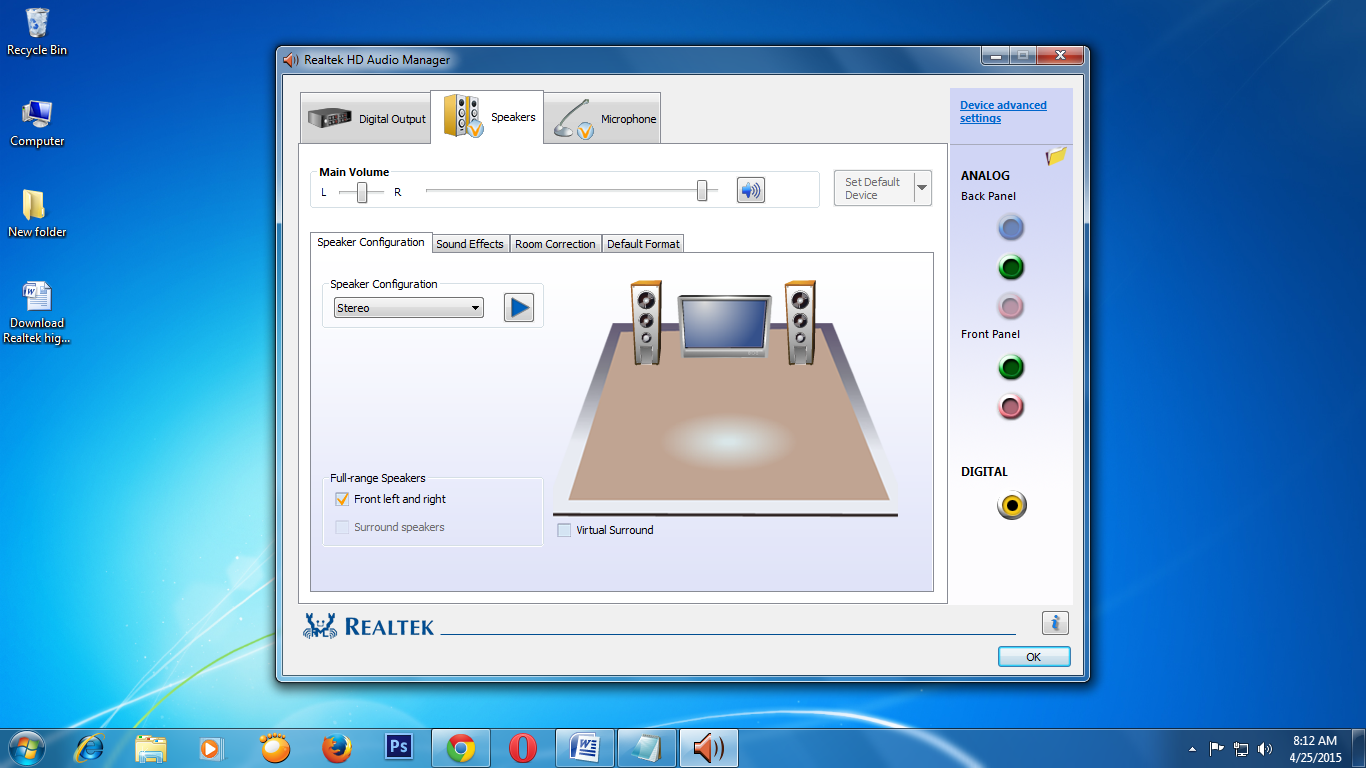
  • Provide Advanced Audio Controls: The Realtek 5.1 audio driver often includes a user-friendly interface that allows users to fine-tune audio settings, adjust volume levels for individual speakers, and customize the audio output to suit their preferences.
  • Ensure Compatibility: The driver ensures compatibility between your audio hardware and Windows 11, guaranteeing seamless operation and optimal audio performance.
  • Support Multiple Audio Devices: The Realtek 5.1 audio driver can typically support multiple audio devices, including headphones, speakers, and external sound cards, allowing users to switch between devices easily.

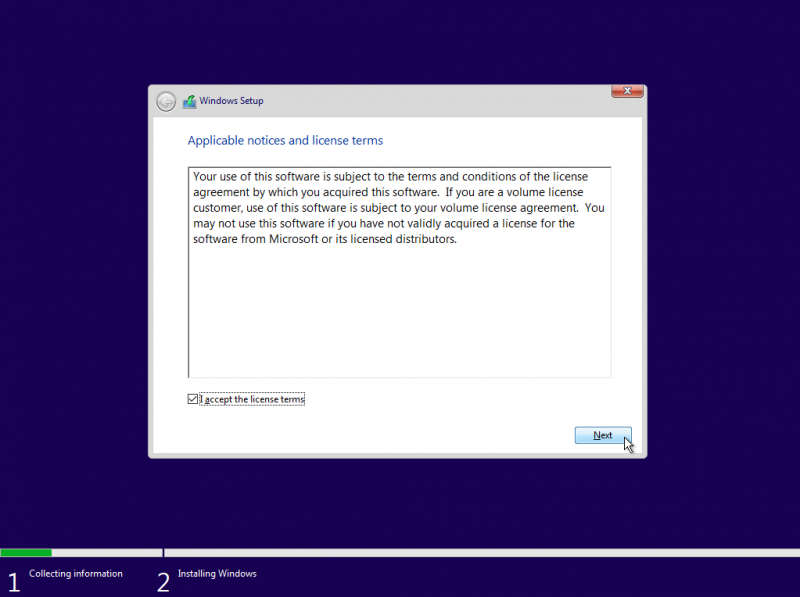
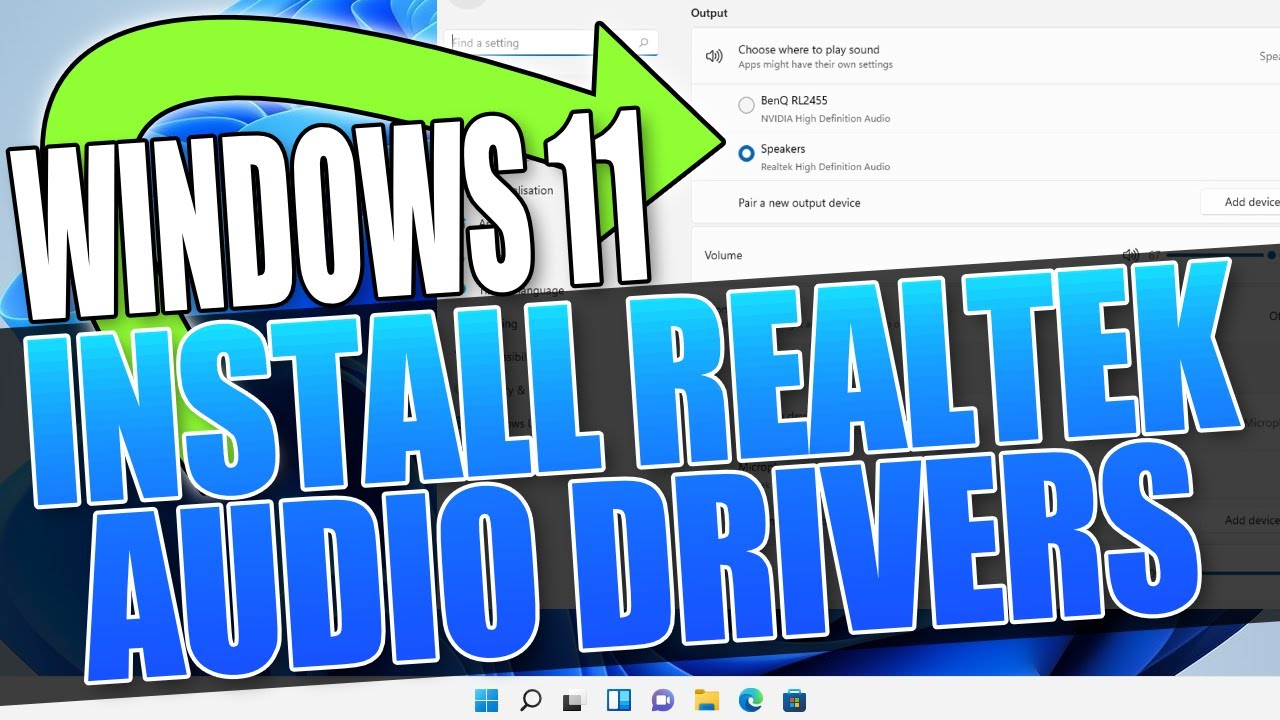
Installing the Realtek 5.1 Audio Driver on Windows 11:

Installing the Realtek 5.1 audio driver is a straightforward process. You can typically obtain the latest driver version from the Realtek website or the manufacturer’s website for your specific motherboard or sound card. The installation process usually involves the following steps:

  1. Download the driver: Visit the Realtek website or the manufacturer’s website and locate the appropriate driver for your Windows 11 system.
  2. Run the installer: Double-click the downloaded driver file to initiate the installation process.
  3. Follow the on-screen instructions: The installer will guide you through the installation process.
  4. Restart your computer: After the installation is complete, restart your computer to ensure the driver is fully integrated into the system.

Troubleshooting Common Audio Issues:

While the Realtek 5.1 audio driver generally provides a smooth experience, users may encounter occasional audio issues. Common troubleshooting steps include:

  • Check the audio device settings: Ensure the correct audio output device is selected in the Windows 11 sound settings.
  • Update the driver: Check for and install any available driver updates from the Realtek website or the manufacturer’s website.
  • Run the audio troubleshooter: Windows 11 includes a built-in audio troubleshooter that can diagnose and resolve common audio problems.
  • Restart the audio service: Restarting the Windows Audio service can resolve some audio issues.
  • Disable audio enhancements: Certain audio enhancements can cause conflicts, so temporarily disabling them may resolve the issue.

Frequently Asked Questions (FAQs):

Q: How do I know if I have the correct Realtek 5.1 audio driver installed?

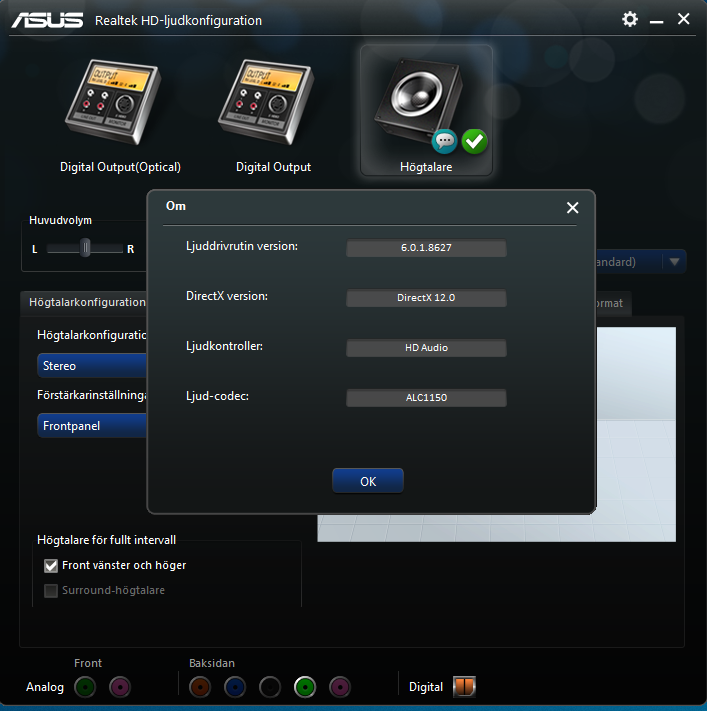
A: You can identify the installed driver by opening the Device Manager (right-click the Start menu and select "Device Manager"). Expand the "Sound, video and game controllers" section. The Realtek audio driver should be listed here.

Q: Why is my 5.1 surround sound not working?

A: Several factors can affect surround sound functionality, including:

  • Incorrect speaker configuration: Ensure your speakers are correctly connected to the audio output ports.
  • Outdated driver: Update the Realtek 5.1 audio driver to the latest version.
  • Sound settings: Verify that the surround sound option is enabled in the Windows 11 sound settings.
  • Hardware issue: Check for any physical damage to the speakers or audio output ports.

Q: How do I adjust the speaker volume individually?

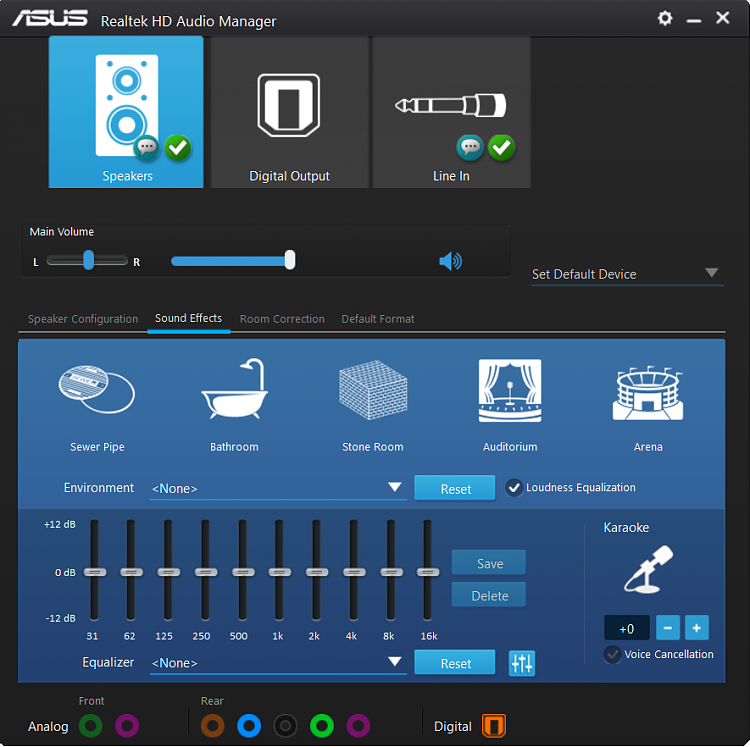
A: The Realtek audio driver typically includes a control panel that allows you to adjust the volume levels for each speaker individually. Access this control panel through the system tray or by searching for "Realtek Audio Manager" in the Windows 11 search bar.

Q: Can I use a 2.1 speaker system with the Realtek 5.1 audio driver?

A: Yes, the Realtek 5.1 audio driver can support 2.1 speaker systems. The driver will automatically adjust the audio output to accommodate the available speakers.

Tips for Optimizing Audio Performance:

  • Use high-quality speakers and headphones: Investing in quality audio equipment can significantly enhance the overall listening experience.
  • Place speakers strategically: Ensure your speakers are positioned correctly for optimal sound dispersion and a more immersive surround sound experience.
  • Adjust audio settings: Experiment with different audio settings, such as equalization and surround sound modes, to find the best audio configuration for your preferences.
  • Keep the driver updated: Regularly update the Realtek 5.1 audio driver to benefit from the latest bug fixes, performance improvements, and new features.

Conclusion:

The Realtek 5.1 audio driver is an essential component for unlocking the full potential of audio on Windows 11 systems. It empowers users to enjoy high-quality sound, immersive surround sound experiences, and advanced audio controls. By following the installation instructions, troubleshooting common issues, and implementing the provided tips, users can optimize audio performance and elevate their digital experiences with the power of Realtek 5.1 audio.

Realtek hd audio manager windows 11 - panatoys How to download any audio driver on Windows 11 Windows 11 realtek audio driver - kdasecrets
Realtek audio driver for windows 11 - travelerase Windows 11 Realtek Audio Driver How To Install Realtek HD Audio Driver In Windows 11 - YouTube
Realtek Audio Manager Windows 11 How to Download and Install Realtek HD Audio Driver on Windows 11 - YouTube

Closure

Thus, we hope this article has provided valuable insights into realtek 5.1 audio driver windows 11. We hope you find this article informative and beneficial. See you in our next article!

Ensuring A Smooth Windows 10 Experience: A Comprehensive Guide To System Health Assessment

Ensuring a Smooth Windows 10 Experience: A Comprehensive Guide to System Health Assessment

Introduction

With great pleasure, we will explore the intriguing topic related to Ensuring a Smooth Windows 10 Experience: A Comprehensive Guide to System Health Assessment. Let’s weave interesting information and offer fresh perspectives to the readers.

Ensuring a Smooth Windows 10 Experience: A Comprehensive Guide to System Health Assessment

How to Check Your Windows Experience Score on Windows 10

The smooth operation of a Windows 10 computer relies heavily on its overall health. A system that is regularly assessed and maintained performs better, runs faster, and is less susceptible to errors and crashes. This is where the Windows 10 system health assessment tool comes into play. It is a valuable resource for users looking to optimize their computer’s performance and identify potential issues before they escalate.

Understanding the Importance of System Health Assessment

A healthy computer system is characterized by:

  • Optimal Performance: A well-maintained system boots up quickly, launches applications swiftly, and responds to user input with minimal delay.
  • Enhanced Security: Regular system checks help identify vulnerabilities and potential security threats, safeguarding your data and privacy.
  • Reduced Errors and Crashes: A healthy system is less prone to errors, freezes, and unexpected shutdowns, leading to a more stable and reliable computing experience.
  • Improved Stability: A regular assessment helps identify and address potential hardware and software issues that could lead to instability and system crashes.
  • Prolonged Lifespan: Maintaining system health can extend the lifespan of your computer by preventing premature wear and tear on hardware components.

Navigating the Windows 10 System Health Assessment Tool

The Windows 10 system health assessment tool is a built-in utility that provides a comprehensive overview of your computer’s status. It can be accessed through the Settings app. Here’s how to find and use it:

  1. Open Settings: Click the Start menu and select "Settings" (gear icon).
  2. Navigate to System: In the Settings window, select "System".
  3. Choose About: Within the System settings, click "About".
  4. Access System Information: The "About" page displays basic system information, including the operating system version, installed RAM, and processor details.
  5. Review System Health: This page also provides a link to "Check for problems", which launches the system health assessment tool.

Understanding the Assessment Results

The system health assessment tool will perform a series of checks, analyzing different aspects of your computer’s health. These checks may include:

  • Storage Space: The tool assesses available storage space and identifies potential issues related to low disk space.
  • System Resources: It analyzes CPU usage, memory utilization, and other system resources to identify potential performance bottlenecks.
  • Hardware and Software Compatibility: The tool checks for compatibility issues between your hardware and software, potentially identifying outdated or incompatible drivers.
  • Security Status: The tool assesses your security settings, including firewall status, antivirus protection, and Windows Defender settings.
  • System Updates: It checks for available updates for Windows and installed applications, ensuring your system has the latest security patches and bug fixes.

Interpreting and Addressing Assessment Findings

The system health assessment tool provides a clear and concise summary of its findings. It will highlight any potential issues and offer solutions or recommendations. These solutions may include:

  • Freeing Up Disk Space: The tool may recommend deleting unnecessary files, uninstalling unused programs, or moving files to an external drive to free up disk space.
  • Updating Drivers: The tool may suggest updating outdated drivers to improve system performance and stability.
  • Running System Maintenance Tasks: The tool may recommend running system maintenance tasks, such as disk cleanup or defragmentation, to optimize system performance.
  • Updating Windows: The tool may suggest installing the latest Windows updates to enhance security and stability.
  • Installing Antivirus Software: The tool may recommend installing antivirus software if your system lacks adequate protection.

Beyond the Built-in Tool: Additional Resources for System Health

While the built-in system health assessment tool is a valuable resource, additional tools and practices can further enhance your computer’s health:

  • Third-Party System Optimization Tools: Consider using third-party system optimization tools that offer more advanced features, such as registry cleaning, startup optimization, and performance monitoring.
  • Regular Disk Cleanup: Make it a habit to regularly clean up your hard drive by deleting temporary files, unused programs, and unnecessary downloads.
  • Defragmentation: Defragmenting your hard drive can improve performance by organizing fragmented files and making them easier for the computer to access.
  • Antivirus and Malware Protection: Install and regularly update antivirus and anti-malware software to protect your system from threats.
  • Regular System Updates: Keep your operating system and installed software up-to-date to ensure security and stability.

FAQs: Addressing Common Concerns

Q: Is the system health assessment tool safe to use?

A: The built-in system health assessment tool is a safe and secure utility. It is developed and maintained by Microsoft and is designed to enhance your computer’s performance and security.

Q: How often should I run the system health assessment tool?

A: It is recommended to run the system health assessment tool at least once a month. You can also run it more frequently if you notice any performance issues or have installed new software.

Q: Can the system health assessment tool fix problems automatically?

A: The system health assessment tool can identify potential issues, but it may not automatically fix them. You will need to follow the tool’s recommendations to address the identified problems.

Q: Is the system health assessment tool available in all versions of Windows 10?

A: The system health assessment tool is available in all versions of Windows 10.

Tips for Optimizing System Health

  • Limit Startup Programs: Minimize the number of programs that launch automatically when you start your computer to improve boot times.
  • Use a Password Manager: Store your passwords securely using a password manager to avoid compromising your accounts.
  • Disable Unnecessary Services: Disable services that you don’t use to free up system resources.
  • Keep Software Updated: Regularly update your software to ensure security and stability.
  • Back Up Your Data: Regularly back up your important data to an external drive or cloud storage service.

Conclusion

Maintaining system health is crucial for a smooth and efficient Windows 10 experience. The built-in system health assessment tool provides a valuable starting point for identifying potential issues. By understanding the tool’s findings and following the provided recommendations, you can optimize your computer’s performance, enhance its security, and extend its lifespan. Remember to also adopt best practices for system maintenance and utilize additional resources to further enhance your computer’s health. A healthy system translates into a more enjoyable and productive computing experience.

How to See Your Windows Experience Index Score in Windows 10 How to Check Windows Experience Score on Windows 10 (3 Methods)  LaptrinhX Getting Windows Experience Index Score on Windows 10 - NEXTOFWINDOWS.COM
How to View the Windows Experience Index on Windows 10? - MiniTool ��Obtenga el รญndice de experiencia de Windows en Windows 10 How to get Windows Experience Index in Windows 10 (Performance Rating)
Calculate the Windows Experience Index on Windows 10 with ExperienceIndexOK - gHacks Tech News How to See Your Windows Experience Index Score in Windows 10

Closure

Thus, we hope this article has provided valuable insights into Ensuring a Smooth Windows 10 Experience: A Comprehensive Guide to System Health Assessment. We thank you for taking the time to read this article. See you in our next article!

Windows 11: Elevating Desktop Aesthetics With Immersive Backgrounds

Windows 11: Elevating Desktop Aesthetics with Immersive Backgrounds

Introduction

With enthusiasm, let’s navigate through the intriguing topic related to Windows 11: Elevating Desktop Aesthetics with Immersive Backgrounds. Let’s weave interesting information and offer fresh perspectives to the readers.

Windows 11: Elevating Desktop Aesthetics with Immersive Backgrounds

Windows 11 Desktop Wallpaper Aesthetic

Windows 11, with its refreshed design and enhanced user experience, introduces a compelling new feature: dynamic, panoramic backgrounds. These captivating visuals transcend the traditional static desktop wallpaper, offering users an immersive and visually engaging environment. This article delves into the intricacies of these panoramic backgrounds, exploring their technical implementation, the benefits they offer, and the unique advantages they bring to the Windows 11 experience.

A Shift in Visual Perspective:

Panoramic backgrounds in Windows 11 depart from the conventional rectangular format, extending beyond the confines of the monitor screen. This expansive approach creates a sense of depth and immersion, blurring the lines between the digital and physical realms. Imagine a serene mountain vista stretching across your entire desktop, or a vibrant cityscape unfolding before your eyes. This immersive experience goes beyond mere visual appeal, influencing the user’s perception of their digital space and enhancing their overall interaction with the operating system.

Technical Implementation and Functionality:

The implementation of panoramic backgrounds in Windows 11 relies on a combination of image processing techniques and software optimization. The operating system seamlessly handles the display of these expansive images, ensuring smooth scrolling and seamless transitions. This is achieved by dividing the panoramic image into multiple sections, each displayed on a specific portion of the screen. As the user scrolls through their desktop, these sections are dynamically rearranged, creating a continuous and immersive visual flow.

Beyond Aesthetics: The Benefits of Panoramic Backgrounds:

The allure of panoramic backgrounds extends beyond their visual appeal, offering tangible benefits for users:

  • Enhanced User Engagement: The immersive nature of these backgrounds fosters a more engaging and captivating user experience. By drawing the user’s attention to the expansive scenery, the background subtly encourages exploration and interaction with the digital space.
  • Improved Focus and Productivity: Studies have shown that visually stimulating environments can positively impact focus and productivity. Panoramic backgrounds, with their calming or inspiring imagery, can create a more conducive work environment, fostering concentration and reducing mental fatigue.
  • Personalized User Experience: Windows 11 allows users to personalize their panoramic backgrounds, choosing from a curated library or uploading their own custom images. This customization empowers users to create a desktop environment that reflects their individual preferences and enhances their overall digital experience.
  • Mood Setting and Ambiance: Panoramic backgrounds offer the ability to set the mood and ambiance of the desktop environment. A tranquil beach scene can create a sense of relaxation, while a vibrant cityscape can evoke a feeling of energy and excitement.

A Deeper Dive into Functionality:

Windows 11 provides users with a variety of options for customizing their panoramic backgrounds:

  • Dynamic Backgrounds: These backgrounds change automatically throughout the day, mirroring the changing light and scenery of the selected location. This feature provides a dynamic and engaging experience, bringing a sense of realism and dynamism to the desktop.
  • Multiple Backgrounds: Users can set different panoramic backgrounds for different displays, allowing them to customize the visual experience for each monitor. This feature is particularly useful for multi-monitor setups, enabling users to create distinct visual environments for different tasks or projects.
  • Background Effects: Windows 11 offers a range of effects that can be applied to panoramic backgrounds, such as blur, transparency, and color filters. These effects allow users to further personalize their desktop environment, creating a unique and visually appealing aesthetic.

FAQs on Panoramic Backgrounds in Windows 11:

Q: Can I use my own images as panoramic backgrounds?

A: Yes, Windows 11 allows users to upload and use their own images as panoramic backgrounds. Users can choose images from their personal library or access online resources to find suitable panoramic images.

Q: Are there any specific image requirements for panoramic backgrounds?

A: While there are no strict image requirements, it is recommended to use high-resolution images with a wide aspect ratio for optimal results. This ensures that the background displays smoothly and maintains its visual integrity across the entire desktop.

Q: How do I change the panoramic background in Windows 11?

A: To change the panoramic background, navigate to the "Settings" app, select "Personalization," and then choose "Background." From there, users can select from the available panoramic backgrounds, upload their own images, or adjust the background settings.

Q: Are panoramic backgrounds compatible with all Windows 11 devices?

A: Panoramic backgrounds are compatible with all Windows 11 devices that support the operating system’s visual enhancements. However, the specific features and functionality may vary depending on the device’s hardware capabilities.

Tips for Utilizing Panoramic Backgrounds Effectively:

  • Choose High-Quality Images: Opt for high-resolution images that are visually appealing and capture the desired mood or ambiance.
  • Consider the Aspect Ratio: Select images with a wide aspect ratio that best suits the screen dimensions for optimal visual coverage.
  • Experiment with Effects: Explore the available background effects to enhance the visual impact and create a unique desktop aesthetic.
  • Regularly Update Backgrounds: Change your panoramic backgrounds periodically to maintain visual interest and keep the desktop environment fresh and engaging.

Conclusion:

Panoramic backgrounds in Windows 11 represent a significant step forward in desktop aesthetics, offering users an immersive and visually captivating experience. By seamlessly blending visual appeal with technical functionality, these backgrounds enhance user engagement, improve productivity, and allow for personalized customization. As Windows 11 continues to evolve, the possibilities for panoramic backgrounds are endless, promising a future where the digital desktop becomes an immersive and engaging extension of the user’s personal space.

My aesthetic Windows 11 desktop. Wallpaper is custom made in PowerPoint, taskbar was modified 15 Outstanding wallpaper aesthetic windows 11 You Can Get It For Free - Aesthetic Arena Immersive 1080P, 2K, 4K, 5K HD wallpapers free download  Wallpaper Flare
25 Selected wallpaper aesthetic for computer You Can Use It Free Of Charge - Aesthetic Arena Sky Aesthetic Computer Wallpapers - Wallpaper Cave 15 Outstanding aesthetic hd 1080p desktop background aesthetic hd 1080p wallpaper for laptop You
Red Aesthetic Desktop 4k Wallpapers - Wallpaper Cave Cool Dynamic Wallpapers - Top Free Cool Dynamic Backgrounds - WallpaperAccess

Closure

Thus, we hope this article has provided valuable insights into Windows 11: Elevating Desktop Aesthetics with Immersive Backgrounds. We thank you for taking the time to read this article. See you in our next article!

Reliving The Golden Age: A Guide To PlayStation 1 Emulators For Windows

Reliving the Golden Age: A Guide to PlayStation 1 Emulators for Windows

Introduction

In this auspicious occasion, we are delighted to delve into the intriguing topic related to Reliving the Golden Age: A Guide to PlayStation 1 Emulators for Windows. Let’s weave interesting information and offer fresh perspectives to the readers.

Reliving the Golden Age: A Guide to PlayStation 1 Emulators for Windows

Top 5 Best ps1 Emulators for PC in 2024

The PlayStation 1, or PS1, was a groundbreaking console that ushered in a new era of gaming. Its library boasts iconic titles that have stood the test of time, captivating generations of players. However, with the advancement of technology, accessing these classic games on modern systems can be challenging. This is where PlayStation 1 emulators for Windows come into play, offering a seamless way to experience these beloved titles on contemporary PCs.

Understanding PlayStation 1 Emulators

A PlayStation 1 emulator is a software program that mimics the hardware of the original console, allowing users to run PS1 games on their Windows computers. These emulators act as a bridge between the older console’s architecture and the modern PC’s processing power. By replicating the PS1’s internal workings, emulators can accurately render graphics, play audio, and execute game code, delivering an authentic experience.

Benefits of Using PlayStation 1 Emulators

Using a PlayStation 1 emulator for Windows presents numerous advantages:

  • Accessibility: Emulators provide a convenient way to access a vast library of PS1 games without requiring the original console or physical copies. This eliminates the need for expensive hardware and allows users to enjoy games that may be difficult to find or purchase.
  • Enhanced Performance: Modern PCs offer significantly more processing power than the original PS1. Emulators leverage this advantage, potentially enhancing game performance with smoother frame rates and improved graphics.
  • Customization: Emulators often provide advanced settings that allow users to customize their gaming experience. This includes options for resolution scaling, frame rate adjustments, and even controller mapping, enabling a tailored gameplay experience.
  • Preservation: Emulators contribute to the preservation of classic games. By offering a platform to run these titles on modern systems, emulators ensure their continued accessibility and prevent them from becoming lost to time.

Choosing the Right PlayStation 1 Emulator

The choice of PlayStation 1 emulator depends on individual preferences and system specifications. Several popular emulators exist, each with its own strengths and weaknesses. Here are some prominent options:

  • ePSXe: This emulator boasts a long history and a dedicated community. It offers excellent compatibility with a wide range of PS1 games and provides advanced features like high-resolution rendering and controller customization.
  • PCSX2: While primarily known for PlayStation 2 emulation, PCSX2 also supports PS1 games. Its robust features and active development make it a powerful option for those seeking advanced emulation capabilities.
  • Mednafen: This emulator focuses on accuracy and compatibility, striving to emulate the PS1 hardware as closely as possible. It is a good choice for users who prioritize authenticity and technical correctness.
  • PS1 Emulator for Android: While this article focuses on Windows, it’s worth noting that mobile emulators like "PPSSPP" provide a portable way to enjoy PS1 games on Android devices.

Setting Up a PlayStation 1 Emulator

Setting up a PlayStation 1 emulator involves a few steps:

  1. Download and install the emulator: Choose an emulator based on your preferences and system specifications. Download the installation file from a reputable source and follow the instructions to install the emulator on your Windows PC.
  2. Acquire PS1 game files (ROMs): Game files, known as ROMs, are digital copies of the original PS1 game discs. It is essential to obtain these files legally. Many websites offer free ROMs of games that are no longer commercially available, ensuring the preservation of these titles.
  3. Configure the emulator: Once the emulator is installed, configure its settings to optimize performance and customize your gaming experience. This may involve selecting a compatible BIOS file, adjusting graphics settings, and mapping controller inputs.
  4. Launch the game: With the emulator configured, locate the game ROM file and launch it within the emulator. The game should now run on your Windows PC, allowing you to experience the classic PS1 titles.

FAQs about PlayStation 1 Emulators

Q: Are PlayStation 1 emulators legal?

A: The legality of using PlayStation 1 emulators depends on the origin of the game files. Using emulators to play games you own is generally considered legal. However, downloading ROMs of copyrighted games without owning the original copies is illegal.

Q: Do I need a powerful computer to run a PlayStation 1 emulator?

A: While modern PCs offer significant processing power, even older systems can run PS1 emulators smoothly. Most games can be emulated without demanding hardware specifications.

Q: How can I improve the performance of my PlayStation 1 emulator?

A: Optimize performance by adjusting the emulator’s settings, such as reducing the resolution or disabling certain graphical features. Ensure your system’s drivers are updated and consider closing other applications running in the background.

Q: Can I use a PS1 controller with my emulator?

A: While some emulators may support original PS1 controllers, most require a USB adapter or a third-party controller that can be mapped to the emulator’s settings.

Tips for Using PlayStation 1 Emulators

  • Research compatibility: Not all PS1 games are compatible with every emulator. Before downloading a specific game, research its compatibility with your chosen emulator.
  • Optimize settings: Experiment with different emulator settings to find the optimal balance between performance and visual quality.
  • Use a controller: While keyboard and mouse controls are possible, using a gamepad offers a more authentic and immersive experience.
  • Explore online resources: Numerous online communities and forums dedicated to PlayStation 1 emulation provide valuable resources, tips, and solutions to common problems.

Conclusion

PlayStation 1 emulators offer a valuable tool for preserving and enjoying classic games on modern systems. They provide accessibility, enhanced performance, customization options, and contribute to the preservation of gaming history. By carefully selecting an emulator, configuring its settings, and obtaining game files legally, users can relive the golden age of PlayStation 1 gaming on their Windows PCs. As technology advances, emulators continue to evolve, ensuring the continued accessibility of these beloved titles for future generations.

PS1 Emulator For PC EPSXe 2021 Easy Setup GUIDE PlayStation ENGLISH Bilibili  atelier-yuwa.ciao.jp FREE DOWNLOAD PLAYSTATION (PS1, PSX) EMULATOR FOR PC - YouTube Best PlayStation emulators for desktop PCs  Tom's Guide
ePSXe 1.9.25 PlayStation 1 Emulator Tutorial: Installation/Setup (Windows) - YouTube 7 Best PS1 Emulators for PC and Android (2023) - Gamerz.ma Best ps1 emulator for windows 10 - hmholoser
Top 10 Best Ps1 Playstation 1 Emulators For Windows 1 - vrogue.co Best Ps1 Emulator For All Devices In 2021 - vrogue.co

Closure

Thus, we hope this article has provided valuable insights into Reliving the Golden Age: A Guide to PlayStation 1 Emulators for Windows. We hope you find this article informative and beneficial. See you in our next article!

Netframe 4 5 Windows 10 Download

netframe 4 5 windows 10 download

Introduction

With great pleasure, we will explore the intriguing topic related to netframe 4 5 windows 10 download. Let’s weave interesting information and offer fresh perspectives to the readers.

The Importance of .NET Framework 4.5 in Windows 10: A Comprehensive Guide

Microsoft .NET framework 4.5 Free Download

The .NET Framework is a crucial component for Windows operating systems, providing a robust platform for developing and running various applications. While newer versions of .NET have emerged, .NET Framework 4.5 remains a vital element for many programs, particularly those developed before the advent of .NET Core and .NET 5+. This article explores the significance of .NET Framework 4.5 in Windows 10, its benefits, and how to obtain and install it effectively.

Understanding the .NET Framework: A Foundation for Software Development

The .NET Framework, developed by Microsoft, serves as a foundation for building and executing applications across various platforms. It encompasses a comprehensive set of libraries, tools, and programming languages, allowing developers to create software that runs seamlessly on Windows systems.

.NET Framework 4.5, released in 2012, brought several advancements to the platform, including:

  • Improved Performance: .NET Framework 4.5 introduced enhancements that optimized application performance, leading to faster execution and smoother user experiences.
  • Enhanced Security: Security features were strengthened, offering improved protection against vulnerabilities and malicious attacks.
  • New Features and Libraries: .NET Framework 4.5 introduced new APIs and libraries, expanding the capabilities of developers to create more sophisticated applications.
  • Support for Windows 10: .NET Framework 4.5 was designed to be compatible with Windows 10, ensuring smooth integration with the operating system.

Why is .NET Framework 4.5 Still Relevant in Windows 10?

Despite the emergence of newer .NET versions, .NET Framework 4.5 remains relevant for several reasons:

  • Legacy Applications: Many applications developed before the release of .NET Core and .NET 5+ rely on .NET Framework 4.5. These applications may not be immediately compatible with newer frameworks, making .NET Framework 4.5 crucial for their continued functionality.
  • Wide Compatibility: .NET Framework 4.5 is widely supported by various software and hardware components, ensuring compatibility with a broad range of systems.
  • Stability and Reliability: .NET Framework 4.5 has been thoroughly tested and refined over the years, offering a proven track record of stability and reliability.

Downloading and Installing .NET Framework 4.5 in Windows 10: A Step-by-Step Guide

The installation process for .NET Framework 4.5 is straightforward:

  1. Verify System Requirements: Ensure your Windows 10 system meets the minimum requirements for .NET Framework 4.5. This typically includes a processor with at least 1 GHz, 1 GB of RAM, and sufficient hard drive space.
  2. Download the Offline Installer: Download the offline installer for .NET Framework 4.5 from the official Microsoft website. This ensures the installation process is not interrupted by internet connectivity issues.
  3. Run the Installer: Execute the downloaded installer file. Follow the on-screen instructions to complete the installation process.
  4. Restart Your Computer: After successful installation, restart your computer to apply the changes effectively.

Frequently Asked Questions (FAQs) about .NET Framework 4.5 in Windows 10

Q: Is .NET Framework 4.5 compatible with Windows 10?

A: Yes, .NET Framework 4.5 is designed to be compatible with Windows 10. It is a core component of the operating system and is often included in Windows 10 installations.

Q: Do I need to install .NET Framework 4.5 if I already have a newer version?

A: If you have a newer version of .NET, you may not need to install .NET Framework 4.5. However, if you encounter issues with legacy applications that require .NET Framework 4.5, installing it may resolve the problem.

Q: What are the risks of not installing .NET Framework 4.5?

A: If you require applications that rely on .NET Framework 4.5, not installing it can prevent those applications from running correctly. This can lead to functionality issues and prevent you from utilizing certain software.

Q: Can I uninstall .NET Framework 4.5 after installation?

A: Yes, you can uninstall .NET Framework 4.5 through the "Programs and Features" control panel in Windows 10. However, this may affect the functionality of applications that rely on .NET Framework 4.5.

Tips for Managing .NET Framework 4.5 in Windows 10

  • Regular Updates: Keep .NET Framework 4.5 up-to-date with the latest patches and security updates to ensure optimal performance and protection against vulnerabilities.
  • Troubleshoot Installation Issues: If you encounter installation issues, consult the Microsoft support website or community forums for troubleshooting guidance.
  • Monitor Application Compatibility: Regularly check for compatibility issues with applications that rely on .NET Framework 4.5. If necessary, consider upgrading to a newer version of .NET or contacting the application developer for support.

Conclusion: The Ongoing Importance of .NET Framework 4.5

While .NET has evolved significantly, .NET Framework 4.5 remains a vital component for many applications running on Windows 10. Its compatibility, stability, and the continued reliance of legacy applications on this version make it essential for ensuring smooth operation and functionality. By understanding the importance of .NET Framework 4.5 and following the appropriate installation and management procedures, users can ensure their Windows 10 systems remain equipped to run a wide range of software effectively.

Microsoft .NET framework 4.5 Free Download Netframe 4 5 Windows 10 Netframe 4 5 Windows 10
Microsoft .NET Framework 4.5.1 32-bit (x86) 64-bit (x64) Standalone Offline Installer for .NET Framework 4.5 .2 - Descargar para PC Gratis Microsoft .NET Framework 4.5 Download & Install for Windows 8/7 - MiniTool Partition Wizard
Tร‰Lร‰CHARGER NET FRAMEWORK 4.5 COMPLET GRATUIT ุชุญู…ูŠู„ ุจุฑู†ุงู…ุฌ ู†ุช ูุฑูˆู… ูˆุฑูƒ NET Framework ูˆูŠู†ุฏูˆุฒ 10 8 7 11 32 ุจุช 64 ุงูˆู ู„ุงูŠู† ูƒุงู…ู„

Closure

Thus, we hope this article has provided valuable insights into netframe 4 5 windows 10 download. We hope you find this article informative and beneficial. See you in our next article!

Net Framework Offline Installer Windows 10

net framework offline installer windows 10

Introduction

With great pleasure, we will explore the intriguing topic related to net framework offline installer windows 10. Let’s weave interesting information and offer fresh perspectives to the readers.

.NET Framework 3.5 Offline Installer for Windows 10 and 8.x  TechGainer

The .NET Framework, a foundational component of Windows, is a robust software development platform that enables the creation and execution of a wide range of applications. For Windows 10 users, it plays a vital role in ensuring compatibility with various software programs, allowing them to function seamlessly. While the .NET Framework can typically be downloaded and installed directly from Microsoft’s servers, there are instances where an offline installer becomes the preferred option. This guide delves into the intricacies of the .NET Framework offline installer for Windows 10, exploring its purpose, benefits, and utilization.

Understanding the Need for an Offline Installer

The .NET Framework offline installer serves as a self-contained package, containing all the necessary files for installation without requiring an active internet connection. This approach is particularly beneficial in scenarios where:

  • Limited or Unreliable Internet Access: In environments with restricted or intermittent internet connectivity, the offline installer eliminates the need for constant online access, enabling a smooth installation process.
  • Large File Downloads: The .NET Framework is a sizable software package, and downloading it over a slow internet connection can be time-consuming and frustrating. The offline installer allows users to download the entire package once, eliminating the need for multiple downloads and ensuring a faster installation experience.
  • System Configuration: For users with strict system configurations or those aiming for a streamlined installation process, the offline installer offers complete control over the installation process, allowing them to install specific components or versions as required.

Exploring the Benefits of the Offline Installer

The .NET Framework offline installer offers several advantages that make it a valuable tool for Windows 10 users:

  • Convenience and Efficiency: By eliminating the need for an internet connection during installation, the offline installer simplifies the process, making it more convenient for users. This approach also ensures a faster and smoother installation experience, particularly in environments with limited bandwidth.
  • Enhanced Control and Flexibility: The offline installer provides users with greater control over the installation process, allowing them to select specific components or versions to install. This flexibility is especially beneficial for users with specific system requirements or those aiming to minimize the impact on system resources.
  • Reliable and Secure Installation: By providing a self-contained package, the offline installer eliminates the possibility of encountering errors or interruptions caused by unstable internet connections. This approach ensures a more reliable and secure installation process, minimizing the risk of installation issues.

Acquiring the .NET Framework Offline Installer

Obtaining the .NET Framework offline installer is a straightforward process:

  1. Visit the Microsoft Download Center: Navigate to the official Microsoft Download Center website.
  2. Search for the .NET Framework: Use the search bar to locate the desired .NET Framework version, specifying "offline installer" in your search query.
  3. Select the Appropriate Version: Choose the version of the .NET Framework that aligns with your Windows 10 operating system and system requirements.
  4. Download and Save the Installer: Download the offline installer package and save it to a convenient location on your computer.

Installing the .NET Framework Offline Installer

Once you have downloaded the offline installer, the installation process is simple:

  1. Run the Installer: Locate the downloaded offline installer file and double-click it to launch the installation process.
  2. Follow the On-Screen Instructions: The installation wizard will guide you through the process, presenting you with options and prompts.
  3. Accept the License Agreement: Review and accept the license agreement before proceeding with the installation.
  4. Complete the Installation: Follow the remaining instructions to complete the installation process.
  5. Restart Your Computer: After the installation is complete, restart your computer to ensure that the changes take effect.

Troubleshooting Common Installation Issues

While the .NET Framework offline installer is generally reliable, occasional installation issues might arise. Here are some common problems and potential solutions:

  • Insufficient Disk Space: Ensure that you have enough disk space available for the installation. The .NET Framework installation requires a significant amount of storage.
  • Missing Prerequisites: Verify that your system meets the minimum requirements for the specific .NET Framework version you are installing.
  • Corrupted Installer File: If the downloaded offline installer file is corrupted, it may lead to installation errors. Download the installer again to ensure a clean file.
  • Administrative Privileges: For successful installation, ensure that you are logged in as an administrator or have administrative privileges.

FAQs: Addressing Common Queries

Q: What are the system requirements for installing the .NET Framework offline installer on Windows 10?

A: The system requirements vary depending on the specific .NET Framework version. Refer to the Microsoft documentation for detailed information on system requirements for each version.

Q: Can I install multiple versions of the .NET Framework on my Windows 10 system?

A: Yes, it is possible to install multiple versions of the .NET Framework on your Windows 10 system. However, ensure that the versions are compatible with your operating system and other installed software.

Q: What are the differences between the online and offline installers?

A: The primary difference lies in the installation process. The online installer requires an active internet connection to download and install the .NET Framework components, while the offline installer provides a self-contained package that does not require an internet connection.

Q: How do I uninstall a specific version of the .NET Framework?

A: To uninstall a specific version of the .NET Framework, use the "Programs and Features" control panel in Windows 10. Select the desired .NET Framework version and click "Uninstall."

Q: Is it necessary to install the latest version of the .NET Framework?

A: Installing the latest version is generally recommended for optimal performance and compatibility with the latest software applications. However, older versions might be required for specific software programs.

Tips for Optimal Installation

  • Back Up Your System: Before installing the .NET Framework, it is advisable to create a system backup to protect your data in case of unforeseen issues.
  • Disable Antivirus Software: Temporarily disable your antivirus software during the installation process to prevent potential conflicts.
  • Check for Updates: Ensure that your Windows 10 operating system is up to date before installing the .NET Framework.
  • Restart Your Computer: Restart your computer after installing the .NET Framework to ensure that the changes take effect properly.
  • Verify Installation: After installation, verify that the .NET Framework is installed correctly by checking the "Programs and Features" control panel in Windows 10.

Conclusion

The .NET Framework offline installer for Windows 10 provides a valuable solution for users facing internet connectivity challenges, seeking enhanced control over the installation process, or prioritizing a smooth and efficient installation experience. By understanding the benefits, acquiring the installer, and following the installation steps, users can seamlessly integrate the .NET Framework into their Windows 10 systems, unlocking the potential for a wider range of software applications and enhancing their overall computing experience. Remember to consult the official Microsoft documentation for the latest information and troubleshooting tips, ensuring a successful and trouble-free installation.

net framework offline installer in windows 10  UPDATE IT NEWS AND ALL INFORMATION Cara Install Net Framework 3 5 Offline Di Windows 10 Youtube How To Install Net Framework 35 On Windows 10 Offline
How to Install Microsoft NET Framework 3 5 Offline in Windows 10 - YouTube Offline install of .NET Framework 3.5 in Windows 10 using DISM How to install Net Framework 3.5 in Windows 10 offline mode using DISM
How to Install .Net Framework 3.5 on Windows 10 Offline - YouTube Net Framework Offline Installer In Windows 10 Update It

Closure

Thus, we hope this article has provided valuable insights into net framework offline installer windows 10. We appreciate your attention to our article. See you in our next article!

Navigating The Windows 10 Student License: A Comprehensive Guide

Navigating the Windows 10 Student License: A Comprehensive Guide

Introduction

In this auspicious occasion, we are delighted to delve into the intriguing topic related to Navigating the Windows 10 Student License: A Comprehensive Guide. Let’s weave interesting information and offer fresh perspectives to the readers.

Windows 10 Student Guide Eval  PDF  Windows 10  Microsoft Windows

The digital landscape of education has evolved significantly, with technology playing an increasingly vital role in learning. For students, having access to a reliable and secure operating system is essential for accessing educational resources, completing assignments, and collaborating with peers. Windows 10, with its robust features and user-friendly interface, has emerged as a popular choice for many students.

This guide aims to provide a comprehensive understanding of the various options available for students seeking to acquire a Windows 10 license. It will delve into the different types of licenses, their associated benefits, and the factors students should consider before making a purchase.

Understanding the Windows 10 Licensing Model

Microsoft offers various licensing models for Windows 10, each catering to specific needs and user profiles. For students, the most relevant options are:

  • Windows 10 Education: This license is designed specifically for educational institutions and is typically purchased by schools and universities for their students. It offers access to a range of educational features, including:

    • Simplified deployment and management: This allows schools to easily deploy and manage Windows 10 across their entire student population.
    • Enhanced security: Features like Windows Defender and AppLocker help protect student devices from malicious threats.
    • Educational apps and tools: Access to a suite of educational apps and tools designed to enhance learning experiences.
    • Cost-effective pricing: Schools can often secure discounted rates for Windows 10 Education licenses.
  • Windows 10 Home: This is a standard consumer-focused license that offers a wide range of features suitable for personal use. While it lacks some of the specialized features of Windows 10 Education, it is a viable option for students who prefer a more affordable solution.

  • Windows 10 Pro: This license is designed for professional users and offers additional features, such as:

    • Enhanced security: Advanced security features like BitLocker and Domain Join are available.
    • Remote desktop access: Allows students to access their devices remotely.
    • Virtualization: Enables students to run multiple operating systems simultaneously.

Choosing the Right License for Your Needs

The most suitable Windows 10 license for a student depends on several factors, including:

  • Your institution’s requirements: If your school or university provides Windows 10 licenses, you may not need to purchase one separately.
  • Your personal needs: Consider your specific needs and usage patterns. If you primarily use your device for educational purposes, a Windows 10 Education license might be the best choice. However, if you need a more general-purpose operating system, Windows 10 Home might suffice.
  • Your budget: Windows 10 Education licenses are often more expensive than Windows 10 Home licenses. However, schools may offer discounts or subsidies for student licenses.

Where to Purchase a Windows 10 License

Once you’ve determined the most appropriate license for your needs, you can purchase it from various sources:

  • Microsoft Store: The official Microsoft Store offers a wide selection of Windows 10 licenses, including both retail and educational versions.
  • Authorized retailers: Many authorized retailers, such as Best Buy, Amazon, and Newegg, also sell Windows 10 licenses.
  • Your school or university: Some institutions may offer discounted Windows 10 licenses to their students.

Tips for Purchasing a Windows 10 License

  • Verify the seller’s authenticity: Only purchase licenses from reputable sources to avoid counterfeit products.
  • Read the terms and conditions carefully: Ensure you understand the license agreement before making a purchase.
  • Consider the cost of upgrades: If you plan to upgrade your device in the future, check if your current license will be transferable.
  • Explore student discounts: Many retailers and software vendors offer discounts to students.

Frequently Asked Questions

Q: Can I use a Windows 10 license on multiple devices?

A: The answer depends on the specific license type. Some licenses are tied to a single device, while others allow for multiple installations. Refer to the license agreement for details.

Q: How do I activate Windows 10 after purchasing a license?

A: After purchasing a license, you will receive a product key. Enter this key during the Windows 10 installation process to activate your copy.

Q: What are the system requirements for Windows 10?

A: Windows 10 has specific system requirements, including processor speed, RAM, and storage space. Refer to Microsoft’s official website for detailed specifications.

Q: Can I upgrade to a higher version of Windows 10 after purchasing a license?

A: You may be able to upgrade to a higher version of Windows 10, depending on your license type and the specific upgrade path. Check with Microsoft for compatibility information.

Q: What happens if I lose my product key?

A: If you lose your product key, you can contact Microsoft support to retrieve it. You may need to provide proof of purchase.

Conclusion

Acquiring a Windows 10 license is an important step for students who want to make the most of their digital learning experience. Understanding the different license options, their benefits, and the factors to consider when making a purchase can help students choose the best solution for their needs. By following the tips outlined in this guide, students can ensure they obtain a genuine and valid license that provides a secure and reliable platform for their educational endeavors.

Microsoft windows license student - tidesell 1:1 Windows 10 Devices: Studentโ€™s Guide โ€“ Professional Development Platform PPT - Navigating the Windows 10 Experience: A Comprehensive Guide to Licenses and Upgr
Microsoft windows license student - tidesell Windows 10 Student Version - Get Full Version of Windows 10 Education How to Get Windows 10 Student free? Here Is a Guide!
Microsoft windows license student - tidesell How To Apply For Windows 10 Education Student Discount 2022 Guide  mobilityarena

Closure

Thus, we hope this article has provided valuable insights into Navigating the Windows 10 Student License: A Comprehensive Guide. We thank you for taking the time to read this article. See you in our next article!

A Comprehensive Guide To Acquiring And Utilizing Windows 10 Pro

A Comprehensive Guide to Acquiring and Utilizing Windows 10 Pro

Introduction

With great pleasure, we will explore the intriguing topic related to A Comprehensive Guide to Acquiring and Utilizing Windows 10 Pro. Let’s weave interesting information and offer fresh perspectives to the readers.

A Comprehensive Guide to Acquiring and Utilizing Windows 10 Pro

What You Have to Know about Windows 10 Professional Activation - cache mania

Windows 10 Pro, the enterprise-focused edition of Microsoft’s popular operating system, offers a robust suite of features designed to enhance productivity, security, and manageability for both individuals and businesses. This comprehensive guide explores the process of obtaining Windows 10 Pro, delves into its key functionalities, and provides insights into its advantages.

Understanding Windows 10 Pro

Windows 10 Pro stands apart from its consumer counterpart, Windows 10 Home, with a set of advanced capabilities tailored for professional and commercial environments. These features cater to the specific needs of users who require enhanced control, security, and administrative flexibility.

Key Features of Windows 10 Pro

  • Domain Join: Windows 10 Pro allows devices to join a domain, enabling centralized management and control over user accounts, applications, and security policies. This feature is crucial for businesses with multiple computers and a need for standardized configurations.
  • BitLocker Drive Encryption: This feature provides robust data encryption for hard drives, protecting sensitive information from unauthorized access even if the device is lost or stolen.
  • Windows Update for Business: Windows 10 Pro offers granular control over updates, allowing businesses to schedule deployments and manage updates across their network. This ensures a controlled and efficient update process without disrupting workflows.
  • Remote Desktop: Windows 10 Pro enables users to connect to and control their computer remotely, allowing them to access files and applications from anywhere with an internet connection. This is particularly useful for professionals who need to work from different locations.
  • Hyper-V: Windows 10 Pro includes Hyper-V, a virtualization technology that allows users to run multiple operating systems simultaneously on a single computer. This is ideal for testing applications, running different operating systems, and enhancing resource utilization.
  • Enhanced Security Features: Windows 10 Pro offers advanced security features like Windows Defender Advanced Threat Protection, which helps detect and prevent sophisticated malware attacks, and Device Guard, which restricts the execution of untrusted software.

Obtaining Windows 10 Pro

There are several ways to acquire Windows 10 Pro, each with its own set of considerations:

  • Purchasing a New Device: Many new computers come pre-installed with Windows 10 Pro. This is the most straightforward option, as the operating system is already integrated with the hardware.
  • Upgrading from Windows 10 Home: If you already have Windows 10 Home installed, you can upgrade to Windows 10 Pro by purchasing a digital license key. This is a cost-effective option for users who need the advanced features of Windows 10 Pro.
  • Retail License: Windows 10 Pro can be purchased as a retail license key, which can be used to install the operating system on a new or existing computer. This option provides flexibility in choosing the hardware and installation process.
  • Volume Licensing: Businesses with multiple computers can utilize volume licensing programs to acquire Windows 10 Pro licenses at discounted rates. These programs offer various licensing models to suit different organizational needs.

Downloading and Installing Windows 10 Pro

Once you have obtained a valid Windows 10 Pro license, you can download the installation media from Microsoft’s website. This media can be used to install Windows 10 Pro on a new computer or perform a clean install on an existing computer.

Tips for Downloading and Installing Windows 10 Pro

  • Ensure a Stable Internet Connection: Downloading the installation media requires a stable and reliable internet connection to ensure a complete and error-free download.
  • Back Up Your Data: Before proceeding with a clean install, it is essential to back up all your important data to avoid losing any information.
  • Verify the License Key: Ensure the license key you have acquired is valid and compatible with Windows 10 Pro.
  • Follow Installation Instructions Carefully: Microsoft provides detailed installation instructions online. Following these instructions carefully will ensure a smooth and successful installation process.

FAQs about Windows 10 Pro

Q: What are the system requirements for running Windows 10 Pro?

A: Windows 10 Pro requires a processor with a clock speed of 1 GHz or faster, at least 1 GB of RAM for 32-bit systems or 2 GB for 64-bit systems, and 16 GB of free hard disk space.

Q: Can I upgrade from Windows 7 or Windows 8.1 to Windows 10 Pro?

A: Yes, you can upgrade from Windows 7 or Windows 8.1 to Windows 10 Pro. However, certain features might not be available depending on the previous version of Windows.

Q: Is Windows 10 Pro compatible with my current hardware?

A: Most modern computers are compatible with Windows 10 Pro. However, it is always recommended to check the manufacturer’s website for specific compatibility information.

Q: What are the benefits of using Windows 10 Pro over Windows 10 Home?

A: Windows 10 Pro offers advanced features like domain join, BitLocker drive encryption, Windows Update for Business, and Remote Desktop, which are essential for businesses and professionals.

Q: Can I use Windows 10 Pro on multiple computers?

A: The licensing terms for Windows 10 Pro specify the number of devices a single license can be used on. Refer to the license agreement for details.

Conclusion

Windows 10 Pro is a powerful and versatile operating system that caters to the needs of professionals and businesses seeking enhanced security, manageability, and productivity features. By understanding its key functionalities, acquiring a valid license, and following the appropriate installation procedures, users can leverage the full potential of Windows 10 Pro to optimize their workflows and achieve their goals.

Microsoft Windows 10 Pro Lifetime License "Windows 10 Pro Key: How to Get It for the Best Price" Windows 10 Pro vs Pro N: What are the differences?
Windows 10 Quick Guide What Is The Difference between Windows 10 Pro and Windows 10 Pro N - EaseUS How to Free Download Windows 10 Pro ISO and Install It on a PC? - MiniTool
Using windows 10 pro as a home server - masopbrowser Microsoft Windows 10 Professional โ€“ HB โ€“ Software

Closure

Thus, we hope this article has provided valuable insights into A Comprehensive Guide to Acquiring and Utilizing Windows 10 Pro. We hope you find this article informative and beneficial. See you in our next article!

Navigating The Digital Landscape: A Guide To Password Managers In Windows 11

Navigating the Digital Landscape: A Guide to Password Managers in Windows 11

Introduction

In this auspicious occasion, we are delighted to delve into the intriguing topic related to Navigating the Digital Landscape: A Guide to Password Managers in Windows 11. Let’s weave interesting information and offer fresh perspectives to the readers.

Windows 11 Password Manager: 5 Best We Tested

In the digital age, the need for robust security measures has become paramount. With online accounts proliferating across various platforms, managing and remembering complex passwords for each one can be a daunting task. This is where password managers emerge as invaluable tools, offering a streamlined and secure approach to online identity management.

The Importance of Password Managers

Password managers serve as digital vaults, securely storing and managing all your online credentials. They eliminate the need to remember numerous passwords, reducing the risk of forgetting them or compromising security through weak or reused passwords. By employing strong encryption algorithms, these tools safeguard your login information from unauthorized access, ensuring your online accounts remain protected.

Key Features of Password Managers in Windows 11

Windows 11, the latest iteration of Microsoft’s operating system, integrates seamlessly with password managers, enhancing the user experience. Here are some key features that make password managers essential in the Windows 11 environment:

  • Secure Password Generation: Password managers generate strong, random passwords that are practically impossible to guess, significantly bolstering account security.
  • Automatic Login: With a single click, password managers automatically fill in your login details, streamlining the process of accessing websites and applications.
  • Cross-Platform Compatibility: Most password managers offer cross-platform compatibility, allowing you to access your stored credentials across various devices, including smartphones, tablets, and computers.
  • Password Auditing and Security Alerts: Advanced features include password auditing, highlighting weak or compromised passwords, and providing security alerts when vulnerabilities are detected.
  • Data Synchronization: Password managers synchronize your data across all your devices, ensuring consistent access to your credentials regardless of your location.
  • Biometric Authentication: Some password managers support biometric authentication, such as fingerprint scanning or facial recognition, adding an extra layer of security.

Choosing the Right Password Manager

The choice of a password manager depends on individual needs and preferences. Factors to consider include:

  • Ease of Use: The interface should be intuitive and user-friendly, facilitating a smooth onboarding experience.
  • Security Features: Look for robust encryption algorithms, multi-factor authentication options, and features like password auditing and breach monitoring.
  • Platform Compatibility: Ensure the password manager is compatible with your preferred operating systems and devices.
  • Pricing: Password managers are available in both free and paid versions. Free versions often offer limited features, while paid plans provide more advanced functionalities.

Benefits of Using a Password Manager

The benefits of utilizing a password manager extend beyond convenience:

  • Enhanced Security: Strong passwords, encryption, and multi-factor authentication significantly reduce the risk of unauthorized access to your online accounts.
  • Improved Privacy: By eliminating the need to store passwords in plain text, password managers protect your sensitive information from unauthorized access.
  • Increased Productivity: Automatic login and password generation streamline online activities, saving time and effort.
  • Centralized Management: Having all your passwords stored in one secure location simplifies account management and password recovery.

FAQs About Password Managers in Windows 11

Q1: Are password managers safe?

Password managers employ robust encryption algorithms to protect your credentials. Reputable providers adhere to industry best practices and security standards, ensuring the safety of your data.

Q2: How do I choose a reliable password manager?

Consider factors like user reviews, security features, platform compatibility, and pricing. Researching the provider’s reputation and security practices is crucial.

Q3: Can I use a password manager on multiple devices?

Yes, most password managers offer cross-platform compatibility, allowing you to access your credentials on various devices.

Q4: What if I forget my master password?

Password managers typically provide recovery options, such as security questions or email-based password resets. However, it is essential to choose a master password you can remember and keep it secure.

Q5: Is it necessary to pay for a password manager?

Free versions of password managers are available, but they often have limitations. Paid plans provide more features, such as advanced security features, unlimited password storage, and customer support.

Tips for Using a Password Manager Effectively

  • Choose a Strong Master Password: Select a complex and unique master password that is easy for you to remember but difficult for others to guess.
  • Enable Two-Factor Authentication: Adding an extra layer of security through two-factor authentication further protects your account from unauthorized access.
  • Regularly Audit Your Passwords: Password managers often provide tools for auditing and identifying weak or compromised passwords.
  • Keep Your Software Updated: Ensure your password manager and other security software are updated regularly to benefit from the latest security patches and bug fixes.

Conclusion

In the modern digital landscape, password managers have become indispensable for safeguarding online identities. By streamlining account management, generating strong passwords, and providing robust security features, these tools empower individuals to navigate the online world with confidence. As technology evolves, password managers continue to adapt and enhance their functionalities, ensuring a secure and seamless online experience for users in Windows 11 and beyond.

Best Password Manager for Windows 11/10/8/7 for 2023 How to Change the Password on Your Windows 11 Computer? - MiniTool 4 best password managers for Windows 11 - TipsMake.com
How to Disable or Remove Login Password on Windows 11 - The Microsoft Windows11 Best Password Managers & Security Tips  Restore Privacy 12 Best Password Managers Software For Windows 10,11 in 2024
Navigating The Digital Landscape With Confidence And Cybersecurity. Digital Landscape Best password managers 2023: Reviews of top products  PCWorld

Closure

Thus, we hope this article has provided valuable insights into Navigating the Digital Landscape: A Guide to Password Managers in Windows 11. We thank you for taking the time to read this article. See you in our next article!

Restoring Digital Memories: A Guide To Repair Apps And Programs For Windows 10 Photos

Restoring Digital Memories: A Guide to Repair Apps and Programs for Windows 10 Photos

Introduction

With great pleasure, we will explore the intriguing topic related to Restoring Digital Memories: A Guide to Repair Apps and Programs for Windows 10 Photos. Let’s weave interesting information and offer fresh perspectives to the readers.

Restoring Digital Memories: A Guide to Repair Apps and Programs for Windows 10 Photos

How To Repair Apps & Programs In Windows 10

Digital photographs, the cherished records of life’s moments, are susceptible to various forms of damage. From accidental deletion to file corruption, the loss of these precious images can be deeply distressing. Fortunately, a range of repair apps and programs specifically designed for Windows 10 photos can help reclaim these lost memories. This comprehensive guide explores the diverse landscape of these tools, offering insights into their functionalities, benefits, and limitations.

Understanding the Importance of Photo Repair Tools

The need for photo repair tools arises from the inherent vulnerabilities of digital images. Common scenarios that necessitate their use include:

  • Accidental Deletion: A misplaced click or a system error can lead to the disappearance of valuable photos.
  • File Corruption: Malware infections, power outages, or storage media malfunctions can corrupt image files, rendering them inaccessible.
  • Damaged Files: Physical damage to storage devices or improper handling can compromise the integrity of photo files.
  • Compression Artifacts: Excessive compression during image resizing or online sharing can introduce visual distortions.

Types of Photo Repair Programs

The landscape of photo repair tools encompasses a diverse range of programs, each catering to specific types of damage and offering varying levels of functionality.

1. Data Recovery Software:

  • Functionality: Primarily focused on recovering deleted files, including photos, from storage devices.
  • Benefits: Can retrieve photos even after emptying the Recycle Bin or formatting a storage drive.
  • Limitations: May not be effective in repairing corrupted or damaged files.

2. Photo Repair Software:

  • Functionality: Designed specifically to address damage within image files, such as corruption or compression artifacts.
  • Benefits: Can restore damaged photos to their original quality, often without significant loss of detail.
  • Limitations: May not be effective for all types of damage, and some programs may have limitations in terms of file format support.

3. Online Photo Repair Tools:

  • Functionality: Web-based services offering quick and often free photo repair solutions.
  • Benefits: Convenient and readily accessible, often requiring minimal technical expertise.
  • Limitations: Limited in functionality compared to dedicated software, and may compromise privacy due to reliance on third-party services.

4. Built-in Windows 10 Photo Editing Features:

  • Functionality: Windows 10’s Photos app offers basic editing tools, including cropping, resizing, and color correction, which can sometimes address minor photo imperfections.
  • Benefits: Convenient and accessible for users already familiar with the Photos app.
  • Limitations: Limited in their ability to repair severely damaged photos or address complex issues.

Choosing the Right Photo Repair Tool

The selection of the appropriate photo repair tool depends on the specific needs of the user. Factors to consider include:

  • Type of Damage: Determine the nature of the damage to the photos (e.g., deletion, corruption, compression artifacts).
  • Severity of Damage: Assess the extent of the damage to determine the required level of repair functionality.
  • File Formats: Ensure the tool supports the file formats of the damaged photos.
  • Budget: Consider the cost of the software or service, as some options are free while others are paid.
  • Ease of Use: Choose a tool that offers a user-friendly interface and intuitive features.

Popular Photo Repair Apps and Programs

The following is a selection of well-regarded photo repair apps and programs available for Windows 10:

  • Stellar Photo Recovery: This comprehensive data recovery software excels in recovering deleted photos, even from formatted drives.
  • Recuva: A free and user-friendly data recovery tool that can recover a wide range of file types, including photos.
  • EaseUS Data Recovery Wizard: Offers a powerful solution for recovering lost photos, including those deleted from the Recycle Bin.
  • PhotoRec: A free and open-source command-line tool that can recover various file types, including photos, from damaged storage devices.
  • MiniTool Power Data Recovery: A paid data recovery tool that boasts advanced features for recovering lost photos.
  • ReImage Photo Repair: A dedicated photo repair tool designed to address various types of image damage, including corruption and compression artifacts.
  • Photo Repair Tool by Ashampoo: A comprehensive photo repair program that offers a range of tools for repairing damaged photos.
  • Photo Doctor: A user-friendly photo repair tool that focuses on restoring faded, blurry, and noisy images.

FAQs: Repair Apps and Programs for Windows 10 Photos

1. Can I repair a photo that has been deleted from the Recycle Bin?

Yes, data recovery software can often recover deleted photos, even after emptying the Recycle Bin. However, the success rate depends on factors such as the time elapsed since deletion and the extent of overwriting on the storage device.

2. What if my photo is corrupted due to a virus infection?

Photo repair software may be able to restore corrupted photos caused by viruses. However, it is crucial to first address the virus infection to prevent further damage.

3. Can I repair a photo that has been physically damaged on a storage device?

Photo recovery tools may be able to recover photos from physically damaged storage devices, but the success rate depends on the severity of the damage. It is advisable to seek professional data recovery services for severe physical damage.

4. Is it possible to repair a photo that has been compressed too much?

Some photo repair tools can address compression artifacts, but the effectiveness depends on the extent of compression. Severe compression can lead to irreversible loss of detail.

5. Are there any free photo repair tools available?

Yes, several free photo repair tools are available, both online and as downloadable software. However, free tools often have limitations in functionality or file format support.

Tips for Using Photo Repair Apps and Programs

  • Backup Your Photos: Regularly back up your photos to prevent permanent loss. Cloud storage services or external hard drives are suitable options.
  • Use Reputable Tools: Choose photo repair tools from trusted developers with a proven track record.
  • Read Reviews: Research user reviews and ratings before purchasing or using any software.
  • Try Free Trials: Many photo repair tools offer free trials to allow you to test their capabilities before committing to a purchase.
  • Be Realistic About Expectations: Photo repair tools can restore damaged photos, but they may not always achieve perfect results.

Conclusion: Restoring Digital Memories

Photo repair apps and programs offer valuable tools for restoring damaged or lost digital photographs. By understanding the different types of tools available, the nature of photo damage, and the importance of backup, users can effectively utilize these programs to protect their precious digital memories. While these tools can be immensely helpful, it is essential to remember that they are not a substitute for regular backups and responsible digital practices. By combining these tools with proactive measures, users can ensure the longevity and accessibility of their cherished digital photographs.

How to use System Restore on Windows 10  Windows Central Windows 10 Repair & Recovery Disk Pro & Home 32 & 64 Bit DVD Recover Reinstall Reboot Fix ALL How to Repair Apps/Programs Common Problems Windows 10 - MiniTool
Restoring Individual Files in Windows 10 Backup: A Step-by-Step Guide - Updated - Technology 6 best apps & software to restore old photos 07 Best Ways to Backup your PC- For Restoring your Memories - Tech Nukti
Download free Digital Picture Restore by Memory card restore v.5.3.1.2 software 547049 Screenshots of digital pictures restore software to perform data recovery

Closure

Thus, we hope this article has provided valuable insights into Restoring Digital Memories: A Guide to Repair Apps and Programs for Windows 10 Photos. We appreciate your attention to our article. See you in our next article!