Archives 2023

Navigating The Path To Windows 11: A Comprehensive Guide To Installation

Navigating the Path to Windows 11: A Comprehensive Guide to Installation

Introduction

In this auspicious occasion, we are delighted to delve into the intriguing topic related to Navigating the Path to Windows 11: A Comprehensive Guide to Installation. Let’s weave interesting information and offer fresh perspectives to the readers.

Windows 11 Installation Guideline and First Look - YouTube

Windows 11, the latest iteration of Microsoft’s operating system, offers a refined user experience with enhanced security features, improved performance, and a modern aesthetic. While its introduction has been met with excitement, the installation process might appear daunting for some. This comprehensive guide aims to demystify the process of installing Windows 11, providing clarity and confidence to users.

Understanding the Installation Process

The installation of Windows 11 can be broadly categorized into two distinct methods: a clean installation and an upgrade from a previous Windows version.

Clean Installation: This method involves formatting the hard drive and installing Windows 11 from scratch. This approach is ideal for users seeking a fresh start, ensuring a clean system free of residual files and potential conflicts from previous installations.

Upgrade: This method allows users to upgrade their existing Windows 10 system to Windows 11. This approach is convenient for users who wish to retain their personal files and applications, minimizing the need for reinstallation.

System Requirements: Ensuring Compatibility

Before embarking on the installation journey, it is crucial to ensure that your hardware meets the minimum system requirements for Windows 11. These requirements are designed to guarantee optimal performance and a seamless user experience.

Minimum System Requirements:

  • Processor: 1 gigahertz (GHz) or faster with 2 or more cores on a compatible 64-bit processor or System on a Chip (SoC).
  • RAM: 4 gigabytes (GB)
  • Storage: 64 GB or larger storage device
  • System Firmware: UEFI, Secure Boot capable
  • TPM: Trusted Platform Module (TPM) version 2.0
  • Graphics Card: Compatible with DirectX 12 or later with WDDM 2.x driver
  • Display: High definition (720p) display, 9 inches or greater diagonally

Preparing for Installation

Before proceeding with the installation process, it is essential to take the following preparatory steps:

  • Backup Data: Create a comprehensive backup of your important data, including personal files, documents, and applications. This backup serves as a safety net in case of unforeseen issues during the installation.
  • Download Windows 11 Installation Media: Obtain the Windows 11 installation media, either in the form of a USB drive or a DVD, from the official Microsoft website.
  • Check for System Updates: Ensure that your current operating system is updated to the latest version. This step helps to minimize potential compatibility issues.
  • Disable Anti-Virus Software: Temporarily disable your antivirus software during the installation process to prevent any conflicts.

Step-by-Step Installation Guide

1. Clean Installation:

  • Boot from Installation Media: Insert the Windows 11 installation media into your computer and restart it. Access the boot menu (usually by pressing F12 or another key during startup) and select the USB drive or DVD as the boot device.
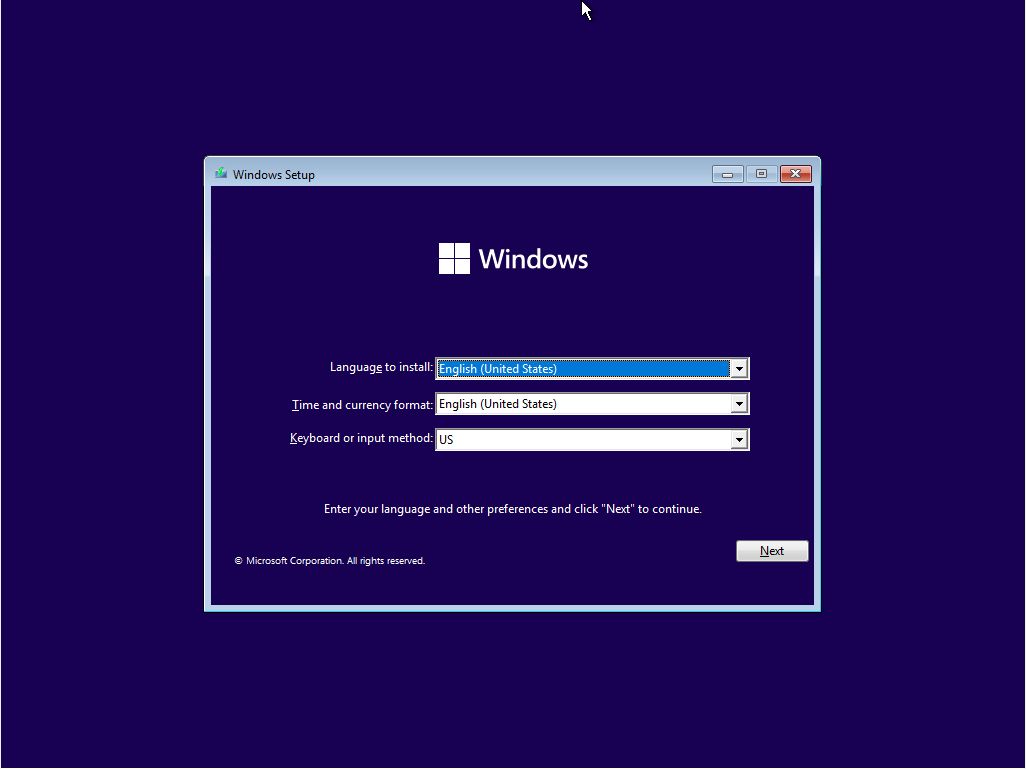
  • Language and Keyboard Selection: Choose your preferred language, time and currency format, and keyboard layout.
  • Installation Type: Select "Custom: Install Windows only (advanced)" to perform a clean installation.
  • Partitioning: Select the desired drive for installation and format it.
  • Installation Progress: The installation process will commence, which may take several minutes.
  • Activation: Upon completion, follow the on-screen instructions to activate Windows 11.

2. Upgrade from Windows 10:

  • Windows Update: Access Windows Update settings and check for updates. If an update for Windows 11 is available, download and install it.
  • Upgrade Assistant: Download and run the Windows 11 Upgrade Assistant from the Microsoft website. This tool will assess your system’s compatibility and guide you through the upgrade process.
  • Installation Process: Follow the on-screen instructions to complete the upgrade process. This may require restarting your computer several times.

Post-Installation Tasks

Once the installation is complete, there are a few essential tasks to ensure a smooth transition to Windows 11:

  • Install Drivers: Update your device drivers to ensure optimal functionality. You can obtain the latest drivers from your device manufacturer’s website.
  • Install Applications: Install your preferred applications, such as web browsers, productivity suites, and entertainment software.
  • Customize Settings: Personalize your Windows 11 experience by adjusting settings such as display resolution, themes, and notification preferences.

Troubleshooting Common Installation Issues

While the installation process is generally straightforward, you might encounter some common issues. Here’s a guide to troubleshooting these problems:

  • Compatibility Issues: If your system does not meet the minimum system requirements, you may encounter errors during the installation process. Ensure that your hardware meets the specifications outlined earlier.
  • Boot Errors: If your computer fails to boot from the installation media, verify that the boot order in the BIOS settings is correct.
  • Installation Errors: If you encounter errors during the installation process, consult the Microsoft support website or contact technical support for assistance.
  • Activation Issues: If you are unable to activate Windows 11, ensure that you have a valid product key. If you purchased a new computer with Windows 11 pre-installed, the activation should be automatic.

Frequently Asked Questions

Q: Can I upgrade from Windows 7 or 8 to Windows 11?

A: No, direct upgrades from Windows 7 or 8 to Windows 11 are not supported. You will need to perform a clean installation.

Q: Do I need to purchase a new license for Windows 11?

A: If you have a valid Windows 10 license, you can upgrade to Windows 11 for free. However, if you are performing a clean installation, you will need to purchase a new license.

Q: What happens to my data during an upgrade?

A: Your personal files, documents, and applications will be retained during an upgrade. However, it is always recommended to create a backup before proceeding.

Q: What are the advantages of Windows 11?

A: Windows 11 offers several advantages, including a modern and intuitive user interface, enhanced security features, improved performance, and integration with cloud services.

Tips for a Successful Installation

  • Plan Ahead: Before starting the installation, create a backup of your important data and ensure that your hardware meets the system requirements.
  • Use a Dedicated USB Drive: Use a dedicated USB drive for the installation media to avoid potential conflicts with other files on your computer.
  • Check for Updates: Ensure that your current operating system is updated to the latest version before attempting an upgrade.
  • Disable Anti-Virus Software: Temporarily disable your antivirus software during the installation process to avoid potential conflicts.
  • Seek Professional Help: If you encounter any difficulties during the installation process, consider seeking professional assistance from a qualified technician.

Conclusion

Installing Windows 11 can be a straightforward process when guided by a clear understanding of the steps involved. By following the instructions outlined in this guide, users can confidently navigate the installation process, whether opting for a clean installation or an upgrade. Remember to prioritize data backup, ensure hardware compatibility, and troubleshoot any issues that may arise. With careful planning and execution, users can successfully install Windows 11 and enjoy its enhanced features and refined user experience.

Windows 11 installation process - Step by Step  How to install Windows 11  Windows 11 Windows 11 Complete Installation Step By Step Youtube - Vrogue PPT - A Comprehensive Installation Guide to Windows 11 ARM With ISO PowerPoint Presentation - ID
How to Install Windows 11 Step by Step: Guide with Images How to install Windows 11: Step by Step Complete Guide  Electronics Monk How to Download and Install Windows 11 Official [Complete Guide] 2022 - YouTube
GET (?PDF?) DOWNLOAD Windows 11: 2022 Complete User Guide. Everything You Need to Know Before How To Install Windows 11 ISO [Developer Preview]: 3 Working Methods!

Closure

Thus, we hope this article has provided valuable insights into Navigating the Path to Windows 11: A Comprehensive Guide to Installation. We thank you for taking the time to read this article. See you in our next article!
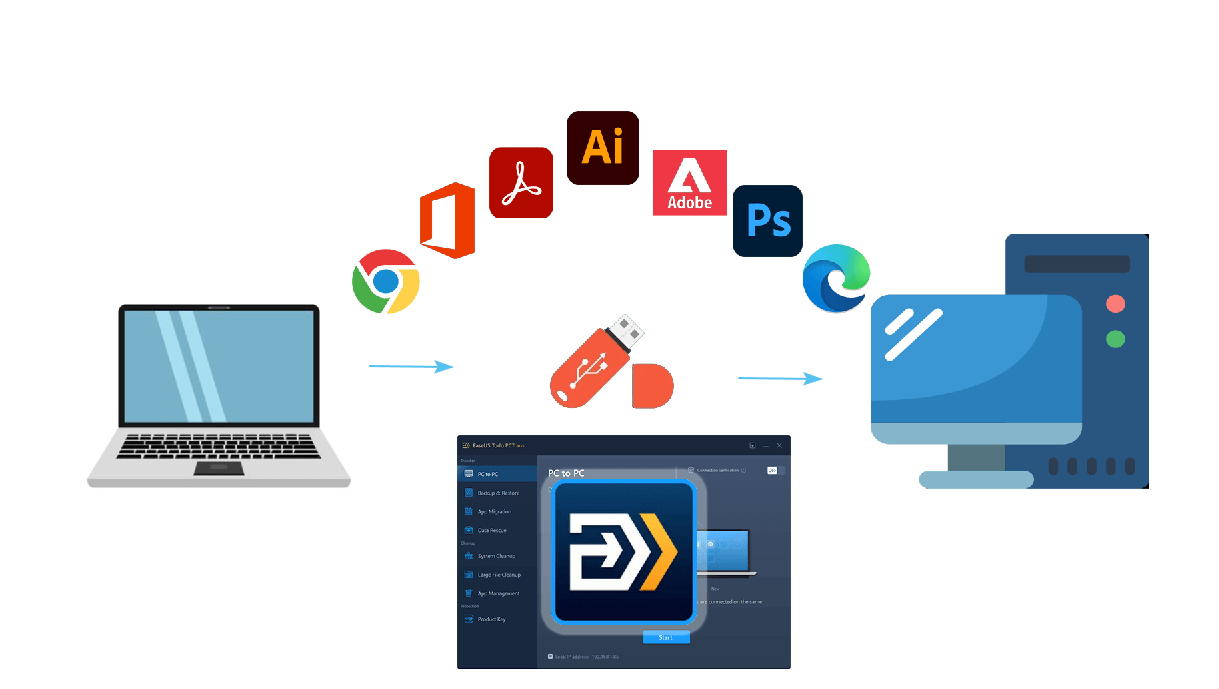
Transferring Programs To A New PC: A Comprehensive Guide

Transferring Programs to a New PC: A Comprehensive Guide

Introduction

With great pleasure, we will explore the intriguing topic related to Transferring Programs to a New PC: A Comprehensive Guide. Let’s weave interesting information and offer fresh perspectives to the readers.

Transferring Programs to a New PC: A Comprehensive Guide

How to Transfer Your Programs, Users and Data From Your Old PC to Your New PC - YouTube

The transition to a new computer can be exciting, but it also presents a significant challenge: transferring your programs and data. This process, while initially daunting, can be streamlined with careful planning and the right tools. This comprehensive guide will provide a detailed understanding of the various methods for transferring programs to a new PC, highlighting the benefits and challenges associated with each approach.

Understanding the Transfer Process

Before embarking on the transfer process, it’s essential to understand the fundamental aspects involved:

  • Software Licenses: Most software programs require a license for use. This license is typically tied to a specific computer or user account. When transferring programs, it’s crucial to ensure that the licenses are compatible with the new PC and that you are authorized to install them.
  • Data Transfer: This encompasses all your files, documents, photos, videos, and other personal data stored on your old computer. It’s critical to have a reliable backup strategy in place to ensure data integrity during the transfer.
  • Program Settings: Each program has its own unique configuration settings, including preferences, customizations, and saved data. These settings need to be transferred alongside the program itself to maintain continuity.

Methods for Transferring Programs

There are several methods for transferring programs to a new PC, each with its own advantages and disadvantages:

1. Direct Transfer (Using Backup and Restore):

This method involves creating a backup of your old computer, including programs, settings, and data, and then restoring it to the new PC.

  • Benefits: This is the simplest and most straightforward method, preserving all program settings and data in their original state.
  • Challenges: This method can be time-consuming, especially for large files and complex programs. It also requires sufficient storage space on both the old and new computers.
  • Tools: Windows Backup and Restore (Windows 7 and earlier), File History (Windows 8 and later), third-party backup software like Acronis True Image or Macrium Reflect.

2. Reinstallation from Original Media or Downloads:

This method involves reinstalling programs from their original installation media (CDs, DVDs) or downloaded installers.

  • Benefits: This method ensures the latest program versions are installed, potentially including updates and bug fixes.
  • Challenges: This method can be tedious and time-consuming, requiring you to locate and download installers for each program individually.
  • Tools: Original program installation media (CDs, DVDs), program installers downloaded from official websites.

3. Cloud-Based Transfer:

This method leverages cloud storage services to transfer programs and data between computers.

  • Benefits: This method is convenient and flexible, allowing you to access your programs and data from any device with an internet connection.
  • Challenges: This method requires a reliable internet connection and sufficient cloud storage space. It may also involve potential security concerns related to data privacy.
  • Tools: Cloud storage services like Google Drive, Dropbox, OneDrive, or Microsoft’s OneDrive.

4. Program-Specific Transfer Tools:

Some programs offer their own dedicated transfer tools, designed to simplify the process of moving data and settings to a new computer.

  • Benefits: These tools are specifically tailored to the program, ensuring seamless transfer of all necessary data and settings.
  • Challenges: This method is only applicable to programs that offer dedicated transfer tools.
  • Tools: Software-specific transfer utilities, often available from the program’s developer or website.

5. Transferring Data Manually:

This method involves manually copying and pasting data from the old computer to the new one.

  • Benefits: This method provides granular control over the data being transferred, allowing you to select only the necessary files.
  • Challenges: This method can be time-consuming and tedious, especially for large data sets. It also requires careful file management to avoid accidental data loss.
  • Tools: External hard drives, USB flash drives, network drives.

Choosing the Right Method

The best method for transferring programs depends on several factors, including:

  • The number and type of programs to be transferred: For a small number of simple programs, direct transfer or reinstallation may be sufficient. For a large number of complex programs, cloud-based transfer or program-specific tools might be more suitable.
  • The amount of data to be transferred: For large data sets, cloud-based transfer or external storage devices are recommended.
  • The availability of internet connectivity: Cloud-based transfer requires a reliable internet connection.
  • The time available for the transfer: Direct transfer and reinstallation can be time-consuming, while cloud-based transfer or program-specific tools offer faster options.

Key Considerations for a Successful Transfer:

  • Backup Before Transfer: Create a complete backup of your old computer before initiating the transfer process. This ensures data recovery in case of any unforeseen issues.
  • Software Compatibility: Check the system requirements of your programs to ensure they are compatible with your new PC.
  • License Transfer: If applicable, contact the software vendor to understand the process for transferring licenses to the new computer.
  • Data Security: If using cloud-based transfer, prioritize security by choosing reputable cloud storage services with strong encryption and privacy measures.
  • Testing After Transfer: After transferring programs, thoroughly test them to ensure they function correctly and all data is accessible.

FAQs

1. What happens to my program licenses when I transfer to a new PC?

Most software licenses are tied to a specific computer or user account. When transferring programs, it’s essential to check the licensing terms and contact the software vendor if necessary to ensure compatibility with the new PC.

2. Can I transfer all my programs and data to a new PC?

It’s generally possible to transfer most programs and data to a new PC, but some programs may have limitations or require specific steps for transferring licenses or settings.

3. Is it safe to transfer programs and data using cloud storage services?

Cloud storage services can be secure, but it’s essential to choose reputable providers with strong encryption and privacy measures. Consider the potential security risks and data privacy implications before using cloud-based transfer methods.

4. What if I lose data during the transfer process?

Having a complete backup of your old computer before transferring programs and data is crucial. If data is lost during the transfer, you can restore it from the backup.

5. How do I transfer program settings to a new PC?

Some programs offer dedicated transfer tools for settings, while others require manual configuration on the new PC. Refer to the program’s documentation or contact the software vendor for specific instructions.

Tips for a Smooth Transfer:

  • Plan Ahead: Before starting the transfer process, create a list of all programs and data you need to move.
  • Prioritize Essential Programs: Start by transferring the most critical programs and data first.
  • Use a Reliable Transfer Method: Choose a transfer method that aligns with your needs and resources, considering factors like data size, time constraints, and security concerns.
  • Test Thoroughly: After transferring programs and data, thoroughly test them to ensure everything is working correctly.
  • Seek Professional Help: If you encounter difficulties or uncertainties during the transfer process, consider seeking assistance from a qualified computer technician.

Conclusion

Transferring programs and data to a new PC can be a complex process, but with careful planning and the right tools, it can be accomplished smoothly and efficiently. By understanding the various methods available, considering the factors influencing your choice, and following the tips provided, you can ensure a successful transition to your new computer while preserving your valuable programs and data.

Transfer programs to new pc  Transfer programs from one computer to another Transferring Programs from an Old Computer to a New One: A Comprehensive Guide - The Enlightened Easily Transfer Installed Programs and Files to Another New Computer Windows 10/11
How to Transfer Programs to a New Computer: An Overview of the Different Methods - The Transferring Installed Programs from One Computer to Another [Guidance] Transferring Installed Programs From One Computer to Another Windows 11
How To Transfer Programs and Files To New Computer, To Windows 10 - YouTube How to Transfer a Computer Program to Another Computer: A Comprehensive Guide - The Enlightened

Closure

Thus, we hope this article has provided valuable insights into Transferring Programs to a New PC: A Comprehensive Guide. We appreciate your attention to our article. See you in our next article!

O Kam Pro Free Download

o kam pro free download

Introduction

In this auspicious occasion, we are delighted to delve into the intriguing topic related to o kam pro free download. Let’s weave interesting information and offer fresh perspectives to the readers.

It is important to understand that "o kam pro free download" is a phrase that suggests the illegal acquisition of software. Sharing or downloading software without proper authorization is a violation of copyright and can have serious legal consequences.

O-KAM Pro for PC - Free Download: Windows 7,10,11 Edition

This article will focus on providing information about software licensing, ethical software acquisition, and the potential risks associated with downloading software from unofficial sources.

Understanding Software Licensing

Software licensing is a legal agreement between the software developer and the user, outlining the terms of use. This agreement defines how the software can be used, copied, distributed, and modified.

There are various types of software licenses:

  • Proprietary Software: This type of software is owned by a specific company, and users must purchase a license to use it. The license typically restricts the user’s ability to modify or distribute the software.
  • Open Source Software: This software is freely available for use, modification, and distribution. The source code is open to the public, allowing users to modify and improve the software.
  • Freeware: This type of software is available for free, but it may be subject to certain limitations, such as restrictions on commercial use or distribution.
  • Shareware: This software is typically available for free trial, after which users must purchase a license to continue using it.

Ethical Software Acquisition

Acquiring software ethically involves obtaining it from authorized sources, such as:

  • Software Developer’s Website: The most reliable way to obtain software is directly from the developer’s website. This ensures the software is genuine and comes with the necessary documentation and support.
  • Authorized Resellers: Reputable software retailers offer authorized copies of software, providing a safe and legal way to purchase it.
  • Software Subscription Services: Services like Microsoft Office 365 or Adobe Creative Cloud offer subscriptions that provide access to a suite of software for a monthly or annual fee.

Risks of Downloading Software from Unofficial Sources

Downloading software from unofficial sources, such as torrents or file-sharing websites, carries significant risks:

  • Malware Infection: Downloaded files may contain malware, such as viruses, spyware, or ransomware, which can damage your computer, steal personal information, or disrupt your online activities.
  • Copyright Infringement: Downloading copyrighted software without a valid license is a violation of copyright law, which can result in legal penalties.
  • Unstable Software: Software obtained from unofficial sources may be incomplete, outdated, or corrupted, leading to instability, errors, or security vulnerabilities.
  • Lack of Support: Software downloaded from unofficial sources often lacks support from the developer, meaning users may not be able to receive updates, bug fixes, or assistance with technical issues.

FAQs about Software Licensing and Acquisition

Q: What are the benefits of obtaining software from authorized sources?

A: Obtaining software from authorized sources ensures the software is genuine, secure, and comes with support from the developer. This reduces the risk of malware infection, copyright infringement, and software instability.

Q: Is it legal to download software from torrents or file-sharing websites?

A: Downloading copyrighted software from unofficial sources is illegal and can result in legal penalties, including fines and imprisonment.

Q: What are the risks of downloading software from unofficial sources?

A: Downloading software from unofficial sources carries significant risks, including malware infection, copyright infringement, unstable software, and lack of support.

Q: How can I check if a software download is legitimate?

A: Always download software from the official website of the developer or from a reputable software retailer. Verify the source by checking the website’s SSL certificate (look for the padlock icon in the address bar) and checking reviews from other users.

Q: What are some tips for acquiring software ethically?

A: Always download software from authorized sources, such as the developer’s website or reputable software retailers. Read the software license agreement before installing and using the software.

Conclusion

Acquiring software from authorized sources is essential for ensuring the safety, security, and legality of your software usage. Downloading software from unofficial sources carries significant risks, including malware infection, copyright infringement, and unstable software. Always prioritize ethical and legal software acquisition to protect your computer, data, and yourself from potential harm.

O-KAM Pro for PC / Mac / Windows 11,10,8,7 - Free Download - Napkforpc.com O-KAM Pro for iOS (iPhone/iPad/iPod touch) - Free Download at AppPure O-KAM Pro for PC - Free Download: Windows 7,10,11 Edition
O-KAM Pro for Android - Free App Download O-KAM Pro For Pc : O-KAM Pro Computer Client Download O-KAM Pro APK (Android App) - Free Download
O-KAM Pro APK for Android Download Download O-KAM Pro App Free on PC (Emulator) - LDPlayer

Closure

Thus, we hope this article has provided valuable insights into o kam pro free download. We hope you find this article informative and beneficial. See you in our next article!

Windows 10 Pro: A Comprehensive Guide To Its Features And Benefits

Windows 10 Pro: A Comprehensive Guide to its Features and Benefits

Introduction

With enthusiasm, let’s navigate through the intriguing topic related to Windows 10 Pro: A Comprehensive Guide to its Features and Benefits. Let’s weave interesting information and offer fresh perspectives to the readers.

Windows 10 Pro: A Comprehensive Guide to its Features and Benefits

All You Need to Know About Windows 10 Professional: A Comprehensive Guide - Aartisto Web Media

Windows 10 Pro, an advanced edition of Microsoft’s popular operating system, is designed for professionals, small businesses, and power users seeking enhanced security, management, and productivity features. This comprehensive guide delves into the core functionalities of Windows 10 Pro, highlighting its key advantages and outlining its relevance in today’s digital landscape.

Understanding the Foundation: Key Features of Windows 10 Pro

Windows 10 Pro builds upon the foundation of Windows 10 Home, incorporating a robust set of features tailored for professional environments. These features can be categorized into several key areas:

1. Enhanced Security:

  • BitLocker Drive Encryption: This powerful feature encrypts entire drives, ensuring data confidentiality even if the device is lost or stolen. BitLocker provides strong protection against unauthorized access, crucial for safeguarding sensitive business information.
  • Windows Hello: Windows Hello enables secure and convenient login using facial recognition or fingerprint scanning, enhancing user authentication and reducing reliance on passwords.
  • Device Guard: This feature enhances system security by restricting the execution of untrusted software, effectively limiting potential threats and malware attacks.
  • Windows Defender Advanced Threat Protection: Proactively detects and mitigates advanced threats, providing an extra layer of protection for critical systems and data.

2. Streamlined Management:

  • Domain Join: This allows devices to be integrated into a network domain, enabling centralized management of user accounts, applications, and security policies.
  • Group Policy Management: Administrators can configure and enforce specific settings across multiple devices, ensuring consistency and compliance within an organization.
  • Windows Update for Business: Offers greater control over software updates, allowing organizations to schedule updates and test them before deploying them across the network.
  • Remote Desktop Connection: Enables users to access and control their work computers remotely, fostering flexibility and productivity.

3. Advanced Productivity:

  • Windows Sandbox: A secure, isolated environment for testing applications or running untrusted software without affecting the main operating system.
  • Hyper-V: A virtualization platform allowing users to run multiple operating systems simultaneously on a single device, enhancing resource utilization and testing capabilities.
  • Microsoft Store for Business: Provides a centralized platform for managing and deploying applications across the organization, simplifying software distribution and updates.
  • Cortana: The intelligent personal assistant offers voice-activated commands, task management, and information retrieval, enhancing user productivity and streamlining workflows.

4. Enhanced Collaboration:

  • Microsoft Teams: A robust communication and collaboration platform enabling team chat, video conferencing, file sharing, and project management, fostering seamless teamwork.
  • Microsoft OneDrive for Business: Provides secure cloud storage for business data, facilitating file sharing, collaboration, and access from any device.
  • Windows Ink Workspace: Enhances digital note-taking and drawing capabilities, enabling users to interact with their devices in a more intuitive and natural way.

Why Choose Windows 10 Pro? A Detailed Examination of its Benefits

The comprehensive set of features in Windows 10 Pro provides several tangible benefits for businesses and professionals:

1. Enhanced Data Security:

  • Protection from Data Breaches: BitLocker Drive Encryption and Windows Defender Advanced Threat Protection provide robust safeguards against unauthorized access and malware attacks, minimizing the risk of data breaches and safeguarding sensitive business information.
  • Compliance with Regulatory Standards: The advanced security features in Windows 10 Pro align with industry regulations like HIPAA and GDPR, ensuring compliance and protecting user privacy.
  • Minimizing Downtime: Device Guard and other security features help prevent malware infections and system vulnerabilities, reducing downtime and maintaining business continuity.

2. Improved Management and Control:

  • Centralized Administration: Domain join and Group Policy Management enable centralized control over devices, applications, and user accounts, simplifying administration and ensuring consistent security policies.
  • Streamlined Deployment and Updates: Windows Update for Business allows organizations to schedule and test updates before deploying them across the network, minimizing disruptions and ensuring smooth software updates.
  • Increased Flexibility and Productivity: Remote Desktop Connection empowers users to access their work computers remotely, fostering flexibility and productivity, particularly for mobile workforces.

3. Enhanced Productivity and Collaboration:

  • Streamlined Workflows: Windows Sandbox and Hyper-V provide isolated environments for testing applications and running multiple operating systems, enhancing productivity and allowing for safe experimentation.
  • Seamless Collaboration: Microsoft Teams and OneDrive for Business facilitate seamless communication, file sharing, and collaboration, fostering efficient teamwork and knowledge sharing.
  • Improved User Experience: Windows Ink Workspace enhances digital note-taking and drawing capabilities, improving user experience and enabling more intuitive interaction with devices.

4. Cost-Effective Solution:

  • Reduced IT Costs: Centralized management and streamlined deployment processes decrease IT administrative overhead, reducing costs associated with software management and maintenance.
  • Improved Security Posture: Enhanced security features reduce the risk of data breaches and system vulnerabilities, minimizing potential costs associated with data recovery and security incidents.
  • Increased Employee Productivity: Improved collaboration tools and enhanced user experience contribute to increased employee productivity, leading to higher efficiency and potentially reduced operational costs.

FAQs about Windows 10 Pro

Q: What is the difference between Windows 10 Pro and Windows 10 Home?

A: Windows 10 Pro offers a more comprehensive set of features designed for professionals and businesses, including enhanced security, management, and productivity tools. Windows 10 Home is a more consumer-focused edition, lacking the advanced functionalities found in Windows 10 Pro.

Q: Can I upgrade from Windows 10 Home to Windows 10 Pro?

A: Yes, you can upgrade from Windows 10 Home to Windows 10 Pro. Microsoft offers a straightforward upgrade process, allowing users to purchase a license and activate the Pro edition on their existing Windows 10 Home installation.

Q: Is Windows 10 Pro suitable for personal use?

A: While Windows 10 Pro offers advanced features, it may not be necessary for all personal users. If you primarily use your computer for everyday tasks like browsing the internet, using social media, and playing games, Windows 10 Home may be sufficient. However, if you require enhanced security, management, or productivity features, Windows 10 Pro could be a suitable option.

Q: What are the system requirements for Windows 10 Pro?

A: Windows 10 Pro requires a compatible PC with a minimum of 1 GHz processor, 1 GB RAM for 32-bit or 2 GB RAM for 64-bit, 16 GB free hard disk space, and a DirectX 9 graphics device with WDDM 1.0 driver.

Tips for Optimizing Windows 10 Pro

  • Regularly Update Your System: Ensure your operating system and applications are up to date to benefit from the latest security patches and performance enhancements.
  • Optimize Disk Space: Regularly clean up your hard drive by removing unnecessary files, uninstalling unused programs, and using disk cleanup tools.
  • Manage Startup Programs: Reduce system startup time by disabling unnecessary programs that launch automatically.
  • Use Task Manager: Monitor system resources and identify processes consuming excessive memory or CPU, allowing you to prioritize or terminate them.
  • Customize Performance Settings: Adjust system settings to prioritize performance, power efficiency, or visual effects based on your needs.

Conclusion

Windows 10 Pro is a powerful operating system designed to meet the needs of professionals and businesses. Its comprehensive set of features, including enhanced security, streamlined management, advanced productivity tools, and robust collaboration capabilities, provides a comprehensive solution for organizations seeking to optimize their digital operations. By leveraging the benefits of Windows 10 Pro, businesses can enhance data security, improve management efficiency, foster collaboration, and ultimately increase productivity and streamline workflows, contributing to overall success in the digital age.

All You Need to Know About Windows 10 Professional: A Comprehensive Guide - Aartisto Web Media Windows 10 Pro-User Guide & Easy Learning 2019.pdf  Windows 10  Microsoft Windows All You Need to Know About Windows 10 Professional: A Comprehensive Guide - Aartisto Web Media
Microsoft announces Windows 10 Pro for Workstations - CGPress MICROSOFT Windows 10 Pro Review Microsoft Windows 10 Pro  Major Geeks
Windows 10 Pro ISO Installation Guide and Review - GET INTO PC FILE Buy Windows 10 Pro for Workstations  Digital Delivery  LicenceDeals

Closure

Thus, we hope this article has provided valuable insights into Windows 10 Pro: A Comprehensive Guide to its Features and Benefits. We thank you for taking the time to read this article. See you in our next article!

Troubleshooting Audio Issues On Windows 10: A Comprehensive Guide

Troubleshooting Audio Issues on Windows 10: A Comprehensive Guide

Introduction

With enthusiasm, let’s navigate through the intriguing topic related to Troubleshooting Audio Issues on Windows 10: A Comprehensive Guide. Let’s weave interesting information and offer fresh perspectives to the readers.

Troubleshooting Audio Issues on Windows 10: A Comprehensive Guide

How to Fix Windows 10 Audio Sound Problems [3 Solutions] - YouTube

The inability to hear sound from your computer can be frustrating, especially when you rely on it for work, entertainment, or communication. Windows 10, while generally robust, can experience audio glitches, leaving users perplexed and searching for solutions. This article aims to provide a comprehensive guide to identifying and resolving common audio issues on Windows 10, offering practical steps and explanations to empower users to regain their sound.

Understanding the Problem: Identifying the Source of the Audio Issue

Before diving into troubleshooting, it’s crucial to understand the nature of the problem. This involves identifying if the issue is isolated to a specific application, a particular device, or affecting the entire system.

  • Application-Specific Issue: If you can’t hear sound from a specific application like a game or a video player, the issue might be related to the application’s settings, compatibility, or internal errors.
  • Device-Specific Issue: If you are unable to hear sound from a particular device, such as headphones or external speakers, the problem might lie with the device itself, its connection, or its driver.
  • System-Wide Issue: If there’s a complete absence of sound across all applications and devices, the problem likely stems from a system-wide setting, a driver issue, or a hardware malfunction.

Troubleshooting Steps: A Systematic Approach to Resolving Audio Issues

Once you have identified the potential source of the issue, you can proceed with a systematic approach to troubleshooting. This involves progressively checking and adjusting various settings and components.

1. Basic Checks and Adjustments:

  • Volume Control: Ensure that the volume slider on your computer, the connected device, and within the application you are using are not muted.
  • Audio Output Device: Verify that the correct audio output device is selected in Windows settings. You can access this by right-clicking the speaker icon in the taskbar and selecting "Open Sound settings."
  • Speaker Connection: If you are using external speakers, check the connection cables and ensure they are securely plugged into both the computer and the speakers.
  • Hardware Issues: Check if the speakers or headphones are working properly by testing them on another device.

2. Driver Updates and Reinstallation:

Outdated or corrupted audio drivers can cause audio issues.

  • Automatic Driver Updates: Windows Update can automatically update drivers. To check for updates, go to "Settings" > "Update & Security" > "Windows Update" and click "Check for updates."
  • Manual Driver Updates: You can download and install the latest drivers from the manufacturer’s website. Search for your audio device model on the manufacturer’s website and download the latest drivers for Windows 10.
  • Driver Reinstallation: If you suspect a driver issue, reinstalling the driver might resolve the problem. Go to "Device Manager" (search for it in the Start menu), expand "Sound, video and game controllers," right-click your audio device, and select "Uninstall device." Restart your computer, and Windows will automatically reinstall the driver.

3. System-Wide Audio Settings:

  • Windows Audio Service: Ensure that the Windows Audio service is running. Go to "Services" (search for it in the Start menu), find "Windows Audio," right-click, and select "Start" if it’s stopped.
  • Audio Enhancements: Disable any audio enhancements that might be interfering with sound output. Right-click the speaker icon in the taskbar, select "Open Sound settings," and then click "Sound Control Panel." Go to the "Playback" tab, select your audio device, click "Properties," and then click the "Enhancements" tab. Uncheck all options and click "Apply."

4. Application-Specific Troubleshooting:

  • Application Settings: Check the application’s settings for any volume or audio output controls.
  • Compatibility Issues: Some applications might have compatibility issues with Windows 10. Try running the application in compatibility mode by right-clicking the application’s executable file, selecting "Properties," going to the "Compatibility" tab, and checking "Run this program in compatibility mode for." Choose a previous Windows version and click "Apply."

5. Advanced Troubleshooting:

  • System Restore: If the problem started recently, you can try restoring your system to an earlier point in time. Go to "Settings" > "Update & Security" > "Recovery" and click "Open System Restore."
  • Clean Boot: Performing a clean boot can help isolate the problem by starting Windows with a minimal set of drivers and programs. This can help determine if a third-party program is interfering with audio functionality.
  • Hardware Check: If all other troubleshooting steps fail, it’s possible that the issue lies with the audio hardware itself. Check for any loose connections or physical damage to the audio components.

FAQs: Addressing Common Questions about Audio Issues on Windows 10

Q: Why is there no sound on my laptop after I upgraded to Windows 10?

A: Upgrading to Windows 10 might cause audio driver conflicts or require driver updates. Reinstalling or updating the audio driver is often the solution.

Q: I can hear sound from my speakers, but not from my headphones. What’s wrong?

A: The problem might be with the headphones themselves, their connection, or the audio output device selection in Windows settings. Check the connection, test the headphones on another device, and verify that the correct output device is selected.

Q: My computer is making a crackling or buzzing sound. What could be the cause?

A: This could be due to a faulty audio driver, interference from other devices, or a hardware issue. Try updating the audio driver, checking for interference from other devices, and ensuring the audio hardware is properly connected.

Q: I’m getting a "No audio output device is installed" error. How can I fix it?

A: This error suggests a problem with the audio hardware or its drivers. Try reinstalling the audio driver or checking for hardware issues.

Tips: Proactive Measures to Prevent Audio Issues on Windows 10

  • Keep Drivers Updated: Regularly update your audio drivers to ensure compatibility and stability.
  • Avoid Unnecessary Software Installation: Avoid installing unnecessary software that might interfere with audio functionality.
  • Check for Updates: Regularly check for Windows updates, as they often include driver updates and system improvements.
  • Monitor System Health: Monitor your system for errors or warnings related to audio devices or drivers.

Conclusion: A Guide to Empowering Users to Resolve Audio Issues

Addressing audio issues on Windows 10 can be a process of elimination, requiring patience and a systematic approach. By understanding the potential causes, following the troubleshooting steps, and implementing proactive measures, users can effectively diagnose and resolve most audio problems. Remember, this guide provides a comprehensive framework, but specific solutions may vary depending on the individual issue.

2024 Complete Guide: Solve Every Windows 10 Sound Issue - Easy Audio Fixes! - YouTube Fix audio/sound problems on windows 10!! - Howtosolveit - YouTube How to Fix Audio Sound Problem on Windows 10 [Work 100%] - YouTube
How to Fix Sound or Audio Problems on Windows 10  Audio Problems Solved - YouTube How to quickly fix sound problems on Windows 10 - Pureinfotech How to quickly fix sound problems on Windows 10 - Pureinfotech
How to Fix Sound or Audio Problems in Windows 10 How to Fix sound or Audio problems on windows 10  - YouTube

Closure

Thus, we hope this article has provided valuable insights into Troubleshooting Audio Issues on Windows 10: A Comprehensive Guide. We hope you find this article informative and beneficial. See you in our next article!

Paint 3D: A Comprehensive Guide To Windows 10’s Built-in 3D Creation Tool

Paint 3D: A Comprehensive Guide to Windows 10’s Built-in 3D Creation Tool

Introduction

With enthusiasm, let’s navigate through the intriguing topic related to Paint 3D: A Comprehensive Guide to Windows 10’s Built-in 3D Creation Tool. Let’s weave interesting information and offer fresh perspectives to the readers.

Paint 3D: A Comprehensive Guide to Windows 10’s Built-in 3D Creation Tool

How to use Microsoft's Paint 3D in Windows 10  PCWorld

Paint 3D, a user-friendly 3D modeling application, is seamlessly integrated into Windows 10, offering a readily accessible platform for exploring the world of three-dimensional design. This article provides a detailed overview of Paint 3D, encompassing its functionalities, benefits, and practical applications.

Understanding Paint 3D: A Simplified 3D Modeling Experience

Paint 3D stands as an intuitive entry point into the realm of 3D design. Unlike complex professional software, it offers a streamlined interface, making it approachable for both beginners and experienced users. The application is built on a foundation of basic 3D shapes, allowing users to create objects by manipulating, combining, and customizing these primitives.

Key Features and Capabilities

Paint 3D boasts a comprehensive set of features designed to empower users in their 3D creative endeavors:

  • Shape Library: Users can select from a diverse library of pre-built 3D shapes, including cubes, spheres, cones, cylinders, and more. These shapes serve as the foundation for constructing more intricate objects.
  • Object Manipulation: Paint 3D provides intuitive tools for manipulating 3D objects. Users can easily rotate, resize, and reposition objects within the 3D workspace.
  • 3D Text: Users can add text to their 3D creations, further enhancing their artistic expression.
  • Color Palette: A wide range of colors is available for users to apply to their 3D models, enabling them to express their creativity through vibrant hues.
  • Brush Tool: Paint 3D features a brush tool that allows users to apply textures and patterns to their objects, adding depth and detail to their creations.
  • Effects: The application offers various effects that can be applied to 3D models, including lighting, shadows, and reflections, enhancing the realism and visual appeal of the final product.
  • Export Options: Users can export their 3D creations in various formats, including .3MF, .OBJ, and .STL, facilitating compatibility with other 3D design software and platforms.

Benefits of Using Paint 3D

Paint 3D presents numerous advantages for users seeking to engage with 3D design:

  • Accessibility: As a built-in application on Windows 10, Paint 3D is readily accessible, eliminating the need for downloads or installations.
  • User-Friendliness: The intuitive interface and straightforward functionalities make Paint 3D approachable for users of all skill levels, even those with no prior experience in 3D modeling.
  • Creativity Unleashed: Paint 3D empowers users to express their creativity by allowing them to build, customize, and personalize 3D objects.
  • Educational Tool: The application can serve as an educational tool, fostering an understanding of 3D concepts and encouraging exploration of spatial reasoning.
  • Practical Applications: Paint 3D can be used for various practical purposes, including creating prototypes, designing 3D printed models, and developing visual aids for presentations and educational materials.

Exploring the Possibilities with Paint 3D

Paint 3D’s capabilities extend beyond basic 3D modeling. It can be utilized for a wide array of creative and practical endeavors:

  • Product Prototyping: Designers can utilize Paint 3D to create digital prototypes of products, allowing them to visualize and iterate on designs before physical production.
  • 3D Printing: Paint 3D’s export options facilitate the creation of printable 3D models, enabling users to bring their designs to life through 3D printing technology.
  • Educational Visual Aids: Teachers and educators can leverage Paint 3D to create engaging visual aids for their lessons, enhancing student understanding of complex concepts through interactive 3D models.
  • Game Design: Aspiring game designers can use Paint 3D to create basic 3D models for their games, exploring the fundamentals of 3D design within the context of game development.
  • Personal Projects: Paint 3D empowers individuals to create personalized 3D objects for various purposes, including decorative items, personalized gifts, and unique artistic expressions.

FAQs about Paint 3D

Q: Is Paint 3D free to use?

A: Yes, Paint 3D is a free application included with Windows 10, making it accessible to all users without any additional cost.

Q: What are the system requirements for Paint 3D?

A: Paint 3D is compatible with Windows 10 operating systems, and its system requirements are generally modest, allowing it to run on a wide range of devices.

Q: Can I use Paint 3D to create professional-quality 3D models?

A: While Paint 3D is designed for accessibility and ease of use, it may not be suitable for highly complex or professional-level 3D modeling projects. For such endeavors, specialized 3D software packages are recommended.

Q: Can I export my Paint 3D creations to other 3D software?

A: Yes, Paint 3D allows users to export their 3D models in various formats, including .3MF, .OBJ, and .STL, ensuring compatibility with other 3D design software and platforms.

Q: How do I access Paint 3D on my Windows 10 computer?

A: Paint 3D is readily accessible through the Windows Start menu. Simply type "Paint 3D" in the search bar, and the application will appear in the search results.

Tips for Using Paint 3D

  • Start with Simple Shapes: Begin by experimenting with the basic 3D shapes provided in the library, gradually building complexity as you become more comfortable with the interface.
  • Utilize the Undo Feature: Don’t be afraid to experiment and make mistakes. The undo feature allows you to easily revert to previous steps in your design process.
  • Explore the Effects: Experiment with the various effects available in Paint 3D to enhance the realism and visual appeal of your 3D models.
  • Save Regularly: Regularly save your work to avoid losing progress in case of unexpected system issues.
  • Seek Inspiration: Explore online resources and tutorials to discover new techniques and ideas for using Paint 3D.

Conclusion

Paint 3D stands as a valuable tool for users of all skill levels seeking to explore the world of 3D design. Its user-friendly interface, comprehensive features, and accessibility make it a compelling choice for both beginners and experienced creators. Whether you’re interested in creating prototypes, designing 3D printed models, or simply exploring your artistic side, Paint 3D offers a gateway to the exciting realm of three-dimensional design.

How to use Microsoft's Paint 3D in Windows 10  PCWorld How to use Microsoft's Paint 3D in Windows 10  PCWorld Paint 3d windows 10 tutorial - experiencekda
Windows 10's new Paint 3D app drags physical objects into digital worlds  PCWorld Microsoft paint 3d tutorial - grebrothers 6 things you can do with Paint 3D in Windows 10  Digital Citizen
Windows 10 Paint 3d Tutorial How To Creat A 3d Photo Images Windows 10 Tip: A guide to the basic tools in Paint 3D - Windows Experience BlogWindows

Closure

Thus, we hope this article has provided valuable insights into Paint 3D: A Comprehensive Guide to Windows 10’s Built-in 3D Creation Tool. We hope you find this article informative and beneficial. See you in our next article!

Unlocking The Power Of PlayStation Remote Play On Windows 10: A Comprehensive Guide

Unlocking the Power of PlayStation Remote Play on Windows 10: A Comprehensive Guide

Introduction

With great pleasure, we will explore the intriguing topic related to Unlocking the Power of PlayStation Remote Play on Windows 10: A Comprehensive Guide. Let’s weave interesting information and offer fresh perspectives to the readers.

Unlocking the Power of PlayStation Remote Play on Windows 10: A Comprehensive Guide

Ps remote play windows 10

The advent of remote play technology has revolutionized the gaming landscape, allowing players to seamlessly extend their console experiences beyond the confines of their living rooms. PlayStation Remote Play, in particular, offers a powerful and versatile solution for Windows 10 users, enabling them to enjoy their PlayStation games on their PCs, laptops, or even tablets. This article delves into the intricacies of PlayStation Remote Play on Windows 10, providing a comprehensive guide to its installation, setup, and utilization.

Understanding PlayStation Remote Play

At its core, PlayStation Remote Play utilizes your home internet connection to stream gameplay from your PlayStation console to a compatible device, such as a Windows 10 PC. This technology essentially turns your PC into a remote display for your console, allowing you to control your games using a connected DualShock 4 or DualSense controller.

Benefits of PlayStation Remote Play on Windows 10

  • Flexibility and Convenience: Play your PlayStation games anywhere within your home network, freeing you from the limitations of being tethered to your TV.
  • Enhanced Visual Experience: Enjoy your games on a larger screen with higher resolution capabilities, particularly beneficial for PC monitors or laptops.
  • Sharing the Fun: Stream your gameplay to a PC for friends or family to watch and enjoy together.
  • Accessibility: Utilize Remote Play to access your PlayStation games on devices that might not be directly compatible with the console, such as older laptops or tablets.
  • Multitasking Potential: Play your favorite PlayStation games while simultaneously using your PC for other tasks, like browsing the web or working on documents.

Downloading and Installing PlayStation Remote Play on Windows 10

  1. Download the Software: Visit the official PlayStation website and navigate to the PlayStation Remote Play download page. Select the "Windows" option and download the installer file.
  2. Run the Installer: Double-click the downloaded file to initiate the installation process. Follow the on-screen instructions to complete the setup.
  3. Connect Your Controller: Plug in your DualShock 4 or DualSense controller to your PC using a USB cable. The software will automatically recognize and configure the controller.
  4. Log in to Your PlayStation Network Account: Upon launching the PlayStation Remote Play application, you will be prompted to sign in using your PlayStation Network account credentials. This step is necessary to establish a connection between your PC and your console.

Setting Up PlayStation Remote Play

  1. Connect Your Console: Ensure your PlayStation console is connected to the same network as your PC. Both devices need to be on the same Wi-Fi network for seamless streaming.
  2. Enable Remote Play on Your Console: Navigate to "Settings" on your PlayStation console, then select "Remote Play Connection Settings." Enable "Enable Remote Play" and confirm your network settings.
  3. Test the Connection: After enabling Remote Play on your console, launch the PlayStation Remote Play application on your PC. The application will attempt to establish a connection with your console. If successful, you will see a live feed from your console on your PC screen.

Tips for Optimizing PlayStation Remote Play Performance

  • Strong Internet Connection: A stable and fast internet connection is crucial for smooth streaming. Consider using a wired connection for your console and PC if possible, as it generally provides a more reliable connection than Wi-Fi.
  • Network Settings: Optimize your network settings for gaming. Configure your router to prioritize traffic to your console and PC.
  • Resolution and Frame Rate: Adjust the resolution and frame rate settings in the PlayStation Remote Play application to balance visual quality with performance. Lower settings can improve streaming stability, especially on slower internet connections.
  • Controller Configuration: Customize the button mapping and sensitivity of your DualShock 4 or DualSense controller in the PlayStation Remote Play settings for optimal control.

Frequently Asked Questions about PlayStation Remote Play on Windows 10

  • What are the system requirements for PlayStation Remote Play on Windows 10?
    • Operating System: Windows 10 (64-bit)
    • Processor: Intel Core i5-5600U or AMD A10-7850K (or equivalent)
    • Memory: 2 GB RAM
    • Storage: 100 MB free space
    • Network: Broadband internet connection with a minimum upload speed of 2 Mbps
    • Controller: DualShock 4 or DualSense controller (connected via USB cable or Bluetooth)
  • Can I use PlayStation Remote Play with a PS5?
    • Yes, PlayStation Remote Play is fully compatible with the PS5 console.
  • Can I use a DualShock 3 controller with PlayStation Remote Play?
    • No, the DualShock 3 is not compatible with PlayStation Remote Play. You need to use a DualShock 4 or DualSense controller.
  • Can I use PlayStation Remote Play on a Windows 7 or Windows 8 PC?
    • No, PlayStation Remote Play is only officially supported on Windows 10.
  • Can I use PlayStation Remote Play on a mobile device?
    • Yes, PlayStation Remote Play is available for Android and iOS devices.
  • Can I use PlayStation Remote Play to stream my gameplay to Twitch or YouTube?
    • While PlayStation Remote Play itself does not offer direct streaming capabilities, you can use third-party software like OBS Studio to capture and stream your Remote Play gameplay.

Conclusion

PlayStation Remote Play on Windows 10 provides a powerful and versatile solution for extending your PlayStation gaming experience to your PC. By following the steps outlined in this guide, you can easily set up and enjoy the benefits of playing your favorite PlayStation games on your Windows 10 device. Whether you’re looking for a more convenient way to game, a larger screen for immersive visuals, or the ability to multitask, PlayStation Remote Play offers a compelling and accessible option for enhancing your PlayStation experience.

How to set up PS4 Remote Play in Windows 10 Ps remote play windows 10 [STEP BY STEP GUIDE] Bluetooth PS4 Controller to Windows 10 for Remote Play : remoteplay
Ps remote play windows 10 - gulubo How to set up PS4 Remote Play in Windows 10 REMOTE PLAY WILL NOT OPEN EZ FIX  PS REMOTE PLAY EZ FIX ! (Windows 10 PC) - YouTube
How to set up PS4 Remote Play in Windows 10 How to download PS Remote Play on windows 10 - YouTube

Closure

Thus, we hope this article has provided valuable insights into Unlocking the Power of PlayStation Remote Play on Windows 10: A Comprehensive Guide. We appreciate your attention to our article. See you in our next article!

Navigating The Mustek ScanExpress A3 USB Driver Landscape In Windows 10: A Comprehensive Guide

Navigating the Mustek ScanExpress A3 USB Driver Landscape in Windows 10: A Comprehensive Guide

Introduction

In this auspicious occasion, we are delighted to delve into the intriguing topic related to Navigating the Mustek ScanExpress A3 USB Driver Landscape in Windows 10: A Comprehensive Guide. Let’s weave interesting information and offer fresh perspectives to the readers.

Mustek ScanExpress A3 USB 1200 Pro Driver v.1.3, v.1.5 download for Windows - deviceinbox.com

The Mustek ScanExpress A3, a versatile and robust scanner, offers users the ability to digitize documents and images with high-quality precision. However, ensuring seamless operation on a Windows 10 system hinges on the proper installation and utilization of the appropriate driver. This guide delves into the intricacies of the Mustek ScanExpress A3 USB driver within the Windows 10 environment, providing a comprehensive understanding of its significance, functionalities, and potential challenges.

Understanding the Crucial Role of Drivers

Drivers act as the bridge between hardware devices, like the ScanExpress A3, and the operating system, Windows 10 in this case. They provide the necessary instructions for the system to recognize and interact with the scanner, enabling it to perform its intended functions. Without the correct driver, the ScanExpress A3 will remain inaccessible, rendering it useless.

Locating the Mustek ScanExpress A3 USB Driver

The first step in utilizing the ScanExpress A3 on Windows 10 involves acquiring the appropriate driver. The primary source for this driver is the official Mustek website. Here, users can navigate to the "Support" or "Downloads" section, where they can search for the specific driver compatible with their ScanExpress A3 model and Windows 10 version.

Installation Process: A Step-by-Step Guide

Once the driver file is downloaded, the installation process is generally straightforward:

  1. Run the installer: Double-click the downloaded driver file to initiate the installation process.
  2. Follow on-screen instructions: The installer will typically guide users through a series of prompts, requesting confirmation and potentially requiring system restarts.
  3. Complete the installation: After following the prompts, the driver installation should be complete. The ScanExpress A3 should now be recognized by Windows 10.

Troubleshooting Potential Installation Issues

Occasionally, driver installation may encounter obstacles. Some common issues and their potential solutions include:

  • Driver incompatibility: If the downloaded driver is not compatible with the specific ScanExpress A3 model or Windows 10 version, it might fail to install. In this case, revisit the Mustek website and ensure the driver is compatible.
  • Missing prerequisites: Some drivers may require specific system prerequisites, such as .NET Framework or other software components. Ensure these prerequisites are installed before attempting driver installation.
  • Driver conflicts: Existing drivers on the system might conflict with the ScanExpress A3 driver. To resolve this, temporarily disable other scanners or related devices before attempting installation.
  • Administrative privileges: Driver installation might require administrative privileges. Ensure the user account has the necessary permissions.

Utilizing the ScanExpress A3 with the Installed Driver

With the driver installed, the ScanExpress A3 should be ready for use. Access the scanner’s functionality through various methods:

  • Windows Scan application: Windows 10 includes a built-in Scan application. Within this application, select the ScanExpress A3 as the source and configure scan settings.
  • Third-party scanning software: Numerous third-party scanning software applications offer advanced features and customization options. These applications often support the ScanExpress A3 and can be used to initiate scans and manage scanned documents.
  • Dedicated Mustek software: Mustek may provide dedicated software for the ScanExpress A3, offering additional features and controls. Check the Mustek website for available software options.

Frequently Asked Questions (FAQs)

Q1: How do I update the ScanExpress A3 driver in Windows 10?

A: To update the driver, visit the Mustek website and download the latest compatible driver for your ScanExpress A3 model and Windows 10 version. Then, follow the installation steps outlined above.

Q2: What if the ScanExpress A3 is not recognized by Windows 10 after driver installation?

A: Firstly, ensure the scanner is properly connected to the computer via USB. If the issue persists, try restarting the computer. If the problem remains, check the device manager for any error messages or exclamation marks next to the ScanExpress A3 entry. You might need to reinstall the driver or contact Mustek support for assistance.

Q3: Can I use the ScanExpress A3 with a virtual machine running Windows 10?

A: It is generally possible to use the ScanExpress A3 within a virtual machine running Windows 10. However, ensure the virtual machine settings allow access to the USB port and that the necessary drivers are installed within the virtual machine environment.

Tips for Optimal ScanExpress A3 Performance

  • Regular driver updates: Keep the ScanExpress A3 driver updated to ensure optimal functionality and compatibility with Windows 10.
  • Proper connection: Ensure the ScanExpress A3 is securely connected to the computer via a USB port.
  • Clean the scanner: Regularly clean the scanner’s glass and rollers to prevent dust and debris from affecting scan quality.
  • Optimize scan settings: Experiment with different scan settings to achieve the desired image quality and file size.

Conclusion

The Mustek ScanExpress A3 USB driver plays a critical role in enabling the smooth operation of the scanner within a Windows 10 environment. By understanding the driver’s importance, following the installation process, and troubleshooting potential issues, users can unlock the full potential of this versatile device. Regularly updating drivers, ensuring proper connectivity, and optimizing scan settings contribute to a seamless and productive scanning experience.

Скачать драйвер Mustek ScanExpress A3 USB бесплатно Scanexpress A3 Usb Windows 10 - lasoparesults Mustek Scanexpress A3 Usb Scanner Driver Download - cardtopp
Mustek ScanExpress A3 USB 1200 Pro download instruction manual pdf Mustek ScanExpress A3 USB 2400 Pro Scanner Drivers, Manuals & Utility Mustek A3 1200s Scanner Driver - sugarrenew
Mustek ScanExpress A3 USB Flatbed Scanner  GoSale Price Comparison Results Mondoberfläche Garn Dump mustek scanexpress a3 usb treiber windows 10 Sprießen Sport machen

Closure

Thus, we hope this article has provided valuable insights into Navigating the Mustek ScanExpress A3 USB Driver Landscape in Windows 10: A Comprehensive Guide. We hope you find this article informative and beneficial. See you in our next article!

Troubleshooting Bluetooth Connectivity Issues On Windows 10: A Comprehensive Guide

Troubleshooting Bluetooth Connectivity Issues on Windows 10: A Comprehensive Guide

Introduction

With enthusiasm, let’s navigate through the intriguing topic related to Troubleshooting Bluetooth Connectivity Issues on Windows 10: A Comprehensive Guide. Let’s weave interesting information and offer fresh perspectives to the readers.

Troubleshooting Bluetooth Connectivity Issues on Windows 10: A Comprehensive Guide

How to fix Bluetooth connection problems on Windows 10 - YouTube

The convenience of Bluetooth technology in modern computing is undeniable. It enables seamless wireless connections for various peripherals, including headphones, speakers, mice, keyboards, and even printers. However, encountering a scenario where Bluetooth functionality is absent or inaccessible on a Windows 10 device can be frustrating. This article aims to provide a comprehensive guide to addressing this issue, exploring potential causes and offering practical solutions.

Understanding the Absence of Bluetooth Options

When a Windows 10 computer lacks a visible Bluetooth option, it indicates a fundamental problem hindering the system’s ability to recognize and utilize Bluetooth hardware. This absence can stem from various factors, ranging from simple driver issues to more complex hardware malfunctions.

Common Causes and Troubleshooting Steps

1. Bluetooth Driver Issues:

  • Driver Incompatibility: The most frequent culprit is an outdated or incompatible Bluetooth driver. The operating system might not have the correct driver installed, leading to the absence of Bluetooth settings.
  • Driver Corruption: Corrupted or damaged Bluetooth drivers can also cause functionality issues.

Troubleshooting:

  • Update Drivers: Begin by updating the Bluetooth driver. Navigate to the "Device Manager" (search "Device Manager" in the Windows search bar), expand the "Bluetooth" category, and right-click on your Bluetooth adapter. Select "Update driver" and follow the on-screen instructions. Windows will attempt to automatically find and install the latest driver.
  • Reinstall Drivers: If updating drivers fails, consider completely uninstalling and reinstalling the Bluetooth driver. In the "Device Manager," right-click on the Bluetooth adapter, select "Uninstall device," and confirm the action. Restart your computer, and Windows should automatically attempt to reinstall the driver.
  • Manufacturer Website: If automatic updates fail, visit the manufacturer’s website for your computer or Bluetooth adapter. Download the latest driver specifically designed for your device and operating system, and manually install it.

2. Hardware Malfunction:

  • Bluetooth Adapter Failure: A malfunctioning Bluetooth adapter can prevent the system from recognizing it.
  • Internal Hardware Issues: In rare cases, internal hardware issues within the computer might affect Bluetooth functionality.

Troubleshooting:

  • Check Device Manager: Ensure the Bluetooth adapter is listed in the "Device Manager." If it is present but marked with a yellow exclamation mark, it signifies a driver or hardware issue.
  • External Bluetooth Adapter: Connect an external Bluetooth adapter to a USB port. If the new adapter functions correctly, it indicates the internal Bluetooth adapter might be faulty.
  • System Diagnostics: If the problem persists, consider running system diagnostics to check for potential hardware issues.

3. System Settings:

  • Hidden Bluetooth Settings: Windows 10 might have hidden Bluetooth settings due to specific configuration or user preferences.
  • Disabled Bluetooth Service: The Bluetooth service might be accidentally disabled, preventing Bluetooth functionality.

Troubleshooting:

  • Show Hidden Devices: In the "Device Manager," click on "View" and select "Show hidden devices." This will reveal any disabled or hidden devices, including the Bluetooth adapter.
  • Enable Bluetooth Service: Open the "Services" app (search "Services" in the Windows search bar). Locate "Bluetooth Support Service" and double-click on it. Ensure the "Startup type" is set to "Automatic" and click "Start" to initiate the service.

4. BIOS Settings:

  • Disabled Bluetooth in BIOS: Some computer manufacturers might disable Bluetooth functionality in the BIOS settings by default.

Troubleshooting:

  • Access BIOS: Restart your computer and press the designated key (usually F2, F10, or Delete) to enter the BIOS setup. Consult your computer’s manual for the specific key.
  • Enable Bluetooth: Navigate to the "Advanced" or "Peripherals" settings within the BIOS menu and enable the Bluetooth option. Save the changes and exit the BIOS.

5. Windows Updates:

  • Outdated Windows Version: An outdated Windows version might lack necessary updates for Bluetooth functionality.
  • Incomplete Update: Incomplete Windows updates can cause system conflicts and affect Bluetooth operation.

Troubleshooting:

  • Check for Updates: Open the "Windows Update" settings (search "Windows Update" in the Windows search bar) and check for available updates. Install any pending updates and restart your computer.
  • Troubleshoot Update Issues: If updates fail to install, try troubleshooting update issues using the "Windows Update Troubleshooter" available in the "Settings" app.

6. Other Potential Issues:

  • Software Conflicts: Some software applications might interfere with Bluetooth functionality.
  • Power Saving Settings: Aggressive power saving settings might disable Bluetooth to conserve energy.

Troubleshooting:

  • Disable Conflicting Software: Temporarily disable any recently installed software that might be causing conflicts.
  • Adjust Power Settings: Open the "Power Options" settings (search "Power Options" in the Windows search bar) and adjust the power plan to ensure Bluetooth is not disabled for power saving purposes.

7. Third-Party Software:

  • Bluetooth Management Software: Some Bluetooth adapters come with dedicated management software. Ensure this software is updated and configured correctly.
  • Antivirus Interference: Antivirus software might sometimes interfere with Bluetooth connectivity.

Troubleshooting:

  • Update Management Software: Update the Bluetooth adapter’s management software if available.
  • Temporarily Disable Antivirus: Temporarily disable your antivirus software to rule out any interference.

Importance and Benefits of Bluetooth Connectivity

The ability to connect wirelessly to a wide array of devices is a cornerstone of modern computing. Bluetooth technology offers numerous advantages:

  • Convenience: Eliminates the need for cables, simplifying setup and usage.
  • Portability: Enables wireless connections for mobile devices, offering flexibility and mobility.
  • Versatility: Supports a vast range of peripherals, expanding device capabilities.
  • Energy Efficiency: Consumes less power compared to wired connections.
  • Cost-Effectiveness: Offers a cost-effective alternative to wired solutions.

FAQs

Q: Why is my Bluetooth not showing up in the "Device Manager"?

A: This often indicates a driver issue, hardware malfunction, or the Bluetooth adapter being disabled in the BIOS. Follow the troubleshooting steps outlined above to address these potential causes.

Q: I have a Bluetooth adapter, but it doesn’t work. What should I do?

A: Ensure the Bluetooth adapter is properly installed and connected. Update or reinstall the drivers, check for hardware issues, and verify Bluetooth is enabled in the BIOS.

Q: My Bluetooth is working, but I can’t connect to devices. What could be the problem?

A: The issue might lie in the device you are trying to connect to. Ensure the device is discoverable and within Bluetooth range. Verify pairing settings and troubleshoot any potential connection errors.

Tips for Optimizing Bluetooth Connectivity

  • Keep Drivers Updated: Regularly update Bluetooth drivers to ensure compatibility and optimal performance.
  • Check Device Compatibility: Ensure the devices you intend to connect are compatible with Bluetooth technology.
  • Maintain Short Distances: Bluetooth signals weaken over distance. Keep devices within close proximity for reliable connections.
  • Avoid Interference: Minimize interference from other wireless devices, such as Wi-Fi routers, to improve signal strength.
  • Power Management Settings: Adjust power management settings to prevent Bluetooth from being disabled for power saving purposes.

Conclusion

The absence of Bluetooth options on a Windows 10 computer can be a frustrating experience. However, by understanding the potential causes and following the troubleshooting steps outlined in this guide, users can effectively address this issue. By systematically analyzing driver issues, hardware malfunctions, system settings, and other potential factors, users can restore Bluetooth functionality and enjoy the convenience of wireless connectivity.

How to Fix Bluetooth Problems in Windows 10 - YouTube How To Fix Bluetooth Connecting Working Issue On Windows 10 How to Fix Bluetooth Problems in Windows 10?  TechLatest
How to fix Bluetooth issues in Windows 10  Windows 10 Bluetooth not working  - YouTube How to Fix Bluetooth Connection Issues in Windows 10? – WebNots How to fix Bluetooth connection problems on Windows 10 - Pureinfotech
Comprehensive Guide to Troubleshooting Bluetooth Connectivity Issues in Windows - Bernard Aybout How to fix Bluetooth disconnect and other problems on Windows 10?

Closure

Thus, we hope this article has provided valuable insights into Troubleshooting Bluetooth Connectivity Issues on Windows 10: A Comprehensive Guide. We thank you for taking the time to read this article. See you in our next article!

Unlocking The Potential: A Guide To Windows 10’s Enhanced Functionality

Unlocking the Potential: A Guide to Windows 10’s Enhanced Functionality

Introduction

With great pleasure, we will explore the intriguing topic related to Unlocking the Potential: A Guide to Windows 10’s Enhanced Functionality. Let’s weave interesting information and offer fresh perspectives to the readers.

Unlocking the Potential: A Guide to Windows 10’s Enhanced Functionality

PPT - Unlocking the Full Potential of Windows 10 with the Best Software PowerPoint Presentation

Windows 10 S Mode, initially introduced as a streamlined and secure operating system, has evolved into a platform that offers a unique blend of simplicity and flexibility. While S Mode prioritizes security and app compatibility through the Microsoft Store, it may not always meet the specific needs of all users. Recognizing this, Microsoft has provided a clear pathway for users to transition out of S Mode and unlock the full potential of Windows 10, offering a wider range of software options and customization possibilities.

Understanding the Significance of Transitioning Out of S Mode:

Transitioning out of S Mode is not simply about gaining access to a broader app selection. It represents a strategic shift in how users engage with their operating system, empowering them with greater control and flexibility. By leaving S Mode, users gain the ability to:

  • Install Apps from Various Sources: S Mode restricts users to installing apps exclusively from the Microsoft Store. Transitioning out of S Mode removes this limitation, allowing users to download and install software from other trusted sources, including developer websites and reputable software vendors. This broader access opens doors to a wider range of applications, including specialized tools, productivity software, and creative programs.

  • Run More Powerful Software: S Mode prioritizes security and stability by limiting the types of software that can be run. This approach ensures a smooth and secure user experience but may restrict users from running more complex or demanding software applications. Transitioning out of S Mode allows users to install and utilize software that may require specific hardware configurations or have more advanced functionalities.

  • Customize System Settings: S Mode offers a streamlined and user-friendly experience with limited customization options. By switching out of S Mode, users gain access to a wider array of system settings, enabling them to fine-tune their operating system to their specific preferences. This includes the ability to customize the Start Menu, Taskbar, and desktop background, as well as adjust performance settings and network configurations.

  • Optimize System Performance: S Mode prioritizes a secure and stable environment, potentially limiting the full potential of the system’s performance. Leaving S Mode allows users to optimize their system settings and configure software to maximize performance, potentially leading to smoother operation and faster processing speeds.

The Transition Process: A Straightforward Approach:

The process of transitioning out of S Mode is straightforward and designed to be user-friendly. Here’s a breakdown of the steps involved:

  1. Access the Windows Store: Open the Microsoft Store application on your device.
  2. Search for "Switch out of S Mode": Enter the phrase "Switch out of S Mode" in the search bar.
  3. Select the "Switch out of S Mode" App: Click on the "Switch out of S Mode" app displayed in the search results.
  4. Follow On-Screen Instructions: The app will guide you through the remaining steps, requiring you to accept the terms and conditions and potentially restart your device.

FAQs on Transitioning Out of S Mode:

Q: What happens to my existing apps after switching out of S Mode?

A: All apps installed from the Microsoft Store will remain functional after transitioning out of S Mode. However, any apps downloaded from external sources will need to be reinstalled.

Q: Can I switch back to S Mode after transitioning out?

A: Currently, there is no built-in option to revert back to S Mode after switching out. However, you can perform a clean installation of Windows 10 in S Mode to revert to the original configuration.

Q: Does transitioning out of S Mode affect my warranty or security?

A: Transitioning out of S Mode does not impact your device’s warranty. Microsoft continues to provide security updates and support for Windows 10, regardless of the mode in which it is operating.

Q: Are there any costs associated with switching out of S Mode?

A: Switching out of S Mode is a free process, and no additional fees are required.

Tips for Transitioning Out of S Mode:

  • Backup Your Data: Before transitioning out of S Mode, it is always advisable to back up your important data to ensure its safety. This includes files, documents, and other critical information.
  • Review Software Compatibility: Before switching out of S Mode, review the compatibility of your existing software applications. Some apps may not function properly after transitioning.
  • Consider Security Measures: Transitioning out of S Mode opens up the system to a wider range of software, potentially increasing the risk of security threats. It is essential to implement robust security measures, such as antivirus software and regular system updates, to mitigate these risks.

Conclusion: Embracing the Full Potential of Windows 10

Transitioning out of S Mode offers users a gateway to a more versatile and powerful Windows 10 experience. It empowers users with the ability to install software from various sources, customize system settings, and optimize performance to meet their individual needs. While S Mode provides a secure and streamlined environment, transitioning out unlocks the full potential of Windows 10, enabling users to maximize their productivity and explore the vast array of software applications available. By understanding the benefits and process involved, users can confidently make an informed decision about whether transitioning out of S Mode aligns with their individual needs and preferences.

Unlocking The Full Potential: Activating Windows 10 Using CMD Enhance Security In Windows 10 - YouTube How to Lock or Unlock Taskbar in Windows 10
Windows 10 21H2 to bring auto PC locking/unlocking feature wrt human presence & distance from Unlocking the Potential of Windows 10 Tablets How to Lock or Unlock Taskbar in Windows 10
How to Unlock My Windows 10 Laptop – UnBrick.ID Unlocking Potential - Tools For Motivation

Closure

Thus, we hope this article has provided valuable insights into Unlocking the Potential: A Guide to Windows 10’s Enhanced Functionality. We thank you for taking the time to read this article. See you in our next article!