Archives 2023

Windows 11 Pro: A Comprehensive Guide To Features, Activation, And Benefits

Windows 11 Pro: A Comprehensive Guide to Features, Activation, and Benefits

Introduction

In this auspicious occasion, we are delighted to delve into the intriguing topic related to Windows 11 Pro: A Comprehensive Guide to Features, Activation, and Benefits. Let’s weave interesting information and offer fresh perspectives to the readers.

Windows 11 Pro: A Comprehensive Guide to Features, Activation, and Benefits

Buy WINDOWS 11 PRO USER GUIDE: A Comprehensive User Guide for Beginners and Seniors to Master

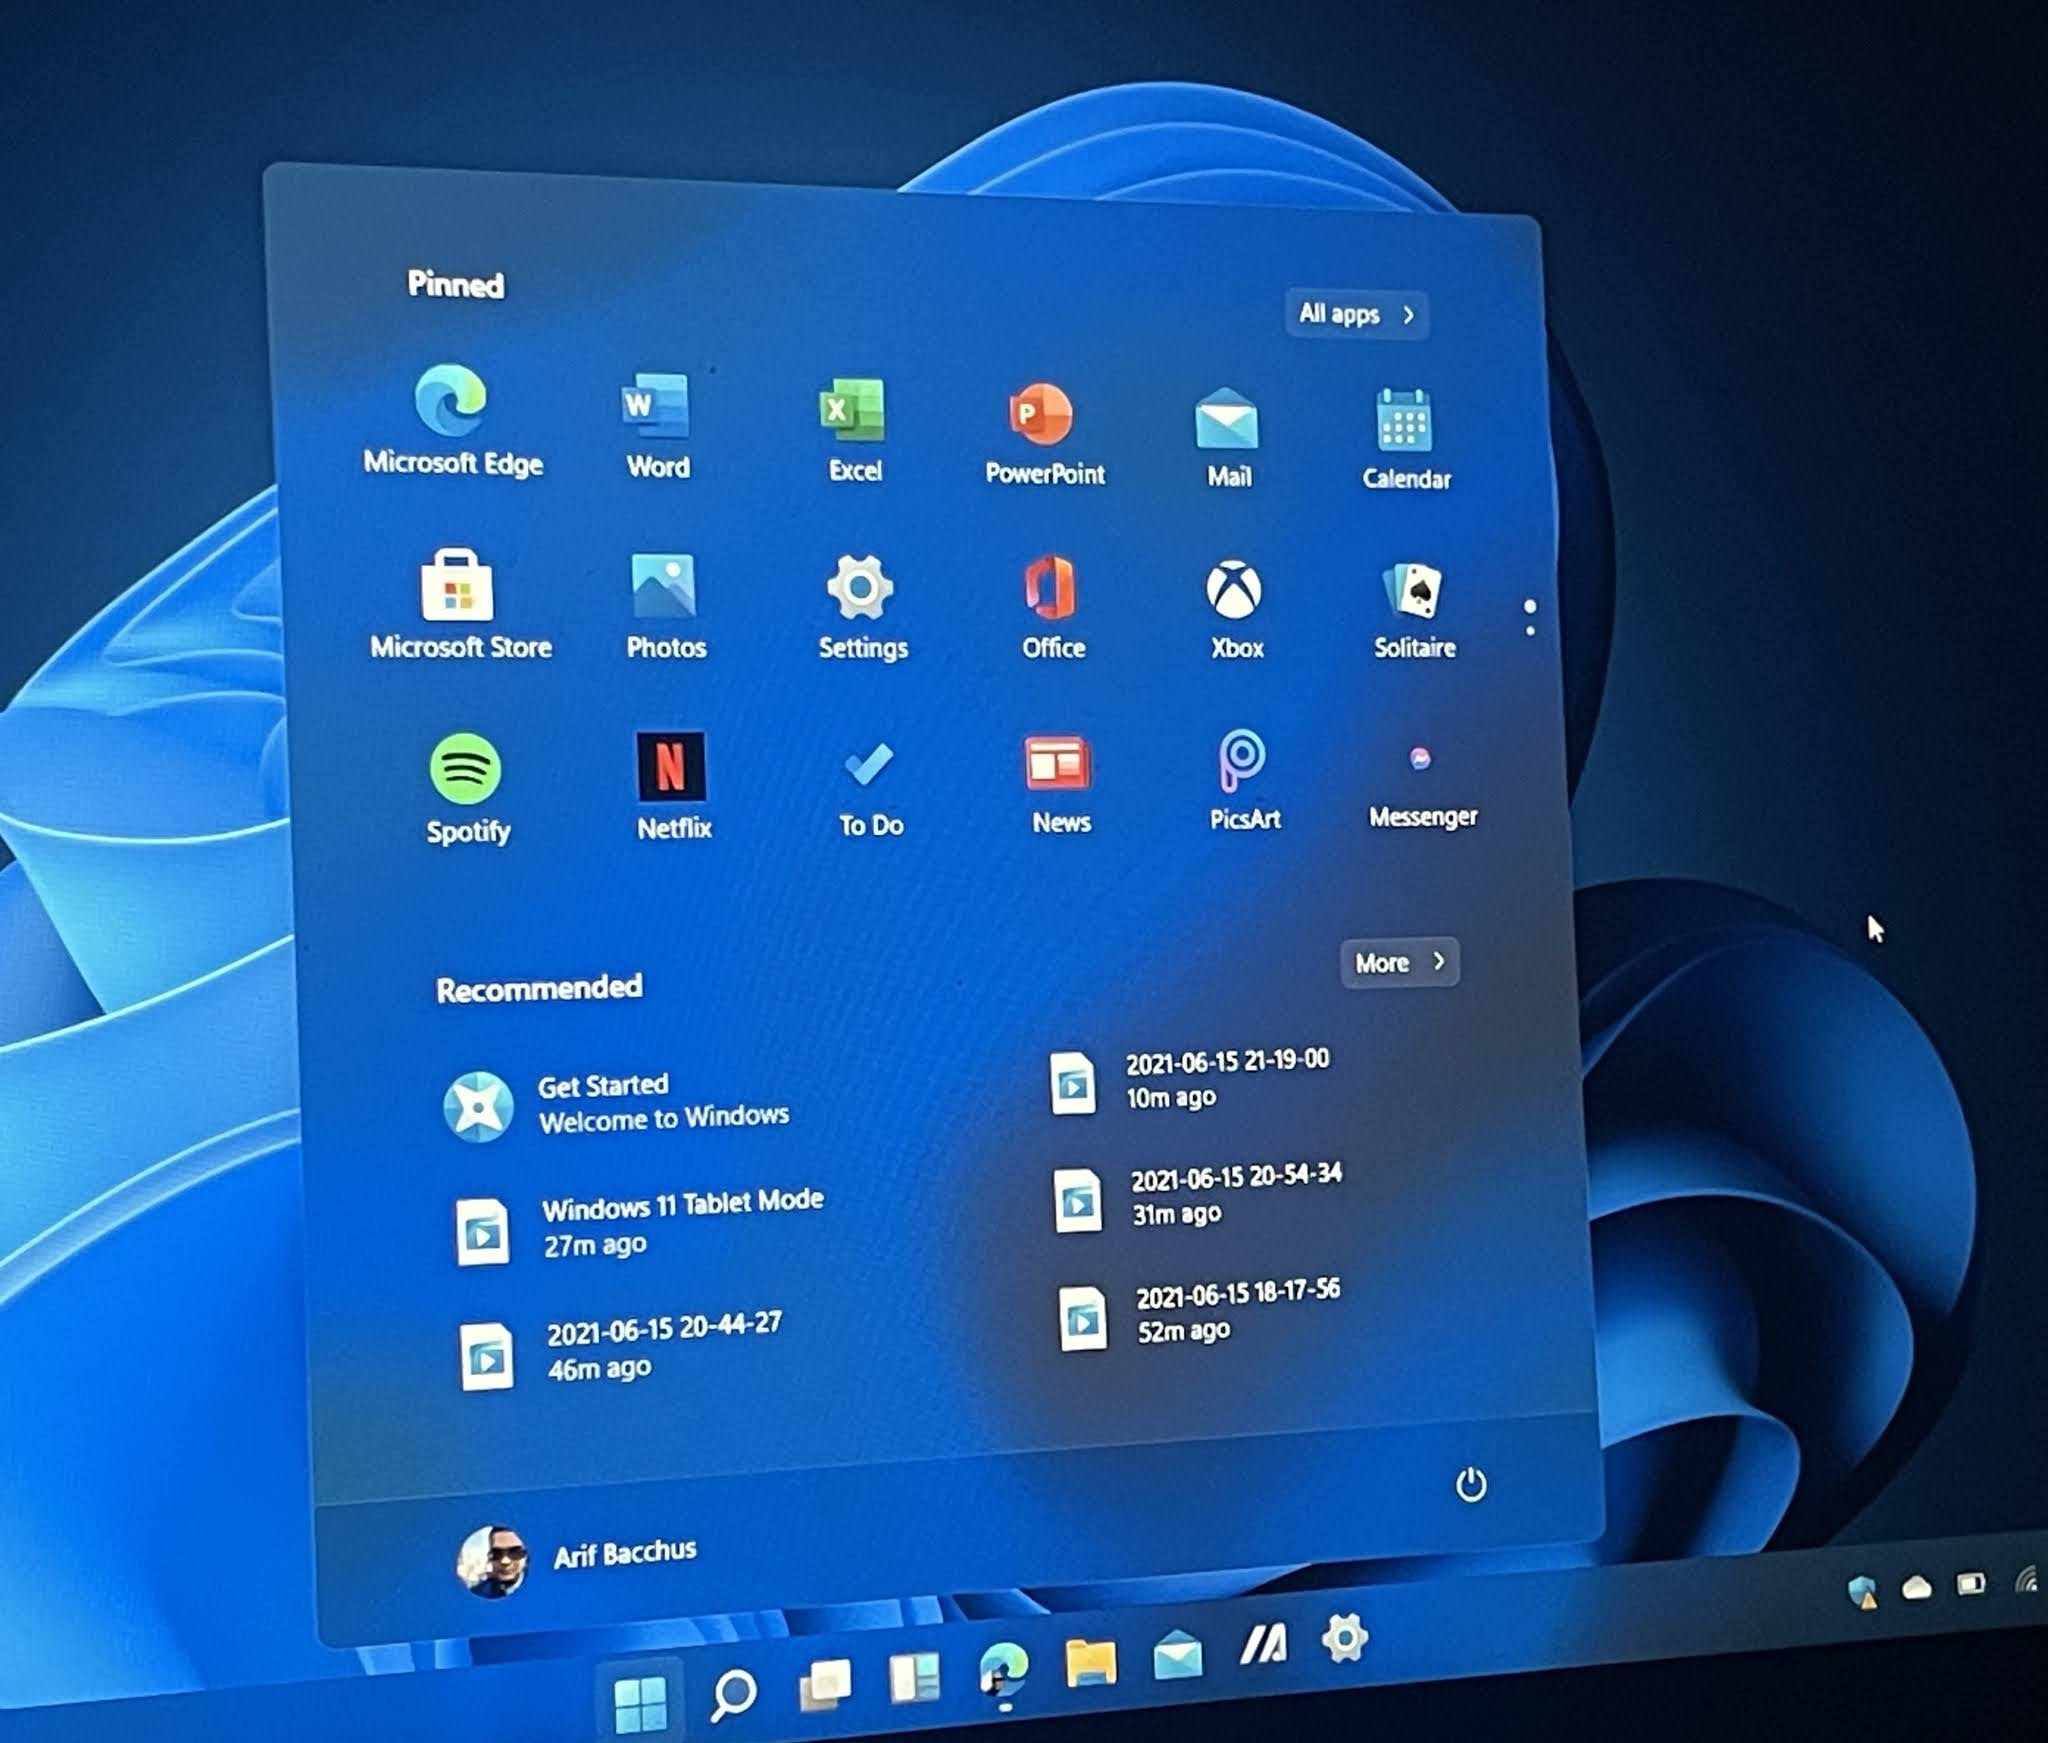
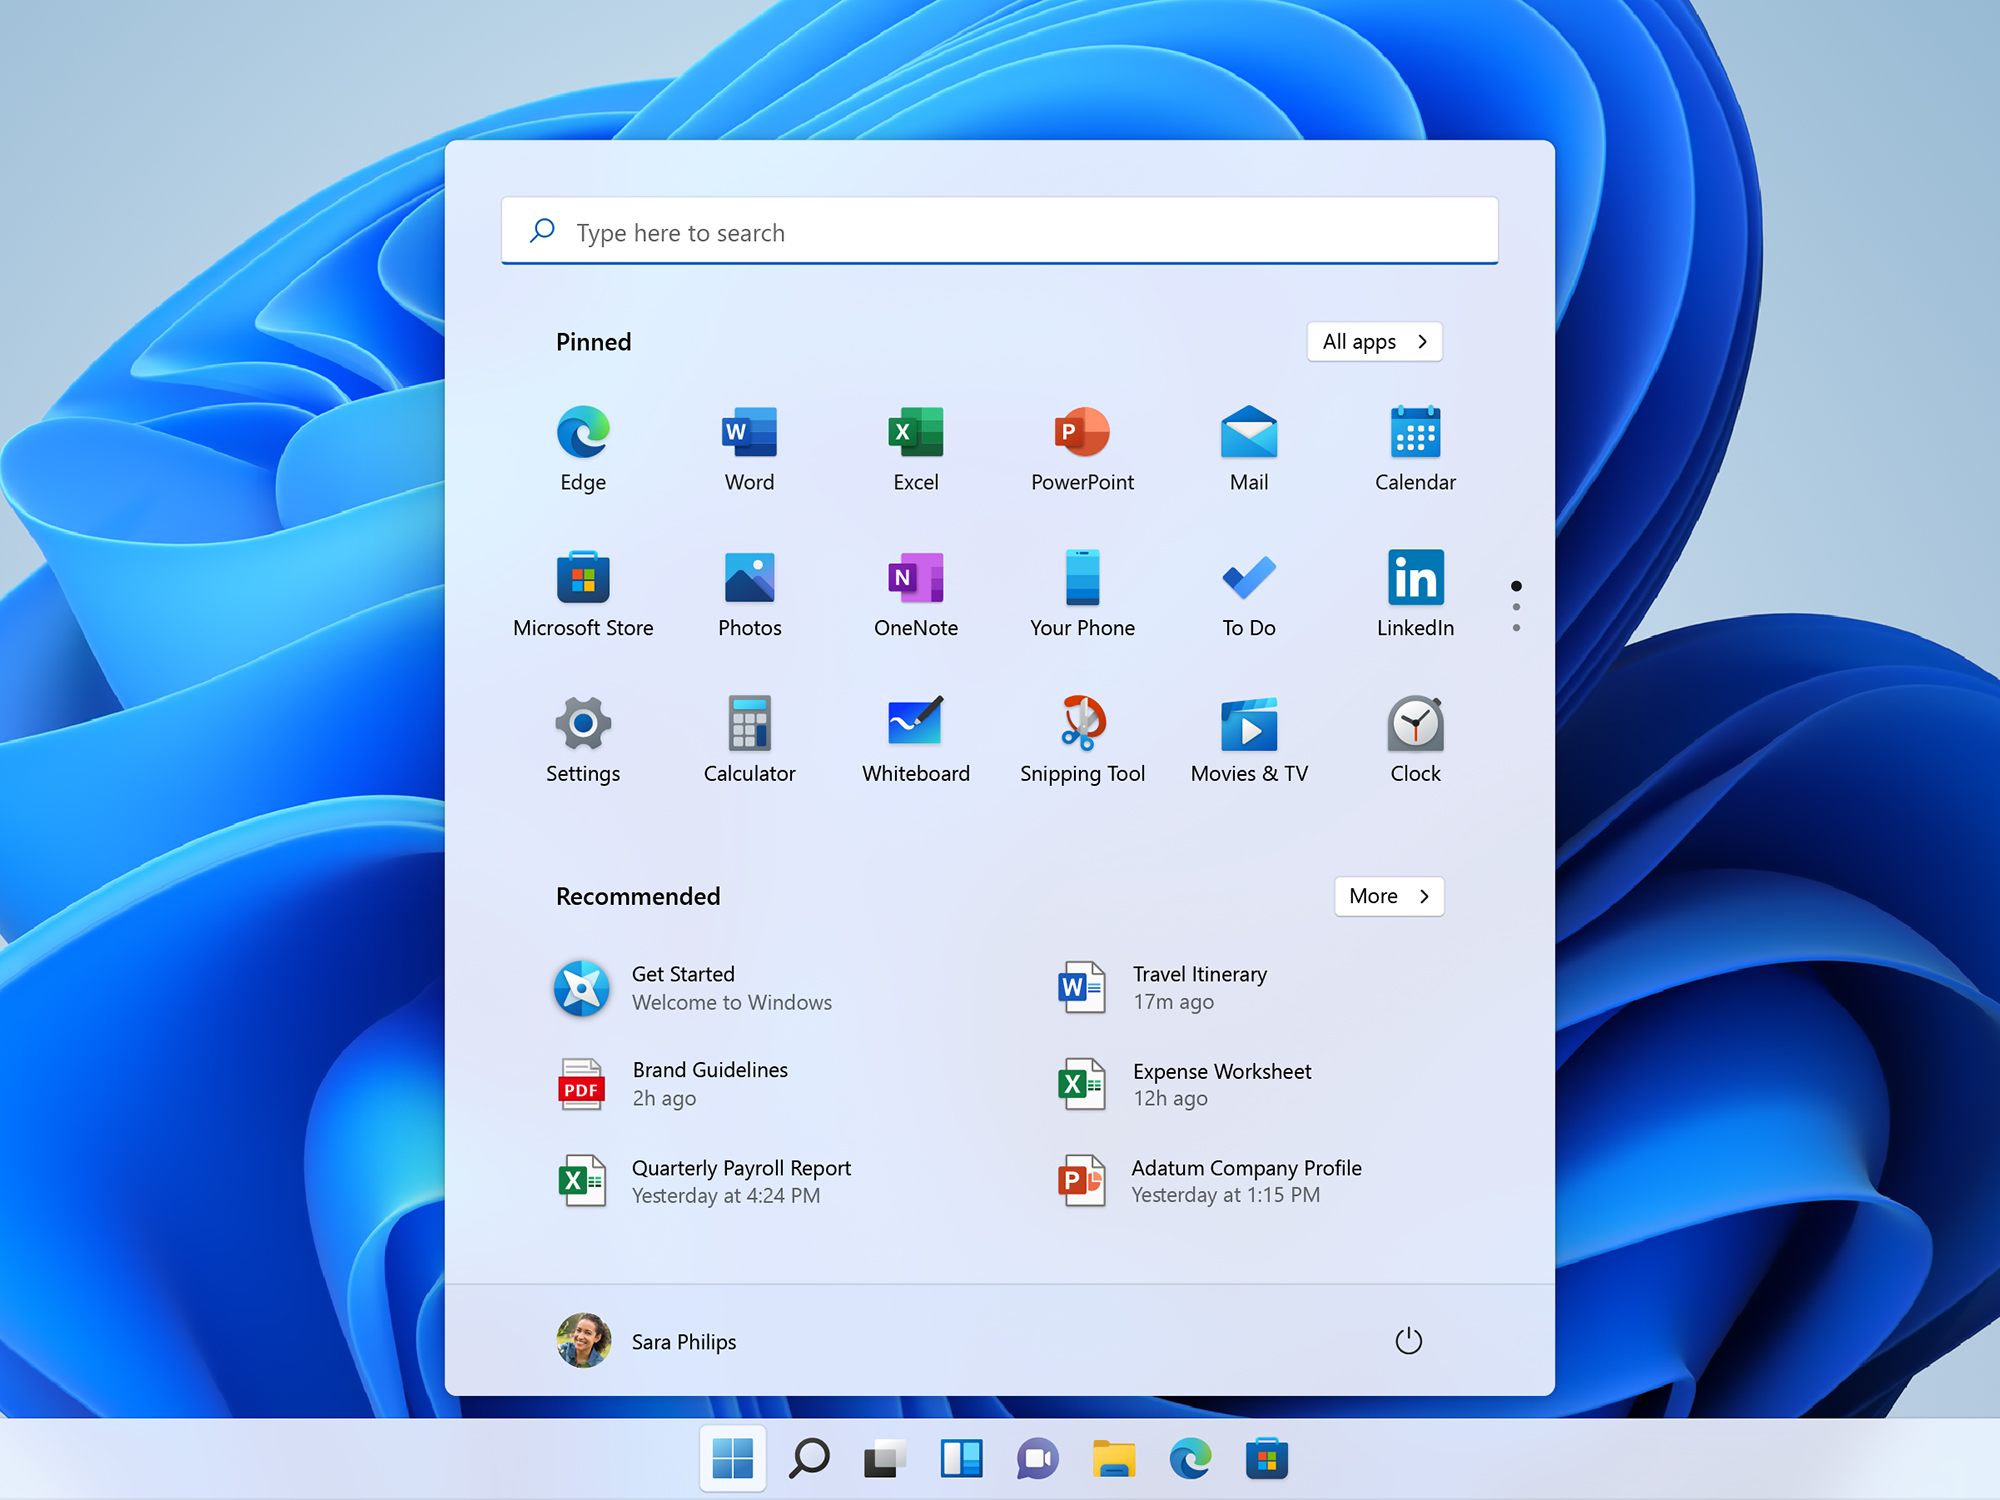
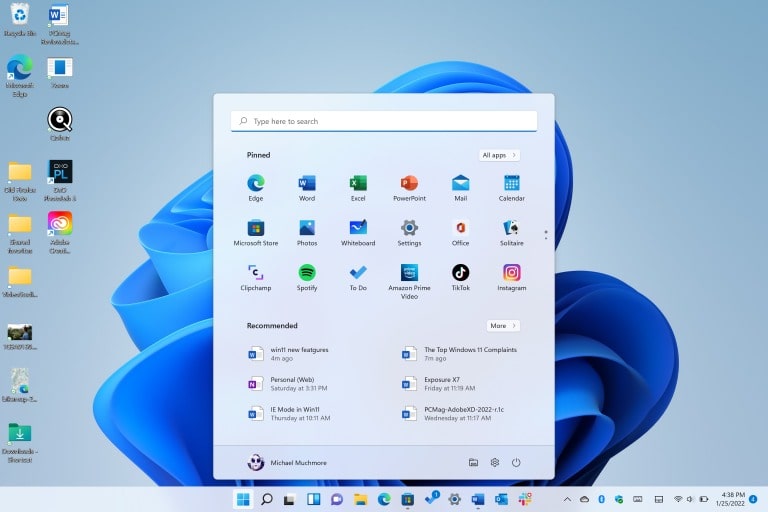
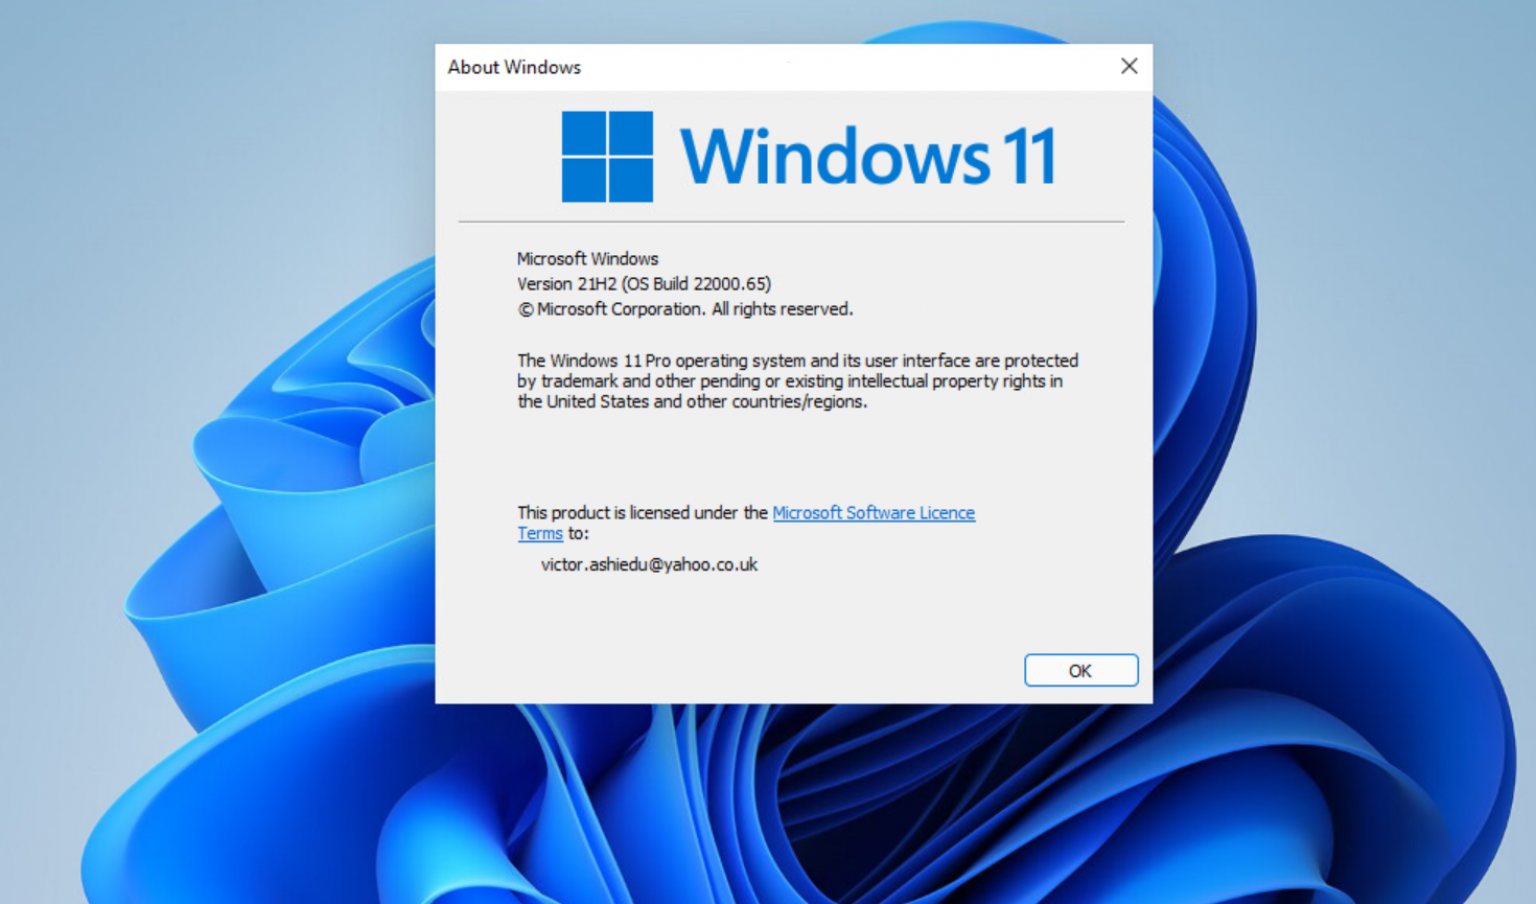
Windows 11 Pro is the professional-grade version of Microsoft’s latest operating system. It offers a range of enhanced features and functionalities designed for businesses, professionals, and power users who require a robust and secure computing experience. This guide explores the key aspects of Windows 11 Pro, delving into its features, activation process, and the benefits it provides.

Understanding the Significance of Windows 11 Pro

Windows 11 Pro is more than just an upgrade from its predecessor. It represents a significant leap forward in terms of user experience, performance, and security. Its features cater to the needs of individuals and organizations seeking advanced capabilities for productivity, collaboration, and data protection.

Core Features of Windows 11 Pro

Windows 11 Pro boasts a comprehensive set of features that differentiate it from the standard Windows 11 Home edition. These features are designed to address the specific requirements of businesses and professionals, enhancing their workflow and safeguarding their data.

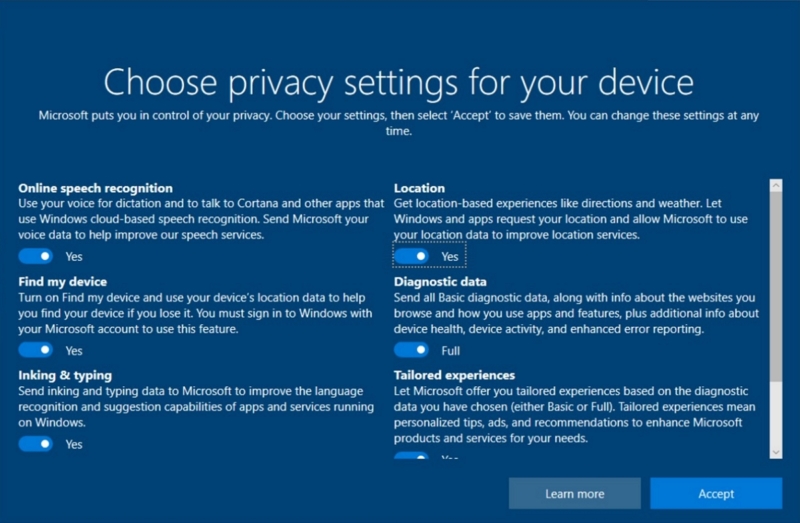
  • Enhanced Security: Windows 11 Pro prioritizes security with features like BitLocker drive encryption, which safeguards sensitive data stored on the device. This feature is particularly crucial for businesses handling confidential information.
  • Domain Join: Businesses can seamlessly integrate their Windows 11 Pro devices into existing Active Directory domains, enabling centralized management and control over user accounts, network resources, and security policies.
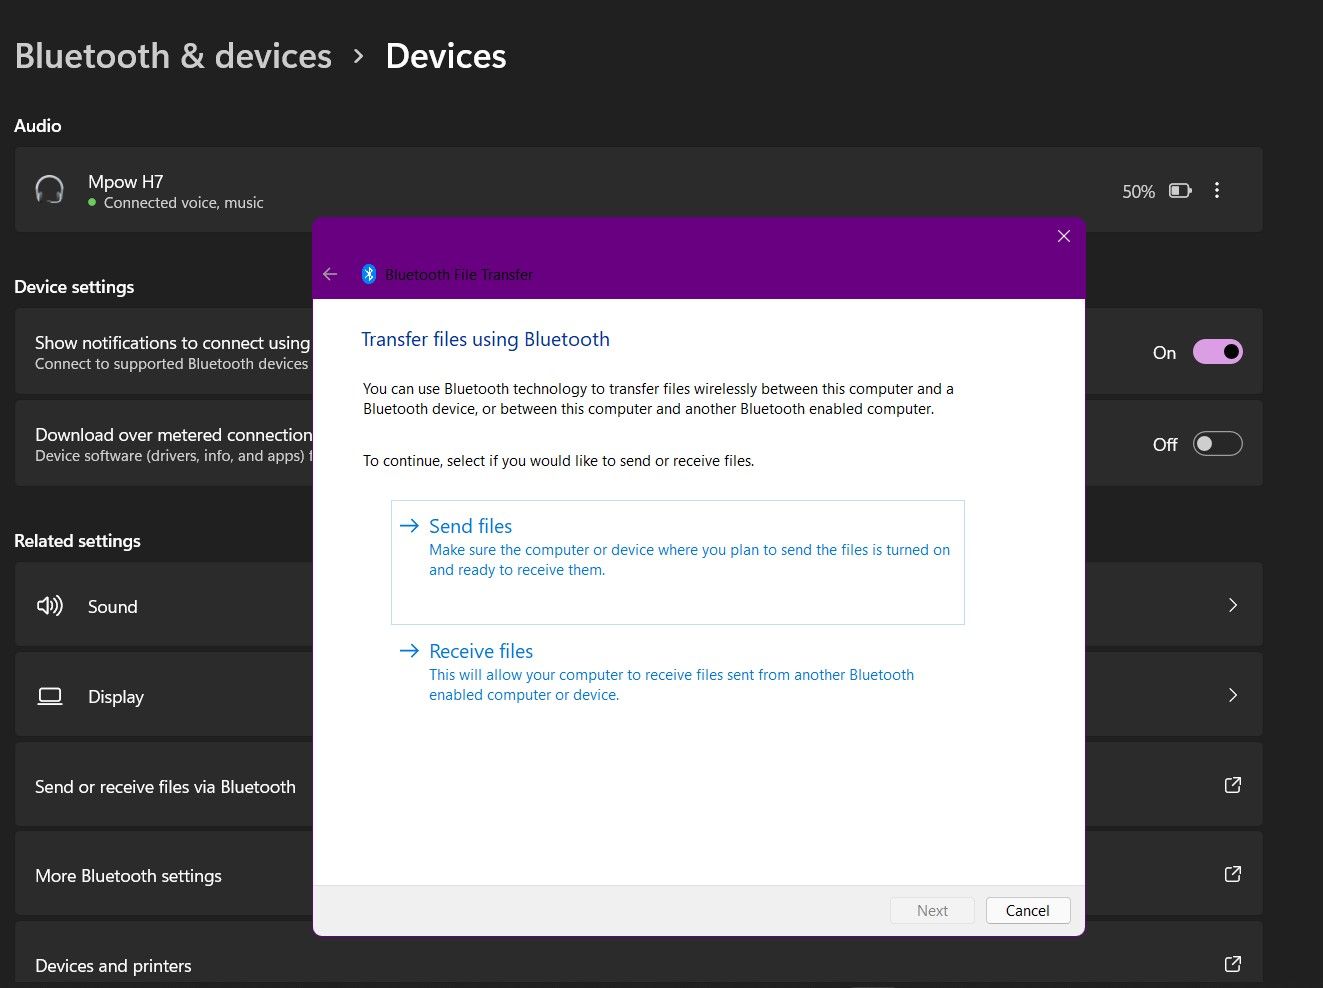
  • Remote Desktop: This feature allows users to access and control their Windows 11 Pro device remotely, enabling them to work from anywhere with a secure internet connection. This is a valuable tool for remote workers and businesses with dispersed teams.
  • Hyper-V: Windows 11 Pro includes Hyper-V, a powerful virtualization technology that allows users to run multiple operating systems simultaneously on a single device. This is particularly useful for software developers, testers, and IT professionals who need to work with different environments.
  • Windows Sandbox: This feature provides a secure, isolated environment for running untrusted applications without affecting the main operating system. This helps protect against malware and other security threats.
  • Windows Update for Business: This feature allows businesses to control and manage Windows updates across their devices, ensuring they receive the latest security patches and feature updates in a timely manner.
  • Group Policy Management: Windows 11 Pro provides advanced group policy management tools that enable administrators to configure and manage user settings, security policies, and application deployments across the entire network.
  • Windows Hello for Business: This feature enhances user authentication with biometric login options like facial recognition and fingerprint scanning, providing a more secure and convenient login experience.

Activation: The Key to Unlocking Windows 11 Pro Features

Activation is a crucial step in utilizing the full potential of Windows 11 Pro. It verifies the legitimacy of the operating system and unlocks all its features, including the advanced functionalities designed for businesses and professionals.

How to Activate Windows 11 Pro

There are several ways to activate Windows 11 Pro:

  • Product Key: This is the most common method. A product key is a unique 25-character code that is used to activate the operating system. You can obtain a product key by purchasing a new copy of Windows 11 Pro or by upgrading from a previous version.
  • Digital License: A digital license is an electronic method of activation that is linked to your Microsoft account. If you have previously activated Windows 11 Pro on another device, you can use your digital license to activate it on a new device.
  • Volume Licensing: Businesses can use volume licensing agreements to obtain multiple copies of Windows 11 Pro at a discounted price. Volume licensing also provides access to additional features and support services.

The Importance of Genuine Activation

Activating Windows 11 Pro with a valid product key or digital license is crucial for several reasons:

  • Unlocking All Features: Activation unlocks all the features of Windows 11 Pro, including those designed for businesses and professionals.
  • Security and Stability: Genuine activation ensures that your device is protected from malware and other security threats. It also enhances the overall stability and performance of the operating system.
  • Legal Compliance: Using an unactivated or pirated version of Windows 11 Pro is illegal and can result in legal consequences.
  • Software Updates: Genuine activation allows you to receive the latest software updates and security patches, ensuring that your device is protected from vulnerabilities.

Benefits of Windows 11 Pro

Windows 11 Pro offers a wide range of benefits for businesses, professionals, and power users:

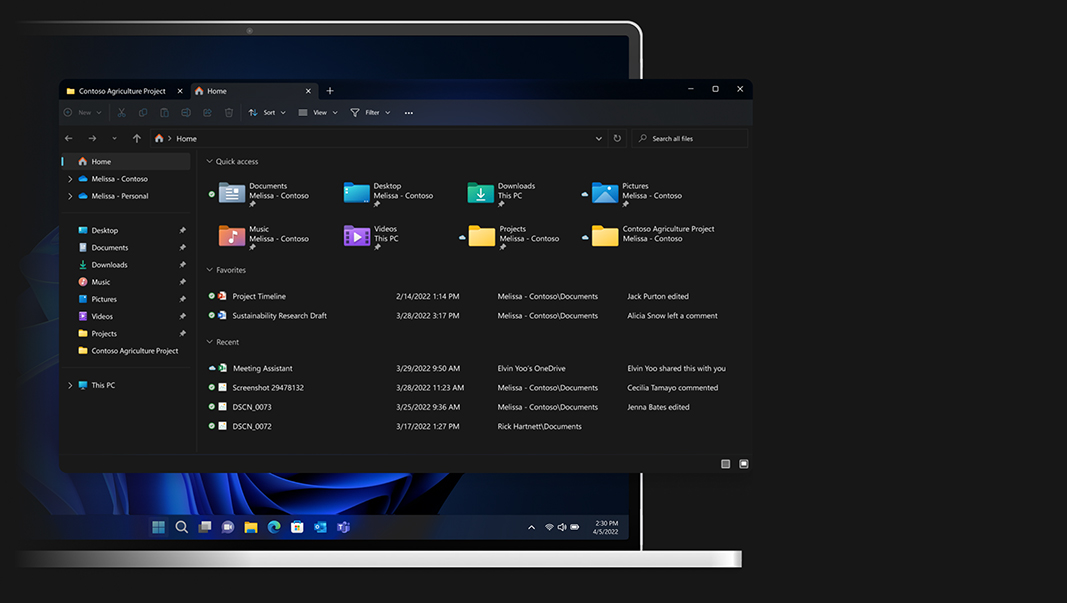
  • Enhanced Productivity: Windows 11 Pro provides a streamlined and intuitive user interface, along with advanced features that boost productivity, such as improved multitasking capabilities, optimized file management tools, and seamless integration with Microsoft productivity apps like Office 365.
  • Improved Security: Windows 11 Pro features robust security measures, including BitLocker drive encryption, Windows Defender Antivirus, and Windows Hello for Business, which protect against malware, data breaches, and unauthorized access.
  • Enhanced Collaboration: Features like Remote Desktop and Domain Join facilitate seamless collaboration among team members, regardless of their location. This enhances communication and streamlines workflows for businesses and organizations.
  • Scalability and Flexibility: Windows 11 Pro is designed to be scalable and flexible, allowing businesses to easily manage and deploy it across multiple devices, ensuring consistent functionality and security.
  • Cost-Effectiveness: Windows 11 Pro provides a cost-effective solution for businesses, as it offers a comprehensive set of features and functionalities that can replace multiple specialized software applications, reducing overall software costs.

FAQs about Windows 11 Pro

Q: What is the difference between Windows 11 Home and Windows 11 Pro?

A: Windows 11 Pro is the professional-grade version of Windows 11, offering advanced features for businesses and professionals, including enhanced security, domain join, remote desktop, Hyper-V, and other functionalities not available in Windows 11 Home.

Q: Can I upgrade from Windows 11 Home to Windows 11 Pro?

A: Yes, you can upgrade from Windows 11 Home to Windows 11 Pro. You will need to purchase a Windows 11 Pro product key and follow the upgrade process.

Q: How do I find my Windows 11 Pro product key?

A: If you purchased a new copy of Windows 11 Pro, your product key should be included in the packaging. You can also find your product key on your digital license, which is linked to your Microsoft account.

Q: Can I use a Windows 10 product key to activate Windows 11 Pro?

A: No, Windows 10 product keys are not compatible with Windows 11 Pro. You will need a separate Windows 11 Pro product key to activate the operating system.

Q: Is Windows 11 Pro compatible with my current hardware?

A: Windows 11 Pro has specific hardware requirements. You can check the compatibility of your device by visiting the Microsoft website.

Tips for Using Windows 11 Pro

  • Regularly Update Your System: Keep your Windows 11 Pro device up-to-date with the latest security patches and software updates to ensure optimal performance and security.
  • Utilize Built-in Security Features: Take advantage of the robust security features included in Windows 11 Pro, such as BitLocker drive encryption and Windows Defender Antivirus, to protect your data and device from threats.
  • Optimize System Performance: Regularly clean your system of temporary files and unused applications to improve performance and free up storage space.
  • Explore Advanced Features: Take the time to explore the advanced features of Windows 11 Pro, such as Hyper-V, Remote Desktop, and Windows Sandbox, to enhance your workflow and productivity.
  • Utilize Group Policy Management: If you are managing multiple devices, leverage group policy management tools to configure and manage user settings, security policies, and application deployments across your network.

Conclusion

Windows 11 Pro is a powerful and versatile operating system that offers a wide range of features and benefits designed for businesses, professionals, and power users. Its advanced security measures, robust management tools, and enhanced collaboration features make it an ideal choice for organizations seeking a reliable and secure computing environment. By understanding the key features, activation process, and benefits of Windows 11 Pro, users can unlock its full potential and optimize their computing experience for productivity, security, and collaboration.

"Get More Done with Windows 11 Pro: A Comprehensive Guide to Features, Benefits, and Why it Windows 11 Pro Activation Key Buy Windows 11 User Guide for Beginners: A Comprehensive Guide to Master Windows 11 Operating
Windows 11: A Comprehensive Guide about Features and Updates Perunity - Latest Business Story Windows 11 Pro License Key Microsoft Windows 11 Pro  StackSocial
Windows 11 Pro Full Overview Windows 11 Pro Features - vrogue.co Windows 11 Professional License Activation Product Key 7BA

Closure

Thus, we hope this article has provided valuable insights into Windows 11 Pro: A Comprehensive Guide to Features, Activation, and Benefits. We hope you find this article informative and beneficial. See you in our next article!

Understanding Disk Partitioning In Windows 10: A Comprehensive Guide

Understanding Disk Partitioning in Windows 10: A Comprehensive Guide

Introduction

In this auspicious occasion, we are delighted to delve into the intriguing topic related to Understanding Disk Partitioning in Windows 10: A Comprehensive Guide. Let’s weave interesting information and offer fresh perspectives to the readers.

Understanding Disk Partitioning in Windows 10: A Comprehensive Guide

Understanding Different Disk Partitions In Windows 10

Disk partitioning is a fundamental aspect of managing storage space in Windows 10. It involves dividing a physical hard drive into multiple logical sections, each treated as a separate storage unit. This practice offers numerous advantages, enhancing system organization, performance, and security. This comprehensive guide delves into the intricacies of disk partitioning in Windows 10, providing a clear understanding of its purpose, benefits, and practical implementation.

The Essence of Disk Partitioning

Imagine a large, empty room. Partitioning is akin to dividing this space into smaller, dedicated areas, each serving a specific purpose. Similarly, disk partitioning divides a physical hard drive into logical sections, known as partitions. Each partition acts as an independent storage unit, enabling the user to organize files, install operating systems, or dedicate space for specific applications.

Benefits of Disk Partitioning

1. Enhanced Organization and Management: Partitioning allows for a structured approach to file organization. Users can dedicate partitions for specific purposes, such as storing operating systems, applications, personal data, or backups. This eliminates the clutter of a single, monolithic storage space and facilitates efficient file management.

2. Improved Security: Partitioning provides a layer of security by isolating different data sets. For instance, installing an operating system on a separate partition safeguards it from potential data corruption or malware attacks that might affect other partitions. This approach minimizes the impact of system failures and facilitates data recovery.

3. Enhanced Performance: By dedicating partitions to specific tasks, the system can optimize resource allocation and improve overall performance. For example, installing an operating system on a separate partition with faster read/write speeds can significantly enhance boot times and application launch speeds.

4. Flexibility and Scalability: Partitioning allows for the flexible allocation of storage space. Users can adjust partition sizes based on their evolving needs, adding or removing partitions as required. This flexibility is crucial in managing storage space efficiently, especially when dealing with large data volumes or multiple operating systems.

5. Simplified Data Recovery: Partitioning facilitates data recovery in the event of system failures or hard drive malfunctions. By separating data into different partitions, recovery efforts can focus on specific sections, minimizing the impact on other data sets.

Types of Partitions in Windows 10

1. Primary Partitions: These are the fundamental partitions that can boot an operating system. Windows 10 allows a maximum of four primary partitions on a single hard drive.

2. Extended Partitions: Extended partitions are used to create logical partitions within a single primary partition. This allows for the creation of more than four partitions on a hard drive, albeit with the limitation that only one extended partition can be present.

3. Logical Partitions: These are created within an extended partition and cannot boot an operating system directly. They are typically used for storing data, applications, or backups.

Creating Partitions in Windows 10

Windows 10 provides built-in tools for managing disk partitions, simplifying the process. Here’s a step-by-step guide:

1. Accessing Disk Management:

  • Press the Windows key + X to open the Quick Access menu.
  • Select "Disk Management" from the list.

2. Identifying Available Space:

  • The Disk Management window displays all connected hard drives and their partitions.
  • Identify the drive you wish to partition and locate any unallocated space.

3. Creating a New Partition:

  • Right-click on the unallocated space and select "New Simple Volume."
  • Follow the on-screen wizard to configure the new partition’s size, drive letter, and file system.

4. Formatting the Partition:

  • The wizard will prompt you to format the new partition. Choose the desired file system (typically NTFS for Windows 10) and assign a volume label.

5. Completing the Process:

  • Click "Finish" to complete the partition creation process.

Considerations for Partitioning

  • Disk Space Allocation: Carefully consider the size of each partition, allocating sufficient space for the intended purpose.
  • File System Choice: Select the appropriate file system for each partition, taking into account compatibility and performance requirements.
  • Backup Strategy: Implement a robust backup strategy to safeguard data in the event of system failures or accidental data loss.

FAQs Regarding Disk Partitioning in Windows 10

1. Is partitioning necessary for Windows 10?

While not mandatory, partitioning offers significant benefits in terms of organization, security, and performance. It is recommended for users who want to manage their storage space effectively, especially those with large data volumes or multiple operating systems.

2. Can I partition a drive that already has an operating system installed?

Yes, you can partition a drive with an existing operating system, but proceed with caution. Ensure you have sufficient unallocated space and back up your data before proceeding.

3. How do I resize existing partitions?

Windows 10’s Disk Management tool allows resizing existing partitions, but it may not always be possible to shrink or expand them to the desired size. Third-party partitioning tools often offer more flexibility in resizing operations.

4. Can I delete a partition?

Yes, you can delete a partition, but ensure it does not contain critical data. Remember that deleting a partition will erase all data within it.

5. What is the difference between GPT and MBR partitioning?

GPT (GUID Partition Table) and MBR (Master Boot Record) are two partitioning schemes. GPT supports larger hard drives and offers better security features, while MBR is compatible with older systems.

Tips for Effective Disk Partitioning in Windows 10

  • Plan Ahead: Carefully consider the purpose and size of each partition before creating them.
  • Use a Partitioning Tool: Third-party partitioning tools offer more advanced features and flexibility compared to Windows 10’s built-in tools.
  • Back Up Data: Always back up your data before making any changes to your disk partitions.
  • Monitor Partition Usage: Regularly monitor partition usage to ensure sufficient space for all your needs.

Conclusion

Disk partitioning is a powerful tool for managing storage space in Windows 10. By dividing a hard drive into logical sections, users can enhance organization, improve security, optimize performance, and simplify data recovery. Understanding the benefits, types, and processes involved in partitioning allows for informed decisions regarding storage management, ensuring a more efficient and secure computing experience.

How to partition Windows 10 - Tech Advisor Understanding Different Disk Partitions In Windows 10 Get Comprehensive Understanding of Windows 10 Recovery Partition - MiniTool Partition Wizard
How to Partition an External Hard Disk in Windows 10 & 11 Disk Partition Windows 10  Disk Partition Kse Kre?  create and format hard disk partition How To Partition A Hard Drive In Windows 10 [Free, No Software Required]
Create and Format a Hard Disk Partition in Windows 10 SOLVED: Windows 10 Hard Drive Partitions Explained In Simple Terms โ€“ Up & Running Inc โ€“ Tech How

Closure

Thus, we hope this article has provided valuable insights into Understanding Disk Partitioning in Windows 10: A Comprehensive Guide. We hope you find this article informative and beneficial. See you in our next article!

The Power Of Preinstallation Environment (PE) Windows 10: A Comprehensive Guide

The Power of Preinstallation Environment (PE) Windows 10: A Comprehensive Guide

Introduction

In this auspicious occasion, we are delighted to delve into the intriguing topic related to The Power of Preinstallation Environment (PE) Windows 10: A Comprehensive Guide. Let’s weave interesting information and offer fresh perspectives to the readers.

The Power of Preinstallation Environment (PE) Windows 10: A Comprehensive Guide

Ultimate Guide To Creating Windows Preinstallation Environment (WinPE)

The Preinstallation Environment (PE) Windows 10 is a specialized, minimal version of the Windows 10 operating system designed for specific tasks, primarily during the pre-installation or recovery phases of a computer’s lifecycle. It is a versatile tool that offers a range of functionalities, making it indispensable for IT professionals, system administrators, and even home users with advanced troubleshooting needs.

Understanding the Essence of PE Windows 10

Imagine a simplified version of Windows 10, stripped down to its core components, focused on providing essential tools for specific purposes. This is precisely what PE Windows 10 represents. It is a self-contained environment, residing on a bootable media like a USB drive or DVD, capable of running independently from the main operating system. This characteristic makes it ideal for situations where the primary operating system is inaccessible or malfunctioning.

Key Features and Benefits of PE Windows 10

The PE Windows 10 environment is a powerhouse of functionalities, enabling users to perform critical tasks that would otherwise be impossible with a compromised operating system. Some of its key features include:

  • Boot from External Media: PE Windows 10 can be loaded from external media like USB drives or DVDs, bypassing the need for a functional hard drive. This is particularly useful for troubleshooting boot issues, recovering data, or installing a new operating system.

  • Basic System Tools: PE Windows 10 provides a set of essential system tools, including Disk Management, Command Prompt, and Windows Explorer. These tools allow for tasks like disk partitioning, file manipulation, and system diagnostics.

  • Network Connectivity: PE Windows 10 offers basic network capabilities, enabling users to connect to the internet or a local network. This facilitates downloading updates, accessing online resources, or transferring files.

  • Driver Support: PE Windows 10 includes a limited set of drivers for common hardware components, ensuring basic functionality during troubleshooting or installation processes.

  • Customization Options: While not as extensive as the full Windows 10 operating system, PE Windows 10 allows for some level of customization, enabling users to add specific tools or drivers for their specific needs.

The Importance of PE Windows 10

PE Windows 10 plays a crucial role in several scenarios, making it an invaluable tool for various users:

  • System Recovery: When a computer fails to boot or experiences critical errors, PE Windows 10 can be used to diagnose the problem, repair corrupted files, or even restore the system to a previous state.

  • Operating System Installation: PE Windows 10 provides the necessary environment for installing a new operating system, including partitioning the hard drive, formatting drives, and configuring the system settings.

  • Data Recovery: In the event of data loss or hard drive failure, PE Windows 10 can be used to access the affected drive, recover valuable data, and transfer it to a safe location.

  • Hardware Troubleshooting: PE Windows 10 can be used to diagnose hardware issues, identify malfunctioning components, and perform necessary repairs or replacements.

  • System Optimization: PE Windows 10 can be used to perform system optimization tasks, such as cleaning up temporary files, defragmenting the hard drive, or managing system resources.

Creating a PE Windows 10 Environment

Creating a bootable PE Windows 10 environment requires specific tools and steps. While the process might appear complex, it can be accomplished with readily available resources and instructions:

  1. Download PE Builder Tools: Several free and paid PE builder tools are available online, allowing users to create a bootable PE environment. Popular options include WinPE Builder, WinBuilder, and AOMEI PE Builder.

  2. Select a Source Windows Installation: The PE builder tool requires a source Windows 10 installation file (ISO image) to extract the necessary components.

  3. Customize the PE Environment: Users can customize the PE environment by adding specific tools, drivers, or applications based on their needs.

  4. Create a Bootable Media: The PE builder tool creates a bootable USB drive or DVD, containing the PE Windows 10 environment.

FAQs on PE Windows 10

Q: What are the differences between PE Windows 10 and the full Windows 10 operating system?

A: PE Windows 10 is a minimal version of Windows 10, stripped down to essential components, designed for specific tasks, primarily during pre-installation or recovery phases. It lacks many features found in the full Windows 10 operating system, including most applications, user interface customizations, and full hardware support.

Q: Can I use PE Windows 10 to access my personal files and applications?

A: While PE Windows 10 offers basic file management capabilities, it is not designed for accessing personal files or running applications. It primarily focuses on system-level tasks and troubleshooting.

Q: Do I need to install PE Windows 10 on my computer?

A: No, PE Windows 10 is a self-contained environment that runs from a bootable media, such as a USB drive or DVD. It does not require installation on your computer’s hard drive.

Q: Can I use PE Windows 10 to upgrade my current operating system?

A: PE Windows 10 is not designed for upgrading existing operating systems. It is primarily used for troubleshooting, recovery, and clean installations.

Q: Is PE Windows 10 free to use?

A: PE Windows 10 itself is free to use. However, some PE builder tools might require a license fee.

Tips for Using PE Windows 10

  • Back Up Important Data: Before using PE Windows 10 for system recovery or troubleshooting, ensure you have backed up all critical data to prevent accidental loss.

  • Choose a Reliable PE Builder Tool: Select a reputable and well-supported PE builder tool to ensure a stable and functional PE environment.

  • Customize the PE Environment Based on Needs: Add specific tools, drivers, or applications to the PE environment based on the tasks you need to perform.

  • Test the PE Environment Before Use: Test the bootable PE media on a test machine to ensure it functions correctly before using it on your main computer.

Conclusion

The Preinstallation Environment (PE) Windows 10 is a powerful and versatile tool that provides a unique set of capabilities for troubleshooting, recovery, and system management. Its ability to run independently from the main operating system, coupled with its essential system tools, makes it an indispensable resource for IT professionals, system administrators, and even home users with advanced troubleshooting needs. By understanding the benefits and functionalities of PE Windows 10, users can leverage its power to address various system-related challenges and ensure a smooth computing experience.

Ultimate Guide To Creating Windows Preinstallation Environment (WinPE) Microsoft Windows Preinstallation Environment User's Guide  Manualzz Windows Preinstallation Environment - Winpe Tools
Hiren's BootCD PE (Preinstallation Environment) baseado no Windows 10 PE x64. - YouTube What is Windows PE Ultimate Guide To Creating Windows Preinstallation Environment (WinPE)
Ultimate Guide To Creating Windows Preinstallation Environment (WinPE) Windows Preinstallation Environment - BetaWiki

Closure

Thus, we hope this article has provided valuable insights into The Power of Preinstallation Environment (PE) Windows 10: A Comprehensive Guide. We thank you for taking the time to read this article. See you in our next article!

Remove Learn About This Picture

remove learn about this picture

Introduction

In this auspicious occasion, we are delighted to delve into the intriguing topic related to remove learn about this picture. Let’s weave interesting information and offer fresh perspectives to the readers.

Please provide me with the picture you would like me to write about. I need to see the image to understand its content and context before I can write an article about it.

Remove Learn about this picture Desktop icon in Windows 11

Once you provide the picture, I can write a comprehensive article that:

  • Explains the picture’s content and context in detail.
  • Analyzes its significance and potential impact.
  • Provides relevant information and background knowledge.
  • Includes engaging and informative FAQs, tips, and a conclusion.

I will ensure the article is written in a professional, expository style, avoiding first and second-person pronouns and AI jargon.

How To Delete Windows 11 Desktop Spotlight Learn Abou - vrogue.co Remove Windows Spotlight "Learn about this picture" icon from Desktop Guide on How to Remove Learn About This Picture in Windows 11
Delete Windows Spotlight Learn More About This Picture Icon From Windows 11 Desktop  itechguides How to remove Learn more about this picture icon in Windows 11 - YouTube How to Remove 'Learn About this Picture' on Windows 11
Cรกch xรณa biแปƒu tฦฐแปฃng Learn about this picture khi bแบญt hรฌnh nแปn Spotlight trรชn Windows 11 22H2 How to Remove โ€œLearn about this pictureโ€ Desktop Icon in Windows 11 ยป Winhelponline

Closure

Thus, we hope this article has provided valuable insights into remove learn about this picture. We hope you find this article informative and beneficial. See you in our next article!

Bypassing Windows 10’s Out-of-Box Experience (OOBE): A Comprehensive Guide

Bypassing Windows 10’s Out-of-Box Experience (OOBE): A Comprehensive Guide

Introduction

With great pleasure, we will explore the intriguing topic related to Bypassing Windows 10’s Out-of-Box Experience (OOBE): A Comprehensive Guide. Let’s weave interesting information and offer fresh perspectives to the readers.

Bypassing Windows 10’s Out-of-Box Experience (OOBE): A Comprehensive Guide

HOW TO BYPASS OOBE - Out-of-Box Experience - YouTube

The Windows 10 Out-of-Box Experience (OOBE) is a series of setup steps that users encounter when first installing or reinstalling the operating system. It guides users through essential configuration tasks, such as choosing language, region, network connection, and account creation. While this process is designed for user convenience, it can become a hurdle in certain scenarios, leading to the need for bypassing the OOBE.

This guide provides a detailed explanation of bypassing the Windows 10 OOBE, exploring its various methods, potential applications, and associated considerations.

Understanding the Need for OOBE Bypass

Bypassing the OOBE is not a typical requirement for standard Windows 10 installations. It primarily finds use in specific situations, including:

  • Automated Deployments: In enterprise environments, organizations often deploy Windows 10 to multiple devices simultaneously. Bypassing the OOBE streamlines this process, allowing administrators to preconfigure settings and user accounts, saving time and effort.
  • Testing and Development: Developers and testers often need to access a fresh Windows 10 installation quickly for testing purposes. Bypassing the OOBE allows them to skip the setup process and directly access the operating system.
  • Recovering Damaged Systems: In cases where the Windows 10 installation is corrupted or damaged, bypassing the OOBE might be necessary to access the system and perform recovery operations.
  • Customizing Installations: Users who want to customize their Windows 10 installation with specific settings or drivers may find it advantageous to bypass the OOBE and apply these customizations before the initial setup.

Methods for Bypassing the OOBE

Several methods can be employed to bypass the Windows 10 OOBE, each with its own advantages and drawbacks:

1. Using an Unattended Installation:

This method involves creating an unattended installation file using a tool like Windows System Image Manager (DISM). The unattended file contains pre-defined settings and configurations that automatically apply during the installation process, effectively bypassing the OOBE. This method is commonly used in enterprise environments for mass deployment.

2. Utilizing the "Skip the OOBE" Command:

This command, "oobe /skipwelcome", can be entered during the boot process to skip the initial welcome screen and proceed directly to the desktop. This method is relatively simple but may not be suitable for all scenarios, as it lacks the ability to configure settings beforehand.

3. Employing the "Sysprep" Utility:

Sysprep is a powerful tool that prepares a Windows 10 installation for deployment or imaging. It can be used to generalize the installation, removing specific user configurations and settings, allowing for a clean and customizable OOBE experience.

4. Leveraging the "SetupComplete.cmd" Script:

This script, located in the "C:WindowsSystem32Sysprep" directory, allows for custom commands and scripts to be executed after the OOBE. This method provides flexibility in automating specific tasks or customizations after bypassing the OOBE.

5. Using a Third-Party Tool:

Several third-party tools are available specifically designed to bypass the Windows 10 OOBE. These tools often provide a graphical interface and additional features for configuring settings and customizing the installation process.

Considerations and Risks

While bypassing the OOBE can be beneficial in certain situations, it’s essential to be aware of the potential risks and considerations:

  • Security Concerns: Bypassing the OOBE can potentially expose the system to security vulnerabilities if appropriate security measures are not implemented.
  • Configuration Issues: Incorrect configuration settings during OOBE bypass can lead to system instability or functionality issues.
  • Software Compatibility: Certain software applications may rely on specific settings configured during the OOBE. Bypassing it might result in compatibility problems.
  • Data Loss: In some cases, bypassing the OOBE might inadvertently lead to data loss if the system is not properly prepared.

Importance of Proper Implementation

Bypassing the OOBE should be undertaken with caution and thorough understanding of its implications. Proper planning, testing, and implementation are crucial to ensure a successful and secure experience.

FAQs on Bypassing the OOBE

Q: Can I bypass the OOBE on every Windows 10 installation?

A: While the methods discussed can bypass the OOBE, it’s not recommended for every installation. It’s primarily intended for specific scenarios like automated deployments or troubleshooting.

Q: What are the security implications of bypassing the OOBE?

A: Bypassing the OOBE can expose the system to security vulnerabilities if security measures are not implemented during the installation process.

Q: Can I customize Windows 10 settings after bypassing the OOBE?

A: Yes, you can still customize Windows 10 settings after bypassing the OOBE. However, certain settings may require a clean installation or re-applying the configuration.

Q: What happens if I encounter errors during the OOBE bypass process?

A: Errors during the OOBE bypass process can lead to system instability or even data loss. It’s essential to back up data before attempting this process.

Q: Is it possible to revert back to the standard OOBE after bypassing it?

A: Depending on the method used, it might be possible to revert back to the standard OOBE by performing a clean installation of Windows 10.

Tips for Bypassing the OOBE

  • Back Up Data: Before attempting to bypass the OOBE, ensure you have a complete backup of your data to prevent potential loss.
  • Research Thoroughly: Understand the different methods and their implications before proceeding.
  • Test Carefully: Test the bypass process in a controlled environment before applying it to a production system.
  • Consult Documentation: Refer to official Microsoft documentation for detailed instructions and best practices.
  • Seek Expert Help: If you are unsure about any aspect of the process, seek guidance from a qualified IT professional.

Conclusion

Bypassing the Windows 10 OOBE is a specialized technique that can streamline deployments, facilitate testing, and enable customization. However, it’s important to approach it with caution, understanding its potential risks and ensuring proper implementation. By following the guidelines outlined in this guide, users can leverage this technique effectively while minimizing potential issues. Remember, a thorough understanding of the process, combined with proper planning and execution, is key to a successful and secure experience.

Bypassing the OOBE in Windows 10 - YouTube All about OOBE or Out of Box Experience in Windows 10 - Technoresult All about OOBE or Out of Box Experience in Windows 10 - Technoresult
Rerunning the initial Windows setup (OOBE - Out Of box Experience) - YouTube OOBE error in Windows 10 Out-of-Box Experience Windows Out Of Box Experience: OOBESETTINGSMULTIPLEPAGE error on Windows 10  Learn [Solve IT]
How to: Complete the Windows 10 Out of Box Experience - Microsoft Community Out of Box Experience in Windows 10

Closure

Thus, we hope this article has provided valuable insights into Bypassing Windows 10’s Out-of-Box Experience (OOBE): A Comprehensive Guide. We thank you for taking the time to read this article. See you in our next article!

The Silent Update: Troubleshooting Audio Issues After Windows 10 Upgrades

The Silent Update: Troubleshooting Audio Issues After Windows 10 Upgrades

Introduction

With enthusiasm, let’s navigate through the intriguing topic related to The Silent Update: Troubleshooting Audio Issues After Windows 10 Upgrades. Let’s weave interesting information and offer fresh perspectives to the readers.

The Silent Update: Troubleshooting Audio Issues After Windows 10 Upgrades

How to Fix No Sound After Windows 10 Update - YouTube

The Windows 10 operating system, known for its frequent updates, can occasionally introduce unexpected complications, one of which is the loss of audio functionality after an upgrade. This issue, while frustrating, is often resolvable through a methodical approach that addresses potential causes and employs various troubleshooting techniques. This article aims to provide a comprehensive guide for navigating this common post-update challenge, offering clarity, actionable steps, and insights into the underlying reasons behind the silence.

Understanding the Cause of Audio Loss:

The absence of sound after a Windows 10 update can stem from several factors, each demanding a specific approach for resolution. The most common culprits include:

  • Driver Conflicts: Windows updates often introduce new drivers, which may conflict with existing audio drivers, leading to incompatibility and audio malfunction.
  • Corrupted System Files: The update process can sometimes corrupt essential system files, including those responsible for audio output, resulting in a breakdown of audio functionality.
  • Hardware Issues: While less likely, hardware malfunctions, such as faulty sound cards or speakers, can also manifest as audio loss after an update.
  • Software Interference: Certain applications or software installed on the system can interfere with audio output, particularly if they use audio drivers or have conflicting settings.
  • Windows Audio Service Errors: The Windows Audio service, responsible for managing audio output, can encounter errors or become disabled during the update process, leading to silence.

Troubleshooting Strategies for Audio Recovery:

Addressing the silence after a Windows 10 update requires a systematic approach, starting with basic checks and progressively delving into more advanced solutions. The following steps provide a comprehensive guide:

  1. Restart the Computer: The simplest solution often proves effective. A restart can resolve temporary glitches or conflicts that may have occurred during the update process.

  2. Check Audio Settings: Verify that the volume is not muted and that the correct output device is selected in the Windows sound settings.

  3. Update Audio Drivers: Outdated or incompatible drivers are a common culprit. Visit the manufacturer’s website for your sound card or motherboard and download the latest drivers compatible with your Windows 10 version.

  4. Run the Windows Audio Troubleshooter: Windows includes a built-in troubleshooter designed to diagnose and fix audio issues. Access it through the "Settings" app, navigate to "Update & Security," then select "Troubleshoot" and choose "Playing Audio."

  5. Check for Hardware Malfunctions: If the issue persists, consider testing the speakers or headphones on another device to rule out hardware failure.

  6. Disable and Re-enable Audio Services: The Windows Audio service might be disabled or malfunctioning. Open the "Services" window (search for "services.msc" in the Start menu), locate the "Windows Audio" service, right-click, and select "Restart." If the service is disabled, enable it.

  7. Perform a System Restore: If the problem arose immediately after the update, a system restore might revert the system to a previous state, restoring audio functionality. Access system restore through the "Control Panel," navigate to "System and Security," and select "System."

  8. Run a System File Checker (SFC) Scan: Corrupted system files can cause audio problems. Open the Command Prompt as administrator and type "sfc /scannow" to initiate a scan and repair any corrupted files.

  9. Reinstall Audio Drivers: If driver conflicts persist, uninstall the current drivers and reinstall them from the manufacturer’s website.

  10. Contact Microsoft Support: If all else fails, contact Microsoft support for further assistance or guidance on more advanced troubleshooting steps.

Frequently Asked Questions (FAQs) on Audio Loss After Windows 10 Updates:

Q: What if the audio issue persists after following all the steps?

A: If the issue remains unresolved, it might indicate a more complex problem. Consider contacting Microsoft support for further guidance or seeking professional assistance from a computer technician.

Q: Can I prevent audio issues from occurring after future updates?

A: While not entirely preventable, you can minimize the risk by backing up your system before major updates, ensuring your drivers are up-to-date, and avoiding unnecessary software installations that might conflict with audio functionality.

Q: Is there a way to restore audio functionality without reinstalling Windows?

A: In most cases, reinstalling Windows should be a last resort. The troubleshooting steps outlined in this guide aim to resolve audio issues without resorting to a complete reinstall.

Tips for Preventing Audio Loss After Updates:

  • Update Drivers Regularly: Keep your audio drivers up-to-date by downloading the latest versions from the manufacturer’s website.
  • Back Up Your System: Create a system image backup before installing major updates to ensure a safe restore point if issues arise.
  • Avoid Unnecessary Software Installations: Limit the installation of software that might interfere with audio functionality, particularly those that rely on their own audio drivers.
  • Monitor for Updates: Stay informed about upcoming Windows updates and their potential impact on your system.

Conclusion:

Audio loss after a Windows 10 update can be a frustrating experience, but it is often resolvable through systematic troubleshooting. By understanding the potential causes, employing a methodical approach, and utilizing the available tools and resources, users can regain their audio functionality and restore their computing experience. Remember that seeking professional help from Microsoft support or a computer technician is always an option if the issue proves persistent.

How to Fix: No Sound After Windows 10/11 Update - Sound Missing 2024 [Solved] - YouTube How to Fix Sound or Audio Problems on Windows 10  windows 10 sound issues after update - 2019 How to fix audio after applying system update (KB5015878) on Windows 10  Windows Central
Fix Audio problem after Windows update KB5015878 in Windows 10 - YouTube How To Resolve/Fix Audio or Sound Problems After Update Windows 10 in 2020? - YouTube Fix Audio problem after Windows update KB5015878 in Windows 10 - YouTube
How to fix audio after applying system update (KB5015878) on Windows 10 How to Fix Sound Problems After Windows 10 Upgrade Solved

Closure

Thus, we hope this article has provided valuable insights into The Silent Update: Troubleshooting Audio Issues After Windows 10 Upgrades. We hope you find this article informative and beneficial. See you in our next article!

Navigating File Transfers In Windows 11: A Comprehensive Guide To Bluetooth Connectivity

Navigating File Transfers in Windows 11: A Comprehensive Guide to Bluetooth Connectivity

Introduction

In this auspicious occasion, we are delighted to delve into the intriguing topic related to Navigating File Transfers in Windows 11: A Comprehensive Guide to Bluetooth Connectivity. Let’s weave interesting information and offer fresh perspectives to the readers.

How to Transfer Files via Bluetooth on Windows 11

The evolution of technology has brought forth a myriad of ways to share data. Among them, Bluetooth has emerged as a reliable and versatile solution, particularly for short-range file transfers. While Windows 11 offers a robust and user-friendly interface, navigating the intricacies of Bluetooth file sharing can sometimes be challenging. This article delves into the specifics of receiving files via Bluetooth on Windows 11, providing a comprehensive guide to ensure seamless and efficient data exchange.

The Fundamentals of Bluetooth File Transfer

Bluetooth, a wireless communication technology, operates on a short-range frequency, typically within a 10-meter radius. Its primary function is to facilitate data transfer between devices, including smartphones, laptops, tablets, and peripherals. In the context of Windows 11, Bluetooth serves as a bridge for transferring files between your computer and compatible devices, such as another computer, a smartphone, or a printer.

Enabling Bluetooth on Windows 11

Prior to initiating any file transfer, ensuring that Bluetooth is enabled on your Windows 11 device is crucial. To activate Bluetooth:

  1. Open Settings: Click the "Start" button, then select "Settings."
  2. Navigate to Bluetooth & Devices: In the Settings menu, choose "Bluetooth & devices."
  3. Enable Bluetooth: Toggle the Bluetooth switch to the "On" position.

Pairing Your Devices for File Transfer

Pairing your Windows 11 computer with the sending device is the next crucial step. This process establishes a secure connection, allowing the devices to communicate and exchange data.

  1. Discoverable Mode: On the sending device (e.g., a smartphone), ensure Bluetooth is enabled and the device is set to "discoverable mode." This allows your Windows 11 computer to locate it.
  2. Device Search: In the Windows 11 Bluetooth & devices settings, click "Add Bluetooth or other device."
  3. Select Bluetooth: Choose "Bluetooth" from the available options.
  4. Pair with Device: Your computer will scan for discoverable devices. Select the desired device from the list and follow the on-screen instructions to complete the pairing process.

Receiving Files via Bluetooth on Windows 11

Once the devices are paired, you can initiate the file transfer process. The receiving device, in this case, your Windows 11 computer, will automatically detect files sent via Bluetooth.

  1. File Transfer Request: Upon receiving a file transfer request, a notification will pop up on your Windows 11 screen.
  2. Accept or Decline: Choose "Accept" to receive the file or "Decline" to dismiss the request.
  3. File Location: The received file will be saved to your "Downloads" folder by default. However, you can customize the destination folder if desired.

Alternative Methods for Receiving Files

While the traditional Bluetooth file transfer method is straightforward, there are alternative approaches available, offering additional flexibility and control.

  1. File Transfer Apps: Numerous file transfer applications are available for Windows 11, providing a more streamlined and feature-rich experience. Some popular options include:
    • SHAREit: A cross-platform file transfer application with a user-friendly interface.
    • Xender: Known for its high transfer speeds and compatibility with various devices.
    • AirDroid: Allows for file transfer, remote control, and other functionalities.
  2. Cloud Storage Services: Utilizing cloud storage services like Dropbox, Google Drive, or OneDrive can be an efficient way to share files. The sender uploads the file to the cloud, and the receiver can access it through the service’s web interface or mobile app.

Troubleshooting Common Bluetooth File Transfer Issues

Despite the simplicity of the process, occasional issues may arise during Bluetooth file transfers. Here are some common problems and their potential solutions:

  1. Device Invisibility: If your Windows 11 computer cannot locate the sending device, ensure Bluetooth is enabled on both devices and the sending device is in discoverable mode.
  2. Pairing Failure: If pairing fails, try restarting both devices and attempting the pairing process again. Ensure the devices are within range and there are no obstacles hindering the Bluetooth signal.
  3. Slow Transfer Speeds: Bluetooth transfer speeds can be relatively slow compared to other methods. Consider using a wired connection for large files or using a file transfer app that optimizes speed.
  4. File Corruption: If received files are corrupted, try re-sending the files or ensure the sending device has sufficient storage space and battery life.

FAQs about Receiving Files via Bluetooth on Windows 11

Q: Can I transfer any type of file via Bluetooth?

A: While Bluetooth supports a wide range of file types, it may not be suitable for transferring large files or files with sensitive information.

Q: Is Bluetooth file transfer secure?

A: Bluetooth uses encryption to secure data transfers. However, it’s essential to ensure that your devices are paired with trusted devices and avoid sharing sensitive information over unsecure connections.

Q: Can I transfer files between two Windows 11 computers via Bluetooth?

A: Yes, file transfers between two Windows 11 computers are possible via Bluetooth.

Q: What is the maximum file size I can transfer via Bluetooth?

A: The maximum file size depends on the Bluetooth version and the capabilities of the devices involved. Generally, Bluetooth 4.0 and above supports larger files, while older versions may have limitations.

Tips for Seamless Bluetooth File Transfer on Windows 11

  • Keep Devices Close: Ensure the devices are within Bluetooth range (typically 10 meters) for optimal signal strength.
  • Minimize Interference: Avoid transferring files in areas with strong Wi-Fi signals or other wireless devices, as they can interfere with Bluetooth connectivity.
  • Update Drivers: Ensure your Bluetooth driver is up-to-date for optimal performance and compatibility.
  • Consider Alternative Methods: For large files or files with sensitive information, consider using alternative methods like wired connections, cloud storage, or file transfer apps.

Conclusion

Receiving files via Bluetooth on Windows 11 presents a convenient and accessible method for data exchange between compatible devices. By understanding the fundamentals of Bluetooth connectivity, pairing devices effectively, and troubleshooting potential issues, users can seamlessly transfer files and leverage the versatility of this wireless technology. While Bluetooth may not be the most efficient solution for every scenario, it remains a valuable tool for sharing data, particularly for smaller files and short-range transfers.

How to Transfer Files between Two Windows 11 PCs with Bluetooth?  Gear Up Windows How to Use Bluetooth on Windows 11 How to Transfer File From Android to Windows 11 via Bluetooth
How to Transfer Files Using Bluetooth on Windows 11 - YouTube How to transfer files via Bluetooth in Windows 11 (without external apps) - YouTube Receive Files Bluetooth Windows 11
How to Send or Receive files via Bluetooth on Windows 11/10 How to Transfer Files between Two Windows 11 PCs with Bluetooth?  Gear Up Windows

Closure

Thus, we hope this article has provided valuable insights into Navigating File Transfers in Windows 11: A Comprehensive Guide to Bluetooth Connectivity. We thank you for taking the time to read this article. See you in our next article!

Windows 11: A Year Of Updates, Enhancements, And New Features

Windows 11: A Year of Updates, Enhancements, and New Features

Introduction

In this auspicious occasion, we are delighted to delve into the intriguing topic related to Windows 11: A Year of Updates, Enhancements, and New Features. Let’s weave interesting information and offer fresh perspectives to the readers.

Windows 11: A Year of Updates, Enhancements, and New Features

Microsoft unveils the New Windows 11 packed with New Amazing Features

Windows 11, Microsoft’s latest operating system, has undergone a significant transformation since its initial release in October 2021. The year 2023 has witnessed a steady stream of updates, refinements, and new features, solidifying its position as a robust and versatile platform for both personal and professional use. This article delves into the key developments that have shaped Windows 11’s evolution in the past year, highlighting its significance and benefits for users.

A Focus on Performance and Stability:

One of the primary goals of Windows 11 updates in 2023 has been to enhance performance and stability. The rollout of numerous cumulative updates has addressed bug fixes, security vulnerabilities, and performance bottlenecks. This continuous improvement process ensures a smoother user experience, minimizing crashes and system errors.

Improved User Interface and Customization:

Windows 11 has always emphasized a clean and intuitive user interface, and this focus has continued throughout 2023. Updates have brought refinements to the Start Menu, taskbar, and other interface elements, making them more visually appealing and user-friendly. Furthermore, the ability to personalize the desktop with themes, wallpapers, and accent colors has been expanded, providing greater control over the visual appearance of the operating system.

Enhanced Security Features:

Security remains a top priority for Microsoft, and Windows 11 reflects this commitment. The introduction of features like Windows Hello for Business, which leverages biometric authentication for stronger security, and the ongoing improvement of Windows Defender Antivirus have significantly strengthened the operating system’s defense against malware and cyber threats.

Integration with Microsoft 365 and Cloud Services:

Microsoft has continued to strengthen the integration between Windows 11 and its Microsoft 365 suite of productivity applications. Updates have streamlined the user experience for accessing and managing documents, spreadsheets, and presentations stored in the cloud. This seamless integration enhances productivity and simplifies collaboration across various devices.

Introducing New Features:

Beyond performance and security enhancements, Windows 11 has also introduced new features designed to enhance user productivity and engagement. These include:

  • Focus Assist: This feature helps users minimize distractions by silencing notifications and alerts during focused work sessions.
  • Snap Layouts: Windows 11 now offers a more intuitive and efficient way to arrange multiple windows on the screen, maximizing screen real estate and improving multitasking.
  • Widgets: The addition of a dedicated widget panel provides quick access to relevant information and applications, such as weather updates, news headlines, and calendar appointments.
  • Android App Support: The ability to run Android apps directly on Windows 11, through the Amazon Appstore, has significantly expanded the range of applications available on the platform.

The Importance of Windows 11 Updates:

The continuous updates to Windows 11 are not merely cosmetic changes. They represent a commitment from Microsoft to provide a secure, stable, and feature-rich operating system that meets the evolving needs of its users. These updates ensure that Windows 11 remains a relevant and competitive platform in the ever-changing technological landscape.

Benefits of Windows 11:

The updates and new features introduced in Windows 11 offer several benefits for users, including:

  • Enhanced Security: Stronger security features protect against malware, cyberattacks, and data breaches.
  • Improved Performance: Optimizations and bug fixes result in a smoother, faster, and more responsive user experience.
  • Greater Customization: More options for personalizing the desktop and interface enhance user satisfaction and productivity.
  • Increased Productivity: Features like Focus Assist and Snap Layouts streamline workflows and improve multitasking capabilities.
  • Expanded Functionality: The introduction of Android app support and integration with Microsoft 365 expands the platform’s capabilities and versatility.

Frequently Asked Questions (FAQs):

Q: Is Windows 11 free to upgrade?

A: Windows 11 is a free upgrade for eligible Windows 10 users. However, not all Windows 10 devices meet the minimum system requirements for the upgrade.

Q: What are the minimum system requirements for Windows 11?

A: The minimum system requirements for Windows 11 include:

  • Processor: 1 gigahertz (GHz) or faster with 2 or more cores
  • RAM: 4 gigabytes (GB)
  • Storage: 64 GB or larger storage device
  • Graphics Card: Compatible with DirectX 12 or later, WDDM 2.x driver
  • Display: High-definition (720p) display with a minimum screen size of 9 inches

Q: How can I upgrade to Windows 11?

A: You can upgrade to Windows 11 through the Windows Update feature on your computer. However, it’s important to ensure your device meets the minimum system requirements before attempting the upgrade.

Q: What are the benefits of upgrading to Windows 11?

A: Upgrading to Windows 11 offers several benefits, including:

  • Enhanced security features
  • Improved performance and stability
  • A more modern and intuitive user interface
  • New features like Focus Assist, Snap Layouts, and Android app support

Q: What happens to my data during the Windows 11 upgrade?

A: Your data should be preserved during the Windows 11 upgrade. However, it’s always a good practice to back up your important files before performing any major operating system update.

Tips for Using Windows 11:

  • Keep your system updated: Regularly install updates to ensure the latest security patches and performance improvements.
  • Customize your desktop: Personalize your desktop with themes, wallpapers, and accent colors to create a visually appealing and productive workspace.
  • Explore new features: Experiment with features like Focus Assist, Snap Layouts, and Android app support to enhance your productivity and workflow.
  • Utilize the Start Menu: The Start Menu offers quick access to your favorite apps, files, and settings.
  • Use the Widgets panel: The Widgets panel provides convenient access to relevant information and applications.
  • Back up your data: Regularly back up your important files to ensure data security and recovery in case of system failures.

Conclusion:

Windows 11 continues to evolve and improve with each update, offering users a secure, stable, and feature-rich operating system. The focus on performance, stability, security, and user-friendliness ensures that Windows 11 remains a powerful and versatile platform for personal and professional use. By embracing the new features and updates, users can maximize their productivity, enhance their digital experience, and stay ahead of the curve in the ever-changing world of technology.

10 settings to get you started with Windows 11  Popular Science Windows 11 Insider 22621.608 update adds new features - Huawei Central Upgrade to Microsoft Windows 11 - Get the Latest Features and Enhancements with Valto, Microsoft
New Windows 11 All Features: Full Depth Review Latest Windows 11 Windows 11  Features & How To Install Guide + Setup  Sg-Educate Windows 11 Feature Updates to Be Released Every 12 Months - Itechguides
New Features and Enhancements in Windows 11 Update (Moment 3) for Enhanced Security and Improved Windows 11 Updates, Features and System Requirements

Closure

Thus, we hope this article has provided valuable insights into Windows 11: A Year of Updates, Enhancements, and New Features. We thank you for taking the time to read this article. See you in our next article!

Bridging The Gap: Seamless File Sharing Between Android And Windows 10

Bridging the Gap: Seamless File Sharing Between Android and Windows 10

Introduction

With great pleasure, we will explore the intriguing topic related to Bridging the Gap: Seamless File Sharing Between Android and Windows 10. Let’s weave interesting information and offer fresh perspectives to the readers.

Bridging the Gap: Seamless File Sharing Between Android and Windows 10

Arc seamless File Sharing Android IOS MacOS Windows Multi Devices - YouTube

In an era of interconnected devices, the ability to effortlessly share files between different operating systems has become increasingly essential. Windows 10 and Android, two dominant platforms, have long presented challenges in this regard. However, recent advancements have introduced a convenient solution: Nearby Sharing. This innovative technology facilitates the transfer of files, images, and even links between Android devices and Windows 10 PCs, removing the barriers of compatibility and simplifying the sharing process.

Understanding Nearby Sharing: A Deeper Dive

At its core, Nearby Sharing leverages Bluetooth and Wi-Fi to establish a secure, direct connection between devices. It operates on the principle of peer-to-peer communication, eliminating the need for cloud services or internet connectivity. This direct approach ensures faster transfer speeds and enhanced privacy, as data does not traverse external servers.

How Nearby Sharing Works:

  1. Discovery: When enabled, Nearby Sharing continuously scans for nearby devices that have the feature activated. This scan utilizes Bluetooth signals to establish initial contact.
  2. Pairing: Upon identifying a compatible device, a request is sent to initiate the connection. Users can approve or deny the request based on their preference.
  3. File Transfer: Once paired, the selected file is transferred directly from the source device to the recipient device. The transfer process is encrypted, ensuring data security.

The Advantages of Nearby Sharing:

  • Simplicity: The intuitive interface and straightforward process make Nearby Sharing accessible to users of all technical levels.
  • Speed: Direct file transfer through Bluetooth and Wi-Fi results in significantly faster transfer speeds compared to cloud-based solutions.
  • Privacy: Data remains within the local network, eliminating the need for cloud storage and minimizing privacy concerns.
  • Flexibility: Nearby Sharing supports a wide range of file types, including documents, images, videos, and even links.
  • Accessibility: The feature is built into both Windows 10 and Android, eliminating the need for additional software or downloads.

Enabling and Using Nearby Sharing:

On Android Devices:

  1. Open the "Settings" app.
  2. Navigate to "Connected devices" or "Google" (depending on the device).
  3. Select "Nearby Share."
  4. Toggle the feature "On."
  5. Choose the desired sharing options, such as "Visible to everyone" or "Visible to contacts only."

On Windows 10 PCs:

  1. Open the "Settings" app.
  2. Select "System" and then "Shared experiences."
  3. Enable "Nearby Sharing" and choose the desired sharing options.

Sharing Files:

  1. Android to Android: Open the file you wish to share, tap the "Share" icon, and select the desired recipient from the list of nearby devices.
  2. Android to Windows 10: Open the file, tap the "Share" icon, and select the Windows 10 PC from the list.
  3. Windows 10 to Android: Open the file, right-click, select "Share," and choose the Android device from the list.
  4. Windows 10 to Windows 10: Open the file, right-click, select "Share," and choose the other Windows 10 PC from the list.

Frequently Asked Questions:

Q: What is the range of Nearby Sharing?

A: The effective range of Nearby Sharing is typically within 30 feet (10 meters). However, the actual range can vary depending on factors such as environmental conditions and the strength of Bluetooth and Wi-Fi signals.

Q: Is Nearby Sharing secure?

A: Yes, Nearby Sharing utilizes encryption to protect data during transfer. The connection between devices is also established through a secure handshake, minimizing the risk of unauthorized access.

Q: What types of files can I share using Nearby Sharing?

A: Nearby Sharing supports a wide range of file types, including documents, images, videos, and even links. However, the specific file types supported may vary depending on the version of the operating system and the capabilities of the devices.

Q: Can I share files with multiple devices simultaneously?

A: Currently, Nearby Sharing only allows sharing files with one device at a time. However, multiple users can independently share files with each other.

Q: How do I disable Nearby Sharing?

A: To disable Nearby Sharing, follow the same steps used to enable it, but toggle the feature "Off."

Tips for Optimizing Nearby Sharing:

  • Ensure Bluetooth and Wi-Fi are enabled: Nearby Sharing relies on these technologies to establish connections.
  • Keep devices close together: The effective range of Nearby Sharing is limited, so ensure devices are within close proximity.
  • Check for updates: Ensure both Android and Windows 10 devices are running the latest software updates for optimal compatibility and performance.
  • Clear the cache: If encountering issues, clearing the cache of the Nearby Sharing app may resolve them.
  • Enable sharing with everyone or contacts only: Choose the desired sharing options based on your privacy preferences.

Conclusion:

Nearby Sharing represents a significant advancement in file sharing between Android and Windows 10 devices. Its ease of use, speed, privacy, and accessibility have made it a valuable tool for users seeking a seamless and efficient way to transfer files across platforms. As technology continues to evolve, Nearby Sharing is likely to further enhance its capabilities, offering even greater convenience and flexibility for users in the future.

How to Share Files Between Android and Windows on Your Network - Make Tech Easier Seamless File Sharing: Google Nearby Share for Windows How to Share and Access Files Between Android and Windows 10
Seamless Android-Windows File Sharing Unlocked Microsoft Edge 'Drop' feature will allow seamless file sharing between Windows 11, Android & Mac Arc Seamless File Sharing for Android - Download
How To Use Nearby Share To Share Files Between Android And Windows  techpp How to Nearby Share files between Android and Windows PC  Digit

Closure

Thus, we hope this article has provided valuable insights into Bridging the Gap: Seamless File Sharing Between Android and Windows 10. We hope you find this article informative and beneficial. See you in our next article!

Understanding Windows 10 Update Tools: A Comprehensive Guide

Understanding Windows 10 Update Tools: A Comprehensive Guide

Introduction

With enthusiasm, let’s navigate through the intriguing topic related to Understanding Windows 10 Update Tools: A Comprehensive Guide. Let’s weave interesting information and offer fresh perspectives to the readers.

Understanding Windows 10 Update Tools: A Comprehensive Guide

Understanding Microsoft Updates for Windows 10 #008 - YouTube

Windows 10, like any operating system, requires regular updates to ensure optimal performance, security, and stability. These updates deliver new features, bug fixes, and security patches, protecting your system from vulnerabilities and enhancing its overall functionality. While Windows Update, the built-in tool, is the primary method for receiving updates, various other tools and methods can be employed to manage and customize this process. This article aims to provide a comprehensive overview of these tools and their applications, shedding light on their importance and benefits for Windows 10 users.

Windows Update: The Foundation of Update Management

Windows Update, accessible through the Settings app, is the core mechanism for receiving updates. It automatically downloads and installs updates in the background, ensuring your system remains up-to-date. While this automated process is convenient, it can be customized to suit individual preferences. Users can schedule update installations, pause updates temporarily, and choose which updates to install. This flexibility allows users to manage the update process according to their needs and system usage patterns.

The Role of Windows Update Assistant

Windows Update Assistant is a dedicated tool designed to assist users in upgrading their existing Windows versions to the latest release. It can be particularly useful for users who wish to upgrade from older versions of Windows or who are experiencing difficulties with the built-in update mechanism. The assistant simplifies the upgrade process, guiding users through the necessary steps and ensuring a smooth transition.

Utilizing the Media Creation Tool for a Fresh Start

The Media Creation Tool is a versatile tool that allows users to create bootable USB drives or DVDs containing the latest Windows 10 installation files. This tool is invaluable for performing clean installations, upgrading older systems, or reinstalling Windows on a new computer. It provides a fresh start, eliminating potential issues caused by corrupted files or outdated drivers.

The Power of the Windows 10 Upgrade Advisor

The Windows 10 Upgrade Advisor is a diagnostic tool that assesses a user’s current system to determine its compatibility with the latest Windows 10 update. It identifies potential issues, such as incompatible hardware or software, and provides recommendations for resolving them before proceeding with the update. This pre-update check ensures a smoother upgrade experience and minimizes the risk of encountering problems during or after the update process.

Third-Party Update Managers: Exploring Alternatives

While Windows Update provides the foundation for update management, third-party update managers offer alternative approaches and additional features. These tools often provide more granular control over the update process, allowing users to select specific updates, schedule installations, and even download updates from multiple sources. Some third-party managers also offer advanced features, such as update rollback, driver management, and system optimization tools.

Exploring the Benefits of Windows 10 Updates

Windows 10 updates play a crucial role in maintaining a secure and functional operating system. They offer numerous benefits, including:

  • Enhanced Security: Updates patch vulnerabilities, safeguarding your system against malware, viruses, and other threats.
  • Improved Performance: Updates optimize system performance, address bugs, and improve overall stability.
  • New Features and Functionality: Updates introduce new features, applications, and enhancements, expanding the capabilities of your system.
  • Compatibility and Stability: Updates ensure compatibility with the latest hardware and software, guaranteeing a seamless user experience.
  • Reduced Risk of System Errors: Regularly updating your system helps prevent system errors, crashes, and other unexpected issues.

Frequently Asked Questions about Windows 10 Updates

Q: Are Windows 10 updates mandatory?

A: While Windows 10 updates are generally recommended for optimal system performance and security, they are not strictly mandatory. Users can choose to defer or pause updates for a limited time, but it is important to note that delaying updates may expose your system to vulnerabilities.

Q: How can I manage Windows 10 updates?

A: Windows Update settings allow you to customize the update process. You can schedule updates, pause them temporarily, and choose which updates to install. Third-party update managers offer additional control and features.

Q: What if I encounter issues after a Windows 10 update?

A: If you encounter issues after an update, you can try troubleshooting steps such as restarting your computer, running a system scan, or rolling back the update. You can also seek assistance from Microsoft support or consult online forums for guidance.

Q: Are Windows 10 updates free?

A: Windows 10 updates are generally free for users who have already upgraded to Windows 10. However, there may be costs associated with upgrading from older versions of Windows or purchasing new devices with pre-installed Windows 10.

Q: How often are Windows 10 updates released?

A: Windows 10 updates are released on a regular basis, typically monthly or quarterly, depending on the type of update. Major feature updates are usually released twice a year, while smaller updates are released more frequently.

Tips for Managing Windows 10 Updates

  • Stay Informed: Keep up-to-date with the latest Windows 10 update announcements and release notes to understand the changes and potential issues.
  • Backup Your Data: Before installing any major updates, ensure you have a recent backup of your important data to prevent data loss in case of unexpected issues.
  • Check System Requirements: Verify that your system meets the minimum requirements for the latest Windows 10 update to avoid compatibility problems.
  • Monitor System Performance: After installing an update, monitor your system’s performance for any changes or issues.
  • Consider Third-Party Tools: Explore third-party update managers to gain more control over the update process and access additional features.

Conclusion

Windows 10 updates are essential for maintaining a secure, stable, and functional operating system. While Windows Update provides the foundation for update management, various tools and methods can be employed to customize the process and address specific user needs. By understanding these tools and their applications, users can effectively manage Windows 10 updates, ensuring their systems remain protected and perform optimally.

The complete guide to Windows 10 updates - Digital Citizen Ultimate Outsider: Understanding Windows 10 Upgrade System Settings Windows 10 Updating, Reinstalling And Activation Guide: Essential Advice To Avoid Problems
Windows 10 Update Tool: Infos & Download How To Update Windows 10: From Download To Installation How to Update Apps in Windows 10 (Complete Guide)
How To Install Windows 10 21H1 Update Manually  Itechguides.com How to manually upgrade to the Windows 10 Creators Update - Pureinfotech

Closure

Thus, we hope this article has provided valuable insights into Understanding Windows 10 Update Tools: A Comprehensive Guide. We hope you find this article informative and beneficial. See you in our next article!