Archives 2023

Managing Windows 11 Copilot Deployment: A Comprehensive Guide To Group Policy Management

Managing Windows 11 Copilot Deployment: A Comprehensive Guide to Group Policy Management

Introduction

With enthusiasm, let’s navigate through the intriguing topic related to Managing Windows 11 Copilot Deployment: A Comprehensive Guide to Group Policy Management. Let’s weave interesting information and offer fresh perspectives to the readers.

Managing Windows 11 Copilot Deployment: A Comprehensive Guide to Group Policy Management

How to Enable or Disable Windows Copilot in Windows 11 - Geek Rewind

Windows 11’s integration of Copilot, the AI-powered assistant, offers a transformative experience for users. However, within an enterprise environment, the deployment of Copilot requires careful consideration and management. Group Policy Objects (GPOs) provide a robust framework for controlling and customizing software and settings across a network. This guide explores the effective use of GPOs to manage Copilot deployment within Windows 11, ensuring a secure and efficient user experience.

Understanding Copilot Deployment and Group Policy

Copilot’s presence within Windows 11 is a significant change, offering new possibilities for productivity and user interaction. However, its deployment requires careful consideration to ensure compatibility, security, and user experience optimization. This is where GPOs play a crucial role.

GPOs are administrative templates that enable centralized control over various aspects of a Windows environment. Through GPOs, administrators can configure user settings, software installations, security configurations, and other policies, ensuring a consistent and manageable environment.

Leveraging GPOs to Manage Copilot Deployment

By harnessing the power of GPOs, administrators can effectively manage Copilot deployment across their organization. Here’s a breakdown of key considerations and steps involved:

1. Defining Deployment Scope:

  • Target User Groups: Determine the specific user groups that will have access to Copilot. This might involve segmenting employees based on roles, departments, or specific projects.
  • Exclusions: Identify any user groups or specific individuals who should not have access to Copilot, ensuring a targeted deployment strategy.

2. Configuration and Policy Settings:

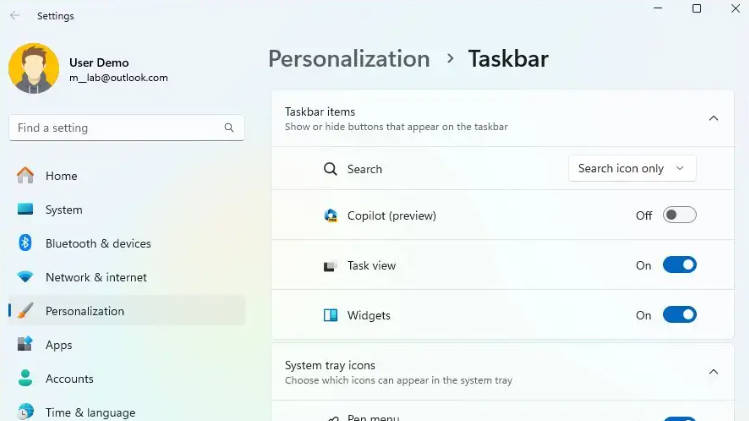
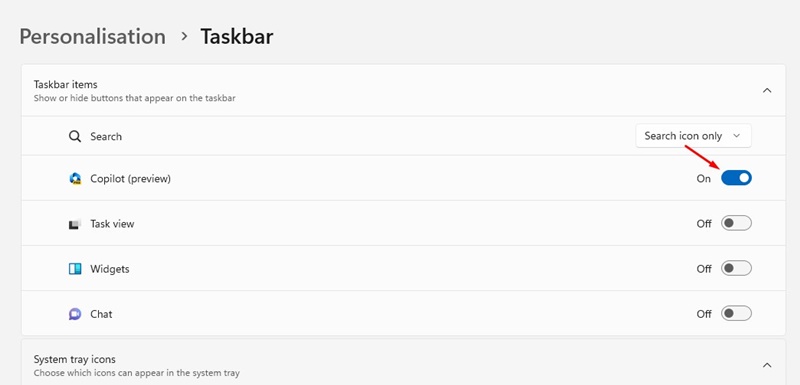
  • Copilot Availability: Use GPOs to enable or disable Copilot for specific user groups or devices. This allows administrators to control access based on pre-defined criteria.
  • Copilot Features: Configure specific Copilot features, such as the ability to access specific data sources or perform certain tasks. This ensures a controlled and secure environment.
  • Data Privacy: Implement policies that govern data usage and access related to Copilot. This includes settings for data collection, sharing, and encryption, ensuring user privacy and compliance with relevant regulations.

3. Implementing Policies:

  • Group Policy Management Console: Utilize the Group Policy Management Console (GPMC) to create and manage GPOs. This tool provides a user-friendly interface for defining and deploying policies.
  • Policy Deployment: Link the created GPOs to specific organizational units (OUs) or devices, ensuring the policies are applied to the intended targets.
  • Policy Enforcement: Monitor policy enforcement and ensure the desired Copilot configuration is applied consistently.

4. Monitoring and Updates:

  • Performance Monitoring: Regularly monitor Copilot usage and performance to identify potential issues or areas for improvement.
  • Policy Updates: Keep the Copilot-related policies updated to reflect changes in functionality, security, or user requirements.

Best Practices for Copilot Management with GPOs

  • Testing: Implement a thorough testing phase before deploying Copilot-related policies to ensure compatibility and functionality.
  • Documentation: Maintain clear and comprehensive documentation of all Copilot-related policies, including their purpose, configuration, and implementation details.
  • User Training: Provide users with clear instructions and training on how to use Copilot effectively and responsibly.

Frequently Asked Questions (FAQs)

1. Can I disable Copilot completely using GPOs?

Yes, GPOs allow administrators to disable Copilot entirely for specific user groups or devices. This ensures that Copilot is not available to those users.

2. How do I prevent Copilot from accessing specific data sources?

GPOs allow you to configure Copilot’s access to data sources, such as specific files, folders, or network shares. You can restrict access to sensitive information by configuring these settings.

3. Can I use GPOs to customize Copilot’s behavior?

Yes, GPOs provide a mechanism to configure various Copilot settings, including its language, appearance, and specific functionality. This allows administrators to tailor Copilot to the needs of their organization.

4. What are the security implications of deploying Copilot?

Copilot relies on data access and processing, so it’s essential to implement robust security policies to protect sensitive information. GPOs can help enforce data encryption, access control, and other security measures.

5. How do I ensure compliance with data privacy regulations?

GPOs can be used to enforce data privacy policies, ensuring compliance with regulations like GDPR and CCPA. This includes settings for data collection, usage, and deletion.

Tips for Effective Copilot Management

  • Phased Rollout: Implement a phased rollout of Copilot, starting with a pilot group to identify and address potential issues.
  • User Feedback: Encourage user feedback to gather insights on Copilot’s usability and identify areas for improvement.
  • Regular Review: Regularly review Copilot-related policies and configurations to ensure they remain relevant and effective.

Conclusion

Group Policy Objects offer a powerful mechanism for managing Copilot deployment within Windows 11. By leveraging GPOs, administrators can ensure a secure, efficient, and tailored user experience. Implementing a well-defined deployment strategy, incorporating best practices, and actively monitoring policy enforcement are crucial for maximizing the benefits of Copilot while mitigating potential risks. By adopting a proactive approach to Copilot management, organizations can unlock the full potential of this transformative AI-powered assistant, empowering their workforce and driving innovation.

Install Group Policy Management Console on Windows 11 Install Group Policy Management Console on Windows 11 Assisting Enterprises with the Latest Windows 11 and Copilot Deployment
How To Install Group Policy Management Console On Windows 11 Istituto - Vrogue How to Turn Off Copilot in Windows 11: A Comprehensive Guide - Aitoolnet Что такое Windows Copilot в Windows 11 и как он работает
Install Group Policy Management Console on Windows 11 How to Enable Windows Copilot on Windows 11 (Full Guide)  LaptrinhX

Closure

Thus, we hope this article has provided valuable insights into Managing Windows 11 Copilot Deployment: A Comprehensive Guide to Group Policy Management. We appreciate your attention to our article. See you in our next article!

Navigating The Labyrinth: Understanding And Resolving Outlook Sync Issues In Windows 11

Navigating the Labyrinth: Understanding and Resolving Outlook Sync Issues in Windows 11

Introduction

With enthusiasm, let’s navigate through the intriguing topic related to Navigating the Labyrinth: Understanding and Resolving Outlook Sync Issues in Windows 11. Let’s weave interesting information and offer fresh perspectives to the readers.

How to Resolve Sync Issues in Outlook

The seamless flow of information is paramount in the modern digital landscape. For professionals and individuals alike, Microsoft Outlook stands as a cornerstone of email management, calendaring, and task organization. However, the efficiency of this platform can be disrupted by synchronization issues, particularly within the Windows 11 environment. These disruptions can lead to frustration and lost productivity, hindering the smooth operation of daily workflows. This article aims to shed light on the intricacies of Outlook synchronization problems in Windows 11, providing a comprehensive understanding of their causes, troubleshooting strategies, and preventative measures.

The Importance of Synchronization in Outlook

Synchronization in Outlook plays a crucial role in maintaining data consistency across multiple devices and platforms. It ensures that all changes made to emails, calendar entries, contacts, and tasks are reflected accurately and promptly on all connected devices. This seamless data flow is essential for:

  • Real-time Access: Users can access their Outlook data from anywhere, be it their personal computer, laptop, smartphone, or tablet, without worrying about data discrepancies.
  • Collaboration and Teamwork: Shared calendars, task lists, and contact lists are kept synchronized, facilitating smooth collaboration and team communication.
  • Data Integrity: Synchronization ensures that all data is backed up and readily available in case of device loss or system failure.

Common Causes of Outlook Synchronization Issues in Windows 11

Understanding the root cause of synchronization problems is the first step towards effective troubleshooting. The following factors can contribute to Outlook sync issues in Windows 11:

1. Network Connectivity Issues: A stable internet connection is essential for Outlook synchronization. Intermittent or unreliable network connections can lead to data transfer delays or incomplete synchronization.

2. Server-Side Problems: Issues with Microsoft Exchange servers or other online services hosting Outlook data can disrupt synchronization. These issues might be temporary or require intervention from Microsoft.

3. Outlook Configuration Errors: Incorrectly configured Outlook settings, such as the account type, server addresses, and authentication credentials, can hinder synchronization.

4. Software Conflicts: Certain applications or software updates might interfere with Outlook’s synchronization process, leading to conflicts and errors.

5. Corrupted Data Files: Damaged or corrupted Outlook data files, such as the .ost or .pst files, can disrupt synchronization and cause data loss.

6. Insufficient Disk Space: Insufficient disk space on the device can prevent Outlook from storing and synchronizing data effectively.

7. Antivirus Software Interference: Some antivirus programs might interfere with Outlook’s synchronization process, blocking data transfer or causing conflicts.

8. Windows Updates: Recent Windows updates can sometimes introduce compatibility issues that disrupt Outlook synchronization.

9. Outlook Add-ins: Third-party add-ins for Outlook might interfere with the synchronization process, causing unexpected behavior.

10. Account Permissions: Incorrect or insufficient account permissions can restrict Outlook from accessing or synchronizing data on the server.

Troubleshooting Strategies for Outlook Sync Issues in Windows 11

Addressing Outlook synchronization problems requires a methodical approach. The following troubleshooting steps can help identify and resolve common issues:

1. Verify Network Connectivity: Ensure a stable and reliable internet connection. Restart your router or modem if necessary.

2. Check for Server Issues: Visit the Microsoft Exchange Server Status page or contact your email provider to verify if there are any known server outages or issues.

3. Review Outlook Account Settings: Go to File > Account Settings > Account Settings in Outlook and verify that the account type, server addresses, and authentication credentials are correct.

4. Run Outlook in Safe Mode: Start Outlook in Safe Mode by pressing Ctrl + Alt + Delete, selecting Task Manager, and then clicking "File" > "Run new task." Type "outlook.exe /safe" and click OK. This disables add-ins and other extensions that might be interfering with synchronization.

5. Repair Outlook Data Files: Use the "Repair" tool within Outlook to fix any corrupted data files. In Outlook, go to File > Account Settings > Account Settings and select the affected account. Click "Repair" and follow the on-screen instructions.

6. Check for Disk Space: Ensure sufficient disk space on the device. Delete unnecessary files or move data to a different storage location if needed.

7. Disable Antivirus Software Temporarily: Disable your antivirus software temporarily to see if it is interfering with Outlook synchronization.

8. Update Windows and Outlook: Install the latest Windows and Outlook updates to address potential compatibility issues.

9. Disable Outlook Add-ins: Disable any third-party add-ins that might be interfering with synchronization. In Outlook, go to File > Options > Add-ins. Select "COM Add-ins" from the "Manage" dropdown and click "Go." Disable any suspicious add-ins and restart Outlook.

10. Verify Account Permissions: Contact your email provider or IT administrator to verify account permissions and ensure that Outlook has sufficient access to synchronize data.

11. Reset Outlook Profile: Create a new Outlook profile and reconfigure your accounts. In the Control Panel, search for "Mail" and open the Mail app. Click "Show Profiles" and then "Add." Follow the on-screen instructions to create a new profile.

12. Reinstall Outlook: If all other troubleshooting steps fail, consider reinstalling Outlook. Ensure that you have a backup of your important data before proceeding.

Frequently Asked Questions (FAQs)

1. Why is my Outlook calendar not syncing with my phone?

This issue could be caused by incorrect settings on your phone or Outlook account, network connectivity problems, or server-side issues. Check the calendar sync settings on both your phone and Outlook account. Ensure that the correct account is selected and that the sync frequency is appropriate.

2. How do I fix Outlook email sync issues in Windows 11?

Follow the troubleshooting steps outlined above, starting with verifying network connectivity and account settings. If the problem persists, consider running Outlook in Safe Mode, repairing Outlook data files, or reinstalling Outlook.

3. My Outlook contacts are not syncing. What should I do?

Ensure that the correct contact sync settings are enabled in both Outlook and on your device. Check for network connectivity issues and server problems. If necessary, repair your Outlook data files or reinstall Outlook.

4. Why is my Outlook not syncing with my other devices?

Synchronization issues can arise due to various factors, including network connectivity problems, incorrect account settings, corrupted data files, or software conflicts. Follow the troubleshooting steps outlined above to diagnose and resolve the issue.

5. What if my Outlook sync issues persist after trying the troubleshooting steps?

If the problem persists, consider seeking assistance from Microsoft Support or your email provider. Provide detailed information about the issue, including the troubleshooting steps you have already taken.

Tips for Preventing Outlook Sync Issues in Windows 11

Proactive measures can help prevent future synchronization problems:

1. Maintain a Stable Network Connection: Ensure a reliable and stable internet connection. Use a wired connection whenever possible.

2. Regularly Update Windows and Outlook: Install the latest Windows and Outlook updates to address potential compatibility issues and security vulnerabilities.

3. Backup Outlook Data: Regularly back up your Outlook data files (.pst or .ost) to prevent data loss in case of corruption or other issues.

4. Limit the Use of Third-Party Add-ins: Use only trusted and necessary add-ins for Outlook. Avoid installing unnecessary add-ins that might interfere with synchronization.

5. Monitor Disk Space: Regularly check disk space and delete unnecessary files to ensure sufficient storage for Outlook data.

6. Avoid Using Public Wi-Fi for Sensitive Data: Public Wi-Fi networks can be less secure. Avoid accessing sensitive data or synchronizing Outlook on public Wi-Fi networks.

7. Use a Strong Password: Use a strong and unique password for your Outlook account to protect your data from unauthorized access.

8. Enable Two-Factor Authentication: Enable two-factor authentication for your Outlook account to add an extra layer of security.

Conclusion

Outlook synchronization issues in Windows 11 can be frustrating, but with a systematic approach to troubleshooting and preventative measures, users can ensure smooth data flow and maintain productivity. Understanding the common causes of synchronization problems, implementing the outlined troubleshooting strategies, and adopting proactive measures can significantly reduce the likelihood of encountering these issues. By addressing these challenges head-on, users can leverage the full potential of Outlook and harness its power for efficient communication, collaboration, and information management.

How to Resolve Sync Issues in Outlook How to Troubleshoot Outlook Sync issues in Windows? Troubleshooting Outlook Sync Issues - Top 4 Ways to Fix
Resolve Outlook Sync Issues Quickly 9 Solutions to Fix "Outlook Not Syncing" Error Simple Steps to Resolve Sync Issues in Outlook
Resolve Synchronization Log Issue in MS Outlook How to Resolve Sync Issues in Outlook – A Detailed Guide

Closure

Thus, we hope this article has provided valuable insights into Navigating the Labyrinth: Understanding and Resolving Outlook Sync Issues in Windows 11. We appreciate your attention to our article. See you in our next article!

Navigating The Windows 11 Upgrade: Understanding PC Health Check And Its Role

Navigating the Windows 11 Upgrade: Understanding PC Health Check and its Role

Introduction

With great pleasure, we will explore the intriguing topic related to Navigating the Windows 11 Upgrade: Understanding PC Health Check and its Role. Let’s weave interesting information and offer fresh perspectives to the readers.

Windows 11 Upgrade Pc Health Check - Get Latest Windows 11 Update

The release of Windows 11 marked a significant update in the Microsoft operating system, offering a range of new features and design enhancements. However, with this update came a crucial aspect for users: ensuring their computer met the necessary system requirements. This is where the PC Health Check tool played a pivotal role.

Understanding the PC Health Check Tool

The PC Health Check tool, developed by Microsoft, acted as a pre-upgrade assessment tool for Windows 11. This tool, available for download from the Microsoft website, scanned a user’s computer for key hardware and software specifications, comparing them against the minimum system requirements for Windows 11.

The Importance of the PC Health Check Tool

The PC Health Check tool served a critical purpose: to inform users whether their existing computer system was compatible with Windows 11. This compatibility assessment focused on various factors, including:

  • Processor (CPU): Windows 11 requires a 1 GHz or faster processor with at least two cores.
  • RAM: A minimum of 4 GB of RAM is necessary for a smooth Windows 11 experience.
  • Storage: The tool checks for at least 64 GB of storage space.
  • TPM: The tool evaluates the presence and functionality of the Trusted Platform Module (TPM) 2.0, a security feature crucial for Windows 11.
  • Secure Boot: The tool assesses whether the Secure Boot feature is enabled in the BIOS settings, another essential security requirement.
  • Display: The tool verifies if the display supports a minimum resolution of 960 x 720 pixels.

Benefits of Utilizing the PC Health Check Tool

The benefits of using the PC Health Check tool extend beyond simply checking for compatibility. It provided users with:

  • Clear Insights: The tool delivered a straightforward assessment, indicating whether the computer met the requirements or not. This transparency allowed users to make informed decisions regarding an upgrade.
  • Pre-Upgrade Planning: For users whose computers did not meet the requirements, the tool provided valuable information about the necessary upgrades. This allowed for proactive planning and budgeting before attempting the Windows 11 upgrade.
  • Troubleshooting Assistance: The tool offered insights into specific hardware or software issues that might hinder compatibility. This information empowered users to address potential problems before proceeding with the upgrade.
  • Enhanced User Experience: By ensuring compatibility, the PC Health Check tool contributed to a smoother and more efficient Windows 11 experience.

FAQs Regarding the PC Health Check Tool

Q: Is the PC Health Check tool mandatory for upgrading to Windows 11?

A: While the tool is not mandatory, it is highly recommended. It helps users determine if their computer meets the minimum requirements, preventing potential issues during the upgrade process.

Q: What if my computer doesn’t meet the requirements?

A: If your computer does not meet the requirements, you have several options:

  • Upgrade Hardware: Consider upgrading components like the processor, RAM, or storage to meet the minimum specifications.
  • Stick with Windows 10: Continue using Windows 10, as it will continue to receive security updates for several years.
  • Consider a New Computer: If upgrading hardware is not feasible, consider purchasing a new computer that meets the Windows 11 requirements.

Q: Can I still upgrade to Windows 11 if my computer doesn’t meet the requirements?

A: While it is possible to bypass the requirements and force an upgrade, it is not recommended. Doing so can lead to performance issues, compatibility problems, and security risks.

Q: Is the PC Health Check tool available for all Windows versions?

A: The PC Health Check tool was initially designed for Windows 10 users considering an upgrade to Windows 11. It is not compatible with older Windows versions.

Q: What happens if the PC Health Check tool detects an issue?

A: The tool will provide specific details about the issue, such as the missing hardware component or the required software update. This information helps users understand the problem and take appropriate action.

Tips for Utilizing the PC Health Check Tool

  • Download the Latest Version: Ensure you have the most recent version of the PC Health Check tool from the official Microsoft website.
  • Run the Tool as Administrator: Running the tool with administrator privileges ensures proper access to system files and settings.
  • Review the Results Carefully: Pay close attention to the tool’s findings, especially if it identifies any issues.
  • Seek Additional Support: If you encounter difficulties or have questions about the tool, refer to Microsoft’s official documentation or contact their support team.

Conclusion

The PC Health Check tool served as a crucial step for users considering an upgrade to Windows 11. By providing a comprehensive assessment of system compatibility, the tool empowered users to make informed decisions, plan upgrades effectively, and ultimately enjoy a smoother and more efficient Windows 11 experience. While the tool is no longer actively updated, its importance lies in its ability to highlight the critical role of hardware and software specifications in ensuring a successful operating system transition.

Windows 11 Upgrade Pc Health Check 2024 - Win 11 Home Upgrade 2024 Microsoft PC Health Check adds detailed Windows 11 compatibility info - Stimulus Check Up How to Run the PC Health Check App for Microsoft Windows 11 Upgrades  Dell Canada
Microsoft Announces Windows 11, Can Your PC Run It? Windows 11 pc health check download - raygai PC Health Check App Windows 11 Upgrade Requirement Updates HTMD Blog
Pc health check windows 11 - underose Windows 11 pc health check - vseideal

Closure

Thus, we hope this article has provided valuable insights into Navigating the Windows 11 Upgrade: Understanding PC Health Check and its Role. We appreciate your attention to our article. See you in our next article!

Navigating The World Of Windows 11: A Comprehensive Guide To Understanding And Acquiring The Operating System

Navigating the World of Windows 11: A Comprehensive Guide to Understanding and Acquiring the Operating System

Introduction

In this auspicious occasion, we are delighted to delve into the intriguing topic related to Navigating the World of Windows 11: A Comprehensive Guide to Understanding and Acquiring the Operating System. Let’s weave interesting information and offer fresh perspectives to the readers.

Buy Windows 11 User Guide for Beginners: A Comprehensive Guide to Master Windows 11 Operating

Microsoft Windows 11, the latest iteration of the iconic operating system, has garnered considerable attention since its release. While the operating system is available for purchase, there are legitimate avenues to acquire Windows 11 at no cost. This article aims to provide a comprehensive understanding of Windows 11, its features, and the various ways to access it without incurring any financial expenditure.

Understanding the Fundamentals of Windows 11

Windows 11, released in October 2021, builds upon the foundation laid by its predecessor, Windows 10. It boasts a refined user interface, improved performance, and enhanced security features. Some of the key features that distinguish Windows 11 include:

  • Refreshed User Interface: Windows 11 presents a visually appealing and streamlined user experience with rounded corners, centered taskbar icons, and a redesigned Start Menu.
  • Enhanced Performance: The operating system leverages the latest hardware advancements to deliver smoother performance and faster application loading times.
  • Improved Security: Windows 11 incorporates robust security measures, including Windows Hello for facial and fingerprint recognition, and Microsoft Defender for comprehensive threat protection.
  • Focus on Gaming: Windows 11 optimizes gaming performance with features like DirectX 12 Ultimate, Auto HDR, and the Xbox Game Pass integration.
  • Integration with Microsoft Services: The operating system seamlessly integrates with other Microsoft services, including Microsoft Store, OneDrive, and Teams, for a unified experience.

Exploring the Legitimate Paths to Acquiring Windows 11 Free of Charge

While Microsoft offers Windows 11 for purchase, several avenues exist for obtaining the operating system without incurring any financial cost. These methods are legitimate and adhere to Microsoft’s licensing guidelines:

  • Windows 11 Upgrade for Eligible Windows 10 Devices: Microsoft provides a free upgrade to Windows 11 for devices running eligible versions of Windows 10. This upgrade path is accessible through the Windows Update mechanism.
  • Windows 11 Insider Program: The Windows Insider Program allows individuals to participate in the development process by testing pre-release versions of Windows 11. This program offers early access to the latest features and provides valuable feedback to Microsoft.
  • Windows 11 for Education: Students and educators can obtain Windows 11 for free through various educational programs offered by Microsoft.
  • Windows 11 for Non-Profit Organizations: Non-profit organizations may be eligible for discounted or free licenses of Windows 11 through Microsoft’s programs for non-profits.
  • Windows 11 for Developers: Developers can access Windows 11 for free through Microsoft’s Developer program, which provides tools and resources for software development.

Navigating the Legitimate Avenues: A Step-by-Step Guide

Understanding the available options is only the first step. Successfully acquiring Windows 11 free of charge requires navigating these avenues effectively. Here is a step-by-step guide to help you through the process:

  • Check Your Windows 10 Eligibility: Before attempting to upgrade to Windows 11, ensure your Windows 10 device meets the minimum system requirements. These include specific processor, memory, storage, and display specifications.
  • Access Windows Update: Open the "Settings" app on your Windows 10 device and navigate to "Update & Security." Select "Windows Update" and check for available updates. If a Windows 11 upgrade is available, it will be listed here.
  • Enroll in the Windows Insider Program: Visit the official Windows Insider Program website and sign up for the program. Choose the "Dev Channel" for the most recent pre-release builds of Windows 11.
  • Explore Educational and Non-Profit Programs: Contact your educational institution or non-profit organization to inquire about potential eligibility for Windows 11 programs.
  • Join the Microsoft Developer Program: If you are a developer, visit the Microsoft Developer Program website and apply for membership. This grants access to developer-specific resources, including Windows 11.

Addressing Common Questions and Concerns

The process of acquiring Windows 11 for free can raise questions and concerns. Here are answers to some frequently asked questions:

Q: Is it legal to download Windows 11 for free?

A: It is legal to download Windows 11 for free through the aforementioned legitimate avenues. However, downloading the operating system from unofficial sources or using pirated versions is illegal and can have serious consequences.

Q: What are the potential risks associated with downloading Windows 11 from unofficial sources?

A: Downloading Windows 11 from unofficial sources poses several risks, including:

  • Malware and Viruses: Unofficial sources may contain malicious software that can compromise your device’s security and steal personal information.
  • License Violations: Using pirated versions of Windows 11 is a violation of Microsoft’s licensing agreements and can result in legal penalties.
  • Lack of Support: Unofficial versions of Windows 11 may not receive security updates or technical support from Microsoft.

Q: Can I upgrade my Windows 10 device to Windows 11 if it doesn’t meet the minimum system requirements?

A: While you can manually install Windows 11 on a device that doesn’t meet the minimum requirements, it is not recommended. Doing so may lead to performance issues, instability, and potential security vulnerabilities.

Q: What are the differences between the free and paid versions of Windows 11?

A: The free versions of Windows 11 obtained through the legitimate avenues mentioned above are functionally identical to the paid versions. There are no feature limitations or restrictions.

Tips for a Smooth Windows 11 Acquisition

  • Backup Your Data: Before proceeding with any upgrade or installation, ensure you back up your important data to prevent data loss.
  • Check System Requirements: Verify that your device meets the minimum system requirements for Windows 11 before proceeding with any upgrade or installation.
  • Read Installation Instructions Carefully: Follow the official installation instructions provided by Microsoft for a smooth and successful installation process.
  • Stay Informed: Keep up-to-date with the latest information from Microsoft regarding Windows 11, including updates, security patches, and new features.

Conclusion

Acquiring Windows 11 free of charge is possible through legitimate and authorized avenues. Understanding these options and navigating them effectively can provide access to the latest features and advancements of the operating system without incurring any financial cost. Remember to prioritize safety and security by avoiding unofficial sources and adhering to Microsoft’s licensing guidelines. By following the steps outlined in this guide, individuals can enjoy the benefits of Windows 11 while remaining compliant with legal and ethical considerations.

Buy Windows 11: Discover from Beginner to Expert with this Ultimate & Complete Step-by-Step User Windows 11 Revealed: A Comprehensive Overview of the New OS Buy WINDOWS 11 FOR BEGINNERS AND SENIORS 2022: Fully Illustrated User Guide on How to Master
Buy Windows 11 User Guide for Beginners and Seniors: A Complete User Guide with Step-by-Step Buy Windows 112021 User Guide: A Complete 2021 Guide with Tips and Tricks for the New Microsoft Buy Windows 11 User Guide: A Step by Step Guide to Install and Use the New Windows 11 Operating
Buy Understanding WINDOWS 11 Senior Guide: The Complete Step By Step Manual For Beginners And Buy WINDOWS 11 HOME User Manual: A Comprehensive Illustrated Guide to Navigating the New

Closure

Thus, we hope this article has provided valuable insights into Navigating the World of Windows 11: A Comprehensive Guide to Understanding and Acquiring the Operating System. We hope you find this article informative and beneficial. See you in our next article!

Photoshop 7.0 Free Download For Windows 10

photoshop 7.0 free download for windows 10

Introduction

With great pleasure, we will explore the intriguing topic related to photoshop 7.0 free download for windows 10. Let’s weave interesting information and offer fresh perspectives to the readers.

The Enduring Legacy of Photoshop 7.0: A Comprehensive Guide for Windows 10 Users

Download Adobe Photoshop 7.0 for Windows 10, 7 Free

While the world of image editing has advanced significantly since its release, Photoshop 7.0 remains a significant landmark in the history of digital art and design. Its enduring popularity, particularly among users of older Windows operating systems like Windows 10, stems from its robust feature set, user-friendly interface, and compatibility with legacy software and workflows. This article delves into the reasons behind its continued relevance, exploring its key features, addressing common concerns, and providing valuable tips for utilizing this classic software effectively on modern machines.

Understanding the Appeal of Photoshop 7.0

Photoshop 7.0 was released in 2002, marking a pivotal moment in the evolution of digital image manipulation. It introduced several groundbreaking features that continue to influence modern image editing tools:

  • Intuitive User Interface: Photoshop 7.0 boasts a clean and well-organized interface, making it easy for both beginners and experienced users to navigate and access its vast array of tools and features. Its intuitive layout, with its familiar toolbars and palettes, has contributed significantly to its enduring popularity.
  • Comprehensive Feature Set: From basic image adjustments like brightness and contrast to advanced techniques like layer masking, blending modes, and complex selections, Photoshop 7.0 offers a wide range of tools for manipulating images. This comprehensive toolkit allows users to achieve professional-level results for a wide range of applications, from simple photo retouching to complex graphic design projects.
  • Flexibility and Compatibility: Photoshop 7.0 is renowned for its compatibility with various file formats, including PSD, TIFF, JPEG, GIF, and PNG. This flexibility ensures seamless integration with other software applications and allows for smooth transfer of files between different platforms.
  • Stable and Reliable: Photoshop 7.0 is known for its stability and reliability. Its robust architecture ensures smooth operation, minimizing crashes and errors. This dependability has earned it the trust of professionals and enthusiasts alike, making it a reliable tool for critical projects.

Addressing Common Concerns: Photoshop 7.0 on Windows 10

While Photoshop 7.0 offers significant advantages, its compatibility with modern operating systems like Windows 10 can raise concerns. These are addressed below:

  • Compatibility Issues: Running Photoshop 7.0 on Windows 10 may require some workarounds. This often involves compatibility mode settings, adjusting display scaling, and potentially installing older versions of drivers for peripherals like scanners.
  • Security Risks: Using older software can expose your system to security vulnerabilities. It’s crucial to ensure you have robust antivirus software and keep your operating system and other software updated to mitigate potential threats.
  • Limited Feature Set: Photoshop 7.0 lacks the advanced features found in newer versions, such as content-aware fill, camera raw processing, and 3D capabilities.

Tips for Effective Use of Photoshop 7.0 on Windows 10

Despite the challenges, Photoshop 7.0 remains a valuable tool for many users, especially those working with older projects or preferring its familiar interface. Here are some tips for maximizing its potential on Windows 10:

  • Compatibility Mode: Run Photoshop 7.0 in compatibility mode for Windows XP or earlier versions. This often resolves compatibility issues and improves stability.
  • Display Scaling: Adjust display scaling settings in Windows 10 to ensure the software interface appears correctly and avoids blurry elements.
  • Driver Updates: Update drivers for peripherals like scanners and tablets to ensure compatibility with Photoshop 7.0.
  • Security Measures: Implement robust security practices, including using antivirus software and keeping your system updated, to minimize security risks.
  • Explore Alternatives: Consider using alternative image editing software if you require advanced features not available in Photoshop 7.0.

FAQs: Understanding Photoshop 7.0 on Windows 10

Q: Is Photoshop 7.0 still available for download?

A: While Adobe no longer officially distributes Photoshop 7.0, it can be found on various third-party websites. However, downloading software from unofficial sources can pose security risks. It’s crucial to exercise caution and verify the source’s legitimacy before downloading.

Q: Can I use Photoshop 7.0 with modern hardware and software?

A: Photoshop 7.0 can be used on modern hardware, but compatibility issues may arise. It’s essential to check for compatibility mode settings and adjust display scaling to ensure smooth operation. However, it may not be fully compatible with all modern software and peripherals.

Q: Is Photoshop 7.0 secure to use on Windows 10?

A: Running older software like Photoshop 7.0 on Windows 10 can expose your system to security vulnerabilities. It’s crucial to implement robust security measures, such as using antivirus software and keeping your system updated, to mitigate potential threats.

Q: What are the limitations of Photoshop 7.0 compared to newer versions?

A: Photoshop 7.0 lacks many of the advanced features found in newer versions, such as content-aware fill, camera raw processing, and 3D capabilities. It also lacks support for modern file formats and workflows.

Conclusion: The Enduring Relevance of Photoshop 7.0

Photoshop 7.0, despite its age, remains a valuable tool for many users, particularly those working with older projects or preferring its familiar interface. Its robust feature set, user-friendly interface, and compatibility with legacy software and workflows continue to make it a relevant choice for specific applications. However, users must be aware of the potential compatibility issues, security risks, and limitations compared to newer versions. By understanding these factors and employing appropriate strategies, users can leverage the enduring power of Photoshop 7.0 to achieve their creative goals on Windows 10.

Download adobe photoshop 7-0 free download full version - topsonic Adobe Photoshop 7.0 Free Download For Windows (7/8/10) Adobe Photoshop 7.0 Free Download for Windows 11, 10, 8, 7
Adobe Photoshop 7.0 Free Download for Windows 11, 10, 8, 7 Adobe Photoshop 7.0 Free Download For Windows 10/8/7 (2020 Latest) Adobe Photoshop 7.0 Free Download For Windows 10, 8, 7 (2020)
Adobe Photoshop 7.0 Free Download Full Version for PC Microsoft adobe photoshop 7.0 free download - lasopaafri

Closure

Thus, we hope this article has provided valuable insights into photoshop 7.0 free download for windows 10. We thank you for taking the time to read this article. See you in our next article!

Navigating The Modern Workplace: A Comprehensive Guide To Office 365 Login And Download

Navigating the Modern Workplace: A Comprehensive Guide to Office 365 Login and Download

Introduction

With enthusiasm, let’s navigate through the intriguing topic related to Navigating the Modern Workplace: A Comprehensive Guide to Office 365 Login and Download. Let’s weave interesting information and offer fresh perspectives to the readers.

The Modern Workplace - with Microsoft 365 - Onsite / Online Training Courses

The modern workplace is increasingly reliant on digital tools and cloud-based solutions. Office 365, Microsoft’s comprehensive suite of productivity applications, has become a cornerstone of this digital transformation, offering a seamless blend of familiar software like Word, Excel, and PowerPoint, with innovative collaborative tools and secure cloud storage.

This article aims to provide a detailed guide on accessing and utilizing Office 365, covering the essential aspects of login, download, and installation, along with valuable tips for maximizing its potential.

Understanding Office 365 Login and Access

The first step to harnessing the power of Office 365 is understanding how to log in and access its features.

1. Account Access:

  • Existing Account: If you already possess an Office 365 account (provided by your employer or educational institution), you can access it through the official Microsoft website.
  • New Account: To create a new Office 365 account, visit the Microsoft website and follow the registration process. You will be prompted to provide personal information and choose a subscription plan.

2. Login Process:

  • Web Browser Access: Navigate to the Office 365 login page (office.com).
  • Credentials: Enter your email address associated with your Office 365 account and your password.
  • Two-Factor Authentication: For enhanced security, you might be required to enter a verification code sent to your phone or email.

3. Accessing Applications:

  • Web-Based Apps: Once logged in, you will have access to a range of online applications like Word, Excel, PowerPoint, Outlook, and more.
  • Desktop Apps: To download and install the desktop versions of Office 365 applications, follow the instructions provided within your account portal.

Downloading and Installing Office 365 Applications

1. Downloading the Installer:

  • Account Portal: Access your Office 365 account and locate the "Install Office" option.
  • Microsoft Website: Visit the Microsoft website and select the "Download Office" option.
  • Subscription Type: Ensure you choose the correct version of Office 365 compatible with your operating system (Windows or macOS).

2. Installation Process:

  • Run the Installer: Double-click the downloaded installer file.
  • Follow Instructions: The installer will guide you through the installation process, which may include accepting terms of service and selecting installation options.
  • Restart: Your computer may require a restart to complete the installation.

3. Activation:

  • Account Credentials: After installation, you will be prompted to activate Office 365 using your account credentials.
  • License Verification: The installation process verifies your subscription license to ensure you have the necessary permissions to use the applications.

Maximizing the Benefits of Office 365

Office 365 is more than just a collection of familiar applications; it’s a powerful platform designed to enhance collaboration, productivity, and efficiency. Here are key ways to maximize its benefits:

1. Collaborative Features:

  • Shared Documents: Utilize features like co-authoring to collaborate on documents, spreadsheets, and presentations in real-time.
  • Teamwork Tools: Leverage tools like Microsoft Teams for group communication, file sharing, and virtual meetings.
  • Cloud Storage: Utilize OneDrive to store files securely in the cloud, making them accessible from any device.

2. Productivity Enhancements:

  • Cloud-Based Services: Access Office 365 applications from any device with an internet connection.
  • Automatic Updates: Enjoy automatic updates to ensure you have the latest features and security patches.
  • Mobile Apps: Utilize dedicated mobile apps for Office 365 applications on your smartphone or tablet.

3. Security and Privacy:

  • Data Encryption: Office 365 utilizes robust encryption to protect your data both in transit and at rest.
  • Multi-Factor Authentication: Implement two-factor authentication for enhanced account security.
  • Data Recovery: Leverage backup and recovery features to ensure data protection in case of unforeseen events.

FAQs Regarding Office 365 Login and Download

1. What if I forget my Office 365 password?

If you forget your password, you can reset it by following the password recovery process on the Office 365 login page. You will likely be asked to provide personal information or receive a verification code via email.

2. Can I use Office 365 on multiple devices?

Yes, you can access Office 365 on multiple devices, provided you have an active subscription. The number of devices you can use simultaneously may vary depending on your subscription plan.

3. How do I manage my Office 365 subscription?

You can manage your subscription details, including payment information, through your Office 365 account portal.

4. What are the system requirements for installing Office 365?

The system requirements for installing Office 365 vary depending on the version you choose. You can find detailed information on the Microsoft website.

5. What happens if I cancel my Office 365 subscription?

If you cancel your subscription, you will lose access to the applications and features associated with it. You may have the option to download and install a standalone version of Office, depending on your subscription plan.

Tips for a Seamless Office 365 Experience

1. Stay Updated: Regularly check for updates to ensure you have the latest features and security patches.

2. Explore Features: Take advantage of the various features and tools available within Office 365 to enhance your workflow.

3. Seek Support: If you encounter any issues, consult the Microsoft support website or contact customer service for assistance.

4. Backup Data: Regularly back up your important data to ensure its safety and recoverability.

5. Optimize Performance: Ensure your device meets the minimum system requirements for optimal Office 365 performance.

Conclusion

Office 365 has become an indispensable tool for individuals and organizations seeking to enhance productivity, collaboration, and security in the modern workplace. By understanding the login and download process, exploring its features, and adopting best practices, users can unlock its full potential and streamline their digital workflow. As technology continues to evolve, Office 365 remains a powerful and adaptable platform, ready to meet the ever-changing demands of the digital world.

Your modern workplace in the cloud with Office 365  SII Group Modern Workplace with Microsoft 365 Office 365 Admin Login
Microsoft Modern Workplace  365 Premium License  Optimising IT Tesia FilaVia - Microsoft 365 ASTEC IT Microsoft 365  How to Build a Modern Workplace with Microsoft 365 in 2021 - ASTEC IT
Microsoft Office 365 Admin Login – User Guide - Broughted Microsoft Modern Workplace Capability Map

Closure

Thus, we hope this article has provided valuable insights into Navigating the Modern Workplace: A Comprehensive Guide to Office 365 Login and Download. We thank you for taking the time to read this article. See you in our next article!

Seamlessly Sharing Files: Exploring Windows 11’s Nearby Sharing Feature

Seamlessly Sharing Files: Exploring Windows 11’s Nearby Sharing Feature

Introduction

In this auspicious occasion, we are delighted to delve into the intriguing topic related to Seamlessly Sharing Files: Exploring Windows 11’s Nearby Sharing Feature. Let’s weave interesting information and offer fresh perspectives to the readers.

Seamlessly Sharing Files: Exploring Windows 11’s Nearby Sharing Feature

How to Use Nearby Sharing on Windows 11

Windows 11 introduces a convenient and efficient way to share files between nearby devices: Nearby Sharing. This feature leverages Bluetooth and Wi-Fi to facilitate the transfer of files, images, and even links without the need for cables or cloud services.

Understanding the Mechanics of Nearby Sharing

Nearby Sharing operates on a simple principle: it utilizes Bluetooth and Wi-Fi to create a temporary, secure connection between devices within a short range. This connection enables the transfer of data without relying on an internet connection, making it ideal for sharing files locally.

Key Features of Nearby Sharing

  • Simplicity: Nearby Sharing is designed for ease of use. Users can share files with a single click, eliminating the need for complex setup or configuration.
  • Security: The feature utilizes Bluetooth and Wi-Fi, both of which employ security protocols to ensure data privacy and integrity during transfers.
  • Versatility: Nearby Sharing supports a wide range of file types, including images, documents, videos, and even links, making it a versatile tool for sharing various content.
  • Accessibility: The feature is integrated directly into Windows 11, making it readily accessible to all users.
  • Efficiency: By bypassing cloud services and internet connections, Nearby Sharing offers faster file transfer speeds compared to traditional methods.

Enabling Nearby Sharing on Windows 11

To enable Nearby Sharing on a Windows 11 device:

  1. Open Settings: Click the Start button and select "Settings."
  2. Navigate to System: Choose "System" from the left-hand menu.
  3. Select "Shared experiences": Click on "Shared experiences" located in the right pane.
  4. Enable Nearby Sharing: Toggle the "Nearby Sharing" switch to the "On" position.
  5. Choose Sharing Options: Select "Everyone nearby" to share files with all nearby devices, or "My devices only" to restrict sharing to devices connected to your Microsoft account.

Sharing Files Using Nearby Sharing

  1. Select the File: Locate the file you wish to share.
  2. Right-Click: Right-click on the file and choose "Share."
  3. Choose "Nearby Sharing": Select "Nearby Sharing" from the options presented.
  4. Select Receiving Device: The nearby device will appear in the list. Click on the device to initiate the transfer.
  5. Confirm Transfer: The receiving device will prompt for confirmation. Click "Accept" to receive the file.

Troubleshooting Common Issues with Nearby Sharing

  • Device Visibility: Ensure both devices have Nearby Sharing enabled and are within a reasonable range (approximately 30 feet).
  • Bluetooth Connectivity: Verify that Bluetooth is enabled on both devices.
  • Network Connectivity: Ensure both devices are connected to the same Wi-Fi network.
  • Compatibility: Check if both devices are running compatible versions of Windows 11.
  • Firewall Settings: Temporary disable firewalls on both devices to rule out interference.
  • Device Permissions: Grant necessary permissions to Nearby Sharing within the Windows settings.

Frequently Asked Questions (FAQs)

Q: What types of files can I share using Nearby Sharing?

A: Nearby Sharing supports a wide range of file types, including images, documents, videos, and links. However, the specific file types supported may vary depending on the receiving device and its capabilities.

Q: Is Nearby Sharing secure?

A: Yes, Nearby Sharing utilizes Bluetooth and Wi-Fi, both of which employ security protocols to ensure data privacy and integrity during transfers.

Q: Can I share files with devices running older operating systems?

A: Nearby Sharing is primarily designed for devices running Windows 11. Sharing with devices running older operating systems may not be possible.

Q: Can I use Nearby Sharing to share files with devices running other operating systems?

A: While Nearby Sharing is primarily designed for Windows 11 devices, it may be possible to share files with some Android devices. However, compatibility and functionality may vary.

Q: What is the maximum file size I can share using Nearby Sharing?

A: The maximum file size supported by Nearby Sharing is not explicitly defined. However, the actual size limit may vary depending on factors such as device storage space, network bandwidth, and file type.

Q: Can I use Nearby Sharing to share files over the internet?

A: No, Nearby Sharing is a local sharing feature. It requires both devices to be within close proximity and does not use the internet for file transfer.

Tips for Optimizing Nearby Sharing

  • Keep Devices Close: Ensure both devices are within close proximity for optimal performance.
  • Enable Bluetooth and Wi-Fi: Ensure both devices have Bluetooth and Wi-Fi enabled.
  • Check Network Connectivity: Verify that both devices are connected to the same Wi-Fi network.
  • Update Windows 11: Keep your Windows 11 operating system updated to the latest version for the best compatibility and performance.
  • Clear Obstacles: Remove any physical obstacles between the devices that might interfere with Bluetooth and Wi-Fi signals.

Conclusion

Nearby Sharing in Windows 11 provides a user-friendly and efficient method for sharing files between nearby devices. Its simplicity, security, versatility, and accessibility make it a valuable addition to the Windows ecosystem. By leveraging Bluetooth and Wi-Fi, Nearby Sharing offers a secure and convenient alternative to traditional file sharing methods, empowering users to share content locally with ease.

How to Enable and Use Nearby Sharing in Windows 11? 2024�� Seamless File Sharing: Google Nearby Share for Windows How To Use Nearby Sharing On Windows 11  digisrun
How to Use Nearby Sharing on Windows 11?  Gear Up Windows Nearby share for pc  nearby share windows 11  android to pc file transfer  how to use nearby Share Files Using Nearby Sharing In Windows 11 HTMD Blog
Nearby Share Windows 11 — Transfer Files Between Android to PC (2023) - YouTube How to Use Nearby Sharing on Windows 11?  Gear Up Windows

Closure

Thus, we hope this article has provided valuable insights into Seamlessly Sharing Files: Exploring Windows 11’s Nearby Sharing Feature. We hope you find this article informative and beneficial. See you in our next article!

Obstacles To Installing Windows 10: A Comprehensive Guide

Obstacles to Installing Windows 10: A Comprehensive Guide

Introduction

With great pleasure, we will explore the intriguing topic related to Obstacles to Installing Windows 10: A Comprehensive Guide. Let’s weave interesting information and offer fresh perspectives to the readers.

Obstacles to Installing Windows 10: A Comprehensive Guide

PPT - A Comprehensive Guide to Installing Windows 10_ Step-by-Step Tutorial PowerPoint

Windows 10, Microsoft’s latest operating system, offers a range of features and functionalities designed to enhance the user experience. However, encountering difficulties during the installation process is not uncommon. Understanding the potential obstacles and their solutions is crucial for a smooth transition to Windows 10.

Common Causes for Installation Issues:

1. Hardware Compatibility:

  • Processor: Windows 10 has specific processor requirements. Older systems might not meet the minimum specifications, leading to installation failure.
  • RAM: Insufficient RAM can significantly hinder the installation process and subsequent system performance.
  • Storage: The available storage space must be sufficient to accommodate the operating system files and user data. A minimum of 16GB is recommended.
  • Graphics Card: The graphics card must be compatible with Windows 10. Older systems may require driver updates or may not be compatible at all.

2. Boot Order and BIOS Settings:

  • Boot Order: The system’s boot order in the BIOS must prioritize the installation media (USB drive or DVD) to initiate the installation process.
  • Secure Boot: Some BIOS settings, like Secure Boot, might need to be disabled to allow for installation from a non-UEFI compatible media.
  • Legacy Mode: Older systems may require switching to Legacy Mode in the BIOS to install Windows 10.

3. Installation Media Integrity:

  • Corrupted Media: Damaged or corrupted installation media can prevent successful installation. It is crucial to verify the integrity of the media before attempting installation.
  • Incorrect Version: Using an incompatible version of Windows 10 (e.g., 32-bit on a 64-bit system) can result in installation failure.

4. Existing Operating System:

  • Conflicting Files: Pre-existing operating systems, especially older versions of Windows, can cause conflicts during the installation process.
  • Partitioning Errors: Incorrectly partitioned hard drives can hinder the installation.

5. Driver Issues:

  • Missing or Outdated Drivers: Windows 10 may not automatically install all necessary drivers, particularly for older hardware.

6. Network Connectivity:

  • Internet Access: Windows 10 installation may require internet access for driver downloads and activation.

7. System Errors:

  • Blue Screen of Death (BSOD): Encountering a BSOD during the installation process indicates a critical system error.
  • Error Messages: Specific error messages during installation provide valuable clues about the root cause of the problem.

Troubleshooting Steps:

1. Verify Hardware Compatibility:

  • Refer to the official Windows 10 system requirements to ensure your system meets the minimum specifications.

2. Check BIOS Settings:

  • Access the BIOS by pressing the appropriate key during system startup (often F2 or DEL).
  • Ensure the boot order prioritizes the installation media.
  • Verify the Secure Boot and Legacy Mode settings.

3. Validate Installation Media:

  • Use a reliable source to download the Windows 10 installation media.
  • Verify the integrity of the downloaded file using a checksum tool.
  • Consider creating a new bootable USB drive or DVD to rule out media corruption.

4. Prepare the Hard Drive:

  • Back up all important data before proceeding with the installation.
  • Consider formatting the target hard drive to ensure a clean installation.
  • If partitioning is necessary, use the Disk Management tool or a third-party partitioning software.

5. Troubleshoot Driver Issues:

  • Download and install the latest drivers for your hardware components.
  • Consult the manufacturer’s website for specific driver downloads.

6. Resolve Network Connectivity Problems:

  • Ensure a stable internet connection during the installation process.
  • If necessary, use a wired connection instead of Wi-Fi.

7. Address System Errors:

  • Note down any specific error messages encountered during the installation.
  • Search for solutions online or consult Microsoft support for assistance.

FAQs:

Q: Can I install Windows 10 on an older computer?

A: While Windows 10 can be installed on older systems, it is crucial to verify hardware compatibility. Older systems may not meet the minimum system requirements, and some features might not be fully supported.

Q: What if I encounter a blue screen of death (BSOD) during installation?

A: A BSOD indicates a critical system error. Try restarting the installation process. If the issue persists, consider running a memory test or checking for hardware issues.

Q: Why is my computer not recognizing the installation media?

A: Ensure the boot order in the BIOS prioritizes the installation media. Verify that the media is properly formatted and bootable.

Q: Can I install Windows 10 without an internet connection?

A: Windows 10 installation typically requires internet access for driver downloads and activation. However, you can use an offline installation method, which involves creating a bootable USB drive with all necessary files.

Q: What if I get an error message during installation?

A: Error messages provide valuable clues about the root cause of the problem. Search for solutions online or contact Microsoft support for assistance.

Tips for a Smooth Installation:

  • Back up all important data before proceeding with the installation.
  • Ensure a stable internet connection during the installation process.
  • Use a reliable source to download the Windows 10 installation media.
  • Verify the integrity of the downloaded files using a checksum tool.
  • Check the BIOS settings for boot order and compatibility.
  • Consult the manufacturer’s website for the latest drivers for your hardware.
  • Consider using a clean install to avoid potential conflicts.
  • If encountering issues, seek help from online forums or Microsoft support.

Conclusion:

Installing Windows 10 can be a straightforward process, but encountering obstacles is not uncommon. Understanding the potential causes of installation issues and implementing appropriate troubleshooting steps can significantly improve the likelihood of a successful installation. By carefully assessing hardware compatibility, verifying BIOS settings, and addressing driver and network connectivity issues, users can navigate the installation process with greater confidence and ensure a smooth transition to Windows 10.

3 Obstacles you Need to Clear when Upgrading to Windows 10  Upgrade to windows 10, Upgrade How to Install Windows 10: a Simple Step-by-Step Guide with Pictures Here's a step-by-step guide to installing Windows 10 - HardwareZone.com.my
The Ultimate Guide to Installing Windows 10 on a Fresh Hard Drive - Infetech.com  Tech News How To Download And Install Windows 10 Full Step By Step Gaming Pc  Images and Photos finder Installing Windows 10: A Comprehensive Guide - Enigma Scribes
Installing Windows 10 How to Install Windows 10: Step-by-Step Guide with Pictures

Closure

Thus, we hope this article has provided valuable insights into Obstacles to Installing Windows 10: A Comprehensive Guide. We appreciate your attention to our article. See you in our next article!

A Comprehensive Guide To Windows 11’s Nearby Share Feature

A Comprehensive Guide to Windows 11’s Nearby Share Feature

Introduction

In this auspicious occasion, we are delighted to delve into the intriguing topic related to A Comprehensive Guide to Windows 11’s Nearby Share Feature. Let’s weave interesting information and offer fresh perspectives to the readers.

A Comprehensive Guide to Windows 11’s Nearby Share Feature

How to Use Nearby Sharing on Windows 11

Windows 11 introduced a powerful new feature called Nearby Share, enabling users to seamlessly transfer files between compatible devices without relying on cloud services or external drives. This technology, inspired by similar features on Android and macOS, simplifies file sharing within a local network, making it a valuable tool for both individual users and collaborative environments.

Understanding Nearby Share

Nearby Share leverages Bluetooth and Wi-Fi to establish a direct connection between devices, allowing for swift file transfers. The process is remarkably simple: devices discover each other within proximity, facilitating the selection of files for transfer.

Key Benefits of Nearby Share

  1. Ease of Use: The user experience is intuitive and straightforward, requiring minimal technical expertise.
  2. Speed and Efficiency: Transfers are generally faster than cloud-based solutions, especially for larger files.
  3. Privacy and Security: Data remains within the local network, eliminating the need for third-party cloud services and minimizing potential security risks.
  4. Versatility: Nearby Share supports a wide range of file types, including documents, images, videos, and even applications.
  5. Cross-Platform Compatibility: The feature is not limited to Windows 11 devices. Users can share files with Android devices equipped with Nearby Share functionality.

Enabling and Configuring Nearby Share

To utilize Nearby Share, users need to ensure their device meets the following requirements:

  • Windows 11: The feature is built into Windows 11 and requires no separate download.
  • Bluetooth and Wi-Fi: Both technologies must be enabled on the sending and receiving devices.
  • Nearby Share Enabled: The feature needs to be activated within the Windows settings.

To enable Nearby Share:

  1. Open the Windows Settings application.
  2. Navigate to System > Shared experiences.
  3. Toggle Nearby Share to On.
  4. Configure the desired settings, such as device visibility and the types of files to share.

Using Nearby Share for File Transfer

Once Nearby Share is enabled, transferring files is a simple process:

  1. Select the file(s) you wish to share.
  2. Right-click on the selected files and choose "Share."
  3. Select the receiving device from the list of available devices.
  4. The receiving device will prompt the user to accept the transfer.
  5. Once accepted, the files will be transferred to the receiving device.

Troubleshooting Nearby Share Issues

While Nearby Share is generally reliable, users may encounter occasional issues. Common troubleshooting steps include:

  • Ensuring Bluetooth and Wi-Fi are enabled.
  • Checking for available updates for both devices.
  • Restarting both devices.
  • Temporarily disabling firewalls or antivirus software.
  • Verifying the receiving device is within range.
  • Restarting the Nearby Share service within the Windows settings.

Exploring Advanced Features

Nearby Share offers additional functionalities beyond basic file transfers:

  • Sharing to Multiple Devices: Users can simultaneously share files to multiple devices within range.
  • Sharing with Specific Devices: Users can select specific devices to receive files, ensuring targeted sharing.
  • Password Protection: For sensitive files, users can set a password to restrict access.
  • Sharing with Nearby PCs: The feature allows users to share files with other Windows 11 devices directly, bypassing the need for cloud storage or external drives.

FAQs Regarding Nearby Share

Q: Is Nearby Share compatible with older versions of Windows?

A: No, Nearby Share is exclusive to Windows 11.

Q: Can I share files with iOS devices?

A: Currently, Nearby Share does not support direct file sharing with iOS devices.

Q: Is Nearby Share secure?

A: Nearby Share uses Bluetooth and Wi-Fi to establish a direct connection, minimizing the risk of unauthorized access.

Q: What is the maximum file size I can share?

A: There is no specific file size limit, but the speed and success of the transfer may depend on the network connection and file size.

Q: Can I use Nearby Share to transfer files over the internet?

A: No, Nearby Share requires both devices to be within the same local network.

Tips for Optimizing Nearby Share

  • Maintain a Strong Wi-Fi Connection: A stable internet connection can significantly improve transfer speeds.
  • Keep Devices Updated: Regular software updates ensure optimal performance and compatibility.
  • Use a Password for Sensitive Files: Adding a password to sensitive files enhances security.
  • Check for Device Compatibility: Ensure both devices support Nearby Share and are within range.
  • Explore Advanced Settings: Utilize features like device visibility and file type selection to optimize your experience.

Conclusion

Windows 11’s Nearby Share feature provides a convenient and efficient method for transferring files between compatible devices within a local network. Its ease of use, speed, privacy, and cross-platform compatibility make it a valuable tool for both personal and professional use. As technology advances, we can expect further refinements and enhancements to Nearby Share, solidifying its position as a crucial component of modern file sharing solutions.

How to Enable Nearby Sharing in Windows 11?  Gear up Windows 11 & 10 How to Use Nearby Sharing on Windows 11?  Gear Up Windows How to use Window 11’s Nearby Sharing feature  LaptrinhX / News
How to Use Nearby Sharing on Windows 11?  Gear Up Windows How To Use Nearby Share In Windows 11_best Methods - Rayabaan How to enable Nearby Sharing feature in Windows 11  iThinkDifferent
How to Enable Nearby Sharing in Windows 11?  Gear Up Windows Nearby Share Not Working on Windows 11? Try These Proven Solutions

Closure

Thus, we hope this article has provided valuable insights into A Comprehensive Guide to Windows 11’s Nearby Share Feature. We thank you for taking the time to read this article. See you in our next article!

The Recycle Bin: A Vital Component Of Windows 10’s Data Management

The Recycle Bin: A Vital Component of Windows 10’s Data Management

Introduction

With great pleasure, we will explore the intriguing topic related to The Recycle Bin: A Vital Component of Windows 10’s Data Management. Let’s weave interesting information and offer fresh perspectives to the readers.

The Recycle Bin: A Vital Component of Windows 10’s Data Management

We answer: What is Recycle Bin in Windows 10 and how to use it?

In the digital landscape, data is constantly in motion. Files are created, modified, and deleted, leaving a trail of information that requires careful management. Windows 10, with its intuitive interface and robust functionalities, provides a user-friendly system for handling data, and the Recycle Bin stands as a crucial element in this ecosystem.

The Recycle Bin, a seemingly simple icon on the desktop, serves as a temporary holding area for deleted files. This seemingly mundane function holds profound implications for data recovery, preventing accidental data loss and promoting responsible file management practices.

Understanding the Mechanics of the Recycle Bin

When a user deletes a file, it is not immediately erased from the hard drive. Instead, it is moved to the Recycle Bin, where it remains accessible for a period of time. This temporary storage allows users to retrieve accidentally deleted files, mitigating the risk of permanent data loss.

The Recycle Bin operates on a simple principle: it acts as a buffer between the user’s actions and the permanent deletion of files. This buffer zone provides a safety net for users, enabling them to undo their actions and retrieve essential data.

Exploring the Benefits of the Recycle Bin

The Recycle Bin’s seemingly simple functionality offers numerous benefits, enhancing data management and user experience within Windows 10.

1. Accidental Data Recovery: The primary function of the Recycle Bin is to prevent accidental data loss. Users often delete files unintentionally, either due to a slip of the finger or a misunderstanding of the deletion process. The Recycle Bin acts as a safety net, allowing users to retrieve these files before they are permanently removed from the system.

2. Data Recovery for Specific Scenarios: The Recycle Bin is not limited to recovering accidentally deleted files. It can also be used to recover files that were deleted due to unforeseen circumstances, such as a system crash or a virus infection. By restoring files from the Recycle Bin, users can minimize data loss and maintain the integrity of their digital information.

3. Efficient Storage Management: The Recycle Bin plays a vital role in managing storage space on a computer. By holding deleted files temporarily, the Recycle Bin allows users to reclaim space on their hard drive without permanently deleting valuable information. This temporary storage system ensures that data is not lost while allowing users to manage their storage space effectively.

4. Enhanced File Management Practices: The Recycle Bin encourages users to adopt responsible file management practices. By providing a mechanism for recovering deleted files, the Recycle Bin promotes a cautious approach to file deletion, minimizing the risk of data loss and fostering a sense of control over digital information.

Addressing Common Concerns and FAQs

1. What Happens to Files Once They are Deleted from the Recycle Bin?

Once a file is permanently deleted from the Recycle Bin, it is removed from the hard drive and can no longer be recovered using standard methods. However, specialized data recovery software may be able to retrieve deleted files under certain circumstances.

2. How Large is the Recycle Bin and Can Its Size Be Adjusted?

The size of the Recycle Bin is determined by the available space on the hard drive. It can be adjusted manually by accessing the Recycle Bin properties. Users can set a maximum size for the Recycle Bin, ensuring that it does not consume excessive storage space.

3. Can the Recycle Bin be Emptied Permanently?

Yes, the Recycle Bin can be emptied permanently by selecting the "Empty Recycle Bin" option. This action permanently deletes all files stored in the Recycle Bin, making them unrecoverable.

4. How Can I Recover Files Deleted from the Recycle Bin?

Once a file is permanently deleted from the Recycle Bin, recovering it using standard methods is impossible. However, specialized data recovery software can be used to retrieve deleted files under certain circumstances.

Tips for Utilizing the Recycle Bin Effectively

1. Empty the Recycle Bin Regularly: It is recommended to empty the Recycle Bin regularly to free up storage space and prevent the accumulation of unnecessary files.

2. Adjust the Recycle Bin Size: Users can adjust the maximum size of the Recycle Bin to ensure that it does not consume excessive storage space.

3. Use the "Restore" Option: When recovering accidentally deleted files, use the "Restore" option to return the files to their original location.

4. Understand the Difference Between "Delete" and "Empty Recycle Bin": It is important to understand the difference between deleting a file and emptying the Recycle Bin. Deleting a file moves it to the Recycle Bin, while emptying the Recycle Bin permanently removes all files from the temporary storage.

5. Consider Using Data Recovery Software: In cases of accidental data loss, specialized data recovery software can be used to retrieve deleted files, even after they have been permanently removed from the Recycle Bin.

Conclusion: The Recycle Bin: A Cornerstone of Data Management

The Recycle Bin, seemingly a simple icon on the desktop, plays a vital role in data management within Windows 10. It serves as a safety net for users, preventing accidental data loss and promoting responsible file management practices. By understanding the mechanics and benefits of the Recycle Bin, users can effectively manage their digital information, minimize data loss, and maximize the efficiency of their computing experience.

Windows 10 Recycle Bin: All the Things You Need to Know How To Get Help In Windows Recycle Bin – Lates Windows 10 Update Recycle bin windows 10 - fiaceto
Restore deleted files windows 10 recycle bin - topnav The Windows 10 Recycle Bin: All you need to know  Digital Citizen Change Recycle Bin Settings In Windows 10  deskgeek
Empty Recycle Bin automatically in Windows 10 Windows 10 recycling Bin evolution - WindowsChimp

Closure

Thus, we hope this article has provided valuable insights into The Recycle Bin: A Vital Component of Windows 10’s Data Management. We thank you for taking the time to read this article. See you in our next article!