Navigating The Digital Landscape: A Comprehensive Guide To Utilizing O Kam App On PC
Navigating the Digital Landscape: A Comprehensive Guide to Utilizing o Kam App on PC
Related Articles: Navigating the Digital Landscape: A Comprehensive Guide to Utilizing o Kam App on PC
Introduction
In this auspicious occasion, we are delighted to delve into the intriguing topic related to Navigating the Digital Landscape: A Comprehensive Guide to Utilizing o Kam App on PC. Let’s weave interesting information and offer fresh perspectives to the readers.
Table of Content
Navigating the Digital Landscape: A Comprehensive Guide to Utilizing o Kam App on PC

The digital age has ushered in an era of interconnectedness, fostering an environment where information and communication flow seamlessly. This has led to the emergence of numerous applications designed to simplify and enhance our digital experiences. Among these, o Kam app stands out as a versatile tool that bridges the gap between the virtual and physical worlds, enabling users to seamlessly interact with their devices.
This article aims to provide a comprehensive guide to o Kam app for PC, exploring its features, functionalities, and potential applications. It will delve into the app’s importance in navigating the digital landscape, highlighting its benefits and addressing common queries.
Understanding the Essence of o Kam App
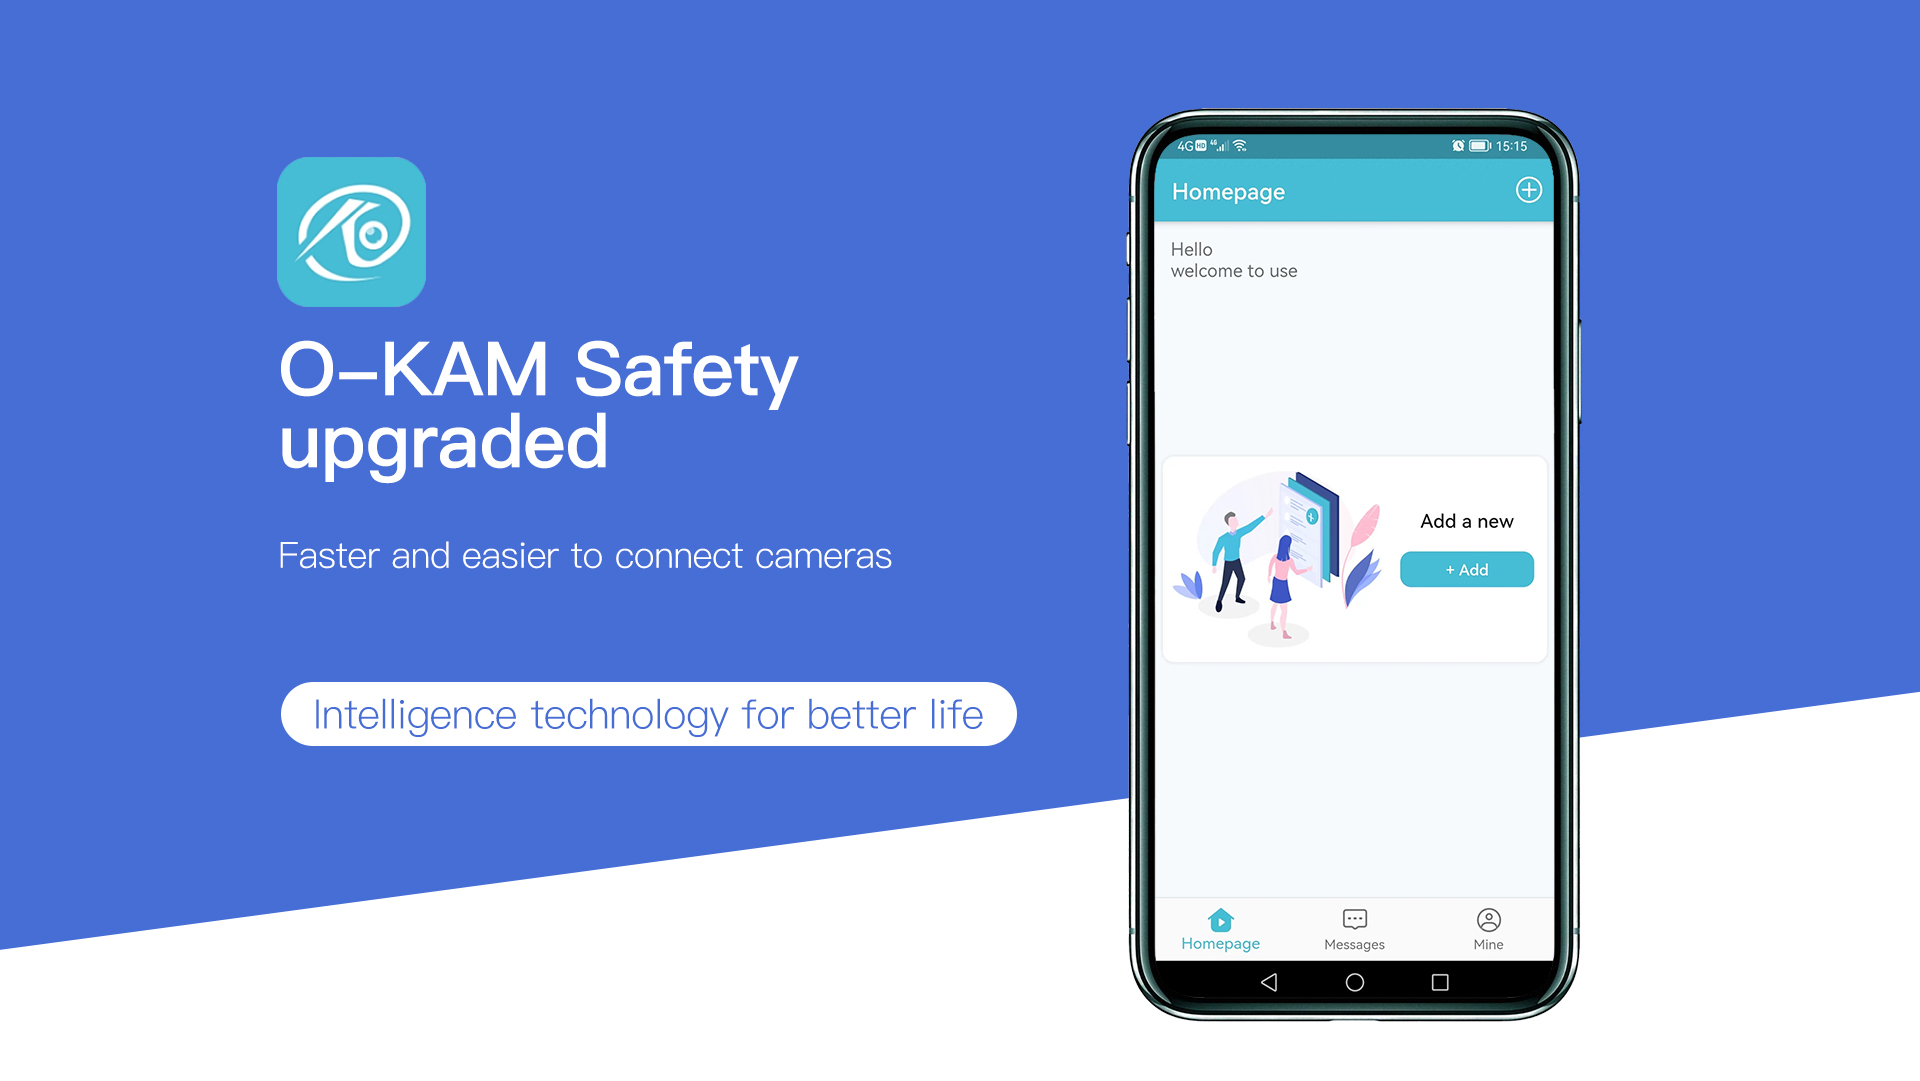
o Kam app is a multifaceted software application designed to enhance user interaction with their computers. It acts as a bridge between the physical world and the digital realm, allowing users to control their PCs using various input methods. This includes:
- Mouse and Keyboard Emulation: o Kam app replicates the functionality of a traditional mouse and keyboard, enabling users to control their PCs remotely or through alternative input devices.
- Gesture Recognition: The app supports gesture-based input, allowing users to interact with their PCs using natural hand movements. This can be particularly useful for individuals with limited mobility or those seeking a more intuitive control interface.
- Voice Control: o Kam app incorporates voice recognition technology, enabling users to control their PCs using spoken commands. This feature is highly beneficial for individuals with visual impairments or those seeking hands-free operation.
Benefits of Utilizing o Kam App on PC
The versatility of o Kam app makes it a valuable tool for a wide range of users. Its benefits extend beyond mere convenience, offering accessibility and efficiency enhancements that can significantly improve the user experience.
- Accessibility: o Kam app provides a gateway to technology for individuals with physical limitations. By enabling control through alternative input methods, it empowers users who might otherwise struggle to interact with traditional computer interfaces.
- Enhanced Productivity: The app’s gesture recognition and voice control features can boost productivity by streamlining workflows. Users can perform tasks, navigate applications, and manage files with greater ease and efficiency.
- Improved User Experience: o Kam app’s intuitive interface and customizable settings provide a personalized and user-friendly experience. Users can tailor the app to their specific needs and preferences, creating a more comfortable and efficient workflow.
- Multi-Device Compatibility: o Kam app supports a wide range of devices, including smartphones, tablets, and game controllers. This flexibility allows users to control their PCs from various locations and using different input methods.
Navigating the Installation and Configuration Process
Installing and configuring o Kam app on your PC is a straightforward process. The app is readily available for download from reputable sources, and the installation process is typically user-friendly. Once installed, users can access a comprehensive set of configuration options, allowing them to personalize the app’s functionality to meet their specific needs.
Frequently Asked Questions (FAQs) about o Kam App
Q1: Is o Kam app compatible with all PC operating systems?
A: While o Kam app strives to maintain compatibility with a wide range of operating systems, specific versions may have varying degrees of support. It’s advisable to check the app’s official website or documentation for the latest compatibility information.
Q2: Does o Kam app require any special hardware?
A: o Kam app generally works with standard PC hardware. However, features like gesture recognition may require a webcam or other compatible input devices. The app’s documentation will provide details on specific hardware requirements.
Q3: Is o Kam app secure?
A: Like any software application, security is a paramount concern. o Kam app is designed with security in mind, employing standard security measures to protect user data and privacy. However, it’s always prudent to download the app from trusted sources and keep it updated with the latest security patches.
Q4: Can I use o Kam app for gaming?
A: While o Kam app can be used for gaming, its primary focus is on general PC control. For specific gaming requirements, dedicated gaming controllers or other specialized software might be more suitable.
Tips for Optimizing o Kam App Usage
- Experiment with Different Input Methods: Explore the various input methods offered by o Kam app to find the one that best suits your needs and preferences.
- Customize Settings: Utilize the app’s configuration options to personalize settings and tailor the app to your specific requirements.
- Familiarize Yourself with Keyboard Shortcuts: Learn common keyboard shortcuts to enhance your efficiency and streamline your workflows.
- Stay Updated: Regularly check for app updates to ensure you have the latest features and security enhancements.
Conclusion
o Kam app for PC emerges as a versatile and valuable tool in the digital landscape, empowering users to interact with their computers in innovative ways. Its ability to bridge the gap between the physical and digital realms makes it an invaluable asset for individuals seeking accessibility, productivity enhancements, and a more intuitive user experience. By understanding the app’s features, benefits, and potential applications, users can unlock a world of possibilities and navigate the digital world with greater ease and efficiency.


Closure
Thus, we hope this article has provided valuable insights into Navigating the Digital Landscape: A Comprehensive Guide to Utilizing o Kam App on PC. We hope you find this article informative and beneficial. See you in our next article!


![How to Fix: No Sound After Windows 10/11 Update - Sound Missing 2024 [Solved] - YouTube](https://i.ytimg.com/vi/tvjynf0zMG8/maxresdefault.jpg)


![How to Fix Windows 10 Audio Sound Problems [3 Solutions] - YouTube](https://i.ytimg.com/vi/rtPf5igHNn8/maxresdefault.jpg)

:max_bytes(150000):strip_icc()/Addbluetooth-28829cf9d400427dab372c0a2a92e95e.jpg)


![No Audio Output Device Is Installed in Windows 10 Fix [Working] - YouTube](https://i.ytimg.com/vi/AyxN6qURKdA/maxresdefault.jpg)


:max_bytes(150000):strip_icc()/0011_customize-windows-11-5196410-619a7567f6cd4dfc89a7c1783dc36250.jpg)

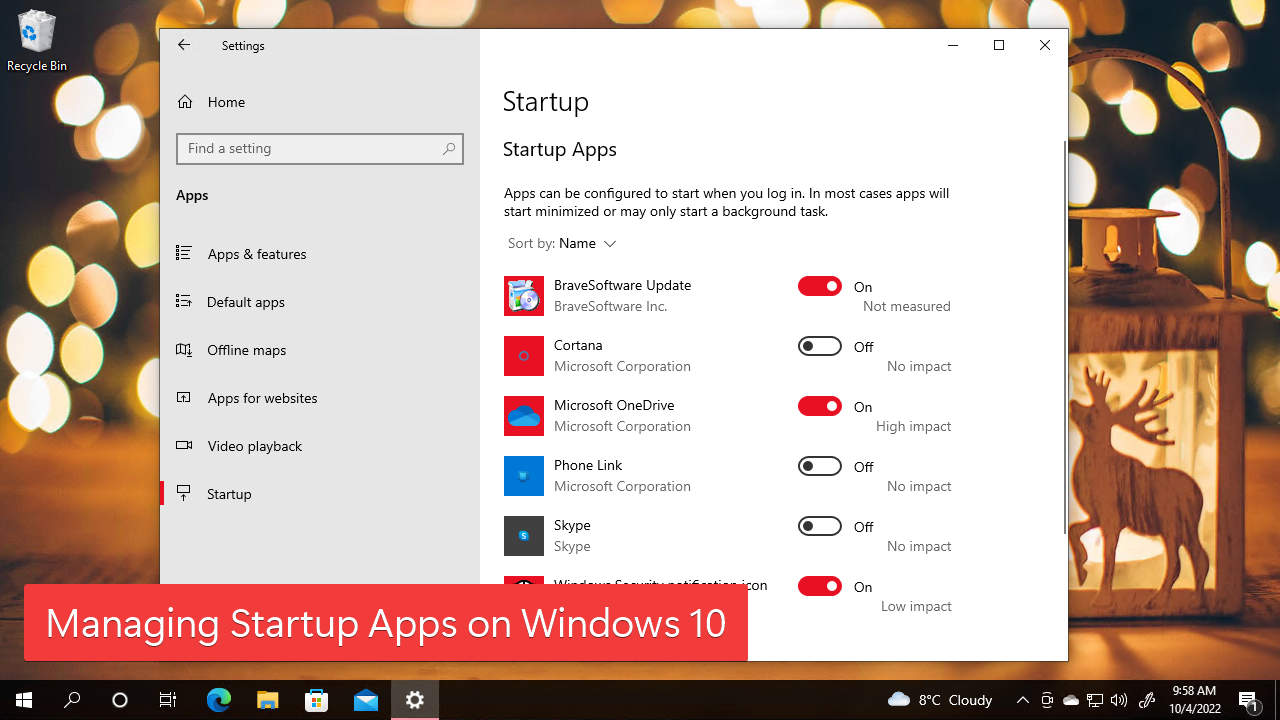
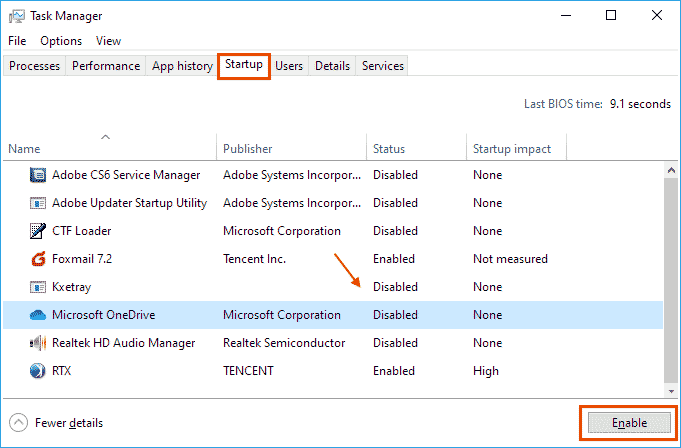
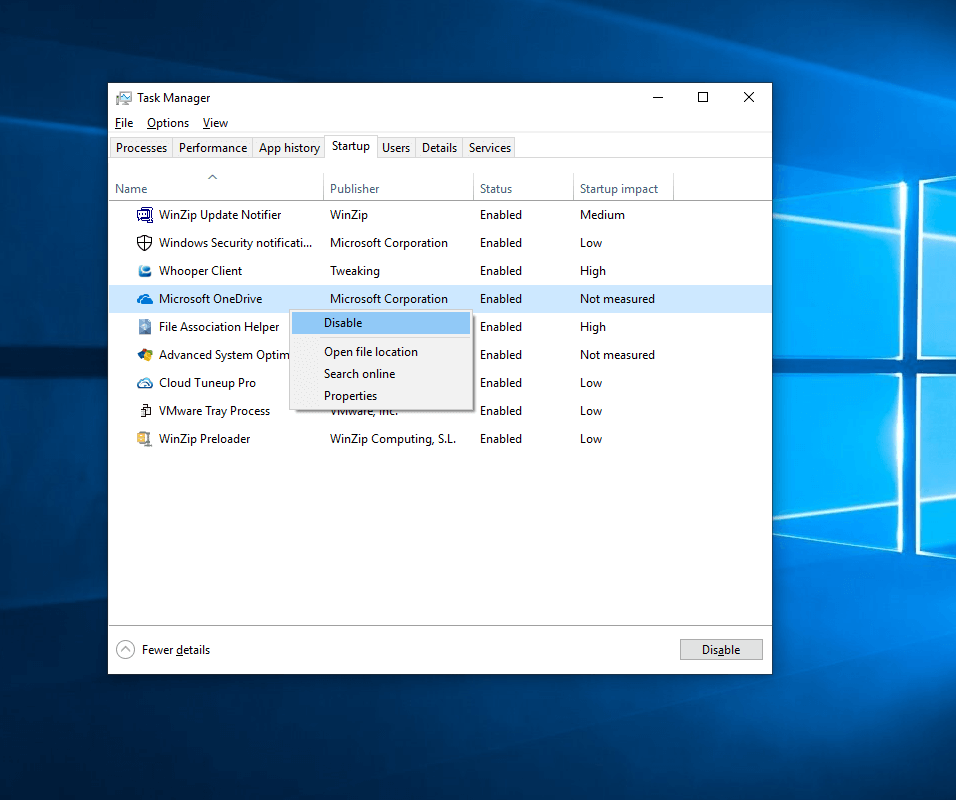
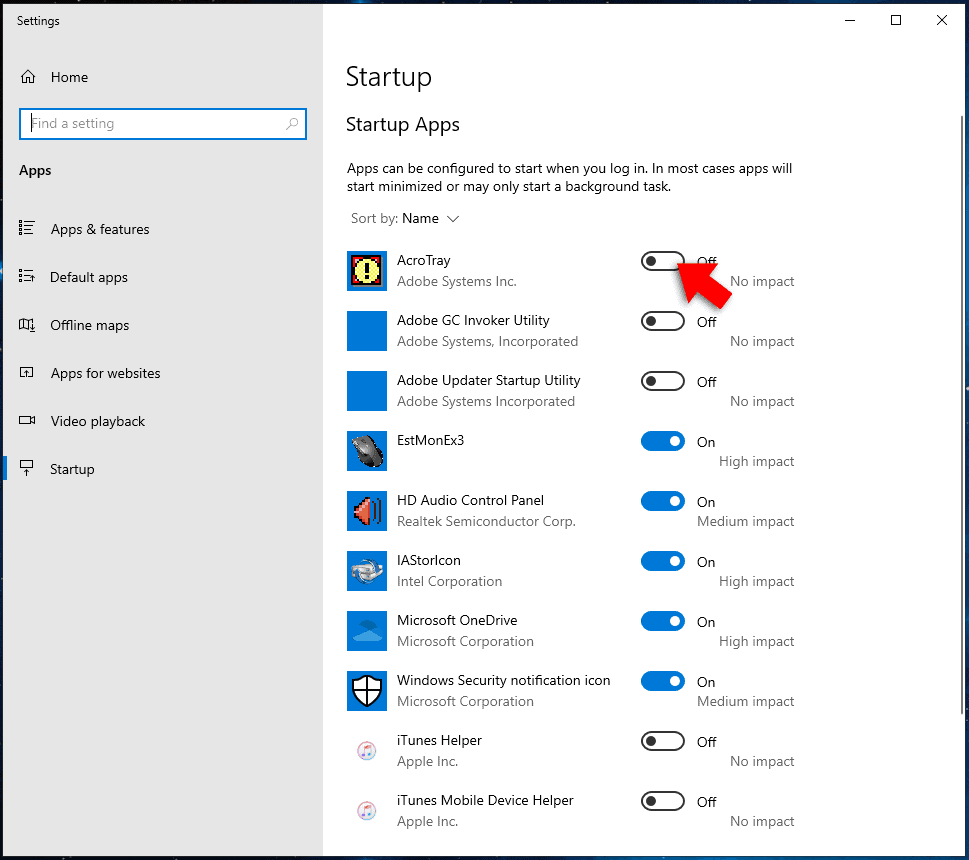
![How to Manage Startup Programs in Windows 10 [Tutorial]](https://consumingtech.com/wp-content/uploads/2017/07/Startup-status-enabled-1024x597.png)