Archives 2023

A Window To The World: Exploring The Significance Of Official Windows 10 Wallpapers

A Window to the World: Exploring the Significance of Official Windows 10 Wallpapers

Introduction

With enthusiasm, let’s navigate through the intriguing topic related to A Window to the World: Exploring the Significance of Official Windows 10 Wallpapers. Let’s weave interesting information and offer fresh perspectives to the readers.

A Window to the World: Exploring the Significance of Official Windows 10 Wallpapers

Windows 10 official wallpaper 9 - Windows 10 Wallpaper (39400452) - Fanpop

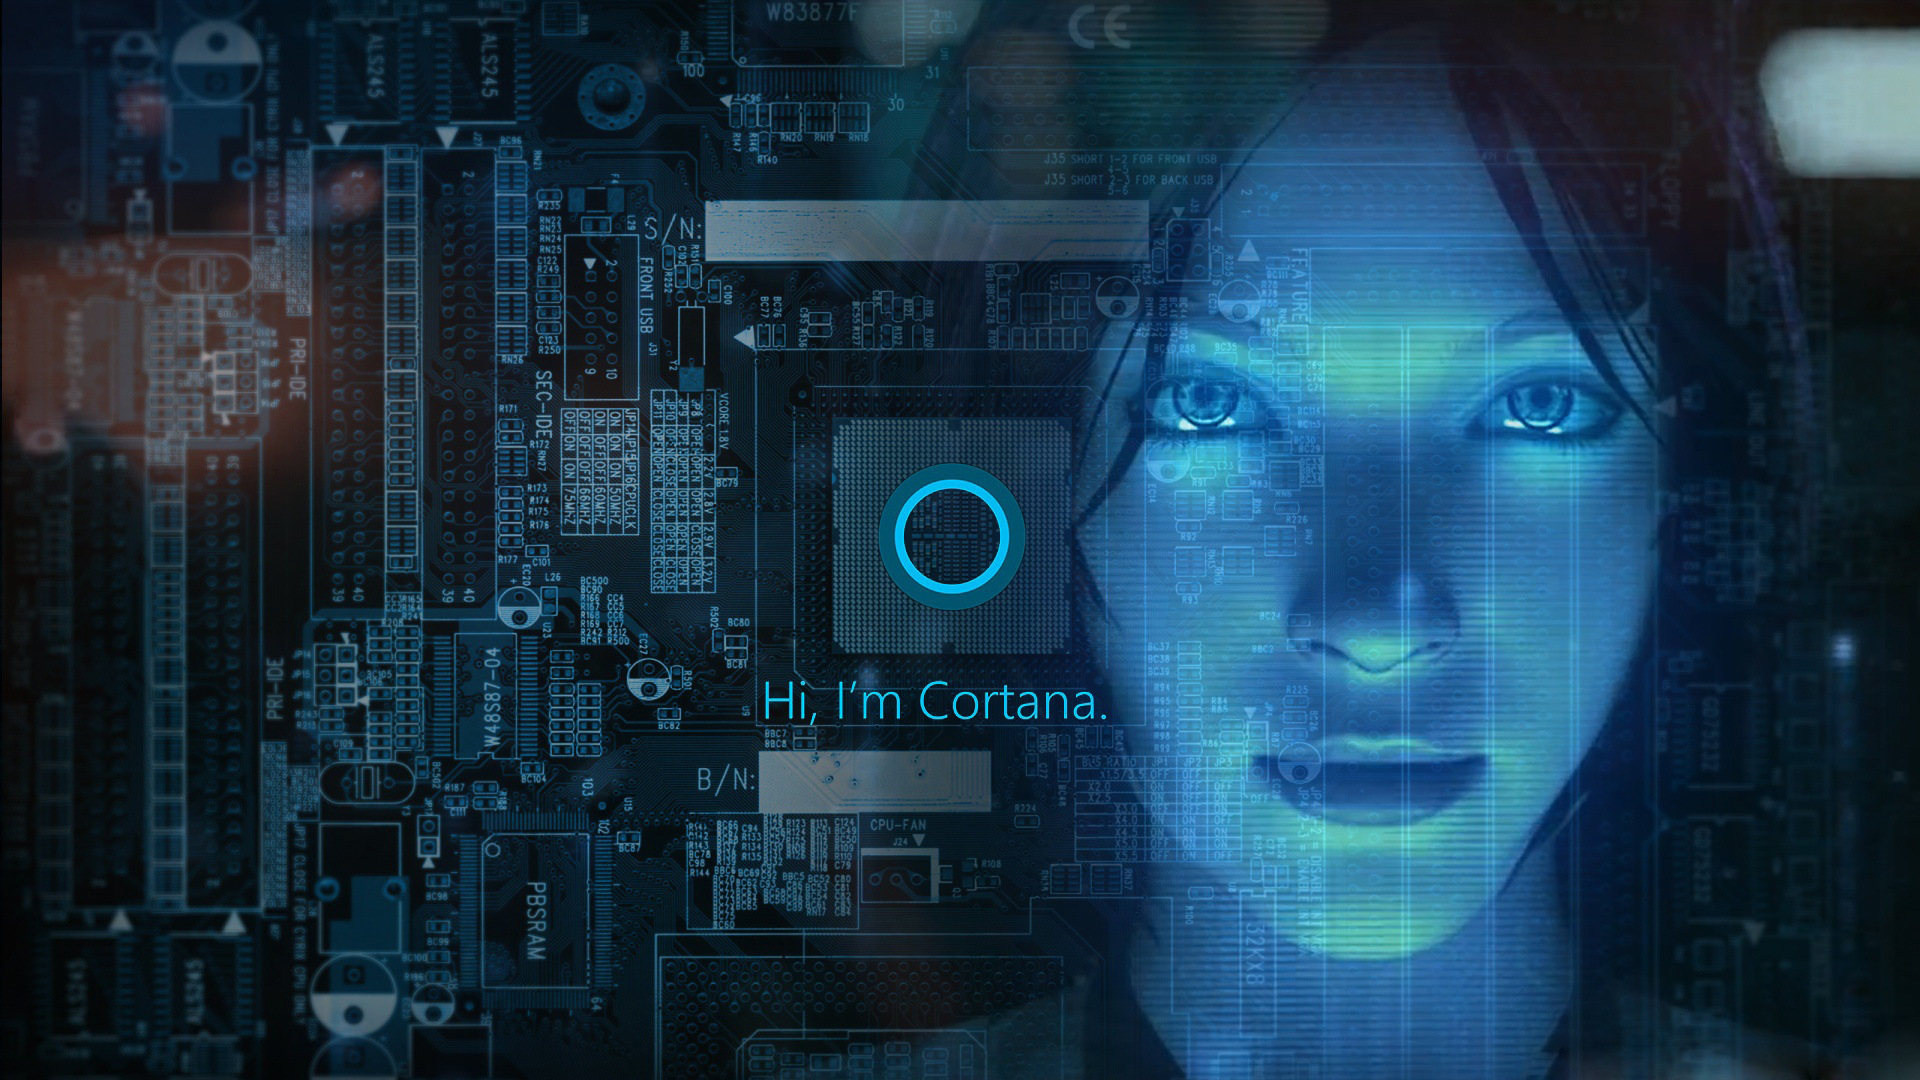
The Windows 10 operating system, with its user-friendly interface and robust functionalities, has become an integral part of the digital landscape. Beyond its core features, however, lies a subtle yet powerful element that contributes to the overall user experience โ€“ the official wallpapers. These seemingly simple images play a significant role in shaping the visual identity of Windows 10, influencing user perception and creating a distinct aesthetic.

The Evolution of Windows Wallpapers: From Simple to Sophisticated

The history of Windows wallpapers is a reflection of evolving design philosophies and technological advancements. Early versions of Windows featured rudimentary patterns and basic graphics. As technology matured, wallpapers evolved to incorporate more complex imagery, mirroring the increasing sophistication of the operating system itself.

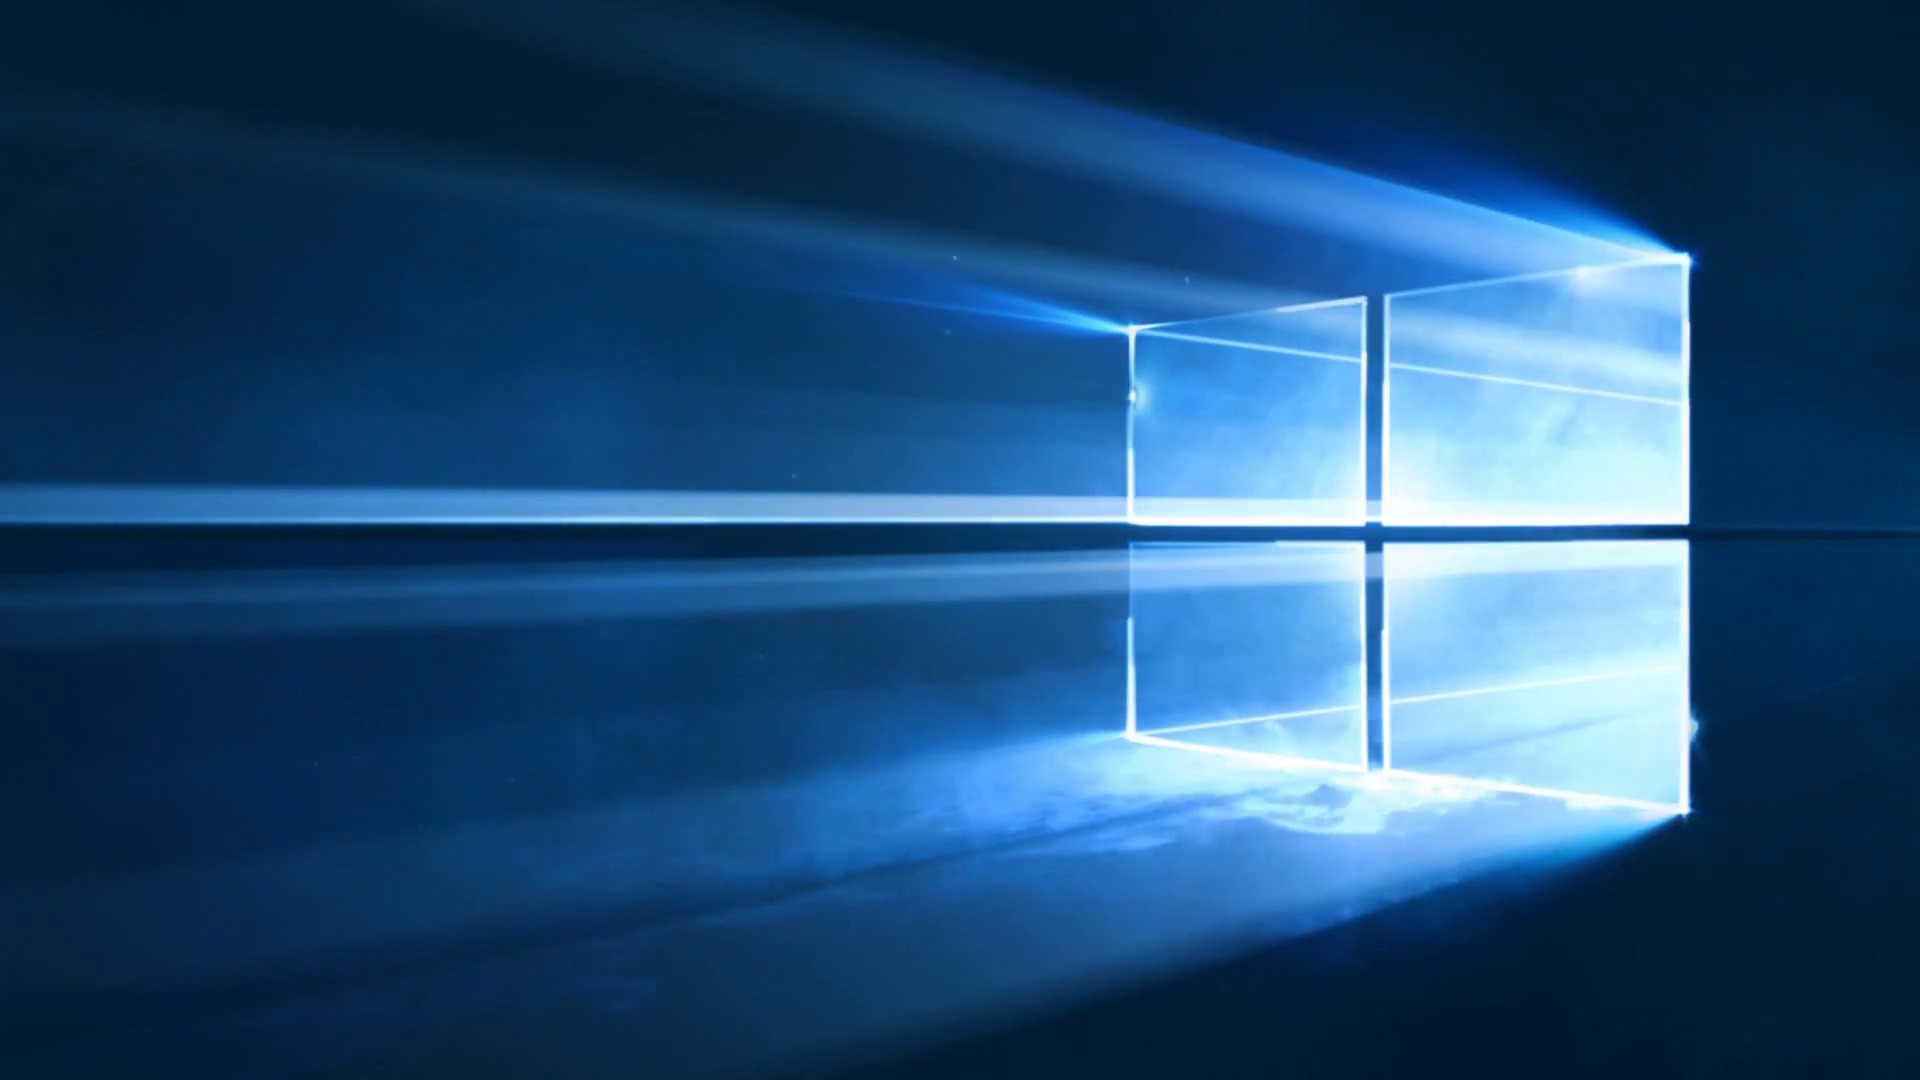
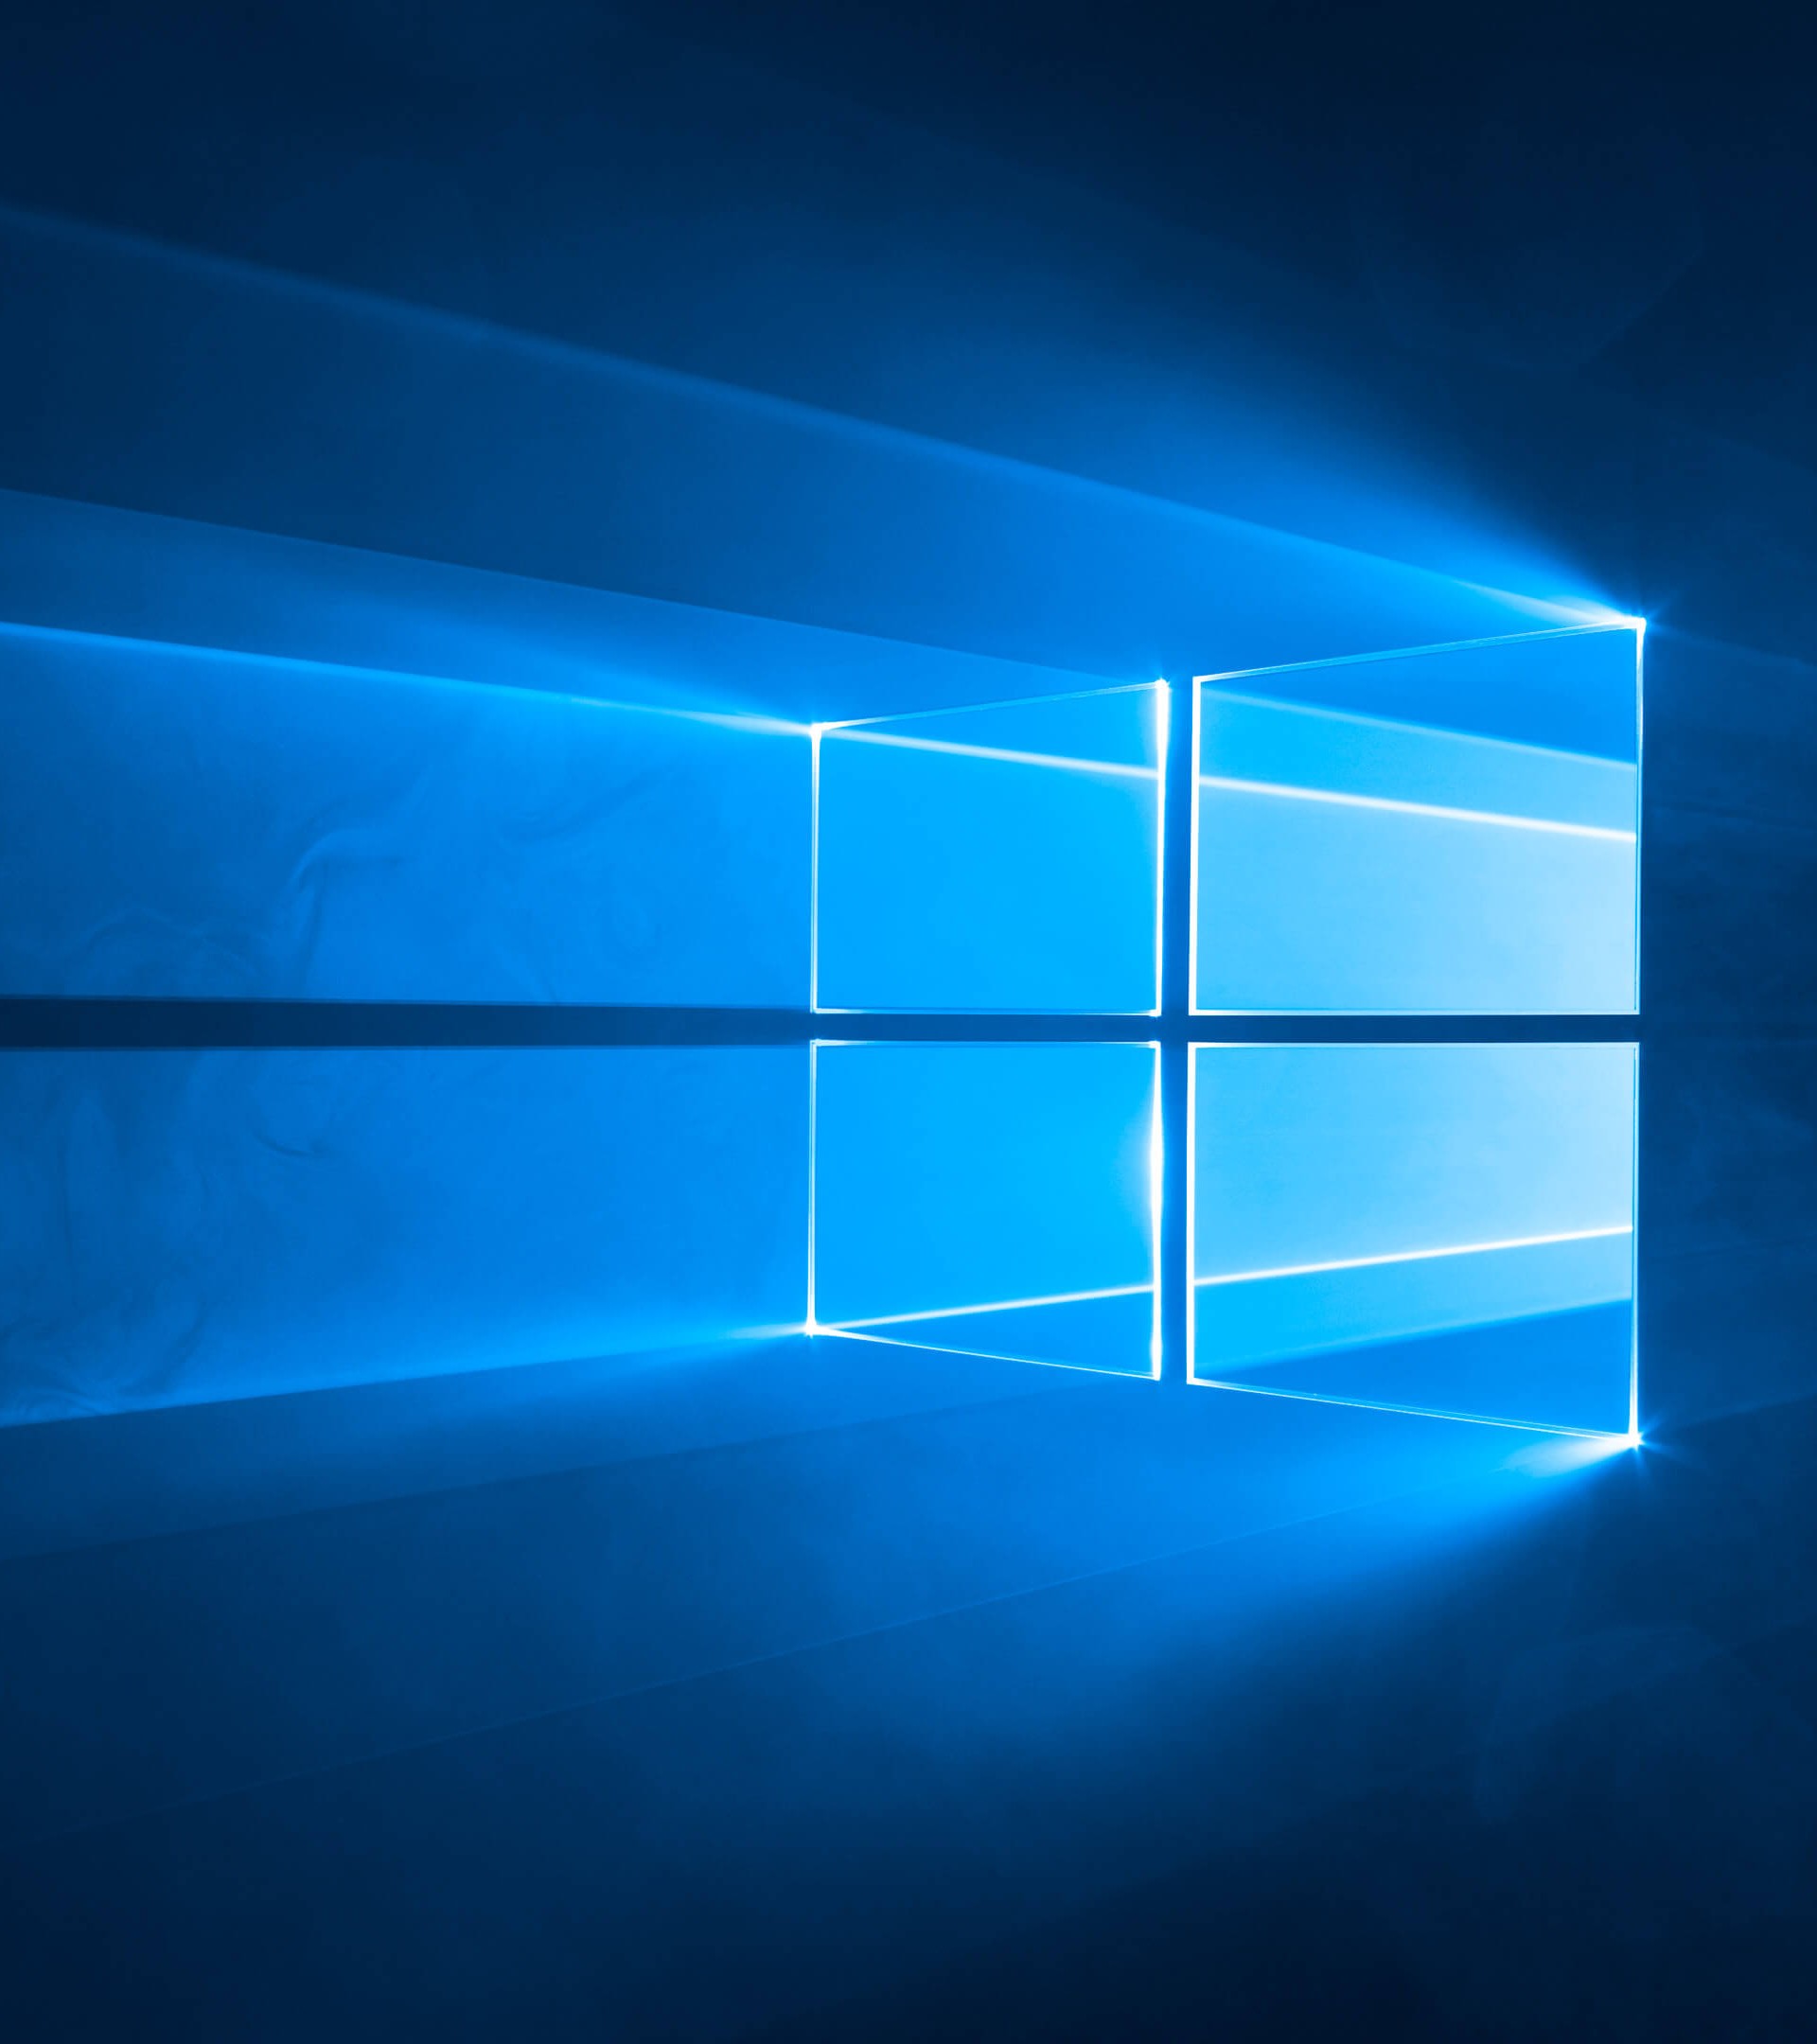
The transition to Windows 10 marked a paradigm shift in the approach to wallpaper design. Gone were the days of generic, static images. Instead, Microsoft introduced a curated collection of high-resolution, visually captivating wallpapers that captured the essence of the Windows 10 experience. These wallpapers are not merely decorative elements; they are carefully chosen to evoke specific emotions, enhance user engagement, and reflect the core values of the operating system.

The Importance of Official Windows 10 Wallpapers

Official Windows 10 wallpapers serve multiple purposes, extending beyond mere aesthetics. They are integral to the user experience in the following ways:

  • Setting the Tone: Wallpapers act as the first visual impression of the operating system. They set the tone for the overall user experience, influencing the perceived mood and ambiance of the desktop environment. A vibrant, dynamic wallpaper can energize the user, while a serene, minimalist design can promote focus and productivity.

  • Reflecting Brand Identity: Official Windows 10 wallpapers are carefully crafted to reflect the brand identity of Microsoft. They often feature elements that are synonymous with the company’s values, such as innovation, creativity, and user-centricity. This consistency in visual language reinforces brand recognition and strengthens the connection between users and the operating system.

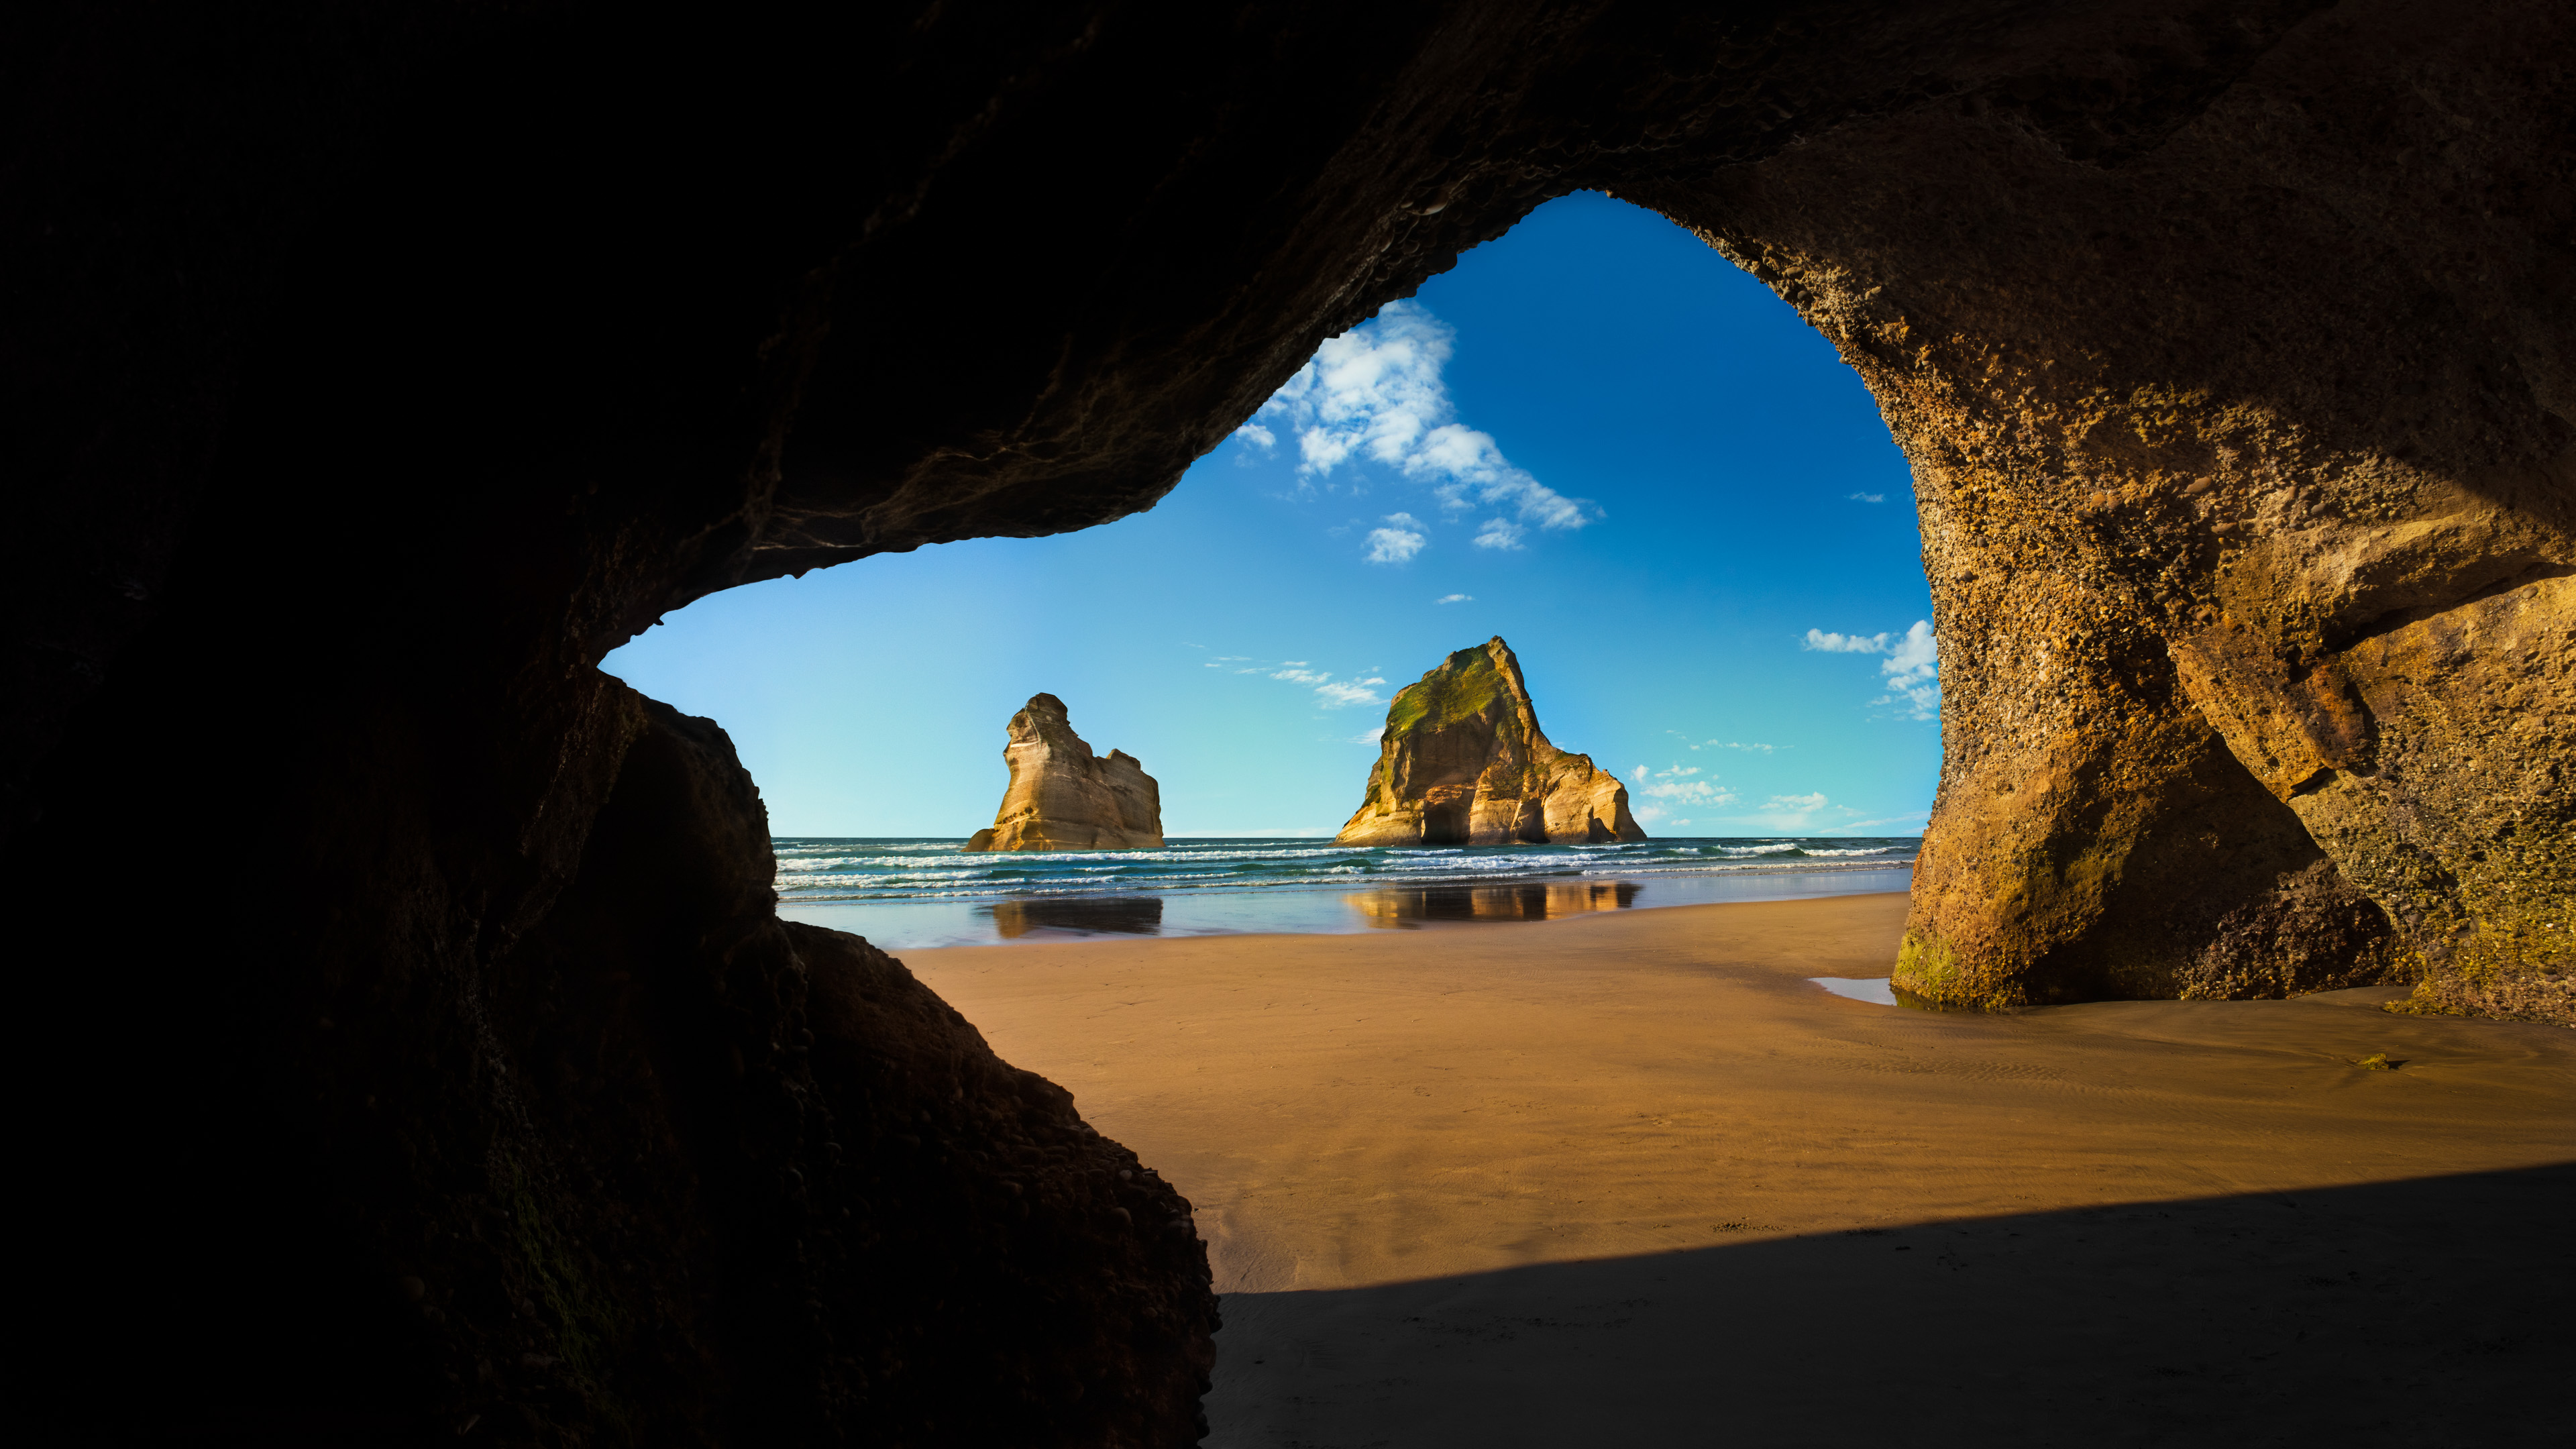
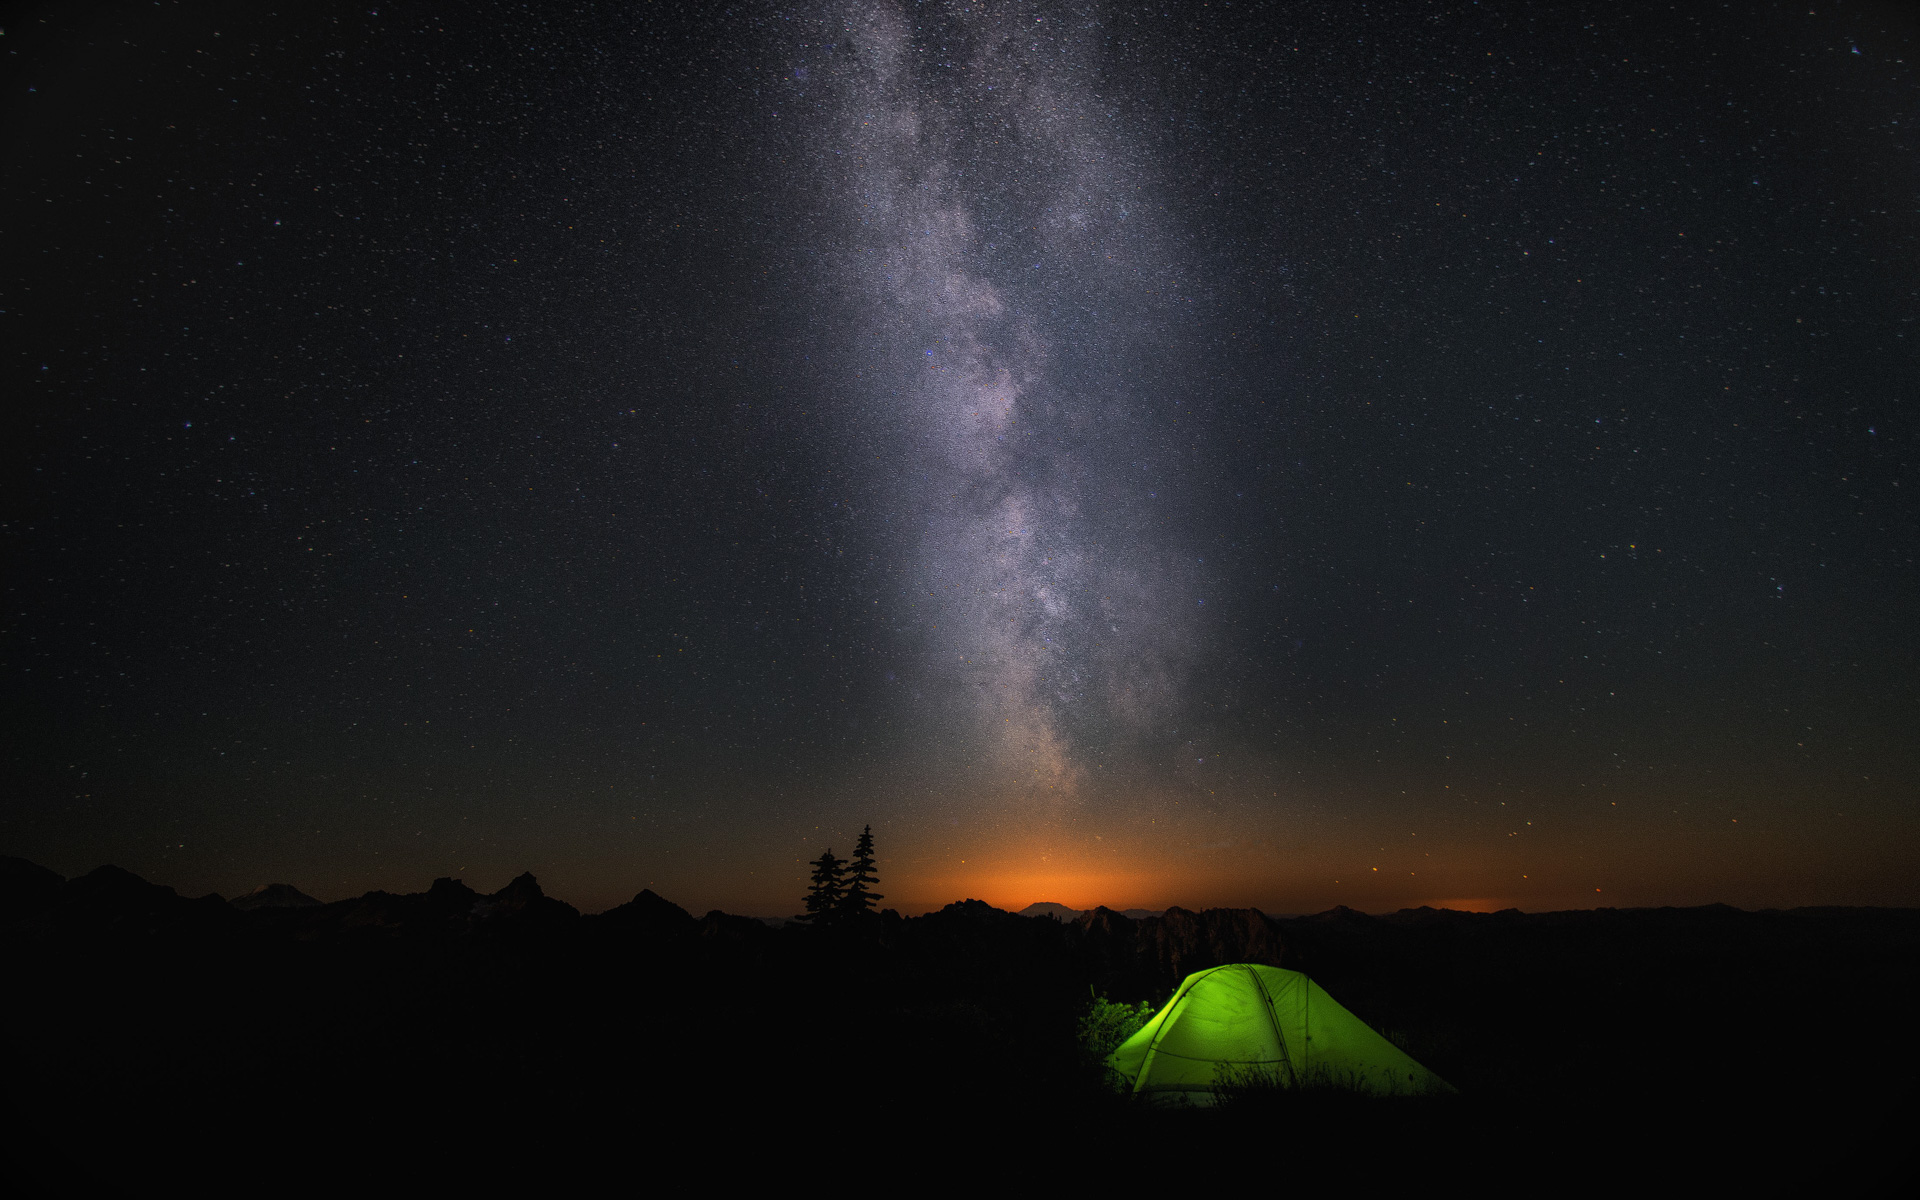
  • Providing a Sense of Place: Many official Windows 10 wallpapers feature breathtaking landscapes, captivating cityscapes, or abstract designs. These images transport users to different locations and evoke a sense of place, fostering a connection to the wider world beyond the screen.

  • Enhancing User Engagement: Visually appealing wallpapers can enhance user engagement with the operating system. They provide a sense of personalization and allow users to customize their desktop environment to reflect their individual preferences. This level of engagement can lead to a more positive user experience and foster a sense of ownership over the operating system.

  • Promoting Exploration and Discovery: Official Windows 10 wallpapers often showcase a diverse range of themes and styles. This encourages users to explore different visual aesthetics and discover new perspectives. This process of exploration can spark creativity and inspire users to personalize their desktops further.

Frequently Asked Questions (FAQs)

Q: Where can I find official Windows 10 wallpapers?

A: Official Windows 10 wallpapers are typically included with the operating system itself. They can also be downloaded from the Microsoft website or the Windows Store.

Q: Can I use my own images as wallpapers?

A: Absolutely. Windows 10 allows users to personalize their desktops with their own images. This provides greater flexibility and allows users to express their individual preferences.

Q: Are there any specific guidelines for choosing a wallpaper?

A: While there are no strict guidelines, it is generally recommended to choose wallpapers that are visually appealing, high-resolution, and appropriate for the intended use.

Q: How often are official Windows 10 wallpapers updated?

A: Microsoft regularly updates its collection of official Windows 10 wallpapers. New wallpapers are typically released alongside major operating system updates or seasonal events.

Tips for Choosing and Using Official Windows 10 Wallpapers

  • Consider your work environment: If you use your computer primarily for work, choose a wallpaper that promotes focus and productivity. Minimalist designs or calming landscapes can be effective choices.

  • Experiment with different styles: Explore the diverse collection of official Windows 10 wallpapers and experiment with different themes and aesthetics. This allows you to discover what works best for you and your personal preferences.

  • Use high-resolution images: Ensure that the wallpapers you choose are high-resolution to avoid pixelation or blurry images on your screen.

  • Adjust the wallpaper settings: Windows 10 provides a range of customization options for wallpapers, such as adjusting the brightness, contrast, and tiling settings. Experiment with these options to find the optimal look for your desktop.

Conclusion

Official Windows 10 wallpapers are more than just decorative elements. They are carefully curated images that play a significant role in shaping the user experience, reflecting brand identity, and promoting engagement with the operating system. By understanding the importance of these wallpapers, users can leverage them to personalize their desktops, create a visually appealing environment, and enhance their overall interaction with Windows 10. As technology continues to evolve, the role of official Windows 10 wallpapers will likely become even more prominent, reflecting the growing importance of visual aesthetics in the digital world.

Microsoft Reveals the Official Windows 10 Wallpaper Official Windows 10 Wallpaper - WallpaperSafari Microsoft Reveals the Official Windows 10 Wallpaper
Microsoft Windows 10 Wallpaper Official - WallpaperSafari Windows 10 Wallpaper  PixelsTalk.Net Official Windows 10 Wallpaper - WallpaperSafari
Windows 10 official achtergrond 5 - Windows 10 achtergrond (39400448) - Fanpop Microsoft Reveals the Official Windows 10 Wallpaper

Closure

Thus, we hope this article has provided valuable insights into A Window to the World: Exploring the Significance of Official Windows 10 Wallpapers. We appreciate your attention to our article. See you in our next article!

Navigating Your Digital Landscape: Exploring The Benefits Of Removing Quick Access In Windows 11

Navigating Your Digital Landscape: Exploring the Benefits of Removing Quick Access in Windows 11

Introduction

With enthusiasm, let’s navigate through the intriguing topic related to Navigating Your Digital Landscape: Exploring the Benefits of Removing Quick Access in Windows 11. Let’s weave interesting information and offer fresh perspectives to the readers.

How to Remove Quick Access in Windows 11

Windows 11, with its streamlined interface and focus on user experience, offers a plethora of features designed to enhance productivity and simplify everyday tasks. One such feature, Quick Access, aims to expedite file access by displaying frequently used files and folders in the File Explorer window. While intended to streamline navigation, Quick Access can become a source of clutter and security concerns for certain users. This article delves into the reasons why removing Quick Access from Windows 11 can be a beneficial decision for specific user profiles, providing a comprehensive understanding of its implications and offering practical guidance for achieving this customization.

Understanding the Function and Potential Drawbacks of Quick Access

Quick Access, a feature introduced in Windows 8, serves as a personalized gateway to recently accessed files and folders, offering quick access to frequently used items. While convenient for many users, Quick Access can present challenges for others, particularly those prioritizing privacy or data security.

Privacy Concerns: Quick Access, by its nature, reveals a user’s browsing history and file access patterns. This information, while seemingly innocuous, can be sensitive in certain contexts. For example, individuals handling confidential documents or working in environments where privacy is paramount may find the exposure of their file access patterns undesirable.

Security Risks: The automatic inclusion of files and folders in Quick Access can inadvertently expose sensitive data. Malicious software, if present on the system, can exploit Quick Access to gain access to valuable information. Additionally, if the device is shared among multiple users, Quick Access can reveal the browsing and file access history of all users, potentially compromising privacy and security.

Cluttered Interface: For individuals who prefer a clean and organized digital workspace, Quick Access can contribute to visual clutter. The automatic inclusion of files and folders, even those not frequently accessed, can create a chaotic interface, hindering efficient navigation.

The Case for Removing Quick Access

While Quick Access offers convenience for many, its potential drawbacks necessitate a careful evaluation of its suitability for individual needs. For users prioritizing privacy, security, or a streamlined interface, removing Quick Access can be a prudent decision.

Removing Quick Access: A Step-by-Step Guide

Removing Quick Access in Windows 11 is a straightforward process, requiring a few simple steps:

  1. Open File Explorer: Navigate to the File Explorer window, either by clicking the File Explorer icon on the taskbar or by pressing the Windows key + E.

  2. Access Settings: Click on the "View" tab located at the top of the File Explorer window.

  3. Disable Quick Access: Uncheck the box labeled "Show Quick Access" in the "Options" section of the "View" tab.

  4. Confirm Changes: Click on the "Apply" button to save the changes and exit the File Explorer window.

Beyond Removal: Further Customization Options

Removing Quick Access is the initial step towards a more personalized File Explorer experience. Additional customization options are available to further refine the interface and enhance productivity:

  • Customize the "This PC" View: The "This PC" view, accessible from the left-hand pane of File Explorer, provides a structured view of your computer’s drives and folders. You can customize the displayed items, such as network locations or specific folders, by right-clicking on the "This PC" view and selecting "Properties."

  • Manage Hidden Items: By default, hidden files and folders are not displayed in File Explorer. You can choose to view hidden items by accessing the "View" tab, clicking on the "Show/Hide" group, and selecting "Hidden items."

  • Customize File Explorer Ribbon: The ribbon at the top of File Explorer provides quick access to common commands and features. You can customize the ribbon by right-clicking on any empty space and selecting "Customize the Ribbon."

FAQs: Addressing Common Questions

1. Can I remove Quick Access without losing access to my frequently used files and folders?

Yes, removing Quick Access will not delete or remove any files or folders from your system. It simply removes the dedicated Quick Access view from the File Explorer window. You can still access your frequently used files and folders through the "This PC" view or by using the search function.

2. Will removing Quick Access affect the performance of my computer?

Removing Quick Access is unlikely to have a noticeable impact on your computer’s performance. It primarily affects the File Explorer interface and does not impact system resources.

3. Can I restore Quick Access if I decide I need it later?

Yes, you can re-enable Quick Access by following the same steps outlined above but selecting the "Show Quick Access" option in the "View" tab of File Explorer.

4. What are the best alternatives to Quick Access?

Several alternatives to Quick Access can provide similar functionality with greater control and customization. These include:

  • File Explorer Search: Utilize the built-in search function in File Explorer to quickly find specific files or folders based on keywords or file types.

  • Pinned Files and Folders: Pin frequently used files or folders to the taskbar or Start menu for quick access.

  • Third-party File Managers: Explore third-party file management software offering features like file indexing, categorization, and advanced search capabilities.

Tips for Maximizing File Explorer Efficiency

Beyond removing Quick Access, several additional tips can enhance your File Explorer experience and boost productivity:

  • Use Keyboard Shortcuts: Leverage keyboard shortcuts like Ctrl + N (New Folder), Ctrl + C (Copy), Ctrl + V (Paste), and Ctrl + Z (Undo) to navigate and manage files efficiently.

  • Customize File Explorer View: Experiment with different view options, such as "Details" or "Large Icons," to find the most visually appealing and informative view for your needs.

  • Utilize File Explorer’s Search Function: Take advantage of the powerful search capabilities in File Explorer to quickly find specific files or folders based on file name, content, date modified, or file type.

  • Organize Your Files: Create a logical folder structure for your files and folders to ensure easy navigation and retrieval.

  • Utilize File Explorer’s History: Access the "Recent" or "Frequent" sections in File Explorer to quickly revisit previously accessed files and folders.

Conclusion

Removing Quick Access in Windows 11 can be a beneficial decision for users prioritizing privacy, security, or a streamlined interface. By understanding the potential drawbacks of Quick Access and exploring the available customization options, individuals can tailor their File Explorer experience to suit their specific needs and preferences. While Quick Access offers convenience, the ability to customize and refine the File Explorer environment empowers users to create a digital workspace that reflects their individual workflow and priorities.

How To Enable Or Disable Quick Access In Windows 11  techcult How to Enable or Disable Quick Access in Windows 11 โ€“ TechCult How To Enable Or Disable Quick Access Feature In Windows 11
How to Use Quick Access in Windows 11 - Guiding Tech How to Use Quick Access in Windows 11 - Guiding Tech How To Clear Quick Access In Windows 11 - vrogue.co
How To Remove Quick Access From File Explorer In Windows 11 - YouTube How to Remove Quick Access in Windows 11

Closure

Thus, we hope this article has provided valuable insights into Navigating Your Digital Landscape: Exploring the Benefits of Removing Quick Access in Windows 11. We thank you for taking the time to read this article. See you in our next article!

Navigating The NVIDIA GeForce GTX 1660 Ti Driver Landscape In Windows 11: A Comprehensive Guide

Navigating the NVIDIA GeForce GTX 1660 Ti Driver Landscape in Windows 11: A Comprehensive Guide

Introduction

In this auspicious occasion, we are delighted to delve into the intriguing topic related to Navigating the NVIDIA GeForce GTX 1660 Ti Driver Landscape in Windows 11: A Comprehensive Guide. Let’s weave interesting information and offer fresh perspectives to the readers.

How To Download nvidia geforce gtx 1660 ti graphics card Drivers - YouTube

The NVIDIA GeForce GTX 1660 Ti, a popular graphics card known for its performance and affordability, thrives in the Windows 11 environment when paired with the right drivers. These drivers, essential software components, act as the bridge between the graphics card and the operating system, ensuring smooth operation and optimal performance. This article delves into the intricacies of NVIDIA GeForce GTX 1660 Ti drivers in Windows 11, exploring their importance, installation process, troubleshooting tips, and common FAQs.

Understanding the Importance of Drivers

Drivers are the unsung heroes of the digital world, acting as translators between hardware components and the operating system. In the case of the NVIDIA GeForce GTX 1660 Ti, drivers enable the card to communicate with Windows 11, allowing it to perform tasks like rendering graphics, displaying images, and accelerating video playback. Without the correct drivers, the graphics card might not function properly, leading to issues such as screen flickering, distorted images, or even complete system instability.

The NVIDIA GeForce Experience: Your Driver Management Hub

NVIDIA GeForce Experience is a powerful tool that simplifies the driver management process. This software, available for free from NVIDIA’s website, automatically detects your graphics card and provides you with the latest drivers. It also offers features like game optimization, recording gameplay, and sharing screenshots, enhancing your overall gaming experience.

Installing the Correct Drivers: A Step-by-Step Guide

  1. Identify your graphics card: Open the NVIDIA Control Panel (right-click on the desktop and select "NVIDIA Control Panel") and navigate to "System Information" to confirm your graphics card model.
  2. Download the latest drivers: Visit the NVIDIA website and navigate to the "Drivers" section. Select your graphics card model and operating system (Windows 11).
  3. Run the installation file: Once downloaded, run the executable file and follow the on-screen instructions.
  4. Restart your computer: After installation, restart your computer for the changes to take effect.

Troubleshooting Common Driver Issues

While the driver installation process is generally straightforward, encountering issues is not uncommon. Here’s a breakdown of common problems and their solutions:

  • Driver incompatibility: If you’re experiencing problems after installing new drivers, consider reverting to the previous version. You can find older drivers on the NVIDIA website or through the GeForce Experience.
  • Corrupted drivers: Corrupted drivers can lead to various issues. Try reinstalling the drivers after completely removing the old ones. Use the NVIDIA Display Driver Uninstaller (DDU) for a thorough removal.
  • Outdated drivers: Outdated drivers can cause performance issues and compatibility problems. Ensure you’re using the latest drivers by checking for updates through GeForce Experience or the NVIDIA website.
  • Driver conflicts: If you’re experiencing issues with other software or hardware, try updating or reinstalling the conflicting programs.

Frequently Asked Questions (FAQs) about NVIDIA GeForce GTX 1660 Ti Drivers in Windows 11

Q: How often should I update my drivers?

A: It’s recommended to update your drivers regularly, at least every few months, to benefit from performance enhancements, bug fixes, and new features.

Q: Can I use drivers from older Windows versions?

A: Using drivers designed for older Windows versions on Windows 11 is not recommended. This can lead to compatibility issues and potential system instability.

Q: What if I can’t find drivers for my specific model?

A: If you’re unable to find drivers for your specific model on the NVIDIA website, it’s possible that your graphics card is no longer supported. Consider updating your graphics card or contacting NVIDIA support for assistance.

Q: Can I manually install drivers?

A: While you can manually install drivers, it’s generally recommended to use GeForce Experience or the NVIDIA website for automatic installation. Manual installation can be more complex and may require advanced technical knowledge.

Tips for Optimal Driver Performance

  • Keep your operating system updated: Ensure that your Windows 11 installation is up-to-date with the latest security patches and updates.
  • Use the latest drivers: Regularly check for driver updates through GeForce Experience or the NVIDIA website.
  • Monitor your system temperatures: Overheating can cause performance issues and driver instability. Ensure proper cooling for your graphics card and system.
  • Clean your system: Regularly clean your system from dust and debris, as this can affect airflow and cooling.
  • Use the NVIDIA Control Panel: This tool allows you to customize graphics settings for individual games and applications, potentially improving performance.

Conclusion

The NVIDIA GeForce GTX 1660 Ti remains a compelling graphics card in the Windows 11 environment, delivering a balanced blend of performance and affordability. Optimizing its performance relies heavily on the proper installation and management of drivers. By following the guidelines provided in this article, users can ensure a smooth and enjoyable experience with their NVIDIA GeForce GTX 1660 Ti in Windows 11, maximizing its potential and reaping the benefits of its powerful capabilities.

How to install nvidia drivers for gtx1660 ti - saskool Update GTX 1660 Ti Drivers For Better Gaming Experience - Driver Easy Driver Gtx 1660 Ti Download  donyaye-trade.com
Download NVIDIA GeForce GTX 1660 Ti driver Introducing GeForce GTX 1660 Ti: The Perfect 1080p Upgrade  GeForce News  NVIDIA Gtx 1660 Ti Drivers Download / Download drivers for nvidia geforce gtx 1660 ti video cards
New Game Ready Driver Released: Includes Support For GeForce GTX 1660 SUPER; Adds ReShade How to Update GTX 1660 Driver  Quickly & Easily - Driver Easy

Closure

Thus, we hope this article has provided valuable insights into Navigating the NVIDIA GeForce GTX 1660 Ti Driver Landscape in Windows 11: A Comprehensive Guide. We appreciate your attention to our article. See you in our next article!

The Silent Symphony: Troubleshooting No Sound After Windows 11 Installation

The Silent Symphony: Troubleshooting No Sound After Windows 11 Installation

Introduction

With enthusiasm, let’s navigate through the intriguing topic related to The Silent Symphony: Troubleshooting No Sound After Windows 11 Installation. Let’s weave interesting information and offer fresh perspectives to the readers.

The Silent Symphony: Troubleshooting No Sound After Windows 11 Installation

No Sound After Windows 11 Update Or Sound Missing Problem - 7 Fix How To - YouTube

The transition to Windows 11 promises a fresh and enhanced user experience, but the lack of sound after installation can quickly turn the excitement into frustration. A silent operating system, devoid of the auditory cues we have come to rely on, can be both jarring and inconvenient. This article delves into the common causes behind this issue, providing a comprehensive guide to troubleshooting and restoring your audio experience.

Understanding the Silent Symphony: Potential Culprits

The absence of sound after a Windows 11 installation can stem from a variety of factors, each requiring a specific approach to resolution. The most common culprits include:

  • Driver Issues: The absence of, or incompatibility with, the correct audio drivers is a primary suspect. During the installation process, Windows may not automatically install the necessary drivers for your specific sound card or integrated audio chip. This leads to the system failing to recognize the audio hardware, resulting in silence.

  • Audio Services Deactivation: Windows relies on various services to manage audio functionality. These services could have been inadvertently disabled during the installation process, preventing sound output.

  • System Configuration Errors: Incorrect settings within the sound configuration panel, such as the default playback device or output volume, can also contribute to the silence.

  • Hardware Malfunction: While less common, a physical issue with the sound card or its connection to the motherboard could be the root cause. This could involve a faulty sound card, loose connections, or even a damaged audio jack.

The Diagnostic Symphony: Identifying the Root Cause

Before embarking on troubleshooting, it is essential to systematically identify the source of the problem. This can be achieved through a series of checks:

  1. Device Manager Inspection: The Device Manager provides a comprehensive overview of your system’s hardware. Navigate to the "Sound, video and game controllers" section. If the audio device appears with a yellow exclamation mark, it indicates a driver issue.

  2. Windows Audio Services Check: Ensure that the Windows Audio service is running. Access the services window by searching for "services.msc" in the search bar. Locate the "Windows Audio" service and confirm its status. If it is stopped, start it manually.

  3. Sound Configuration Verification: Open the sound settings by searching for "Sound" in the search bar. Verify that the correct output device is selected and that the volume is not muted.

The Symphony of Solutions: Restoring Sound

Armed with an understanding of the potential causes, we can now explore the solutions for each scenario:

1. Addressing Driver Issues:

  • Automatic Driver Installation: Windows Update is often a reliable source for driver updates. Access the Windows Update settings and check for available updates. If a new audio driver is available, install it.

  • Manual Driver Installation: If Windows Update fails to provide the necessary driver, visit the manufacturer’s website for your motherboard or sound card. Download the latest drivers for your specific model and install them manually.

  • Driver Rollback: If a recent driver update caused the sound issue, consider rolling back to the previous version. Right-click the audio device in Device Manager, select "Properties," and navigate to the "Driver" tab. Choose "Roll Back Driver" to revert to the previous version.

2. Reactivating Audio Services:

  • Windows Audio Service: Locate the "Windows Audio" service in the services window. If it is stopped, start it manually. Right-click the service, select "Properties," and ensure the startup type is set to "Automatic."

  • Other Audio Services: Other services, such as "Multimedia Class Scheduler" and "Windows Time Service," may indirectly influence audio functionality. Check their status and ensure they are running.

3. Correcting System Configuration:

  • Default Playback Device: In the sound settings, verify that the correct output device is selected. If multiple devices are listed, choose the one corresponding to your speakers or headphones.

  • Volume Levels: Check the volume levels for both the system and the selected output device. Ensure that neither is muted or set to a very low level.

4. Diagnosing Hardware Issues:

  • Sound Card Connectivity: Ensure that the sound card is properly connected to the motherboard. If using an external sound card, check the connection to the USB port.

  • Audio Jack Integrity: Inspect the audio jack for any damage or debris. Try cleaning the jack with a compressed air can.

  • Hardware Testing: If you suspect a hardware failure, consider using a dedicated hardware testing tool to diagnose the issue.

FAQs: Addressing Common Concerns

Q: Why is there no sound after upgrading to Windows 11?

A: The upgrade process can sometimes disrupt audio settings or driver compatibility. This is why it’s essential to check the sound configuration, update drivers, and ensure audio services are running after the upgrade.

Q: My speakers are working with other devices, but not with Windows 11. What could be the issue?

A: This suggests a software-related issue, likely a driver incompatibility or incorrect system settings. Follow the troubleshooting steps outlined above to address these possibilities.

Q: I have tried all the troubleshooting steps, but still no sound. What should I do?

A: If all other solutions fail, consider contacting Microsoft support or consulting a computer technician for further assistance.

Tips for Preventing Future Silence:

  • Regular Driver Updates: Stay up-to-date with the latest drivers for your audio hardware to ensure compatibility and optimal performance.

  • Backup System Settings: Before making any significant changes to your system, create a system restore point. This allows you to revert to a previous state if any issues arise.

  • Monitor Audio Services: Keep an eye on the status of audio services, especially after major system changes or updates.

Conclusion: The Harmony Restored

The absence of sound after a Windows 11 installation can be a frustrating experience, but by understanding the potential causes and following the troubleshooting steps outlined, you can restore the harmonious symphony of your computer’s audio. Remember to be patient, persistent, and systematic in your approach, and you will soon be enjoying the full spectrum of sound from your Windows 11 system.

No Audio Device Installed Windows 11 6 Ways to Fix Windows 11 Sound Not Working Permanently How To Fix No Sound Output Problems On Windows 11  Fix All Audio Issues
No Sound After Windows 11 Update Or Sound Missing Problem FIXED - YouTube Fix No Audio After Windows 11 Update 3 Minute 2022 (2023) Download How To Fix: Sound 10 Sou - Vrogue Fix No Audio after Windows 11 Update [3 Minute Fix 2024]
How to Fix No Audio After Installing Windows 11 on PC/Laptop  ะ’ะธะดะตะพ How to Fix No Sound After Windows 11 Update - Sound Not Working - YouTube

Closure

Thus, we hope this article has provided valuable insights into The Silent Symphony: Troubleshooting No Sound After Windows 11 Installation. We thank you for taking the time to read this article. See you in our next article!

Troubleshooting Outlook Issues After A Windows 11 Update: A Comprehensive Guide

Troubleshooting Outlook Issues After a Windows 11 Update: A Comprehensive Guide

Introduction

In this auspicious occasion, we are delighted to delve into the intriguing topic related to Troubleshooting Outlook Issues After a Windows 11 Update: A Comprehensive Guide. Let’s weave interesting information and offer fresh perspectives to the readers.

Troubleshooting Outlook Issues After a Windows 11 Update: A Comprehensive Guide

Troubleshooting Outlook email Sending/Receiving problems on Windows 11 - YouTube

The seamless integration of Microsoft Outlook with Windows operating systems is a cornerstone of many individuals’ and organizations’ productivity. However, the introduction of a new Windows update, particularly a major upgrade like Windows 11, can sometimes disrupt this harmony, leading to unexpected issues with Outlook functionality. This article provides a comprehensive guide to diagnose and resolve common Outlook problems that arise following a Windows 11 update, equipping users with the knowledge and tools to restore their email experience.

Understanding the Root Causes

Several factors can contribute to Outlook malfunctioning after a Windows 11 update:

  • Software Compatibility: Windows 11 introduces new features and system architecture, potentially leading to compatibility issues with older versions of Outlook or its associated components.
  • Conflicting Settings: Changes in system settings during the update process might clash with Outlook’s configuration, causing unexpected behavior.
  • Corrupted Data: The update process could inadvertently corrupt Outlook’s data files, hindering its ability to function correctly.
  • Missing Dependencies: Essential system files or libraries required for Outlook’s operation might have been removed or altered during the update, disrupting its functionality.
  • Third-Party Interference: Installed third-party software, particularly those related to email management or security, may interfere with Outlook’s operation after the update.

Common Outlook Issues After Windows 11 Update

  • Outlook Fails to Launch: The application might not respond or display error messages when attempting to start.
  • Slow Performance: Outlook might experience lag, sluggish response times, or delays in loading emails and attachments.
  • Email Sending and Receiving Errors: Issues with sending or receiving emails, including delays, delivery failures, or error messages.
  • Calendar Synchronization Issues: Calendar events might not sync properly, leading to discrepancies between Outlook and other devices.
  • Contact List Errors: Contacts may disappear or become inaccessible, causing difficulties in communication.

Troubleshooting Steps: A Systematic Approach

Addressing Outlook issues after a Windows 11 update requires a systematic approach, starting with basic troubleshooting techniques and progressing to more advanced solutions.

1. Basic Troubleshooting:

  • Restart Your Computer: A simple restart can resolve temporary glitches and refresh system resources.
  • Check for Updates: Ensure that Outlook and Windows 11 are up to date. Microsoft frequently releases updates to address compatibility issues and improve performance.
  • Run Outlook as Administrator: Right-click the Outlook icon and select "Run as administrator" to ensure sufficient permissions.
  • Disable Add-ins: Temporarily disable Outlook add-ins to identify if any are causing conflicts. Navigate to "File" > "Options" > "Add-ins" > "Manage" > "Go" and disable add-ins one by one.
  • Repair Outlook: Run an Outlook repair tool to fix corrupted files or configurations. In the Control Panel, navigate to "Programs and Features," right-click on "Microsoft Office" or "Microsoft 365," and select "Repair."

2. Advanced Troubleshooting:

  • Reinstall Outlook: If basic troubleshooting fails, reinstalling Outlook might resolve the issue. Ensure that you have a backup of your Outlook data before proceeding.
  • Create a New Outlook Profile: A new profile can eliminate potential corruption in existing settings. In the Control Panel, navigate to "Mail" > "Show Profiles" > "Add" and create a new profile.
  • Check Antivirus and Firewall Settings: Antivirus and firewall software can sometimes interfere with Outlook’s functionality. Temporarily disable them to determine if they are causing the issue.
  • Verify Network Connection: Ensure a stable internet connection and check for any network connectivity issues.
  • Check for System File Corruption: Run the System File Checker (SFC) tool to repair corrupted system files. Open Command Prompt as administrator and type "sfc /scannow."

3. Addressing Specific Issues:

  • Email Sending and Receiving Errors: Verify your email account settings, including username, password, and server addresses. Check for any server outages or maintenance schedules.
  • Calendar Synchronization Issues: Ensure your calendar is connected to the correct account and verify the synchronization settings.
  • Contact List Errors: Check the location of your contact list and ensure it is accessible. Consider importing contacts from a backup file.

FAQs Regarding Outlook Issues After Windows 11 Update:

  • Q: My Outlook data is missing. How can I recover it?

    A: If you have a backup of your Outlook data, restore it to its original location. If you do not have a backup, consider using data recovery software to attempt recovery.

  • Q: I am experiencing slow performance in Outlook. What can I do?

    A: Optimize your Outlook settings by disabling unnecessary add-ins, reducing the number of email folders, and limiting the number of open emails.

  • Q: My Outlook calendar is not syncing properly. How can I fix it?

    A: Verify your calendar account settings, including the synchronization frequency and server address. Check for any updates to your calendar application or service.

  • Q: I am receiving error messages when trying to send emails. What could be the cause?

    A: Check your email account settings, including username, password, and server addresses. Ensure your antivirus and firewall are not blocking email traffic.

Tips for Preventing Future Issues:

  • Backup Your Outlook Data: Regularly back up your Outlook data, including emails, contacts, and calendar appointments, to prevent data loss.
  • Keep Outlook and Windows Updated: Install the latest updates for both Outlook and Windows 11 to ensure compatibility and address potential security vulnerabilities.
  • Monitor System Changes: Be aware of any significant system changes, including updates or new software installations, and their potential impact on Outlook’s functionality.
  • Seek Professional Assistance: If troubleshooting fails, consider seeking assistance from a Microsoft support representative or a qualified IT professional.

Conclusion:

While Windows 11 updates offer numerous improvements and benefits, they can occasionally lead to compatibility issues with existing applications, including Outlook. By understanding the common causes and applying the troubleshooting steps outlined in this guide, users can effectively diagnose and resolve Outlook problems that arise after a Windows 11 update, restoring their email productivity and ensuring a smooth transition to the new operating system.

How to troubleshoot and fix common problems in Outlook  Windows Central 6 Fixes to Try if Outlook Keeps Crashing on Windows 11 FIX Windows Update Issues For Windows 11 Errors Troubleshooting Tips HTMD Blog
Top 8 Ways to Fix Outlook Not Opening on Windows 11 FIX Windows Update Issues For Windows 11 Errors Troubleshooting Tips HTMD Blog How to troubleshoot Microsoft Outlook setup  Microsoft - YouTube
How To Troubleshoot Issue Related To Outlook Update Windows 11 Not Working After Update? 12 Fixes

Closure

Thus, we hope this article has provided valuable insights into Troubleshooting Outlook Issues After a Windows 11 Update: A Comprehensive Guide. We appreciate your attention to our article. See you in our next article!

A Comprehensive Guide To Installing Windows 11

A Comprehensive Guide to Installing Windows 11

Introduction

With great pleasure, we will explore the intriguing topic related to A Comprehensive Guide to Installing Windows 11. Let’s weave interesting information and offer fresh perspectives to the readers.

A Comprehensive Guide to Installing Windows 11

Windows 11 User Guide A Step By Step Guide To Install And Use The New Images

Windows 11, the latest iteration of Microsoft’s popular operating system, offers a refined user experience, enhanced security features, and a modern design. Installing Windows 11 is a crucial step for users seeking to experience these advancements. This comprehensive guide will delve into the intricacies of the Windows 11 installation process, providing a detailed understanding of the steps involved and addressing common queries.

Understanding the Installation Process

Installing Windows 11 involves a series of steps that ensure a clean and functional operating system. The process typically begins with a bootable USB drive or DVD containing the Windows 11 installation files. This bootable media serves as the primary source for installing the operating system on your computer.

Key Steps in the Installation Process:

  1. Prepare for Installation: Before embarking on the installation process, it is essential to back up your data. This precaution safeguards your valuable files and settings in case of any unforeseen issues during the installation. Additionally, ensure that your hardware meets the minimum system requirements for Windows 11.

  2. Create a Bootable Installation Media: The creation of a bootable USB drive or DVD is paramount. This media contains the necessary files to install Windows 11. Microsoft provides a dedicated tool, the "Windows 11 Installation Assistant," for creating bootable media.

  3. Boot from the Installation Media: Once the bootable media is created, restart your computer and configure the BIOS settings to boot from the USB drive or DVD. This action initiates the Windows 11 installation process.

  4. Language and Keyboard Selection: The initial installation screen prompts you to choose your preferred language and keyboard layout. These selections determine the language and keyboard settings of your newly installed Windows 11 system.

  5. Installation Type: You are presented with two installation options: "Upgrade" and "Custom." Choosing "Upgrade" installs Windows 11 over your existing operating system, preserving your data and settings. "Custom" allows you to format your hard drive and perform a clean installation, removing all existing data.

  6. Partitioning and Formatting: If you choose "Custom," you can partition and format your hard drive. Partitioning divides your hard drive into separate sections, allowing you to organize your data. Formatting prepares the selected partition for installation.

  7. File Installation and System Configuration: The installation process proceeds with copying the Windows 11 files to your computer. During this phase, the system configures the core components of the operating system, including drivers and essential services.

  8. Personalization and Activation: Upon completion of the file installation, you are prompted to personalize your Windows 11 experience by setting up your account, choosing a password, and configuring basic settings. The final step involves activating Windows 11 using a valid product key.

FAQs: Addressing Common Concerns

Q1: What are the minimum system requirements for Windows 11?

A: To run Windows 11 smoothly, your computer must meet the following minimum requirements:

  • Processor: 1 gigahertz (GHz) or faster with 2 or more cores on a compatible 64-bit processor or System on a Chip (SoC).
  • RAM: 4 gigabytes (GB) of RAM.
  • Storage: 64 GB or larger storage device.
  • System Firmware: UEFI, Secure Boot capable.
  • TPM: Trusted Platform Module (TPM) version 2.0.
  • Graphics: Compatible with DirectX 12 or later with WDDM 2.x driver.
  • Display: High Definition (720p) display, 9 inches or greater diagonal.

Q2: Can I upgrade from Windows 10 to Windows 11?

A: Yes, Microsoft offers a free upgrade path for eligible Windows 10 users. However, your computer must meet the minimum system requirements for Windows 11.

Q3: What happens to my data during the installation process?

A: If you choose the "Upgrade" option, your data and settings will be preserved. However, if you opt for a "Custom" installation, all data will be erased from the selected partition.

Q4: What if the installation process fails?

A: In case of installation failure, try troubleshooting common issues such as faulty media, hardware incompatibility, or corrupted files. If the problem persists, consider seeking assistance from Microsoft support.

Q5: How do I activate Windows 11?

A: Windows 11 activation requires a valid product key. You can obtain a product key during a new computer purchase, through a retail purchase, or by upgrading from a previous version of Windows.

Tips for a Smooth Installation

1. Back Up Your Data: Prioritize backing up your important files and settings to prevent data loss during the installation process.

2. Check System Requirements: Ensure your computer meets the minimum system requirements for Windows 11 to avoid compatibility issues.

3. Use a Bootable USB Drive: Creating a bootable USB drive is highly recommended, as it provides a reliable and convenient method for installing Windows 11.

4. Format Your Hard Drive (Optional): If you desire a clean installation, consider formatting your hard drive to eliminate any potential conflicts with existing files.

5. Troubleshoot Installation Errors: In case of installation errors, review the error messages carefully and consult online resources or contact Microsoft support for assistance.

6. Update Drivers: After installation, update your drivers to ensure optimal performance and compatibility with Windows 11.

7. Customize Your Settings: Personalize your Windows 11 experience by configuring settings such as themes, wallpapers, and privacy options.

Conclusion

Installing Windows 11 is a straightforward process, but it requires careful planning and execution. By following the steps outlined in this guide, users can ensure a smooth and successful installation experience. The benefits of upgrading to Windows 11, including enhanced security, a refined user interface, and improved performance, make it a worthwhile endeavor for users seeking a modern and efficient computing environment. Remember to back up your data, check system requirements, and troubleshoot any issues that may arise. With proper preparation and attention to detail, users can seamlessly transition to the latest version of Windows, unlocking its full potential and enjoying a streamlined computing experience.

Windows 11 installation process - Step by Step  How to install Windows 11  Windows 11 How to Install Windows 11 on any PC Step by step ๏ธ Ultimate Guide �� Install Microsoft Windows 11 Buy Windows 11: A Complete Tutorial Guide for Beginners with Tips & Tricks to Mastering Windows
The Ultimate Guide to Installing Windows 11  Petri Buy WINDOWS 11 AT YOUR FINGER TIPS: A Simplified Guide To Install And Master All The New How to Install Windows 11  Installing Windows 11 on My Computer/PC �� - YouTube
How to Install Windows 11 Step by Step: Guide with Images How to Install Windows 11 Update or Upgrade  FREE Step by Step - YouTube

Closure

Thus, we hope this article has provided valuable insights into A Comprehensive Guide to Installing Windows 11. We thank you for taking the time to read this article. See you in our next article!

The Evolution Of Visual Communication: A Deep Dive Into Windows 11 Icons

The Evolution of Visual Communication: A Deep Dive into Windows 11 Icons

Introduction

In this auspicious occasion, we are delighted to delve into the intriguing topic related to The Evolution of Visual Communication: A Deep Dive into Windows 11 Icons. Let’s weave interesting information and offer fresh perspectives to the readers.

The Evolution of Visual Communication: A Deep Dive into Windows 11 Icons

The Evolution of Visual Communication by Justine Hobbs on Prezi

Windows 11, the latest iteration of Microsoft’s operating system, ushered in a wave of visual change. Beyond the aesthetic appeal, the redesigned icons play a crucial role in enhancing user experience and streamlining interaction with the operating system. This article explores the intricate design philosophy behind these icons, delving into their evolution, their underlying principles, and their impact on the overall user experience.

A Legacy of Visual Identity:

The history of Windows icons is a testament to the evolution of user interface design. From the early days of Windows 95, icons have served as visual cues, representing applications, files, and system functionalities. Over time, these icons have undergone numerous transformations, reflecting advancements in technology, changing design trends, and evolving user preferences.

Windows 11 marks a significant departure from its predecessors in terms of icon design. The new icons are characterized by a modern, minimalist aesthetic, featuring simplified shapes, bold colors, and a focus on clarity and accessibility. This shift is driven by a desire to create a visual language that is both intuitive and visually appealing, ensuring a seamless user experience across different platforms and devices.

The Design Principles Behind Windows 11 Icons:

The design of Windows 11 icons is guided by a set of core principles:

  • Clarity and Simplicity: The icons strive to convey their meaning at a glance, eliminating unnecessary complexity. This is achieved through the use of simple, recognizable shapes and bold colors that stand out against the interface.
  • Consistency and Familiarity: While embracing a new aesthetic, the icons maintain a level of familiarity with their predecessors. This ensures a smooth transition for users familiar with previous versions of Windows, minimizing the learning curve.
  • Accessibility: The icons are designed to be accessible to all users, regardless of their visual abilities. This is achieved through the use of high contrast colors, clear outlines, and a consistent visual hierarchy.
  • Modernity and Versatility: The icons reflect the contemporary design trends, featuring a clean, minimalist aesthetic that adapts seamlessly to different screen sizes and resolutions.

The Impact of Redesigned Icons:

The redesigned icons contribute significantly to the overall user experience of Windows 11:

  • Enhanced Navigation: The clear and consistent visual language of the icons facilitates intuitive navigation, enabling users to quickly locate and access desired applications and files.
  • Improved Accessibility: The high contrast colors and simplified shapes make the icons easily distinguishable for users with visual impairments.
  • Aesthetics and User Engagement: The modern, minimalist design contributes to a visually appealing and engaging user interface, enhancing the overall aesthetic appeal of the operating system.
  • Brand Identity: The new icons contribute to the overall brand identity of Windows, showcasing its evolution towards a more modern and user-centric approach.

FAQs on Windows 11 Icons:

Q: Why did Microsoft choose to redesign the icons for Windows 11?

A: The redesign of Windows 11 icons was driven by a desire to create a more modern, intuitive, and visually appealing user experience. The new icons are designed to be simpler, clearer, and more accessible, reflecting the evolution of user interface design and the changing needs of users.

Q: What are the key design principles behind the new icons?

A: The new icons are designed with a focus on clarity, simplicity, consistency, accessibility, modernity, and versatility. These principles ensure that the icons are easily recognizable, intuitive to use, and visually appealing across different platforms and devices.

Q: How do the new icons improve the user experience?

A: The redesigned icons enhance navigation, improve accessibility, contribute to a more visually appealing interface, and reinforce the brand identity of Windows. They are designed to make interacting with the operating system more intuitive and enjoyable.

Q: Are the new icons compatible with older versions of Windows?

A: The new icons are specifically designed for Windows 11 and are not compatible with older versions of the operating system.

Tips for Understanding and Using Windows 11 Icons:

  • Explore the Start Menu: The Start Menu provides a comprehensive overview of the icons associated with various applications and system functionalities.
  • Pay Attention to Color and Shape: The icons utilize distinct colors and shapes to convey meaning and facilitate quick identification.
  • Utilize Search Functionality: Windows 11 offers a powerful search function that can help you locate specific icons or applications based on keywords.
  • Seek Help from Online Resources: Numerous online resources, including Microsoft’s official documentation, provide detailed information and explanations about the new icons.

Conclusion:

The redesigned icons in Windows 11 represent a significant step forward in user interface design. They are not merely cosmetic enhancements; they are integral components of a user-centric approach that prioritizes clarity, accessibility, and visual appeal. By embracing a modern, minimalist aesthetic and adhering to key design principles, the new icons contribute to a more intuitive, engaging, and visually satisfying user experience, reinforcing the evolution of Windows towards a more user-friendly and accessible operating system.

INFOGRAPHIC: A BRIEF HISTORY OF VISUAL COMMUNICATION Communication evolution icon 645899 Vector Art at Vecteezy ุฏุงู†ู„ูˆุฏ Udemy Deep Dive Into Windows Communication Foundation (WCF) - ุข
Deep Dive: Visual Communication Basics What is Visual Communication and How Can It Improve Your Presentations Evolution Of Communication Ppt
Customize Icons Windows 11 Evolution of communication timeline - visual language through the ages  Presentation Design

Closure

Thus, we hope this article has provided valuable insights into The Evolution of Visual Communication: A Deep Dive into Windows 11 Icons. We hope you find this article informative and beneficial. See you in our next article!

The Search For "Project IGI 3": A Journey Through Gaming History And Reality

The Search for "Project IGI 3": A Journey Through Gaming History and Reality

Introduction

In this auspicious occasion, we are delighted to delve into the intriguing topic related to The Search for "Project IGI 3": A Journey Through Gaming History and Reality. Let’s weave interesting information and offer fresh perspectives to the readers.

The Search for "Project IGI 3": A Journey Through Gaming History and Reality

Project IGI 3 Official World Premiere Gameplay Trailer - YouTube

The world of gaming is filled with legendary titles, each holding a special place in the hearts of players. Among these, the "Project IGI" series stands out, particularly "Project IGI 1" and "Project IGI 2: Covert Strike," which captivated audiences with their immersive gameplay and realistic espionage themes. However, the question of "Project IGI 3" remains a persistent enigma, sparking curiosity and debate among fans.

The Myth and the Reality:

The elusive "Project IGI 3" is a subject of ongoing speculation. No official announcement or release from the developers, Innerloop Studios, has ever confirmed its existence. Despite this, numerous websites and forums claim to offer downloads for the game, often accompanied by misleading titles and descriptions. These sources are typically unreliable and may contain malware, posing a significant risk to users’ computers.

Understanding the Lack of "Project IGI 3":

Several factors contribute to the absence of a third installment in the "Project IGI" series:

  • Innerloop Studios’ Closure: The original developers, Innerloop Studios, ceased operations in 2005. This effectively ended the possibility of an official sequel from the original creators.
  • IP Ownership: The intellectual property rights for "Project IGI" are currently held by Codemasters, who acquired Innerloop Studios in 2005. Codemasters’ focus on other projects and the lack of a commercially viable "Project IGI 3" concept have likely contributed to the absence of a sequel.
  • Gameplay Challenges: The "Project IGI" games relied heavily on innovative technology for their time, particularly in terms of AI and physics. Replicating this level of sophistication while incorporating modern gaming trends would be a significant undertaking, potentially hindering the profitability of a sequel.

Exploring Alternatives:

While a true "Project IGI 3" remains a distant dream, several alternatives offer similar gameplay experiences:

  • "Project IGI" Remasters: Fans have created unofficial remasters of the original games, incorporating updated graphics and gameplay features. These projects, while unofficial, provide a nostalgic experience for fans.
  • Modern Stealth Games: The gaming landscape has evolved significantly since the release of "Project IGI." Games like "Hitman" and "Splinter Cell" offer modern takes on the stealth genre, with complex mechanics and engaging storylines.
  • Other "Project IGI" Spin-offs: While not official sequels, some games, like "Project IGI: Operation Silent Storm," offer a similar gameplay experience with a different storyline and setting.

The Enduring Legacy of "Project IGI":

Despite the lack of a "Project IGI 3," the original games continue to hold a special place in gaming history. Their impact on the stealth genre and their influence on subsequent titles are undeniable. The iconic characters, immersive environments, and challenging gameplay continue to captivate players, ensuring the legacy of "Project IGI" lives on.

FAQs:

Q: Is "Project IGI 3" actually in development?

A: No, there is no official confirmation of "Project IGI 3" being in development. Any claims to the contrary are false.

Q: Where can I download "Project IGI 3"?

A: Avoid downloading "Project IGI 3" from untrusted sources. These downloads may contain malware and are not legitimate.

Q: Why isn’t there a "Project IGI 3"?

A: The closure of Innerloop Studios, the IP ownership by Codemasters, and the challenges of modernizing the gameplay are likely factors contributing to the absence of a sequel.

Q: Are there any alternatives to "Project IGI 3"?

A: Yes, several modern stealth games and unofficial remasters offer similar gameplay experiences.

Tips:

  • Be cautious of unofficial downloads: Avoid downloading "Project IGI 3" from untrusted sources, as these may contain malware.
  • Explore alternative stealth games: Modern titles like "Hitman" and "Splinter Cell" offer engaging stealth gameplay.
  • Revisit the original games: Enjoy the nostalgic experience of playing "Project IGI 1" and "Project IGI 2: Covert Strike."

Conclusion:

The search for "Project IGI 3" remains an ongoing quest, fueled by the enduring legacy of the original games. While a true sequel remains elusive, the impact of "Project IGI" on the gaming landscape is undeniable. The series continues to inspire players and developers, reminding us of the power of immersive gameplay and captivating storytelling. As we move forward, we can appreciate the legacy of "Project IGI" and explore the diverse world of modern stealth games, each offering unique experiences that pay homage to the pioneers of the genre.

Project IGI 3 The Plan PC Game - san gamer Project IGI 3 image - IndieDB Project IGI 3 Release Date and IGI 3 PC Game Download - 2023
IGI 3 Is Finally Here With A New Trailer ��  IGI: Origins Release Date, Gameplay, Graphics Project IGI 3 Torrent Download Archives - Gaming Beasts Igi 3 download - berlindapond
Project IGI 3 PC Complete Game Direct Torrent Download Project IGI 3 Official PC Game Free Download Here - GDV

Closure

Thus, we hope this article has provided valuable insights into The Search for "Project IGI 3": A Journey Through Gaming History and Reality. We hope you find this article informative and beneficial. See you in our next article!

Unresponsive Windows 10: A Comprehensive Guide To Troubleshooting Shutdown Issues

Unresponsive Windows 10: A Comprehensive Guide to Troubleshooting Shutdown Issues

Introduction

In this auspicious occasion, we are delighted to delve into the intriguing topic related to Unresponsive Windows 10: A Comprehensive Guide to Troubleshooting Shutdown Issues. Let’s weave interesting information and offer fresh perspectives to the readers.

Unresponsive Windows 10: A Comprehensive Guide to Troubleshooting Shutdown Issues

How to shutdown unresponsive application in Window 10

Windows 10, despite its robust features, can occasionally encounter unexpected behavior, including a persistent refusal to shut down gracefully. This issue, manifesting as a frozen screen, unresponsive mouse cursor, or a seemingly endless "Shutting Down" message, can be frustrating for users. While the reasons behind this problem can be varied, understanding the underlying causes and applying appropriate troubleshooting steps can effectively resolve the issue.

Understanding the Problem

A Windows 10 computer that refuses to shut down properly indicates a system-level disruption. The underlying causes can range from minor software glitches to more serious hardware malfunctions. These issues can arise from various sources, including:

  • Software Conflicts: Incompatibility between installed programs, driver issues, or corrupted system files can prevent the shutdown process from completing.
  • Hardware Failures: Malfunctioning components like the hard drive, RAM, or motherboard can hinder the system’s ability to execute shutdown commands.
  • System Overloads: Excessive resource utilization by running programs or background processes can strain the system and hinder shutdown.
  • Virus or Malware Infections: Malicious software can interfere with system processes, including shutdown, leading to unexpected behavior.
  • Power Management Issues: Faulty power supply units or improperly configured power settings can contribute to shutdown problems.
  • Incomplete Updates: Interrupted or failed Windows updates can leave the system in an inconsistent state, preventing proper shutdown.

Troubleshooting Strategies

Addressing a Windows 10 shutdown issue requires a systematic approach, starting with simple solutions and progressing to more advanced techniques.

1. Force Shutdown:

In cases where the system is completely unresponsive, a forced shutdown is necessary to regain control. This involves physically pressing and holding the power button until the computer shuts off. While this method is drastic, it’s often the only way to regain control when the system is frozen.

2. Restart the Computer:

A restart can often resolve temporary software glitches or resource conflicts that hinder shutdown. This can be initiated by pressing the power button or using the "Restart" option in the Start menu.

3. Check for Updates:

Outdated drivers or operating system versions can contribute to shutdown issues. Ensure that Windows and all installed drivers are up-to-date by checking for updates through Windows Update.

4. Run System File Checker (SFC):

Corrupted system files can disrupt shutdown processes. Running the System File Checker (SFC) tool can scan and repair any damaged files, potentially resolving the issue. To access SFC, open the Command Prompt as administrator and type "sfc /scannow".

5. Close Running Programs:

Excessive resource usage by running programs can prevent shutdown. Close all unnecessary programs and applications, especially those known to consume significant resources.

6. Disable Startup Programs:

Unnecessary programs that automatically launch at startup can contribute to resource conflicts. Disable unnecessary startup programs by navigating to Task Manager (Ctrl+Shift+Esc), opening the Startup tab, and disabling programs that are not essential.

7. Check for Hardware Malfunctions:

If software troubleshooting fails, consider hardware issues. Check for loose connections, faulty RAM modules, or failing hard drives. Consider running hardware diagnostics to identify any potential hardware problems.

8. Run a Virus Scan:

Malware infections can interfere with system processes, including shutdown. Run a comprehensive antivirus scan to detect and remove any malicious software that might be causing the issue.

9. Reset Power Settings:

Faulty power settings can disrupt shutdown behavior. Resetting power settings to their default values can sometimes resolve the problem. This can be done by searching for "Power Options" in the Start menu and selecting "Choose what the power buttons do" under "Power and Sleep."

10. Clean Boot:

A clean boot starts Windows with minimal programs and drivers, helping to isolate the source of the shutdown issue. This can be initiated by searching for "msconfig" in the Start menu, navigating to the "Services" tab, and disabling all unnecessary services.

11. System Restore:

If the shutdown problem arose recently, a system restore can revert the system to a previous working state, potentially resolving the issue. Access System Restore by searching for "Create a restore point" in the Start menu and selecting "System Restore."

12. Reinstall Windows:

In severe cases, a clean reinstall of Windows might be necessary to resolve persistent shutdown issues. This involves formatting the hard drive and installing a fresh copy of Windows.

FAQs

Q: What are the most common causes of a Windows 10 computer refusing to shut down?

A: The most common causes include software conflicts, driver issues, corrupted system files, and excessive resource usage by running programs.

Q: Is it safe to force shut down my computer?

A: While a forced shutdown is sometimes necessary to regain control, it is not recommended as a regular practice. Frequent forced shutdowns can lead to data corruption or damage to the hard drive.

Q: How can I prevent shutdown issues in the future?

A: Regularly update Windows and drivers, close unnecessary programs, and run antivirus scans to minimize the risk of shutdown problems.

Q: What should I do if troubleshooting steps fail to resolve the issue?

A: If troubleshooting fails, consider seeking professional assistance from a qualified technician.

Tips

  • Regularly update Windows and drivers: Ensure your system is running the latest software versions to minimize the risk of compatibility issues.
  • Close unnecessary programs: Avoid running too many programs simultaneously to prevent resource conflicts.
  • Run regular antivirus scans: Protect your system from malware infections that can disrupt system processes.
  • Monitor system resources: Keep an eye on CPU, RAM, and disk usage to identify potential resource bottlenecks.
  • Back up your data regularly: This will safeguard your data in case of system failures or data loss.

Conclusion

A Windows 10 computer that refuses to shut down can be a frustrating experience, but with a systematic approach to troubleshooting, the issue can often be resolved. By starting with simple solutions and gradually progressing to more advanced techniques, users can identify and address the underlying cause of the shutdown problem. Regular maintenance, including system updates, antivirus scans, and resource management, can help prevent future shutdown issues and ensure a smooth and reliable computing experience.

Fix Windows 10 Shutdown issues - YouTube How to Fix Slow and Unresponsive Windows 10 - TipsMake.com How to Troubleshoot 'Windows 10 PC Takes Forever to Shutdown' Problem - IR Cache
Troubleshoot Windows 10 Taskbar Unresponsive And Very Slow How To Fix Windows 10 Not Shutdown Problem 2 Easy Way 100% Solved - YouTube How To Fix Auto Shutdown/Restart Problem On Windows 10 In 2021 - 360CongNghe.net
How To Fix Windows 10 Shutdowns Problems On Laptops: Master Solving Taskbar unresponsive windows 10 - rtsprofiles

Closure

Thus, we hope this article has provided valuable insights into Unresponsive Windows 10: A Comprehensive Guide to Troubleshooting Shutdown Issues. We hope you find this article informative and beneficial. See you in our next article!

Creating A Bootable USB Drive For Windows 10: A Comprehensive Guide

Creating a Bootable USB Drive for Windows 10: A Comprehensive Guide

Introduction

With great pleasure, we will explore the intriguing topic related to Creating a Bootable USB Drive for Windows 10: A Comprehensive Guide. Let’s weave interesting information and offer fresh perspectives to the readers.

Creating a Bootable USB Drive for Windows 10: A Comprehensive Guide

How to Create a Windows 10 Bootable USB - Using a Media Creation Tool

The process of installing Windows 10 on a new computer or reinstalling it on an existing one often necessitates the creation of a bootable USB drive. This drive acts as a portable installation medium, allowing users to bypass traditional optical disc methods and install Windows directly from the USB drive. This method offers numerous advantages, including faster installation speeds, greater portability, and improved compatibility with modern systems.

Understanding the Process

Creating a bootable USB drive for Windows 10 involves several key steps:

  1. Downloading the Windows 10 ISO Image: The first step is to obtain the official Windows 10 ISO image from Microsoft’s website. This file contains all the necessary installation files for Windows 10.

  2. Preparing the USB Drive: A USB flash drive with sufficient storage capacity (at least 8GB) is required. The drive must be formatted to the correct file system (usually FAT32) and should be empty before proceeding.

  3. Using a Tool to Create the Bootable Drive: Several tools can assist in creating a bootable USB drive from the downloaded ISO image. These tools vary in their features and interface but ultimately achieve the same goal.

Popular Tools for Creating Bootable USB Drives

  • Rufus: A lightweight and widely used tool known for its simplicity and speed. Rufus offers various options for customizing the boot drive, including selecting the boot mode (UEFI or BIOS) and enabling advanced features like GPT partitioning.

  • Windows USB/DVD Download Tool: A tool developed by Microsoft, specifically designed for creating bootable USB drives or DVDs for Windows installations. This tool offers a straightforward interface and is compatible with various Windows versions.

  • Media Creation Tool: Another Microsoft-provided tool, the Media Creation Tool allows users to create a bootable USB drive or ISO image for Windows 10. This tool simplifies the process, downloading the appropriate Windows 10 version based on the user’s existing license.

Step-by-Step Guide to Creating a Bootable USB Drive

  1. Download the Windows 10 ISO Image: Visit the official Microsoft website and download the Windows 10 ISO image. Choose the appropriate version (Home, Pro, etc.) and language.

  2. Prepare the USB Drive: Connect the USB flash drive to your computer. Open the file explorer and locate the drive. Right-click on the drive and select "Format." Choose FAT32 as the file system and ensure the "Quick Format" option is selected. Click "Start" to format the drive.

  3. Use a Tool to Create the Bootable Drive: Choose a tool like Rufus, the Windows USB/DVD Download Tool, or the Media Creation Tool. Follow the instructions provided by the chosen tool.

    • Rufus:

      • Open Rufus and select the downloaded Windows 10 ISO image.
      • Select the USB drive from the "Device" dropdown menu.
      • Ensure the "Create a bootable disk using" option is set to "ISO Image."
      • Choose the appropriate boot mode (UEFI or BIOS) based on your system’s configuration.
      • Click "Start" to begin the process.
    • Windows USB/DVD Download Tool:

      • Open the tool and select the downloaded Windows 10 ISO image.
      • Choose "USB device" as the media type.
      • Select the USB drive from the "Device" dropdown menu.
      • Click "Begin copying" to start the process.
    • Media Creation Tool:

      • Open the tool and select "Create installation media for another PC."
      • Choose the appropriate language, edition, and architecture (32-bit or 64-bit) for your system.
      • Select "USB flash drive" as the media type.
      • Choose the USB drive from the "Device" dropdown menu.
      • Click "Next" and follow the on-screen instructions.
  4. Wait for the Process to Complete: The process of creating a bootable USB drive may take some time, depending on the size of the ISO image and the speed of your computer. Do not interrupt the process.

  5. Verify the Bootable Drive: Once the process is complete, you can verify that the USB drive is bootable by restarting your computer and entering the BIOS or UEFI settings. Look for the option to boot from the USB drive and select it. If the drive is bootable, you should see the Windows 10 setup screen.

FAQs

Q: What if my USB drive is not recognized by the tool?

A: Ensure the USB drive is properly connected to the computer. Try using a different USB port. If the drive still isn’t recognized, it may be faulty or incompatible.

Q: Can I use a USB drive with less than 8GB storage capacity?

A: While technically possible, it is not recommended. A larger drive ensures sufficient space for the installation files and temporary data.

Q: What happens if I interrupt the process of creating the bootable drive?

A: Interrupting the process can result in a corrupted USB drive, rendering it unusable for installation. It is crucial to allow the process to complete without interruption.

Q: Can I create a bootable USB drive for Windows 10 using a Mac computer?

A: Yes, you can use a tool like TransMac to create a bootable USB drive for Windows 10 on a Mac computer.

Q: How can I use the bootable USB drive to install Windows 10?

A: After creating the bootable USB drive, you can use it to install Windows 10 on a new computer or reinstall it on an existing one. During the boot process, select the option to boot from the USB drive. Follow the on-screen instructions to complete the installation.

Tips

  • Back up your data: Before proceeding with the installation, back up all your important data to prevent data loss.
  • Check system requirements: Ensure your computer meets the minimum system requirements for Windows 10.
  • Disable antivirus software: Temporarily disable antivirus software during the installation process to avoid potential conflicts.
  • Use a reliable USB drive: Choose a high-quality USB flash drive from a reputable brand to ensure reliability during the installation process.
  • Keep the USB drive connected during the installation: Do not disconnect the USB drive until the installation process is complete.

Conclusion

Creating a bootable USB drive for Windows 10 is a straightforward process that empowers users to install or reinstall Windows 10 with ease. By following the steps outlined in this guide and using the appropriate tools, users can create a bootable USB drive that allows for a smooth and efficient installation experience. This method offers numerous advantages over traditional installation methods, making it an ideal choice for modern users.

Creating A Windows 10 Usb Boot Windows 10 how to make a usb drive bootable - managesexi How to Create Windows 10 Bootable USB Flash Drive  RUFUS
How to Create a Windows 10 Bootable USB Drive using DiskPart  Computer Systems Servicing Guide How To Create Bootable USB Drive from Windows 10 ISO With CMD - YouTube Bootable Windows 10 USB Flash Disk. How to Create Windows 10 Bootable USB Disk? - YouTube
How To Create Bootable Windows 10 Usb Flash Drive Using The Media - Vrogue How To Create A Bootable Usb With Easybcd On Windows 10

Closure

Thus, we hope this article has provided valuable insights into Creating a Bootable USB Drive for Windows 10: A Comprehensive Guide. We appreciate your attention to our article. See you in our next article!