Archives 2023

QBittorrent: A Comprehensive Guide For Windows 10 Users

qBittorrent: A Comprehensive Guide for Windows 10 Users

Introduction

In this auspicious occasion, we are delighted to delve into the intriguing topic related to qBittorrent: A Comprehensive Guide for Windows 10 Users. Let’s weave interesting information and offer fresh perspectives to the readers.

qBittorrent: A Comprehensive Guide for Windows 10 Users

How To Install qBittorrent in Windows 10 - YouTube

In the realm of file sharing, torrenting remains a popular and efficient method. While numerous torrent clients exist, qBittorrent stands out as a reliable, feature-rich, and user-friendly option for Windows 10 users. This article delves into the intricacies of qBittorrent, exploring its functionalities, benefits, and how it empowers users to navigate the torrenting landscape with ease.

Understanding the Core of qBittorrent

qBittorrent is a free and open-source BitTorrent client, renowned for its lightweight nature, robust feature set, and commitment to user privacy. Unlike some commercial alternatives, qBittorrent does not bundle adware or spyware, ensuring a clean and secure torrenting experience.

Key Features of qBittorrent

qBittorrent is packed with features that cater to both casual and advanced users:

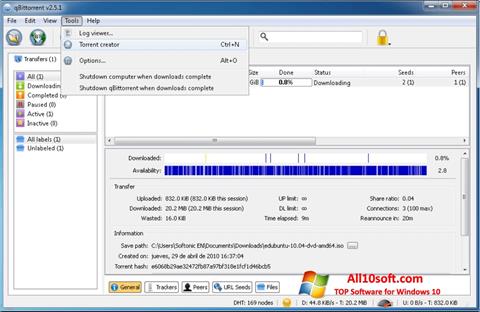
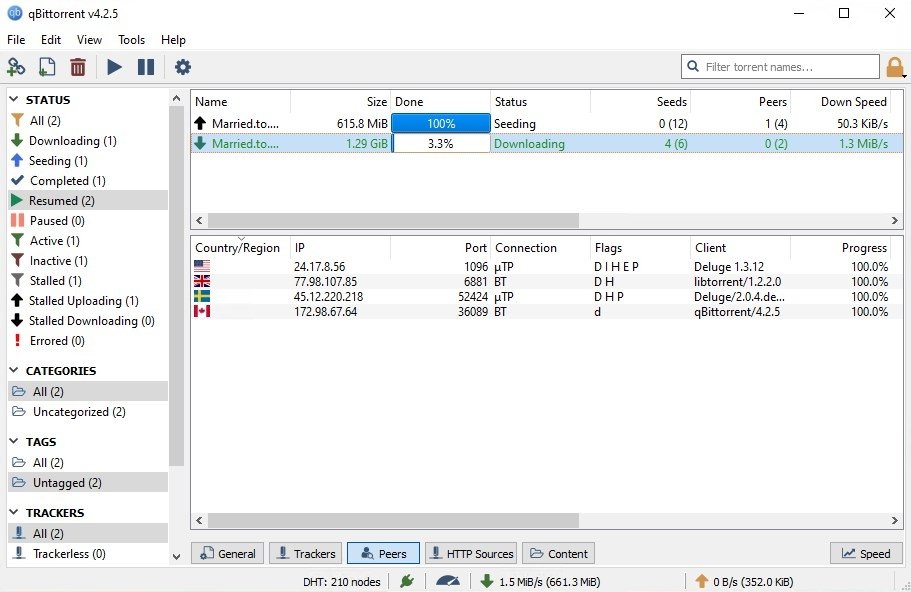
  • User-Friendly Interface: qBittorrent boasts a clean and intuitive interface that is easy to navigate, even for newcomers to torrenting. Its straightforward design allows users to quickly locate and manage torrents, download files, and monitor progress.
  • Comprehensive Torrent Management: qBittorrent provides granular control over torrents, enabling users to set download and upload speeds, schedule downloads, prioritize files within a torrent, and manage multiple torrents simultaneously.
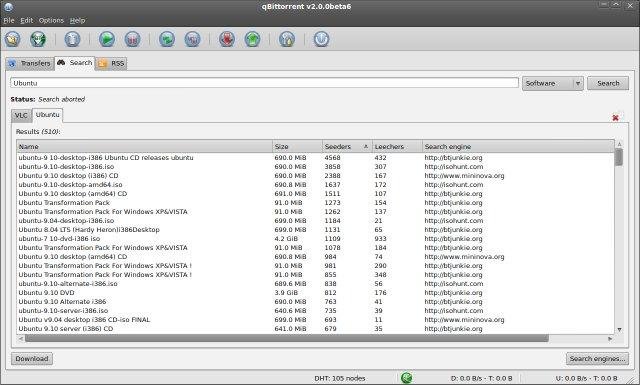
  • Built-in Search Functionality: The client incorporates a built-in search engine that allows users to search for torrents directly within the application, eliminating the need for external search tools. This integrated functionality streamlines the torrent discovery process.
  • RSS Feed Support: qBittorrent supports RSS feeds, enabling users to automatically download torrents from specified feeds. This feature is particularly useful for users who want to stay updated on the latest releases or content in specific categories.
  • Advanced Filtering Options: qBittorrent offers advanced filtering options, allowing users to fine-tune their search results based on criteria such as file size, file type, and torrent popularity. This feature enhances the precision and efficiency of torrent discovery.
  • IP Filtering and Encryption: qBittorrent prioritizes user privacy and security by supporting IP filtering and encryption protocols. These features help to protect users’ identities and data during torrenting activities.
  • Cross-Platform Compatibility: qBittorrent is available for various operating systems, including Windows, macOS, Linux, and FreeBSD. This cross-platform compatibility allows users to seamlessly transition between different devices without compromising functionality.
  • Regular Updates and Support: qBittorrent is actively maintained and developed, ensuring regular updates to address security vulnerabilities, enhance features, and improve user experience.

Benefits of Using qBittorrent

qBittorrent offers a compelling set of benefits that make it a preferred choice for many Windows 10 users:

  • Free and Open Source: qBittorrent is free to use and open-source, meaning its source code is publicly available for inspection and modification. This transparency fosters trust and allows users to contribute to its development.
  • Lightweight and Resource-Efficient: qBittorrent is designed to be lightweight and resource-efficient, minimizing its impact on system performance. This makes it suitable for users with limited system resources or those who prefer a streamlined torrenting experience.
  • Secure and Privacy-Focused: qBittorrent prioritizes user privacy and security by avoiding adware, spyware, and intrusive tracking mechanisms. Its built-in encryption and IP filtering features further enhance user protection.
  • Feature-Rich and Customizable: qBittorrent provides a comprehensive set of features and customization options, enabling users to tailor the client to their specific needs and preferences.
  • Active Community and Support: qBittorrent enjoys a vibrant and supportive community of users and developers, providing a wealth of resources, documentation, and assistance for users facing issues or seeking guidance.

FAQs About qBittorrent for Windows 10

1. Is qBittorrent Legal to Use?

The legality of using torrent clients like qBittorrent depends on the specific content being downloaded. Downloading copyrighted material without permission is illegal in most jurisdictions. However, qBittorrent itself is a legal tool and can be used for downloading legal content, such as open-source software, public domain files, or content licensed under Creative Commons.

2. Is qBittorrent Safe to Use?

qBittorrent is generally considered safe to use, particularly when compared to some commercial torrent clients that bundle adware or spyware. However, it’s crucial to exercise caution when downloading torrents from unknown sources, as they may contain malware or viruses. Using reputable torrent websites and scanning downloaded files with antivirus software can help mitigate risks.

3. How Do I Download and Install qBittorrent on Windows 10?

Downloading and installing qBittorrent on Windows 10 is straightforward:

  • Visit the official qBittorrent website (https://www.qbittorrent.org/).
  • Download the latest version of the installer for Windows.
  • Run the installer and follow the on-screen instructions.
  • Once installed, launch qBittorrent and configure it according to your preferences.

4. How Do I Use qBittorrent to Download Torrents?

  • Locate a torrent file you wish to download.
  • Drag and drop the torrent file into the qBittorrent window or click the "Add Torrent" button.
  • qBittorrent will automatically start downloading the torrent.
  • You can monitor the download progress and manage the torrent using the various options available in the interface.

5. What Are Some Best Practices for Using qBittorrent?

  • Download from Reputable Sources: Prioritize downloading torrents from trusted and reputable websites to minimize the risk of malware or viruses.
  • Use a VPN: A VPN can encrypt your internet traffic and mask your IP address, enhancing your privacy and security while torrenting.
  • Scan Downloaded Files: Always scan downloaded files with a reliable antivirus program to ensure they are free from malware or viruses.
  • Keep qBittorrent Updated: Regularly update qBittorrent to benefit from security patches, bug fixes, and new features.
  • Manage Download and Upload Speeds: Adjust download and upload speeds to optimize performance and avoid network congestion.
  • Use a Torrent Magnet Link: Torrent magnet links are a convenient and efficient way to initiate downloads without the need for a separate torrent file.

Tips for Optimizing qBittorrent

  • Configure Download and Upload Limits: Set appropriate download and upload limits based on your internet connection and bandwidth availability.
  • Prioritize Torrents: Use the priority system to prioritize specific torrents, ensuring that they receive more bandwidth and complete faster.
  • Schedule Downloads: Schedule downloads for specific times to avoid network congestion or maximize download speeds during off-peak hours.
  • Use the RSS Feed Feature: Subscribe to RSS feeds for your favorite content providers to automatically download new torrents as they become available.
  • Enable Encryption: Activate encryption to protect your data and privacy while torrenting.
  • Enable IP Filtering: Use IP filtering to block known malicious peers and enhance security.

Conclusion

qBittorrent stands as a powerful and versatile torrent client for Windows 10 users. Its user-friendly interface, comprehensive feature set, and commitment to privacy make it an ideal choice for individuals seeking a reliable and efficient torrenting experience. By understanding its functionalities, benefits, and best practices, users can harness the power of qBittorrent to download and manage torrents with ease and security. Whether you’re a casual downloader or a seasoned torrent enthusiast, qBittorrent empowers you to navigate the world of torrenting with confidence and control.

Qbittorrent for windows 10 - ersap Download and Install Qbittorrent on Windows 10 - YouTube Qbittorrent Download and Install on Windows 10 - Best Settings for Privacy and High Performance
๋‹ค์šด๋กœ๋“œ qBittorrent Windows 10 (32/64 bit) ํ•œ๊ตญ์–ด qBittorrent - A Must Read Comprehensive Guide - DotCom Magazine-Influencers And Entrepreneurs Qbittorrent windows - acakit
qBittorrent-For-Windows-10 - Windows Mode [Guide] Torrent Setup with OpenVPN + Qbittorrent on Windows 10 : r/FastestVPN

Closure

Thus, we hope this article has provided valuable insights into qBittorrent: A Comprehensive Guide for Windows 10 Users. We hope you find this article informative and beneficial. See you in our next article!

Navigating The Digital Landscape: Understanding File Management In Windows 10

Navigating the Digital Landscape: Understanding File Management in Windows 10

Introduction

In this auspicious occasion, we are delighted to delve into the intriguing topic related to Navigating the Digital Landscape: Understanding File Management in Windows 10. Let’s weave interesting information and offer fresh perspectives to the readers.

Manajemen File Di Microsoft Windows 10 โ€“ Tips And Solution

The digital world is built on data, and files are the building blocks of that data. Whether it’s a document, an image, a video, or a program, files are the containers that hold the information we create, share, and use daily. Windows 10, the widely-used operating system, provides a robust framework for managing these files, enabling users to access, organize, and manipulate them effectively.

This article delves into the intricacies of file management within Windows 10, exploring the various methods for accessing and interacting with files, highlighting the importance of efficient file organization, and offering practical tips for maximizing user experience.

Understanding the File System

Windows 10 employs a hierarchical file system, organizing files and folders in a tree-like structure. This structure ensures efficient navigation and retrieval of data. At the top of the hierarchy sits the root directory, represented by the "C:" drive (or other drives depending on the system configuration). From this root, further directories branch out, each representing a specific category or location for storing data.

For instance, the "Users" directory holds individual user accounts, with each account containing sub-directories for documents, pictures, music, and other personal files. This hierarchical structure allows for logical organization, making it easier to locate and manage files.

Accessing Files: Exploring the Options

Windows 10 offers multiple methods for accessing files, catering to different user preferences and workflows:

  • File Explorer: This is the primary tool for navigating and managing files. It provides a graphical interface for browsing directories, viewing file contents, and performing actions like copying, moving, deleting, and renaming files.

  • Search Bar: Windows 10’s integrated search functionality allows users to quickly find specific files by name, type, or even content. Simply type the search term in the taskbar’s search bar, and the system will present relevant results.

  • Recent Files: The "Recent Files" section in the Start menu provides a quick access point to files that have been recently opened or modified. This saves time when working with frequently used files.

  • Pinned Files: The "Pinned Files" section in the Start menu allows users to pin specific files or folders for easy access. This is particularly useful for files that are regularly accessed.

  • Context Menus: Right-clicking on a file or folder in File Explorer opens a context menu with a range of actions, including opening, copying, moving, deleting, renaming, and more. This provides a convenient way to perform common file operations.

Beyond Accessing: Interacting with Files

Accessing files is just the first step. Windows 10 offers a plethora of tools and functionalities for interacting with files, enabling users to:

  • Open Files: Double-clicking a file opens it using the associated application. For example, double-clicking a .docx file will open it in Microsoft Word.

  • Edit Files: Depending on the file type, users can edit files directly within the associated application. This allows for modifying text, images, audio, video, and other file formats.

  • Share Files: Windows 10 provides various methods for sharing files, including email attachments, cloud storage services, and network sharing.

  • Print Files: Many file types can be printed directly from Windows 10. This functionality is often integrated within the associated application.

  • Convert Files: Windows 10 offers built-in tools and third-party software for converting files between different formats. This allows for greater compatibility across various applications and platforms.

The Importance of Organization: Navigating the Digital Landscape

Efficient file organization is crucial for managing a digital library. A well-structured file system ensures that files are easily located, accessed, and managed. Here are some key principles for effective file organization:

  • Use a Consistent Naming System: Employ a clear and consistent naming convention for files, making it easier to identify them. For example, use descriptive file names and date stamps.

  • Create Folders: Organize files into folders based on category, project, or date. This helps to avoid clutter and provides a logical structure for accessing files.

  • Utilize Subfolders: Further subdivide folders into smaller categories for more granular organization.

  • Use Tags: Windows 10 allows users to tag files with keywords. This enables quick retrieval using search filters.

  • Regularly Clean Up: Regularly delete unnecessary files and folders to maintain a clean and organized file system.

Tips for Optimizing File Management

Here are some practical tips for enhancing file management in Windows 10:

  • Customize File Explorer: Tailor File Explorer to suit personal preferences by customizing the ribbon, navigation pane, and view options.

  • Use File Explorer’s Search Function: Leverage File Explorer’s powerful search capabilities to quickly locate files based on criteria like file name, type, date, and location.

  • Utilize Cloud Storage: Integrate cloud storage services like OneDrive or Google Drive to store and access files from multiple devices.

  • Back Up Regularly: Regularly back up important files to prevent data loss. This can be done through external hard drives, cloud storage, or system backups.

  • Consider File Management Software: Explore specialized file management software that offers advanced features like file indexing, search optimization, and duplicate file detection.

FAQs on File Management in Windows 10

Q: How do I create a new folder in Windows 10?

A: To create a new folder in File Explorer, right-click within the desired directory, select "New," and then "Folder." You can then rename the folder to your liking.

Q: How do I move a file from one folder to another in Windows 10?

A: Select the file you want to move, right-click on it, and choose "Cut." Navigate to the target folder, right-click within the folder, and select "Paste."

Q: How do I delete a file in Windows 10?

A: Select the file you want to delete, right-click on it, and choose "Delete." Alternatively, you can use the "Delete" key on your keyboard.

Q: How do I rename a file in Windows 10?

A: Right-click on the file you want to rename, select "Rename," and type in the new file name. Press "Enter" to confirm the change.

Q: How do I open a file in Windows 10?

A: Double-click the file you want to open. This will launch the associated application and display the file’s contents.

Q: How do I share a file in Windows 10?

A: Right-click on the file you want to share, select "Share," and choose the desired sharing method. This could involve email, cloud storage, or network sharing.

Q: How do I change the default program for opening a specific file type?

A: Right-click on the file, select "Open with," and choose the desired application. You can then select "Always use this app to open .[file extension] files" to make this the default program for that file type.

Q: How do I compress a file or folder in Windows 10?

A: Right-click on the file or folder you want to compress, select "Send to," and then "Compressed (zipped) folder." This creates a compressed archive of the selected data.

Q: How do I recover a deleted file in Windows 10?

A: Windows 10’s Recycle Bin stores deleted files temporarily. You can access the Recycle Bin and restore deleted files. However, if the file was permanently deleted, data recovery software may be required.

Conclusion

File management is an integral part of using Windows 10 effectively. By understanding the file system, exploring the various access methods, and embracing efficient organization principles, users can streamline their digital workflows and maximize productivity. From accessing and manipulating files to sharing and backing up data, Windows 10 provides a comprehensive suite of tools for managing the digital landscape. By leveraging these tools and adopting best practices, users can navigate the digital world with confidence and efficiency.

Best File Management Software For Windows 10 - JOE TECH Windows 10 Tip: Manage Files and Folders with File Explorer File Management in Windows 10 Part 1 - YouTube
Windows 10 - File Explorer Management Tutorial - How to Organize Files and Folders - Folder How to Choose the Best Free File Management Software for Windows 10 โ€“ Tech guide Windows 10 - File Management Tutorial - How To Organize  Doovi
Best File Management Software For Windows 10 โ€“ Tech guide File management tools windows 10- - lightspecials

Closure

Thus, we hope this article has provided valuable insights into Navigating the Digital Landscape: Understanding File Management in Windows 10. We appreciate your attention to our article. See you in our next article!

Understanding Windows 10 Pro: The Key To Unleashing Power And Security

Understanding Windows 10 Pro: The Key to Unleashing Power and Security

Introduction

In this auspicious occasion, we are delighted to delve into the intriguing topic related to Understanding Windows 10 Pro: The Key to Unleashing Power and Security. Let’s weave interesting information and offer fresh perspectives to the readers.

Understanding Windows 10 Pro: The Key to Unleashing Power and Security

Windows 10 pro keys - milkdax

Windows 10 Pro is a robust operating system designed for businesses and power users, offering advanced features and security measures not found in the standard Windows 10 Home edition. This article aims to provide a comprehensive understanding of the crucial role the product key plays in activating and unlocking the full potential of Windows 10 Pro.

The Essence of the Product Key

A product key is a unique 25-character alphanumeric code that serves as a digital fingerprint for your Windows 10 Pro installation. It acts as a license agreement, verifying that you have the right to use the software and granting you access to its full functionality. Without a valid product key, your Windows 10 Pro installation will be considered unlicensed, limiting its use and potentially exposing your system to security vulnerabilities.

Benefits of Windows 10 Pro

Windows 10 Pro offers a wide range of benefits for businesses and demanding users, including:

  • Enhanced Security: Features like BitLocker drive encryption, Device Guard, and Windows Hello provide robust protection against data breaches and unauthorized access.
  • Domain Join Capability: Seamlessly integrate your devices into an existing network, allowing for centralized management and policy enforcement.
  • Remote Desktop Access: Control your computer remotely, enabling access from any location with an internet connection.
  • Advanced Features: Enjoy features like Hyper-V virtualization, Windows Sandbox, and the ability to create and manage multiple user accounts.
  • Stability and Reliability: Windows 10 Pro is designed for business environments, offering increased stability and reliability through regular updates and security patches.

Obtaining a Windows 10 Pro Product Key

There are several ways to obtain a legitimate Windows 10 Pro product key:

  • Retail Purchase: Purchase a physical or digital product key from authorized retailers.
  • OEM License: New computers often come pre-installed with Windows 10 Pro, with the product key embedded within the system’s BIOS.
  • Volume Licensing: Businesses can purchase volume licenses for multiple devices, often at discounted rates.
  • Upgrade from Windows 10 Home: If you have a legitimate Windows 10 Home installation, you can upgrade to Pro by purchasing a product key and following the upgrade process.

Importance of Genuine Product Keys

Using a genuine product key is essential for several reasons:

  • Legal Compliance: Using an unlicensed version of Windows 10 Pro is a violation of copyright law and can result in legal penalties.
  • Security and Stability: Unlicensed versions may be vulnerable to malware and security threats, compromising your data and system stability.
  • Access to Updates: Genuine installations receive regular updates and security patches, ensuring your system remains secure and up-to-date.
  • Full Functionality: Only a valid product key unlocks the full potential of Windows 10 Pro, including advanced features and support.

FAQs: Product Keys and Windows 10 Pro

1. Can I use the same product key on multiple devices?

No, a single product key is only valid for one device.

2. What happens if I lose my product key?

If you lose your product key, you may be able to retrieve it from your Microsoft account, the original purchase receipt, or the system’s BIOS (for OEM licenses).

3. Is it possible to transfer my product key to a new computer?

Yes, but it’s important to follow the correct procedures to ensure the transfer is legitimate and does not violate Microsoft’s licensing terms.

4. What if I purchased a product key from an unauthorized source?

Using a product key obtained from an unauthorized source is illegal and can lead to security risks. It’s crucial to purchase from reputable retailers or authorized distributors.

5. Can I use a Windows 10 Pro product key on Windows 10 Home?

No, product keys are specific to their respective editions and cannot be used interchangeably.

Tips for Managing Product Keys

  • Store your product key securely: Keep your product key in a safe place, such as a password manager or a written record.
  • Back up your product key: Create a backup of your product key in case of loss or system failure.
  • Use reputable sources: Only purchase product keys from authorized retailers or distributors.
  • Be cautious of suspicious offers: Avoid websites or individuals offering suspiciously low prices or free product keys.
  • Keep your system updated: Regularly install updates and security patches to protect your system and maintain its stability.

Conclusion

A valid product key is crucial for unlocking the full potential of Windows 10 Pro. It ensures legal compliance, provides access to advanced features and security measures, and guarantees a stable and secure operating environment. By understanding the importance of genuine product keys and following the tips provided, you can maximize the benefits of Windows 10 Pro and protect your system from potential vulnerabilities.

PPT - Cracking the Code_ Understanding Windows 10 Pro OEM Keys PowerPoint Presentation - ID:12800629 All You Should Know About Windows 10 Pro Product Key Free - www.vrogue.co Windows 10 pro Keys
PPT - Unlocking the Power of Windows 10 Pro with a Genuine Windows 10 Key PowerPoint Windows 10 pro keys - flowver Unleashing the Power of Windows 10 Pro: Exploring the Ultimate Permanent Activator V1.5
Windows 10 Pro - Lifetime Activation Key  Retail License - Xetog Microsoft Windows 10 Professional Key (32/64 Bit)

Closure

Thus, we hope this article has provided valuable insights into Understanding Windows 10 Pro: The Key to Unleashing Power and Security. We appreciate your attention to our article. See you in our next article!

Navigating The Visual Landscape: Understanding Windows 10’s Display Settings

Navigating the Visual Landscape: Understanding Windows 10’s Display Settings

Introduction

With enthusiasm, let’s navigate through the intriguing topic related to Navigating the Visual Landscape: Understanding Windows 10’s Display Settings. Let’s weave interesting information and offer fresh perspectives to the readers.

Windows 10 Display Settings superguide: How to adjust every feature  PCWorld

The Windows 10 operating system offers a multitude of customization options to cater to diverse user preferences and needs. Among these, the display settings, often referred to as "Affichage" in French, play a crucial role in shaping the visual experience on your computer. This section delves into the intricate workings of these settings, providing a comprehensive understanding of their functions and how they influence your Windows 10 environment.

Unveiling the Display Settings: A Comprehensive Overview

The display settings in Windows 10 are a centralized hub for managing all aspects related to your screen’s appearance and functionality. These settings are accessible through the Settings app, which can be launched by clicking the Start menu and selecting the cogwheel icon. Within the Settings app, navigate to System, and then select Display.

Resolution and Scaling: The Foundation of Visual Clarity

The Resolution setting determines the number of pixels displayed on your screen, directly impacting the sharpness and detail of images and text. Higher resolutions provide a crisper visual experience, but require more processing power. The Scaling setting adjusts the size of elements on your screen, offering greater readability for users with visual impairments or those who prefer larger text and icons.

Orientation and Arrangement: Tailoring the Screen Layout

The Orientation setting allows you to adjust the screen’s rotation, switching between portrait and landscape modes. This feature proves particularly useful for users with touchscreens or those who prefer a vertical viewing experience. For multi-monitor setups, the Multiple Displays section provides options for arranging and configuring multiple screens, enabling seamless transitions between displays and maximizing screen real estate.

Brightness and Color: Fine-Tuning the Visual Experience

The Brightness setting controls the overall brightness of your screen, allowing you to adjust it based on ambient lighting conditions. The Color setting provides a range of options for customizing the color profile of your display, enabling users to fine-tune the color saturation and temperature to their liking.

Night Light and Other Accessibility Features

Windows 10 offers a Night Light feature that reduces blue light emissions from the screen during nighttime hours, promoting better sleep patterns. Additionally, the display settings include options for users with visual impairments, such as High Contrast mode, which increases the visibility of text and icons, and Magnifier, which enlarges portions of the screen for easier viewing.

The Importance of Optimal Display Settings

Properly configuring your display settings is crucial for a comfortable and efficient computing experience. Optimizing resolution, scaling, and brightness can enhance visual clarity, reduce eye strain, and improve productivity. Furthermore, leveraging accessibility features can make Windows 10 more accessible to a wider range of users.

Frequently Asked Questions (FAQs)

Q: How do I adjust the resolution of my screen?

A: To change the resolution of your screen, navigate to Settings > System > Display. In the Display section, select the screen you want to adjust and click on the Resolution dropdown menu. Choose the desired resolution from the list and click Apply.

Q: What is the difference between scaling and resolution?

A: Resolution refers to the number of pixels displayed on your screen, while scaling adjusts the size of elements on the screen. Increasing the resolution makes images and text sharper, while scaling makes them larger or smaller.

Q: Can I use different resolutions for multiple monitors?

A: Yes, you can configure different resolutions for each monitor in a multi-monitor setup. Navigate to Settings > System > Display > Multiple Displays and select the desired resolution for each monitor.

Q: How do I enable Night Light?

A: To enable Night Light, navigate to Settings > System > Display > Night Light. Toggle the Night Light switch to the On position. You can also schedule Night Light to turn on and off automatically at specific times.

Tips for Optimizing Your Display Settings

  • Experiment with different resolutions and scaling levels to find the best visual experience for your needs.
  • Adjust brightness based on ambient lighting conditions to reduce eye strain.
  • Consider using Night Light during nighttime hours to promote better sleep.
  • Explore accessibility features like High Contrast mode and Magnifier to enhance the usability of Windows 10 for users with visual impairments.

Conclusion: A Personalized Visual Experience

The display settings in Windows 10 provide a powerful suite of tools for customizing the visual experience on your computer. By understanding the various options available and making informed choices, users can tailor their display settings to suit their individual needs and preferences, ensuring a comfortable, efficient, and visually appealing computing environment. Whether you prioritize visual clarity, accessibility, or a personalized aesthetic, Windows 10’s display settings empower you to create a screen experience that is uniquely yours.

How To View Detailed Display Information In Windows 10 How To View Detailed Display Information In Windows 10 How best to change your display settings in Windows 10 - CNET
Use Windows 10's individual display scaling to perfect your multi-monitor setup  PCWorld How To View Detailed Display Information In Windows 10 Windows 10 Display Settings superguide: How to adjust every feature  PCWorld
Windows 10 Display Settings superguide: How to adjust every feature  PCWorld Understanding Windows 10 - A Guide to Help Get You Started  Daves Computer Tips

Closure

Thus, we hope this article has provided valuable insights into Navigating the Visual Landscape: Understanding Windows 10’s Display Settings. We hope you find this article informative and beneficial. See you in our next article!

Windows 11: A Comprehensive Guide To Upgrading In 2023

Windows 11: A Comprehensive Guide to Upgrading in 2023

Introduction

With great pleasure, we will explore the intriguing topic related to Windows 11: A Comprehensive Guide to Upgrading in 2023. Let’s weave interesting information and offer fresh perspectives to the readers.

Windows 11: A Comprehensive Guide to Upgrading in 2023

Upgrading to Windows 11 Why Wait for Microsoft Step by step - YouTube

The release of Windows 11 marked a significant shift in the operating system landscape, introducing a redesigned interface, enhanced security features, and new functionalities. While the allure of a fresh experience is undeniable, the decision to upgrade from Windows 10 is not without its considerations. This comprehensive guide delves into the merits and drawbacks of adopting Windows 11, providing insights to inform your decision.

The Advantages of Upgrading to Windows 11

1. A Modernized User Interface: Windows 11 boasts a refined and visually appealing design. The Start Menu has been redesigned, adopting a centered layout and emphasizing visual cues, aligning with the modern aesthetic of contemporary operating systems. The taskbar, too, has undergone a transformation, with icons now residing in the center, offering a streamlined and intuitive user experience.

2. Enhanced Security Features: Windows 11 integrates robust security enhancements, prioritizing user protection. The operating system incorporates features like Windows Hello, enabling biometric login through facial recognition or fingerprint scanning, eliminating the need for traditional passwords. Windows Defender, the built-in antivirus software, has been fortified, offering real-time protection against evolving threats.

3. Optimized Performance and Efficiency: Windows 11 leverages the power of modern hardware, delivering improved performance and efficiency. The operating system is designed to utilize the latest hardware advancements, resulting in faster boot times, smoother multitasking, and enhanced application responsiveness.

4. Seamless Integration with Microsoft Ecosystem: Windows 11 seamlessly integrates with other Microsoft services, enhancing productivity and connectivity. The operating system offers seamless integration with Microsoft Teams, OneDrive, and other Microsoft 365 applications, streamlining workflows and fostering a unified user experience.

5. Support for Latest Hardware: Windows 11 is designed to fully leverage the capabilities of modern hardware. The operating system supports the latest processors, graphics cards, and other components, ensuring compatibility and optimal performance for cutting-edge devices.

6. Gaming Enhancements: Windows 11 introduces features specifically tailored for gamers, enhancing their experience. The operating system supports DirectStorage, a technology that allows games to load assets directly from storage, reducing loading times. Additionally, Auto HDR enhances visual fidelity, delivering a more immersive gaming experience.

The Drawbacks of Upgrading to Windows 11

1. System Requirements: Windows 11 imposes stricter system requirements compared to its predecessor. To run the operating system smoothly, devices must meet specific hardware specifications, including a compatible processor, sufficient RAM, and a Secure Boot-enabled UEFI firmware. Older systems may not meet these requirements, preventing them from upgrading.

2. Compatibility Issues: While Microsoft strives for compatibility, some older applications and peripherals might not function seamlessly with Windows 11. This can pose a challenge for users reliant on legacy software or hardware, requiring them to seek alternatives or update their equipment.

3. Limited Customization: Windows 11, while visually appealing, offers limited customization options compared to its predecessor. The Start Menu and taskbar are less customizable, restricting users from arranging their interface according to their preferences.

4. Privacy Concerns: While Windows 11 offers enhanced security features, it also collects more user data than Windows 10. This data collection, intended to improve user experience and personalize services, can raise privacy concerns for users sensitive to their data footprint.

5. Initial Learning Curve: The redesigned user interface and new features in Windows 11 may require users to adjust their workflows and learn new functionalities. This initial learning curve can be a barrier for users accustomed to the familiar interface of Windows 10.

FAQs about Upgrading to Windows 11

Q: What are the minimum system requirements for Windows 11?

A: Windows 11 requires a 1 GHz or faster processor with two or more cores, 4 GB of RAM, 64 GB of storage, and a compatible graphics card. The operating system also mandates a Secure Boot-enabled UEFI firmware and a display with a resolution of at least 1280 x 720 pixels.

Q: Will my current software and hardware work with Windows 11?

A: While Microsoft strives for compatibility, some older applications and peripherals might not work seamlessly with Windows 11. It’s recommended to check the compatibility of your software and hardware before upgrading.

Q: How can I check if my device meets the system requirements for Windows 11?

A: Microsoft provides a PC Health Check app that can assess your device’s compatibility with Windows 11. Download and run the app to determine if your system meets the requirements.

Q: Is it possible to downgrade from Windows 11 to Windows 10?

A: Yes, it is possible to downgrade from Windows 11 to Windows 10. However, this process is not as straightforward as upgrading and might require a clean installation of Windows 10.

Q: How can I back up my data before upgrading to Windows 11?

A: Backing up your data before upgrading is essential. You can use various methods, including external hard drives, cloud storage services, or system image backups.

Tips for Upgrading to Windows 11

1. Check System Requirements: Ensure your device meets the minimum system requirements for Windows 11 before proceeding with the upgrade.

2. Back Up Your Data: Create a comprehensive backup of your data, including files, settings, and applications, to prevent data loss during the upgrade process.

3. Check Software and Hardware Compatibility: Verify the compatibility of your software and hardware with Windows 11 to avoid potential issues after upgrading.

4. Download and Install the Latest Updates: Install the latest updates for your existing Windows 10 installation to ensure a smooth upgrade process.

5. Perform a Clean Installation (Optional): For a fresh start, consider performing a clean installation of Windows 11, wiping your hard drive and installing the operating system from scratch.

Conclusion

Upgrading to Windows 11 presents both opportunities and challenges. The operating system offers a modernized user interface, enhanced security features, and optimized performance, but it also comes with stricter system requirements, potential compatibility issues, and a limited customization experience. The decision to upgrade should be based on a thorough assessment of your individual needs, system compatibility, and the potential benefits and drawbacks. By carefully considering these factors, you can make an informed decision that aligns with your computing requirements and preferences.

Windows 11 Comprehensive Guide And Cheat Sheet Windows 11 Comprehensive Guide And Cheat Sheet Windows 11 upgrade - jasgreatest
Windows 11 Vs Windows 10 - Should You Upgrade? - PCSavage A Comprehensive English Guide on Upgrading to Windows 11 - REALM RUSH Windows 11 upgrade offer screen + upgrading! - YouTube
How to Upgrade Windows 11 HOME to Windows 11 PRO? - YouTube Windows 11 Review: Worth Upgrading? [2023] - TECHTELEGRAPH

Closure

Thus, we hope this article has provided valuable insights into Windows 11: A Comprehensive Guide to Upgrading in 2023. We appreciate your attention to our article. See you in our next article!

The Importance Of Antivirus Protection In Windows 11

The Importance of Antivirus Protection in Windows 11

Introduction

With enthusiasm, let’s navigate through the intriguing topic related to The Importance of Antivirus Protection in Windows 11. Let’s weave interesting information and offer fresh perspectives to the readers.

The Importance of Antivirus Protection in Windows 11

Best Antivirus for Windows 11 in 2023  Cybernews

Windows 11, the latest iteration of Microsoft’s operating system, boasts enhanced security features and a modern interface. However, even with these advancements, the need for robust antivirus protection remains paramount. This article delves into the crucial role of antivirus software in safeguarding Windows 11 users from a multitude of cyber threats.

Understanding the Cyber Threat Landscape

The digital world is constantly evolving, and so are the threats lurking within it. Malware, encompassing viruses, worms, Trojans, ransomware, and spyware, poses a persistent danger to computer systems. These malicious programs can infiltrate devices through various means, including:

  • Phishing emails: Deceptive emails designed to trick users into clicking malicious links or downloading infected attachments.
  • Malicious websites: Websites that host malware or exploit vulnerabilities in web browsers.
  • Drive-by downloads: Unintentional downloads of malware while browsing the internet.
  • Exploiting software vulnerabilities: Attackers exploit security flaws in software applications to gain unauthorized access to systems.

Antivirus Software: A First Line of Defense

Antivirus software acts as a critical shield against these cyber threats. It employs various techniques to detect and neutralize malicious programs, including:

  • Signature-based detection: Comparing files to a database of known malware signatures.
  • Heuristic analysis: Identifying suspicious behavior patterns indicative of malware.
  • Cloud-based protection: Leveraging a network of servers to analyze files and update malware definitions in real time.
  • Real-time protection: Monitoring system activity for suspicious actions and blocking potential threats.

Benefits of Antivirus Protection in Windows 11

Implementing antivirus software in Windows 11 offers significant benefits, including:

  • Protection against malware: Antivirus software actively scans for and removes known malware threats, preventing them from causing harm.
  • Data security: Safeguarding sensitive information stored on the computer, such as personal data, financial details, and confidential documents.
  • System stability: Preventing malware from disrupting system performance and causing crashes.
  • Online security: Protecting against online threats such as phishing attacks and malicious websites.
  • Peace of mind: Providing users with confidence that their systems are protected from cyber threats.

Choosing the Right Antivirus Software

Selecting the most suitable antivirus software for Windows 11 requires careful consideration of several factors:

  • Protection features: Evaluating the software’s ability to detect and neutralize various types of malware.
  • Performance impact: Assessing the software’s effect on system performance and resource consumption.
  • Ease of use: Considering the user interface and the simplicity of managing the software.
  • Customer support: Evaluating the availability and quality of technical support.
  • Cost: Comparing the pricing plans and features offered by different vendors.

FAQs on Antivirus Protection in Windows 11

Q: Is Windows 11’s built-in security enough?

A: While Windows 11 offers enhanced security features, it is not a substitute for comprehensive antivirus protection. The built-in security measures focus on general system protection, while antivirus software provides specialized malware detection and removal capabilities.

Q: Is it necessary to install multiple antivirus programs?

A: Installing multiple antivirus programs can lead to conflicts and performance issues. It is generally recommended to rely on a single reputable antivirus solution.

Q: Can antivirus software slow down my computer?

A: Modern antivirus software is designed to minimize performance impact. However, certain features, such as real-time scanning, may consume some system resources. Choosing a lightweight and efficient antivirus solution can mitigate this issue.

Q: How often should I update my antivirus software?

A: Antivirus software should be updated regularly to ensure it has the latest malware definitions and security patches. Most antivirus programs automatically update in the background, but it is recommended to manually check for updates periodically.

Tips for Optimal Antivirus Protection in Windows 11

  • Install a reputable antivirus software: Choose a well-known and trusted antivirus solution.
  • Keep the antivirus software updated: Ensure that your antivirus software has the latest definitions and security patches.
  • Scan your computer regularly: Perform full system scans at least once a month and more frequently if you suspect malware infection.
  • Be cautious when opening emails and attachments: Avoid opening suspicious emails or clicking on links from unknown sources.
  • Use strong passwords and enable two-factor authentication: Secure your accounts and protect against unauthorized access.
  • Stay informed about cybersecurity threats: Keep yourself updated on the latest malware threats and security best practices.

Conclusion

In the ever-evolving digital landscape, antivirus protection is no longer a luxury but a necessity. Windows 11, despite its robust security features, requires the added layer of defense provided by a comprehensive antivirus solution. By implementing a reliable antivirus program and following best practices, users can significantly reduce their risk of malware infection and safeguard their systems, data, and online privacy.

Windows 11 Inbuilt Antivirus Windows 11 Free Antivirus l Best Antivirus For Windows 11 Antivirus For Windows 11 5+ Best Antivirus Options For Windows 11 To Try Out Today โ€“ Tugu Atv Best Windows 11 Antivirus in 2021 - NixLoop
Windows 11 Security Features: Beginner's Guide (Updated 2022) Top 5 Antivirus for Windows 11 in 2023 - 31West Best Antivirus Windows 11 2024 Reddit - Nani Tamara
11 Best Free Antivirus Apps for Windows 11 Security How to Install Avast Free Antivirus in Windows 11 - thecoderworld

Closure

Thus, we hope this article has provided valuable insights into The Importance of Antivirus Protection in Windows 11. We hope you find this article informative and beneficial. See you in our next article!

Migrating Data To A New Computer: A Comprehensive Guide

Migrating Data to a New Computer: A Comprehensive Guide

Introduction

With great pleasure, we will explore the intriguing topic related to Migrating Data to a New Computer: A Comprehensive Guide. Let’s weave interesting information and offer fresh perspectives to the readers.

Migrating Data to a New Computer: A Comprehensive Guide

The basics of data migration: A comprehensive guide  Onna Technologies, Inc. - JDSupra

The transition to a new computer is often met with excitement, but it can also be a daunting task. One of the most crucial aspects of this process is ensuring the smooth transfer of your valuable data from your old system to the new one. This migration process involves moving your files, applications, settings, and even operating system configurations to your new device.

Why is Data Migration Important?

Migrating data to a new computer is essential for several reasons:

  • Preservation of Data: Your data, including documents, photos, videos, and other important files, represents a significant part of your digital life. Migrating it to your new computer ensures its preservation and accessibility.
  • Continuity of Work: Seamlessly transferring your applications and settings allows you to continue working without interruptions or delays. This is especially important for professionals who rely on specific software and configurations.
  • Efficiency and Productivity: Having your data and applications readily available on your new computer streamlines your workflow and enhances productivity.
  • Security and Backup: The migration process provides an opportunity to create backups of your data, safeguarding it against potential data loss due to hardware failures or other unforeseen circumstances.

Methods for Data Migration

There are various methods for migrating data to a new computer, each with its own advantages and considerations:

  • External Storage Devices: This traditional method involves using external hard drives, USB flash drives, or SD cards to transfer files between computers. It is a simple and straightforward approach, but it can be time-consuming for large amounts of data and requires careful organization.
  • Cloud Storage Services: Cloud services like Google Drive, Dropbox, and OneDrive offer convenient and secure ways to store and transfer data. You can easily access your files from any device with an internet connection, making it a flexible option.
  • File Transfer Protocols: FTP (File Transfer Protocol) and SFTP (Secure File Transfer Protocol) are network protocols used to transfer files between computers. These methods are commonly used for transferring large datasets or when security is paramount.
  • Direct Transfer Using Network: If your old and new computers are connected to the same network, you can use built-in tools like Windows File Explorer or macOS Finder to transfer files directly. This method requires both computers to be powered on and connected to the network.
  • Data Migration Software: Specialized software designed for data migration simplifies the process by automating file transfers, application installations, and settings migration. These tools often offer features like data filtering, scheduling, and progress monitoring.

Factors to Consider When Choosing a Migration Method

The best method for data migration depends on several factors:

  • Amount of Data: For large datasets, cloud storage or specialized migration software may be more efficient.
  • Data Sensitivity: If your data is highly confidential, consider using secure methods like SFTP or encrypted cloud storage.
  • Technical Expertise: If you are comfortable with technology, you can choose more complex methods like FTP or direct network transfer.
  • Time Constraints: If you need to migrate data quickly, cloud storage or data migration software can be faster options.

Steps for Data Migration

Regardless of the chosen method, the general steps for data migration involve the following:

  1. Preparation:
    • Backup Your Data: Create a backup of your data on an external drive or cloud storage before starting the migration process. This ensures data recovery if something goes wrong.
    • Prepare Your New Computer: Install the necessary drivers, software, and updates on your new computer.
  2. Data Transfer:
    • Select a Migration Method: Choose the method that best suits your needs and technical abilities.
    • Transfer Data: Use the chosen method to transfer your files, applications, and settings to your new computer.
  3. Verification and Testing:
    • Verify Data Integrity: Ensure that all data has been transferred correctly and is accessible on your new computer.
    • Test Applications: Launch your applications on the new computer to ensure they function as expected.
  4. Clean Up and Secure Your Old Computer:
    • Remove Sensitive Data: Delete or securely erase sensitive data from your old computer before discarding or selling it.
    • Back Up and Format: Create a backup of your old computer’s hard drive, if desired, and then format the drive to erase all data.

FAQs

Q: What if I don’t have enough storage space on my new computer?
A: Consider using cloud storage or external hard drives to store data that doesn’t need to be on your primary drive. You can also delete unnecessary files or applications to free up space.

Q: How can I migrate my operating system to the new computer?
A: Some operating systems offer built-in tools for migrating system settings and user profiles. However, for a complete operating system migration, you might need to use specialized software or create a bootable USB drive with the operating system installation files.

Q: What are the security risks associated with data migration?
A: Data migration can expose your information to security risks, especially if you are using unsecured methods like public Wi-Fi or unencrypted file transfers. Always use secure connections and consider encrypting your data before transferring it.

Q: What are some common mistakes to avoid during data migration?
A:

  • Not backing up your data: Always create a backup before starting the migration process.
  • Using unsecured methods: Avoid using public Wi-Fi or unencrypted file transfers for sensitive data.
  • Not verifying data integrity: Ensure that all data has been transferred correctly and is accessible on the new computer.
  • Not cleaning up your old computer: Remove sensitive data and format the hard drive before discarding or selling your old computer.

Tips

  • Plan Ahead: Before starting the migration process, make a list of all the data and applications you need to transfer.
  • Use a Check List: Create a checklist to ensure that all necessary files, settings, and applications are transferred correctly.
  • Test the Process: Before migrating all your data, test the process with a small sample to ensure everything is working as expected.
  • Seek Professional Help: If you are unsure about the migration process or have a large and complex data environment, consider seeking help from a professional IT service provider.

Conclusion

Migrating data to a new computer is a crucial step in the transition process. By understanding the different methods, considering the factors involved, and following the steps outlined, you can ensure a smooth and efficient data transfer. Remember to prioritize data security, verify data integrity, and clean up your old computer to avoid potential risks. With proper planning and execution, you can seamlessly transfer your digital life to your new computer and continue working efficiently and productively.

The basics of data migration: A comprehensive guide  Onna Technologies, Inc. - JDSupra Data Migration - What it is, and how you can to do it faster Configuration Data and Data Migration - Dynamics 365  Microsoft Learn
The basics of data migration: A comprehensive guide  Onna Technologies, Inc. - JDSupra The best methods for transferring data between computers to ensure an efficient migration Data Migration: Process, Types, and Golden Rules to Follow (2023)
Strategic Guide to Legacy Application Migration  ModLogix Data Migration: Process, Strategy, Types, and Key Steps

Closure

Thus, we hope this article has provided valuable insights into Migrating Data to a New Computer: A Comprehensive Guide. We appreciate your attention to our article. See you in our next article!

Optimizing Windows 11 For Smooth Performance With 4GB RAM

Optimizing Windows 11 for Smooth Performance with 4GB RAM

Introduction

With great pleasure, we will explore the intriguing topic related to Optimizing Windows 11 for Smooth Performance with 4GB RAM. Let’s weave interesting information and offer fresh perspectives to the readers.

Optimizing Windows 11 for Smooth Performance with 4GB RAM

Windows 11 Preview on 4 GB RAM Build  User Experience  Windows Insider Program - YouTube

While 4GB RAM may be considered a low amount in today’s computing landscape, it is still possible to achieve a reasonably smooth Windows 11 experience with proper optimization. This article delves into the intricacies of maximizing performance on a system with limited RAM, exploring various techniques and strategies.

Understanding the Importance of RAM Optimization

Random Access Memory (RAM) plays a crucial role in a computer’s overall performance. It acts as a temporary storage space for frequently accessed data, allowing the operating system and applications to run efficiently. When RAM is insufficient, the system relies heavily on the hard drive for temporary storage, leading to noticeable slowdowns and lag.

Optimizing Windows 11 for 4GB RAM: A Comprehensive Guide

1. Minimizing Startup Programs:

Unnecessary programs running in the background consume precious RAM and processing power. To optimize startup, follow these steps:

  • Task Manager: Open Task Manager (Ctrl+Shift+Esc) and navigate to the "Startup" tab. Disable any programs that are not essential for the system’s initial operation.
  • System Configuration: Press Windows key + R, type "msconfig," and press Enter. Navigate to the "Startup" tab and uncheck any programs that are not required at startup.

2. Disabling Visual Effects:

Windows 11 features various visual effects that enhance the user interface but can strain resources. Disabling them can free up RAM and improve performance.

  • System Properties: Right-click "This PC" and select "Properties." Choose "Advanced system settings," then click "Settings" under Performance.
  • Visual Effects: In the "Performance Options" window, select the "Adjust for best performance" option. Alternatively, customize the visual effects by unchecking options like "Show shadows under windows" and "Enable desktop composition."

3. Managing Background Processes:

Background processes, such as updates and indexing, can consume significant RAM. Managing these processes effectively is crucial for performance optimization.

  • Windows Update: Schedule Windows updates for times when the system is not in active use.
  • Indexing: Disable indexing for specific folders or drives if they are not frequently searched. This can be done in "Control Panel" > "Indexing Options."
  • Background Apps: In "Settings" > "Privacy & security" > "Background apps," disable or limit the background activity of apps that are not essential.

4. Limiting the Number of Open Applications:

Having numerous applications running simultaneously can consume excessive RAM, leading to slowdowns.

  • Task Manager: Monitor the "Performance" tab in Task Manager to identify applications consuming significant resources. Close unnecessary applications to free up RAM.
  • Minimize Tabs: Limit the number of browser tabs open simultaneously to reduce memory usage. Consider using extensions like "OneTab" to manage and temporarily close tabs.

5. Utilizing Memory Optimization Tools:

Third-party memory optimization tools can help manage and optimize system RAM usage. Some popular options include:

  • Wise Memory Optimizer: This tool analyzes RAM usage and optimizes it by closing unnecessary processes.
  • Auslogics BoostSpeed: This comprehensive tool includes features for optimizing RAM, cleaning up disk space, and managing startup programs.

6. Disk Space Management:

A cluttered hard drive can negatively impact system performance. Regularly cleaning up unnecessary files can free up disk space and improve responsiveness.

  • Disk Cleanup: Use the built-in "Disk Cleanup" tool to remove temporary files, system files, and other unnecessary data.
  • Third-Party Tools: Consider using third-party disk cleaning and optimization tools for more comprehensive cleaning.

7. Updating Drivers and Software:

Outdated drivers and software can contribute to system instability and performance issues. Ensure all drivers and software are up to date to ensure optimal compatibility and efficiency.

  • Device Manager: Open "Device Manager" (right-click "This PC" > "Manage" > "Device Manager") and check for updates for each device.
  • Software Updates: Regularly check for updates for all installed software.

8. Enabling Page File Management:

The Page File, also known as virtual memory, allows Windows to use hard drive space as temporary RAM when physical RAM is insufficient. Properly managing the Page File can help improve system performance.

  • System Properties: Open "System Properties" as described earlier. Navigate to "Advanced system settings" > "Advanced" tab > "Performance" settings.
  • Page File: Click "Change" and choose "Custom size." Set a minimum and maximum size for the Page File. Experiment with different sizes to find the optimal configuration for your system.

9. Choosing Lightweight Applications:

Consider using lightweight alternatives to resource-intensive applications. For example, use a lightweight web browser like Opera or Vivaldi instead of Chrome or Firefox.

10. Regular Maintenance:

Regular maintenance is crucial for maintaining system health and performance. This includes:

  • Defragmentation: Regularly defragment the hard drive to optimize file organization and improve access speed.
  • Scanning for Malware: Regularly scan the system for malware to prevent performance degradation caused by malicious software.

FAQs about Optimizing Windows 11 for 4GB RAM:

Q: Will optimizing Windows 11 for 4GB RAM make it run as fast as a system with more RAM?

A: While optimization can significantly improve performance, it cannot completely compensate for the lack of RAM. With 4GB RAM, users may still experience occasional slowdowns, especially when running demanding applications or multitasking.

Q: Is it possible to run Windows 11 on a computer with only 4GB RAM?

A: Yes, Windows 11 can run on a computer with 4GB RAM, but the experience may be sluggish, particularly for demanding tasks. Optimizing the system can help mitigate these issues but may not eliminate them entirely.

Q: What are the potential drawbacks of optimizing Windows 11 for 4GB RAM?

A: While optimizing for limited RAM can improve performance, it may also result in a less visually appealing user interface due to the disabling of visual effects. Additionally, some advanced features or functionalities may be limited due to the system’s resource constraints.

Tips for Optimizing Windows 11 for 4GB RAM:

  • Prioritize essential applications and close unnecessary programs.
  • Consider using a lightweight web browser for browsing.
  • Avoid running multiple resource-intensive applications simultaneously.
  • Regularly clean up temporary files and unnecessary data.
  • Keep drivers and software up to date.
  • Experiment with different Page File settings to find the optimal configuration.

Conclusion:

Optimizing Windows 11 for a system with 4GB RAM can significantly improve performance and user experience. By implementing the techniques and strategies outlined in this article, users can achieve a smoother and more responsive system, even with limited resources. Remember that optimization is an ongoing process, and users may need to adjust their settings and habits based on their specific needs and usage patterns. While 4GB RAM may not be ideal for demanding tasks, proper optimization can unlock a surprisingly capable Windows 11 experience.

How to Optimize Windows 11 For Better Performance Optimizing windows 11 for better Performance  Increase Windows11 performance with 5 simple How to Optimize Windows 11 for best performance  Lifehack
A Guide to Optimizing Windows 11 Performance - Powerful, Smooth, and Brilliant  LaptopWorld The BEST Windows Optimizer For Windows 11 - YouTube Speed Up Windows 11  How to Make Windows 11 Faster!  Optimize/Boost Windows 11 for Gaming
Optimizing Windows 11 for a Smoother Performance How to Optimize Windows 11 for Gaming and Get Better Performance

Closure

Thus, we hope this article has provided valuable insights into Optimizing Windows 11 for Smooth Performance with 4GB RAM. We hope you find this article informative and beneficial. See you in our next article!

Accessing Windows 11 From A Mac: A Comprehensive Guide

Accessing Windows 11 from a Mac: A Comprehensive Guide

Introduction

With great pleasure, we will explore the intriguing topic related to Accessing Windows 11 from a Mac: A Comprehensive Guide. Let’s weave interesting information and offer fresh perspectives to the readers.

Accessing Windows 11 from a Mac: A Comprehensive Guide

Windows 11 on Mac: How to Run It, Pros and Cons, and Limitations - A Comprehensive Guide

The ability to remotely access a Windows 11 computer from a Mac provides users with a powerful and versatile tool for a variety of tasks. Whether you need to manage files on a Windows machine, run specific software, or simply access your work environment from a different location, remote desktop access offers a seamless and efficient solution. This guide will provide a detailed explanation of the various methods for accessing Windows 11 from a Mac, along with insights into the benefits and considerations involved.

Methods for Remote Desktop Access

Several methods allow users to remotely access a Windows 11 computer from a Mac. Each method offers unique advantages and functionalities, catering to different user needs and preferences.

1. Microsoft Remote Desktop (RDP)

Microsoft Remote Desktop (RDP) is the official and most widely used method for remote access to Windows computers. It’s a robust and feature-rich solution built directly into Windows 11, offering high performance and security.

Setting up RDP on Windows 11:

  1. Enable Remote Desktop: Navigate to "Settings" > "System" > "Remote Desktop" and toggle the "Enable Remote Desktop" switch to "On."
  2. Configure Security: Select "Choose users who can remotely access this computer" and add the desired users or groups.
  3. Note the IP Address: Locate the IP address of the Windows 11 machine, which can be found in "Network & Internet" settings.

Connecting from a Mac:

  1. Download and Install Microsoft Remote Desktop App: Access the Mac App Store and download the "Microsoft Remote Desktop" application.
  2. Add a PC: Launch the app and click "Add PC." Enter the IP address of the Windows 11 machine and provide a descriptive name for the connection.
  3. Authentication: When connecting, you will be prompted to enter the username and password of the Windows 11 user account that has been granted remote access.

Benefits of RDP:

  • High Performance: RDP is optimized for remote desktop access, delivering smooth and responsive performance even for graphically intensive tasks.
  • Security: RDP employs robust security features, including encryption and authentication, ensuring secure communication between the Mac and Windows 11 computer.
  • Widely Supported: RDP is a standard protocol supported by various operating systems and devices, making it a versatile solution.

2. Apple Remote Desktop

Apple Remote Desktop is a dedicated remote management tool designed specifically for macOS. While primarily used for managing and controlling multiple Macs, it can also be used to access and control Windows 11 computers.

Setting up Apple Remote Desktop:

  1. Install Apple Remote Desktop: Purchase and install Apple Remote Desktop on the Mac that will be used for remote access.
  2. Configure Windows 11 for Access: Ensure that the Windows 11 computer has the necessary remote management tools installed and configured.
  3. Add the Windows 11 Computer: Launch Apple Remote Desktop and add the Windows 11 computer to the list of managed devices.

Connecting from a Mac:

  1. Select the Windows 11 Computer: Within Apple Remote Desktop, choose the Windows 11 computer you wish to access.
  2. Authentication: You might be prompted to provide credentials for the Windows 11 user account.

Benefits of Apple Remote Desktop:

  • Simplified Management: Ideal for managing multiple Windows 11 computers from a central location.
  • Advanced Features: Offers features such as remote file transfer, command execution, and screen recording.

3. Third-Party Remote Desktop Software

Several third-party remote desktop applications are available for Mac users, offering alternative solutions with varying features and functionalities. Some popular options include:

  • TeamViewer: A widely used solution for remote access and collaboration, known for its user-friendliness and cross-platform compatibility.
  • Parallels Desktop: A virtual machine software that allows running Windows 11 on a Mac, providing a seamless experience for accessing Windows applications and files directly.
  • Chrome Remote Desktop: A browser-based solution that allows remote access to Windows 11 computers via Google Chrome.

Choosing the Right Method

The best method for remote desktop access depends on your specific needs and preferences. Consider the following factors:

  • Security Requirements: RDP offers robust security features, while some third-party solutions might have varying levels of security.
  • Performance Needs: RDP is optimized for remote desktop access, while other methods might have performance limitations depending on network conditions.
  • Functionality: Different methods offer varying functionalities, such as file transfer, command execution, and screen recording.
  • Cost: Some third-party solutions are free, while others require a subscription.

Benefits of Remote Desktop Access

Remote desktop access to Windows 11 from a Mac offers numerous benefits, enhancing productivity, flexibility, and collaboration.

  • Access Windows Applications and Files: Run Windows-specific software and access files stored on a Windows 11 computer from a Mac.
  • Remote Work and Collaboration: Access your work environment from anywhere with an internet connection, enabling seamless remote work and collaboration.
  • Technical Support and Troubleshooting: Provide remote technical support to users experiencing issues with their Windows 11 computers.
  • Remote Management: Manage and control multiple Windows 11 computers from a central location, simplifying administration and maintenance.

Troubleshooting Tips

  • Firewall Settings: Ensure that the Windows 11 firewall allows incoming RDP connections.
  • Network Connectivity: Verify that the Mac and Windows 11 computer are connected to the same network or have a stable internet connection.
  • User Permissions: Ensure that the user account attempting to connect has remote access permissions on the Windows 11 computer.
  • Software Compatibility: Ensure that the remote desktop software is compatible with both the Mac and Windows 11 operating systems.

FAQs

Q: Can I access a Windows 11 computer that is not on the same network as my Mac?

A: Yes, you can access a Windows 11 computer over the internet using RDP or third-party solutions that support remote access over the internet. You will need to configure port forwarding on the router connected to the Windows 11 computer to allow incoming connections.

Q: Is it safe to use remote desktop access?

A: Remote desktop access can be secure when using reputable methods like RDP and configuring appropriate security settings. However, it’s important to be aware of potential security risks and take necessary precautions to protect your data.

Q: What are the performance implications of using remote desktop access?

A: Performance can vary depending on the method used, network conditions, and the complexity of the tasks being performed. RDP is generally optimized for remote desktop access, but other methods might have performance limitations.

Q: How can I improve the performance of my remote desktop connection?

A: Consider using a wired connection for better network stability, ensuring that your internet connection has sufficient bandwidth, and optimizing the remote desktop software settings for better performance.

Conclusion

Remote desktop access to Windows 11 from a Mac provides a powerful and versatile tool for users who need to manage, control, or simply access Windows machines from a different location. By understanding the various methods available, their advantages and limitations, and implementing best practices for security and performance, users can effectively leverage this technology to enhance productivity, flexibility, and collaboration.

How to Install Windows 11 on a Mac: A Comprehensive Guide- All the ways you can run Windows 11 on a Mac  Cult of Mac Windows 11 Upgrade Mac - Get Latest Windows 11 Update
Windows 11: A Comprehensive Guide about Features and Updates Perunity - Latest Business Story PPT - A Comprehensive Guide to Downloading Windows 10 for Mac and Windows 11 for PC PowerPoint Windows 11  A Step-By-Step Guide on How to customize taskbar to look like Mac OS  ะ’ะธะดะตะพ
Microsoft announces new Windows 11 features to make your everyday easier  BigTechWire Windows 11 23H2 โ€“ New Features, AI & Comprehensive Guide โ€“ Viref

Closure

Thus, we hope this article has provided valuable insights into Accessing Windows 11 from a Mac: A Comprehensive Guide. We thank you for taking the time to read this article. See you in our next article!

Upgrading From Windows 10 To Windows 11: A Comprehensive Guide

Upgrading from Windows 10 to Windows 11: A Comprehensive Guide

Introduction

With enthusiasm, let’s navigate through the intriguing topic related to Upgrading from Windows 10 to Windows 11: A Comprehensive Guide. Let’s weave interesting information and offer fresh perspectives to the readers.

Upgrading from Windows 10 to Windows 11: A Comprehensive Guide

How To Upgrade From Windows 10 To Windows 11 Explained Windows 11  Images and Photos finder

The release of Windows 11 marked a significant evolution in the Windows operating system, bringing with it a redesigned interface, improved performance, and new features. For users of Windows 10, the question of upgrading to Windows 11 naturally arises. This article provides a comprehensive overview of the upgrade process, outlining its benefits, potential challenges, and considerations for a smooth transition.

Understanding the Upgrade Process

The transition from Windows 10 to Windows 11 involves a process of migrating data and installing the new operating system. Microsoft offers a straightforward upgrade path, allowing users to perform the upgrade directly within the Windows 10 environment.

Benefits of Upgrading to Windows 11

1. Enhanced User Interface: Windows 11 boasts a modern and streamlined interface with rounded corners, centered taskbar icons, and a focus on visual clarity. This updated design aims to enhance user experience and improve navigation.

2. Performance Improvements: Windows 11 leverages the latest hardware advancements, optimizing performance and offering faster boot times, smoother multitasking, and improved responsiveness.

3. New Features and Functionality: Windows 11 introduces a range of new features, including:

  • Android App Support: Users can now run Android apps directly on their Windows 11 devices.
  • Widgets: A new widget panel provides quick access to information and applications.
  • Improved Gaming Experience: Windows 11 optimizes gaming performance with features like DirectStorage and Auto HDR.
  • Enhanced Security: Windows 11 incorporates advanced security measures, including a new security dashboard and improved threat protection.

4. Compatibility with Latest Hardware: Windows 11 is designed to fully utilize the capabilities of modern hardware, offering optimal performance for devices equipped with the latest processors, graphics cards, and storage solutions.

5. Extended Support: Windows 11 offers an extended support lifecycle compared to Windows 10, ensuring users have access to security updates and bug fixes for a longer period.

Considerations Before Upgrading

1. System Requirements: Windows 11 has specific hardware requirements, including a compatible processor, sufficient RAM, and a secure boot enabled. It is crucial to ensure your device meets these requirements before attempting the upgrade.

2. Data Backup: Before initiating the upgrade, it is highly recommended to create a complete backup of your system and important data. This ensures data recovery in case of unforeseen issues during the upgrade process.

3. Software Compatibility: While Windows 11 is designed to be compatible with a wide range of software, some applications might not function properly or require updates. It is advisable to check compatibility before upgrading to avoid potential software conflicts.

4. Drivers and Updates: Ensure your device has the latest drivers and updates installed before proceeding with the upgrade. Outdated drivers can lead to compatibility issues and hinder the upgrade process.

5. Time Commitment: The upgrade process can take several hours, depending on the size of your system and the speed of your internet connection. Plan accordingly and ensure you have sufficient time available for the upgrade.

Upgrading to Windows 11: A Step-by-Step Guide

  1. Check System Requirements: Verify that your device meets the minimum system requirements for Windows 11.
  2. Backup Your Data: Create a complete backup of your system and important data.
  3. Install Latest Updates: Ensure your device has the latest Windows 10 updates installed.
  4. Open Windows Update: Access the Windows Update settings in your Windows 10 system.
  5. Check for Windows 11: Windows Update will automatically check for the availability of Windows 11.
  6. Initiate Upgrade: If Windows 11 is available, follow the on-screen instructions to initiate the upgrade process.
  7. Follow Upgrade Instructions: Carefully follow the instructions provided by the upgrade wizard.
  8. Restart Device: Once the upgrade is complete, your device will restart and boot into Windows 11.

Frequently Asked Questions (FAQs)

Q: Is the upgrade to Windows 11 free?

A: Yes, the upgrade to Windows 11 is free for eligible Windows 10 devices.

Q: Will my applications and data be transferred to Windows 11?

A: Yes, the upgrade process will automatically transfer your applications and data to Windows 11. However, it is still recommended to create a backup before upgrading.

Q: Can I downgrade from Windows 11 to Windows 10 after upgrading?

A: While downgrading is possible, it might be a complex process and might require a clean installation of Windows 10. It is advisable to thoroughly research the process before attempting a downgrade.

Q: What happens if my device doesn’t meet the minimum requirements for Windows 11?

A: If your device does not meet the requirements, you will not be able to upgrade to Windows 11. You might need to consider upgrading your hardware or continuing to use Windows 10.

Tips for a Smooth Upgrade

  • Ensure sufficient storage space: Windows 11 requires a minimum of 64 GB of storage space.
  • Disconnect external devices: Disconnect any unnecessary external devices, such as printers, scanners, and external drives, to avoid potential conflicts during the upgrade process.
  • Close all applications: Close all running applications before initiating the upgrade.
  • Connect to a stable internet connection: A stable internet connection is crucial for downloading the upgrade files and completing the installation process.
  • Be patient: The upgrade process can take several hours, so be patient and allow the process to complete without interruption.

Conclusion

Upgrading from Windows 10 to Windows 11 presents a significant opportunity to experience a modern and enhanced operating system with improved performance, new features, and extended support. By carefully considering the benefits, requirements, and potential challenges, users can make an informed decision about whether to upgrade. Following the provided steps and tips can ensure a smooth and successful transition to Windows 11, unlocking its full potential and enhancing the overall computing experience.

upgrade from Windows 10 to Windows 11 for free [Full Guide] Windows 11 upgrade from windows 10 - planningose Upgrading Windows 10 to Windows 11 - YouTube
Windows 11 Tips and Tricks โ€“ Mayank Sanghvi Upgrading Windows 10 to Windows 11 - YouTube How To Upgrade Windows 10 To Windows 11 For Free 2021  itechhacks
How to upgrade from Windows 10 to Windows 11 without losing apps and files  iThinkDifferent How to upgrade windows 10 to windows 11  Genuine free upgrade #windowsupgrade - YouTube

Closure

Thus, we hope this article has provided valuable insights into Upgrading from Windows 10 to Windows 11: A Comprehensive Guide. We hope you find this article informative and beneficial. See you in our next article!