Archives December 2023

Paint 3D: A Comprehensive Guide To The 3D Modeling Tool In Windows 11

Paint 3D: A Comprehensive Guide to the 3D Modeling Tool in Windows 11

Introduction

With great pleasure, we will explore the intriguing topic related to Paint 3D: A Comprehensive Guide to the 3D Modeling Tool in Windows 11. Let’s weave interesting information and offer fresh perspectives to the readers.

Paint 3D: A Comprehensive Guide to the 3D Modeling Tool in Windows 11

How To Download and Install Paint 3D In Windows 11 [Tutorial] - YouTube

Paint 3D, a user-friendly 3D modeling application, is a staple feature of Windows 11, offering a gateway into the world of three-dimensional design. While it may not possess the advanced features of professional software, its accessibility and intuitive interface make it an ideal tool for beginners, hobbyists, and even educators seeking to introduce fundamental 3D concepts.

This article delves into the intricacies of Paint 3D, exploring its functionality, benefits, and practical applications. We will examine its download and installation process, highlighting key features and outlining essential tips for maximizing its potential.

Understanding Paint 3D: A User-Friendly Approach to 3D Modeling

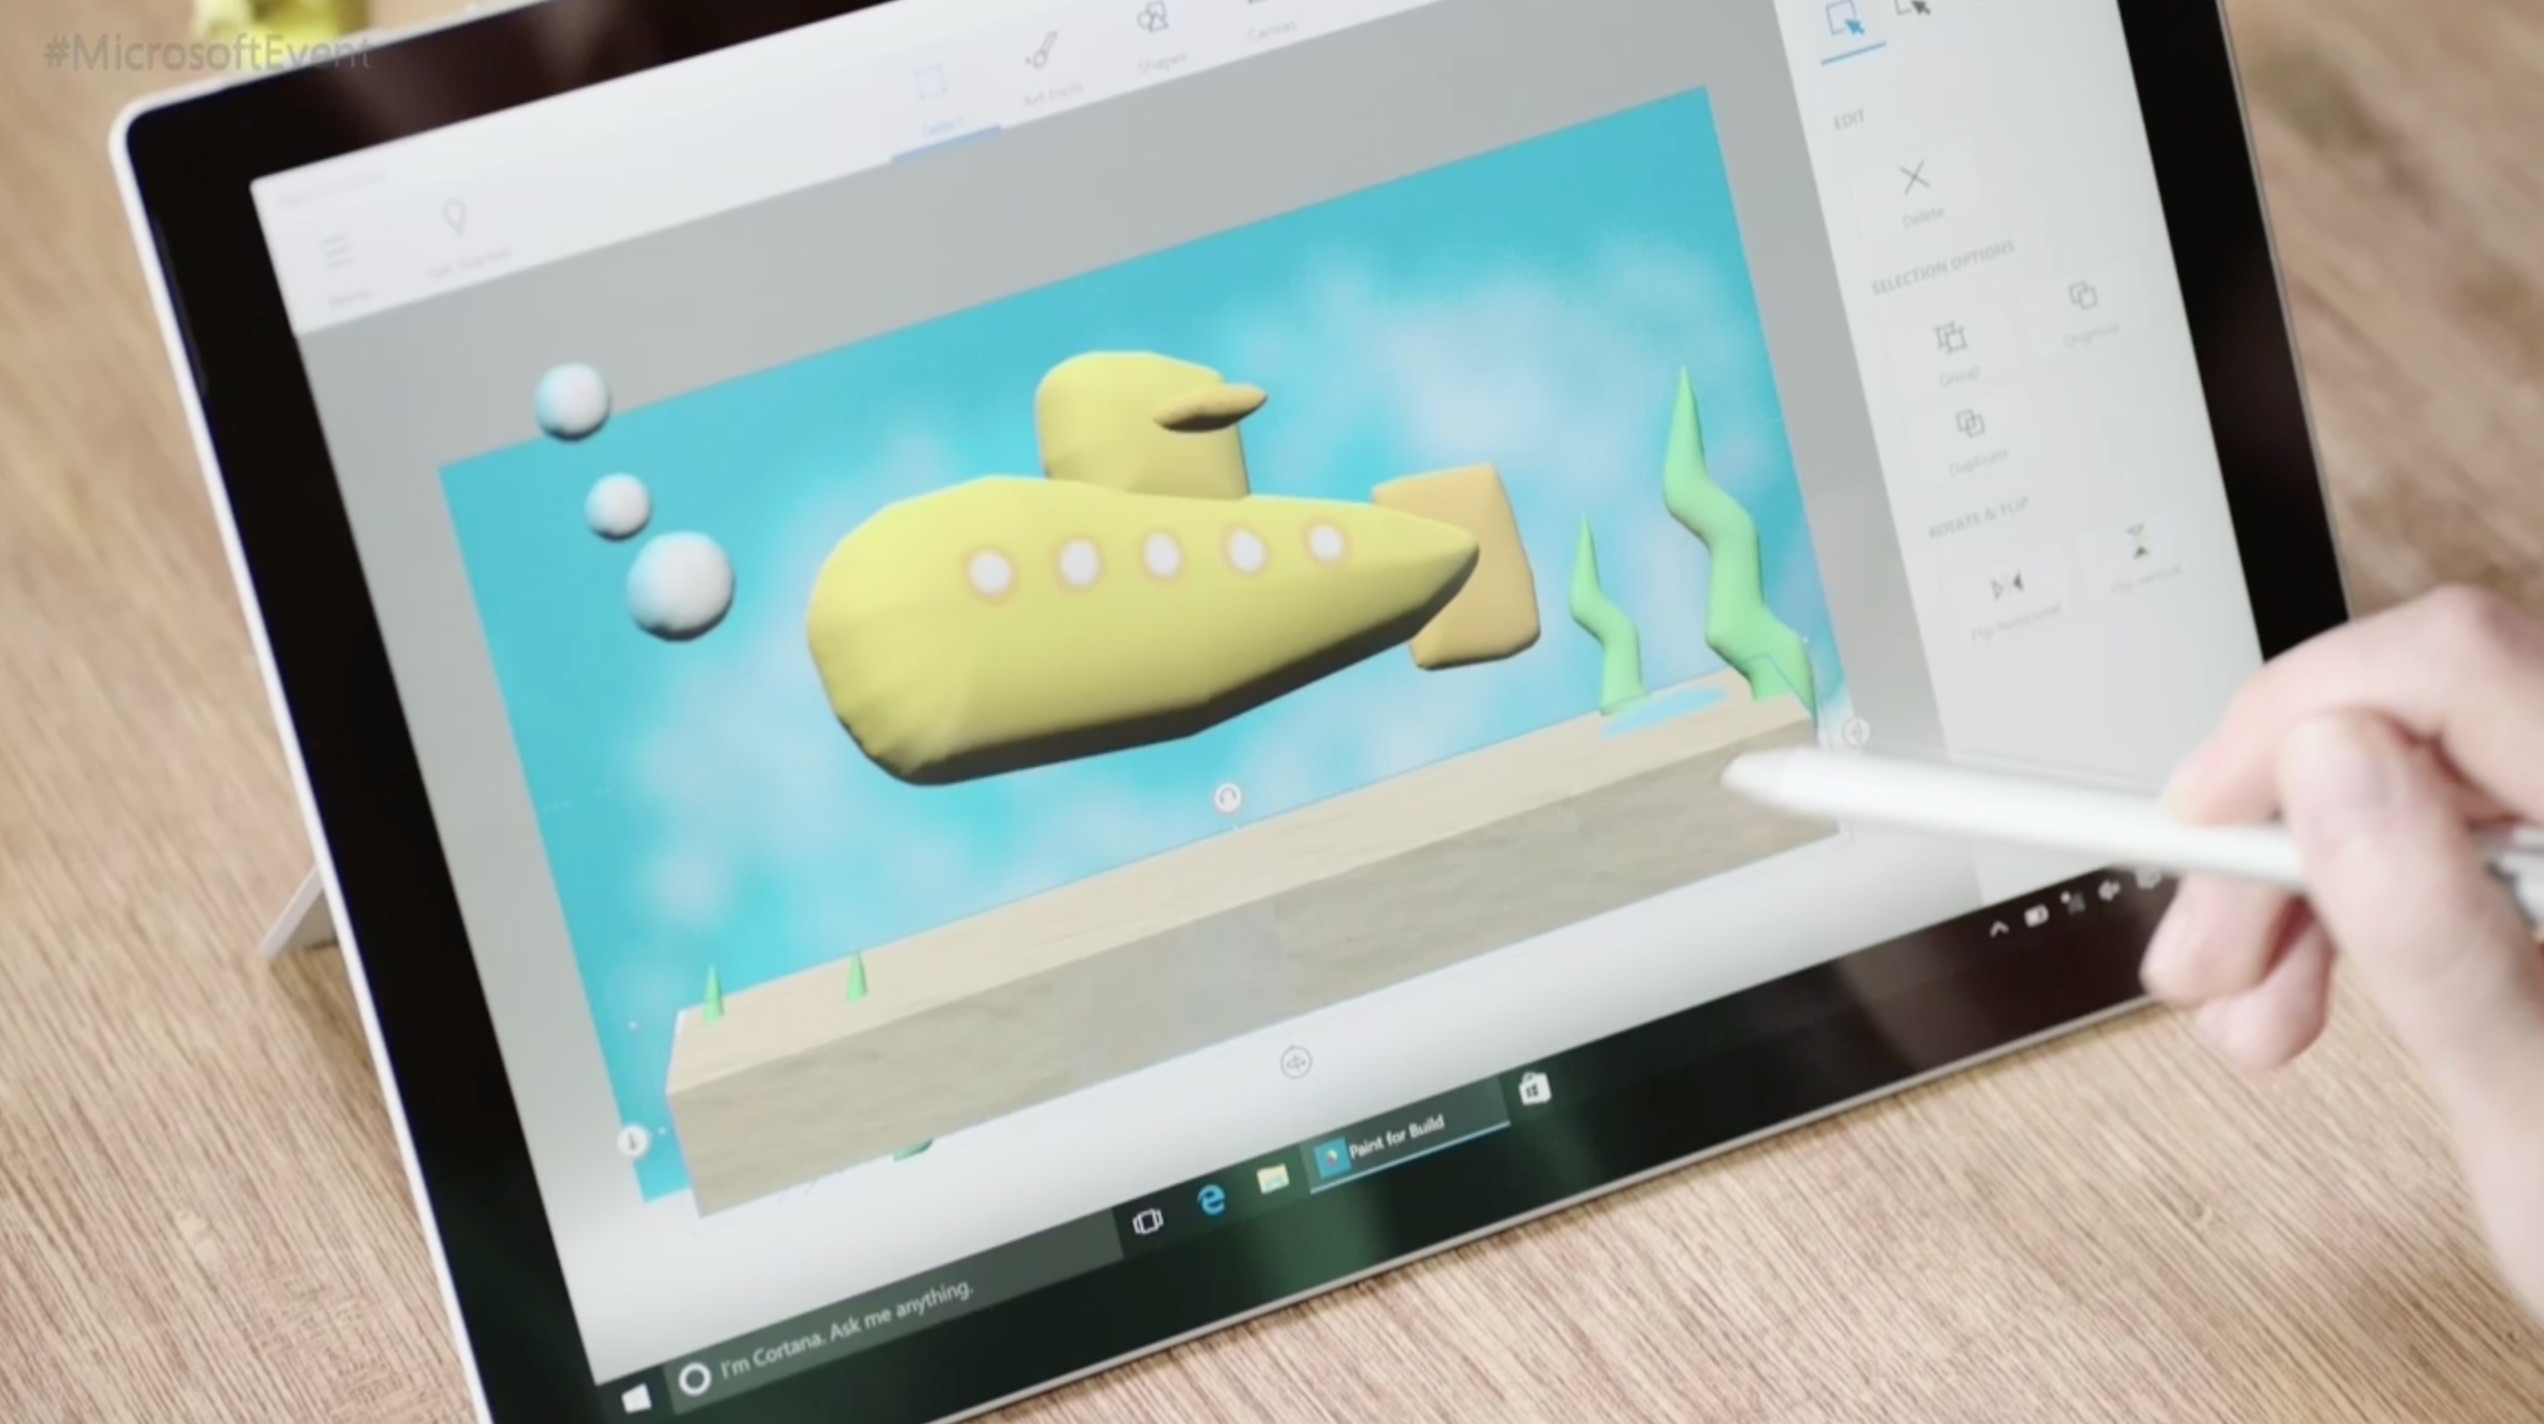
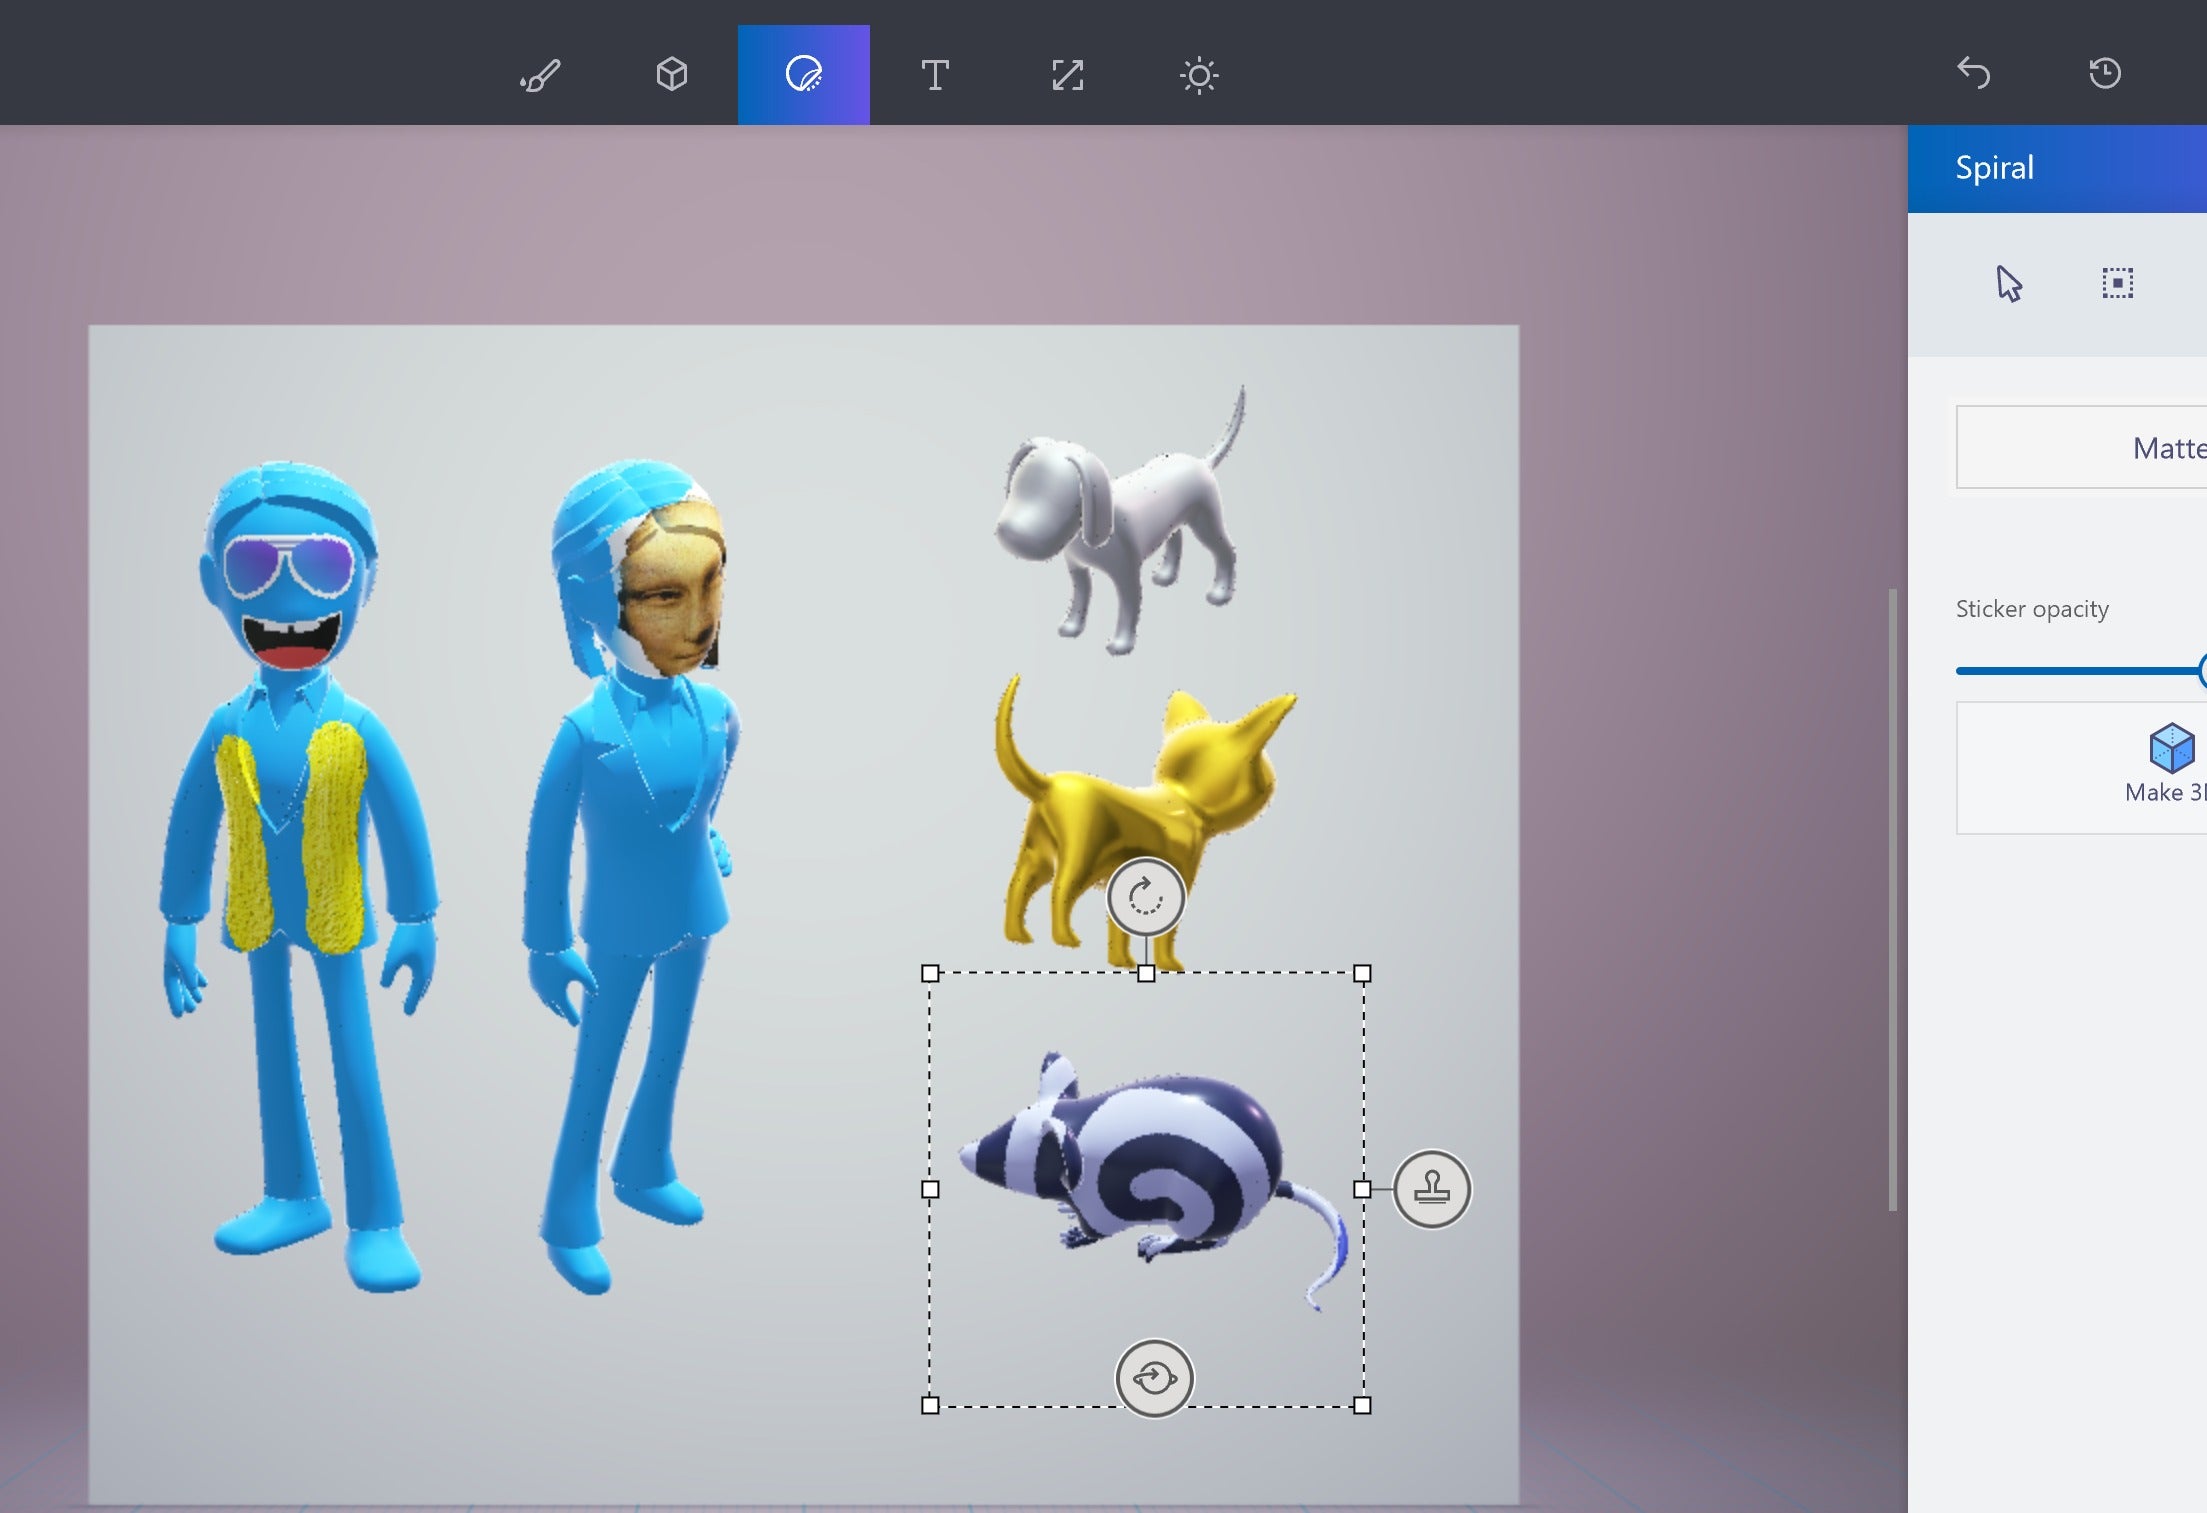
Paint 3D is a versatile tool designed to empower users of all skill levels to create and manipulate 3D objects. Its intuitive interface, resembling the familiar Paint application, simplifies the learning curve, allowing users to quickly grasp fundamental concepts and begin creating.

Key Features and Functionality:

  • 3D Object Creation: Paint 3D allows users to create basic 3D shapes, including cubes, spheres, cylinders, and cones. These shapes can be manipulated, resized, and transformed into more complex objects through a variety of tools.
  • Texturing and Coloring: Users can apply textures, colors, and patterns to their 3D models, adding depth and realism. Paint 3D offers a range of pre-defined textures, allowing for quick customization.
  • 3D Object Import and Export: Paint 3D supports the import and export of 3D models in various file formats, including OBJ, 3MF, and STL. This functionality enables users to work with models created in other software or to share their creations with others.
  • Basic Animation: Paint 3D offers rudimentary animation capabilities, allowing users to create simple animations by manipulating the position and rotation of 3D objects over time.
  • 2D Image Integration: Users can incorporate 2D images into their 3D scenes, adding context and enhancing the visual appeal of their creations.

Downloading and Installing Paint 3D in Windows 11:

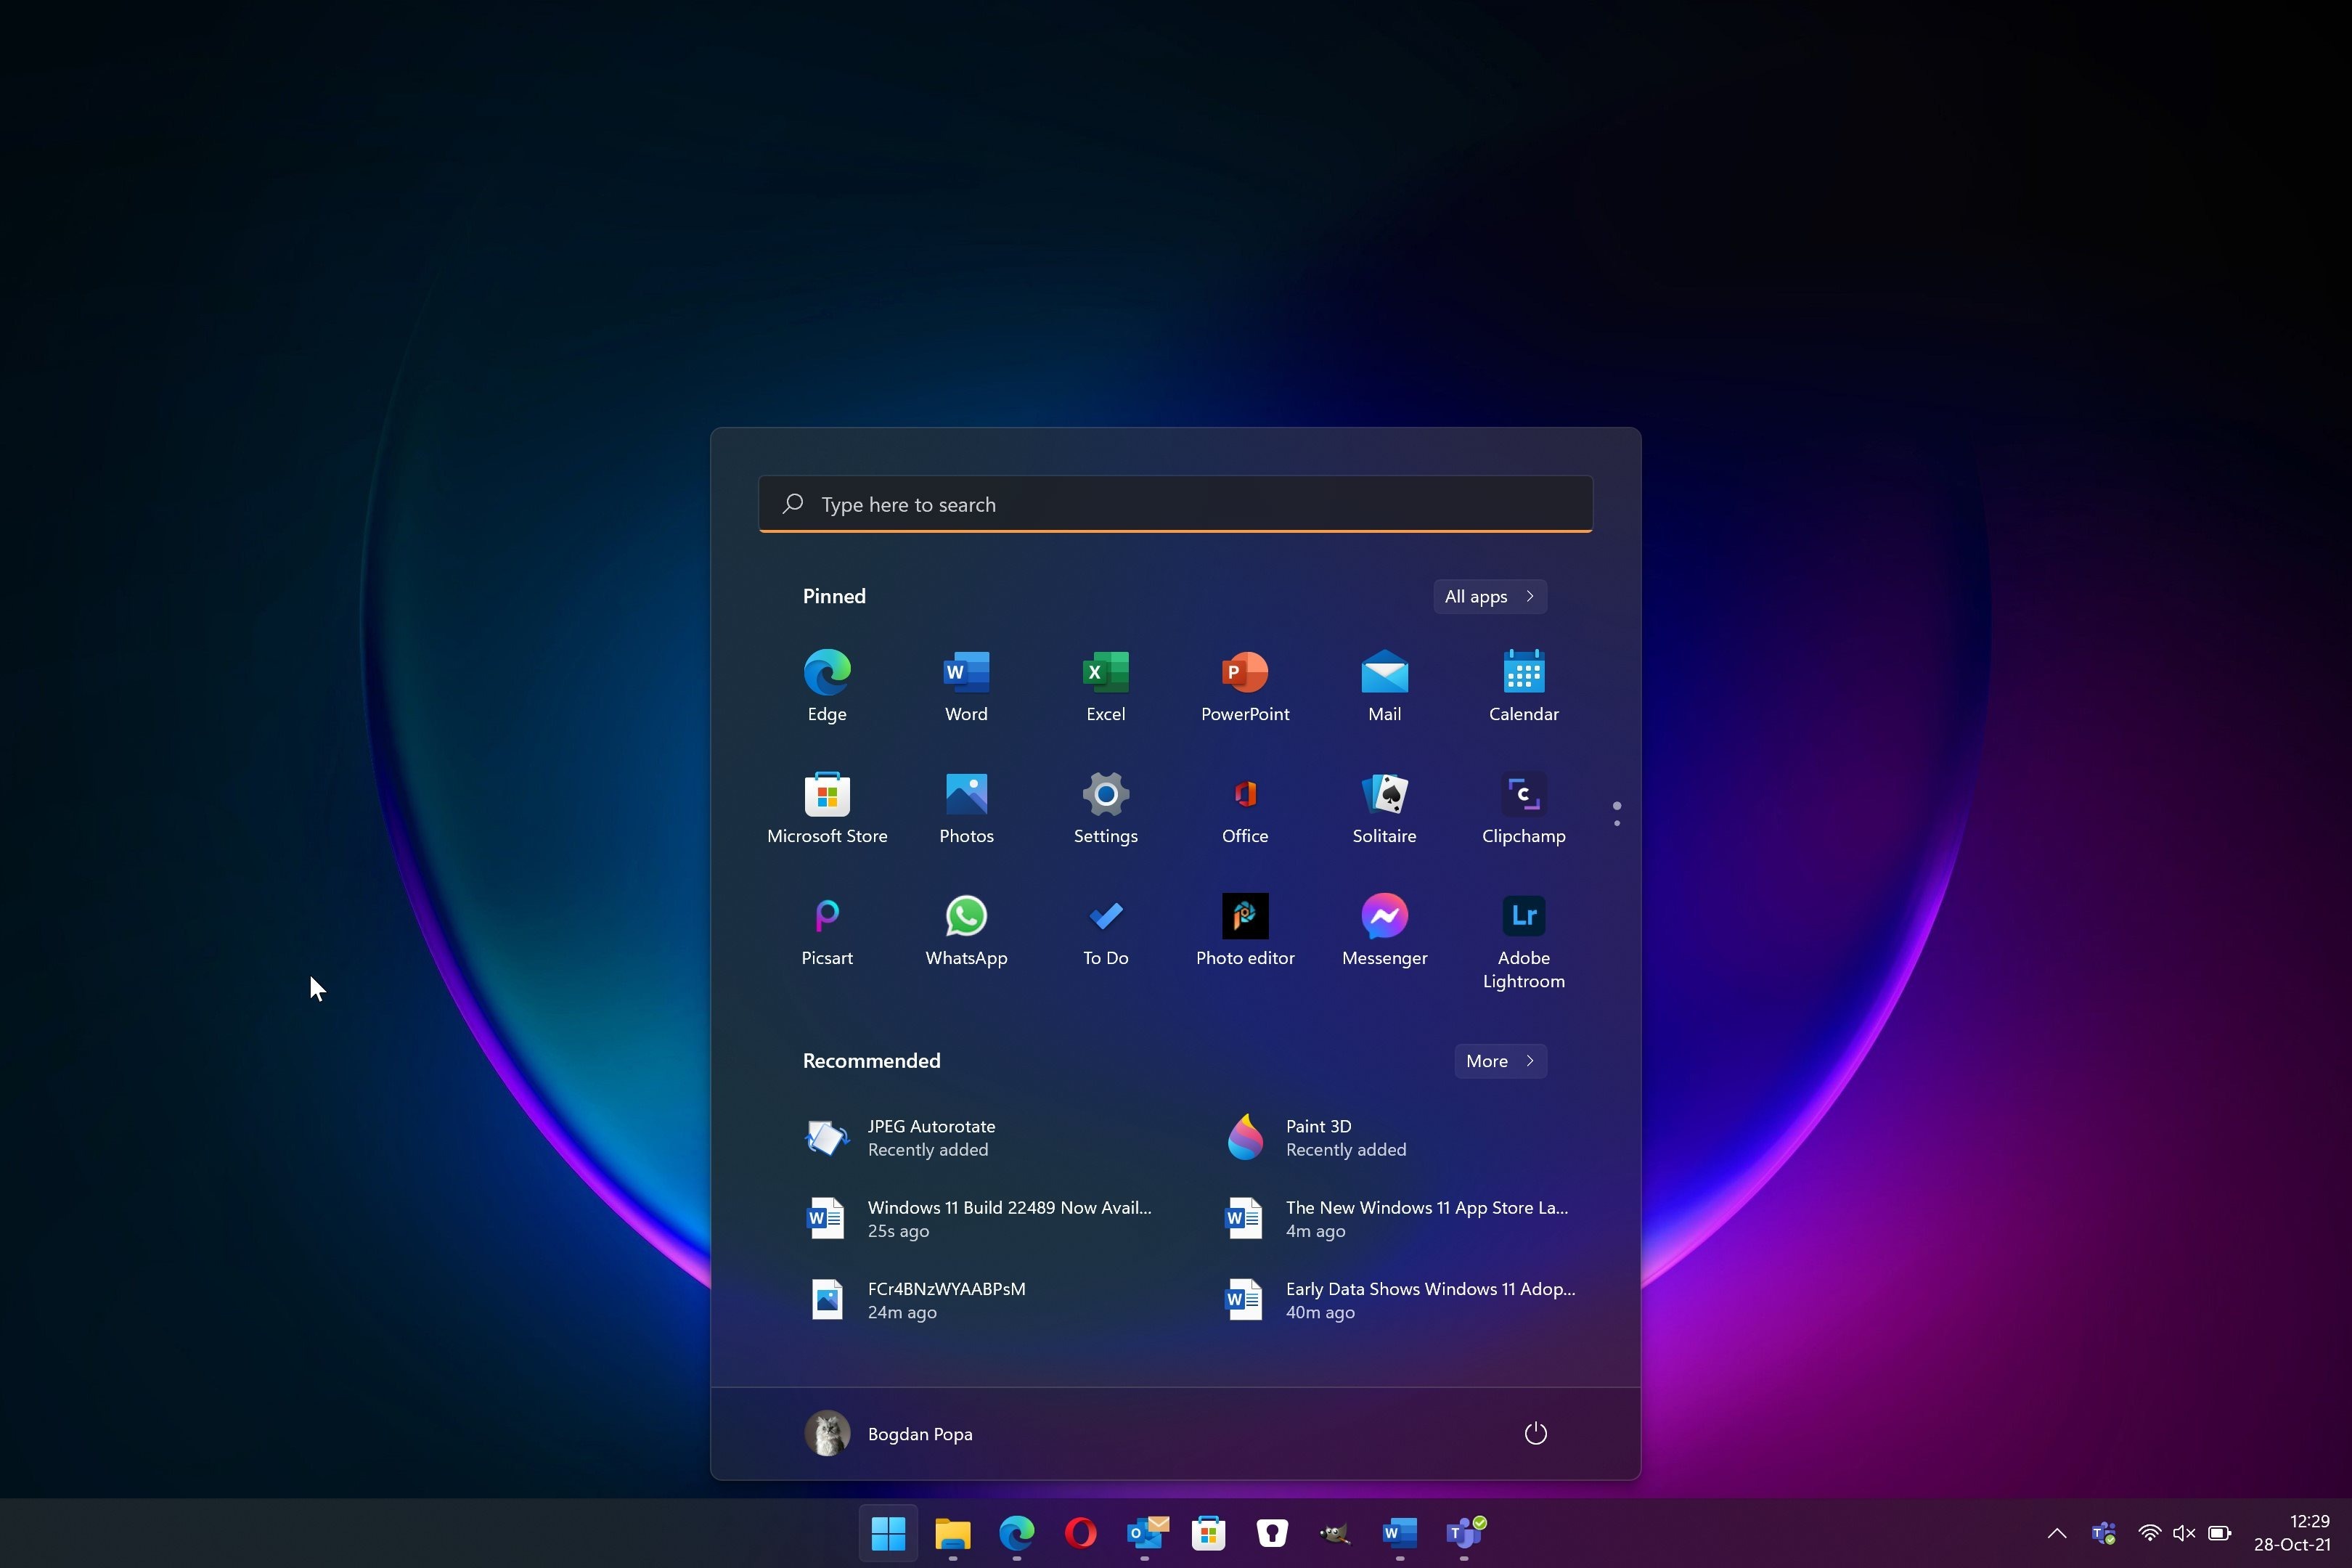
Paint 3D is pre-installed on Windows 11 operating systems. Users can access it through the Start Menu, the search bar, or by navigating to the "Apps" folder.

Benefits of Using Paint 3D:

  • Accessibility: Paint 3D’s intuitive interface and straightforward tools make it accessible to users of all skill levels, even those with no prior experience in 3D modeling.
  • Creativity and Exploration: Paint 3D encourages experimentation and fosters creativity by providing a safe space to explore 3D design concepts.
  • Educational Value: Paint 3D can be used as an educational tool to introduce students to basic 3D design principles and concepts.
  • Practical Applications: Paint 3D can be used for a variety of purposes, including creating simple 3D models for personal projects, designing prototypes, or generating visual aids for presentations.

Utilizing Paint 3D Effectively: Tips and Strategies

  • Start with Basic Shapes: Begin by experimenting with the fundamental 3D shapes provided by Paint 3D. Explore their properties and learn how to manipulate them.
  • Utilize the Selection Tools: Master the selection tools to accurately select, move, rotate, and resize objects.
  • Explore Texturing Options: Experiment with various textures and colors to add depth and realism to your 3D models.
  • Utilize the 3D Text Tool: Create 3D text objects and customize them to enhance your designs.
  • Learn from Tutorials: Numerous online tutorials and resources offer step-by-step guidance on using Paint 3D effectively.

FAQs Regarding Paint 3D:

1. Is Paint 3D a professional 3D modeling software?

While Paint 3D is a powerful tool for beginners and hobbyists, it is not a professional-grade 3D modeling software. It lacks the advanced features and functionality found in industry-standard applications.

2. Can I use Paint 3D to create complex 3D models?

Paint 3D is well-suited for creating simple 3D models. However, for more intricate and detailed models, users may require professional software with advanced modeling tools.

3. Does Paint 3D support animation?

Paint 3D offers basic animation capabilities, allowing users to create simple animations by manipulating the position and rotation of 3D objects over time. However, its animation features are limited compared to dedicated animation software.

4. What file formats does Paint 3D support?

Paint 3D supports the import and export of 3D models in various file formats, including OBJ, 3MF, and STL.

5. Is Paint 3D compatible with other 3D modeling software?

Paint 3D can import and export 3D models in common file formats, allowing for compatibility with other 3D modeling software.

Conclusion: Paint 3D – A Stepping Stone to 3D Design

Paint 3D serves as an accessible and user-friendly entry point into the world of 3D modeling. Its intuitive interface, combined with its basic yet effective features, empowers individuals to explore their creativity and learn the fundamentals of three-dimensional design.

While it may not be a professional-grade tool, Paint 3D provides a valuable platform for experimentation, learning, and creating simple yet engaging 3D models. Its ease of use and accessibility make it an ideal choice for beginners, hobbyists, and educators seeking to introduce the exciting realm of 3D design.

How to Insert and Paint 3D Models in Paint 3D How to Download and Install Paint 3D on Windows 11/10 - YouTube Microsoft paint 3d tutorial - grebrothers
Paint 3d review - loxatrendy Microsoft’s Paint 3D is a simple entry into rudimentary 3D modeling  TechCrunch 5 Ways to Create 3D Art Using the Paint 3D Toolbar
Windows 11/10 でペイント 3D アプリを使用してクールな 3D 画像を作成する方法 – ElseFix.com 15+ Paint 3D Model From Photo

Closure

Thus, we hope this article has provided valuable insights into Paint 3D: A Comprehensive Guide to the 3D Modeling Tool in Windows 11. We appreciate your attention to our article. See you in our next article!

Navigating The Labyrinth: Troubleshooting R In Windows 10

Navigating the Labyrinth: Troubleshooting R in Windows 10

Introduction

In this auspicious occasion, we are delighted to delve into the intriguing topic related to Navigating the Labyrinth: Troubleshooting R in Windows 10. Let’s weave interesting information and offer fresh perspectives to the readers.

Navigating the Labyrinth of Success (AI Generated) Stock Illustration - Illustration of depth

R, the open-source statistical programming language, has become an indispensable tool for data scientists, analysts, and researchers worldwide. Its versatility, powerful libraries, and active community have propelled it to the forefront of data analysis. However, users often encounter frustration when R fails to launch on their Windows 10 systems. This article delves into the common causes behind this issue, providing comprehensive troubleshooting steps and insights to help users restore their R environment.

Understanding the Underlying Issues

The inability to launch R on Windows 10 can stem from a variety of factors, each requiring a specific approach to resolve. These factors can be broadly categorized as follows:

1. Installation Errors:

  • Incomplete or Corrupted Installation: An incomplete or corrupted R installation is a primary culprit. This could arise from interrupted downloads, insufficient disk space, or system errors during the installation process.
  • Conflicting Software: Other applications installed on the system might interfere with R’s execution. This could include antivirus software, firewall settings, or even other programming environments.
  • Missing Dependencies: R relies on specific libraries and components to function correctly. If these dependencies are missing or incompatible with the system’s configuration, R might fail to launch.

2. System Configuration Problems:

  • Environment Variables: R requires specific environment variables to be set correctly for proper operation. Incorrect or missing environment variables can prevent R from finding its necessary files and launching.
  • Path Issues: The system’s PATH variable, which defines the directories where the operating system searches for executable files, plays a crucial role in R’s launch. If R’s installation directory is not included in the PATH variable, the system will not be able to locate the R executable.
  • User Permissions: Insufficient user permissions can restrict R’s access to system resources, leading to launch failures.

3. Software Conflicts and Compatibility Issues:

  • Outdated R Version: Using an outdated version of R might lead to compatibility issues with the operating system or other software installed on the system.
  • Incompatible Packages: R packages, which provide additional functionality, might be incompatible with the current R version or the system’s architecture.

4. Hardware and System Resource Constraints:

  • Insufficient RAM: R, especially when dealing with large datasets, requires substantial memory resources. Insufficient RAM can lead to crashes or slow performance, ultimately preventing R from launching.
  • Disk Space Limitations: R’s installation and data files require a certain amount of disk space. Limited disk space can hinder R’s ability to operate effectively.

Troubleshooting Strategies: A Step-by-Step Guide

1. Verify Installation Integrity:

  • Reinstall R: A clean reinstallation is often the most effective solution for installation-related problems. Ensure that you download the latest stable version from the official R website (https://cran.r-project.org/).
  • Run as Administrator: Try launching R as an administrator to rule out permission-related issues. This can be done by right-clicking the R executable and selecting "Run as administrator."

2. Check System Configuration:

  • Environment Variables: Verify that the environment variables necessary for R are correctly set. Consult the R documentation or online resources for specific instructions on setting these variables.
  • PATH Variable: Ensure that the directory containing the R executable is included in the system’s PATH variable. This can be adjusted through the Windows Control Panel.

3. Address Software Conflicts:

  • Antivirus and Firewall Settings: Temporarily disable your antivirus software and firewall to see if they are interfering with R’s launch.
  • Other Software: Identify and disable any software that might be conflicting with R’s operation.
  • Update R: Ensure you are using the latest version of R. Check for updates on the official R website.

4. Optimize System Resources:

  • RAM: Increase the amount of RAM available to your system by closing unnecessary applications or upgrading your system’s memory.
  • Disk Space: Free up disk space by deleting unnecessary files or moving data to an external drive.

5. Seek Additional Help:

FAQs: Addressing Common Concerns

Q: Why is R not launching after a recent system update?

A: System updates can sometimes cause conflicts with installed software, including R. Try reinstalling R or checking for updates to your R packages.

Q: I am getting an error message when I try to launch R. What should I do?

A: The error message provides valuable clues about the underlying issue. Search for the error message on R forums or documentation to find potential solutions.

Q: I am using a virtual machine. Why is R not launching?

A: Virtual machines can have specific limitations and configurations. Ensure that your virtual machine has sufficient resources allocated and that the virtual environment is properly configured for R.

Q: I am using a 32-bit operating system. Can I run R?

A: R is available for both 32-bit and 64-bit operating systems. Download the version that is compatible with your system’s architecture.

Tips for a Smooth R Experience

  • Regular Updates: Keep R and its packages updated to ensure compatibility and access to the latest features.
  • System Optimization: Optimize your system’s performance by regularly cleaning up temporary files and defragmenting your hard drive.
  • Use a Dedicated Environment: Consider using a virtual machine or a separate environment for R to avoid potential conflicts with other software.
  • Learn R Fundamentals: Familiarize yourself with R’s basic syntax and commands to effectively troubleshoot and debug your code.

Conclusion: Empowering Data Exploration

Successfully launching R on Windows 10 unlocks a world of data analysis possibilities. By understanding the common causes of launch issues and following the troubleshooting steps outlined in this article, users can overcome these hurdles and harness the power of R for their data-driven endeavors. Remember, the R community is a valuable resource for support and guidance, and continuous learning and exploration are key to maximizing the potential of this powerful tool.

Navigating a Known Labyrinth - YouTube How to Run Windows 11/10 Troubleshooters to Fix PC Problems - MiniTool Navigating The Labyrinth Screenshots · SteamDB
Labyrinth Windows Developer Preview - YouTube Navigating the Labyrinth: Asynchronous JavaScript, Callbacks, Promises, and Async/Await Decoded Navigating the lobby labyrinth: A guide to transparency and ethics for MEPs  ALTER-EU
Navigating the Labyrinth: An Executive Guide to Data Management eBook : Sebastian-Coleman, Laura Navigating The Labyrinth: A Comprehensive Guide To The Long Walk Map - Map France of Lourdes labeled

Closure

Thus, we hope this article has provided valuable insights into Navigating the Labyrinth: Troubleshooting R in Windows 10. We hope you find this article informative and beneficial. See you in our next article!

Near Share: A Comprehensive Guide To Effortless File Sharing On Windows

Near Share: A Comprehensive Guide to Effortless File Sharing on Windows

Introduction

In this auspicious occasion, we are delighted to delve into the intriguing topic related to Near Share: A Comprehensive Guide to Effortless File Sharing on Windows. Let’s weave interesting information and offer fresh perspectives to the readers.

Near Share: A Comprehensive Guide to Effortless File Sharing on Windows

What Is "Near Share" In Windows 10? How To Share Files Wirelessly

In today’s interconnected world, the ability to share files quickly and seamlessly is crucial. While cloud storage services have become ubiquitous, there are times when a more direct and immediate approach is preferred. Windows Near Share, a built-in feature introduced in Windows 10 and further enhanced in Windows 11, offers a compelling alternative to traditional file transfer methods. This article provides a comprehensive overview of Near Share, exploring its functionality, benefits, and limitations.

Understanding Near Share: A Wireless File Transfer Revolution

Near Share, often referred to as "Nearby Sharing" in Windows settings, leverages Bluetooth and Wi-Fi to facilitate wireless file transfers between Windows devices. It allows users to share files, images, documents, and even web links with nearby devices without the need for internet connectivity or complex setup. This direct approach eliminates the reliance on cloud storage, making file sharing faster, more secure, and more efficient, particularly in situations where internet access is limited or unreliable.

How Near Share Works: A Technical Deep Dive

Near Share operates on a peer-to-peer network, establishing a direct connection between the sending and receiving devices. The process involves the following steps:

  1. Discovery: When a user initiates a file transfer, the sending device broadcasts a signal to nearby devices. This signal includes information about the file type, size, and intended recipient.
  2. Pairing: If a compatible receiving device is within range and has Near Share enabled, it receives the broadcast signal and displays a notification. The user on the receiving device can then choose to accept or decline the file transfer.
  3. Transfer: Once accepted, a secure connection is established between the two devices, and the file is transmitted directly.

The Benefits of Near Share: A Case for Simplicity and Security

Near Share offers several advantages over traditional file sharing methods:

  • Speed and Efficiency: Near Share eliminates the need for uploading files to the cloud and then downloading them on the receiving device, significantly reducing transfer times.
  • Direct Transfer: Files are transferred directly between devices without relying on third-party services, ensuring privacy and control over data.
  • No Internet Required: Near Share functions even in the absence of an internet connection, making it ideal for situations where internet access is unavailable or unreliable.
  • Ease of Use: The user interface is intuitive and straightforward, making it easy for users of all technical skill levels to share files.
  • Security: Near Share employs secure protocols, including Bluetooth and Wi-Fi encryption, to protect data during transmission.

Limitations of Near Share: Recognizing the Boundaries

While Near Share offers a powerful and convenient way to share files, it’s important to be aware of its limitations:

  • Range: The effective range of Near Share is limited by the capabilities of Bluetooth and Wi-Fi, typically within a radius of approximately 30 feet.
  • Compatibility: Near Share requires both the sending and receiving devices to have Windows 10 or later installed and Near Share enabled.
  • File Size: While Near Share can handle large files, the maximum file size that can be transferred is determined by the capabilities of the devices and the wireless connection.
  • Data Transfer Rate: The speed of data transfer depends on the strength of the wireless connection and the capabilities of the devices.

Near Share: A Practical Guide to Getting Started

To use Near Share, both the sending and receiving devices must have the feature enabled:

  1. Enable Near Share on Windows:
    • Open Windows Settings.
    • Navigate to "System" > "Shared experiences."
    • Enable "Near Share" and choose the desired sharing options.
  2. Sharing a File:
    • Open the file you wish to share.
    • Right-click the file and select "Share."
    • Choose the desired recipient device from the list of available devices.
    • The recipient device will receive a notification and can accept or decline the transfer.

FAQs: Addressing Common Questions

Q: What types of files can I share using Near Share?

A: Near Share supports a wide range of file types, including documents, images, videos, music, and web links.

Q: Is Near Share secure?

A: Yes, Near Share uses secure protocols like Bluetooth and Wi-Fi encryption to protect data during transmission.

Q: How do I know if Near Share is working?

A: If you see a notification on your device when someone tries to share a file with you, Near Share is working.

Q: What if I don’t see the device I want to share with?

A: Ensure that both devices have Near Share enabled, are within range, and that the receiving device has accepted the file transfer.

Q: Can I use Near Share to share files with devices that don’t have Windows?

A: No, Near Share is currently only compatible with Windows devices.

Tips for Effective Near Share Usage

  • Check for Updates: Ensure that both devices have the latest Windows updates installed for optimal performance.
  • Optimize Wi-Fi Connection: Use a strong Wi-Fi connection for faster transfer speeds.
  • Clear Bluetooth Cache: Occasionally clear the Bluetooth cache on both devices to resolve connectivity issues.
  • Enable "Everyone" Sharing: For wider accessibility, enable "Everyone" sharing in Near Share settings, but be aware of potential security risks.

Conclusion: A Seamless Future of File Sharing

Near Share represents a significant advancement in wireless file sharing technology, offering a simple, secure, and efficient way to transfer files between Windows devices. Its ease of use, speed, and reliance on direct connections make it an attractive alternative to cloud-based solutions. As technology evolves, Near Share is likely to continue to improve, expanding its capabilities and further simplifying the file sharing experience. Whether for personal or professional use, Near Share empowers users to share files effortlessly and securely, enhancing productivity and collaboration in the digital age.

Seamless File Sharing: Google Nearby Share for Windows How To Use Near Share In Windows 10 How does Microsoft Near Share for browser file sharing work?  TechTarget
What Is "Near Share" In Windows 10? How To Share Files Wirelessly How Windows 10's Near Share feature wirelessly beams files to nearby PCs  PCWorld How to Use Edge Near Share in Windows 10 from the Edge Browser
How Windows 10's Near Share feature wirelessly beams files to nearby PCs - Good Gear Guide Australia How to Use Nearby Sharing to Share Files in Windows 10

Closure

Thus, we hope this article has provided valuable insights into Near Share: A Comprehensive Guide to Effortless File Sharing on Windows. We hope you find this article informative and beneficial. See you in our next article!

Windows 10 Version 22H2: A Deeper Dive Into The Latest Update

Windows 10 Version 22H2: A Deeper Dive into the Latest Update

Introduction

With great pleasure, we will explore the intriguing topic related to Windows 10 Version 22H2: A Deeper Dive into the Latest Update. Let’s weave interesting information and offer fresh perspectives to the readers.

Windows 10 Version 22H2: A Deeper Dive into the Latest Update

Windows 10 22H2 is released, here's what we know

Windows 10, Microsoft’s flagship operating system, has undergone continuous evolution since its release in 2015. The latest iteration, known as version 22H2, marks a significant milestone in this journey, bringing a host of new features, enhancements, and security improvements. This article delves into the key aspects of this update, examining its impact on user experience and the broader Windows ecosystem.

Understanding the Significance of Version 22H2

The release of version 22H2 signifies Microsoft’s ongoing commitment to delivering a robust and feature-rich operating system that adapts to the ever-evolving needs of users. This update is not merely a cosmetic upgrade; it introduces fundamental changes that enhance productivity, security, and overall user satisfaction.

Key Features and Enhancements

1. Enhanced Security and Privacy:

Version 22H2 prioritizes user security and privacy. It incorporates robust security features like:

  • Windows Defender SmartScreen: This enhanced system protects users from malicious websites and downloads, providing an extra layer of defense against online threats.
  • Windows Security App: This consolidated security hub offers a comprehensive view of device security status, allowing users to manage settings, run scans, and implement necessary safeguards.
  • Improved Privacy Controls: Version 22H2 empowers users with greater control over their data, allowing them to fine-tune privacy settings and manage access to personal information.

2. Improved Performance and Stability:

This update focuses on optimizing system performance and stability, delivering a smoother user experience.

  • Optimized System Resources: Version 22H2 allocates system resources more efficiently, resulting in faster application loading times and improved overall responsiveness.
  • Enhanced Stability: The update addresses known stability issues, reducing the likelihood of crashes and system freezes, ensuring a more reliable operating environment.

3. Enhanced User Experience:

Version 22H2 introduces a range of user-centric enhancements that improve usability and productivity.

  • Redesigned Taskbar: The taskbar has been redesigned for a more modern and intuitive look, offering improved organization and accessibility.
  • Enhanced File Explorer: The File Explorer has received a visual refresh, incorporating modern design elements and providing a more streamlined user experience.
  • Improved Accessibility Features: Version 22H2 incorporates new accessibility features, making the operating system more inclusive and accessible to users with disabilities.

4. Focus on Gaming:

Version 22H2 recognizes the importance of gaming and incorporates features that enhance the gaming experience.

  • DirectStorage Support: This feature allows games to load assets directly from the storage device, eliminating bottlenecks and resulting in faster loading times.
  • Auto HDR: This feature automatically enhances game visuals, providing a more immersive and visually stunning experience.

5. Enhanced Productivity Features:

Version 22H2 empowers users with enhanced productivity features, streamlining workflow and boosting efficiency.

  • Focus Assist: This feature minimizes distractions, allowing users to concentrate on their tasks without interruptions.
  • Snap Layouts: This feature allows users to arrange windows efficiently, optimizing screen space and maximizing productivity.

6. New Features for Developers:

Version 22H2 includes features that cater to developers, providing them with a more robust and versatile development environment.

  • Windows Subsystem for Android: This feature allows developers to run Android apps on Windows, opening up new possibilities for cross-platform development.
  • Windows Terminal: This powerful terminal application offers a unified experience for command-line tools, enhancing developer productivity.

7. Enhanced Integration with Microsoft Services:

Version 22H2 strengthens the integration between Windows and other Microsoft services, enhancing user convenience and functionality.

  • Microsoft Teams Integration: This integration seamlessly integrates Microsoft Teams into the operating system, providing a unified communication and collaboration platform.
  • Microsoft Store Enhancements: The Microsoft Store has been redesigned, offering a more streamlined and user-friendly experience for discovering and installing applications.

FAQs about Windows 10 Version 22H2

Q: Is this update mandatory?

A: No, the update is not mandatory. Users have the option to defer or postpone the update. However, it is recommended to install the update as it brings significant security and performance improvements.

Q: How do I install the update?

A: The update is typically installed automatically through Windows Update. Users can also manually check for updates by going to Settings > Update & Security > Windows Update and clicking Check for updates.

Q: What are the system requirements for this update?

A: The system requirements for version 22H2 are generally the same as for previous versions of Windows 10. However, it is recommended to check the official Microsoft website for specific requirements.

Q: What happens to my existing data after the update?

A: The update should not affect your existing data. However, it is always recommended to back up important data before installing any major system update.

Q: Will this update affect the performance of my computer?

A: Version 22H2 is designed to improve system performance. However, the actual performance impact may vary depending on the hardware specifications of the computer.

Tips for Using Windows 10 Version 22H2

1. Familiarize Yourself with New Features: Explore the new features and enhancements introduced in version 22H2 to maximize its benefits.

2. Update Drivers: Ensure that your device drivers are up-to-date to ensure optimal compatibility and performance with the new update.

3. Run System Maintenance: Regularly run system maintenance tasks like disk cleanup and defragmentation to maintain optimal performance.

4. Keep Software Up-to-Date: Regularly update your software applications to ensure compatibility and security.

5. Back Up Your Data: It is always recommended to back up important data before installing any major system update.

Conclusion

Windows 10 version 22H2 represents a significant advancement in the Windows ecosystem, delivering a range of improvements that enhance security, performance, user experience, and productivity. This update is a testament to Microsoft’s ongoing commitment to providing a robust and feature-rich operating system that adapts to the evolving needs of users. By embracing the new features and enhancements, users can unlock the full potential of this update and enjoy a more secure, efficient, and enjoyable computing experience.

Here is how you can upgrade to Windows 10 22H2 right now - Neowin Windows 10 22H2 Update  Windows 10 2022 Update - YouTube Microsoft: Windows 10 22H2 update will ship with a scoped set of features
Windows 10 22H2 arrives in Release Preview Channel for Windows Insiders - Neowin Windows 10 22H2: Everything you need to know - Pureinfotech Release date for Microsoft’s Windows 10 22H2 update finally confirmed - Softonic
Should I install Windows 10 22H2 on my PC? Yes, but proceed with caution. - Pureinfotech Windows 10 Pro 22h2 Iso Download 64 Bit 2023 – Get Latest Windows 10 Update

Closure

Thus, we hope this article has provided valuable insights into Windows 10 Version 22H2: A Deeper Dive into the Latest Update. We appreciate your attention to our article. See you in our next article!

Navigating The Digital Landscape: QR Code Reader Apps On Windows 10

Navigating the Digital Landscape: QR Code Reader Apps on Windows 10

Introduction

With great pleasure, we will explore the intriguing topic related to Navigating the Digital Landscape: QR Code Reader Apps on Windows 10. Let’s weave interesting information and offer fresh perspectives to the readers.

Generate Qr Code In Windows 10 Knowledge Sharing Tech - vrogue.co

In the contemporary digital landscape, where information flows freely and seamlessly, QR codes have emerged as a pivotal tool for bridging the gap between the physical and digital realms. These ubiquitous square-shaped barcodes, carrying a wealth of data within their intricate patterns, have become an indispensable element of modern life. Recognizing the growing prominence of QR codes, Microsoft Windows 10 has integrated seamless QR code scanning capabilities into its operating system, empowering users to effortlessly access the information encoded within these visual gateways.

This article delves into the world of QR code reader apps on Windows 10, exploring their functionalities, benefits, and the diverse applications they cater to.

Understanding the Essence of QR Codes

QR codes, short for Quick Response codes, are two-dimensional barcodes that can store a variety of information, including website URLs, contact details, text messages, social media profiles, and even payment information. Their ability to encode a significant amount of data within a compact space has made them a versatile tool across various industries.

The Significance of QR Code Reader Apps on Windows 10

Windows 10’s integration of QR code scanning capabilities underscores the operating system’s commitment to providing users with a comprehensive and user-friendly digital experience. These apps offer a myriad of benefits, including:

  • Effortless Access to Digital Content: QR codes serve as a bridge between the physical and digital worlds. Users can effortlessly access websites, social media profiles, and other online resources simply by scanning a QR code with their Windows 10 device.
  • Enhanced Convenience: QR code reader apps streamline everyday tasks. They facilitate quick and easy access to product information, online menus, event details, and more.
  • Security and Reliability: Many QR code reader apps incorporate advanced security features, ensuring that users are accessing legitimate information and avoiding malicious websites or phishing attempts.
  • Accessibility and Inclusivity: QR codes can be readily adapted to cater to diverse needs. They can be used to provide access to information in multiple languages, offering a more inclusive experience for individuals with different language preferences.
  • Marketing and Promotion: Businesses leverage QR codes to engage with customers, provide product information, offer discounts, and collect valuable data. These codes enable businesses to create interactive and engaging experiences for their customers.

A Comprehensive Overview of QR Code Reader Apps on Windows 10

The Windows Store offers a diverse array of QR code reader apps, each tailored to meet specific user needs and preferences. While many apps share core functionalities, they often differentiate themselves through their unique features, user interface, and additional capabilities.

Popular QR Code Reader Apps on Windows 10

  • QR Code Reader: This app is a simple and straightforward solution for scanning QR codes. It offers a clean interface and supports various QR code formats, including URLs, text, and contact information.
  • QR Code Scanner: This app boasts a robust scanning engine and supports high-resolution QR codes. It also includes features like history tracking and the ability to share scanned data.
  • QR Code Reader Pro: This app offers a comprehensive set of features, including advanced scanning capabilities, customization options, and integration with other apps. It also provides a barcode reader functionality for scanning barcodes on product packaging.
  • QR Code Scanner & Barcode Reader: This app combines QR code scanning and barcode reading capabilities in a single application. It supports various barcode formats and offers a user-friendly interface.

Beyond Basic Scanning: Advanced Features and Applications

While basic scanning functionality is essential, many QR code reader apps on Windows 10 go beyond the fundamentals, offering advanced features and specialized applications.

  • Batch Scanning: Some apps allow users to scan multiple QR codes simultaneously, saving time and effort.
  • Offline Scanning: Certain apps enable users to scan QR codes even without an internet connection, providing flexibility and accessibility in various situations.
  • Customizable Scanning Options: Users can often configure scanning settings, such as the type of data to be extracted, the desired output format, and the level of security required.
  • Integration with Other Apps: Several apps integrate seamlessly with other applications on Windows 10, allowing users to share scanned data with messaging apps, email clients, or other platforms.
  • Specialized Applications: Some apps cater to specific industries or use cases. For example, apps designed for healthcare professionals may include features for scanning medical records or patient information, while apps for businesses may offer tools for managing inventory or tracking customer interactions.

FAQs by QR Code Reader App Windows 10

1. Can I scan QR codes using the built-in camera app on Windows 10?

While the Windows 10 camera app does not inherently support QR code scanning, users can leverage third-party QR code reader apps that integrate with the camera app. These apps typically provide a "Scan QR Code" option within the camera app’s interface, allowing users to scan QR codes directly through their camera.

2. How can I ensure the security of the information I access through QR codes?

It is crucial to exercise caution when scanning QR codes from unknown sources. Always verify the source of the QR code and the information it links to. Reputable QR code reader apps often incorporate security features that warn users about potentially malicious websites or phishing attempts.

3. Can I use QR code reader apps to generate QR codes?

Many QR code reader apps on Windows 10 offer QR code generation capabilities. Users can create QR codes that link to websites, text messages, contact information, or other data. This feature allows users to share information easily and efficiently.

4. Are there any limitations to QR code scanning on Windows 10?

QR code scanning on Windows 10 is generally reliable and efficient. However, some limitations may exist, such as:

  • Low-quality QR codes: If the QR code is damaged, faded, or poorly printed, it may be difficult to scan accurately.
  • Lighting conditions: Scanning QR codes in low light or direct sunlight can pose challenges for the camera’s ability to recognize the code.
  • Device limitations: Older Windows 10 devices may lack the necessary hardware or software to support QR code scanning.

Tips by QR Code Reader App Windows 10

  • Choose a reputable QR code reader app: Opt for apps from trusted developers with a good track record and positive user reviews.
  • Check for updates: Regularly update your QR code reader app to ensure you have the latest security features and bug fixes.
  • Be cautious with QR codes from unknown sources: Avoid scanning QR codes from suspicious websites, emails, or physical locations.
  • Verify the information: Always double-check the information displayed after scanning a QR code to ensure it matches your expectations.
  • Use a high-quality camera: Ensure your Windows 10 device has a camera capable of capturing clear images of QR codes.

Conclusion by QR Code Reader App Windows 10

QR code reader apps on Windows 10 have become essential tools in the modern digital landscape. They provide seamless access to a wealth of information, enhance convenience, and offer a range of advanced features and specialized applications. By embracing the power of QR codes, users can navigate the digital world with ease, efficiency, and security. As technology continues to evolve, QR code reader apps are poised to play an even more prominent role in shaping the future of digital interactions.

CodeTwo QR Code Desktop Reader - Windows 10 Download QR Code Scanner for Windows 10 Mobile 4 Best QR Code Reader for Windows (Updated)
Get QR Scanner Plus - Microsoft Store Yes, you can read QR Codes on Windows QR code Scanner for Windows 10  Camera and Image Scan  สแกน qr - STC EDU
generate qr code in windows 10 - Knowledge Sharing Tech 4 Ways to Scan QR Codes on a Windows PC - Make Tech Easier

Closure

Thus, we hope this article has provided valuable insights into Navigating the Digital Landscape: QR Code Reader Apps on Windows 10. We appreciate your attention to our article. See you in our next article!

The Performance Dip: Exploring The Reasons Behind Slowdowns After Windows 11 Updates

The Performance Dip: Exploring the Reasons Behind Slowdowns After Windows 11 Updates

Introduction

In this auspicious occasion, we are delighted to delve into the intriguing topic related to The Performance Dip: Exploring the Reasons Behind Slowdowns After Windows 11 Updates. Let’s weave interesting information and offer fresh perspectives to the readers.

The Performance Dip: Exploring the Reasons Behind Slowdowns After Windows 11 Updates

Why is My Computer So Slow After Windows 11 Update?

The transition to Windows 11 has been a significant event for many users, promising a refined experience and enhanced features. However, alongside these improvements, some users have reported experiencing a noticeable decrease in their computer’s performance after updating to Windows 11. This slowdown, manifesting as sluggish application launches, prolonged boot times, and overall system sluggishness, can be a frustrating experience. Understanding the potential causes behind this performance dip is crucial for identifying effective solutions and restoring the desired level of responsiveness.

The Underlying Factors Contributing to Performance Degradation

Several factors can contribute to a decline in performance after a Windows 11 update. These factors can be broadly categorized into:

1. Hardware Compatibility:

  • Outdated or Incompatible Hardware: Windows 11 has specific hardware requirements, including a compatible processor, sufficient RAM, and a modern graphics card. If a computer does not meet these requirements, it may struggle to run Windows 11 effectively, leading to performance issues.
  • Driver Compatibility Issues: Drivers, the software that enables communication between your hardware and operating system, are essential for smooth operation. Updating to Windows 11 might introduce compatibility issues with existing drivers, leading to performance bottlenecks.
  • Limited System Resources: Windows 11, with its enhanced features and visual improvements, demands more system resources than its predecessor. Computers with limited RAM or hard drive space might struggle to keep up with the increased resource demands, causing slowdowns.

2. Software and System Configuration:

  • Background Processes and Services: The number of background processes and services running on a computer can significantly impact performance. Windows 11 may introduce new services or processes that consume resources, potentially leading to performance degradation.
  • Storage Space and Fragmentation: A cluttered hard drive with limited free space can lead to slowdowns. Fragmentation, where files are scattered across the hard drive, can also hinder performance.
  • System Configuration and Optimization: Improper system configuration, such as outdated BIOS settings or incorrect power management settings, can negatively affect performance.

3. Windows 11 Update-Specific Issues:

  • Bugs and Glitches: Like any software update, Windows 11 might introduce bugs or glitches that can affect system performance. These issues can be resolved through subsequent updates or patches.
  • Resource Intensive Features: Some features in Windows 11, such as the new Start menu, Widgets, and virtual desktop management, might be resource-intensive and contribute to slowdowns on older or less powerful machines.
  • System Optimization for Newer Hardware: Windows 11 may be optimized for newer hardware, potentially leading to performance degradation on older systems.

Identifying the Root Cause: A Diagnostic Approach

To effectively address the performance slowdown, pinpointing the root cause is crucial. A systematic approach to diagnosis can help identify the culprit:

1. Check Hardware Compatibility:

  • System Requirements: Confirm that your computer meets the minimum hardware requirements for Windows 11. This information can be found on the official Microsoft website.
  • Device Manager: Utilize the Device Manager in Windows to check for any yellow exclamation marks indicating driver issues or hardware conflicts.
  • Performance Monitor: The Performance Monitor tool can provide insights into resource usage, identifying potential bottlenecks related to CPU, RAM, or disk usage.

2. Analyze Software and System Configuration:

  • Task Manager: Use the Task Manager to identify resource-intensive processes running in the background. This can help determine if any unnecessary programs are contributing to slowdowns.
  • Disk Cleanup and Defragmentation: Run Disk Cleanup to remove unnecessary files and defragment the hard drive to improve disk performance.
  • System Configuration: Check system configuration settings, including BIOS settings and power management options, to ensure they are optimized for performance.

3. Investigate Windows 11 Update-Specific Issues:

  • Windows Update History: Review the Windows Update history to identify any recent updates that might have caused performance issues.
  • Troubleshooting Tools: Utilize built-in troubleshooting tools, such as the Windows Troubleshooter, to identify and resolve potential issues related to system performance.
  • Community Forums and Support: Consult online forums and Microsoft support resources for known issues and potential solutions related to Windows 11 performance.

Restoring Performance: A Multifaceted Approach

Once the root cause of the performance slowdown is identified, implementing appropriate solutions can restore the desired responsiveness.

1. Addressing Hardware Compatibility Issues:

  • Upgrade Hardware: If your computer does not meet the minimum hardware requirements, upgrading components like RAM, storage, or the graphics card can significantly improve performance.
  • Update Drivers: Ensure that all drivers are up to date, either through Windows Update or by downloading the latest drivers from the manufacturer’s website.
  • Disable Unnecessary Devices: Temporarily disable devices that are not essential, such as external hard drives or USB devices, to free up system resources.

2. Optimizing Software and System Configuration:

  • Minimize Background Processes: Disable unnecessary background processes and services through the Task Manager or System Configuration.
  • Clean Up Storage: Regularly clean up temporary files, uninstall unused programs, and move large files to external storage to free up disk space.
  • Adjust Power Settings: Configure power settings to favor performance over power saving to ensure the system runs at its full potential.

3. Resolving Windows 11 Update-Specific Issues:

  • Roll Back to Previous Version: If the performance issues are directly attributed to a recent Windows 11 update, consider rolling back to a previous version.
  • Reinstall Windows 11: A clean installation of Windows 11 can often resolve persistent performance issues, ensuring a fresh system without any lingering conflicts.
  • Contact Microsoft Support: For complex issues or if troubleshooting fails, reaching out to Microsoft support can provide expert assistance.

Frequently Asked Questions (FAQs)

Q: Why is my computer slower after updating to Windows 11?

A: The slowdown could be due to several factors, including incompatible hardware, driver issues, insufficient system resources, background processes, or bugs introduced by the update.

Q: Can I downgrade from Windows 11 to Windows 10?

A: Yes, you can downgrade to Windows 10 within a limited timeframe after upgrading to Windows 11. However, you may need to reinstall Windows 10 from scratch.

Q: How much RAM do I need for Windows 11?

A: The minimum RAM requirement for Windows 11 is 4GB, but 8GB is recommended for a smoother experience.

Q: Is Windows 11 heavier than Windows 10?

A: Yes, Windows 11 generally requires more system resources than Windows 10, especially for newer features like the Widgets and virtual desktops.

Q: How can I prevent my computer from slowing down after future Windows updates?

A: Regularly check for updates, ensure drivers are up to date, maintain sufficient storage space, and minimize background processes to minimize the impact of future updates.

Tips for Maintaining Optimal Performance

  • Regularly Update Drivers: Ensure that all device drivers are up to date to prevent compatibility issues.
  • Optimize System Settings: Adjust power settings, disable unnecessary background processes, and optimize system configuration for performance.
  • Monitor Resource Usage: Use the Task Manager to keep an eye on CPU, RAM, and disk usage, identifying potential bottlenecks.
  • Regularly Clean Up Disk Space: Delete temporary files, uninstall unused programs, and move large files to external storage to free up disk space.
  • Perform a Clean Installation: If performance issues persist, consider a clean installation of Windows 11 to resolve potential conflicts or corrupt files.

Conclusion

Experiencing a performance decline after updating to Windows 11 can be frustrating, but understanding the underlying causes and implementing appropriate solutions can restore the desired responsiveness. By systematically diagnosing the issue, identifying the root cause, and implementing appropriate measures, users can optimize their systems for a smooth and efficient Windows 11 experience.

Fix update released - Microosft confirms Windows 11 performance slowdown after prolonged use Computer Very Slow After Windows 11 Upgrade - Get Latest Windows 11 Update How to Fix Slow Startup Windows 11?  9 Simple Ways - MiniTool Partition Wizard
Fix: Internet Running Slow After Windows 11 Update - Technipages 5 Common Windows 11 Issues You Can Solve Super Quickly - ErrorTools Updates are Underway Windows 11: How to Bypass It
What You Need to Know About the Performance Issues in Windows 11 2022 Update Windows 11 updates not showing up? Cause and fix instructions-Common Problem-php.cn

Closure

Thus, we hope this article has provided valuable insights into The Performance Dip: Exploring the Reasons Behind Slowdowns After Windows 11 Updates. We appreciate your attention to our article. See you in our next article!

R For Windows 10: A Comprehensive Guide To Data Analysis And Statistical Computing

R for Windows 10: A Comprehensive Guide to Data Analysis and Statistical Computing

Introduction

With great pleasure, we will explore the intriguing topic related to R for Windows 10: A Comprehensive Guide to Data Analysis and Statistical Computing. Let’s weave interesting information and offer fresh perspectives to the readers.

R for Windows 10: A Comprehensive Guide to Data Analysis and Statistical Computing

R Programming: A Comprehensive Guide to Statistical Computing » Let Me Read

R, a free and open-source programming language and software environment, has become an indispensable tool for data analysis, statistical computing, and graphical representation. Its versatility and wide range of packages make it a powerful platform for researchers, data scientists, and anyone seeking to extract meaningful insights from data. This article delves into the world of R, focusing on its accessibility and utilization on Windows 10, and explores its key features, benefits, and applications.

Understanding R: A Foundation for Data Analysis

R’s origins lie in the academic world, developed by Ross Ihaka and Robert Gentleman at the University of Auckland, New Zealand. Its initial purpose was to facilitate statistical computing and graphical visualization. Over time, R has evolved into a robust and comprehensive language, supporting a vast array of statistical methods, machine learning algorithms, and data manipulation techniques.

The Power of Open Source: Accessibility and Community

R’s open-source nature is a significant advantage. It allows users to freely download, use, and distribute the software without licensing fees. This accessibility has fostered a vibrant and collaborative community of R users, contributing to its continuous development and expansion.

Key Features of R: A Versatile Toolkit

R’s strength lies in its extensive features, making it a powerful tool for data analysis and manipulation.

  • Comprehensive Statistical Capabilities: R offers a wide range of statistical methods, from basic descriptive statistics to advanced techniques like regression analysis, time series analysis, and hypothesis testing.
  • Powerful Data Manipulation: R’s data structures, including vectors, matrices, data frames, and lists, allow for efficient data organization and manipulation.
  • Graphical Visualization: R excels in creating informative and visually appealing graphs and charts, facilitating data exploration and communication.
  • Package Ecosystem: R’s package ecosystem is a treasure trove of specialized functions and libraries, extending its functionality to various domains like bioinformatics, finance, and machine learning.
  • Scripting and Automation: R supports scripting, enabling the automation of repetitive tasks and the development of customized analytical workflows.

R for Windows 10: Seamless Integration and User-Friendly Experience

Installing R on Windows 10 is a straightforward process. The official R website provides a dedicated installer for the operating system, ensuring compatibility and smooth integration.

Installation Process:

  1. Download: Visit the official R website (https://cran.r-project.org/) and navigate to the "Download R for Windows" section.
  2. Installer: Download the appropriate installer file (usually an .exe file) for your Windows 10 system.
  3. Installation: Run the installer file and follow the on-screen instructions. Choose a suitable installation directory and accept the default settings unless you have specific preferences.
  4. Verification: After successful installation, open R by searching for it in the Windows Start menu. You should see the R console, indicating a successful installation.

Getting Started with R: A Beginner’s Guide

For beginners, R might seem daunting, but it’s surprisingly user-friendly. Here’s a step-by-step guide to help you get started:

  1. R Console: The R console is your primary interface. It allows you to enter commands and see the results.
  2. Basic Commands: Start with basic commands like print("Hello World") to display text and sqrt(25) to calculate the square root of a number.
  3. Variables: Assign values to variables using the assignment operator <-. For example, x <- 10 assigns the value 10 to the variable x.
  4. Data Structures: Learn about R’s data structures, including vectors, matrices, data frames, and lists.
  5. Packages: Explore R’s package ecosystem. Use the install.packages() function to install packages like ggplot2 for data visualization.
  6. Online Resources: Leverage the vast online resources available, including tutorials, documentation, and forums.

R’s Applications: From Academic Research to Industry Insights

R’s versatility and power have led to its widespread adoption in diverse fields.

  • Academic Research: R is a cornerstone for statistical analysis in research across various disciplines, including biology, economics, psychology, and social sciences.
  • Data Science: Data scientists utilize R for tasks like data cleaning, feature engineering, model building, and analysis.
  • Business Analytics: R plays a crucial role in business analytics, enabling companies to extract insights from customer data, optimize marketing campaigns, and improve decision-making.
  • Finance: R’s financial libraries facilitate portfolio optimization, risk management, and financial modeling.
  • Bioinformatics: R’s bioinformatics packages are widely used for analyzing genomic data, studying gene expression, and exploring protein structures.

FAQs: Addressing Common Queries

Q: Is R difficult to learn?

A: R has a learning curve, but it’s not insurmountable. Numerous resources and tutorials cater to beginners, making it accessible to individuals with varying levels of programming experience.

Q: What are the best resources for learning R?

A: Online platforms like Coursera, edX, and DataCamp offer comprehensive R courses. Books like "R for Data Science" and "R Cookbook" provide practical guidance.

Q: Can I use R for machine learning?

A: Yes, R has a rich set of machine learning libraries, including caret, randomForest, and e1071, enabling you to build and evaluate machine learning models.

Q: How do I get help with R?

A: The vibrant R community provides extensive support. Forums like Stack Overflow and the R mailing list offer a platform for asking questions and seeking guidance.

Tips for Effective R Utilization

  • Start Small: Begin with basic commands and gradually explore more complex features.
  • Practice Regularly: Consistent practice is key to mastering R. Work on small projects and analyze real-world datasets.
  • Utilize Packages: Explore R’s package ecosystem to find libraries relevant to your specific needs.
  • Document Your Code: Add comments to your code to make it understandable and maintainable.
  • Seek Help: Don’t hesitate to ask for help from the R community.

Conclusion: Embracing R for Data-Driven Insights

R’s open-source nature, comprehensive features, and active community make it a valuable tool for data analysis and statistical computing. Its versatility and ease of use allow users to explore data, uncover patterns, and gain valuable insights. Whether you’re an academic researcher, a data scientist, or simply someone seeking to understand data better, R empowers you to extract meaning from information and make informed decisions. By leveraging its capabilities and embracing its learning curve, you can unlock the power of data analysis and embark on a journey of discovery.

Statistical Analysis with R  Guide to Statistical Analysis with R R Tutorials - eXtension Intro to R
Navigating The Landscape Of Data Analysis: A Comprehensive Guide To R Studio - France Location Statistical Analysis With R Beginner's Guide Data Visualisation Statistical Analysis and Programming in R
Data Analysis in R - YouTube The R Project for Statistical Computing - Tools - OasisHUB

Closure

Thus, we hope this article has provided valuable insights into R for Windows 10: A Comprehensive Guide to Data Analysis and Statistical Computing. We thank you for taking the time to read this article. See you in our next article!

Understanding And Managing Drive Letters In Windows 10: A Comprehensive Guide

Understanding and Managing Drive Letters in Windows 10: A Comprehensive Guide

Introduction

In this auspicious occasion, we are delighted to delve into the intriguing topic related to Understanding and Managing Drive Letters in Windows 10: A Comprehensive Guide. Let’s weave interesting information and offer fresh perspectives to the readers.

Understanding and Managing Drive Letters in Windows 10: A Comprehensive Guide

How To Change Drive Letters In Windows 10?

In the world of computing, drive letters are fundamental identifiers for storage devices connected to your computer. Windows 10, like its predecessors, uses these letters to organize and access various storage locations, including hard drives, solid-state drives (SSDs), external drives, and network shares.

This guide delves into the intricacies of drive letters in Windows 10, specifically addressing the common question of "how to open a specific drive, like the F drive, on your computer." It will provide clear explanations, practical steps, and useful insights to help you understand and manage your storage effectively.

The Significance of Drive Letters in Windows 10:

Drive letters serve as convenient labels, allowing the operating system and users to easily navigate and access different storage locations. They provide a standardized method for organizing data, facilitating file transfers, and simplifying disk management tasks.

Understanding the F Drive and Other Drive Letters:

The F drive, like any other drive letter, represents a specific storage location connected to your computer. It could be a physical hard drive, an external USB drive, a network share, or even a virtual drive created by software.

  • Physical Hard Drives: These are the primary storage devices in most computers, often designated as the C drive (where the operating system is installed) and potentially other letters for additional hard drives.
  • External Drives: USB drives, SD cards, and other external storage devices are typically assigned drive letters when connected to your computer.
  • Network Shares: Files and folders on other computers or servers on a network can be accessed through drive letters, making it easier to collaborate and share data.
  • Virtual Drives: Some software applications create virtual drives, often represented by letters like D, E, or F, to store temporary files or provide access to specific data.

Opening the F Drive in Windows 10:

Opening the F drive, or any other drive, in Windows 10 is a straightforward process:

  1. Through File Explorer: The most common method is to open File Explorer (Windows key + E) and navigate to the "This PC" section. Here, you will find a list of available drives, including the F drive. Double-clicking on the F drive icon will open it, displaying its contents in a new window.

  2. Using the Address Bar: In File Explorer, you can directly type the drive letter in the address bar, followed by a colon (e.g., "F:"). Pressing Enter will open the F drive.

  3. Run Command: You can also use the "Run" command (Windows key + R) and type "F:" in the text field, followed by pressing Enter. This will open the F drive.

Troubleshooting Common Issues:

  • Drive Letter Not Showing: If the F drive is not visible in "This PC," check if the device is properly connected and powered on. If it’s an external drive, try connecting it to a different USB port.
  • Drive Letter Missing: If the drive letter is missing, you can assign one manually through Disk Management (right-click on "This PC" and select "Manage," then navigate to "Disk Management").
  • Drive Letter Changed: If the F drive is assigned a different letter, you can change it in Disk Management. However, be cautious as changing drive letters can affect applications that rely on specific drive locations.

FAQs about Drive Letters in Windows 10:

Q: Can I change the drive letter assigned to my F drive?

A: Yes, you can change the drive letter assigned to any drive using Disk Management. However, it’s important to note that this can affect applications that reference the drive by its original letter.

Q: Why does my F drive disappear sometimes?

A: This could be due to several reasons:

  • The drive is not connected: Ensure the drive is properly connected and powered on.
  • The drive is not recognized: Check if the device is detected in Device Manager (right-click on "This PC" and select "Manage," then navigate to "Device Manager").
  • The drive is in sleep mode: Some external drives enter sleep mode to conserve power. Try accessing the drive again to wake it up.

Q: What happens if I delete the contents of my F drive?

A: Deleting the contents of any drive permanently removes the data stored on it. Ensure you have a backup of important files before deleting anything from a drive.

Q: Can I use the F drive to install Windows 10?

A: While you can install Windows 10 on a drive other than the C drive, it’s generally recommended to install it on the primary hard drive (usually C). Installing Windows on the F drive might lead to compatibility issues and potential data loss.

Tips for Managing Drive Letters in Windows 10:

  • Use consistent drive letter naming conventions: For external drives, use a consistent naming system, such as "DataDrive" or "BackupDrive," to easily identify them.
  • Keep track of assigned drive letters: Note down the drive letters assigned to your external drives, network shares, and virtual drives to avoid confusion.
  • Avoid changing drive letters frequently: Changing drive letters can disrupt applications and lead to unexpected behavior.
  • Back up important data: Regularly back up your data to prevent data loss in case of drive failures or accidental deletion.

Conclusion:

Drive letters are an integral part of how Windows 10 manages storage devices. Understanding how they work and how to access and manage them effectively is crucial for efficient data organization and storage management. By following the steps and guidelines outlined in this guide, you can confidently navigate your storage landscape and ensure seamless access to your files and data. Remember to exercise caution when dealing with drive letters, especially when making changes to their assignments, and always back up important data to prevent loss.

How to Change Drive Letter on Windows 10/11? (The Complete Guide) Quick Guide: Changing Drive Letters in Windows 10 - Infetech.com  Tech News, Reviews, and Analysis How to Change Drive Letter in Windows 10 (Easy to Follow Guide)
How To Show Drive Letters First In Windows 10 File Ex - vrogue.co Change and Assign Drive Letter in Windows 10  Tutorials How to change drive letter in Windows 10,8,7 PC or Laptop - H2S Media
How to Change Drive Letter in Windows 10 How to change the drive letter in Windows 10/11, DVD and USB drives?

Closure

Thus, we hope this article has provided valuable insights into Understanding and Managing Drive Letters in Windows 10: A Comprehensive Guide. We appreciate your attention to our article. See you in our next article!

Troubleshooting R In Windows 10: A Comprehensive Guide

Troubleshooting R in Windows 10: A Comprehensive Guide

Introduction

In this auspicious occasion, we are delighted to delve into the intriguing topic related to Troubleshooting R in Windows 10: A Comprehensive Guide. Let’s weave interesting information and offer fresh perspectives to the readers.

Troubleshooting R in Windows 10: A Comprehensive Guide

Microsoft Windows 10 Troubleshooting Guide – J.R. Clarke Public Library

R, a powerful open-source programming language and software environment, is widely used for statistical computing, data visualization, and machine learning. While it’s a versatile tool, users sometimes encounter difficulties running R on Windows 10. This guide aims to provide a comprehensive understanding of potential issues and offer practical solutions for resolving them.

Common Causes of R Not Running on Windows 10:

  • Installation Issues: Incorrect installation procedures, incomplete downloads, or corrupted files can lead to R failing to launch.
  • Environment Variables: R relies on specific environment variables to function correctly. Incorrectly configured or missing variables can cause issues.
  • Software Dependencies: R requires certain software components to be installed, such as the Rtools package and a compatible compiler.
  • Path Conflicts: Conflicting paths in the system environment variables can interfere with R’s execution.
  • Software Updates: Updating operating system components, antivirus software, or other applications can sometimes disrupt R’s functionality.
  • Administrative Privileges: R may require administrative privileges to install and run correctly.
  • Compatibility Issues: Certain versions of R may not be compatible with specific Windows 10 builds or other software.
  • Hardware Limitations: Insufficient RAM or outdated hardware can impact R’s performance and cause it to malfunction.

Troubleshooting Steps:

1. Verify Installation:

  • Reinstall R: Ensure a clean installation by completely uninstalling R and then reinstalling it from the official website.
  • Check File Integrity: Download the R installer again and verify the integrity of the downloaded file. Use a checksum tool to compare the downloaded file with the official checksum provided on the website.
  • Run as Administrator: Right-click the R shortcut and select "Run as administrator." This grants R the necessary privileges to function properly.

2. Manage Environment Variables:

  • Check Existing Variables: Open the System Properties window (by searching for "System" in the Start menu), navigate to "Advanced system settings," and click "Environment Variables." Verify that the following variables are set correctly:
    • R_HOME: This variable should point to the root directory of your R installation.
    • R_LIBS_USER: This variable defines the location of user-specific libraries.
    • PATH: The PATH variable should include the directory containing the R executable (typically "C:Program FilesRR-4.x.xbin").
  • Add or Modify Variables: If necessary, add or modify the environment variables to ensure they are correctly configured.

3. Install Essential Software:

  • Rtools: Rtools provides essential tools for building and compiling R packages. Install the appropriate version of Rtools for your R installation.
  • Compiler: R requires a compatible compiler to build packages. If you haven’t already, install a compiler like MinGW-w64 or Microsoft Visual Studio.

4. Resolve Path Conflicts:

  • Check Path Variables: Review the PATH environment variable and ensure there are no conflicting or redundant entries.
  • Remove Unnecessary Entries: Remove any unnecessary entries from the PATH variable, especially those related to older R installations or other software that may interfere with R’s execution.

5. Update Software:

  • Windows Updates: Ensure that your Windows 10 operating system is up to date. Install all available updates to maintain compatibility and resolve potential conflicts.
  • Antivirus Software: Temporarily disable your antivirus software and try running R again. If the issue is resolved, consider adding R to your antivirus’s exclusion list.

6. Check Hardware:

  • RAM: Ensure that your computer has sufficient RAM to run R smoothly. R can be resource-intensive, especially when working with large datasets.
  • CPU: An outdated CPU might struggle to keep up with R’s demands. Consider upgrading your CPU if necessary.

7. Compatibility Issues:

  • R Version: Ensure that your R version is compatible with your Windows 10 build. Check the R website for compatibility information and download a compatible version if needed.
  • Other Software: Certain software, such as antivirus programs, firewalls, or other applications, might interfere with R’s functionality. Try disabling them temporarily to see if they are causing the issue.

FAQs:

Q: What are the benefits of using R in Windows 10?

A: R offers a multitude of benefits for data analysis and machine learning:

  • Open-source and Free: R is free to use and distribute, making it accessible to everyone.
  • Powerful Statistical Capabilities: R provides a comprehensive set of tools for statistical analysis, including data manipulation, visualization, and modeling.
  • Extensive Libraries: R boasts a vast collection of packages developed by a global community, covering a wide range of applications.
  • Active Community: R has a large and active user community, providing support, resources, and collaboration opportunities.
  • Flexibility and Customization: R offers a high degree of flexibility and customization, allowing users to tailor their analysis workflows.

Q: Why is R not running on my Windows 10 machine?

A: There are several reasons why R might not be running on Windows 10, including installation issues, environment variable problems, software dependencies, path conflicts, or compatibility issues.

Q: How do I install R on Windows 10?

A: Download the latest version of R from the official website (https://cran.r-project.org/). Run the installer and follow the on-screen instructions. Ensure that you have administrative privileges to install R successfully.

Q: How do I troubleshoot R environment variables?

A: Open the System Properties window, navigate to "Advanced system settings," and click "Environment Variables." Check the variables mentioned in the "Manage Environment Variables" section and make sure they are correctly configured.

Tips:

  • Keep R Updated: Regularly update R to benefit from the latest features, bug fixes, and security enhancements.
  • Use a Package Manager: Consider using a package manager like RStudio or Tinn-R to streamline your R workflow and simplify package management.
  • Consult Online Resources: Utilize online resources like Stack Overflow, R documentation, and community forums to find solutions to specific problems.
  • Start with a Simple Script: When troubleshooting, start with a simple R script to isolate the issue. Gradually add complexity to identify the source of the problem.
  • Check Error Messages: Pay close attention to error messages generated by R. They often provide valuable clues about the underlying cause of the issue.

Conclusion:

Successfully running R on Windows 10 requires careful attention to installation procedures, environment variables, software dependencies, and compatibility issues. By following the troubleshooting steps and tips outlined in this guide, users can overcome common obstacles and unlock the full potential of this powerful tool for data analysis and machine learning.

How To Open Troubleshooting In Windows 10 How to access Windows 10 troubleshooting tools step by step  TechTarget How to access Windows 10 troubleshooting tools step by step  TechTarget
Windows 10 Quick Tips - Troubleshooting  Daves Computer Tips 13 Troubleshooting Tools to Fix Windows 10  MakeUseOf How to Enable Recommended Troubleshooting in Windows 10
How to access Windows 10 troubleshooting tools step by step How to use Recommended Troubleshooting on Windows 10 May 2019 Update  Windows Central

Closure

Thus, we hope this article has provided valuable insights into Troubleshooting R in Windows 10: A Comprehensive Guide. We hope you find this article informative and beneficial. See you in our next article!

Understanding The Evolution Of Gmail: A Comprehensive Guide To Interface Changes

Understanding the Evolution of Gmail: A Comprehensive Guide to Interface Changes

Introduction

With great pleasure, we will explore the intriguing topic related to Understanding the Evolution of Gmail: A Comprehensive Guide to Interface Changes. Let’s weave interesting information and offer fresh perspectives to the readers.

Understanding the Evolution of Gmail: A Comprehensive Guide to Interface Changes

The evolution of Gmail - YouTube

Gmail, Google’s ubiquitous email service, has undergone significant transformations since its inception. These changes, ranging from subtle refinements to complete overhauls, reflect the platform’s ongoing commitment to enhancing user experience and adapting to the ever-evolving digital landscape. This article aims to provide a comprehensive understanding of these changes, exploring the reasons behind them and the impact they have on user interaction.

The Early Days: Simplicity and Functionality

Gmail’s initial iteration, launched in 2004, prioritized simplicity and functionality. The interface was clean and uncluttered, focusing on core email features such as composing, sending, and receiving messages. This minimalist approach resonated with users seeking a streamlined and efficient email experience, contributing to Gmail’s rapid adoption.

The Rise of Features and Customization:

Over time, Gmail evolved to incorporate a wider range of features, catering to the growing demands of users. The introduction of labels, filters, and search functionality enhanced email organization and management. Users could now categorize messages, automate actions, and quickly locate specific emails. This shift towards customization allowed users to tailor their Gmail experience to their specific needs and preferences.

The Integration of Google Services:

Gmail’s integration with other Google services, such as Google Drive and Calendar, marked a significant turning point. This interconnectedness enabled users to seamlessly access and manage their files, schedules, and emails within a unified ecosystem. The integration of Google Chat and Meet further expanded Gmail’s capabilities, transforming it into a comprehensive communication platform.

The Emergence of a Modern Interface:

The modern Gmail interface, characterized by a clean, intuitive design and a focus on visual elements, reflects the platform’s evolution towards a user-centric experience. The introduction of themes, personalized backgrounds, and dynamic layouts allows for greater customization and personalization. This emphasis on visual appeal enhances user engagement and promotes a more enjoyable email experience.

The Impact of Mobile Devices:

The rise of mobile devices has profoundly impacted Gmail’s development. The platform has adapted to the constraints of smaller screens, introducing responsive design elements and touch-optimized controls. This ensures a seamless and intuitive experience across devices, regardless of screen size.

The Importance of User Feedback:

Gmail’s evolution is driven by constant feedback from its vast user base. Google actively seeks user input through surveys, forums, and feedback mechanisms. This collaborative approach ensures that the platform remains relevant and responsive to user needs.

Benefits of the Evolving Gmail Interface:

The changes in Gmail’s interface have resulted in numerous benefits for users:

  • Enhanced User Experience: The focus on intuitive design and user-friendly features makes Gmail easier to navigate and use.
  • Improved Efficiency: The introduction of features such as labels, filters, and search functionality streamlines email management and saves time.
  • Increased Productivity: The integration of Google services allows users to manage their emails, files, and schedules from a single platform, increasing productivity.
  • Enhanced Security: Gmail’s continuous security updates and encryption measures protect user data and privacy.
  • Personalized Experience: Customization options allow users to tailor their Gmail experience to their specific needs and preferences.

FAQs about Changes in Gmail Interface:

Q: Why does my Gmail look different?

A: Gmail regularly updates its interface to improve user experience, introduce new features, and adapt to evolving technologies. These updates may result in changes to the layout, design elements, and functionality.

Q: How can I revert to the old Gmail interface?

A: While Google generally prioritizes the latest interface, it may offer options to revert to previous versions. Check the settings menu for any available options to switch between different interface versions.

Q: What are the key changes in the new Gmail interface?

A: The new Gmail interface often includes updates to the layout, design elements, and features. Key changes may include a more streamlined design, improved search functionality, enhanced integration with other Google services, and a focus on mobile optimization.

Q: Will my old emails be affected by the changes?

A: The changes in Gmail’s interface generally do not affect the content or accessibility of your existing emails. Your emails will remain accessible and organized as before.

Tips for Adapting to the New Gmail Interface:

  • Familiarize yourself with the new layout and design elements. Take some time to explore the changes and understand the new interface.
  • Utilize the help resources available. Gmail provides comprehensive help documentation and tutorials to assist with navigating the new interface.
  • Seek support from the community. Online forums and support groups can offer guidance and troubleshooting tips for adapting to the new Gmail interface.

Conclusion:

Gmail’s evolution is a testament to its commitment to providing a user-centric and adaptable email platform. The changes in its interface reflect the platform’s ongoing efforts to enhance user experience, improve efficiency, and adapt to the ever-changing digital landscape. By understanding the reasons behind these changes and the benefits they offer, users can navigate the evolving Gmail interface with greater confidence and efficiency.

Gmail Logo and Its History  LogoMyWay The Evolution of Gmail [Infographic] - iClarified #Infographic #Infografia Gmail Evolution,La Evolución de Gmail  Info
The Evolution of Gmail From 2004 Until Today - GeekShizzle The Evolution of Gmail From 2004 Until Today - GeekShizzle The Evolution of Gmail From 2004 Until Today - GeekShizzle
Google Changed Gmail Logo: Here’s What Changes Made So Far? – OXO Solutions® The Evolution of Gmail, Visualized

Closure

Thus, we hope this article has provided valuable insights into Understanding the Evolution of Gmail: A Comprehensive Guide to Interface Changes. We thank you for taking the time to read this article. See you in our next article!