Archives December 2023

Navigating The Labyrinth: Common Outlook Calendar Issues In Windows 11

Navigating the Labyrinth: Common Outlook Calendar Issues in Windows 11

Introduction

In this auspicious occasion, we are delighted to delve into the intriguing topic related to Navigating the Labyrinth: Common Outlook Calendar Issues in Windows 11. Let’s weave interesting information and offer fresh perspectives to the readers.

Calendar display issues in Outlook 365 for Windows 11 : r/Office365

The Outlook Calendar, an integral part of Microsoft’s productivity suite, plays a pivotal role in managing schedules, appointments, and tasks for individuals and organizations alike. However, users of Windows 11 have reported encountering various issues with the Outlook Calendar, ranging from minor inconveniences to significant disruptions in workflow. This article delves into the common challenges faced by Windows 11 users with their Outlook Calendars, providing insights into their causes, potential solutions, and preventive measures.

The Spectrum of Outlook Calendar Issues:

The issues encountered by Windows 11 users with their Outlook Calendars can be broadly categorized into the following:

1. Synchronization Problems:

  • Delayed or Incomplete Synchronization: This issue manifests as events, appointments, or tasks not appearing in the calendar in real-time or being partially reflected. It can stem from network connectivity problems, server overload, or conflicts with other calendar applications.

  • Synchronization Errors: These errors often result in data loss, incorrect calendar entries, or the inability to access the calendar altogether. They can arise from corrupted data files, incompatible software versions, or faulty synchronization settings.

2. Display and Rendering Issues:

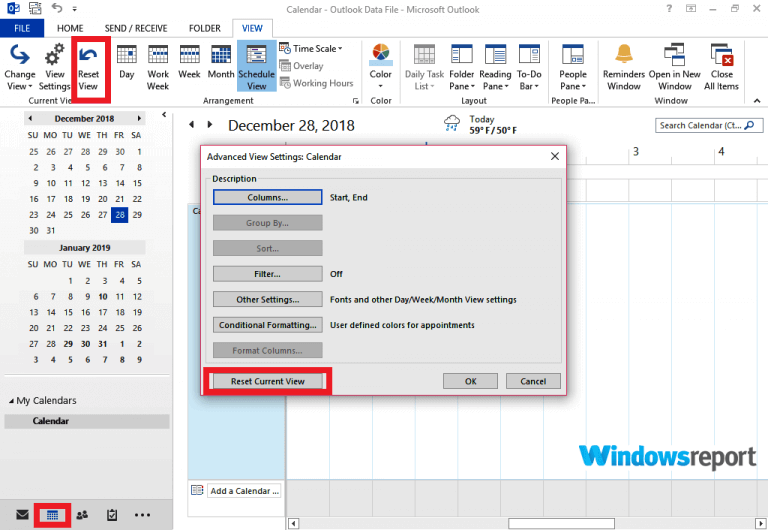
  • Calendar View Errors: Users may experience problems with the calendar view, such as incorrect date displays, missing events, or inability to navigate between different views (daily, weekly, monthly). These issues can be caused by outdated calendar settings, corrupted calendar files, or incompatibility with the Windows 11 operating system.

  • Visual Glitches: Irregularities in the calendar’s visual appearance, such as distorted text, missing icons, or incorrect color schemes, can significantly hinder usability. This can be attributed to outdated graphics drivers, corrupted display settings, or conflicts with other installed software.

3. Functionality and Feature Limitations:

  • Limited Event Creation or Editing: Users may encounter difficulties creating new events, editing existing ones, or setting reminders. These issues can be related to permission restrictions, corrupted data files, or software bugs.

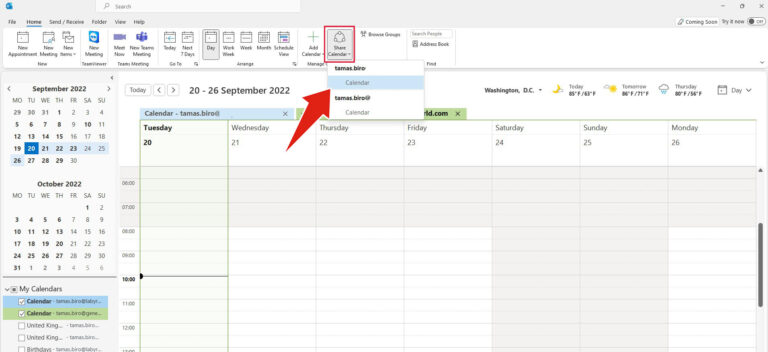
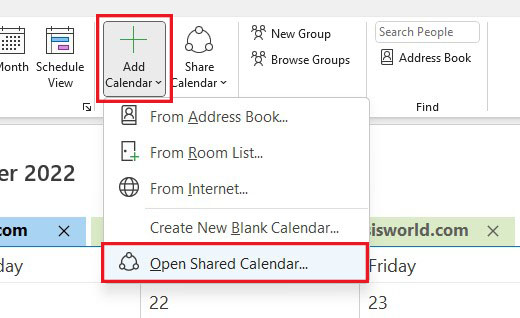
  • Missing or Unavailable Features: Some users may find that specific features, such as calendar sharing, recurring events, or calendar integration with other applications, are not functioning as expected. This could be due to software updates, configuration errors, or limitations imposed by the user’s account type.

4. Performance and Responsiveness:

  • Slow Loading Times: The Outlook Calendar might take an extended time to load, display events, or respond to user actions. This can be attributed to insufficient system resources, network latency, or software conflicts.

  • Frequent Crashes or Freezes: The Outlook Calendar may experience frequent crashes or freeze, interrupting workflow and causing data loss. This can be caused by outdated software versions, corrupted data files, or hardware limitations.

Unraveling the Causes: A Closer Look:

Understanding the root cause of Outlook Calendar issues in Windows 11 is crucial for devising effective solutions. Here’s a breakdown of common culprits:

1. Software-Related Issues:

  • Outdated Outlook Version: An outdated Outlook version can lack compatibility with Windows 11, leading to various issues. Regularly updating Outlook to the latest version is crucial.

  • Conflicting Software: Other installed software, particularly those managing calendars or scheduling, can interfere with Outlook Calendar functionality. Identifying and disabling or updating such software can resolve conflicts.

  • Corrupted Data Files: Damaged Outlook data files, such as the .pst or .ost files, can cause synchronization errors, display issues, and functionality limitations. Repairing or rebuilding these files can often resolve the problem.

2. System-Related Issues:

  • Windows 11 Compatibility: While Windows 11 is designed for seamless integration with Outlook, certain configurations or settings might cause compatibility issues. Ensuring proper system settings and updates is crucial.

  • Hardware Limitations: Insufficient RAM, hard drive space, or processing power can impact the performance and responsiveness of Outlook Calendar, leading to slow loading times and crashes.

  • Network Connectivity: Poor network connectivity can lead to synchronization problems, delayed loading times, and inability to access online features.

3. User Configuration Errors:

  • Incorrect Calendar Settings: Faulty calendar settings, such as incorrect time zones, date formats, or synchronization settings, can lead to display errors and functionality limitations.

  • Permission Restrictions: Limited permissions on the user’s account or the calendar itself can restrict access to certain features, such as event creation or sharing.

Navigating the Solutions: A Practical Guide:

Addressing Outlook Calendar issues in Windows 11 requires a systematic approach, starting with identifying the root cause and then implementing appropriate solutions. Here’s a step-by-step guide:

1. Check for Updates:

  • Outlook: Ensure that Outlook is updated to the latest version by checking for updates within the application itself.

  • Windows 11: Keep Windows 11 updated with the latest patches and security updates to ensure compatibility and address known issues.

2. Troubleshoot Synchronization Issues:

  • Network Connectivity: Verify a stable internet connection. Restart the modem and router if necessary.

  • Outlook Settings: Check the synchronization settings in Outlook, ensuring the correct account is selected and the synchronization frequency is appropriate.

  • Server Status: Verify the status of the Microsoft Exchange Server or Outlook.com server by checking the official Microsoft website or status page.

3. Address Display and Rendering Problems:

  • Calendar Settings: Review the calendar settings, including time zone, date format, and view options, to ensure they are correct.

  • Graphics Drivers: Update the graphics drivers to the latest version to resolve visual glitches and ensure compatibility with Windows 11.

  • Display Settings: Adjust the display settings, including resolution and color depth, to ensure optimal visual clarity.

4. Resolve Functionality and Feature Limitations:

  • Permissions: Check the user’s permissions on the calendar and the account to ensure they have access to all necessary features.

  • Software Conflicts: Identify and disable or update any conflicting software that might be interfering with Outlook Calendar functionality.

  • Data Files: Repair or rebuild corrupted Outlook data files using the built-in tools or third-party utilities.

5. Enhance Performance and Responsiveness:

  • System Resources: Ensure sufficient RAM, hard drive space, and processing power to support Outlook Calendar’s operation.

  • Background Processes: Close unnecessary background processes and applications to free up system resources.

  • Software Conflicts: Identify and disable any software that might be consuming excessive resources and impacting Outlook Calendar’s performance.

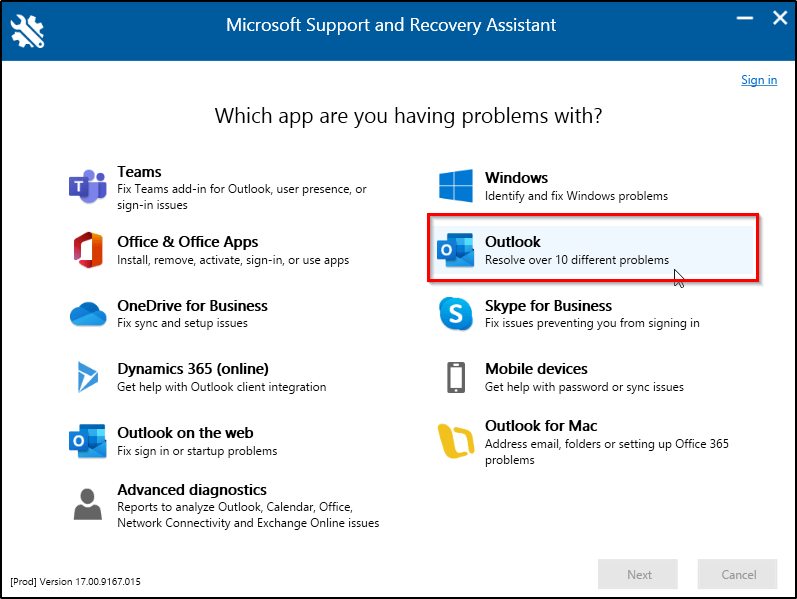
6. Seek Professional Assistance:

  • Microsoft Support: Contact Microsoft Support for assistance with complex issues or if the problem persists after attempting troubleshooting steps.

  • IT Professionals: Consult with an IT professional if the issue requires advanced technical expertise or involves network configurations.

FAQs by Outlook Calendar Issues Windows 11:

1. Why is my Outlook Calendar not syncing in Windows 11?

Synchronization problems can arise from network connectivity issues, server overload, conflicts with other calendar applications, corrupted data files, incompatible software versions, or faulty synchronization settings.

2. How do I fix the Outlook Calendar view in Windows 11?

Calendar view errors can be resolved by updating Outlook to the latest version, reviewing calendar settings, repairing corrupted data files, and updating graphics drivers.

3. Why is my Outlook Calendar slow in Windows 11?

Slow loading times can be caused by insufficient system resources, network latency, outdated software versions, corrupted data files, or conflicts with other software.

4. How do I prevent Outlook Calendar issues in Windows 11?

Regularly update Outlook and Windows 11, ensure stable network connectivity, optimize system resources, and avoid installing conflicting software.

Tips by Outlook Calendar Issues Windows 11:

  • Regular Backups: Create regular backups of Outlook data files to prevent data loss in case of issues.

  • Clean Installation: Consider performing a clean installation of Outlook or Windows 11 if issues persist after troubleshooting.

  • Third-Party Tools: Utilize third-party tools for repairing corrupted data files, optimizing system performance, or enhancing calendar functionality.

Conclusion by Outlook Calendar Issues Windows 11:

Outlook Calendar is an essential tool for managing schedules and appointments in Windows 11. While various issues can arise, understanding the root causes and implementing appropriate solutions can effectively resolve them. Regular maintenance, updates, and troubleshooting techniques are crucial for ensuring a smooth and efficient calendar experience. By following the guidelines outlined in this article, users can navigate the potential challenges and maximize the benefits of Outlook Calendar in Windows 11.

How To Fix Outlook Calendar Problems - Irina Marie-Ann Windows 11 outlook calendar issues - Microsoft Community Microsoft fixing Outlook.com's calendar subscription issues  PCWorld
How To Fix Outlook Calendar Problems - Irina Marie-Ann 5 most common outlook issues and how to easily fix them How to Share your Outlook Calendar - Labyrinth Technology
Microsoft releases new Outlook app for Windows 11 (preview) - Pureinfotech How to Share your Outlook Calendar - Labyrinth Technology

Closure

Thus, we hope this article has provided valuable insights into Navigating the Labyrinth: Common Outlook Calendar Issues in Windows 11. We thank you for taking the time to read this article. See you in our next article!

Understanding And Managing Disk Partitions In Windows 10: A Comprehensive Guide

Understanding and Managing Disk Partitions in Windows 10: A Comprehensive Guide

Introduction

With great pleasure, we will explore the intriguing topic related to Understanding and Managing Disk Partitions in Windows 10: A Comprehensive Guide. Let’s weave interesting information and offer fresh perspectives to the readers.

Understanding and Managing Disk Partitions in Windows 10: A Comprehensive Guide

Understanding Different Disk Partitions In Windows 10

The intricate world of computer systems often presents users with technical complexities, and disk partitioning is no exception. However, understanding disk partitions is crucial for optimizing storage space, enhancing system performance, and ensuring data security. This comprehensive guide delves into the intricacies of disk partitioning in Windows 10, providing a clear explanation of its significance, benefits, and practical applications.

What are Disk Partitions?

Imagine your computer’s hard drive as a vast expanse of land. Disk partitioning acts like dividing this land into distinct regions, each with its own unique purpose and access controls. These regions are known as partitions. Each partition functions as a separate logical drive, allowing you to organize and manage your data more effectively.

Why Partition Your Hard Drive?

The benefits of partitioning a hard drive in Windows 10 are multifaceted:

  • Enhanced Data Organization: Partitions allow you to create dedicated spaces for different types of data, such as operating systems, applications, personal files, and backups. This structured approach prevents clutter and facilitates efficient data management.
  • Improved Security: By segregating data into separate partitions, you can enhance security. For instance, a dedicated partition for sensitive information can be encrypted, restricting unauthorized access.
  • Enhanced System Performance: Installing Windows 10 on a dedicated partition can improve system performance by reducing the risk of data fragmentation and conflicts.
  • Dual Booting: Partitions enable dual booting, allowing you to install and run multiple operating systems on the same computer. This is particularly useful for users who require access to different operating systems for specific tasks.
  • Space Management: Partitions provide a flexible approach to managing storage space. You can allocate specific amounts of space to each partition based on your needs, allowing for efficient resource allocation.

Types of Disk Partitions in Windows 10:

Windows 10 supports various partition styles, each with specific characteristics:

  • Primary Partitions: These are the most common type of partition, providing the primary storage space for the operating system and other applications. A hard drive can have up to four primary partitions.
  • Extended Partitions: Extended partitions are used to create logical drives. They cannot be directly accessed and are typically used to house multiple logical drives.
  • Logical Drives: These are created within extended partitions and act as independent drives, providing flexibility in data organization and storage.
  • System Reserved Partition: This hidden partition is automatically created during Windows 10 installation and houses important system files, boot loaders, and recovery data.

Creating and Managing Disk Partitions in Windows 10:

Windows 10 provides built-in tools for managing disk partitions:

  • Disk Management: Accessed through the Control Panel, Disk Management offers a graphical interface for creating, deleting, formatting, and resizing partitions.
  • Command Prompt: Advanced users can leverage the "diskpart" command in the Command Prompt to perform complex partition management tasks.

Important Considerations:

  • Backup Data Before Partitioning: Before undertaking any partition-related activities, it is crucial to back up all important data. This safeguards against potential data loss during the process.
  • Understanding Partition Sizes: Carefully consider the size of each partition based on your storage needs and anticipated future growth.
  • Choosing the Right Partition Style: Select the appropriate partition style based on your requirements. Primary partitions are suitable for most users, while extended partitions offer more flexibility.

Frequently Asked Questions:

Q: Can I partition my hard drive without losing data?

A: While it is possible to resize existing partitions without data loss, creating new partitions often requires formatting, which erases all data on the newly created partition. Always back up important data before partitioning.

Q: Can I merge partitions in Windows 10?

A: Merging partitions is generally not possible within Windows 10’s built-in tools. However, third-party partition management software can be used to merge partitions.

Q: How do I choose the optimal partition size for my operating system?

A: A general guideline is to allocate at least 100 GB for the Windows 10 partition. However, the optimal size depends on individual usage patterns and the size of other installed applications.

Q: What is the difference between a primary partition and a logical drive?

A: A primary partition is a direct subdivision of the hard drive, while a logical drive is created within an extended partition. A hard drive can have up to four primary partitions, but an extended partition can hold multiple logical drives.

Q: Can I partition an external hard drive in Windows 10?

A: Yes, you can partition external hard drives in Windows 10 using the same tools and techniques used for internal drives.

Tips for Effective Partition Management:

  • Regularly Monitor Partition Space: Monitor the available space on each partition to prevent data loss due to insufficient storage.
  • Defragment Partitions: Regularly defragmenting partitions can improve system performance by organizing fragmented data files.
  • Consider Using Third-Party Tools: While Windows 10 provides basic partition management tools, third-party software offers more advanced features, such as data migration, partition recovery, and cloning.

Conclusion:

Understanding and effectively managing disk partitions in Windows 10 is essential for optimizing storage space, enhancing system performance, and safeguarding data. By applying the principles outlined in this guide, users can leverage the power of disk partitioning to streamline their computing experience and ensure a seamless and efficient workflow. Whether you are a seasoned computer user or a novice, mastering the art of disk partitioning empowers you to take control of your digital landscape and unlock the full potential of your Windows 10 system.

Windows 10 Disk Management Unallocated How to partition Windows 10 - Tech Advisor How to Use Disk Management to Create and Manage Partitions in Windows 10 โ€“ Tech guide
How to partition a hard drive in Windows 10 - IONOS Understanding Different Disk Partitions In Windows 10 How To Merge Disk Partitions In Windows 10 Complete Guide  yorketech
How to Use Disk Management to Create and Manage Partitions in Windows 10 โ€“ Tech guide How To Merge Disk Partitions In Windows 10 Complete Guide  yorketech

Closure

Thus, we hope this article has provided valuable insights into Understanding and Managing Disk Partitions in Windows 10: A Comprehensive Guide. We hope you find this article informative and beneficial. See you in our next article!

Project IGI 1: A Classic First-Person Shooter Returns To Windows 11

Project IGI 1: A Classic First-Person Shooter Returns to Windows 11

Introduction

With enthusiasm, let’s navigate through the intriguing topic related to Project IGI 1: A Classic First-Person Shooter Returns to Windows 11. Let’s weave interesting information and offer fresh perspectives to the readers.

Project IGI 1: A Classic First-Person Shooter Returns to Windows 11

project igi 1 pc game free download full version - Real Games Collection

Project IGI, short for "I’m Going In," is a first-person shooter (FPS) game that captured the hearts of gamers in the early 2000s. Developed by Innerloop Studios and published by Codemasters, it was lauded for its realistic gameplay, challenging missions, and immersive atmosphere. Despite its age, the game’s legacy persists, and it remains a popular choice for those seeking a nostalgic gaming experience. This article explores the process of downloading and playing Project IGI 1 on Windows 11, highlighting its enduring appeal and providing essential information for a smooth gaming experience.

A Blast From the Past: Project IGI 1 and its Legacy

Project IGI 1, released in 2000, was a groundbreaking title in the FPS genre. The game offered a compelling narrative, placing players in the role of an elite agent, codenamed "Agent 47," tasked with infiltrating enemy facilities and completing high-stakes missions. Its success can be attributed to several key factors:

  • Realistic Gameplay: Project IGI 1 featured realistic physics, weapon handling, and enemy AI, offering a challenging and immersive experience. Players had to strategize their approach, utilizing stealth, combat, and environmental elements to succeed.
  • Stealth Emphasis: The game encouraged players to utilize stealth tactics, allowing them to silently eliminate enemies and avoid confrontation. This added a layer of complexity and strategic depth, rewarding careful planning and execution.
  • Engaging Missions: The game’s mission design was diverse and engaging, offering a variety of objectives and scenarios. Players had to adapt their approach based on the specific mission, utilizing different weapons, tactics, and equipment.
  • Immersive Atmosphere: The game’s realistic environments and sound design contributed to its immersive atmosphere, drawing players into the world of espionage and covert operations.

Despite being released over two decades ago, Project IGI 1 continues to hold a special place in the hearts of gamers. Its blend of stealth, action, and realistic gameplay remains engaging, making it a worthy addition to any retro gaming enthusiast’s collection.

Downloading and installing Project IGI 1 on Windows 11 can be a straightforward process. However, it requires a few steps to ensure compatibility and smooth gameplay. Here’s a comprehensive guide:

  1. Finding the Source: Begin by searching for reputable sources for the game. Avoid downloading from unofficial websites, as these may contain malware or corrupted files. Look for trusted websites like GOG.com, which offer DRM-free versions of classic games.
  2. Downloading the Installer: Once you’ve located a reliable source, download the game installer. This file will contain all the necessary files for installing Project IGI 1 on your computer.
  3. Running the Installer: After downloading, locate the installer file and run it. Follow the on-screen instructions to install the game. Choose a suitable installation directory and proceed with the installation process.
  4. Compatibility Considerations: While Project IGI 1 is generally compatible with Windows 11, you may encounter compatibility issues. To address these, consider installing compatibility mode, which allows older games to run on newer operating systems. Right-click the game’s executable file, select "Properties," and navigate to the "Compatibility" tab. Enable compatibility mode for Windows XP or Windows 98, and ensure the game runs smoothly.
  5. Troubleshooting: If you encounter any difficulties during installation or gameplay, refer to online resources for troubleshooting tips. Many forums and websites offer solutions to common issues related to running older games on modern operating systems.

Enhancing the Experience: Essential Tips for Project IGI 1

While Project IGI 1 is a classic game, its age may present some challenges for modern gamers. Here are some tips to enhance your gameplay experience:

  • Resolution and Graphics: The game’s original resolution may be limited. Consider using resolution scaling software or configuring the game’s settings to improve visual clarity.
  • Keyboard and Mouse Controls: The game’s default controls may feel outdated. Experiment with different control schemes or use a gamepad for a more modern experience.
  • Performance Optimization: Project IGI 1 may not run smoothly on modern hardware. Adjust graphics settings, disable unnecessary background processes, and ensure your system meets the game’s minimum requirements for optimal performance.
  • Modding: The game’s modding community provides a wealth of resources, including updated graphics, improved gameplay mechanics, and new missions. Explore these mods to enhance your experience and add new challenges.

Frequently Asked Questions (FAQs)

Q: Is Project IGI 1 free to download?

A: Project IGI 1 is not typically available for free download. However, it may be offered as part of bundle deals or promotional offers on certain online stores.

Q: Can I play Project IGI 1 online with other players?

A: Project IGI 1 does not have official online multiplayer support. However, there are unofficial mods and servers that allow players to connect and play together.

Q: Does Project IGI 1 support modern controllers?

A: While the game does not have native controller support, you can use third-party software or emulators to map controller inputs to keyboard and mouse commands.

Q: Are there any alternative games similar to Project IGI 1?

A: Yes, there are several games that share similarities with Project IGI 1, including:

  • Hitman: Codename 47: Another stealth-action game that focuses on infiltration and assassination.
  • Splinter Cell: A stealth-focused FPS series that emphasizes tactical gameplay and environmental exploration.
  • Metal Gear Solid: A legendary stealth-action franchise that features complex storylines and innovative gameplay mechanics.

Q: How do I save my progress in Project IGI 1?

A: Project IGI 1 uses a traditional save system. You can manually save your progress at designated save points throughout the game.

Conclusion: A Timeless Classic

Project IGI 1 remains a timeless classic, offering a challenging and immersive gaming experience that continues to resonate with players. Its blend of stealth, action, and realism makes it a compelling choice for those seeking a nostalgic adventure or a taste of classic FPS gameplay. By following the download guide and implementing the provided tips, players can enjoy Project IGI 1 on Windows 11, reliving the thrill of its iconic missions and embracing the legacy of this enduring video game.

Project IGI Download for Windows Free Project IGI Download (2024 Latest) For Win 11/10, 42% OFF Project IGI 1 Download Full Game For Pc ~ Sea of Games
Project IGI 1 Full Game โ€“ isoroms.com Project IGI Download for Free - 2024 Latest Version Igi Pc Game Windows 10 - yellowimaging
Project IGI Download (2024 Latest) For Win 11/10, 42% OFF Project IGI 1 Download Full Game For Pc ~ Sea of Games

Closure

Thus, we hope this article has provided valuable insights into Project IGI 1: A Classic First-Person Shooter Returns to Windows 11. We appreciate your attention to our article. See you in our next article!

Navigating The Free Antivirus Landscape: A Comprehensive Guide For Windows 10 Users

Navigating the Free Antivirus Landscape: A Comprehensive Guide for Windows 10 Users

Introduction

In this auspicious occasion, we are delighted to delve into the intriguing topic related to Navigating the Free Antivirus Landscape: A Comprehensive Guide for Windows 10 Users. Let’s weave interesting information and offer fresh perspectives to the readers.

Best Free Antivirus for Windows 10: A Comprehensive Guide - The Knowledge Hub

In the digital age, where cyber threats are increasingly sophisticated, safeguarding your Windows 10 device is paramount. While paid antivirus solutions often offer comprehensive protection, free options can provide a reliable baseline of security for users seeking a cost-effective solution.

This article delves into the world of free antivirus software for Windows 10, offering a comprehensive guide to help users make informed decisions. We will explore the key features, strengths, and limitations of various popular free antivirus programs, aiding you in selecting the best fit for your specific needs.

Understanding the Importance of Antivirus Software

Antivirus software acts as a vital line of defense against malicious programs, commonly known as malware, which can infiltrate your computer and wreak havoc. These threats include:

  • Viruses: Programs designed to replicate themselves and spread to other systems, often causing data corruption or system crashes.
  • Worms: Self-replicating programs that spread through networks, exploiting vulnerabilities to gain access to systems and potentially steal data.
  • Trojans: Programs disguised as legitimate software, often used to steal sensitive information or gain unauthorized access to your device.
  • Spyware: Programs that monitor your online activity and collect personal data without your consent.
  • Ransomware: Malware that encrypts your files and demands payment for their decryption.

Key Features to Consider

When evaluating free antivirus software, consider these essential features:

  • Real-time Protection: This feature continuously monitors your system for suspicious activity, blocking malware before it can infect your device.
  • Virus Scanning: This allows you to perform manual scans of your computer, identifying and removing existing malware.
  • Malware Removal: A crucial feature that eliminates detected threats from your system.
  • Firewall: This acts as a barrier between your computer and the internet, blocking unauthorized access attempts.
  • Anti-Phishing Protection: This helps prevent you from falling victim to phishing scams, which attempt to steal your personal information by mimicking legitimate websites.
  • Anti-Spam Filter: This feature helps reduce the amount of unwanted emails, including those containing malware or phishing links.
  • Parental Control: This feature allows you to restrict access to certain websites and apps for children.

Popular Free Antivirus Options for Windows 10

1. Microsoft Defender:

  • Strengths: Built-in to Windows 10, offering a convenient and reliable baseline of protection. Regularly updated by Microsoft, ensuring the latest threat detection capabilities.
  • Limitations: Limited features compared to some third-party options. May not offer the same level of comprehensive protection as paid antivirus software.

2. Avast Free Antivirus:

  • Strengths: Comprehensive real-time protection, robust virus scanning, and a reliable firewall. Offers additional features like anti-spam and a secure browser extension.
  • Limitations: Can be resource-intensive, potentially slowing down your computer. Limited customer support compared to paid versions.

3. AVG AntiVirus Free:

  • Strengths: Strong malware detection capabilities, a user-friendly interface, and a solid firewall. Offers additional features like anti-phishing and a browser extension.
  • Limitations: Limited features compared to paid versions. Some users may find the interface cluttered.

4. Avira Free Antivirus:

  • Strengths: Excellent malware detection rates, low system impact, and a user-friendly interface. Offers additional features like a browser extension and a performance optimizer.
  • Limitations: Limited features compared to paid versions. Some users may find the interface less intuitive.

5. Sophos Home Free:

  • Strengths: Comprehensive real-time protection, a user-friendly interface, and strong malware detection capabilities. Offers additional features like anti-ransomware and a web filtering tool.
  • Limitations: Limited features compared to paid versions. May not be suitable for users who require advanced features like parental control.

6. Panda Free Antivirus:

  • Strengths: Excellent malware detection rates, a user-friendly interface, and a lightweight design. Offers additional features like a USB protection tool and a travel mode.
  • Limitations: Limited features compared to paid versions. May not be suitable for users who require advanced features like a firewall.

7. Bitdefender Antivirus Plus Free:

  • Strengths: Strong malware detection capabilities, a lightweight design, and a user-friendly interface. Offers additional features like a VPN and a password manager.
  • Limitations: Limited features compared to paid versions. May not be suitable for users who require advanced features like parental control.

Choosing the Right Free Antivirus for You

The best free antivirus for you will depend on your individual needs and preferences. Consider the following factors:

  • System Requirements: Ensure the chosen software is compatible with your Windows 10 version and system resources.
  • Features: Determine which features are most important to you, such as real-time protection, virus scanning, firewall, or anti-phishing.
  • Ease of Use: Choose a program with a user-friendly interface that you can easily navigate.
  • Customer Support: Consider the availability of customer support options, such as online help, email, or phone.

FAQs

Q: Is a free antivirus enough for Windows 10?

A: While free antivirus software can provide a reliable baseline of protection, it may not offer the same level of comprehensive security as paid solutions. For users with sensitive data or who frequently engage in online banking or shopping, a paid antivirus may be a better choice.

Q: Do free antivirus programs slow down my computer?

A: Some free antivirus programs can be resource-intensive, potentially slowing down your computer. It is important to choose a program that is lightweight and efficient.

Q: Can I use multiple free antivirus programs at the same time?

A: It is not recommended to use multiple antivirus programs simultaneously, as they can conflict with each other and cause system instability.

Q: What are the best free antivirus programs for gaming?

A: Some free antivirus programs are specifically designed to minimize their impact on gaming performance. Look for programs that offer a "gaming mode" or a "performance optimization" feature.

Tips for Using Free Antivirus Software

  • Keep your software updated: Regularly update your antivirus software to ensure you have the latest threat detection capabilities.
  • Scan your computer regularly: Perform regular scans to identify and remove any existing malware.
  • Be cautious of suspicious emails and websites: Avoid clicking on links or opening attachments from unknown senders.
  • Use strong passwords: Create unique and strong passwords for all your online accounts.
  • Enable your firewall: Ensure your firewall is enabled to block unauthorized access attempts.
  • Be aware of phishing scams: Do not provide personal information on websites that seem suspicious.

Conclusion

Choosing a free antivirus program for Windows 10 is a crucial step in protecting your device from cyber threats. By carefully considering your needs and evaluating the features of various options, you can find a reliable and cost-effective solution that meets your requirements. Remember, while free antivirus software can provide a valuable layer of security, it is essential to practice good online hygiene and stay informed about the latest threats to ensure the safety of your digital life.

Comprehensive Guide to the Best Free Antivirus for Windows 10 - Ehmtic 2014 6 Best Free Windows 10 Antivirus Software in (2024) Comprehensive Guide to the Best Free Antivirus for Windows 10 - Ehmtic 2014
Best 100% Free Antivirus Software For Windows 10 5 Best Free Antivirus for Windows 10 - Safe and Secure 2021 10 Best Free Antivirus Software For Windows 10 The Pc
Best Free Antivirus for Windows 10 โ€“ windowstricks.in Free Antivirus For Windows 10 - Techie Craze

Closure

Thus, we hope this article has provided valuable insights into Navigating the Free Antivirus Landscape: A Comprehensive Guide for Windows 10 Users. We hope you find this article informative and beneficial. See you in our next article!

Navigating The Ext4 Filesystem On Windows 11: A Comprehensive Guide

Navigating the Ext4 Filesystem on Windows 11: A Comprehensive Guide

Introduction

In this auspicious occasion, we are delighted to delve into the intriguing topic related to Navigating the Ext4 Filesystem on Windows 11: A Comprehensive Guide. Let’s weave interesting information and offer fresh perspectives to the readers.

A Guide to Using EXT4 on Windows 11 - Click This Blog

Windows 11, the latest iteration of Microsoft’s operating system, is renowned for its user-friendliness and compatibility with a wide array of hardware and software. However, its native file system, NTFS, is not universally recognized by other operating systems, particularly Linux distributions. This presents a challenge when users need to access data stored on Linux-formatted drives, often formatted with the Ext4 filesystem, within the Windows environment.

Ext4, the fourth generation of the Extended Filesystem, is the default filesystem for most contemporary Linux distributions. It boasts features like journaling, advanced metadata handling, and robust error recovery mechanisms, making it a reliable choice for storing vast amounts of data. While Windows 11 does not natively support Ext4, there are several methods to enable read and write access to Ext4 partitions, unlocking the potential for seamless data exchange between Windows and Linux systems.

Understanding the Ext4 Filesystem

Before delving into the intricacies of accessing Ext4 drives on Windows 11, it is essential to understand the fundamental differences between Ext4 and NTFS.

  • NTFS (New Technology File System): Developed by Microsoft, NTFS is the primary filesystem used in Windows operating systems. It is known for its robust security features, efficient file allocation, and support for large file sizes. However, it is not widely compatible with other operating systems.

  • Ext4 (Extended Filesystem): Developed for Linux, Ext4 is a journaling filesystem designed for high performance and reliability. It offers advanced features like file system quotas, delayed allocation, and extensive metadata capabilities. Its compatibility with Windows is limited, requiring specific software solutions.

Methods for Accessing Ext4 Partitions on Windows 11

The ability to read and write data on Ext4 partitions from Windows 11 can be achieved through various approaches, each with its own advantages and limitations:

  1. Third-Party Software: Numerous third-party applications are available for Windows that provide read/write access to Ext4 partitions. These solutions often leverage drivers and libraries to bridge the compatibility gap between the two file systems. Some popular options include:

    • Ext2Fsd: This free and open-source driver allows read/write access to Ext2, Ext3, and Ext4 filesystems. It is a reliable and widely used solution.
    • Ext4 IFS: This commercial software offers a more comprehensive solution, providing advanced features like file system analysis and repair capabilities.
    • Paragon ExtFS: Another commercial option, Paragon ExtFS provides a user-friendly interface for accessing Ext4 partitions. It also includes features like data recovery and disk management.
  2. Dual Boot Setup: Installing a Linux distribution alongside Windows 11 provides a more direct and robust method to access Ext4 partitions. This approach allows you to boot into either operating system, providing native access to the respective file systems. This option requires partitioning your hard drive and installing the chosen Linux distribution.

  3. Virtual Machine Environments: Utilizing a virtual machine (VM) like VirtualBox or VMware allows you to run a Linux distribution within the Windows environment. This approach provides a sandboxed environment for accessing Ext4 partitions within the Linux VM, without directly interacting with the Windows filesystem.

Choosing the Right Method

The optimal approach for accessing Ext4 partitions on Windows 11 depends on individual needs and preferences.

  • Third-party software: Offers a convenient and straightforward solution for basic read/write access.
  • Dual boot: Provides a more direct and robust approach, offering native access to both Windows and Linux filesystems.
  • Virtual machine: Offers a safe and isolated environment for running Linux and accessing Ext4 partitions without affecting the Windows system.

Benefits of Accessing Ext4 Partitions on Windows 11

Enabling read and write access to Ext4 partitions on Windows 11 opens up a world of possibilities for users:

  • Data Transfer: Seamlessly transfer files between Windows and Linux systems, facilitating data exchange between different operating environments.
  • Cross-Platform Collaboration: Work on projects that utilize applications or data stored on both Windows and Linux systems, fostering collaboration between users of different operating systems.
  • Accessing Linux Distributions: Utilize Linux distributions on Windows, taking advantage of their unique features and software libraries.
  • Data Recovery: Recover data from damaged or corrupted Ext4 partitions, utilizing tools and utilities available within the Linux environment.

FAQs Regarding Accessing Ext4 Partitions on Windows 11

Q: Is it safe to access Ext4 partitions on Windows 11?

A: Accessing Ext4 partitions on Windows 11 is generally safe, provided you use reliable and reputable software solutions. However, it is crucial to choose software from trusted sources and avoid suspicious or untrusted applications.

Q: Can I format an Ext4 partition on Windows 11?

A: Windows 11 does not natively support formatting Ext4 partitions. You need to use specific tools available within Linux distributions or third-party software designed for this purpose.

Q: What are the potential risks of accessing Ext4 partitions on Windows 11?

A: The primary risk lies in using unreliable or poorly developed software that could potentially damage the Ext4 partition or corrupt data. Always ensure you use trusted and reputable software solutions.

Q: Can I use Ext4 partitions for storing Windows system files?

A: It is not recommended to store Windows system files on an Ext4 partition. Windows relies on NTFS for its core functionality, and attempting to install or run Windows from an Ext4 partition could lead to instability and system errors.

Tips for Accessing Ext4 Partitions on Windows 11

  • Choose reputable software: Opt for well-established and trusted software solutions from reputable developers.
  • Backup your data: Before attempting to access or modify Ext4 partitions, ensure you have a reliable backup of your data to prevent potential data loss.
  • Understand the risks: Be aware of the potential risks involved in accessing foreign file systems, and use caution when working with Ext4 partitions on Windows 11.
  • Consult documentation: Refer to the documentation of the chosen software solution for detailed instructions and troubleshooting information.

Conclusion

Accessing Ext4 partitions on Windows 11 offers a valuable bridge between the two operating systems, enabling seamless data exchange and enhancing cross-platform compatibility. By understanding the different methods and choosing the appropriate solution based on individual needs, users can unlock the potential of Ext4 partitions within the Windows environment. Remember to exercise caution, utilize reliable software, and prioritize data backup to ensure a safe and successful experience.

How to Read EXT4 Partitions in Windows 11/10/8/7? How To Fully Access Ext4 Partition and Data in Windows 11/10/8/7? How to Mount, Read, or Format EXT4 on Windows 11 [2024 Guide]
How to Access and Read EXT4 Partition and Data on Windows 11/10 [2024 Updated] How To Read Ext4 In Windows 11 10  thewindowsclub How to Access and Read EXT4 Partition and Data on Windows 11/10 [2024 Updated]
How to Access and Read EXT4 Partition and Data on Windows 11/10 [2024 Updated] So mounten, lesen oder formatieren Sie EXT4 unter Windows 11 - TWCB (DE)

Closure

Thus, we hope this article has provided valuable insights into Navigating the Ext4 Filesystem on Windows 11: A Comprehensive Guide. We thank you for taking the time to read this article. See you in our next article!

R For Windows 10: A Comprehensive Guide To Downloading And Utilizing The Power Of Statistical Computing

R for Windows 10: A Comprehensive Guide to Downloading and Utilizing the Power of Statistical Computing

Introduction

With enthusiasm, let’s navigate through the intriguing topic related to R for Windows 10: A Comprehensive Guide to Downloading and Utilizing the Power of Statistical Computing. Let’s weave interesting information and offer fresh perspectives to the readers.

R for Windows 10: A Comprehensive Guide to Downloading and Utilizing the Power of Statistical Computing

R Programming: A Comprehensive Guide to Statistical Computing ยป Let Me Read

R, a free and open-source programming language and software environment, has become an indispensable tool for data scientists, statisticians, and researchers worldwide. Its versatility, coupled with a vast ecosystem of packages, empowers users to perform complex statistical analyses, data visualizations, and model development with ease. This comprehensive guide aims to equip users with the knowledge and resources necessary to download and leverage the power of R on their Windows 10 systems.

Understanding the Importance of R

R’s prominence in the data science landscape stems from its unique combination of features:

  • Comprehensive Statistical Capabilities: R offers a wide range of statistical functions, covering everything from basic descriptive statistics to advanced machine learning algorithms. This enables users to perform in-depth analyses, uncover hidden patterns, and draw meaningful insights from data.
  • Data Visualization Powerhouse: R’s graphical capabilities are unmatched, allowing users to create visually compelling and informative plots. From simple scatterplots to intricate network diagrams, R provides a rich library of tools for data visualization, making complex information easily understandable.
  • Open-Source and Free: R is freely available for download and use, making it accessible to anyone, regardless of their budget or affiliation. This open-source nature also fosters a vibrant community of developers and users who continuously contribute to its growth and development.
  • Extensive Package Ecosystem: The CRAN (Comprehensive R Archive Network) repository houses thousands of user-contributed packages, extending R’s functionality to nearly every domain imaginable. These packages provide specialized tools for specific tasks, such as financial modeling, bioinformatics, or text mining, making R highly adaptable to diverse research and business needs.
  • Active Community Support: The R community is renowned for its helpfulness and willingness to share knowledge. Numerous online forums, mailing lists, and dedicated websites offer ample support for users seeking assistance or guidance.

Downloading R for Windows 10: A Step-by-Step Guide

  1. Visit the Official R Project Website: The first step is to navigate to the official website of the R Project for Statistical Computing: https://www.r-project.org/.
  2. Locate the Download Mirrors: On the website’s homepage, you’ll find a section titled "Download R for Windows." Click on the link to access a list of download mirrors. These mirrors are geographically distributed to ensure faster download speeds for users around the world.
  3. Select the Appropriate Installer: Choose the installer file that corresponds to your Windows 10 version (32-bit or 64-bit). This information can be found in your Windows settings under "System" -> "About."
  4. Download and Install: Once you’ve selected the correct installer, click on the download link. The file will begin downloading to your computer. After the download is complete, double-click the installer file to begin the installation process. Follow the on-screen instructions to install R on your system.

Understanding RStudio: The Essential IDE for R

While R itself is a powerful command-line environment, RStudio provides a user-friendly interface that significantly enhances the R experience. RStudio is an integrated development environment (IDE) specifically designed for R, offering features like:

  • Code Editor with Syntax Highlighting: RStudio’s code editor makes writing and debugging R code easier with syntax highlighting, code completion, and code navigation tools.
  • Interactive Console: RStudio’s interactive console allows users to execute R commands directly and view the results instantly.
  • Workspace Management: The IDE facilitates workspace management by providing a dedicated pane for viewing and managing objects, variables, and data frames.
  • Visualizations and Plots: RStudio seamlessly integrates with R’s plotting capabilities, enabling users to view plots directly within the IDE without needing separate windows.
  • Package Management: RStudio simplifies package management, allowing users to install, update, and manage R packages directly within the IDE.

Downloading RStudio:

  1. Visit the RStudio Website: Navigate to the official RStudio website: https://www.rstudio.com/.
  2. Download the Free Version: RStudio offers a free and open-source version, known as RStudio Desktop, specifically designed for individual users. Click on the "Download RStudio Desktop" button to begin the download process.
  3. Install RStudio: Once the download is complete, double-click the installer file to begin the installation process. Follow the on-screen instructions to install RStudio on your system.

Getting Started with R: A Basic Introduction

After installing R and RStudio, you’re ready to start exploring the world of statistical computing. Here are some basic commands to get you started:

  • Starting R: Open RStudio and type R in the console pane to start an interactive R session.
  • Basic Calculations: You can use R as a calculator:
    • 2 + 2
    • 3 * 5
    • 10 / 2
  • Creating Variables: You can assign values to variables using the assignment operator <-:
    • my_variable <- 10
  • Printing Values: You can print the value of a variable using the print() function:
    • print(my_variable)
  • Data Structures: R supports various data structures, including vectors, matrices, data frames, and lists. You can create these structures using functions like c(), matrix(), data.frame(), and list().
  • Loading Packages: To use packages, you need to load them into your R session using the library() function:
    • library(ggplot2)

Exploring R Packages: Expanding Your Capabilities

The true power of R lies in its extensive package ecosystem. Here are some popular and widely used packages:

  • ggplot2: A powerful and versatile package for creating aesthetically pleasing and informative data visualizations.
  • dplyr: A package designed for data manipulation and transformation, providing efficient functions for filtering, selecting, and summarizing data.
  • tidyr: A package that complements dplyr, focusing on data tidying and reshaping to ensure data consistency and clarity.
  • stringr: A package dedicated to working with strings, offering a comprehensive set of functions for manipulating and analyzing text data.
  • lubridate: A package that simplifies working with dates and times, providing intuitive functions for manipulating and extracting information from date and time variables.
  • caret: A package that provides a unified interface for training and evaluating machine learning models, offering a wide range of algorithms and tools.
  • randomForest: A package that implements random forest algorithms, a popular ensemble learning method used for classification and regression tasks.

Installing Packages:

  1. Open RStudio: Launch RStudio and navigate to the "Packages" tab.
  2. Search for Packages: Use the search bar to find the package you want to install.
  3. Install Package: Click on the "Install" button next to the package name.
  4. Load Package: Once installed, you can load the package into your R session using the library() function.

FAQs about R for Windows 10

Q: Can I use R on other operating systems besides Windows 10?

A: Yes, R is a cross-platform software environment, meaning it is available for various operating systems, including macOS, Linux, and Unix. You can download the appropriate installer for your specific operating system from the R Project website.

Q: Is R free to use?

A: Yes, R is a free and open-source software environment, meaning it is available for download and use without any licensing fees.

Q: Do I need to install R before installing RStudio?

A: Yes, RStudio is an IDE specifically designed for R. You need to install R first, as RStudio relies on R to execute commands and perform analyses.

Q: How do I update R and RStudio?

A: Updating R and RStudio is essential to ensure you have the latest features and bug fixes. You can update R by downloading the latest installer from the R Project website and installing it over your existing version. To update RStudio, navigate to the "Help" menu and select "Check for Updates."

Q: Where can I find help and resources for learning R?

A: The R community is incredibly supportive and offers a wealth of resources for learning and using R. You can find help and resources through:

  • CRAN Website: The CRAN website provides documentation, tutorials, and examples for various R packages.
  • RStudio Website: The RStudio website offers comprehensive documentation, tutorials, and learning resources specifically for RStudio.
  • Online Forums: Websites like Stack Overflow and the R-help mailing list provide a platform for asking questions and getting help from experienced R users.
  • Books and Courses: Numerous books and online courses are available, catering to different skill levels and learning preferences.

Tips for Using R Effectively

  • Start Small: Begin with simple tasks and gradually increase complexity as you gain proficiency.
  • Practice Regularly: Consistent practice is crucial for mastering R. Dedicate time to coding and experimenting with different functions and packages.
  • Document Your Code: Add comments to your code to explain your logic and make it easier to understand later.
  • Utilize Online Resources: Leverage online resources like tutorials, documentation, and forums to learn new concepts and solve problems.
  • Join the Community: Engage with the R community through forums and social media to share knowledge and learn from others.
  • Be Patient and Persistent: Learning R takes time and effort. Stay patient, persistent, and don’t be afraid to experiment and explore.

Conclusion: R – A Powerful Tool for Data Analysis and Beyond

R has emerged as a cornerstone of data science and statistical computing, empowering users to analyze data, build models, and gain valuable insights. Its comprehensive statistical capabilities, powerful visualization tools, and vast ecosystem of packages make it an indispensable tool for researchers, data scientists, and businesses alike. By following this guide, users can seamlessly download and install R on their Windows 10 systems, unlocking the potential to leverage the power of this versatile programming language for data analysis, research, and innovation.

R for Windows - Windows 10 Download R Statistical Computing  Software  UNLV Information Technology The R Project for Statistical Computing - Tools - OasisHUB
Buy New Perspectives Microsoft (R)Windows 10: Comprehensive Book Online at Low Prices in India Intro to R Download Statistical Computing Using R Software PDF Online 2020
RStudio at a glance  Learning RStudio for R Statistical Computing Statistical Computing with R [Book]

Closure

Thus, we hope this article has provided valuable insights into R for Windows 10: A Comprehensive Guide to Downloading and Utilizing the Power of Statistical Computing. We thank you for taking the time to read this article. See you in our next article!

The Constant Hum: Understanding Why Your Computer Fan Runs Continuously

The Constant Hum: Understanding Why Your Computer Fan Runs Continuously

Introduction

In this auspicious occasion, we are delighted to delve into the intriguing topic related to The Constant Hum: Understanding Why Your Computer Fan Runs Continuously. Let’s weave interesting information and offer fresh perspectives to the readers.

The Constant Hum: Understanding Why Your Computer Fan Runs Continuously

Windows PC fan constantly running - YouTube

The whirring of a computer fan is often a familiar sound, a constant companion in the digital world. However, when that hum becomes an incessant drone, a persistent background noise that never seems to cease, it can raise concerns. A computer fan running continuously is not necessarily a cause for alarm, but it can be an indicator of various factors, some benign and others potentially problematic. Understanding the reasons behind this persistent operation is crucial for maintaining optimal computer performance and longevity.

The Vital Role of Fans in Computer Cooling

Computer fans play a vital role in maintaining the delicate thermal balance within a system. Modern computers, packed with intricate circuitry and powerful processors, generate significant heat during operation. This heat, if left unchecked, can lead to component damage, instability, and even system failure. Fans, acting as miniature air conditioners, dissipate this heat, preventing the system from overheating.

Understanding the Causes of Continuous Fan Operation

The constant hum of a fan can be attributed to several factors:

1. Normal Operation:

  • High CPU Utilization: When a computer is actively processing demanding tasks, such as gaming, video editing, or running multiple applications simultaneously, the CPU experiences a surge in activity, leading to increased heat generation. The fans respond by spinning faster to dissipate this heat effectively.
  • High GPU Utilization: Similar to the CPU, demanding graphics-intensive tasks like gaming or video rendering can cause the GPU to heat up. Fans, often dedicated to the GPU, will increase their speed to manage this thermal load.

2. Environmental Factors:

  • Room Temperature: A hot environment can significantly impact a computer’s internal temperature. If the ambient temperature is high, the fans may run continuously to compensate for the increased heat load.
  • Poor Airflow: Insufficient ventilation within the computer case can hinder the fans’ ability to effectively circulate air, leading to higher temperatures and continuous fan operation. Dust accumulation can also obstruct airflow, further contributing to the issue.

3. Faulty Components:

  • Dust Accumulation: Over time, dust can accumulate on the fans and other internal components, hindering airflow and leading to increased temperatures. This can trigger the fans to run continuously in an attempt to compensate.
  • Faulty Fan: A malfunctioning fan, such as a bearing failure, may not be able to spin at the required speed, leading to inefficient cooling and constant operation.
  • Overheating Component: A faulty component, such as a faulty CPU or GPU, may generate excessive heat, forcing the fans to run continuously to try and mitigate the issue.

4. Software-related Issues:

  • Overclocking: Manually increasing the clock speed of the CPU or GPU can lead to higher performance but also generate more heat. This can trigger the fans to run continuously.
  • Software Errors: Certain software applications or drivers may cause the fans to run at an elevated speed, even when the computer is not under heavy load.

Diagnosing the Cause:

Determining the root cause of continuous fan operation requires a systematic approach:

  1. Check the Computer’s Temperature: Monitoring the CPU and GPU temperatures using dedicated software can provide valuable insight into the system’s thermal state. If the temperatures are significantly elevated, it may indicate a problem with cooling or a faulty component.

  2. Inspect the Fans: Visually inspect the fans for any signs of dust accumulation or mechanical issues. Dust can be cleaned using a compressed air can or a soft brush. If the fans are noisy or making unusual sounds, they may need to be replaced.

  3. Check for Software Conflicts: Try disabling unnecessary software applications or drivers that might be causing the fans to run continuously.

  4. Review Overclocking Settings: If overclocking has been applied, consider reducing the clock speed to see if it alleviates the issue.

  5. Ensure Proper Airflow: Make sure the computer case has adequate ventilation and that there are no obstructions blocking the fans. Consider adding additional fans if airflow is insufficient.

FAQs about Continuous Fan Operation

Q: Is it normal for my computer fan to run continuously?

A: While it’s not ideal, it’s not always a cause for concern. As explained earlier, there are several reasons why fans might run continuously, including normal operation under heavy load or environmental factors. However, if the fan noise is excessive or accompanied by other symptoms, it’s best to investigate further.

Q: How can I reduce the noise from my computer fan?

A: You can try the following:

  • Clean the fans: Dust accumulation can cause fans to spin more aggressively, creating noise.
  • Adjust fan curves: Some motherboards allow you to control the fan speed based on temperature.
  • Replace noisy fans: If the noise is due to a faulty fan, replacing it with a quieter model can be a solution.

Q: What are the risks of ignoring a continuously running fan?

A: Ignoring a continuously running fan can lead to:

  • Component damage: Overheating can damage sensitive components, leading to system instability and failure.
  • Reduced lifespan: Sustained high temperatures can shorten the lifespan of components.
  • Data loss: In extreme cases, overheating can lead to data loss.

Tips for Preventing Continuous Fan Operation

  • Maintain proper airflow: Ensure adequate ventilation around the computer and within the case. Regularly clean dust from the fans and other components.
  • Monitor temperatures: Use dedicated software to monitor CPU and GPU temperatures and adjust fan curves accordingly.
  • Avoid overclocking: Unless you are confident in your knowledge and have proper cooling solutions, avoid overclocking.
  • Update drivers: Keep your system drivers updated to ensure optimal performance and stability.

Conclusion

A computer fan running continuously is a common occurrence, often a sign of the system working hard to maintain its thermal equilibrium. However, it’s important to understand the underlying causes and address any potential issues promptly. By monitoring temperatures, cleaning fans, and ensuring proper airflow, you can prevent excessive fan noise and ensure the long-term health of your computer system. If you notice unusual fan behavior or experience other performance issues, it’s always best to consult a qualified technician for professional diagnosis and repair.

Why does the computer fan stay on continuously? โ€“ CrossPointe Why is My Laptop Fan Constantly Running? (With Solutions) Why Does My Computer Fan Run All the Time?  Techwalla
How to Fix Laptop Fan Continuously Running Fast (Fix High Speed Fan & Reduce Noise)! - YouTube Why Does My Laptop Fan Keep Running? 4 Easy Fixes (2022) โ€“ PC Webopaedia CPU fan runs at full speed all the time - YouTube
Why is My Laptop Fan Constantly Running? (With Solutions) Why Does My Computer Fan Keep Running - RequirementsPC.com

Closure

Thus, we hope this article has provided valuable insights into The Constant Hum: Understanding Why Your Computer Fan Runs Continuously. We hope you find this article informative and beneficial. See you in our next article!

Unraveling The Mystery Of Low Sound In Windows 11: A Comprehensive Guide To Troubleshooting And Resolution

Unraveling the Mystery of Low Sound in Windows 11: A Comprehensive Guide to Troubleshooting and Resolution

Introduction

In this auspicious occasion, we are delighted to delve into the intriguing topic related to Unraveling the Mystery of Low Sound in Windows 11: A Comprehensive Guide to Troubleshooting and Resolution. Let’s weave interesting information and offer fresh perspectives to the readers.

Unraveling the Mystery of Low Sound in Windows 11: A Comprehensive Guide to Troubleshooting and Resolution

Windows 11 Valorant Sound Problem

The ability to hear clearly is paramount to enjoying the full multimedia experience offered by Windows 11. Whether listening to music, watching videos, or engaging in online meetings, a low sound volume can significantly hinder this experience. This article delves into the common causes behind low sound in Windows 11, providing a comprehensive guide to troubleshooting and resolving this issue.

Understanding the Problem: A Multifaceted Issue

Low sound in Windows 11 can stem from various sources, each requiring a specific approach for resolution. These sources can be broadly categorized as:

  • System-level issues: These encompass problems with Windows 11’s audio settings, driver compatibility, or system-wide audio configurations.
  • Hardware-related issues: Faulty audio drivers, malfunctioning speakers or headphones, or even physical damage to the audio components can lead to low sound.
  • Software conflicts: Certain applications or programs might interfere with the audio output, causing a reduction in volume.

Troubleshooting Low Sound in Windows 11: A Step-by-Step Approach

1. Verify Basic Settings:

  • Volume Controls: The most fundamental step involves checking the volume controls. Ensure the volume slider in the taskbar is not muted or set to a low level. Also, verify the volume settings within the specific application being used.
  • Audio Output Device: Confirm that the correct audio output device is selected. Windows 11 may have multiple audio devices connected, and the wrong one might be selected. Navigate to the Sound settings (accessible via the search bar) and select the desired output device.
  • Audio Enhancements: Windows 11 offers various audio enhancements that can affect the volume. These include Equalizer settings, Bass Boost, and Loudness Equalization. Disable these enhancements temporarily to determine if they are causing the low volume issue.

2. Update Audio Drivers:

Outdated or corrupted audio drivers can lead to sound problems. To update drivers:

  • Device Manager: Open the Device Manager (accessible via the search bar), expand Sound, video and game controllers, and right-click on your audio device. Select Update driver and follow the on-screen instructions.
  • Manufacturer Website: Visit the website of your audio device’s manufacturer and download the latest drivers for your specific model and Windows 11 version. Install the driver and restart your computer.

3. Troubleshoot System-Wide Audio Issues:

  • Windows Audio Troubleshooter: Windows 11 includes a built-in troubleshooter for audio problems. Access it by searching for "Troubleshoot settings" in the search bar and selecting "Troubleshoot other problems". Choose "Playing Audio" and follow the steps provided.
  • System Restore: If the issue arises after recent system changes, consider performing a system restore to a previous point in time. This can potentially revert any changes that might have caused the low sound problem.

4. Check for Software Conflicts:

  • Disable Third-Party Audio Software: Temporarily disable any third-party audio software, such as equalizers or sound enhancement programs. If the low sound issue disappears, the software might be interfering with Windows 11’s audio output.
  • Run a Clean Boot: Performing a clean boot can help identify if a specific program is causing the problem. This involves starting Windows 11 with a minimal set of programs and services. Search for "System Configuration" in the search bar, navigate to the Services tab, and disable all non-Microsoft services. Restart your computer and observe if the sound issue persists.

5. Diagnose Hardware Problems:

  • Speaker and Headphone Check: Test your speakers or headphones with a different device to ensure they are functioning correctly.
  • Audio Cable Inspection: Inspect the audio cable for any damage or loose connections. Replace the cable if necessary.
  • Audio Port Check: Ensure the audio port on your computer is clean and free of debris. Try using a different audio port if available.

FAQs: Addressing Common Concerns

Q: What are the most common reasons for low sound in Windows 11?

A: The most frequent causes include outdated audio drivers, incorrect audio output device selection, and software conflicts.

Q: How do I know if the problem is with my speakers or my computer?

A: Test your speakers or headphones with a different device. If they work correctly, the problem lies with your computer’s audio system.

Q: Can I fix low sound by adjusting the equalizer settings?

A: While adjusting the equalizer can potentially improve sound quality, it might not solve low volume issues.

Q: Is there a way to boost the overall sound volume in Windows 11?

A: Windows 11 does not offer a universal volume boost option. However, some audio drivers might have built-in volume controls that can amplify the sound.

Tips for Optimizing Audio in Windows 11

  • Use High-Quality Audio Drivers: Ensure you are using the latest and compatible audio drivers for your device.
  • Disable Unnecessary Audio Enhancements: While audio enhancements can improve sound quality in some cases, they can also lead to volume issues.
  • Adjust Equalizer Settings: Experiment with different equalizer settings to find a sound profile that suits your preferences.
  • Consider External Speakers or Headphones: High-quality external speakers or headphones can deliver a richer and louder audio experience.

Conclusion: A Comprehensive Solution for Low Sound

Addressing low sound in Windows 11 requires a systematic approach. By following the troubleshooting steps outlined in this guide, users can identify the root cause and implement appropriate solutions. From verifying basic settings to updating drivers and diagnosing hardware problems, this comprehensive approach equips users with the necessary tools to restore their audio experience to its full potential. Remember, patience and a methodical approach are key to successfully tackling this issue and enjoying the full range of sound offered by Windows 11.

How To Fix Sound Not Working in Windows 11 (Solved!) How to FIX No Sound Problem in Windows 11  Easy and Quick Tutorial - YouTube 7 Ways to Fix Low Volume on Windows 11 - Guiding Tech
6 maneiras de consertar o som do Windows 11 que nรฃo funciona permanentemente - Boa Informaรงรฃo 6 Ways To Fix Windows 11 Sound Not Working Permanently  itechhacks How to Fix Low Audio in Windows 11 [2024] โ€“ Elisdc
FIX Volume Too Low on Windows 11 [Tutorial] - YouTube Windows 11 Has No sound? Fix It with these Solutions - EaseUS

Closure

Thus, we hope this article has provided valuable insights into Unraveling the Mystery of Low Sound in Windows 11: A Comprehensive Guide to Troubleshooting and Resolution. We hope you find this article informative and beneficial. See you in our next article!

.NET Framework 2.0 For Windows 10: A Legacy Framework For Compatibility

.NET Framework 2.0 for Windows 10: A Legacy Framework for Compatibility

Introduction

With enthusiasm, let’s navigate through the intriguing topic related to .NET Framework 2.0 for Windows 10: A Legacy Framework for Compatibility. Let’s weave interesting information and offer fresh perspectives to the readers.

.NET Framework 2.0 for Windows 10: A Legacy Framework for Compatibility

How to install .NET framework 2.0 in Windows 10? - Microsoft Community

While Windows 10 has transitioned to newer technologies like .NET Core and .NET 5+, .NET Framework 2.0 remains a vital component for legacy applications and specific scenarios on the platform. Its continued presence is not merely a relic of the past; it serves a crucial role in maintaining compatibility with older software and ensuring the smooth operation of certain applications.

Understanding .NET Framework 2.0

.NET Framework 2.0 is a software framework developed by Microsoft that provides a runtime environment and a comprehensive set of libraries for building and running applications on Windows operating systems. Released in 2005, it marked a significant advancement in application development, offering a robust platform for creating various software solutions.

Importance of .NET Framework 2.0 on Windows 10

While newer versions of the .NET framework have been introduced, .NET Framework 2.0 remains relevant for several reasons:

  • Legacy Application Compatibility: Many older applications, particularly those developed before the release of .NET Framework 3.0 and beyond, rely on .NET Framework 2.0. Removing this framework would render these applications incompatible with Windows 10, potentially causing significant disruptions for users and businesses.
  • Specialized Software Requirements: Certain software applications, particularly those in niche industries or with specific technical requirements, may still require .NET Framework 2.0 for optimal functionality.
  • System Stability: .NET Framework 2.0 is deeply integrated with certain Windows 10 system components and functionalities. Removing it could potentially lead to unexpected system behavior and instability.
  • Security Updates: Microsoft continues to provide security updates for .NET Framework 2.0, addressing vulnerabilities and ensuring the continued protection of systems running applications built on this framework.

Benefits of .NET Framework 2.0

  • Proven Reliability: Over the years, .NET Framework 2.0 has proven its reliability and stability, having been used by countless applications and businesses. This reliability makes it a trusted choice for applications requiring consistent performance.
  • Wide Developer Community: .NET Framework 2.0 has a large and active developer community, offering a wealth of resources, libraries, and support for developers working with applications built on this framework.

Installation and Management of .NET Framework 2.0 on Windows 10

While .NET Framework 2.0 is not included in the default installation of Windows 10, it can be installed through the Microsoft website. The installation process is straightforward, requiring only a few simple steps.

Compatibility and Considerations

  • Version Compatibility: .NET Framework 2.0 is compatible with various Windows 10 versions. However, it is essential to ensure that the specific Windows 10 version meets the minimum system requirements for .NET Framework 2.0.
  • Resource Consumption: .NET Framework 2.0 may consume a significant amount of system resources, especially when running multiple applications built on this framework. This can impact system performance, particularly on systems with limited resources.
  • Security Considerations: It is crucial to keep .NET Framework 2.0 updated with the latest security patches to mitigate potential vulnerabilities and ensure the security of applications built on this framework.

FAQs about .NET Framework 2.0 on Windows 10

Q: Is .NET Framework 2.0 still supported by Microsoft?

A: While Microsoft has transitioned to newer .NET frameworks, they continue to provide security updates for .NET Framework 2.0 to address vulnerabilities and ensure the security of applications built on this framework.

Q: Do I need .NET Framework 2.0 on my Windows 10 system?

A: This depends on the applications you use. If you need to run legacy applications or specialized software that requires .NET Framework 2.0, then it is necessary. However, if you are primarily using modern applications, it might not be essential.

Q: How can I check if .NET Framework 2.0 is installed on my Windows 10 system?

A: You can check by opening the Control Panel, navigating to Programs and Features, and searching for .NET Framework 2.0.

Q: What are the potential risks of installing .NET Framework 2.0 on my Windows 10 system?

A: While .NET Framework 2.0 is generally safe, there are potential risks associated with installing any software. It is important to download the framework from the official Microsoft website to ensure the integrity of the installation. Additionally, keeping .NET Framework 2.0 updated with the latest security patches is crucial to mitigate potential vulnerabilities.

Tips for Managing .NET Framework 2.0 on Windows 10

  • Update Regularly: Regularly update .NET Framework 2.0 to ensure you have the latest security patches and bug fixes.
  • Use Trusted Sources: Only download and install .NET Framework 2.0 from official Microsoft sources to avoid malware or corrupted files.
  • Monitor Resource Consumption: If you experience performance issues, consider monitoring the resource consumption of applications built on .NET Framework 2.0 to identify potential bottlenecks.
  • Consider Alternatives: If possible, explore alternative solutions or newer versions of applications that do not require .NET Framework 2.0 to improve performance and security.

Conclusion

.NET Framework 2.0 remains a vital component for maintaining compatibility with legacy applications and ensuring the smooth operation of certain software on Windows 10. While newer frameworks have been introduced, .NET Framework 2.0 continues to play a crucial role in specific scenarios. Understanding its importance, benefits, and potential challenges is essential for managing a stable and secure Windows 10 environment.

Download -net framework 2-0 for windows 10 - uploadmertq Download .NET Framework Version 2.0 for Windows 11, 10, 7, 8/8.1 (64 bit/32 bit) Framework Windows 10
Install .Net Framework 2.0 and 3.5 on Windows 10 - HowPChub Installing .NET Framework 2 On Windows 10 โ€“ The Chewett blog How to Install or Enable Net Framework 2.0 3.0 and 3.5 on Windows 10 Guide 2019  .net framework
Install .NET Framework 2.0, 3.0 and 3.5 in Windows 10 & W11 โ€ข Computroon Net framework 2-0 for windows 10 64 bit - lasopawhiz

Closure

Thus, we hope this article has provided valuable insights into .NET Framework 2.0 for Windows 10: A Legacy Framework for Compatibility. We appreciate your attention to our article. See you in our next article!

Managing User Accounts In Microsoft Edge On Windows 11: A Comprehensive Guide

Managing User Accounts in Microsoft Edge on Windows 11: A Comprehensive Guide

Introduction

With enthusiasm, let’s navigate through the intriguing topic related to Managing User Accounts in Microsoft Edge on Windows 11: A Comprehensive Guide. Let’s weave interesting information and offer fresh perspectives to the readers.

Managing User Accounts in Microsoft Edge on Windows 11: A Comprehensive Guide

Manage Your Microsoft Account in Windows 11 โ€“ windows.do

Microsoft Edge, the default web browser on Windows 11, offers a seamless browsing experience through its integration with user accounts. While this feature allows for personalized settings, synchronized browsing history, and convenient access across multiple devices, there may be instances where removing an account from Edge becomes necessary. This guide provides a comprehensive understanding of account management within Edge, outlining the reasons for account removal, the step-by-step process, and the potential implications.

Understanding Account Integration in Microsoft Edge

Microsoft Edge utilizes user accounts to enhance the browsing experience by:

  • Synchronization: User accounts enable syncing of browsing data, including bookmarks, passwords, history, and settings across multiple devices. This ensures a consistent browsing experience regardless of the device used.
  • Personalized Settings: Account-specific settings, such as default search engine, privacy preferences, and theme choices, are stored and applied across devices.
  • Enhanced Security: User accounts can leverage features like password management and multi-factor authentication, bolstering security and simplifying login processes.

However, certain situations might necessitate the removal of an account from Edge:

  • Privacy Concerns: If a user desires to limit the data shared with Microsoft or wishes to maintain separate browsing environments, removing an account can be a suitable solution.
  • Account Security: If an account is compromised or suspected of malicious activity, removing it from Edge can mitigate potential risks.
  • Device Transition: When switching to a new device or sharing a computer with multiple users, removing an account can ensure privacy and prevent unintended access to personal data.

Removing an Account from Microsoft Edge: A Step-by-Step Guide

The process of removing an account from Edge is straightforward and can be achieved through the following steps:

  1. Launch Microsoft Edge: Open the Edge browser on your Windows 11 device.
  2. Access Settings: Click on the three dots icon located in the top right corner of the browser window. Navigate to "Settings" from the dropdown menu.
  3. Navigate to Profiles: In the left-hand sidebar of the Settings menu, select "Profiles."
  4. Choose the Account: Locate the account you wish to remove from the list of profiles.
  5. Remove Account: Click on the three dots icon next to the account name and select "Remove Profile."
  6. Confirm Removal: Confirm the removal by clicking "Remove" in the confirmation dialog box.

The chosen account will be removed from Edge, and its associated data will no longer be synced.

Implications of Removing an Account from Microsoft Edge

Removing an account from Edge has several implications that users should be aware of:

  • Data Loss: Removing an account will erase all synced data associated with that account, including bookmarks, passwords, history, and settings. This data will be lost from all devices where the account was synced.
  • Separate Browsing Environments: Removing an account creates a separate browsing environment, meaning that browsing history, cookies, and other data will not be shared with other accounts on the same device.
  • Lost Access to Features: Certain features, such as password management and syncing, might become unavailable if the account is removed.

FAQs: Removing an Account from Microsoft Edge

Q: Will removing an account delete my browsing history from my device?

A: Removing an account from Edge will not delete your browsing history from your device. However, it will prevent the history from being synced with other devices where the account was logged in.

Q: Can I remove an account without deleting my data?

A: No, removing an account from Edge will automatically delete all associated data. If you wish to retain your data, you should consider signing out of the account instead of removing it.

Q: What happens to my saved passwords after removing an account?

A: Saved passwords associated with the removed account will be deleted from Edge. However, if you have enabled password syncing with your Microsoft account, your passwords may still be accessible through the Microsoft account website.

Q: Can I recover my data after removing an account from Edge?

A: Once an account is removed from Edge, the associated data cannot be recovered. It is crucial to ensure that any essential data is backed up before removing the account.

Tips for Managing Accounts in Microsoft Edge

  • Regularly Backup Data: Back up important data, such as bookmarks and passwords, to avoid data loss when removing an account.
  • Consider Signing Out: If you only need temporary separation from a browsing environment, consider signing out of the account instead of removing it.
  • Create Separate Profiles: For multiple users on a single device, consider creating separate profiles to maintain individual browsing environments.
  • Review Privacy Settings: Before removing an account, review your privacy settings to understand what data is being synced and how it is being used.

Conclusion

Removing an account from Microsoft Edge is a straightforward process that can be beneficial in various situations. By understanding the implications of account removal, users can make informed decisions about managing their browsing data and privacy. Remember to back up important data before removing an account and consider alternative options, such as signing out, for temporary separation from a browsing environment. By following these guidelines, users can effectively manage their accounts within Microsoft Edge and maintain a secure and personalized browsing experience.

How to manage user account settings on Windows 11  Windows Central Manage user accounts Windows 11  How to Manage Windows 11 password  Windows 11 Credentials User Accounts Settings In Windows 11 - vrogue.co
How to Add a Local User Account on Windows 11 Gebruikersaccountinstellingen beheren in Windows 11 - NL Atsit How To Change Account Name In Windows 11 The Top 4 Me - vrogue.co
user-accounts-control-panel-manage-another-account.jpg Top 6 Ways to Switch User Accounts in Windows 11 - Guiding Tech

Closure

Thus, we hope this article has provided valuable insights into Managing User Accounts in Microsoft Edge on Windows 11: A Comprehensive Guide. We appreciate your attention to our article. See you in our next article!