Archives December 2023

Maximizing Productivity: A Guide To Multitasking With Windows 11

Maximizing Productivity: A Guide to Multitasking with Windows 11

Introduction

In this auspicious occasion, we are delighted to delve into the intriguing topic related to Maximizing Productivity: A Guide to Multitasking with Windows 11. Let’s weave interesting information and offer fresh perspectives to the readers.

Maximizing Productivity: A Guide to Multitasking with Windows 11

Guide to Multitask on Windows 11  Multitasking Tools Windows 11 - YouTube

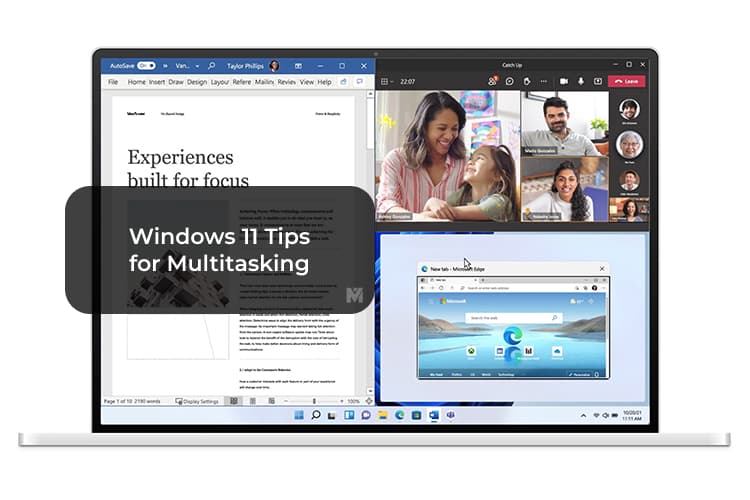
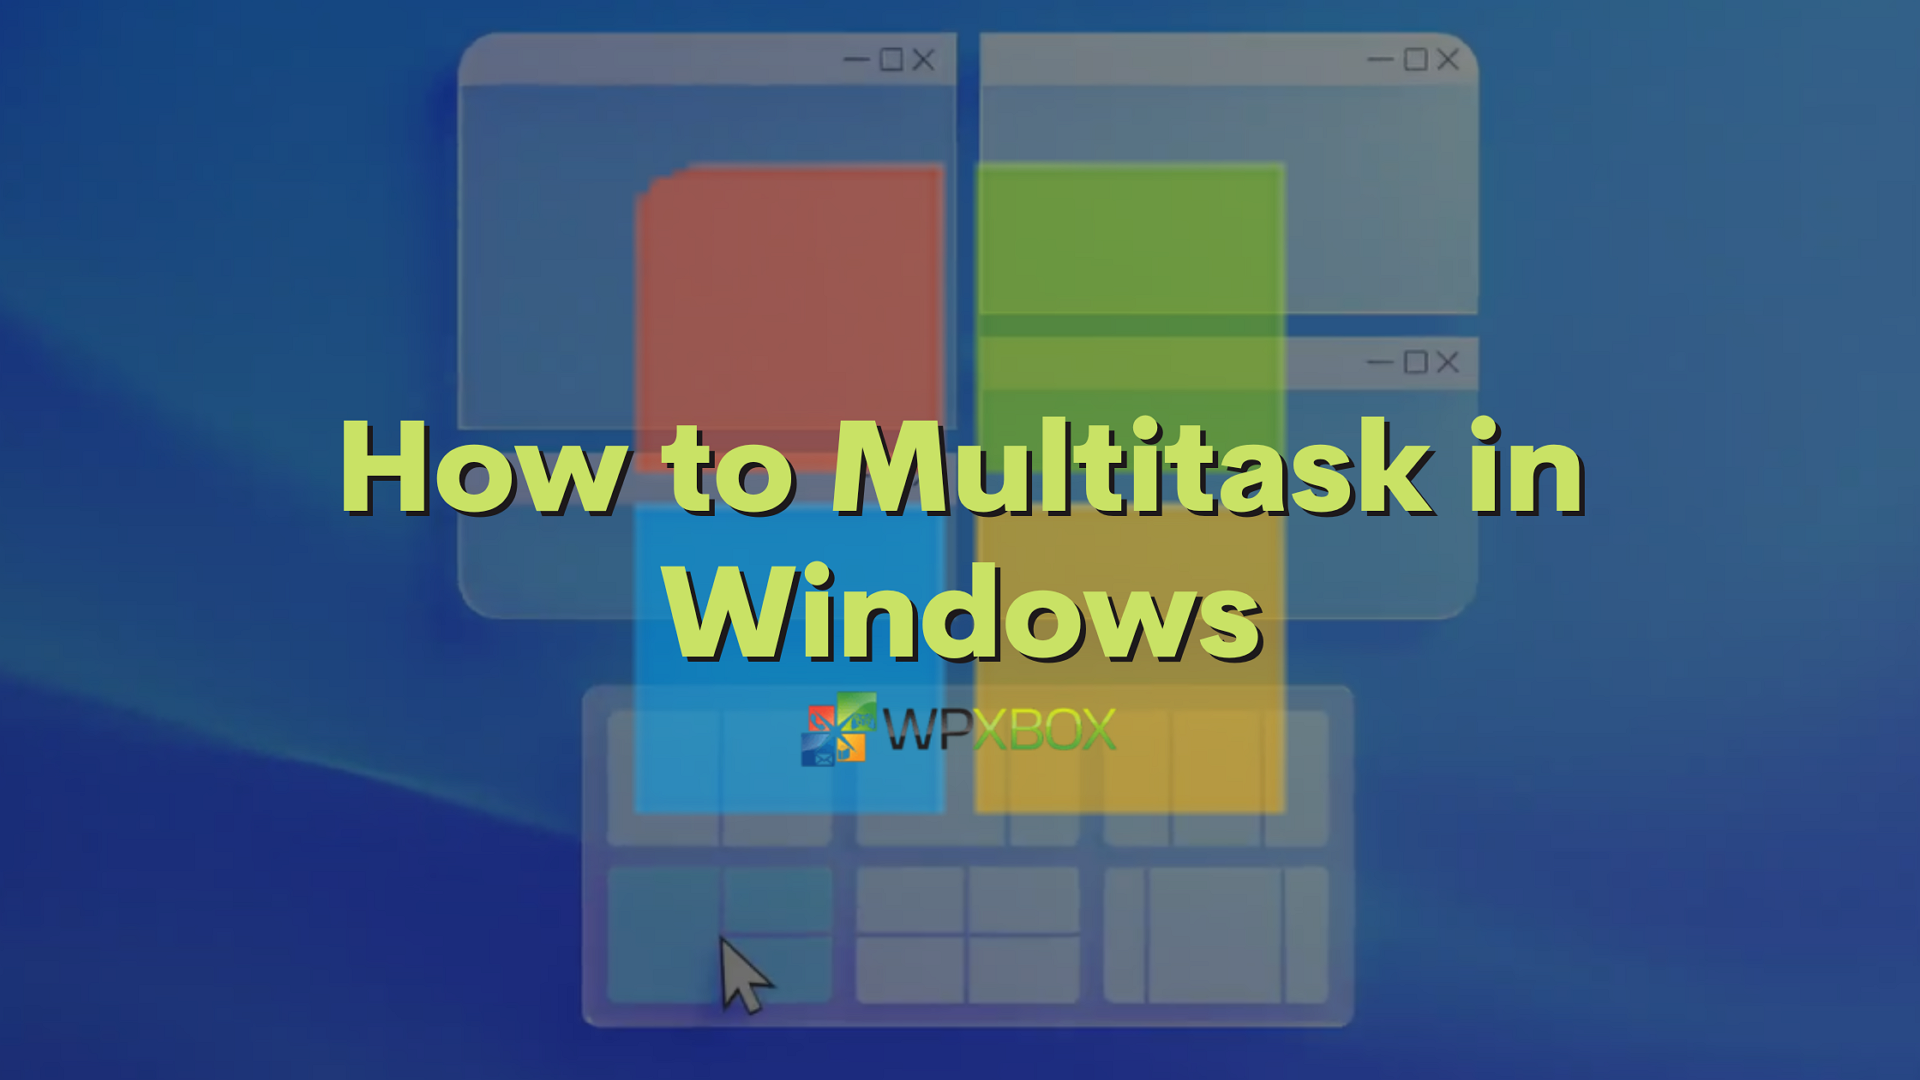
Windows 11, with its sleek interface and enhanced features, presents a powerful platform for multi-tasking. One of the most fundamental and versatile techniques for efficient workflow is the ability to view and interact with multiple applications simultaneously, side by side. This practice, often referred to as "snapping" or "splitting the screen," offers a significant boost in productivity, enabling users to seamlessly manage various tasks without constant switching between windows.

Understanding the Benefits of Multi-Window Viewing

The ability to display multiple windows side by side provides several advantages, contributing to a more streamlined and efficient workflow:

  • Enhanced Focus: By visually segregating different tasks, users can concentrate on one specific window while keeping an eye on other relevant information in the adjacent window. This reduces the need to constantly switch between applications, minimizing distractions and maximizing focus.
  • Streamlined Information Management: When working with multiple documents or data sets, having them displayed side by side facilitates easy comparison and reference. This is particularly useful for tasks involving research, editing, or cross-referencing information from different sources.
  • Improved Collaboration: In collaborative environments, displaying shared documents or presentations side by side allows for simultaneous editing and discussion, fostering real-time communication and collaboration.
  • Increased Efficiency: By eliminating the need to constantly minimize and maximize windows, users can save valuable time and effort, ultimately increasing their overall productivity.

Navigating the Multi-Window Landscape in Windows 11

Windows 11 offers a variety of methods to arrange windows side by side, catering to diverse preferences and workflows. These methods include:

  • Snapping with the Mouse: The most intuitive approach involves dragging and dropping windows to the edges of the screen. When a window is dragged to the left or right edge, it automatically snaps to occupy half the screen width. Similarly, dragging a window to the top or bottom will snap it to occupy half the screen height.
  • Using Keyboard Shortcuts: For a more rapid and efficient approach, Windows 11 provides keyboard shortcuts to snap windows. The most common shortcut is "Windows Key + Left/Right Arrow" which snaps the active window to the left or right half of the screen. Similar shortcuts exist for snapping to the top or bottom half of the screen, and for creating custom layouts.
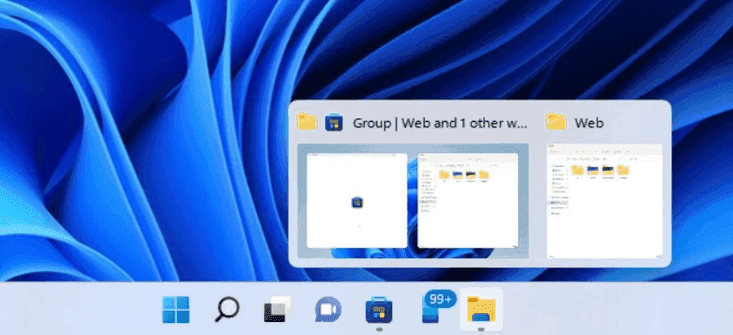
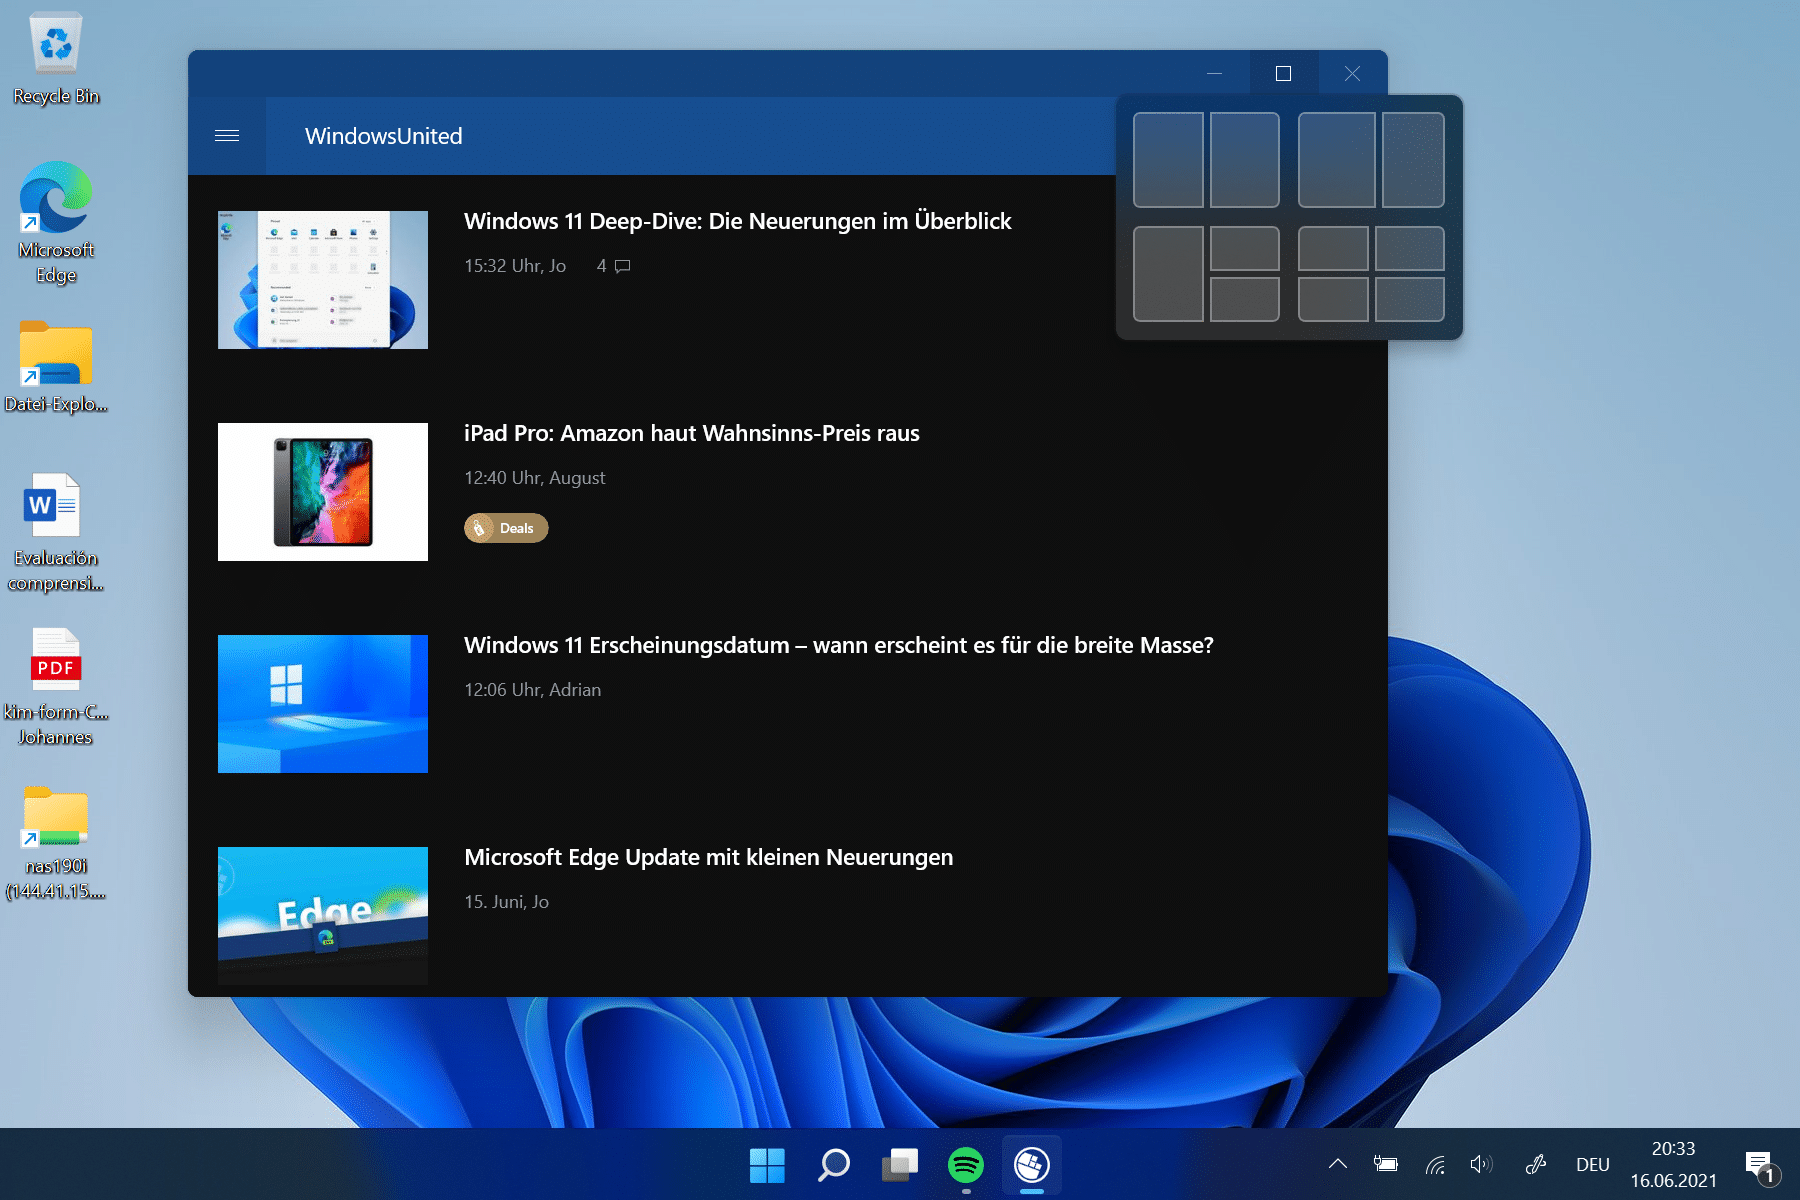
  • Utilizing the Snap Layout Feature: Windows 11 introduces a dedicated "Snap Layouts" feature, offering pre-defined window arrangements. Users can access this feature by hovering the mouse over the maximize button in the top-right corner of a window, revealing a menu of layout options. These options include side-by-side arrangements, as well as layouts with three or four windows.
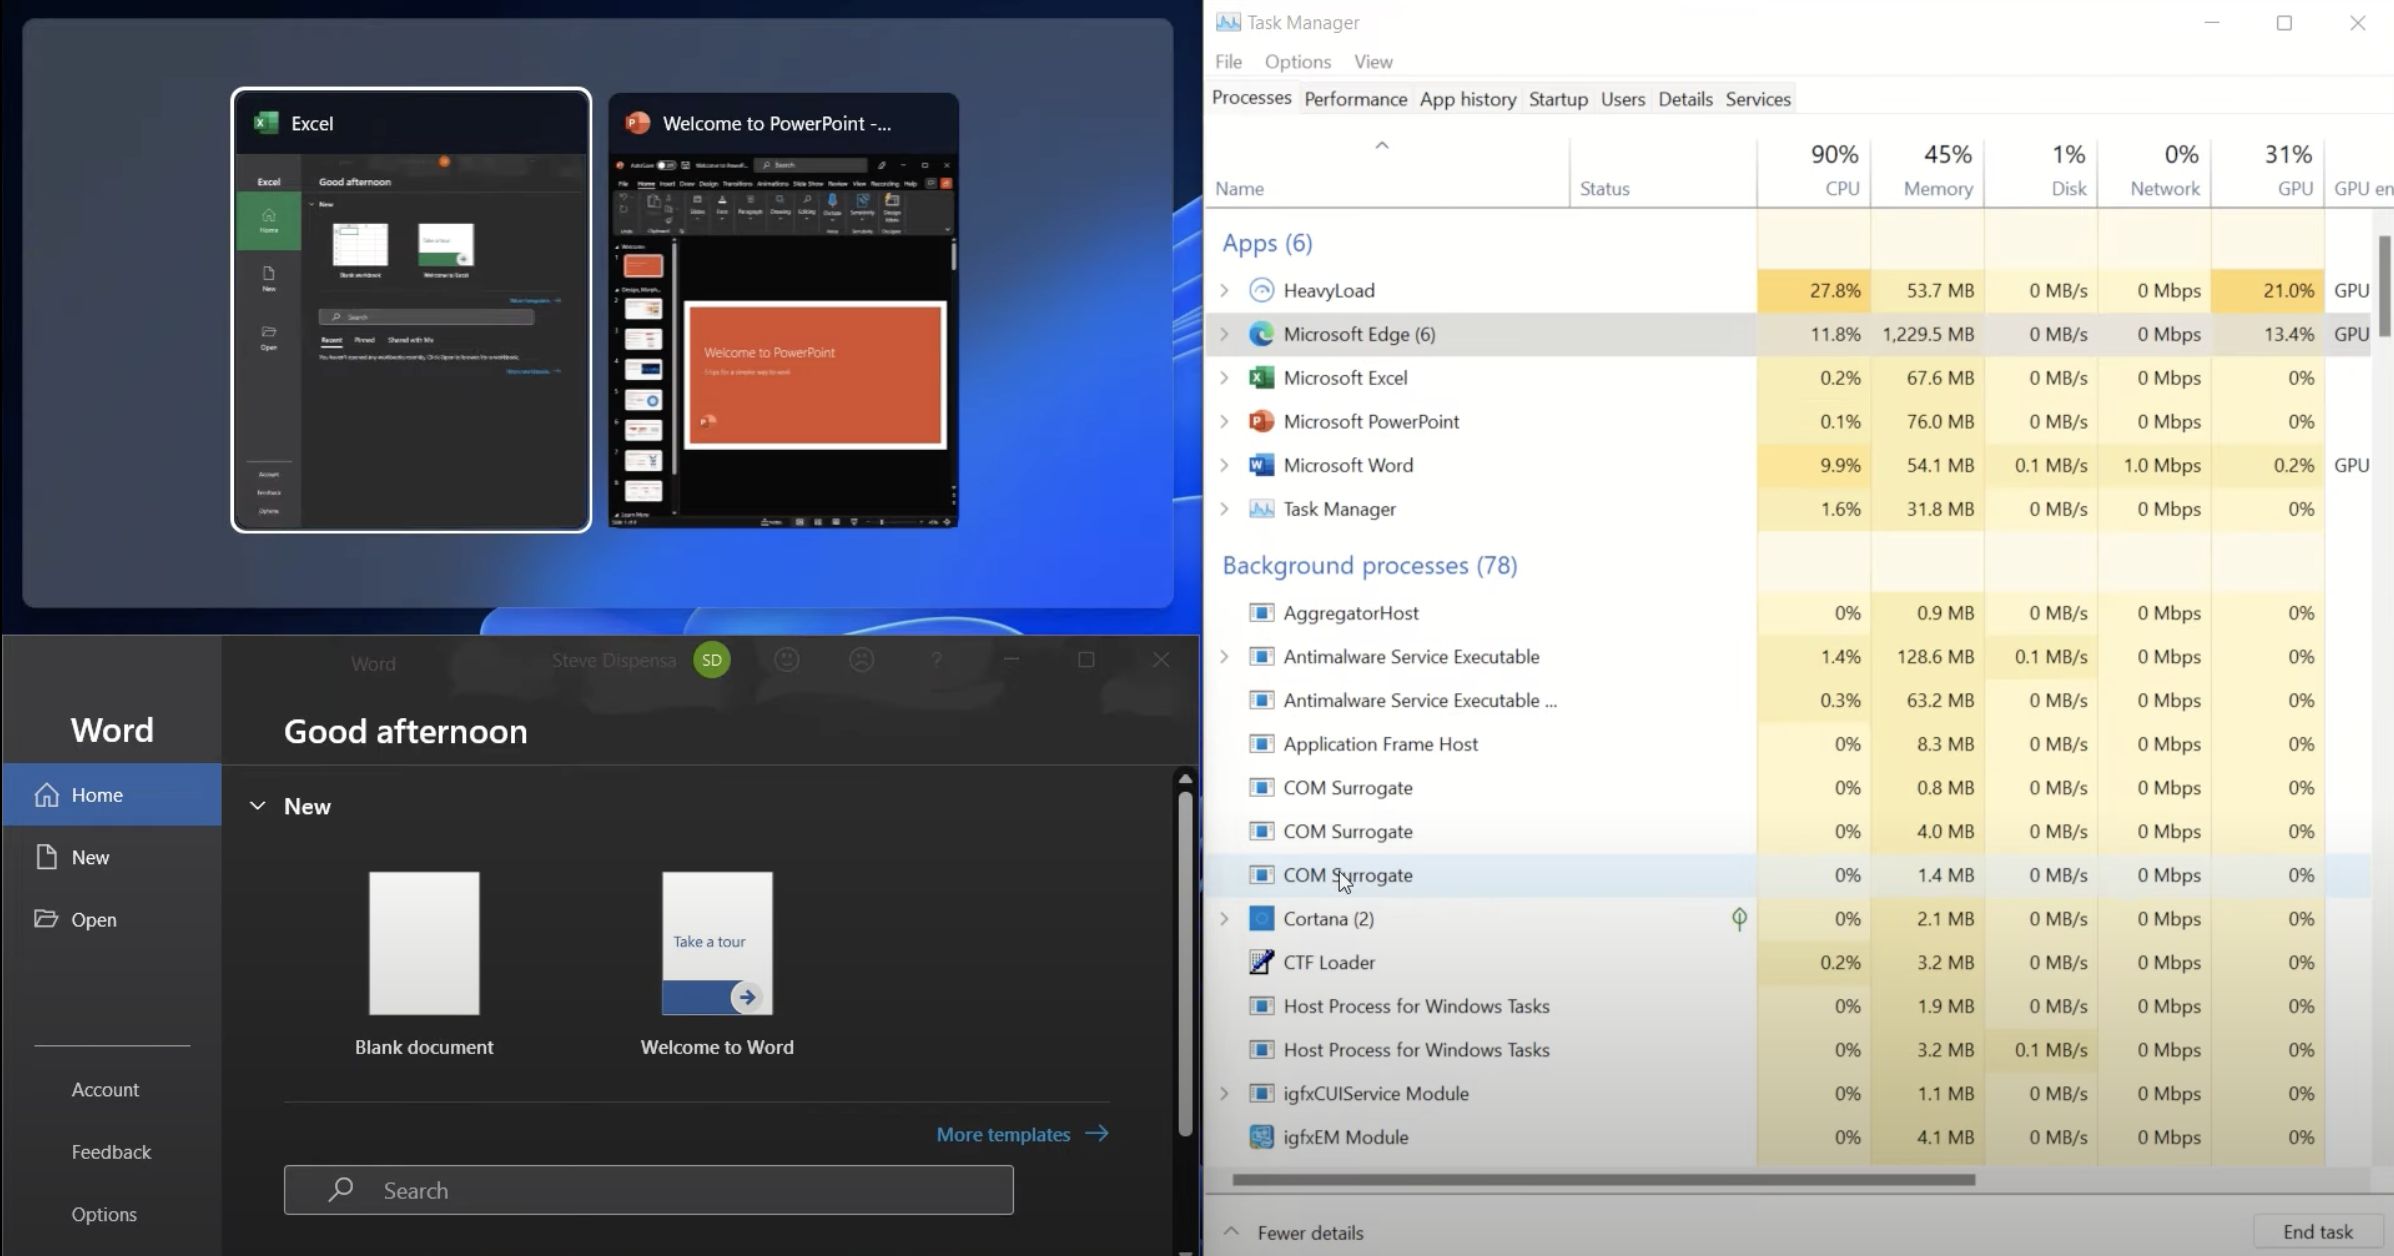
  • Employing Task View: For more complex multi-window scenarios, Task View provides a comprehensive overview of all open windows. By pressing "Windows Key + Tab," users can access Task View, allowing them to select and arrange multiple windows into desired configurations, including side-by-side arrangements.

Beyond Basic Snapping: Exploring Advanced Techniques

While the basic snapping methods offer a solid foundation for multi-window management, Windows 11 provides advanced features to enhance the experience:

  • Snap Groups: This feature allows users to save specific window configurations as "snap groups." When a user reopens the group, Windows 11 automatically restores the saved arrangement, streamlining the process of re-establishing a familiar multi-window workspace.
  • Virtual Desktops: For managing a multitude of tasks and applications, Windows 11 offers virtual desktops. These separate desktops allow users to organize windows into different categories or projects, creating distinct workspaces for focused work. Users can switch between virtual desktops using keyboard shortcuts or the Task View interface, further enhancing multi-window management.
  • Third-Party Tools: While Windows 11 offers robust built-in tools for multi-window management, third-party applications can provide additional features and customization options. These tools often offer advanced snapping capabilities, automatic window arrangement based on application type, and even the ability to control window transparency and opacity.

FAQs: Addressing Common Queries

1. Can I snap windows on multiple monitors?

Yes, Windows 11 supports snapping windows across multiple monitors. Users can drag windows to the edge of one monitor to snap them to the adjacent monitor, or utilize keyboard shortcuts to snap windows to specific monitors.

2. How do I create a custom snap layout?

To create a custom snap layout, use the Snap Layout feature. Hover the mouse over the maximize button of a window and select "Snap Layouts." Choose the "Custom" option, and then drag and drop windows to the desired positions within the layout. You can then save this layout for future use.

3. Can I use Snap Groups with virtual desktops?

Yes, Snap Groups can be used with virtual desktops. You can create and save snap groups on individual virtual desktops, allowing for different multi-window configurations on each desktop.

4. How do I adjust the size of snapped windows?

While snapping automatically divides the screen into equal sections, you can adjust the size of snapped windows by dragging the divider bar between them.

5. What are the best keyboard shortcuts for multi-window management?

  • Windows Key + Left/Right Arrow: Snaps the active window to the left or right half of the screen.
  • Windows Key + Up/Down Arrow: Snaps the active window to the top or bottom half of the screen.
  • Windows Key + Tab: Opens Task View.
  • Windows Key + Ctrl + D: Creates a new virtual desktop.
  • Windows Key + Ctrl + Left/Right Arrow: Switches between virtual desktops.

Tips for Maximizing Multi-Window Efficiency

  • Experiment with Different Layouts: Explore various snap layouts and find the configurations that best suit your workflow.
  • Utilize Keyboard Shortcuts: Mastering keyboard shortcuts can significantly speed up your multi-window management.
  • Customize Your Desktop: Use virtual desktops to organize tasks and applications into different categories.
  • Embrace Third-Party Tools: Consider exploring third-party applications for advanced snapping features and customization options.
  • Minimize Distractions: Avoid opening unnecessary windows or applications, and prioritize only the essential tasks for each workspace.

Conclusion: Unlocking the Power of Multi-Window Management

The ability to seamlessly view and interact with multiple windows side by side is a powerful feature in Windows 11, offering significant advantages for productivity and efficiency. By mastering the various methods for multi-window management, users can streamline their workflow, enhance focus, and unlock the full potential of their multitasking capabilities. From basic snapping techniques to advanced features like Snap Groups and virtual desktops, Windows 11 provides a versatile platform for users to personalize their workspace and optimize their productivity.

How to Multitask on Windows 11 l Increase Productivity!!! Just sharing what I usually do Get the Best Out of Windows 11 Multitasking with These Settings - MashTips Get the Best Out of Windows 11 Multitasking with These Settings - MashTips
Windows 11 Will Offer Better Multitasking to Boost Productivity Multitasking in Windows 11/10 (Complete Guide) Ultimate Guide to Multitasking in Windows 11/10
Guide To Multitask On Windows 11 Multitasking Tools W - vrogue.co Windows 11 New Multitasking Features To Increase Productivity Youtube โ€“ Otosection

Closure

Thus, we hope this article has provided valuable insights into Maximizing Productivity: A Guide to Multitasking with Windows 11. We appreciate your attention to our article. See you in our next article!

Accessing Android Apps On Windows 10: A Comprehensive Guide

Accessing Android Apps on Windows 10: A Comprehensive Guide

Introduction

With great pleasure, we will explore the intriguing topic related to Accessing Android Apps on Windows 10: A Comprehensive Guide. Let’s weave interesting information and offer fresh perspectives to the readers.

Accessing Android Apps on Windows 10: A Comprehensive Guide

Run Android Apps on Windows 10: The Ultimate Guide - Apps UK ��

The world of Android apps, with its vast library of diverse applications, is no longer exclusive to mobile devices. With the advent of emulators and alternative platforms, Windows 10 users can now enjoy the benefits of Android’s ecosystem on their laptops and desktops. This article delves into the various methods for accessing Android apps on Windows 10, analyzing their functionalities, advantages, and drawbacks.

Understanding the Need for Emulation:

Windows 10, being a distinct operating system, cannot directly run Android applications. To bridge this gap, emulators come into play. Emulators create a virtual environment within Windows 10 that mimics the Android operating system, allowing Android apps to run seamlessly.

Popular Emulators for Windows 10:

Several emulators cater to the needs of Windows 10 users seeking Android app access. Some of the most prominent options include:

  • BlueStacks: A widely popular and well-established emulator known for its performance and user-friendly interface. It offers compatibility with a wide range of Android apps and games, making it a suitable choice for both casual and avid users.

  • NoxPlayer: Another highly regarded emulator, NoxPlayer is particularly recognized for its gaming capabilities. It provides optimized settings for smooth gameplay and features like macro recording, enabling users to automate repetitive tasks.

  • MEmu Play: MEmu Play is an excellent emulator for users seeking a lightweight and fast experience. It boasts efficient resource management and supports multiple instances, allowing users to run several Android apps simultaneously.

  • LDPlayer: Designed primarily for gamers, LDPlayer offers a dedicated gaming environment with enhanced graphics and performance. It supports high-resolution displays and features key mapping for seamless control in demanding games.

  • Genymotion: Genymotion is a powerful emulator primarily used by developers for testing and debugging Android applications. It offers extensive customization options and supports a wide range of Android versions.

Choosing the Right Emulator:

Selecting the right emulator depends on individual needs and preferences. Factors to consider include:

  • Performance and resource usage: Some emulators are resource-intensive, while others are more lightweight. Consider your system’s specifications and the type of applications you intend to use.

  • Gaming capabilities: If you prioritize gaming, choose an emulator with dedicated gaming features like macro recording and optimized settings.

  • Customization options: Some emulators offer extensive customization options, enabling users to tailor the virtual environment to their liking.

  • Compatibility with specific applications: Not all emulators support every Android app. Research and ensure the emulator you choose is compatible with the apps you wish to use.

Beyond Emulators: Alternative Platforms:

While emulators are the most common method for accessing Android apps on Windows 10, alternative platforms offer distinct advantages:

  • Amazon Appstore: This platform offers a curated selection of Android apps optimized for Windows 10 devices. It provides a user-friendly interface and seamless integration with the Windows ecosystem.

  • Windows Subsystem for Android: This feature, introduced in Windows 11, enables users to directly install and run Android apps from the Amazon Appstore. It provides a native Android experience within the Windows environment.

Benefits of Accessing Android Apps on Windows 10:

  • Expanded app library: Access to a vast library of Android apps, including popular social media platforms, productivity tools, and entertainment apps.

  • Enhanced productivity: Utilize Android apps for tasks like note-taking, document editing, and project management on a larger screen.

  • Seamless integration with Windows: Some emulators and platforms offer seamless integration with Windows features, enabling users to share files and data between devices.

  • Gaming on a larger screen: Enjoy Android games on a larger display with enhanced visuals and controls.

Potential Drawbacks:

  • Performance limitations: Emulators may experience performance issues, particularly with demanding applications and games.

  • Compatibility issues: Not all Android apps are compatible with all emulators.

  • Security concerns: Emulators may pose security risks if not from trusted sources or properly configured.

FAQs:

Q: Can I download the Google Play Store directly on my Windows 10 laptop?

A: The Google Play Store is not directly downloadable for Windows 10 laptops. You need to use an emulator or an alternative platform like the Amazon Appstore to access Android apps, including those available on the Google Play Store.

Q: Is it safe to use emulators on my Windows 10 laptop?

A: Using emulators from reputable sources is generally safe. However, it’s crucial to download emulators from trusted websites and ensure they are regularly updated for security patches. Avoid downloading emulators from untrusted sources, as they might contain malware.

Q: Can I use my existing Google Play Store account with emulators?

A: Yes, you can typically use your existing Google Play Store account with emulators. You will need to sign in to your account within the emulator to access your apps, purchases, and data.

Q: How much storage space do I need for emulators?

A: The storage space required for emulators varies depending on the chosen emulator and the apps you intend to install. It’s advisable to have at least 5GB of free space for a basic installation.

Q: Can I run multiple Android apps simultaneously using an emulator?

A: Some emulators, like MEmu Play, support running multiple instances, allowing you to run several Android apps simultaneously.

Tips for Optimizing Emulator Performance:

  • Allocate sufficient resources: Ensure your computer has enough RAM and processing power to run the emulator smoothly.

  • Update drivers: Keep your graphics drivers and other system drivers up to date for optimal performance.

  • Adjust emulator settings: Experiment with emulator settings like graphics resolution, CPU and RAM allocation to find the optimal configuration for your system.

  • Close unnecessary programs: Close other applications running on your computer to free up resources for the emulator.

Conclusion:

Accessing Android apps on Windows 10 offers numerous benefits, from expanding app functionality to enjoying mobile games on a larger screen. While emulators provide a reliable way to bridge the gap between operating systems, alternative platforms like the Amazon Appstore and Windows Subsystem for Android offer unique advantages. By understanding the different options, users can choose the method that best suits their needs and enjoy the vast world of Android apps on their Windows 10 devices.

How to Run Android Apps on Windows 10 How to Run Android Apps on Windows 10 How to Install and Run Android Apps on Windows 10 - YouTube
Windows 10 can now run multiple Android apps at once โ€” here's how  Tom's Guide How to RUN Android APPS in Windows 10 with BLUE STACKS! - BlogTinHoc.org How to Install ANDROID Apps on WINDOWS PHONE 10 Preview? Easy Guide - YouTube
How to download android apps on windows 10 - etptutor How to use android apps on windows 10 - YouTube

Closure

Thus, we hope this article has provided valuable insights into Accessing Android Apps on Windows 10: A Comprehensive Guide. We appreciate your attention to our article. See you in our next article!

Removing A Microsoft Account From Windows 11 Using Command Prompt: A Comprehensive Guide

Removing a Microsoft Account from Windows 11 Using Command Prompt: A Comprehensive Guide

Introduction

In this auspicious occasion, we are delighted to delve into the intriguing topic related to Removing a Microsoft Account from Windows 11 Using Command Prompt: A Comprehensive Guide. Let’s weave interesting information and offer fresh perspectives to the readers.

Removing a Microsoft Account from Windows 11 Using Command Prompt: A Comprehensive Guide

How to Remove Microsoft Account from Windows 11? - The Microsoft Windows11

This article delves into the intricacies of removing a Microsoft account from Windows 11 using the Command Prompt, a powerful tool for advanced system management. While the process might seem complex, understanding the underlying principles and following the provided steps can empower users to achieve this task effectively.

Understanding the Significance

Removing a Microsoft account from Windows 11 signifies a deliberate choice to decouple the operating system from a specific user profile. This decision can stem from various motivations:

  • Privacy Concerns: Users might choose to remove their Microsoft account to minimize data collection and enhance privacy.
  • Account Management: A user might wish to remove an account due to a change in ownership, account security concerns, or simply to streamline user profiles.
  • Troubleshooting: In cases of system errors or account-related issues, removing and re-adding the account can be a troubleshooting technique.
  • Local Account Preference: Some users prefer a local account for its simplicity and autonomy, allowing them to manage their system without relying on a cloud-based profile.

Prerequisites and Considerations

Before embarking on this process, it is crucial to acknowledge certain prerequisites and considerations:

  • Administrative Privileges: Accessing and modifying system settings requires administrative privileges. Ensure you are logged in as an administrator or have the necessary permissions.
  • Data Backup: Removing a Microsoft account from Windows 11 might affect associated data, such as settings, applications, and files. It is highly recommended to back up important data before proceeding.
  • Account Recovery: Keep your Microsoft account password and recovery information handy in case you need to access the account later.
  • Third-Party Software: Some third-party applications might rely on the Microsoft account for functionality. Removing the account could impact these applications.

The Command Prompt Approach

The Command Prompt provides a powerful and versatile method to manage system settings, including removing a Microsoft account. Here’s a step-by-step guide:

  1. Opening the Command Prompt:

    • Navigate to the Windows search bar.
    • Type "cmd" and select "Command Prompt" from the search results.
    • Right-click on the Command Prompt icon and choose "Run as administrator."
  2. Identifying the Account to Remove:

    • Execute the following command to list all user accounts on the system:
      net user

      This command displays a list of usernames, including the Microsoft account you intend to remove.

  3. Removing the Account:

    • Use the following command to remove the Microsoft account. Replace "username" with the actual username of the account:
      net user username /delete

      Confirm the deletion by pressing "Y" when prompted.

  4. Restarting the System:

    • After successfully removing the account, restart the system for the changes to take effect.

Common Scenarios and Troubleshooting

While the process outlined above is generally straightforward, certain scenarios might require additional steps or troubleshooting:

  • Account Locked Out: If the Microsoft account is locked out, you might need to reset the password or contact Microsoft support for assistance.
  • Account Not Listed: If the account you wish to remove is not listed in the "net user" command output, ensure you are logged in as an administrator and have the necessary permissions.
  • System Errors: In case of system errors during the removal process, try restarting the system and repeating the steps.

Frequently Asked Questions

Q: Can I remove my primary account using this method?

A: Removing the primary account using the Command Prompt might lead to system instability. It is not recommended to remove the primary account using this method.

Q: What happens to my data after removing the account?

A: Data associated with the removed account, including settings, applications, and files, might be deleted or inaccessible. It is crucial to back up important data before proceeding.

Q: Can I re-add the account after removing it?

A: Yes, you can re-add the Microsoft account to the system after removing it. However, you might need to re-configure settings and applications.

Q: Is there a way to remove the account without using the Command Prompt?

A: Yes, you can remove a Microsoft account from Windows 11 through the Settings app. Navigate to "Accounts" > "Your info" and choose "Sign out."

Tips for Smooth Removal

  • Double-check the username: Ensure you are removing the correct account before executing the "net user" command.
  • Back up your data: Create a backup of important files, settings, and applications before removing the account.
  • Review system logs: After removing the account, review system logs for any errors or warnings.
  • Contact Microsoft Support: If you encounter significant issues, contact Microsoft support for assistance.

Conclusion

Removing a Microsoft account from Windows 11 using the Command Prompt provides a powerful and flexible approach for advanced system management. By understanding the underlying principles, following the provided steps, and considering the potential implications, users can effectively remove accounts while maintaining system integrity. Remember to prioritize data backup and seek professional assistance if necessary.

How To Remove Microsoft Account From Windows 11 Guide  yorketech How to remove Microsoft account in Windows 11 How to Remove Microsoft Account from Windows 11? - The Microsoft Windows11
How to Remove Microsoft Account from Windows 11 [Guide]  Beebom How to Remove a Microsoft Account from Windows 11 [GUIDE] Removing Microsoft Account From Windows 11
How to remove Microsoft account in Windows 11 How to Remove Microsoft Account from Windows 11

Closure

Thus, we hope this article has provided valuable insights into Removing a Microsoft Account from Windows 11 Using Command Prompt: A Comprehensive Guide. We thank you for taking the time to read this article. See you in our next article!

Mastering Microsoft 365 Deployment: A Guide To Efficient Office Deployment Tool Utilization

Mastering Microsoft 365 Deployment: A Guide to Efficient Office Deployment Tool Utilization

Introduction

In this auspicious occasion, we are delighted to delve into the intriguing topic related to Mastering Microsoft 365 Deployment: A Guide to Efficient Office Deployment Tool Utilization. Let’s weave interesting information and offer fresh perspectives to the readers.

Mastering Microsoft 365 Deployment: A Guide to Efficient Office Deployment Tool Utilization

Using Office Deployment Tool For Office 365 with config.office.com - YouTube

The modern workplace relies heavily on seamless technology integration. Microsoft 365, with its suite of productivity tools, has become an integral part of this digital landscape. However, successfully deploying and managing Microsoft 365 across an organization can be a complex undertaking. This is where the Office Deployment Tool (ODT) emerges as a powerful ally, streamlining the process and ensuring a smooth user experience.

Understanding the Office Deployment Tool

The Office Deployment Tool is a command-line utility designed specifically for deploying Microsoft 365 applications and updates within an organization. This tool allows administrators to customize the installation process, tailoring it to meet the specific needs of their environment. By leveraging ODT, organizations gain greater control over:

  • Application Selection: ODT empowers administrators to choose precisely which Microsoft 365 applications are installed on individual machines. This eliminates the need for bulky installations that include unnecessary software, leading to faster deployments and reduced storage requirements.
  • Configuration Settings: ODT allows administrators to configure various settings during the installation process. This includes defining language preferences, activating specific features, and setting up user profiles. By customizing these settings, organizations can ensure that Microsoft 365 applications are configured according to their specific requirements.
  • Deployment Method: ODT supports various deployment methods, including traditional setups, network shares, and cloud-based distribution. This flexibility allows administrators to choose the most appropriate approach based on their existing infrastructure and organizational needs.
  • Automated Updates: ODT facilitates the seamless deployment of updates for Microsoft 365 applications. This ensures that users always have access to the latest features and security patches, maximizing productivity and minimizing potential vulnerabilities.

Benefits of Utilizing the Office Deployment Tool

The Office Deployment Tool offers a multitude of benefits that streamline the Microsoft 365 deployment process and enhance overall efficiency. These benefits include:

  • Simplified Deployment: ODT streamlines the installation process by automating key tasks, reducing the manual effort required for deploying Microsoft 365 applications. This frees up valuable time for administrators to focus on other critical tasks.
  • Enhanced Control: ODT provides administrators with granular control over the deployment process, allowing them to customize the installation to meet specific organizational requirements. This ensures that Microsoft 365 applications are deployed in a way that maximizes their value and minimizes potential issues.
  • Reduced Costs: By optimizing the deployment process and minimizing the need for manual intervention, ODT helps organizations reduce the overall cost of deploying and managing Microsoft 365. This can translate into significant savings for organizations of all sizes.
  • Improved Security: ODT facilitates the deployment of the latest security updates, ensuring that Microsoft 365 applications are always protected from the latest threats. This helps organizations mitigate security risks and protect sensitive data.
  • Increased User Satisfaction: By providing a streamlined and customized installation experience, ODT helps ensure that users have a positive experience with Microsoft 365. This can lead to increased user satisfaction and improved productivity.

Key Features of the Office Deployment Tool

The Office Deployment Tool boasts a range of features designed to empower administrators with greater control and flexibility during the deployment process. These features include:

  • Configuration XML Files: ODT utilizes configuration XML files to define the specific parameters for the installation process. These files allow administrators to specify the applications to be installed, the desired language, and various other settings.
  • Multiple Deployment Methods: ODT supports various deployment methods, including traditional setups, network shares, and cloud-based distribution. This flexibility allows administrators to choose the most appropriate method based on their existing infrastructure and organizational needs.
  • Offline Installation: ODT supports offline installations, enabling administrators to deploy Microsoft 365 applications to machines that lack internet connectivity. This is particularly useful for organizations with remote locations or limited network access.
  • Update Management: ODT facilitates the deployment of updates for Microsoft 365 applications, ensuring that users always have access to the latest features and security patches. This helps organizations maintain a secure and up-to-date environment.

Understanding the ODT Process

The Office Deployment Tool process involves several key steps that ensure a smooth and efficient deployment:

  1. Download ODT: The first step involves downloading the Office Deployment Tool from the Microsoft website. The tool is available for both 32-bit and 64-bit operating systems.
  2. Create Configuration XML File: Administrators need to create a configuration XML file that specifies the desired settings for the installation process. This file defines the applications to be installed, the language preferences, and other relevant parameters.
  3. Download Office Source Files: The next step involves downloading the Office source files from the Microsoft website. These files contain the installation packages for the selected applications.
  4. Run ODT with Configuration File: Finally, administrators run the Office Deployment Tool using the command line, specifying the configuration XML file and the location of the Office source files.

Frequently Asked Questions

Q: What are the system requirements for using the Office Deployment Tool?

A: The Office Deployment Tool is compatible with Windows 7, Windows 8, Windows 8.1, Windows 10, and Windows Server 2008 R2, Windows Server 2012, Windows Server 2012 R2, Windows Server 2016, and Windows Server 2019. It requires .NET Framework 4.5 or later to be installed on the system.

Q: Can I use the Office Deployment Tool to deploy Microsoft 365 applications to a network share?

A: Yes, the Office Deployment Tool supports network-based deployments. Administrators can configure the tool to install applications from a network share, making it easier to deploy Microsoft 365 applications across multiple machines.

Q: Can I use the Office Deployment Tool to deploy Office 2019 applications?

A: Yes, the Office Deployment Tool can be used to deploy Office 2019 applications. However, it is important to note that the configuration XML file used for Office 2019 deployments will differ from the one used for Microsoft 365 deployments.

Q: How can I ensure that my Office Deployment Tool configuration is correct?

A: To ensure that your Office Deployment Tool configuration is correct, you can use the Office Customization Tool (OCT) to preview the settings before deploying them. The OCT allows you to view the configuration settings and make any necessary adjustments before running the ODT.

Q: Can I use the Office Deployment Tool to deploy Microsoft 365 applications to a virtual machine?

A: Yes, the Office Deployment Tool can be used to deploy Microsoft 365 applications to a virtual machine. The process is similar to deploying applications to a physical machine, but it is important to ensure that the virtual machine meets the system requirements for the Office Deployment Tool.

Q: Can I use the Office Deployment Tool to deploy Microsoft 365 applications to a mobile device?

A: The Office Deployment Tool is primarily designed for deploying Microsoft 365 applications to Windows-based computers. It does not support the deployment of applications to mobile devices.

Tips for Effective Office Deployment Tool Utilization

To maximize the effectiveness of the Office Deployment Tool, consider these tips:

  • Plan Your Deployment: Before deploying Microsoft 365 applications, it is important to plan the deployment process carefully. This includes identifying the applications to be installed, the desired settings, and the target machines.
  • Use Configuration XML File: Leverage the configuration XML file to define the specific settings for the installation process. This ensures that Microsoft 365 applications are deployed according to your organization’s requirements.
  • Test Your Deployment: Before deploying Microsoft 365 applications to all users, it is essential to test the deployment on a pilot group of users. This allows you to identify and resolve any issues before the full rollout.
  • Stay Up-to-Date: Keep your Office Deployment Tool and configuration XML files up-to-date with the latest versions. This ensures that you are using the most recent features and security updates.
  • Monitor Your Deployment: After deploying Microsoft 365 applications, it is important to monitor the deployment process and ensure that the applications are functioning as expected. This includes checking for any errors or issues that may arise.

Conclusion

The Office Deployment Tool is an invaluable tool for organizations seeking to streamline the deployment and management of Microsoft 365 applications. By leveraging this powerful utility, administrators can gain greater control over the installation process, customize settings to meet specific organizational needs, and ensure a smooth and efficient user experience. With its ability to automate key tasks, optimize deployment methods, and facilitate the seamless deployment of updates, the Office Deployment Tool empowers organizations to unlock the full potential of Microsoft 365, driving productivity and enhancing overall efficiency.

Deploying Office 365 with Office Deployment Tool (ODT) - Tech Blog, News, How To's and More. Office Deployment Tool: How to Use It to Install Office 365 - MiniTool Partition Wizard Office 365 Deployment Step by Step free PDF - KING OF EXCEL
Office Deployment Tool: How to Use It to Install Office 365 Choose how to deploy Office 365 ProPlus - Office Support Office 365 Deployment Diagram
Office 365 Deployment Step by Step free PDF - KING OF EXCEL Office 365 Deployment Tool For Mac Ggoogle - rapwestern

Closure

Thus, we hope this article has provided valuable insights into Mastering Microsoft 365 Deployment: A Guide to Efficient Office Deployment Tool Utilization. We appreciate your attention to our article. See you in our next article!

Realtek Audio Driver Windows 11 5.1 Channel

realtek audio driver windows 11 5.1 channel

Introduction

With great pleasure, we will explore the intriguing topic related to realtek audio driver windows 11 5.1 channel. Let’s weave interesting information and offer fresh perspectives to the readers.

Unlocking Immersive Audio: Realtek Audio Drivers and 5.1 Channel Sound on Windows 11

Realtek Audio Driver Windows 11 Amd

The modern computing landscape thrives on multi-sensory experiences. While visuals dominate the realm of entertainment and productivity, audio plays a crucial role in shaping our perception and enhancing engagement. This is where Realtek audio drivers, particularly those supporting 5.1 channel sound, come into play, offering a gateway to a richer, more immersive auditory experience on Windows 11.

Understanding Realtek Audio Drivers and 5.1 Channel Sound

Realtek is a prominent manufacturer of integrated circuits, including audio codecs, which are the foundation for sound processing in computers and other devices. These codecs are responsible for converting digital audio data into analog signals, enabling us to hear the sounds generated by our devices. Realtek audio drivers are software programs that act as intermediaries, allowing the operating system to communicate with the audio codec and control its functionalities.

5.1 channel sound, on the other hand, is a surround sound configuration that delivers audio through six distinct speakers: a front left, a front right, a center, a subwoofer, and two rear speakers. This arrangement creates a more realistic and immersive soundscape, placing the listener in the center of the action.

The Importance of Realtek Audio Drivers for 5.1 Channel Sound

Realtek audio drivers are essential for enabling and optimizing 5.1 channel sound on Windows 11. They act as the bridge between the operating system and the audio hardware, ensuring seamless communication and proper functioning of the sound system.

Key Benefits of Realtek Audio Drivers for 5.1 Channel Sound

  • Enhanced Audio Quality: Realtek audio drivers offer advanced features like Dolby Digital and DTS support, resulting in clearer, more detailed, and richer audio output.
  • Immersive Surround Sound: By enabling 5.1 channel sound, Realtek drivers allow users to experience a more realistic and engaging auditory environment, particularly in gaming, movies, and music.
  • Personalized Audio Settings: Realtek audio drivers often provide user-configurable settings, allowing users to customize sound profiles, adjust bass levels, and fine-tune the audio output to their preferences.
  • Hardware Compatibility: Realtek drivers are designed to work seamlessly with various audio hardware, ensuring compatibility and optimal performance.
  • Regular Updates: Realtek consistently releases driver updates, addressing compatibility issues, enhancing performance, and introducing new features.

Installation and Configuration of Realtek Audio Drivers for 5.1 Channel Sound

Installing and configuring Realtek audio drivers for 5.1 channel sound is typically a straightforward process.

  1. Download the Latest Drivers: Visit Realtek’s official website or the manufacturer’s website for your device to download the latest drivers compatible with your specific model and Windows 11 version.
  2. Run the Installation Program: Execute the downloaded installation file and follow the on-screen instructions to install the drivers.
  3. Configure Sound Settings: Access the Windows 11 Sound settings and select the Realtek audio output device.
  4. Enable 5.1 Channel Sound: Within the Realtek audio driver settings, locate the option to enable 5.1 channel sound and activate it.
  5. Test the Sound System: Play audio content and verify that all six speakers are functioning correctly.

Troubleshooting Common Issues with Realtek Audio Drivers and 5.1 Channel Sound

While installing and configuring Realtek audio drivers for 5.1 channel sound is generally straightforward, certain issues may arise.

  • Driver Compatibility: Ensure the downloaded drivers are compatible with your specific Windows 11 version and audio hardware.
  • Hardware Connection: Verify that all speakers are properly connected to the sound card and that the connections are secure.
  • Sound Card Settings: Check the sound card settings to ensure that the correct output channels are selected and that 5.1 channel sound is enabled.
  • Windows Sound Settings: Confirm that the correct audio output device is selected in Windows 11 sound settings.
  • Driver Updates: Install the latest Realtek audio driver updates to resolve potential compatibility or performance issues.

FAQs

Q: Can I use Realtek audio drivers for 5.1 channel sound on any computer?
A: Realtek audio drivers work with computers that have a Realtek audio codec integrated into the motherboard or a dedicated sound card.

Q: What if my computer doesn’t have a 5.1 channel sound card?
A: You can still use Realtek audio drivers for stereo sound or consider purchasing an external 5.1 channel sound card to enjoy the full surround sound experience.

Q: How do I know if my computer has a Realtek audio codec?
A: You can check the device manager in Windows 11. Under "Sound, video and game controllers," look for a device named "Realtek High Definition Audio."

Q: What if I’m having trouble installing or configuring the drivers?
A: Consult the Realtek website or your computer manufacturer’s website for detailed installation and troubleshooting guides. You can also seek assistance from online forums or community platforms.

Tips

  • Use the Latest Drivers: Ensure that you are using the latest Realtek audio drivers to take advantage of the latest features and performance enhancements.
  • Test Audio Output: After installing or updating drivers, test the audio output to ensure that all speakers are working correctly.
  • Adjust Audio Settings: Utilize the Realtek audio driver settings to customize the sound output based on your preferences and listening environment.
  • Seek Support: If you encounter any issues, consult the Realtek website, your computer manufacturer’s website, or online forums for support and troubleshooting information.

Conclusion

Realtek audio drivers, particularly those supporting 5.1 channel sound, play a crucial role in delivering a richer and more immersive auditory experience on Windows 11. By enabling seamless communication between the operating system and audio hardware, these drivers unlock the potential for surround sound, enhancing gaming, movie watching, and music listening.

Investing time in understanding and configuring Realtek audio drivers can significantly improve the overall audio experience, transforming your computer into a hub for multi-sensory entertainment and productivity. By following the guidelines and troubleshooting tips outlined in this article, you can harness the power of Realtek audio drivers and enjoy the full potential of 5.1 channel sound on your Windows 11 device.

Realtek audio driver for windows 11 - travelerase How to Download and Install Realtek HD Audio Driver on Windows 11 - YouTube How To Install Realtek HD Audio Driver In Windows 11 - YouTube
How to Download and Update Realtek HD Audio Driver on Windows 10 or Windows 11 โ€“ Malware Removal Realtek Audio Drivers Windows 11 Hp Windows 11 realtek audio driver - kdasecrets
Realtek-high-definition-audio-driver Windows 11 Realtek audio driver for windows 11 - travelerase

Closure

Thus, we hope this article has provided valuable insights into realtek audio driver windows 11 5.1 channel. We hope you find this article informative and beneficial. See you in our next article!

A Deep Dive Into Windows 11 Performance: Understanding The User Experience

A Deep Dive into Windows 11 Performance: Understanding the User Experience

Introduction

With great pleasure, we will explore the intriguing topic related to A Deep Dive into Windows 11 Performance: Understanding the User Experience. Let’s weave interesting information and offer fresh perspectives to the readers.

A Deep Dive into Windows 11 Performance: Understanding the User Experience

Exploring The Features Of Windows 11: A Deep Dive

Windows 11, the latest iteration of Microsoft’s flagship operating system, has been met with a mix of excitement and apprehension. While its new interface and features are appealing, concerns linger regarding its performance compared to its predecessor, Windows 10. This article seeks to provide a comprehensive understanding of Windows 11’s performance, exploring its strengths, weaknesses, and the factors that influence its overall user experience.

The Importance of Performance

Operating system performance is a critical factor influencing user satisfaction and productivity. A responsive, smooth-running system fosters a positive user experience, enabling efficient task completion and a seamless workflow. Conversely, sluggish performance can lead to frustration, delays, and ultimately, reduced productivity.

Factors Influencing Windows 11 Performance

Several key factors play a significant role in determining Windows 11’s performance:

1. Hardware Specifications:

  • Processor (CPU): A powerful CPU is essential for handling demanding tasks like gaming, video editing, and multi-tasking. Windows 11 recommends an 11th Gen Intel Core or AMD Ryzen 3 processor, but higher-end models offer noticeable performance gains.

  • RAM: Adequate RAM is crucial for multitasking and running multiple applications simultaneously. Windows 11 requires at least 4GB of RAM, but 8GB or more is recommended for optimal performance.

  • Storage: A fast storage drive, such as an NVMe SSD, significantly impacts boot times, application loading speeds, and overall system responsiveness. While Windows 11 can run on a traditional HDD, an SSD is highly recommended for a smoother user experience.

  • Graphics Card (GPU): A dedicated GPU is vital for gaming and graphics-intensive tasks. While integrated GPUs are sufficient for basic tasks, a dedicated GPU provides a noticeable boost in performance for demanding applications.

2. Software Optimization:

  • Windows Updates: Regular updates are essential for security and performance improvements. Windows 11 automatically installs updates, but users can schedule updates to minimize disruption.

  • Background Processes: Excessive background processes can consume system resources and slow down performance. Users can manage background processes through Task Manager to prioritize essential tasks and reduce resource consumption.

  • Third-Party Applications: Unnecessary or poorly optimized applications can impact system performance. Regularly reviewing and removing unused applications can free up resources and improve responsiveness.

3. System Configuration:

  • Power Settings: Choosing the appropriate power plan can affect performance. High-performance plans prioritize speed and responsiveness, while power-saving plans prioritize battery life.

  • Visual Effects: Windows 11 offers various visual effects that can enhance the user interface but also consume system resources. Users can adjust visual effects settings to optimize performance based on their needs.

4. User Habits:

  • Multitasking: Excessive multitasking can strain system resources and lead to performance degradation. Users should prioritize tasks and avoid running too many applications simultaneously.

  • Application Usage: Running resource-intensive applications like video editing software or games requires a powerful system. Users should consider their application usage when choosing hardware specifications.

Windows 11 Performance Enhancements

Windows 11 introduces several features designed to improve performance:

  • DirectStorage: This technology allows games to access data directly from the SSD, bypassing the CPU and significantly reducing loading times.

  • Auto HDR: This feature automatically enhances the dynamic range of games, providing richer visuals and a more immersive experience.

  • Windows Sandbox: This feature provides a secure, isolated environment for testing applications or browsing the web without affecting the main system.

  • Task Manager Improvements: The Task Manager in Windows 11 offers enhanced capabilities for monitoring system performance and managing processes.

Performance Benchmarks and Comparisons

Numerous benchmarks and comparisons have been conducted to assess Windows 11’s performance against its predecessor, Windows 10. While some benchmarks show marginal improvements, others indicate a slight performance degradation in certain areas.

Benchmarks typically measure:

  • Boot Time: Windows 11 generally boasts faster boot times compared to Windows 10, particularly on systems with NVMe SSDs.

  • Application Load Times: Windows 11 demonstrates improved application load times, especially for applications optimized for the new operating system.

  • Gaming Performance: Windows 11 generally offers comparable or slightly better gaming performance than Windows 10, with improvements attributed to features like DirectStorage.

  • Multitasking: Windows 11 shows mixed results in multitasking benchmarks, with some tests indicating improved performance, while others show minor degradation.

It’s important to note that benchmark results can vary depending on:

  • Hardware Specifications: Different hardware configurations can significantly impact performance.
  • Software Optimization: The performance of specific applications can vary based on their optimization for Windows 11.
  • Testing Methodology: Different benchmark tools and testing methods can produce varying results.

Performance Issues and Solutions

While Windows 11 offers several performance enhancements, users may encounter issues that affect their experience. Common performance problems include:

  • Slow Boot Times: This could be due to outdated drivers, excessive background processes, or a fragmented hard drive.

  • Application Lag: Lag can be caused by insufficient RAM, outdated drivers, or conflicting applications.

  • System Crashes: Crashes can be triggered by faulty hardware, corrupted files, or incompatible software.

Solutions to performance issues include:

  • Updating Drivers: Regularly updating drivers ensures compatibility and optimizes performance.

  • Managing Background Processes: Identifying and disabling unnecessary background processes can free up system resources.

  • Running Disk Cleanup: Removing temporary files and unused programs can free up disk space and improve performance.

  • Defragmenting the Hard Drive: Defragmenting a hard drive can improve read and write speeds, resulting in faster boot times and application loading.

  • Checking for Malware: Malware can consume system resources and slow down performance. Regularly scanning for malware is essential.

FAQs: Performance on Windows 11

Q: Is Windows 11 faster than Windows 10?

A: While Windows 11 generally offers faster boot times and improved application load times, overall performance comparisons are nuanced. It depends on the specific hardware configuration, software optimization, and user habits.

Q: Does Windows 11 require more RAM than Windows 10?

A: Windows 11 has the same minimum RAM requirement as Windows 10 (4GB), but it’s recommended to have at least 8GB for optimal performance, especially for multitasking and resource-intensive applications.

Q: Will Windows 11 run on my older computer?

A: Windows 11 has minimum hardware requirements that might not be met by older computers. To check compatibility, use the PC Health Check app available on Microsoft’s website.

Q: How can I improve Windows 11 performance?

A: Several strategies can enhance Windows 11 performance, including updating drivers, managing background processes, running disk cleanup, and defragmenting the hard drive.

Tips: Performance on Windows 11

  • Prioritize Hardware: Invest in a powerful CPU, ample RAM, and a fast SSD for optimal performance.
  • Optimize Software: Regularly update drivers, manage background processes, and remove unnecessary applications.
  • Customize Settings: Adjust power settings, visual effects, and other system configurations to suit your needs.
  • Monitor Performance: Use the Task Manager to monitor system resources and identify potential bottlenecks.
  • Clean Up Regularly: Run disk cleanup and defragmentation tools periodically to maintain system health.

Conclusion: Performance on Windows 11

Windows 11 offers several performance improvements compared to its predecessor, particularly in areas like boot times and application load times. However, overall performance is influenced by a multitude of factors, including hardware specifications, software optimization, and user habits. By understanding these factors and implementing appropriate optimization strategies, users can achieve a smooth and efficient Windows 11 experience. It’s crucial to remember that while Windows 11 provides a foundation for good performance, it’s the user’s responsibility to configure and maintain their system effectively to maximize its potential.

Windows 11 Deep Dive - LIVE - YouTube Exploring The Features Of Windows 11: A Deep Dive Feature Deep Dive โ€“ Windows 11 Readiness
Windows 11 deep dive: Checking out the Widgets pane What is Windows 11 in S mode?  Deep Dive Windows 11 Deep Dive: Walking Through The New OS - YouTube
Windows 11 Deep-Dive: Die Neuerungen im รœberblick - WindowsUnited Windows 11: The Optimization and Performance Improvements

Closure

Thus, we hope this article has provided valuable insights into A Deep Dive into Windows 11 Performance: Understanding the User Experience. We thank you for taking the time to read this article. See you in our next article!

Connecting Two PCs: A Comprehensive Guide To Networked Computing

Connecting Two PCs: A Comprehensive Guide to Networked Computing

Introduction

With enthusiasm, let’s navigate through the intriguing topic related to Connecting Two PCs: A Comprehensive Guide to Networked Computing. Let’s weave interesting information and offer fresh perspectives to the readers.

Connecting Two PCs: A Comprehensive Guide to Networked Computing

How to setup a home network between two computers - Network Shelf

In the modern digital landscape, the ability to connect multiple devices seamlessly is paramount. Whether sharing files, collaborating on projects, or accessing shared resources, establishing a network between computers empowers users with a wealth of benefits. This article delves into the intricacies of connecting two PCs, exploring various methods, considerations, and potential challenges, providing a comprehensive guide for individuals and businesses alike.

Understanding Network Types and Connections

Before embarking on the journey of connecting PCs, it’s crucial to understand the different types of networks and connection methods available.

  • Local Area Network (LAN): A LAN typically connects devices within a limited geographical area, such as a home or office. It facilitates high-speed data transfer and resource sharing among connected devices.
  • Wide Area Network (WAN): A WAN connects devices across vast geographical distances, often utilizing public telecommunication infrastructure like the internet.
  • Wired Connections: Wired connections utilize physical cables, primarily Ethernet cables, to transmit data between devices. They offer high speeds, reliability, and stability.
  • Wireless Connections: Wireless connections rely on radio waves to transmit data, eliminating the need for physical cables. While offering flexibility and mobility, wireless connections can be susceptible to interference and may experience slower speeds compared to wired connections.

Methods for Connecting Two PCs

The process of connecting two PCs can be achieved through various methods, each with its own advantages and disadvantages:

1. Wired Connection using Ethernet Cable

  • Advantages: High speed, stability, reliability.

  • Disadvantages: Requires physical cable connection, limited mobility.

  • Steps:

    • Ensure both PCs have Ethernet ports: Most modern PCs come equipped with Ethernet ports.
    • Connect the Ethernet cable: Connect one end of the Ethernet cable to the Ethernet port on the first PC and the other end to the Ethernet port on the second PC.
    • Configure network settings: Configure both PCs to use the same network settings, including IP address, subnet mask, and gateway. This can be done through the Network and Sharing Center in Windows.
    • Verify connectivity: Test the connection by attempting to access shared resources or transferring files between the two PCs.

2. Wireless Connection using Wi-Fi

  • Advantages: Flexibility, mobility, no physical cable required.

  • Disadvantages: Potential for interference, slower speeds compared to wired connections.

  • Steps:

    • Ensure both PCs have Wi-Fi capabilities: Most modern PCs have built-in Wi-Fi adapters.
    • Create a Wi-Fi network: Set up a Wi-Fi network using a router or access point.
    • Connect PCs to the Wi-Fi network: Connect both PCs to the same Wi-Fi network using the appropriate password.
    • Configure network settings: Configure both PCs to use the same network settings, including IP address, subnet mask, and gateway.
    • Verify connectivity: Test the connection by attempting to access shared resources or transferring files between the two PCs.

3. Ad-Hoc Network

  • Advantages: No router required, simple setup.

  • Disadvantages: Limited range, slower speeds, less secure.

  • Steps:

    • Enable wireless network sharing: Enable wireless network sharing on both PCs.
    • Create an ad-hoc network: On one PC, create an ad-hoc network with a specific name and password.
    • Connect the second PC: On the second PC, search for the ad-hoc network and connect using the password.
    • Configure network settings: Ensure both PCs have the same network settings, including IP address, subnet mask, and gateway.
    • Verify connectivity: Test the connection by attempting to access shared resources or transferring files between the two PCs.

4. Using a Network Bridge

  • Advantages: Connects two PCs without a router, can be used for wired or wireless connections.

  • Disadvantages: Requires additional hardware (network bridge), can be more complex to set up.

  • Steps:

    • Connect the network bridge: Connect the network bridge to both PCs using Ethernet cables or wirelessly depending on the bridge type.
    • Configure the network bridge: Configure the network bridge settings to create a connection between the two PCs.
    • Configure network settings: Configure both PCs to use the same network settings, including IP address, subnet mask, and gateway.
    • Verify connectivity: Test the connection by attempting to access shared resources or transferring files between the two PCs.

Considerations for Network Setup

  • Network Security: Implement strong passwords for Wi-Fi networks and enable firewall protection on all devices.
  • Network Performance: Consider using a wired connection for high-speed data transfer or resource-intensive tasks.
  • Resource Sharing: Configure file and printer sharing settings to enable access to shared resources on both PCs.
  • Network Management: Use network monitoring tools to analyze network performance and troubleshoot potential issues.

Troubleshooting Common Network Issues

  • Connectivity Issues: Verify cable connections, check Wi-Fi signal strength, and ensure both PCs are connected to the same network.
  • Network Settings: Double-check IP address configuration, subnet mask, and gateway settings on both PCs.
  • Firewall Settings: Ensure firewall rules are not blocking network traffic between the two PCs.
  • Driver Issues: Update network drivers on both PCs to ensure compatibility and optimal performance.

FAQs about Connecting Two PCs

Q: Can I connect two PCs without a router?
A: Yes, you can connect two PCs directly using an Ethernet cable, an ad-hoc network, or a network bridge.

Q: What is the best way to connect two PCs for file sharing?
A: Wired connections offer the fastest and most reliable method for file sharing. However, wireless connections provide flexibility and mobility.

Q: What are the security risks of connecting two PCs?
A: Connecting PCs to a shared network can expose them to security risks, including unauthorized access, malware infections, and data breaches. It’s crucial to implement strong security measures, such as passwords, firewalls, and anti-virus software.

Q: Can I connect two PCs using Bluetooth?
A: While Bluetooth can be used for short-range data transfer, it is not typically recommended for connecting two PCs for general network use due to its limited speed and bandwidth.

Tips for Connecting Two PCs

  • Use a high-quality Ethernet cable: Opt for a Cat5e or Cat6 cable for optimal performance and reliability.
  • Choose a strong Wi-Fi password: Use a complex password with a combination of uppercase and lowercase letters, numbers, and symbols.
  • Enable network discovery: Enable network discovery on both PCs to facilitate file sharing and resource access.
  • Configure file and printer sharing: Set specific permissions for shared resources to control access and security.
  • Monitor network performance: Regularly check network performance and address any issues promptly.

Conclusion

Connecting two PCs can unlock a world of possibilities, from efficient file sharing and collaborative projects to enhanced productivity and entertainment experiences. Understanding the different methods, considerations, and troubleshooting techniques empowers individuals and businesses to establish reliable and secure network connections. By implementing the steps outlined in this guide, users can successfully connect their PCs, harnessing the power of networked computing to achieve their digital goals.

How to Connect Two Computers Via LAN Cable / Networking Tutorials for Beginners  Video  Ponirevo How to Connect Two Computers [Step-By-Step Guide] How to Network Two Computers - Tech-FAQ
How to Connect two PC using LAN cable - YouTube Basics of Networking - Connecting Two Computers - YouTube How to Connect Two Computers Together with an Ethernet Cable
Connecting Two Computer using Ethernet Cable #LAN Connection #networking - YouTube Computer Network Guide 101: Connecting Two Computers Using Switch

Closure

Thus, we hope this article has provided valuable insights into Connecting Two PCs: A Comprehensive Guide to Networked Computing. We appreciate your attention to our article. See you in our next article!

Windows 11: A Comprehensive Look At The Pros And Cons

Windows 11: A Comprehensive Look at the Pros and Cons

Introduction

With enthusiasm, let’s navigate through the intriguing topic related to Windows 11: A Comprehensive Look at the Pros and Cons. Let’s weave interesting information and offer fresh perspectives to the readers.

Windows 11: A Comprehensive Look at the Pros and Cons

See the Guide on Pros and Cons of Windows 11 & How to Upgrade

Microsoft’s Windows 11, released in October 2021, represents a significant evolution from its predecessor. It boasts a refreshed user interface, enhanced security features, and improved performance. However, it also introduces changes that may not appeal to all users. This article provides a comprehensive analysis of the advantages and disadvantages of installing Windows 11, enabling informed decision-making.

Pros of Installing Windows 11:

1. Enhanced User Interface: Windows 11 features a modern and streamlined design with rounded corners, a centered taskbar, and a simplified Start menu. This aesthetic overhaul provides a visually appealing and intuitive user experience, particularly for users familiar with mobile operating systems. The redesigned interface prioritizes visual clarity and ease of navigation, making it easier to find the necessary applications and settings.

2. Improved Performance: Windows 11 incorporates various performance enhancements, including a more efficient use of system resources and optimized application launch times. The operating system leverages the latest hardware capabilities, resulting in smoother multitasking and faster application responsiveness. These improvements are particularly noticeable on devices with powerful processors and ample RAM, leading to a more enjoyable computing experience.

3. Enhanced Security Features: Windows 11 strengthens security measures with features like Windows Hello for facial and fingerprint recognition, Microsoft Defender Antivirus with improved malware detection, and a secure boot process. These enhancements provide a robust defense against cyber threats and protect sensitive data. The integration of security features into the operating system itself ensures comprehensive protection without requiring additional software installations.

4. Improved Gaming Experience: Windows 11 incorporates features specifically designed to enhance the gaming experience. These include DirectStorage, which allows games to load faster by directly accessing storage devices, and Auto HDR, which automatically enhances the visual fidelity of games by applying HDR effects. These features, combined with the overall performance improvements, create a more immersive and enjoyable gaming experience.

5. Integration with Android Apps: Windows 11 introduces the ability to run Android applications directly on the desktop through the Amazon Appstore. This feature allows users to access a vast library of mobile applications, expanding the functionality and versatility of the operating system. The integration of Android apps provides a seamless transition between mobile and desktop environments, enhancing productivity and convenience.

Cons of Installing Windows 11:

1. System Requirements: Windows 11 has stringent system requirements, including a minimum of 4GB RAM, a 64-bit processor, and a TPM 2.0 chip. These requirements may exclude older computers from upgrading to Windows 11, forcing users to consider purchasing new hardware or remaining on Windows 10.

2. Compatibility Issues: While Microsoft strives for compatibility, some older applications and peripherals may not function correctly with Windows 11. This can be a significant issue for users heavily reliant on specific software or hardware. It is crucial to ensure compatibility before upgrading, as compatibility issues can lead to productivity losses and frustration.

3. Reduced Customization Options: Windows 11 offers fewer customization options compared to its predecessor. The removal of features like the ability to move the taskbar to the top or sides of the screen and the limited customization of the Start menu may be a drawback for users who prefer a highly personalized experience.

4. Privacy Concerns: Like any operating system, Windows 11 collects user data for various purposes, including diagnostics and personalization. While Microsoft emphasizes data privacy, some users may be concerned about the amount of data collected and its potential use. It is essential to carefully review privacy settings and understand the data collection practices before upgrading.

5. Frequent Updates: Windows 11 receives frequent updates, which can be disruptive to workflow and require significant download times. While these updates aim to improve stability and security, they can also introduce new bugs or compatibility issues.

FAQs on Installing Windows 11:

1. Can I upgrade from Windows 10 to Windows 11?

Yes, you can upgrade from Windows 10 to Windows 11 if your computer meets the minimum system requirements. However, it is recommended to back up your data before upgrading to avoid data loss.

2. Will my existing applications work with Windows 11?

Most applications will work with Windows 11, but some older applications may require updates or may not be compatible. It is recommended to check the compatibility of your essential applications before upgrading.

3. Is Windows 11 free to install?

Yes, Windows 11 is free to install for users with a valid Windows 10 license. However, you may need to purchase a new license if you are upgrading from an older version of Windows or if you are installing Windows 11 on a new computer.

4. Is Windows 11 secure?

Windows 11 incorporates robust security features, including Windows Hello, Microsoft Defender Antivirus, and secure boot. These features provide comprehensive protection against cyber threats.

5. How much storage space does Windows 11 require?

Windows 11 requires at least 64GB of storage space, but it is recommended to have at least 128GB for optimal performance.

Tips for Installing Windows 11:

1. Check System Requirements: Before upgrading, ensure your computer meets the minimum system requirements for Windows 11. This step prevents potential compatibility issues and ensures a smooth installation process.

2. Back Up Your Data: Before upgrading, back up all important data to avoid potential data loss. This can be done by using a cloud storage service, an external hard drive, or a USB flash drive.

3. Check Application Compatibility: Verify the compatibility of your essential applications with Windows 11. This step minimizes the risk of encountering issues after upgrading.

4. Review Privacy Settings: Carefully review the privacy settings in Windows 11 and adjust them according to your preferences. This step helps control the data collected by the operating system.

5. Consider a Clean Install: For a fresh start and to avoid potential compatibility issues, consider performing a clean install of Windows 11. This involves formatting the hard drive and installing Windows 11 from scratch.

Conclusion:

Windows 11 offers a range of improvements, including a modern user interface, enhanced performance, and improved security features. However, it also introduces changes that may not appeal to all users, such as stringent system requirements, reduced customization options, and potential compatibility issues. Ultimately, the decision to install Windows 11 depends on individual needs and preferences. By carefully weighing the pros and cons, users can make an informed decision regarding whether Windows 11 is the right operating system for them.

Windows 11 Pros and Cons - i-Sapna Windows 11: PROS AND CONS The Good & The Bad for Windows 11 - YouTube Should You Upgrade to Windows 11? Pros and Cons  Candid.Technology - YouTube
Windows 11 Pros And Cons: Is It Worth Upgrading In 2023? - Techjustify Differences between Windows 11 Pro and Windows 11 Home - Licendi Introducing Windows 11: Pros and Cons  Entertainment  fauquiernow.com
Worth it to Upgrade to Windows 11? Pros and cons 2022. Windows 11 vs Windows 10 Windows 11 Pros and Cons - PortalViral.Co

Closure

Thus, we hope this article has provided valuable insights into Windows 11: A Comprehensive Look at the Pros and Cons. We hope you find this article informative and beneficial. See you in our next article!

Seamless Sharing In The Digital Age: Exploring The Power Of Windows 10’s Nearby Sharing Feature

Seamless Sharing in the Digital Age: Exploring the Power of Windows 10’s Nearby Sharing Feature

Introduction

In this auspicious occasion, we are delighted to delve into the intriguing topic related to Seamless Sharing in the Digital Age: Exploring the Power of Windows 10’s Nearby Sharing Feature. Let’s weave interesting information and offer fresh perspectives to the readers.

Seamless Sharing in the Digital Age: Exploring the Power of Windows 10’s Nearby Sharing Feature

Seamless File Sharing: Google Nearby Share for Windows

In the interconnected world we inhabit, the ability to effortlessly share files, photos, and even entire folders between devices has become a cornerstone of digital productivity. Windows 10, recognizing this need, introduced a powerful and intuitive feature called "Nearby Sharing," enabling users to transfer data seamlessly between compatible devices within close proximity. This article delves into the intricacies of Nearby Sharing, exploring its functionality, benefits, and potential applications, highlighting its significance in enhancing user experience and fostering collaboration in the digital realm.

Understanding the Mechanism of Nearby Sharing

Nearby Sharing, a component of Windows 10’s connectivity suite, operates on the principles of Bluetooth and Wi-Fi Direct technology. This allows for a secure and efficient transfer of data between nearby devices without the need for an internet connection or external cloud services. The process is remarkably straightforward:

  1. Device Discovery: When enabled, Nearby Sharing broadcasts a signal that allows other nearby devices to detect its presence. This discovery phase relies on the Bluetooth protocol, ensuring a secure and reliable connection.
  2. Pairing and Connection: Upon detecting a compatible device, the user can initiate a connection by selecting the desired recipient. Windows 10 utilizes Wi-Fi Direct for the actual data transfer, leveraging the higher bandwidth and speed of this technology for faster file transfers.
  3. Data Transfer: Once the connection is established, the user can select the files or folders they wish to share. The data is then securely transmitted to the recipient device, ensuring privacy and integrity.

Benefits of Nearby Sharing

The ease of use and versatility of Nearby Sharing translate into a multitude of benefits for Windows 10 users:

  • Simplified File Transfers: Eliminating the need for cumbersome external drives or cloud storage services, Nearby Sharing offers a streamlined and convenient method for transferring files between devices. This is particularly useful for sharing large files, such as high-resolution photos, videos, or documents, where traditional methods can be time-consuming and inefficient.
  • Enhanced Collaboration: Nearby Sharing fosters seamless collaboration by facilitating the quick and easy sharing of files between colleagues or classmates working on projects. This can significantly improve workflow efficiency and accelerate project completion.
  • Increased Productivity: The ability to share files effortlessly across devices empowers users to access and work on their files from any location. This flexibility increases productivity by allowing for seamless transitions between devices without interruptions.
  • Secure Data Transfer: Unlike traditional file-sharing methods that rely on external servers or cloud storage, Nearby Sharing utilizes secure protocols, ensuring the privacy and integrity of shared data. This is particularly relevant in situations where sensitive information needs to be transferred.

Applications of Nearby Sharing

The versatility of Nearby Sharing extends beyond simple file transfers, finding its application in various scenarios:

  • Personal Use: Sharing photos and videos with friends and family, transferring documents between personal devices, or sharing music playlists between devices are just some examples of how Nearby Sharing enhances personal use cases.
  • Professional Settings: In professional environments, Nearby Sharing can facilitate collaborative projects, allowing team members to share large files, presentations, or project documents quickly and securely.
  • Educational Institutions: Students can utilize Nearby Sharing to share assignments, research materials, or group projects with classmates, fostering a collaborative learning environment.
  • Creative Collaboration: Artists, designers, and other creative professionals can leverage Nearby Sharing to share large design files, sketches, or project updates with collaborators, streamlining their creative workflow.

Frequently Asked Questions (FAQs)

Q: What devices are compatible with Nearby Sharing?

A: Nearby Sharing is compatible with Windows 10 devices that have Bluetooth and Wi-Fi Direct capabilities. This includes laptops, desktops, tablets, and even some printers.

Q: How secure is Nearby Sharing?

A: Nearby Sharing utilizes Bluetooth and Wi-Fi Direct protocols, both of which are secure communication technologies. Data transfer is encrypted, ensuring privacy and integrity.

Q: Can I share files with devices outside of my network?

A: Nearby Sharing requires both devices to be within close proximity and on the same network. It does not support sharing files with devices on different networks.

Q: What types of files can I share with Nearby Sharing?

A: Nearby Sharing can handle various file types, including documents, images, videos, music, and even folders.

Q: How can I enable or disable Nearby Sharing?

A: You can enable or disable Nearby Sharing by navigating to "Settings > System > Shared experiences" on your Windows 10 device.

Tips for Utilizing Nearby Sharing Effectively

  • Ensure Devices are Discoverable: Enable "Nearby Sharing" on both devices to ensure they can detect each other.
  • Confirm Device Compatibility: Verify that both devices are compatible with Nearby Sharing.
  • Keep Devices in Close Proximity: Nearby Sharing requires both devices to be within close range for successful data transfer.
  • Check for Updates: Ensure both devices are running the latest versions of Windows 10 to benefit from the latest features and improvements.
  • Monitor Data Transfer Progress: Pay attention to the transfer progress indicator to ensure a successful transfer.

Conclusion

Windows 10’s Nearby Sharing feature stands as a testament to the power of modern technology in simplifying everyday tasks. Its intuitive design, secure protocols, and versatile applications make it a valuable tool for individuals and businesses alike. By streamlining file transfers, facilitating collaboration, and enhancing productivity, Nearby Sharing plays a crucial role in shaping the future of digital communication and collaboration. As technology continues to evolve, Nearby Sharing is poised to become an indispensable part of the digital ecosystem, empowering users to connect and share with ease and efficiency.

How to Use Nearby Sharing to Share Files in Windows 10 How to Use Nearby Sharing in Windows 10 How to Use Nearby Sharing on Windows 10
How Windows 10's Near Share feature wirelessly beams files to nearby PCs  PCWorld How to use Nearby sharing on Windows 10 or 11 and Microsoft Edge - YouTube How to Use Nearby Sharing on Windows 10
How to Use Nearby Sharing in Windows 10 Use Nearby sharing in Windows 10  HUAWEI Support Global

Closure

Thus, we hope this article has provided valuable insights into Seamless Sharing in the Digital Age: Exploring the Power of Windows 10’s Nearby Sharing Feature. We appreciate your attention to our article. See you in our next article!

Seamless Sharing: Exploring The Benefits Of Windows 11’s "Nearby Share" Feature

Seamless Sharing: Exploring the Benefits of Windows 11’s "Nearby Share" Feature

Introduction

In this auspicious occasion, we are delighted to delve into the intriguing topic related to Seamless Sharing: Exploring the Benefits of Windows 11’s "Nearby Share" Feature. Let’s weave interesting information and offer fresh perspectives to the readers.

Seamless Sharing: Exploring the Benefits of Windows 11’s "Nearby Share" Feature

Seamless File Sharing: Google Nearby Share for Windows

In the contemporary digital landscape, the ability to effortlessly share files and content between devices is paramount. Windows 11 introduces a powerful tool for achieving this seamless connectivity: "Nearby Share." This feature, inspired by the success of Android’s "Nearby Share" app, empowers users to quickly and securely transfer files, images, links, and even text between compatible devices within close proximity.

Understanding the Mechanics of Nearby Share

At its core, Nearby Share operates on the principles of Bluetooth and Wi-Fi Direct, establishing a direct connection between devices without relying on internet connectivity. This direct connection ensures swift and secure data transfer, minimizing the time and effort involved in sharing content.

The Advantages of Utilizing Nearby Share

  1. Simplicity and Convenience: Nearby Share significantly simplifies the process of file sharing. Users can effortlessly transfer files between their Windows 11 devices and compatible Android phones or tablets with just a few clicks. No complex configurations or cloud storage services are required, streamlining the entire process.

  2. Enhanced Security: Data transferred via Nearby Share is protected through encryption, ensuring that the content remains secure and inaccessible to unauthorized individuals. This robust security measure provides peace of mind for users sharing sensitive information.

  3. Increased Efficiency: Nearby Share eliminates the need for cumbersome file-sharing methods like email attachments or external drives. The direct connection between devices enables rapid transfers, saving valuable time and effort.

  4. Broader Device Compatibility: While primarily designed for seamless integration between Windows 11 and Android devices, Nearby Share also supports file transfers between compatible Windows 11 devices. This expanded compatibility further enhances the feature’s versatility.

Navigating the Nearby Share Setup Process

Setting up Nearby Share on a Windows 11 device is a straightforward process:

  1. Enable Bluetooth and Wi-Fi: Ensure that both Bluetooth and Wi-Fi are activated on the device.

  2. Access the Settings Menu: Navigate to the "Settings" app on the Windows 11 device.

  3. Locate the "Connected devices" Section: Within the "Settings" menu, locate the "Connected devices" section.

  4. Activate "Nearby Share": Select "Nearby Share" and enable the feature.

  5. Choose Sharing Preferences: Configure the sharing preferences, including the types of content to share and the visibility of the device to other Nearby Share users.

Exploring the Capabilities of Nearby Share

Nearby Share offers a wide range of functionalities to enhance the sharing experience:

  1. File Transfers: Transfer various file types, including documents, images, videos, and audio files, between compatible devices.

  2. Link Sharing: Share web links, URLs, and other online resources effortlessly.

  3. Text Sharing: Transfer short text messages or snippets of information between devices.

  4. Device Discovery: Nearby Share allows users to discover and connect with other compatible devices within proximity.

Frequently Asked Questions about Nearby Share

  • Q: What devices are compatible with Nearby Share?

    • A: Nearby Share is compatible with Windows 11 devices and Android devices running Android 6.0 (Marshmallow) or later.
  • Q: Does Nearby Share require internet connectivity?

    • A: No, Nearby Share utilizes Bluetooth and Wi-Fi Direct, enabling direct connections between devices without relying on internet access.
  • Q: Is Nearby Share secure?

    • A: Yes, Nearby Share employs encryption to protect data during transfer, ensuring security and privacy.
  • Q: How can I troubleshoot Nearby Share issues?

    • A: Ensure both devices have Bluetooth and Wi-Fi enabled. Check for software updates on both devices. Restart both devices and try again.
  • Q: Can I use Nearby Share to share files with non-compatible devices?

    • A: Currently, Nearby Share primarily supports transfers between Windows 11 and Android devices. Sharing with other operating systems may require alternative methods.

Tips for Optimizing Nearby Share

  • Maintain Close Proximity: Ensure the devices are within a reasonable distance for optimal connection.

  • Keep Bluetooth and Wi-Fi Enabled: Ensure both Bluetooth and Wi-Fi are activated on both devices for seamless connectivity.

  • Update Software Regularly: Update both Windows 11 and Android devices to the latest software versions for improved compatibility and performance.

  • Clear Background Processes: Close unnecessary background applications and processes to minimize potential interference with Nearby Share.

  • Check for Device Compatibility: Verify that both devices are compatible with Nearby Share before attempting file transfers.

Conclusion

Windows 11’s "Nearby Share" feature represents a significant advancement in seamless file sharing, offering simplicity, security, and efficiency. By leveraging Bluetooth and Wi-Fi Direct, Nearby Share enables rapid and secure data transfer between compatible devices, eliminating the need for cumbersome traditional methods. As technology continues to evolve, features like Nearby Share will play an increasingly vital role in enhancing the user experience and fostering seamless connectivity across diverse devices.

How to Use Nearby Sharing on Windows 11?  Gear Up Windows How to Use Nearby Sharing on Windows 11 Nearby Share is Finally Available on Windows, Allowing for a Seamless File Sharing Experience
How to Use Nearby Sharing on Windows 11?  Gear Up Windows How To Use Nearby Share In Windows 11_best Methods - Rayabaan Nearby share for pc  nearby share windows 11  android to pc file transfer  how to use nearby
What is Nearby Sharing in Windows 11, How Does it Work? -TECHNIG How to Enable Nearby Sharing in Windows 11?  Gear Up Windows

Closure

Thus, we hope this article has provided valuable insights into Seamless Sharing: Exploring the Benefits of Windows 11’s "Nearby Share" Feature. We thank you for taking the time to read this article. See you in our next article!