Archives December 2023

Outil Windows 11 Pro

outil windows 11 pro

Introduction

With great pleasure, we will explore the intriguing topic related to outil windows 11 pro. Let’s weave interesting information and offer fresh perspectives to the readers.

It appears you’re asking for an article about "outil windows 11 pro". However, "outil" is not a recognized term in the context of Windows 11 Pro. It’s possible this is a misspelling or a specific term used within a particular community or context.

Windows 11 : l'outil de vérification installé d'office dans une mise à jour

To provide you with a comprehensive and accurate article, I need clarification on what you mean by "outil windows 11 pro". Please provide more information about what you’re looking for, such as:

  • What is the intended meaning of "outil"? Is it a specific software tool, a feature within Windows 11 Pro, or a different term entirely?
  • What are the key aspects you want to focus on? Are you looking for an overview of Windows 11 Pro, a specific feature, or its benefits in a particular use case?
  • What is the target audience for this article? Are you aiming for technical users, general users, or a specific industry?

Once you provide this information, I can create an informative and engaging article about Windows 11 Pro, addressing the specific points you’re interested in.

Windows 11 : comment bien configurer l’Outil Capture d’écran Comment ouvrir les outils Windows dans Windows 11 [4 Easy Ways] - Dunouveautech Microsoft Windows 11 Pro
Nouveaux outils Microsoft pour le passage des entreprises à Windows 11 - ITdaily. How to Open Windows Tools in Windows 11 Pro Tools Install Windows 11 �������� - YouTube
6 meilleures façons d'accéder aux outils Windows sur Windows 11 WINDOWS 11 – Pro  TheFireIsReal

Closure

Thus, we hope this article has provided valuable insights into outil windows 11 pro. We hope you find this article informative and beneficial. See you in our next article!

Sharing Made Simple: Exploring Windows 11’s "Nearby Share" Feature

Sharing Made Simple: Exploring Windows 11’s "Nearby Share" Feature

Introduction

With great pleasure, we will explore the intriguing topic related to Sharing Made Simple: Exploring Windows 11’s "Nearby Share" Feature. Let’s weave interesting information and offer fresh perspectives to the readers.

Sharing Made Simple: Exploring Windows 11’s "Nearby Share" Feature

How to Use Nearby Sharing on Windows 11

Windows 11 introduces a convenient and versatile feature called "Nearby Share" that streamlines the process of sharing files, links, and other content between nearby Windows devices. This feature, similar to Apple’s AirDrop, leverages Bluetooth and Wi-Fi to establish a secure connection between devices, enabling users to transfer data quickly and effortlessly.

Understanding the Mechanics of Nearby Share

Nearby Share operates on a principle of proximity and discovery. When a user activates Nearby Share on their Windows 11 device, it broadcasts a signal that other nearby devices with Nearby Share enabled can detect. This signal allows devices to establish a secure connection, facilitating the transfer of data.

The process involves the following steps:

  1. Device Discovery: When a user initiates a sharing action, Nearby Share searches for compatible devices within range.
  2. Connection Establishment: Once a compatible device is detected, Nearby Share establishes a secure connection through Bluetooth and Wi-Fi.
  3. Data Transfer: The selected content is transferred securely over the established connection.
  4. Confirmation: Both the sending and receiving devices receive confirmation once the transfer is complete.

Benefits of Using Nearby Share

Nearby Share offers numerous advantages for Windows 11 users, making it a valuable tool for seamless file sharing:

  • Simplicity and Ease of Use: The intuitive interface and straightforward process make sharing content effortless.
  • Speed and Efficiency: Transfers are generally fast, particularly for smaller files, due to the use of Bluetooth and Wi-Fi.
  • Security: Nearby Share employs secure connections, ensuring that data is transferred privately and protected from unauthorized access.
  • Versatility: It supports a wide range of content types, including files, links, photos, videos, and more.
  • Cross-Device Compatibility: Nearby Share facilitates sharing between various Windows 11 devices, including laptops, desktops, and tablets.

Setting Up and Using Nearby Share

Setting up Nearby Share on a Windows 11 device is a straightforward process:

  1. Navigate to Settings: Open the Windows Settings app by pressing the Windows key + I.
  2. Select "System": Click on the "System" option in the left-hand menu.
  3. Choose "Shared experiences": Locate the "Shared experiences" section and click on it.
  4. Enable Nearby Share: Toggle the "Nearby Share" switch to the "On" position.
  5. Configure Settings: Customize the Nearby Share settings, such as the visibility of your device to other users and the types of content you are willing to share.

To share content using Nearby Share:

  1. Select the content: Choose the file, link, or other content you wish to share.
  2. Initiate the sharing action: Right-click on the selected content and choose the "Share" option.
  3. Select the receiving device: Choose the desired device from the list of nearby devices displayed.
  4. Confirm the transfer: Confirm the transfer on both the sending and receiving devices.

Addressing Common Questions

Q: What devices are compatible with Nearby Share?

A: Nearby Share is compatible with Windows 11 devices. It is not currently compatible with other operating systems like macOS or Android.

Q: How secure is Nearby Share?

A: Nearby Share uses secure connections through Bluetooth and Wi-Fi, ensuring that data is transferred privately and protected from unauthorized access.

Q: Can I control who can see my device on Nearby Share?

A: Yes, you can customize the visibility of your device by choosing the "Everyone" or "My devices" option in the Nearby Share settings.

Q: How far away can devices be for Nearby Share to work?

A: The range of Nearby Share depends on the signal strength of the Bluetooth and Wi-Fi connections. Typically, devices should be within a reasonable proximity for the feature to function.

Q: Can I share large files using Nearby Share?

A: While Nearby Share can transfer files of various sizes, it is generally more suitable for smaller files. For larger files, consider using other methods like cloud storage or external drives.

Tips for Using Nearby Share Effectively

  • Ensure both devices have Nearby Share enabled: Verify that both the sending and receiving devices have Nearby Share activated.
  • Check for compatibility: Ensure that the receiving device is compatible with the content you are sharing.
  • Optimize device proximity: Ensure that devices are within a reasonable distance for the feature to function effectively.
  • Manage visibility settings: Adjust the visibility settings to control who can see your device on Nearby Share.

Conclusion

Nearby Share is a valuable addition to Windows 11, offering a simple, secure, and efficient way to share content between nearby devices. Its ease of use, speed, and versatility make it a practical and convenient tool for users who frequently share files, links, and other data. As Windows 11 evolves, Nearby Share is likely to become an even more integral part of the user experience, further enhancing the seamless sharing of content across the Windows ecosystem.

How to Use Nearby Sharing on Windows 11?  Gear Up Windows How to Use Nearby Sharing on Windows 11?  Gear Up Windows How To Use Nearby Sharing On Windows 11  digisrun
How to Enable Nearby Sharing in Windows 11?  Gear up Windows 11 & 10 How to Enable Nearby Sharing in Windows 11?  Gear Up Windows How to enable and use Nearby Sharing on Windows 11/10
How To Use Nearby Sharing On Windows 11  digisrun Nearby share for pc  nearby share windows 11  android to pc file transfer  how to use nearby

Closure

Thus, we hope this article has provided valuable insights into Sharing Made Simple: Exploring Windows 11’s "Nearby Share" Feature. We appreciate your attention to our article. See you in our next article!

Beyond The Curves: Exploring The Customization Of Windows 11’s Design

Beyond the Curves: Exploring the Customization of Windows 11’s Design

Introduction

With enthusiasm, let’s navigate through the intriguing topic related to Beyond the Curves: Exploring the Customization of Windows 11’s Design. Let’s weave interesting information and offer fresh perspectives to the readers.

Beyond the Curves: Exploring the Customization of Windows 11’s Design

Our first look at Windows 11's new tool to customize desktop background

Windows 11, upon its release, introduced a visual overhaul marked by rounded corners, a design element that has generated significant discussion among users. While many embrace this aesthetic change, others find it disruptive to their workflow or simply prefer the more traditional rectangular look of previous Windows versions. This article explores the options available for modifying this design element, delving into the reasons behind the shift, and addressing the potential benefits and drawbacks of altering Windows 11’s visual style.

The Rounded Corners: A Design Choice with Purpose

The adoption of rounded corners in Windows 11 is not merely a cosmetic choice. Microsoft’s design team aimed to create a more modern and user-friendly interface by incorporating this element. The rationale behind this decision stems from several factors:

  • Enhanced Visual Appeal: Rounded corners contribute to a softer, more visually appealing interface, potentially reducing visual fatigue during prolonged screen time.
  • Improved Navigation: The rounded edges, particularly on windows and buttons, can subtly guide the user’s eye and encourage interaction, potentially improving navigation efficiency.
  • Consistency with Modern Design Trends: Rounded corners have become prevalent in contemporary design, aligning Windows 11 with a broader aesthetic shift observed across various digital platforms.

However, this design choice has sparked debate, with some users finding it aesthetically jarring or hindering their workflow. The rounded corners can, in certain situations, obscure crucial elements like buttons or text, particularly for users accustomed to the rectangular design of previous Windows versions.

Modifying the Interface: Exploring Customization Options

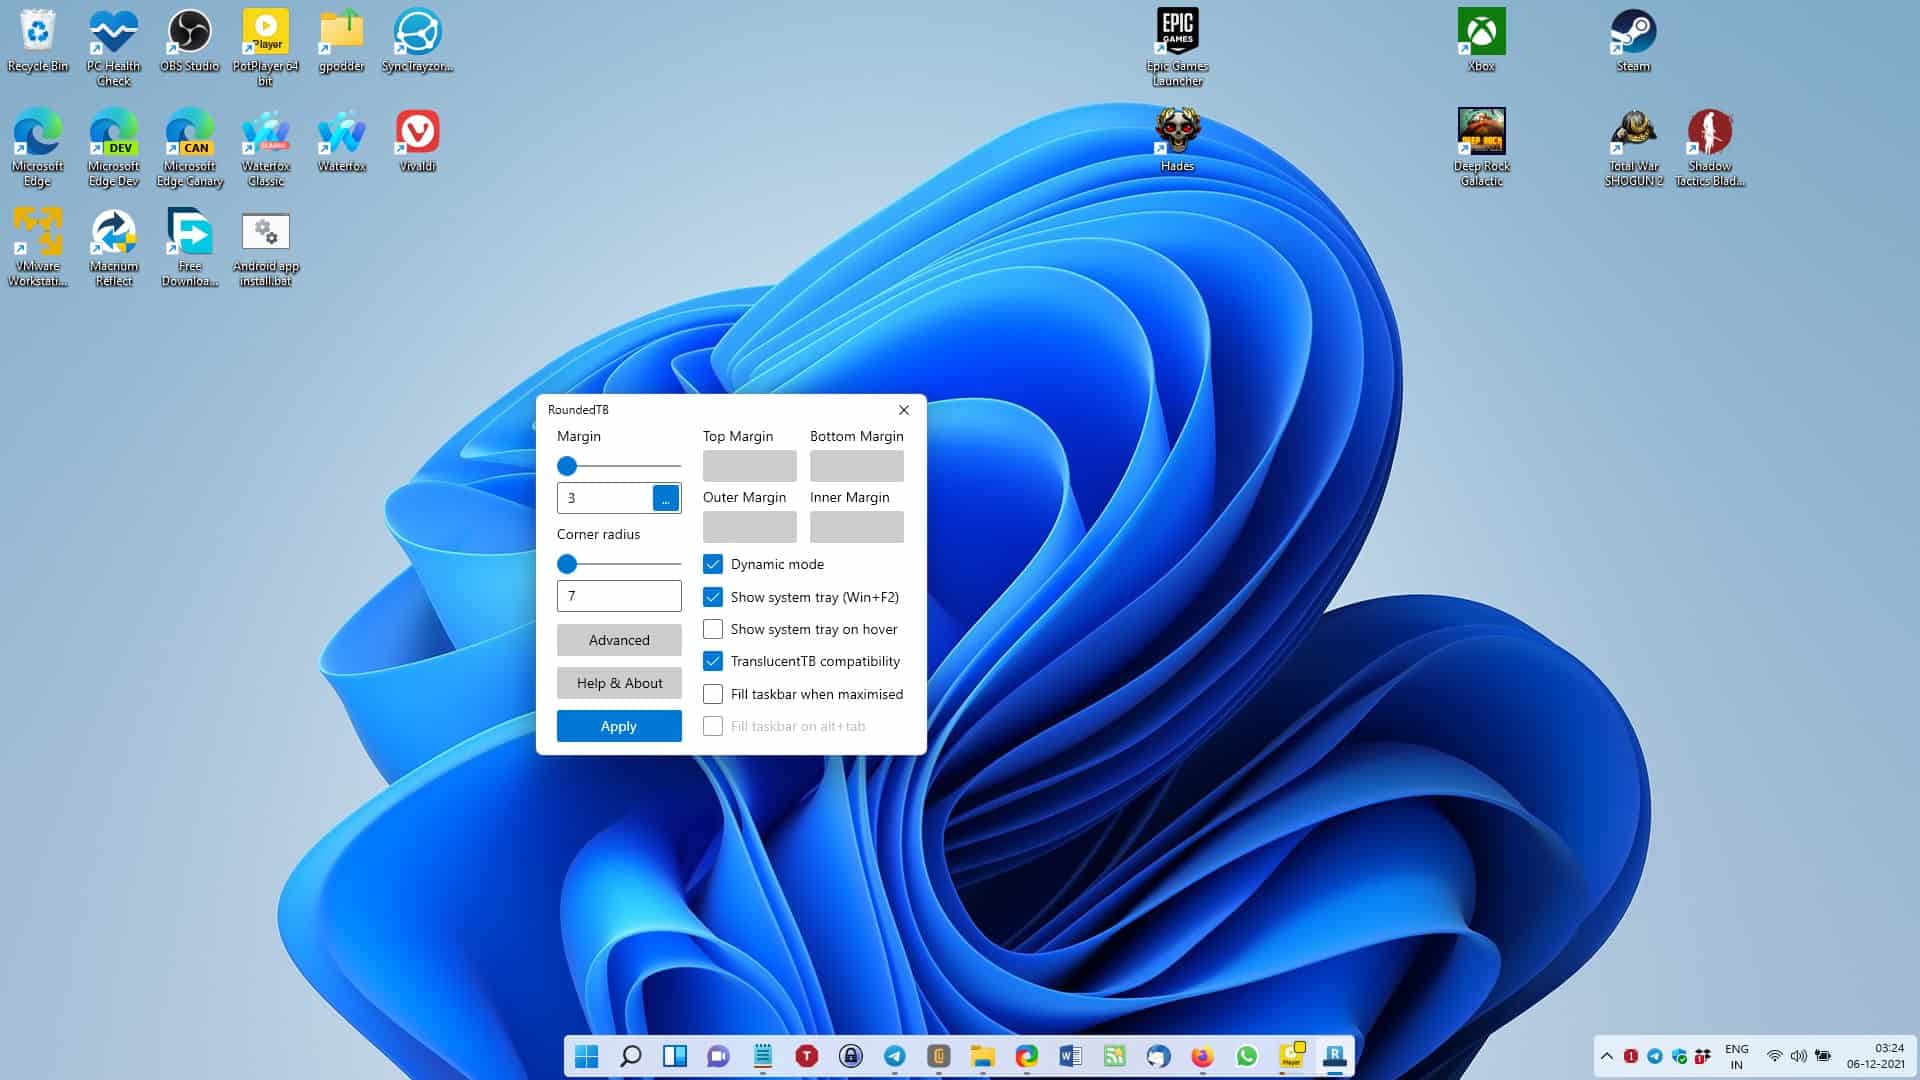
While Windows 11 does not offer a built-in option to directly eliminate rounded corners, various methods can achieve a similar visual effect. These methods range from third-party applications to tweaking system settings, each with its own level of complexity and potential impact on system stability.

1. Third-Party Applications:

Several third-party applications specialize in customizing the Windows interface, including the ability to adjust or remove rounded corners. These applications typically offer a user-friendly interface and a wide range of customization options. However, using such applications can introduce potential security risks if not sourced from reputable developers.

2. System Registry Tweaks:

Advanced users can directly modify the Windows registry to alter the appearance of rounded corners. This method requires a thorough understanding of the registry and carries a risk of system instability if not performed correctly. It is essential to create a system restore point before attempting any registry modifications.

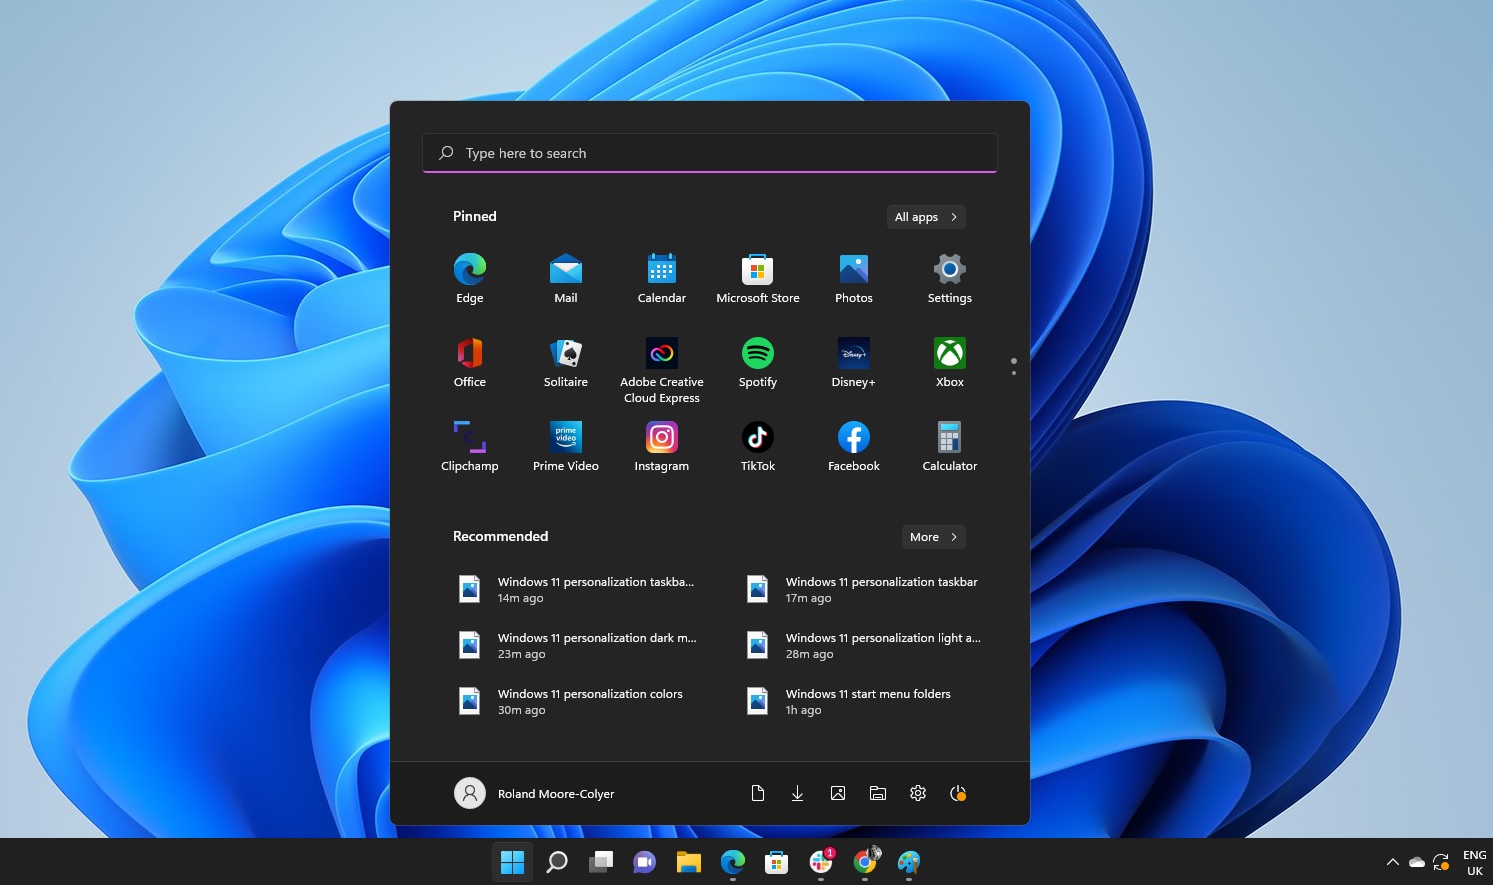
3. Windows 11 Themes:

While not directly addressing rounded corners, custom themes can significantly alter the visual appearance of Windows 11. These themes can change colors, fonts, and other design elements, potentially creating a visual experience closer to the user’s preference.

4. Utilizing Windows 11’s Built-in Features:

While not eliminating rounded corners entirely, Windows 11 provides some built-in features that can minimize their impact:

  • High Contrast Mode: This mode alters the color scheme of the interface, making text and icons more visible, potentially reducing the visual prominence of rounded corners.
  • Zoom Feature: Magnifying the display can minimize the visual impact of rounded corners, making them less noticeable.

Understanding the Trade-offs: Benefits and Drawbacks

Modifying Windows 11’s design, particularly by eliminating rounded corners, involves considering the potential benefits and drawbacks.

Benefits:

  • Improved Visual Clarity: For users who find rounded corners distracting or obstructive, eliminating them can enhance the clarity of the interface, particularly for tasks requiring precise visual information.
  • Increased Familiarity: Users accustomed to the rectangular design of previous Windows versions might find the familiar visual language more comfortable and efficient.
  • Enhanced Productivity: Some users might find that the lack of rounded corners improves their focus and workflow, particularly for tasks requiring meticulous visual attention.

Drawbacks:

  • Potential for Instability: Modifying system settings, especially the registry, can lead to system instability or errors.
  • Compatibility Issues: Third-party applications might not be compatible with all Windows 11 versions or updates, potentially causing conflicts or malfunctions.
  • Loss of Modern Aesthetic: Removing rounded corners might detract from the modern visual appeal of Windows 11, potentially creating a less visually engaging user experience.

Ultimately, the decision to modify Windows 11’s design, including the removal of rounded corners, is a personal one. Users should carefully consider the potential benefits and drawbacks, weigh their individual preferences, and take necessary precautions to avoid system instability.

FAQs: Addressing Common Concerns

1. Can I completely remove rounded corners from Windows 11 without using third-party applications?

While there are no built-in options for direct removal, advanced users can modify the Windows registry to achieve a similar effect. However, this method requires a thorough understanding of the registry and carries a risk of system instability if not performed correctly.

2. Are there any risks associated with using third-party applications to modify rounded corners?

Using third-party applications can introduce potential security risks if not sourced from reputable developers. Always download applications from trusted sources and carefully review user reviews before installation.

3. Will removing rounded corners affect the performance of Windows 11?

Modifying rounded corners should not significantly impact system performance. However, using third-party applications or making registry changes can potentially cause system instability if not performed correctly.

4. Can I revert the changes if I decide to keep the rounded corners?

Yes, depending on the method used. System registry changes can usually be reversed by restoring a system restore point created before the modification. Third-party applications typically provide options to undo changes or revert to default settings.

Tips for Modifying Rounded Corners in Windows 11

  • Back Up Your System: Create a system restore point before making any significant changes to the system settings or installing third-party applications.
  • Research Thoroughly: Carefully research and select reputable third-party applications, ensuring compatibility with your Windows 11 version.
  • Proceed with Caution: When making registry modifications, exercise extreme caution and only change values you understand fully.
  • Consider Alternatives: Explore alternative methods like using high contrast mode or the zoom feature before resorting to more complex modifications.

Conclusion: Embracing Customization and Personalization

Windows 11 offers a range of customization options, allowing users to personalize their experience beyond the default settings. While rounded corners might be an integral part of Windows 11’s visual identity, users have the flexibility to explore alternative options and adapt the interface to their individual preferences. Whether embracing the modern aesthetic or preferring a more traditional look, users can tailor their Windows 11 experience to suit their needs and workflow, creating a personalized and efficient digital environment.

Windows 11 Customization My Windows 11  Windows 11 Customization  Windows 11 Glass Effect - YouTube Windows 11 Customized
Windows 11 custom theme testing  by Mykou on DeviantArt How to customize Windows 11 Taskbar area - YouTube Customize the Windows 11 taskbar, transform it into a dock with RoundedTB - gHacks Tech News
How to customize the Windows 11 Start menu  Tom's Guide Windows 11 Customized

Closure

Thus, we hope this article has provided valuable insights into Beyond the Curves: Exploring the Customization of Windows 11’s Design. We appreciate your attention to our article. See you in our next article!

Navigating The Evolving Landscape: A Comprehensive Guide To Windows 10 Updates

Navigating the Evolving Landscape: A Comprehensive Guide to Windows 10 Updates

Introduction

With enthusiasm, let’s navigate through the intriguing topic related to Navigating the Evolving Landscape: A Comprehensive Guide to Windows 10 Updates. Let’s weave interesting information and offer fresh perspectives to the readers.

Amazon.com: Tech Innovations Unleashed: Navigating the Ever-Evolving Landscape eBook : Lozik

Windows 10, Microsoft’s flagship operating system, has been a constant presence in the digital landscape since its release in 2015. Its ongoing evolution, fueled by regular updates, ensures users experience a system that is consistently refined, secure, and feature-rich. This article provides a detailed overview of recent updates to Windows 10, examining their key features, benefits, and implications for users.

The Foundation of Continuous Improvement: Understanding Windows 10 Updates

Windows 10 updates are not merely cosmetic enhancements. They represent a multifaceted approach to maintaining a robust and secure operating system. These updates encompass a wide spectrum of improvements, including:

  • Security Patches: Addressing vulnerabilities and mitigating potential threats, safeguarding user data and systems from malicious actors.
  • Performance Optimizations: Enhancing system efficiency, reducing resource consumption, and improving responsiveness for a smoother user experience.
  • Feature Enhancements: Introducing new functionalities, tools, and applications, expanding the capabilities of Windows 10 and catering to evolving user needs.
  • Bug Fixes: Resolving identified errors, glitches, and inconsistencies, ensuring stability and a seamless user experience.

Navigating the Update Landscape: A Breakdown of Recent Windows 10 Updates

While a comprehensive list of every Windows 10 update is beyond the scope of this article, focusing on recent significant updates provides a clear picture of the direction of the operating system’s evolution:

1. Windows 10 May 2020 Update (Version 2004): This update ushered in several notable features and improvements:

  • Cloud Download Feature: This innovative feature allows users to download and install Windows 10 on a new device directly from the cloud, simplifying the installation process.
  • Cortana Integration: Cortana’s integration with the Windows Search bar streamlines the search experience, providing a unified platform for finding files, applications, and web information.
  • Windows Sandbox: This secure environment allows users to run applications in isolation, preventing potential security risks and protecting the main system.
  • Enhanced Security Features: The update introduced improvements to Windows Defender Antivirus, bolstering system security against evolving threats.

2. Windows 10 October 2020 Update (Version 20H2): This update focused on refinement and optimization, building upon the foundation laid by the May 2020 Update:

  • Improved Performance: This update included optimizations for system performance, including faster boot times and reduced resource consumption.
  • Enhanced User Experience: Refinement of the user interface and improvements to system responsiveness contributed to a more streamlined and enjoyable experience.
  • Security Enhancements: Continued updates to Windows Defender Antivirus and other security features ensured ongoing protection against evolving cyber threats.

3. Windows 10 May 2021 Update (Version 21H1): This update marked a shift towards smaller, more frequent updates, prioritizing stability and security:

  • Focus on Stability and Security: This update primarily concentrated on addressing known issues, enhancing security, and improving system stability.
  • Streamlined Update Process: The update process was streamlined to minimize disruptions and ensure a smoother user experience.
  • Improved Performance: Further optimizations were implemented to improve system performance and resource utilization.

4. Windows 10 November 2021 Update (Version 21H2): This update introduced several key features and improvements:

  • Enhanced Security: Significant improvements were made to Windows Defender Antivirus, including enhanced threat detection and prevention capabilities.
  • Improved User Interface: Enhancements to the user interface, including new themes and customization options, provided a more personalized and engaging experience.
  • Performance Optimizations: This update further optimized system performance, including faster boot times and improved application responsiveness.

5. Windows 10 2022 Update (Version 22H2): This update focused on user experience enhancements and security:

  • Improved Taskbar: The taskbar received a significant update, including a redesigned search bar and improved application management features.
  • Enhanced File Explorer: The File Explorer received a facelift with a modern look and improved navigation features.
  • Security Enhancements: This update included a range of security improvements, including enhanced threat detection and protection against phishing attacks.

Understanding the Importance of Windows 10 Updates

Regularly updating Windows 10 is not optional; it is essential for maintaining a secure, stable, and functional system. Here’s why:

  • Enhanced Security: Updates often include critical security patches that address vulnerabilities exploited by malicious actors. Neglecting updates can expose your system to malware, data breaches, and other cyber threats.
  • Improved Performance: Updates frequently optimize system performance, leading to faster boot times, smoother application operation, and reduced resource consumption.
  • New Features and Functionality: Updates introduce new features and capabilities, enhancing the overall user experience and expanding the possibilities of Windows 10.
  • Bug Fixes and Stability: Updates resolve known bugs, glitches, and inconsistencies, ensuring a more stable and reliable operating system.

FAQs Regarding Windows 10 Updates

Q: How do I ensure my Windows 10 system is up to date?

A: Windows 10 automatically downloads and installs updates in the background. However, it’s recommended to manually check for updates regularly by navigating to Settings > Update & Security > Windows Update and clicking Check for updates.

Q: What are the risks associated with skipping Windows 10 updates?

A: Skipping updates exposes your system to security vulnerabilities, performance issues, and potential instability. It is strongly advised to keep your Windows 10 system up to date for optimal security and functionality.

Q: How can I control the timing of Windows 10 updates?

A: While automatic updates are the default setting, you can customize the update schedule. Go to Settings > Update & Security > Windows Update and click on Advanced options. You can choose to pause updates for a limited time or schedule a specific time for updates.

Q: What should I do if I encounter problems after installing a Windows 10 update?

A: If you experience issues after an update, try restarting your computer. You can also check for available solutions in the Windows Update settings or visit the Microsoft Support website for troubleshooting tips.

Tips for Managing Windows 10 Updates

  • Regularly Check for Updates: Ensure your system is up to date by checking for updates regularly.
  • Back Up Your Data: Before installing major updates, it’s a good practice to back up your important files to prevent data loss.
  • Monitor Update Progress: Pay attention to the update progress and ensure the installation completes successfully.
  • Troubleshoot Issues: If you encounter problems, consult the Microsoft Support website or community forums for troubleshooting guidance.

Conclusion: Embracing the Evolving Landscape of Windows 10

Windows 10 updates are not just a series of patches; they represent a continuous journey of improvement and innovation. By embracing these updates, users can ensure their systems remain secure, stable, and equipped with the latest features and functionalities. Staying informed about the latest updates and their benefits is crucial for maximizing the potential of Windows 10 and navigating the constantly evolving digital landscape.

How to manage Windows 10 updates to prevent them from ruining your life - TechnoEXPRESS Navigating the Evolving Landscape of Cybersecurity: A Comprehensive Guide to Staying Safe Online Navigating the Evolving Landscape of AI at the Workplace: Insights and Observations
PPT - Navigating the Evolving Landscape PowerPoint Presentation, free download - ID:12285721 Navigating the Evolving Information Management Landscape  ZircoDATA Navigating the Technology Landscape: Insights for the Future
PPT - Navigating the Evolving Landscape of Software Companies Trends, Challenges, and Video - Windows 10 – Basic Desktop and Navigation  Interface Technical Training

Closure

Thus, we hope this article has provided valuable insights into Navigating the Evolving Landscape: A Comprehensive Guide to Windows 10 Updates. We thank you for taking the time to read this article. See you in our next article!

Understanding The Cost Of Windows 10 Home: A Comprehensive Guide

Understanding the Cost of Windows 10 Home: A Comprehensive Guide

Introduction

With great pleasure, we will explore the intriguing topic related to Understanding the Cost of Windows 10 Home: A Comprehensive Guide. Let’s weave interesting information and offer fresh perspectives to the readers.

Understanding the Cost of Windows 10 Home: A Comprehensive Guide

Microsoft Has Added 20 To The Price Of Windows 10 Home

Windows 10 Home is a popular operating system for personal computers, known for its user-friendly interface and robust features. Determining its cost, however, can be a complex process, influenced by various factors. This comprehensive guide aims to provide clarity on the pricing structure of Windows 10 Home, outlining the different purchase options, potential cost variations, and factors that can influence its price.

Understanding the Purchase Options:

The cost of Windows 10 Home depends largely on the chosen purchase method. Here’s a breakdown of the most common options:

  • New PC Purchase: The most common method is purchasing a new computer with Windows 10 Home pre-installed. This approach bundles the operating system with the hardware, often making it the most cost-effective option. The price of the computer itself incorporates the cost of Windows 10 Home, and it’s generally not a separate cost factor.
  • Standalone License: Microsoft offers standalone licenses for Windows 10 Home, enabling users to install the operating system on a new or existing computer. This option is suitable for users who want to upgrade an older system or build their own PC. The price of a standalone license is typically fixed, offering transparency in the overall cost.
  • Upgrade from Previous Versions: Users with older versions of Windows can upgrade to Windows 10 Home for a fee. Microsoft offered a free upgrade path for Windows 7 and 8 users in the past, but this offer has since expired. Currently, the upgrade price is tied to the specific version of Windows being upgraded from and may be subject to change.
  • Subscription-Based Options: Microsoft also offers subscription-based services like Microsoft 365, which include access to Windows 10 Home and other Microsoft products and services. This option provides continuous access to updates and features but requires a recurring subscription fee.

Factors Influencing Price:

Several factors can influence the price of Windows 10 Home, impacting the overall cost for users:

  • Retailer Markups: Prices can vary between different retailers, reflecting their individual pricing strategies and markup policies. Comparing prices from multiple retailers can help identify potential savings.
  • Special Offers and Promotions: Microsoft and retailers often offer special promotions and discounts on Windows 10 Home licenses, particularly during holidays or special events. Staying informed about these offers can lead to significant cost reductions.
  • Language Versions: The price of Windows 10 Home may vary based on the language version. Certain language versions might be more readily available or have different pricing structures.
  • Digital vs. Physical Media: Windows 10 Home licenses can be purchased in digital or physical formats. Digital licenses are typically downloaded and activated online, while physical licenses come with a physical DVD or USB drive. The format might influence the price, with digital versions sometimes being offered at a lower cost.
  • System Requirements: While not directly affecting the price, system requirements for Windows 10 Home can influence the overall cost. Users may need to upgrade their hardware to meet the minimum system requirements, adding to the overall expense.

Importance of Understanding Price:

Understanding the pricing structure of Windows 10 Home is crucial for making informed purchasing decisions. By considering the different purchase options, factors influencing price, and potential cost variations, users can choose the most cost-effective approach for their individual needs.

FAQs about Windows 10 Home Pricing:

  • Q: Is Windows 10 Home free?
    • A: No, Windows 10 Home is not free. While Microsoft offered a free upgrade path for Windows 7 and 8 users in the past, this offer has since expired. Users must purchase a license to use Windows 10 Home.
  • Q: How much does Windows 10 Home cost?
    • A: The cost of Windows 10 Home can vary depending on the purchase method and other factors. Standalone licenses are typically priced around $100-$150, while the cost of Windows 10 Home included with a new PC is incorporated into the overall price of the computer.
  • Q: Can I upgrade from Windows 7 or 8 to Windows 10 Home for free?
    • A: No, the free upgrade offer for Windows 7 and 8 users has expired. Upgrading to Windows 10 Home from older versions requires purchasing an upgrade license.
  • Q: What are the different versions of Windows 10 Home?
    • A: Windows 10 Home is the primary version for personal computers. There are no distinct sub-versions of Windows 10 Home, but the operating system receives regular updates and feature additions.
  • Q: Can I transfer my Windows 10 Home license to a new computer?
    • A: Yes, you can transfer your Windows 10 Home license to a new computer, but there are restrictions. You can typically transfer the license once, and the original computer may be deactivated.

Tips for Saving Money on Windows 10 Home:

  • Compare prices from multiple retailers: Check prices from different online and physical retailers to find the best deals.
  • Look for special offers and promotions: Keep an eye out for discounts and promotional offers from Microsoft and retailers.
  • Consider buying a refurbished computer: Refurbished computers often come with Windows 10 Home pre-installed at a lower price.
  • Upgrade from an older version of Windows: If you have an older version of Windows, upgrading to Windows 10 Home might be a cost-effective option.
  • Explore subscription-based options: Consider subscription-based services like Microsoft 365, which include access to Windows 10 Home and other Microsoft products.

Conclusion:

Understanding the cost of Windows 10 Home involves considering various factors, including purchase options, potential price variations, and cost-saving strategies. By carefully evaluating these aspects, users can make informed decisions and choose the most suitable and affordable approach for their individual needs. Whether purchasing a new computer, acquiring a standalone license, or upgrading from an older version, understanding the pricing structure of Windows 10 Home empowers users to make cost-effective choices and maximize their investment.

'How much is Windows 10?': A cost breakdown of all three versions of Windows 10  Business Insider How much does Windows 10 cost? Price and Version Guide Blog Mr Key Shop Microsoft Windows 10 Home 64-bit (DVD) - Walmart.com
How Much Does Windows 10 Cost? - Windows 10 - Computer Repair Windows 10 Home Licence Windows 10 Home - ResolveIT Webstore
Windows 10 Home Original- ActivaTuSoftware Microsoft Has Added 20 To The Price Of Windows 10 Home

Closure

Thus, we hope this article has provided valuable insights into Understanding the Cost of Windows 10 Home: A Comprehensive Guide. We hope you find this article informative and beneficial. See you in our next article!

Navigating The World Of MySQL: A Comprehensive Guide To The Command Line Client On Windows 10

Navigating the World of MySQL: A Comprehensive Guide to the Command Line Client on Windows 10

Introduction

In this auspicious occasion, we are delighted to delve into the intriguing topic related to Navigating the World of MySQL: A Comprehensive Guide to the Command Line Client on Windows 10. Let’s weave interesting information and offer fresh perspectives to the readers.

MySQL Command-Line Client for Windows [Getting Started Tutorial]

The MySQL command line client, a powerful tool for interacting with MySQL databases, offers a direct and efficient way to manage and manipulate data. For Windows 10 users, accessing this tool is straightforward, requiring a few steps to download and install the necessary software. This comprehensive guide aims to provide a clear and informative understanding of the process, highlighting its significance and benefits for database administrators and developers alike.

Understanding the MySQL Command Line Client

The MySQL command line client, often referred to as the "mysql" client, is a text-based interface that allows users to connect to a MySQL server and execute SQL queries. This direct interaction with the database provides granular control over data manipulation, schema management, and server administration. While graphical user interfaces (GUIs) offer a more visual approach, the command line client excels in its efficiency and flexibility.

Benefits of Using the MySQL Command Line Client

  • Direct Database Access: The command line client provides a direct connection to the MySQL server, enabling users to execute queries and perform actions without relying on intermediary applications. This direct access ensures responsiveness and control over database operations.
  • Flexibility and Control: The command line client offers unparalleled flexibility for executing complex SQL queries, managing database permissions, and performing advanced server administration tasks. Users can leverage the full power of SQL syntax, tailoring their commands for specific needs.
  • Script Automation: The command line interface facilitates scripting, allowing users to automate repetitive tasks and streamline database maintenance processes. By writing scripts, administrators can automate backups, data updates, and other routine operations.
  • Efficiency and Speed: Compared to GUI tools, the command line client often provides faster execution of queries and commands, particularly when dealing with large datasets or complex operations.
  • Troubleshooting and Debugging: The command line interface provides a detailed view of error messages and logs, aiding in debugging and troubleshooting database issues.

Downloading and Installing the MySQL Command Line Client on Windows 10

The MySQL command line client is bundled with the MySQL Community Server package, which can be downloaded from the official MySQL website (https://dev.mysql.com/downloads/mysql/).

Steps for Downloading and Installing:

  1. Visit the MySQL Downloads Page: Navigate to the official MySQL downloads page and select the "MySQL Community Server" option.
  2. Choose the Appropriate Installer: Select the Windows installer package, typically a .msi file, compatible with your system architecture (32-bit or 64-bit).
  3. Download the Installer: Download the installer file and save it to a suitable location on your computer.
  4. Run the Installer: Double-click the downloaded .msi file to launch the installation wizard.
  5. Follow the Installation Instructions: Follow the on-screen instructions to complete the installation process, accepting the default settings or customizing them according to your preferences.
  6. Verify Installation: After the installation is complete, open a command prompt window and type "mysql -V" to verify that the MySQL command line client is installed correctly.

Connecting to a MySQL Server

Once the MySQL command line client is installed, you can connect to a MySQL server using the following command:

mysql -u username -p

Replace "username" with your MySQL user account and press enter. The client will then prompt you for your password.

Basic Commands for Using the MySQL Command Line Client

  • Show Databases: To list all available databases, use the following command:
    SHOW DATABASES;
  • Use Database: To switch to a specific database, use the following command:
    USE database_name;
  • List Tables: To display the tables within a database, use the following command:
    SHOW TABLES;
  • Execute SQL Queries: To run SQL queries, simply type the query after the "mysql>" prompt and press enter. For example, to retrieve all data from a table named "users," use the following command:
    SELECT * FROM users;
  • Exit the Client: To exit the MySQL command line client, use the following command:
    EXIT;

FAQs about the MySQL Command Line Client on Windows 10

Q: What are the system requirements for running the MySQL command line client on Windows 10?

A: The MySQL command line client requires a Windows 10 operating system with a compatible processor and sufficient RAM. The specific requirements may vary depending on the version of MySQL you are using.

Q: Can I use the MySQL command line client with other database management systems?

A: The MySQL command line client is specifically designed for interacting with MySQL databases. It is not compatible with other database management systems such as PostgreSQL, Oracle, or SQL Server.

Q: How do I access the MySQL command line client from a different computer on the network?

A: You can access the MySQL command line client from a remote computer by configuring remote access on the MySQL server and using the appropriate connection parameters in the "mysql" command.

Q: What are some common errors I might encounter while using the MySQL command line client?

A: Common errors include incorrect usernames or passwords, network connectivity issues, syntax errors in SQL queries, and permission problems. Refer to the MySQL documentation for detailed error messages and solutions.

Tips for Using the MySQL Command Line Client Effectively

  • Use Aliases: Create aliases for frequently used commands to save time and effort.
  • Use Tab Completion: The command line client supports tab completion, which can help you complete commands and table names more efficiently.
  • Use the G Modifier: Use the G modifier after a query to display the results in a more readable, column-oriented format.
  • Use the c Command: Use the c command to clear the screen in the command line client.
  • Use the h Command: Use the h command to display help information about the available commands.

Conclusion

The MySQL command line client provides a powerful and efficient way to interact with MySQL databases on Windows 10. Its direct access, flexibility, and scripting capabilities make it an indispensable tool for database administrators and developers. By understanding the installation process, basic commands, and troubleshooting techniques, users can harness the full potential of this essential database management tool.

10 How to use MySQL command line client  How to use MySQL command line tool - YouTube How To Use Mysql Command Line Client In Windows - Login pages Info MySQL Command-Line Client for Windows [Getting Started Tutorial]
How To Use Mysql Command Line Client In Windows - Login pages Info Mysql Command Line Client Command-Line MySQL Client  TestingDocs.com
MySQL Command-Line Client [Getting Started Tutorial] A Complete Guide to Installing MySQL and PHP with IIS  ComeauSoftware.com

Closure

Thus, we hope this article has provided valuable insights into Navigating the World of MySQL: A Comprehensive Guide to the Command Line Client on Windows 10. We hope you find this article informative and beneficial. See you in our next article!

Understanding Windows 10’s Approach To File Isolation: A Comprehensive Guide

Understanding Windows 10’s Approach to File Isolation: A Comprehensive Guide

Introduction

With enthusiasm, let’s navigate through the intriguing topic related to Understanding Windows 10’s Approach to File Isolation: A Comprehensive Guide. Let’s weave interesting information and offer fresh perspectives to the readers.

Understanding Windows 10’s Approach to File Isolation: A Comprehensive Guide

Understanding Windows 10 S and how exactly does it differ from regular windows 10 OS

The digital landscape is constantly evolving, presenting both opportunities and challenges. One of the most significant challenges is the ever-present threat of malware, which can infiltrate systems, steal data, and disrupt operations. To combat this, operating systems like Windows 10 have implemented robust security measures, including sophisticated file isolation mechanisms. This article delves into the concept of file isolation in Windows 10, exploring its functionalities, benefits, and how it contributes to a secure computing environment.

The Need for File Isolation

The fundamental principle behind file isolation lies in the concept of "least privilege." This principle dictates that software should only be granted the minimum access necessary to perform its intended function. In the context of operating systems, this means limiting the ability of applications to interact with other applications, system files, or user data without explicit permission.

The need for file isolation arises from the inherent vulnerabilities of traditional file access models. In the past, applications often had unrestricted access to system resources, making them susceptible to malicious attacks. For instance, a rogue application could potentially modify critical system files, compromise user data, or even take control of the entire system.

Windows 10’s Approach to File Isolation

Windows 10 employs several mechanisms to achieve file isolation, each contributing to a more secure environment:

  1. User Account Control (UAC): UAC is a core security feature in Windows that prompts users for permission before applications can make significant changes to the system. This effectively prevents unauthorized actions and adds an extra layer of protection against malicious software.

  2. App Container: This feature restricts applications to a specific environment, preventing them from accessing files or resources outside their designated area. This isolation helps prevent rogue applications from spreading to other parts of the system.

  3. Windows Sandbox: This feature creates a temporary, isolated environment where users can run untrusted applications without affecting the main operating system. This is particularly useful for testing potentially harmful software or opening files from unknown sources.

  4. Controlled Folder Access: This feature allows users to define specific folders that are off-limits to applications without explicit permission. This prevents unauthorized access to sensitive data, such as personal documents, photos, and financial information.

Benefits of File Isolation in Windows 10

The implementation of file isolation in Windows 10 offers a range of benefits, contributing to a more secure and reliable computing experience:

  1. Enhanced Security: By limiting application access to system resources, file isolation significantly reduces the attack surface for malware. This makes it more difficult for malicious software to exploit vulnerabilities and compromise the system.

  2. Improved Stability: Isolating applications helps prevent conflicts and crashes that can occur when multiple applications try to access the same resources. This contributes to a more stable and reliable operating environment.

  3. Data Protection: File isolation safeguards user data by preventing unauthorized access to sensitive information. This is particularly important for applications that handle personal data, such as financial applications or online banking platforms.

  4. Reduced Risk of System Corruption: By limiting application access to system files, file isolation minimizes the risk of accidental or malicious system corruption. This ensures the stability and integrity of the operating system.

  5. Improved User Experience: By preventing applications from interfering with each other, file isolation contributes to a smoother and more responsive user experience. This is particularly noticeable when running multiple applications simultaneously.

Frequently Asked Questions (FAQs) about File Isolation in Windows 10

Q: How do I enable file isolation in Windows 10?

A: File isolation is typically enabled by default in Windows 10. However, specific features like Controlled Folder Access require user configuration. You can access these settings through the Windows Security app.

Q: Does file isolation affect the performance of my computer?

A: While file isolation does introduce a small overhead, it is generally negligible and does not significantly impact system performance.

Q: Can I disable file isolation if I trust a particular application?

A: It is generally not recommended to disable file isolation, as it compromises system security. However, some features like Controlled Folder Access allow users to grant specific applications access to certain folders.

Q: Is file isolation effective against all types of malware?

A: File isolation is a powerful security measure, but it is not foolproof. Some advanced malware may be able to bypass these mechanisms. It is crucial to maintain a comprehensive security strategy, including regular software updates, antivirus protection, and cautious browsing habits.

Tips for Enhancing File Isolation in Windows 10

  1. Keep Your System Updated: Regularly update Windows 10 and your applications to benefit from the latest security patches and bug fixes.

  2. Use a Strong Antivirus: Install and maintain a reputable antivirus solution to protect against malware threats.

  3. Be Cautious About Downloads: Only download software from trusted sources and avoid clicking on suspicious links.

  4. Use Controlled Folder Access: Configure Controlled Folder Access to restrict access to sensitive folders and protect your data.

  5. Use Windows Sandbox: When testing potentially harmful software or opening files from unknown sources, use Windows Sandbox to isolate the activity from your main system.

Conclusion

File isolation is a critical component of Windows 10’s security architecture, playing a vital role in protecting users from malware threats and ensuring a stable and secure computing environment. By understanding the principles behind file isolation and implementing best practices for security, users can significantly minimize the risk of cyberattacks and enjoy a safer digital experience.

Enhance Windows Security with Kernel Isolation: A Comprehensive Guide  ITIGIC Core isolation windows 10 How to turn on Memory Integrity and Core Isolation in Windows 10  LaptrinhX / News
How to turn on Memory Integrity and Core Isolation in Windows 10  LaptrinhX / News Windows 10 Core Isolation - Memory Integ  Jaksta 8 Windows 10 Security Features you must Enable while setting up New PC
Cách bật tính năng bảo vệ Core isolation trên Windows 10 - QuanTriMang.com Windows 10 Core Isolation - Memory Integ  Jaksta

Closure

Thus, we hope this article has provided valuable insights into Understanding Windows 10’s Approach to File Isolation: A Comprehensive Guide. We appreciate your attention to our article. See you in our next article!

Unveiling The Power Of A Windows 10 Preinstallation Environment (PE) ISO: A Comprehensive Guide

Unveiling the Power of a Windows 10 Preinstallation Environment (PE) ISO: A Comprehensive Guide

Introduction

In this auspicious occasion, we are delighted to delve into the intriguing topic related to Unveiling the Power of a Windows 10 Preinstallation Environment (PE) ISO: A Comprehensive Guide. Let’s weave interesting information and offer fresh perspectives to the readers.

Unveiling the Power of a Windows 10 Preinstallation Environment (PE) ISO: A Comprehensive Guide

Build windows pe iso - limfapreview

The Windows 10 Preinstallation Environment (PE) ISO is a powerful tool for system administrators, technicians, and even advanced users seeking to troubleshoot, repair, or deploy Windows 10 systems efficiently. This specialized environment, contained within a bootable ISO image, provides a lightweight version of Windows 10, stripped down to essential components for specific tasks. This article aims to provide a comprehensive understanding of the Windows 10 PE ISO, its functionalities, advantages, and its role in various scenarios.

Understanding the Windows 10 PE ISO

The Windows 10 PE ISO is essentially a bootable environment derived from the full Windows 10 operating system. It includes a minimal set of drivers, utilities, and core services, allowing it to boot from a USB drive or CD/DVD without requiring a fully installed operating system. This makes it ideal for situations where the primary operating system is inaccessible or corrupted.

Key Components and Functionalities

The Windows 10 PE ISO contains several key components that enable its versatility:

  • Windows PE Boot Environment: This forms the foundation of the environment, providing the basic operating system structure for booting and running applications.
  • Command Prompt: The traditional command-line interface offers a powerful tool for executing commands, managing files, and troubleshooting system issues.
  • Windows Imaging and Configuration Designer (WinPE-WIM): This tool allows for the creation and customization of Windows PE images, enabling users to add specific drivers, applications, or scripts tailored to their needs.
  • Windows Deployment Services (WDS): This server-based technology facilitates the deployment of Windows 10 images to multiple devices, streamlining the process of installing or reinstalling the operating system.
  • System Recovery Options: The PE environment includes tools like system restore, startup repair, and data recovery utilities to address various system issues.
  • Third-Party Applications: Users can add custom applications to the PE environment, further extending its capabilities for specific tasks.

Advantages of Using a Windows 10 PE ISO

The Windows 10 PE ISO offers several distinct advantages, making it a valuable tool for various situations:

  • Bootability without a Full Operating System: The PE environment can boot from a USB drive or CD/DVD, allowing access to the system even when the primary operating system is unavailable.
  • Lightweight and Efficient: The minimal set of components ensures a faster boot time and minimal resource consumption, making it ideal for troubleshooting or performing quick tasks.
  • Customizability: Users can tailor the PE environment by adding specific drivers, applications, or scripts, allowing for a customized solution for specific scenarios.
  • System Recovery and Repair: The PE environment includes tools for system recovery, repair, and data recovery, facilitating the resolution of various system issues.
  • Deployment and Imaging: The PE environment is integral to the deployment of Windows 10 images, enabling efficient installation or reinstallation on multiple devices.

Scenarios Where the Windows 10 PE ISO Proves Valuable

The Windows 10 PE ISO proves invaluable in various scenarios, showcasing its versatility and efficiency:

  • Troubleshooting and Repair: When the primary operating system fails to boot or encounters errors, the PE environment provides a safe and accessible platform to diagnose and repair system issues.
  • Data Recovery: In situations where the primary operating system is corrupted or inaccessible, the PE environment allows access to data and facilitates its recovery.
  • System Deployment: The PE environment is crucial for deploying Windows 10 images to multiple devices, ensuring a standardized and efficient installation process.
  • Pre-Boot Environment for Maintenance: The PE environment can be used for performing pre-boot maintenance tasks, such as hardware diagnostics or system configuration changes.
  • Customization and Scripting: The PE environment allows for customization with specific drivers, applications, and scripts, enabling tailored solutions for specific tasks or environments.

FAQs about the Windows 10 PE ISO

Q: How do I create a Windows 10 PE ISO?

A: Creating a Windows 10 PE ISO requires the Windows Assessment and Deployment Kit (ADK) and the Windows Imaging and Configuration Designer (WinPE-WIM). The process involves downloading the necessary tools, customizing the PE image, and then creating the ISO file.

Q: What are the system requirements for using the Windows 10 PE ISO?

A: The system requirements for using the Windows 10 PE ISO are minimal, as it is a lightweight environment. However, it requires a compatible BIOS or UEFI firmware and a USB drive or CD/DVD for booting.

Q: What are some common uses of the Windows 10 PE ISO?

A: Common uses include troubleshooting system issues, recovering data, deploying Windows 10 images, performing pre-boot maintenance tasks, and creating customized solutions for specific needs.

Q: Can I add third-party applications to the Windows 10 PE ISO?

A: Yes, users can add third-party applications to the PE environment by including them in the custom image creation process.

Q: Is the Windows 10 PE ISO compatible with all Windows 10 versions?

A: While the Windows 10 PE ISO is primarily designed for Windows 10, compatibility may vary depending on the specific version and edition of the operating system.

Tips for Using the Windows 10 PE ISO

  • Download and Install the Windows ADK: Ensure you have the latest version of the Windows Assessment and Deployment Kit (ADK) installed to create and customize the PE environment.
  • Create a Bootable USB Drive: Use a reliable tool like Rufus or the Windows USB/DVD Download Tool to create a bootable USB drive containing the Windows 10 PE ISO.
  • Customize the PE Image: Use the Windows Imaging and Configuration Designer (WinPE-WIM) to add specific drivers, applications, or scripts to tailor the PE environment to your needs.
  • Test Thoroughly: Before deploying the PE environment in a critical situation, test it thoroughly on a virtual machine or non-production environment to ensure it functions as expected.
  • Back Up Important Data: Always back up important data before using the PE environment for troubleshooting or system recovery, as it can involve modifications to the system.

Conclusion

The Windows 10 PE ISO is a powerful and versatile tool that empowers administrators, technicians, and advanced users with a lightweight and bootable environment for various tasks. Its ability to boot without a full operating system, its customizability, and its inclusion of essential tools for troubleshooting, recovery, and deployment make it an invaluable resource in numerous scenarios. By understanding the functionalities, advantages, and usage tips of the Windows 10 PE ISO, users can leverage its capabilities to efficiently manage, troubleshoot, and deploy Windows 10 systems.

Ultimate Guide To Creating Windows Preinstallation Environment (WinPE) Windows 10 pe iso file for limbo - woodgrag Microsoft Windows Preinstallation Environment User's Guide  Manualzz
Windows Preinstallation Environment - Winpe Tools Hiren's BootCD PE (Preinstallation Environment) baseado no Windows 10 PE x64. - YouTube Windows Preinstallation Environment - BetaWiki
Ultimate Guide To Creating Windows Preinstallation Environment (WinPE) Ultimate Guide To Creating Windows Preinstallation Environment (WinPE)

Closure

Thus, we hope this article has provided valuable insights into Unveiling the Power of a Windows 10 Preinstallation Environment (PE) ISO: A Comprehensive Guide. We hope you find this article informative and beneficial. See you in our next article!

Navigating The Labyrinth: A Guide To PC Repair Tools For Windows 11

Navigating the Labyrinth: A Guide to PC Repair Tools for Windows 11

Introduction

In this auspicious occasion, we are delighted to delve into the intriguing topic related to Navigating the Labyrinth: A Guide to PC Repair Tools for Windows 11. Let’s weave interesting information and offer fresh perspectives to the readers.

Repair Windows 11 Using 4 Methods  Step-by-Step Guide (2022)

The digital realm, while offering unparalleled convenience and access to information, is not without its challenges. Like any complex system, computers are susceptible to various issues, ranging from minor performance hiccups to critical system failures. Windows 11, Microsoft’s latest operating system, introduces new features and functionalities, but it also inherits the inherent vulnerability of any software platform. This is where PC repair tools come into play, offering users a vital lifeline for troubleshooting and resolving a wide spectrum of computer problems.

Understanding the Landscape: Types of PC Repair Tools

PC repair tools for Windows 11 can be broadly categorized into three distinct types, each addressing specific needs:

  • System Optimization Tools: These tools focus on enhancing system performance by addressing issues like fragmented hard drives, unnecessary startup programs, and registry errors. They often include features for cleaning temporary files, defragmenting hard drives, and managing startup programs. Examples include CCleaner, Advanced SystemCare, and IObit Smart Defrag.

  • Error Detection and Repair Tools: These tools delve deeper, identifying and resolving system errors that can hinder performance or cause instability. They often scan for corrupted files, registry issues, and driver conflicts. Notable examples include Windows Error Checker (SFC), System File Checker (DISM), and specialized utilities like Driver Booster and Reimage Repair.

  • Data Recovery Tools: Data loss can be a devastating event, and data recovery tools are crucial for retrieving lost or deleted files. These tools employ advanced algorithms to scan storage devices and recover data from damaged or formatted drives. Popular options include Recuva, EaseUS Data Recovery Wizard, and Stellar Data Recovery.

The Importance of Choosing the Right Tools

Choosing the right PC repair tool depends on the specific issues encountered and the user’s technical expertise. For novice users, a comprehensive system optimization tool that offers a user-friendly interface and automated solutions might be the most suitable option. Experienced users might prefer specialized tools that provide greater control and advanced features.

Key Features to Consider

When evaluating PC repair tools for Windows 11, several key features should be considered:

  • User Interface: The interface should be intuitive and easy to navigate, even for users with limited technical knowledge.
  • Functionality: The tool should offer a comprehensive suite of features to address various system issues, including optimization, error detection, and data recovery.
  • Performance: The tool should be efficient and not overly resource-intensive, minimizing its impact on system performance.
  • Security: The tool should be secure, protecting user data from unauthorized access or malware.
  • Customer Support: Reliable customer support is essential for resolving any issues or questions that may arise.

Benefits of Using PC Repair Tools

Employing PC repair tools for Windows 11 offers numerous benefits:

  • Improved System Performance: By addressing performance bottlenecks, cleaning up system files, and optimizing settings, these tools can significantly enhance computer speed and responsiveness.
  • Enhanced Stability: Error detection and repair tools can identify and resolve system errors, preventing crashes, freezes, and other instability issues.
  • Data Recovery: Data recovery tools provide a vital lifeline for retrieving lost or deleted files, minimizing data loss in the event of accidental deletion or hardware failure.
  • Proactive Maintenance: Regular use of PC repair tools can help maintain system health, prevent future issues, and extend the lifespan of your computer.

Frequently Asked Questions (FAQs)

Q: Are PC repair tools safe to use?

A: Reputable PC repair tools from established developers are generally safe to use. However, it is crucial to download and install tools from trusted sources and to be cautious about freeware or tools from unknown developers. Always read user reviews and check for security certifications before downloading any software.

Q: Can PC repair tools harm my computer?

A: While properly designed and used tools are safe, using improper tools or making careless changes can potentially damage your computer. It is important to understand the limitations of the tool and to follow the instructions provided by the developer.

Q: Do I need to use multiple PC repair tools?

A: Depending on the specific issues you are facing, you may need to use multiple tools. For instance, you might use a system optimization tool to clean up your system and then use an error detection tool to address any remaining issues.

Q: How often should I use PC repair tools?

A: For general maintenance, running a system optimization tool once a month is generally sufficient. However, if you experience performance issues or encounter system errors, you should run a more comprehensive scan using an error detection tool.

Tips for Using PC Repair Tools Effectively

  • Backup Your Data: Before using any PC repair tool, it is crucial to back up your important data. This will prevent data loss in case of unexpected errors or system failures.
  • Read the Instructions: Carefully read the instructions provided by the developer before using any tool. This will help you understand the tool’s functionality and avoid making mistakes.
  • Choose Reputable Tools: Only download and install tools from reputable developers. Look for user reviews and security certifications before using any software.
  • Run Scans Regularly: Regularly run system scans to identify and address potential issues before they become major problems.
  • Update Regularly: Ensure that the tools you use are up-to-date with the latest security patches and updates.

Conclusion

PC repair tools for Windows 11 are indispensable resources for maintaining system health, troubleshooting issues, and protecting data. Choosing the right tool based on your needs and technical expertise is essential. By following the tips outlined above, you can leverage these tools effectively to ensure a smooth and efficient computing experience. Remember, proactive maintenance and regular use of these tools can help prevent future problems and keep your Windows 11 system running at its best.

5 Best PC Repair Tools for Windows 10 & Windows 11 �� - YouTube 12 Best Free Windows 11 Repair Tools - TrendRadars How To Use The Startup Repair Tool In Windows 11 Geek - vrogue.co
12 Best Free Windows 11 Repair Tools – howto Go-it Download Windows Repair Toolbox for Windows 11/10/8/7 (Latest version 2023) - Downloads Guru Download Windows Repair Kit for Windows 11/10/8/7 (Latest version 2019) - Downloads Guru
Windows 11  Strana 63  Benchmark Forum 16 Best PC Repair Tools For Windows 11,10,8 [2024 PICKS]

Closure

Thus, we hope this article has provided valuable insights into Navigating the Labyrinth: A Guide to PC Repair Tools for Windows 11. We hope you find this article informative and beneficial. See you in our next article!

Managing User Accounts In Windows 11: A Comprehensive Guide To User Permissions And Account Removal

Managing User Accounts in Windows 11: A Comprehensive Guide to User Permissions and Account Removal

Introduction

In this auspicious occasion, we are delighted to delve into the intriguing topic related to Managing User Accounts in Windows 11: A Comprehensive Guide to User Permissions and Account Removal. Let’s weave interesting information and offer fresh perspectives to the readers.

Managing User Accounts in Windows 11: A Comprehensive Guide to User Permissions and Account Removal

How to Manage User Account Settings in Windows 11

Windows 11, like its predecessors, employs a robust user account system to manage access and privileges within the operating system. This system allows for the creation of multiple user accounts, each with its own set of permissions and limitations. This granular control is crucial for ensuring system security, protecting sensitive data, and fostering a collaborative environment.

Understanding User Account Types and Permissions

In Windows 11, user accounts are categorized into two primary types:

  • Administrator Accounts: These accounts possess the highest level of permissions, allowing them to make system-wide changes, install software, manage user accounts, and modify system settings. Typically, only one administrator account is created during the initial setup.
  • Standard Accounts: These accounts have limited privileges and can only access and modify files and settings within their own user profile. They cannot install software, make system-wide changes, or manage other user accounts.

The Importance of Managing User Accounts

Managing user accounts in Windows 11 is essential for several reasons:

  • Security: Limiting user permissions prevents unauthorized access to sensitive data and system files. This helps mitigate the risk of malware infections, data breaches, and accidental system modifications.
  • Stability: Restricting access to system-level settings and applications helps prevent accidental configuration changes that could lead to system instability or crashes.
  • Organization: Creating individual accounts for each user allows for a more organized and personalized experience. Users can customize their desktop, install specific applications, and manage their files without affecting other users.
  • Collaboration: Standard accounts can be used for shared access to specific files and folders, enabling collaborative work without compromising system security.

Removing a User Account: A Necessary Step

While creating and managing user accounts is crucial for a secure and organized system, there are situations where removing a user account becomes necessary. These situations include:

  • Unused accounts: Accounts that are no longer actively used can be removed to streamline system resources and improve security by eliminating potential vulnerabilities.
  • Compromised accounts: If a user account is suspected of being compromised, removing it prevents further access and mitigates the risk of data breaches.
  • Account changes: When a user’s role or responsibilities change, removing their old account and creating a new one with appropriate permissions can ensure proper access control.
  • System cleanup: Removing unnecessary user accounts can help optimize system performance and improve overall system responsiveness.

Removing a User Account in Windows 11: A Step-by-Step Guide

Removing a user account in Windows 11 requires administrator privileges. Here’s a detailed guide:

  1. Open Settings: Click the Start menu and select "Settings" or press the Windows key + I.
  2. Navigate to Accounts: In the Settings app, click "Accounts."
  3. Select Family & Other Users: Click "Family & other users" on the left-hand side.
  4. Locate the Account: Find the user account you wish to remove.
  5. Remove Account: Click on the user account and select "Remove."
  6. Confirm Removal: A confirmation dialog will appear. Click "Delete account and data" to proceed.
  7. Account Removal: The account and its associated data will be permanently removed from the system.

Important Considerations Before Account Removal:

  • Data Backup: Before removing a user account, it is crucial to back up any important data stored within that account’s profile. This data includes files, documents, and settings.
  • Account Ownership: Ensure that you are authorized to remove the account. If the account belongs to someone else, obtain their permission before proceeding.
  • System Impact: Removing an administrator account can potentially disrupt system functionality if no other administrator accounts exist.

FAQs: Addressing Common Questions

Q: Can I remove an administrator account if it is the only one on the system?

A: It is generally not recommended to remove the only administrator account on the system. Doing so could lock you out of your computer. If you need to remove the only administrator account, consider creating a new administrator account beforehand.

Q: What happens to the user’s data when an account is removed?

A: When you remove a user account, all data associated with that account is deleted from the system. This includes files, documents, settings, and any other data stored within the user’s profile folder.

Q: Can I recover a deleted user account?

A: Once a user account is removed, it cannot be recovered. However, you can restore data from a backup if you have one.

Q: Can I remove a user account without deleting its data?

A: No, you cannot remove a user account without deleting its data. However, you can manually move the user’s data to another location before removing the account.

Q: What if I accidentally remove an important user account?

A: If you accidentally remove an important user account, you may need to reinstall Windows to regain access to the system. It is crucial to back up your data regularly to prevent data loss.

Tips for Managing User Accounts

  • Regularly review user accounts: Periodically review the user accounts on your system to identify unused or compromised accounts.
  • Create standard accounts for everyday use: Use standard accounts for most users to limit their privileges and enhance system security.
  • Enable password complexity: Set strong passwords for all user accounts, including administrator accounts, to prevent unauthorized access.
  • Use a password manager: A password manager can help you create and manage strong passwords for all your accounts.
  • Implement two-factor authentication: Enable two-factor authentication for administrator accounts to add an extra layer of security.

Conclusion

Managing user accounts in Windows 11 is a critical aspect of maintaining system security, organization, and stability. By understanding the different account types, their permissions, and the importance of managing them, users can create a secure and efficient computing environment. Removing user accounts, when necessary, is a straightforward process that can help optimize system resources and enhance security. However, it’s essential to proceed with caution, ensuring data backup and appropriate authorization before removing any account. By following the guidelines outlined in this guide, users can effectively manage their user accounts in Windows 11, ensuring a secure and productive computing experience.

Manage user accounts Windows 11  How to Manage Windows 11 password  Windows 11 Credentials How to Reset All Permissions to Default in Windows 11 How To Remove Microsoft Account From Windows 11 Guide  yorketech
Manage Your Microsoft Account in Windows 11 – windows.do How to remove Work or School account in Windows 11/10 How to Switch User Accounts on Windows 11
How To Change A User To An Administrator In Windows 11 Or Windows 10  winbuzzer How To Remove Other User Accounts From Windows 11 - YouTube

Closure

Thus, we hope this article has provided valuable insights into Managing User Accounts in Windows 11: A Comprehensive Guide to User Permissions and Account Removal. We hope you find this article informative and beneficial. See you in our next article!