Archives November 2023

Troubleshooting Outlook Issues After A Windows 11 Update: A Comprehensive Guide

Troubleshooting Outlook Issues After a Windows 11 Update: A Comprehensive Guide

Introduction

In this auspicious occasion, we are delighted to delve into the intriguing topic related to Troubleshooting Outlook Issues After a Windows 11 Update: A Comprehensive Guide. Let’s weave interesting information and offer fresh perspectives to the readers.

Troubleshooting Outlook Issues After a Windows 11 Update: A Comprehensive Guide

Troubleshooting Outlook email Sending/Receiving problems on Windows 11 - YouTube

The seamless integration of Microsoft Outlook with Windows operating systems is a cornerstone of many individuals’ and organizations’ productivity. However, the introduction of a new Windows update, particularly a major upgrade like Windows 11, can sometimes disrupt this harmony, leading to unexpected issues with Outlook functionality. This article provides a comprehensive guide to diagnose and resolve common Outlook problems that arise following a Windows 11 update, equipping users with the knowledge and tools to restore their email experience.

Understanding the Root Causes

Several factors can contribute to Outlook malfunctioning after a Windows 11 update:

  • Software Compatibility: Windows 11 introduces new features and system architecture, potentially leading to compatibility issues with older versions of Outlook or its associated components.
  • Conflicting Settings: Changes in system settings during the update process might clash with Outlook’s configuration, causing unexpected behavior.
  • Corrupted Data: The update process could inadvertently corrupt Outlook’s data files, hindering its ability to function correctly.
  • Missing Dependencies: Essential system files or libraries required for Outlook’s operation might have been removed or altered during the update, disrupting its functionality.
  • Third-Party Interference: Installed third-party software, particularly those related to email management or security, may interfere with Outlook’s operation after the update.

Common Outlook Issues After Windows 11 Update

  • Outlook Fails to Launch: The application might not respond or display error messages when attempting to start.
  • Slow Performance: Outlook might experience lag, sluggish response times, or delays in loading emails and attachments.
  • Email Sending and Receiving Errors: Issues with sending or receiving emails, including delays, delivery failures, or error messages.
  • Calendar Synchronization Issues: Calendar events might not sync properly, leading to discrepancies between Outlook and other devices.
  • Contact List Errors: Contacts may disappear or become inaccessible, causing difficulties in communication.

Troubleshooting Steps: A Systematic Approach

Addressing Outlook issues after a Windows 11 update requires a systematic approach, starting with basic troubleshooting techniques and progressing to more advanced solutions.

1. Basic Troubleshooting:

  • Restart Your Computer: A simple restart can resolve temporary glitches and refresh system resources.
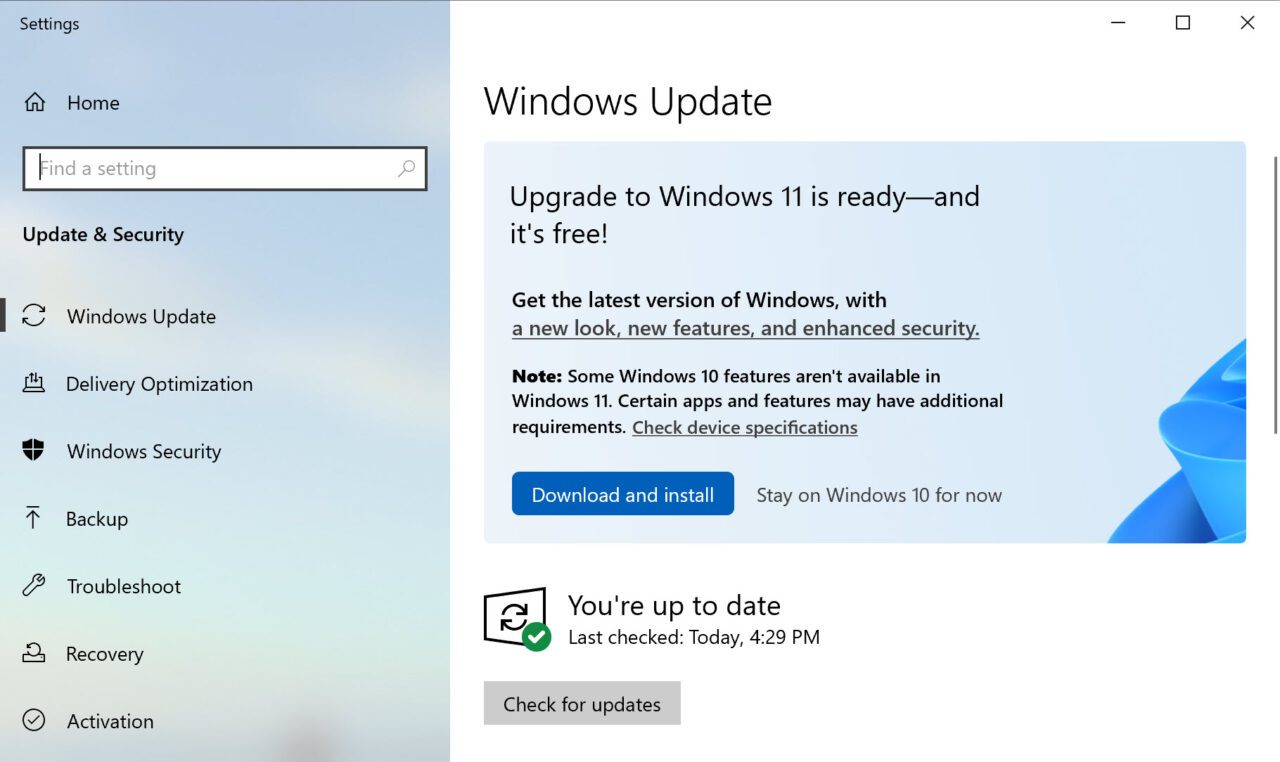
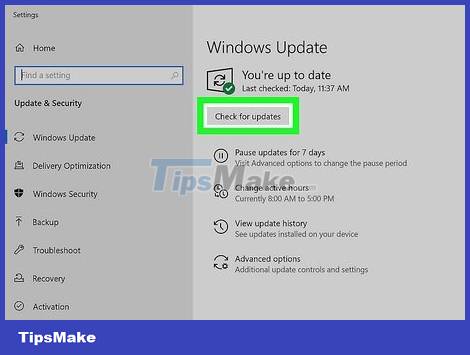
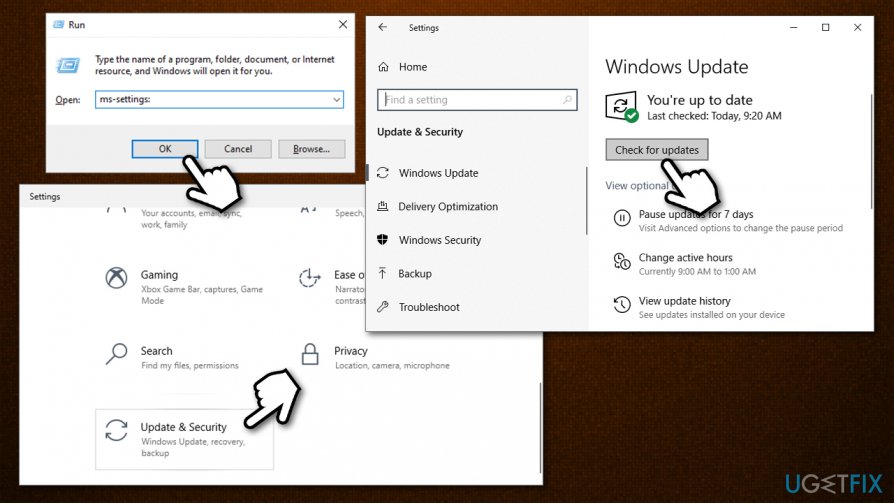
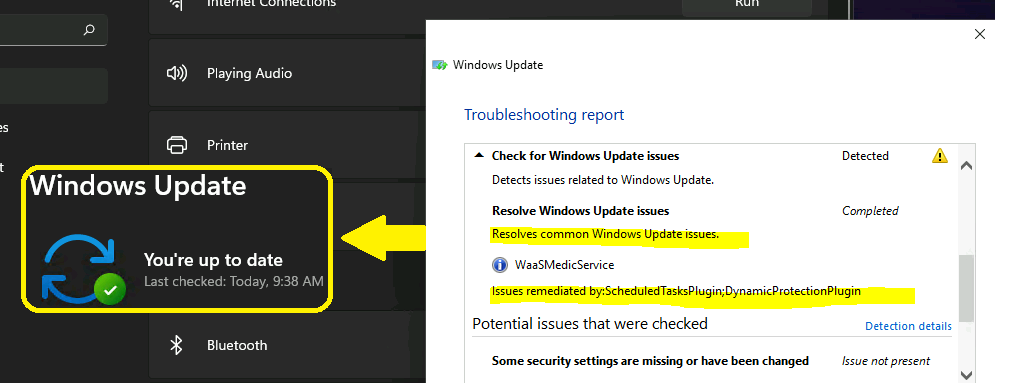
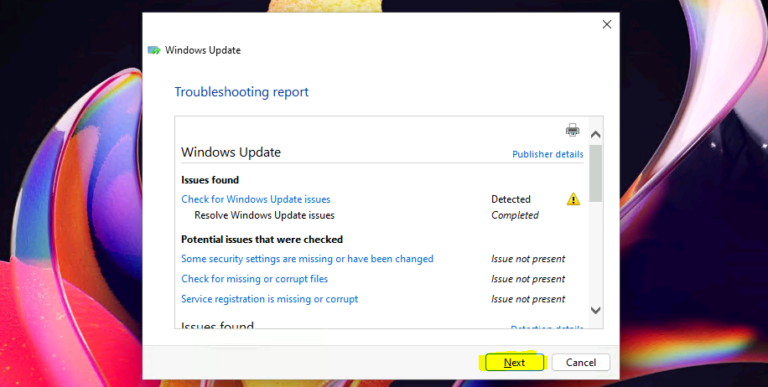
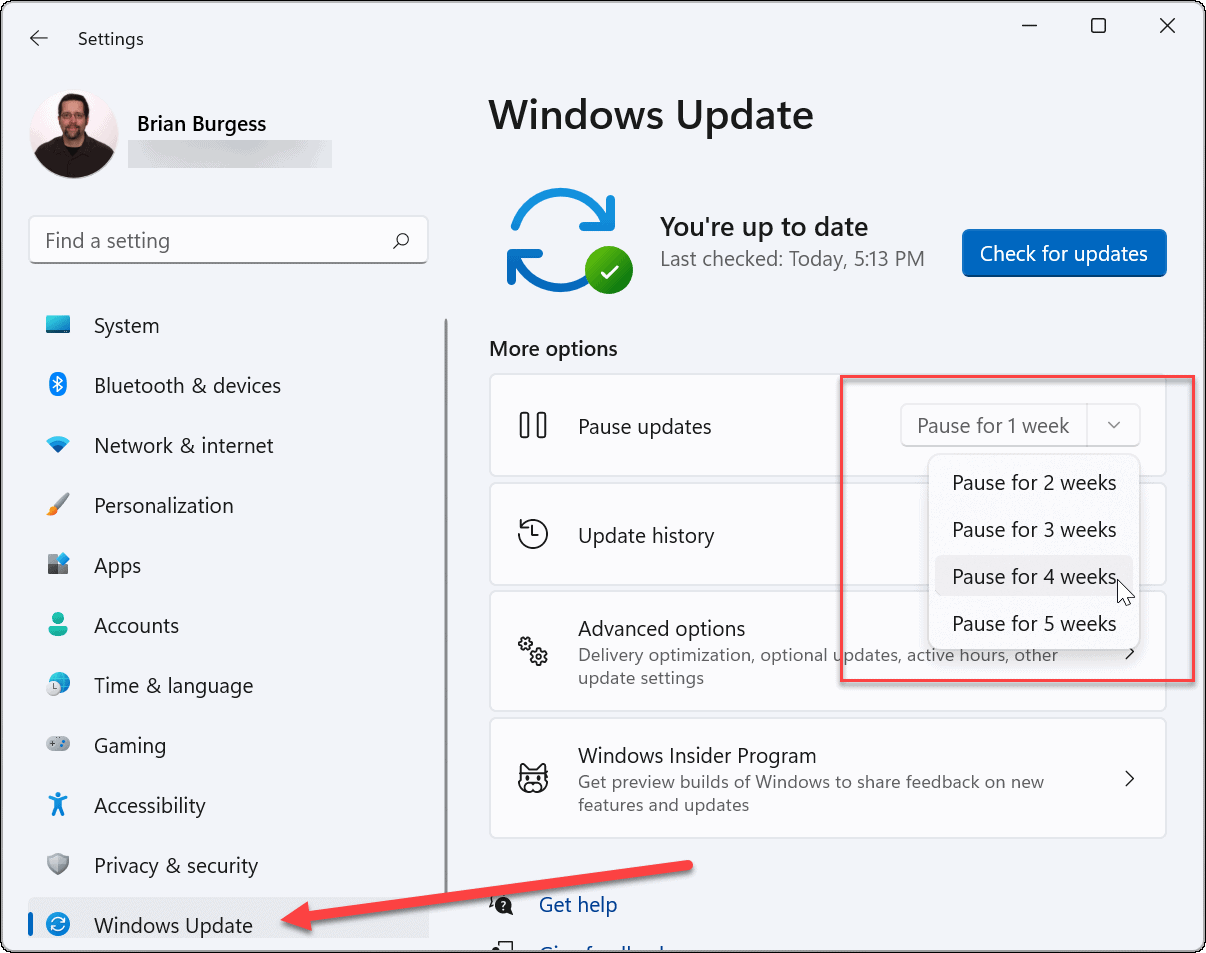
  • Check for Updates: Ensure that Outlook and Windows 11 are up to date. Microsoft frequently releases updates to address compatibility issues and improve performance.
  • Run Outlook as Administrator: Right-click the Outlook icon and select "Run as administrator" to ensure sufficient permissions.
  • Disable Add-ins: Temporarily disable Outlook add-ins to identify if any are causing conflicts. Navigate to "File" > "Options" > "Add-ins" > "Manage" > "Go" and disable add-ins one by one.
  • Repair Outlook: Run an Outlook repair tool to fix corrupted files or configurations. In the Control Panel, navigate to "Programs and Features," right-click on "Microsoft Office" or "Microsoft 365," and select "Repair."

2. Advanced Troubleshooting:

  • Reinstall Outlook: If basic troubleshooting fails, reinstalling Outlook might resolve the issue. Ensure that you have a backup of your Outlook data before proceeding.
  • Create a New Outlook Profile: A new profile can eliminate potential corruption in existing settings. In the Control Panel, navigate to "Mail" > "Show Profiles" > "Add" and create a new profile.
  • Check Antivirus and Firewall Settings: Antivirus and firewall software can sometimes interfere with Outlook’s functionality. Temporarily disable them to determine if they are causing the issue.
  • Verify Network Connection: Ensure a stable internet connection and check for any network connectivity issues.
  • Check for System File Corruption: Run the System File Checker (SFC) tool to repair corrupted system files. Open Command Prompt as administrator and type "sfc /scannow."

3. Addressing Specific Issues:

  • Email Sending and Receiving Errors: Verify your email account settings, including username, password, and server addresses. Check for any server outages or maintenance schedules.
  • Calendar Synchronization Issues: Ensure your calendar is connected to the correct account and verify the synchronization settings.
  • Contact List Errors: Check the location of your contact list and ensure it is accessible. Consider importing contacts from a backup file.

FAQs Regarding Outlook Issues After Windows 11 Update:

  • Q: My Outlook data is missing. How can I recover it?

    A: If you have a backup of your Outlook data, restore it to its original location. If you do not have a backup, consider using data recovery software to attempt recovery.

  • Q: I am experiencing slow performance in Outlook. What can I do?

    A: Optimize your Outlook settings by disabling unnecessary add-ins, reducing the number of email folders, and limiting the number of open emails.

  • Q: My Outlook calendar is not syncing properly. How can I fix it?

    A: Verify your calendar account settings, including the synchronization frequency and server address. Check for any updates to your calendar application or service.

  • Q: I am receiving error messages when trying to send emails. What could be the cause?

    A: Check your email account settings, including username, password, and server addresses. Ensure your antivirus and firewall are not blocking email traffic.

Tips for Preventing Future Issues:

  • Backup Your Outlook Data: Regularly back up your Outlook data, including emails, contacts, and calendar appointments, to prevent data loss.
  • Keep Outlook and Windows Updated: Install the latest updates for both Outlook and Windows 11 to ensure compatibility and address potential security vulnerabilities.
  • Monitor System Changes: Be aware of any significant system changes, including updates or new software installations, and their potential impact on Outlook’s functionality.
  • Seek Professional Assistance: If troubleshooting fails, consider seeking assistance from a Microsoft support representative or a qualified IT professional.

Conclusion:

While Windows 11 updates offer numerous improvements and benefits, they can occasionally lead to compatibility issues with existing applications, including Outlook. By understanding the common causes and applying the troubleshooting steps outlined in this guide, users can effectively diagnose and resolve Outlook problems that arise after a Windows 11 update, restoring their email productivity and ensuring a smooth transition to the new operating system.

How to troubleshoot and fix common problems in Outlook  Windows Central 6 Fixes to Try if Outlook Keeps Crashing on Windows 11 FIX Windows Update Issues For Windows 11 Errors Troubleshooting Tips HTMD Blog
Top 8 Ways to Fix Outlook Not Opening on Windows 11 FIX Windows Update Issues For Windows 11 Errors Troubleshooting Tips HTMD Blog How to troubleshoot Microsoft Outlook setup  Microsoft - YouTube
How To Troubleshoot Issue Related To Outlook Update Windows 11 Not Working After Update? 12 Fixes

Closure

Thus, we hope this article has provided valuable insights into Troubleshooting Outlook Issues After a Windows 11 Update: A Comprehensive Guide. We appreciate your attention to our article. See you in our next article!

A Comprehensive Guide To Installing Windows 11

A Comprehensive Guide to Installing Windows 11

Introduction

With great pleasure, we will explore the intriguing topic related to A Comprehensive Guide to Installing Windows 11. Let’s weave interesting information and offer fresh perspectives to the readers.

A Comprehensive Guide to Installing Windows 11

Windows 11 User Guide A Step By Step Guide To Install And Use The New Images

Windows 11, the latest iteration of Microsoft’s popular operating system, offers a refined user experience, enhanced security features, and a modern design. Installing Windows 11 is a crucial step for users seeking to experience these advancements. This comprehensive guide will delve into the intricacies of the Windows 11 installation process, providing a detailed understanding of the steps involved and addressing common queries.

Understanding the Installation Process

Installing Windows 11 involves a series of steps that ensure a clean and functional operating system. The process typically begins with a bootable USB drive or DVD containing the Windows 11 installation files. This bootable media serves as the primary source for installing the operating system on your computer.

Key Steps in the Installation Process:

  1. Prepare for Installation: Before embarking on the installation process, it is essential to back up your data. This precaution safeguards your valuable files and settings in case of any unforeseen issues during the installation. Additionally, ensure that your hardware meets the minimum system requirements for Windows 11.

  2. Create a Bootable Installation Media: The creation of a bootable USB drive or DVD is paramount. This media contains the necessary files to install Windows 11. Microsoft provides a dedicated tool, the "Windows 11 Installation Assistant," for creating bootable media.

  3. Boot from the Installation Media: Once the bootable media is created, restart your computer and configure the BIOS settings to boot from the USB drive or DVD. This action initiates the Windows 11 installation process.

  4. Language and Keyboard Selection: The initial installation screen prompts you to choose your preferred language and keyboard layout. These selections determine the language and keyboard settings of your newly installed Windows 11 system.

  5. Installation Type: You are presented with two installation options: "Upgrade" and "Custom." Choosing "Upgrade" installs Windows 11 over your existing operating system, preserving your data and settings. "Custom" allows you to format your hard drive and perform a clean installation, removing all existing data.

  6. Partitioning and Formatting: If you choose "Custom," you can partition and format your hard drive. Partitioning divides your hard drive into separate sections, allowing you to organize your data. Formatting prepares the selected partition for installation.

  7. File Installation and System Configuration: The installation process proceeds with copying the Windows 11 files to your computer. During this phase, the system configures the core components of the operating system, including drivers and essential services.

  8. Personalization and Activation: Upon completion of the file installation, you are prompted to personalize your Windows 11 experience by setting up your account, choosing a password, and configuring basic settings. The final step involves activating Windows 11 using a valid product key.

FAQs: Addressing Common Concerns

Q1: What are the minimum system requirements for Windows 11?

A: To run Windows 11 smoothly, your computer must meet the following minimum requirements:

  • Processor: 1 gigahertz (GHz) or faster with 2 or more cores on a compatible 64-bit processor or System on a Chip (SoC).
  • RAM: 4 gigabytes (GB) of RAM.
  • Storage: 64 GB or larger storage device.
  • System Firmware: UEFI, Secure Boot capable.
  • TPM: Trusted Platform Module (TPM) version 2.0.
  • Graphics: Compatible with DirectX 12 or later with WDDM 2.x driver.
  • Display: High Definition (720p) display, 9 inches or greater diagonal.

Q2: Can I upgrade from Windows 10 to Windows 11?

A: Yes, Microsoft offers a free upgrade path for eligible Windows 10 users. However, your computer must meet the minimum system requirements for Windows 11.

Q3: What happens to my data during the installation process?

A: If you choose the "Upgrade" option, your data and settings will be preserved. However, if you opt for a "Custom" installation, all data will be erased from the selected partition.

Q4: What if the installation process fails?

A: In case of installation failure, try troubleshooting common issues such as faulty media, hardware incompatibility, or corrupted files. If the problem persists, consider seeking assistance from Microsoft support.

Q5: How do I activate Windows 11?

A: Windows 11 activation requires a valid product key. You can obtain a product key during a new computer purchase, through a retail purchase, or by upgrading from a previous version of Windows.

Tips for a Smooth Installation

1. Back Up Your Data: Prioritize backing up your important files and settings to prevent data loss during the installation process.

2. Check System Requirements: Ensure your computer meets the minimum system requirements for Windows 11 to avoid compatibility issues.

3. Use a Bootable USB Drive: Creating a bootable USB drive is highly recommended, as it provides a reliable and convenient method for installing Windows 11.

4. Format Your Hard Drive (Optional): If you desire a clean installation, consider formatting your hard drive to eliminate any potential conflicts with existing files.

5. Troubleshoot Installation Errors: In case of installation errors, review the error messages carefully and consult online resources or contact Microsoft support for assistance.

6. Update Drivers: After installation, update your drivers to ensure optimal performance and compatibility with Windows 11.

7. Customize Your Settings: Personalize your Windows 11 experience by configuring settings such as themes, wallpapers, and privacy options.

Conclusion

Installing Windows 11 is a straightforward process, but it requires careful planning and execution. By following the steps outlined in this guide, users can ensure a smooth and successful installation experience. The benefits of upgrading to Windows 11, including enhanced security, a refined user interface, and improved performance, make it a worthwhile endeavor for users seeking a modern and efficient computing environment. Remember to back up your data, check system requirements, and troubleshoot any issues that may arise. With proper preparation and attention to detail, users can seamlessly transition to the latest version of Windows, unlocking its full potential and enjoying a streamlined computing experience.

Windows 11 installation process - Step by Step  How to install Windows 11  Windows 11 How to Install Windows 11 on any PC Step by step ️ Ultimate Guide �� Install Microsoft Windows 11 Buy Windows 11: A Complete Tutorial Guide for Beginners with Tips & Tricks to Mastering Windows
The Ultimate Guide to Installing Windows 11  Petri Buy WINDOWS 11 AT YOUR FINGER TIPS: A Simplified Guide To Install And Master All The New How to Install Windows 11  Installing Windows 11 on My Computer/PC �� - YouTube
How to Install Windows 11 Step by Step: Guide with Images How to Install Windows 11 Update or Upgrade  FREE Step by Step - YouTube

Closure

Thus, we hope this article has provided valuable insights into A Comprehensive Guide to Installing Windows 11. We thank you for taking the time to read this article. See you in our next article!

The Evolution Of Visual Communication: A Deep Dive Into Windows 11 Icons

The Evolution of Visual Communication: A Deep Dive into Windows 11 Icons

Introduction

In this auspicious occasion, we are delighted to delve into the intriguing topic related to The Evolution of Visual Communication: A Deep Dive into Windows 11 Icons. Let’s weave interesting information and offer fresh perspectives to the readers.

The Evolution of Visual Communication: A Deep Dive into Windows 11 Icons

The Evolution of Visual Communication by Justine Hobbs on Prezi

Windows 11, the latest iteration of Microsoft’s operating system, ushered in a wave of visual change. Beyond the aesthetic appeal, the redesigned icons play a crucial role in enhancing user experience and streamlining interaction with the operating system. This article explores the intricate design philosophy behind these icons, delving into their evolution, their underlying principles, and their impact on the overall user experience.

A Legacy of Visual Identity:

The history of Windows icons is a testament to the evolution of user interface design. From the early days of Windows 95, icons have served as visual cues, representing applications, files, and system functionalities. Over time, these icons have undergone numerous transformations, reflecting advancements in technology, changing design trends, and evolving user preferences.

Windows 11 marks a significant departure from its predecessors in terms of icon design. The new icons are characterized by a modern, minimalist aesthetic, featuring simplified shapes, bold colors, and a focus on clarity and accessibility. This shift is driven by a desire to create a visual language that is both intuitive and visually appealing, ensuring a seamless user experience across different platforms and devices.

The Design Principles Behind Windows 11 Icons:

The design of Windows 11 icons is guided by a set of core principles:

  • Clarity and Simplicity: The icons strive to convey their meaning at a glance, eliminating unnecessary complexity. This is achieved through the use of simple, recognizable shapes and bold colors that stand out against the interface.
  • Consistency and Familiarity: While embracing a new aesthetic, the icons maintain a level of familiarity with their predecessors. This ensures a smooth transition for users familiar with previous versions of Windows, minimizing the learning curve.
  • Accessibility: The icons are designed to be accessible to all users, regardless of their visual abilities. This is achieved through the use of high contrast colors, clear outlines, and a consistent visual hierarchy.
  • Modernity and Versatility: The icons reflect the contemporary design trends, featuring a clean, minimalist aesthetic that adapts seamlessly to different screen sizes and resolutions.

The Impact of Redesigned Icons:

The redesigned icons contribute significantly to the overall user experience of Windows 11:

  • Enhanced Navigation: The clear and consistent visual language of the icons facilitates intuitive navigation, enabling users to quickly locate and access desired applications and files.
  • Improved Accessibility: The high contrast colors and simplified shapes make the icons easily distinguishable for users with visual impairments.
  • Aesthetics and User Engagement: The modern, minimalist design contributes to a visually appealing and engaging user interface, enhancing the overall aesthetic appeal of the operating system.
  • Brand Identity: The new icons contribute to the overall brand identity of Windows, showcasing its evolution towards a more modern and user-centric approach.

FAQs on Windows 11 Icons:

Q: Why did Microsoft choose to redesign the icons for Windows 11?

A: The redesign of Windows 11 icons was driven by a desire to create a more modern, intuitive, and visually appealing user experience. The new icons are designed to be simpler, clearer, and more accessible, reflecting the evolution of user interface design and the changing needs of users.

Q: What are the key design principles behind the new icons?

A: The new icons are designed with a focus on clarity, simplicity, consistency, accessibility, modernity, and versatility. These principles ensure that the icons are easily recognizable, intuitive to use, and visually appealing across different platforms and devices.

Q: How do the new icons improve the user experience?

A: The redesigned icons enhance navigation, improve accessibility, contribute to a more visually appealing interface, and reinforce the brand identity of Windows. They are designed to make interacting with the operating system more intuitive and enjoyable.

Q: Are the new icons compatible with older versions of Windows?

A: The new icons are specifically designed for Windows 11 and are not compatible with older versions of the operating system.

Tips for Understanding and Using Windows 11 Icons:

  • Explore the Start Menu: The Start Menu provides a comprehensive overview of the icons associated with various applications and system functionalities.
  • Pay Attention to Color and Shape: The icons utilize distinct colors and shapes to convey meaning and facilitate quick identification.
  • Utilize Search Functionality: Windows 11 offers a powerful search function that can help you locate specific icons or applications based on keywords.
  • Seek Help from Online Resources: Numerous online resources, including Microsoft’s official documentation, provide detailed information and explanations about the new icons.

Conclusion:

The redesigned icons in Windows 11 represent a significant step forward in user interface design. They are not merely cosmetic enhancements; they are integral components of a user-centric approach that prioritizes clarity, accessibility, and visual appeal. By embracing a modern, minimalist aesthetic and adhering to key design principles, the new icons contribute to a more intuitive, engaging, and visually satisfying user experience, reinforcing the evolution of Windows towards a more user-friendly and accessible operating system.

INFOGRAPHIC: A BRIEF HISTORY OF VISUAL COMMUNICATION Communication evolution icon 645899 Vector Art at Vecteezy دانلود Udemy Deep Dive Into Windows Communication Foundation (WCF) - آ
Deep Dive: Visual Communication Basics What is Visual Communication and How Can It Improve Your Presentations Evolution Of Communication Ppt
Customize Icons Windows 11 Evolution of communication timeline - visual language through the ages  Presentation Design

Closure

Thus, we hope this article has provided valuable insights into The Evolution of Visual Communication: A Deep Dive into Windows 11 Icons. We hope you find this article informative and beneficial. See you in our next article!

The Search For "Project IGI 3": A Journey Through Gaming History And Reality

The Search for "Project IGI 3": A Journey Through Gaming History and Reality

Introduction

In this auspicious occasion, we are delighted to delve into the intriguing topic related to The Search for "Project IGI 3": A Journey Through Gaming History and Reality. Let’s weave interesting information and offer fresh perspectives to the readers.

The Search for "Project IGI 3": A Journey Through Gaming History and Reality

Project IGI 3 Official World Premiere Gameplay Trailer - YouTube

The world of gaming is filled with legendary titles, each holding a special place in the hearts of players. Among these, the "Project IGI" series stands out, particularly "Project IGI 1" and "Project IGI 2: Covert Strike," which captivated audiences with their immersive gameplay and realistic espionage themes. However, the question of "Project IGI 3" remains a persistent enigma, sparking curiosity and debate among fans.

The Myth and the Reality:

The elusive "Project IGI 3" is a subject of ongoing speculation. No official announcement or release from the developers, Innerloop Studios, has ever confirmed its existence. Despite this, numerous websites and forums claim to offer downloads for the game, often accompanied by misleading titles and descriptions. These sources are typically unreliable and may contain malware, posing a significant risk to users’ computers.

Understanding the Lack of "Project IGI 3":

Several factors contribute to the absence of a third installment in the "Project IGI" series:

  • Innerloop Studios’ Closure: The original developers, Innerloop Studios, ceased operations in 2005. This effectively ended the possibility of an official sequel from the original creators.
  • IP Ownership: The intellectual property rights for "Project IGI" are currently held by Codemasters, who acquired Innerloop Studios in 2005. Codemasters’ focus on other projects and the lack of a commercially viable "Project IGI 3" concept have likely contributed to the absence of a sequel.
  • Gameplay Challenges: The "Project IGI" games relied heavily on innovative technology for their time, particularly in terms of AI and physics. Replicating this level of sophistication while incorporating modern gaming trends would be a significant undertaking, potentially hindering the profitability of a sequel.

Exploring Alternatives:

While a true "Project IGI 3" remains a distant dream, several alternatives offer similar gameplay experiences:

  • "Project IGI" Remasters: Fans have created unofficial remasters of the original games, incorporating updated graphics and gameplay features. These projects, while unofficial, provide a nostalgic experience for fans.
  • Modern Stealth Games: The gaming landscape has evolved significantly since the release of "Project IGI." Games like "Hitman" and "Splinter Cell" offer modern takes on the stealth genre, with complex mechanics and engaging storylines.
  • Other "Project IGI" Spin-offs: While not official sequels, some games, like "Project IGI: Operation Silent Storm," offer a similar gameplay experience with a different storyline and setting.

The Enduring Legacy of "Project IGI":

Despite the lack of a "Project IGI 3," the original games continue to hold a special place in gaming history. Their impact on the stealth genre and their influence on subsequent titles are undeniable. The iconic characters, immersive environments, and challenging gameplay continue to captivate players, ensuring the legacy of "Project IGI" lives on.

FAQs:

Q: Is "Project IGI 3" actually in development?

A: No, there is no official confirmation of "Project IGI 3" being in development. Any claims to the contrary are false.

Q: Where can I download "Project IGI 3"?

A: Avoid downloading "Project IGI 3" from untrusted sources. These downloads may contain malware and are not legitimate.

Q: Why isn’t there a "Project IGI 3"?

A: The closure of Innerloop Studios, the IP ownership by Codemasters, and the challenges of modernizing the gameplay are likely factors contributing to the absence of a sequel.

Q: Are there any alternatives to "Project IGI 3"?

A: Yes, several modern stealth games and unofficial remasters offer similar gameplay experiences.

Tips:

  • Be cautious of unofficial downloads: Avoid downloading "Project IGI 3" from untrusted sources, as these may contain malware.
  • Explore alternative stealth games: Modern titles like "Hitman" and "Splinter Cell" offer engaging stealth gameplay.
  • Revisit the original games: Enjoy the nostalgic experience of playing "Project IGI 1" and "Project IGI 2: Covert Strike."

Conclusion:

The search for "Project IGI 3" remains an ongoing quest, fueled by the enduring legacy of the original games. While a true sequel remains elusive, the impact of "Project IGI" on the gaming landscape is undeniable. The series continues to inspire players and developers, reminding us of the power of immersive gameplay and captivating storytelling. As we move forward, we can appreciate the legacy of "Project IGI" and explore the diverse world of modern stealth games, each offering unique experiences that pay homage to the pioneers of the genre.

Project IGI 3 The Plan PC Game - san gamer Project IGI 3 image - IndieDB Project IGI 3 Release Date and IGI 3 PC Game Download - 2023
IGI 3 Is Finally Here With A New Trailer ��  IGI: Origins Release Date, Gameplay, Graphics Project IGI 3 Torrent Download Archives - Gaming Beasts Igi 3 download - berlindapond
Project IGI 3 PC Complete Game Direct Torrent Download Project IGI 3 Official PC Game Free Download Here - GDV

Closure

Thus, we hope this article has provided valuable insights into The Search for "Project IGI 3": A Journey Through Gaming History and Reality. We hope you find this article informative and beneficial. See you in our next article!

Unresponsive Windows 10: A Comprehensive Guide To Troubleshooting Shutdown Issues

Unresponsive Windows 10: A Comprehensive Guide to Troubleshooting Shutdown Issues

Introduction

In this auspicious occasion, we are delighted to delve into the intriguing topic related to Unresponsive Windows 10: A Comprehensive Guide to Troubleshooting Shutdown Issues. Let’s weave interesting information and offer fresh perspectives to the readers.

Unresponsive Windows 10: A Comprehensive Guide to Troubleshooting Shutdown Issues

How to shutdown unresponsive application in Window 10

Windows 10, despite its robust features, can occasionally encounter unexpected behavior, including a persistent refusal to shut down gracefully. This issue, manifesting as a frozen screen, unresponsive mouse cursor, or a seemingly endless "Shutting Down" message, can be frustrating for users. While the reasons behind this problem can be varied, understanding the underlying causes and applying appropriate troubleshooting steps can effectively resolve the issue.

Understanding the Problem

A Windows 10 computer that refuses to shut down properly indicates a system-level disruption. The underlying causes can range from minor software glitches to more serious hardware malfunctions. These issues can arise from various sources, including:

  • Software Conflicts: Incompatibility between installed programs, driver issues, or corrupted system files can prevent the shutdown process from completing.
  • Hardware Failures: Malfunctioning components like the hard drive, RAM, or motherboard can hinder the system’s ability to execute shutdown commands.
  • System Overloads: Excessive resource utilization by running programs or background processes can strain the system and hinder shutdown.
  • Virus or Malware Infections: Malicious software can interfere with system processes, including shutdown, leading to unexpected behavior.
  • Power Management Issues: Faulty power supply units or improperly configured power settings can contribute to shutdown problems.
  • Incomplete Updates: Interrupted or failed Windows updates can leave the system in an inconsistent state, preventing proper shutdown.

Troubleshooting Strategies

Addressing a Windows 10 shutdown issue requires a systematic approach, starting with simple solutions and progressing to more advanced techniques.

1. Force Shutdown:

In cases where the system is completely unresponsive, a forced shutdown is necessary to regain control. This involves physically pressing and holding the power button until the computer shuts off. While this method is drastic, it’s often the only way to regain control when the system is frozen.

2. Restart the Computer:

A restart can often resolve temporary software glitches or resource conflicts that hinder shutdown. This can be initiated by pressing the power button or using the "Restart" option in the Start menu.

3. Check for Updates:

Outdated drivers or operating system versions can contribute to shutdown issues. Ensure that Windows and all installed drivers are up-to-date by checking for updates through Windows Update.

4. Run System File Checker (SFC):

Corrupted system files can disrupt shutdown processes. Running the System File Checker (SFC) tool can scan and repair any damaged files, potentially resolving the issue. To access SFC, open the Command Prompt as administrator and type "sfc /scannow".

5. Close Running Programs:

Excessive resource usage by running programs can prevent shutdown. Close all unnecessary programs and applications, especially those known to consume significant resources.

6. Disable Startup Programs:

Unnecessary programs that automatically launch at startup can contribute to resource conflicts. Disable unnecessary startup programs by navigating to Task Manager (Ctrl+Shift+Esc), opening the Startup tab, and disabling programs that are not essential.

7. Check for Hardware Malfunctions:

If software troubleshooting fails, consider hardware issues. Check for loose connections, faulty RAM modules, or failing hard drives. Consider running hardware diagnostics to identify any potential hardware problems.

8. Run a Virus Scan:

Malware infections can interfere with system processes, including shutdown. Run a comprehensive antivirus scan to detect and remove any malicious software that might be causing the issue.

9. Reset Power Settings:

Faulty power settings can disrupt shutdown behavior. Resetting power settings to their default values can sometimes resolve the problem. This can be done by searching for "Power Options" in the Start menu and selecting "Choose what the power buttons do" under "Power and Sleep."

10. Clean Boot:

A clean boot starts Windows with minimal programs and drivers, helping to isolate the source of the shutdown issue. This can be initiated by searching for "msconfig" in the Start menu, navigating to the "Services" tab, and disabling all unnecessary services.

11. System Restore:

If the shutdown problem arose recently, a system restore can revert the system to a previous working state, potentially resolving the issue. Access System Restore by searching for "Create a restore point" in the Start menu and selecting "System Restore."

12. Reinstall Windows:

In severe cases, a clean reinstall of Windows might be necessary to resolve persistent shutdown issues. This involves formatting the hard drive and installing a fresh copy of Windows.

FAQs

Q: What are the most common causes of a Windows 10 computer refusing to shut down?

A: The most common causes include software conflicts, driver issues, corrupted system files, and excessive resource usage by running programs.

Q: Is it safe to force shut down my computer?

A: While a forced shutdown is sometimes necessary to regain control, it is not recommended as a regular practice. Frequent forced shutdowns can lead to data corruption or damage to the hard drive.

Q: How can I prevent shutdown issues in the future?

A: Regularly update Windows and drivers, close unnecessary programs, and run antivirus scans to minimize the risk of shutdown problems.

Q: What should I do if troubleshooting steps fail to resolve the issue?

A: If troubleshooting fails, consider seeking professional assistance from a qualified technician.

Tips

  • Regularly update Windows and drivers: Ensure your system is running the latest software versions to minimize the risk of compatibility issues.
  • Close unnecessary programs: Avoid running too many programs simultaneously to prevent resource conflicts.
  • Run regular antivirus scans: Protect your system from malware infections that can disrupt system processes.
  • Monitor system resources: Keep an eye on CPU, RAM, and disk usage to identify potential resource bottlenecks.
  • Back up your data regularly: This will safeguard your data in case of system failures or data loss.

Conclusion

A Windows 10 computer that refuses to shut down can be a frustrating experience, but with a systematic approach to troubleshooting, the issue can often be resolved. By starting with simple solutions and gradually progressing to more advanced techniques, users can identify and address the underlying cause of the shutdown problem. Regular maintenance, including system updates, antivirus scans, and resource management, can help prevent future shutdown issues and ensure a smooth and reliable computing experience.

Fix Windows 10 Shutdown issues - YouTube How to Fix Slow and Unresponsive Windows 10 - TipsMake.com How to Troubleshoot 'Windows 10 PC Takes Forever to Shutdown' Problem - IR Cache
Troubleshoot Windows 10 Taskbar Unresponsive And Very Slow How To Fix Windows 10 Not Shutdown Problem 2 Easy Way 100% Solved - YouTube How To Fix Auto Shutdown/Restart Problem On Windows 10 In 2021 - 360CongNghe.net
How To Fix Windows 10 Shutdowns Problems On Laptops: Master Solving Taskbar unresponsive windows 10 - rtsprofiles

Closure

Thus, we hope this article has provided valuable insights into Unresponsive Windows 10: A Comprehensive Guide to Troubleshooting Shutdown Issues. We hope you find this article informative and beneficial. See you in our next article!

Creating A Bootable USB Drive For Windows 10: A Comprehensive Guide

Creating a Bootable USB Drive for Windows 10: A Comprehensive Guide

Introduction

With great pleasure, we will explore the intriguing topic related to Creating a Bootable USB Drive for Windows 10: A Comprehensive Guide. Let’s weave interesting information and offer fresh perspectives to the readers.

Creating a Bootable USB Drive for Windows 10: A Comprehensive Guide

How to Create a Windows 10 Bootable USB - Using a Media Creation Tool

The process of installing Windows 10 on a new computer or reinstalling it on an existing one often necessitates the creation of a bootable USB drive. This drive acts as a portable installation medium, allowing users to bypass traditional optical disc methods and install Windows directly from the USB drive. This method offers numerous advantages, including faster installation speeds, greater portability, and improved compatibility with modern systems.

Understanding the Process

Creating a bootable USB drive for Windows 10 involves several key steps:

  1. Downloading the Windows 10 ISO Image: The first step is to obtain the official Windows 10 ISO image from Microsoft’s website. This file contains all the necessary installation files for Windows 10.

  2. Preparing the USB Drive: A USB flash drive with sufficient storage capacity (at least 8GB) is required. The drive must be formatted to the correct file system (usually FAT32) and should be empty before proceeding.

  3. Using a Tool to Create the Bootable Drive: Several tools can assist in creating a bootable USB drive from the downloaded ISO image. These tools vary in their features and interface but ultimately achieve the same goal.

Popular Tools for Creating Bootable USB Drives

  • Rufus: A lightweight and widely used tool known for its simplicity and speed. Rufus offers various options for customizing the boot drive, including selecting the boot mode (UEFI or BIOS) and enabling advanced features like GPT partitioning.

  • Windows USB/DVD Download Tool: A tool developed by Microsoft, specifically designed for creating bootable USB drives or DVDs for Windows installations. This tool offers a straightforward interface and is compatible with various Windows versions.

  • Media Creation Tool: Another Microsoft-provided tool, the Media Creation Tool allows users to create a bootable USB drive or ISO image for Windows 10. This tool simplifies the process, downloading the appropriate Windows 10 version based on the user’s existing license.

Step-by-Step Guide to Creating a Bootable USB Drive

  1. Download the Windows 10 ISO Image: Visit the official Microsoft website and download the Windows 10 ISO image. Choose the appropriate version (Home, Pro, etc.) and language.

  2. Prepare the USB Drive: Connect the USB flash drive to your computer. Open the file explorer and locate the drive. Right-click on the drive and select "Format." Choose FAT32 as the file system and ensure the "Quick Format" option is selected. Click "Start" to format the drive.

  3. Use a Tool to Create the Bootable Drive: Choose a tool like Rufus, the Windows USB/DVD Download Tool, or the Media Creation Tool. Follow the instructions provided by the chosen tool.

    • Rufus:

      • Open Rufus and select the downloaded Windows 10 ISO image.
      • Select the USB drive from the "Device" dropdown menu.
      • Ensure the "Create a bootable disk using" option is set to "ISO Image."
      • Choose the appropriate boot mode (UEFI or BIOS) based on your system’s configuration.
      • Click "Start" to begin the process.
    • Windows USB/DVD Download Tool:

      • Open the tool and select the downloaded Windows 10 ISO image.
      • Choose "USB device" as the media type.
      • Select the USB drive from the "Device" dropdown menu.
      • Click "Begin copying" to start the process.
    • Media Creation Tool:

      • Open the tool and select "Create installation media for another PC."
      • Choose the appropriate language, edition, and architecture (32-bit or 64-bit) for your system.
      • Select "USB flash drive" as the media type.
      • Choose the USB drive from the "Device" dropdown menu.
      • Click "Next" and follow the on-screen instructions.
  4. Wait for the Process to Complete: The process of creating a bootable USB drive may take some time, depending on the size of the ISO image and the speed of your computer. Do not interrupt the process.

  5. Verify the Bootable Drive: Once the process is complete, you can verify that the USB drive is bootable by restarting your computer and entering the BIOS or UEFI settings. Look for the option to boot from the USB drive and select it. If the drive is bootable, you should see the Windows 10 setup screen.

FAQs

Q: What if my USB drive is not recognized by the tool?

A: Ensure the USB drive is properly connected to the computer. Try using a different USB port. If the drive still isn’t recognized, it may be faulty or incompatible.

Q: Can I use a USB drive with less than 8GB storage capacity?

A: While technically possible, it is not recommended. A larger drive ensures sufficient space for the installation files and temporary data.

Q: What happens if I interrupt the process of creating the bootable drive?

A: Interrupting the process can result in a corrupted USB drive, rendering it unusable for installation. It is crucial to allow the process to complete without interruption.

Q: Can I create a bootable USB drive for Windows 10 using a Mac computer?

A: Yes, you can use a tool like TransMac to create a bootable USB drive for Windows 10 on a Mac computer.

Q: How can I use the bootable USB drive to install Windows 10?

A: After creating the bootable USB drive, you can use it to install Windows 10 on a new computer or reinstall it on an existing one. During the boot process, select the option to boot from the USB drive. Follow the on-screen instructions to complete the installation.

Tips

  • Back up your data: Before proceeding with the installation, back up all your important data to prevent data loss.
  • Check system requirements: Ensure your computer meets the minimum system requirements for Windows 10.
  • Disable antivirus software: Temporarily disable antivirus software during the installation process to avoid potential conflicts.
  • Use a reliable USB drive: Choose a high-quality USB flash drive from a reputable brand to ensure reliability during the installation process.
  • Keep the USB drive connected during the installation: Do not disconnect the USB drive until the installation process is complete.

Conclusion

Creating a bootable USB drive for Windows 10 is a straightforward process that empowers users to install or reinstall Windows 10 with ease. By following the steps outlined in this guide and using the appropriate tools, users can create a bootable USB drive that allows for a smooth and efficient installation experience. This method offers numerous advantages over traditional installation methods, making it an ideal choice for modern users.

Creating A Windows 10 Usb Boot Windows 10 how to make a usb drive bootable - managesexi How to Create Windows 10 Bootable USB Flash Drive  RUFUS
How to Create a Windows 10 Bootable USB Drive using DiskPart  Computer Systems Servicing Guide How To Create Bootable USB Drive from Windows 10 ISO With CMD - YouTube Bootable Windows 10 USB Flash Disk. How to Create Windows 10 Bootable USB Disk? - YouTube
How To Create Bootable Windows 10 Usb Flash Drive Using The Media - Vrogue How To Create A Bootable Usb With Easybcd On Windows 10

Closure

Thus, we hope this article has provided valuable insights into Creating a Bootable USB Drive for Windows 10: A Comprehensive Guide. We appreciate your attention to our article. See you in our next article!

Photo Story 3 For Windows 10: A Comprehensive Guide To Creating Engaging Visual Narratives

Photo Story 3 for Windows 10: A Comprehensive Guide to Creating Engaging Visual Narratives

Related Articles: Photo Story 3 for Windows 10: A Comprehensive Guide to Creating Engaging Visual Narratives

Introduction

In this auspicious occasion, we are delighted to delve into the intriguing topic related to Photo Story 3 for Windows 10: A Comprehensive Guide to Creating Engaging Visual Narratives. Let’s weave interesting information and offer fresh perspectives to the readers.

Photo Story 3 for Windows 10: A Comprehensive Guide to Creating Engaging Visual Narratives

PPT - Microsoft Photo Story 3 for Windows PowerPoint Presentation, free download - ID:6806569

Photo Story 3, a program designed for Windows 10, offers a user-friendly interface for creating visually compelling narratives. While often overlooked in the modern digital landscape dominated by sophisticated video editing software, Photo Story 3 remains a valuable tool for crafting simple yet effective slideshows with a focus on storytelling. Its ease of use and intuitive design make it an ideal choice for individuals seeking to preserve memories, share personal experiences, or create educational presentations.

Understanding the Power of Visual Storytelling:

Photo Story 3 emphasizes the power of visual storytelling. It allows users to combine photographs with text, music, and transitions to create a dynamic slideshow that engages the audience. This approach utilizes the inherent human connection with visual elements, making the information conveyed more memorable and impactful.

Key Features of Photo Story 3:

Photo Story 3’s simplicity is its strength. It provides a streamlined set of features that facilitate the creation of compelling slideshows without overwhelming the user with complex functionalities. These key features include:

  • Image Import and Organization: Photo Story 3 supports importing images from various sources, including digital cameras, scanners, and computer files. Users can easily organize their images within the program, ensuring a smooth workflow.
  • Text and Captioning: Adding text to images is crucial for providing context and narrative structure. Photo Story 3 offers flexible text editing options, allowing users to customize font styles, sizes, and colors.
  • Audio Integration: Background music plays a significant role in setting the tone and enhancing the emotional impact of a slideshow. Photo Story 3 allows users to add music from their personal libraries or utilize pre-selected soundtracks.
  • Transitions and Effects: Photo Story 3 offers a range of transitions, including fades, wipes, and zooms, to seamlessly connect images and create a visually appealing flow.
  • Export Options: Once the slideshow is complete, users can export it in various formats, including video files (WMV) and self-running presentations. This versatility ensures compatibility with different devices and platforms.

Benefits of Using Photo Story 3:

While Photo Story 3 may not offer the advanced editing capabilities of professional video editing software, it excels in its simplicity and user-friendliness. This makes it an ideal tool for:

  • Preserving Memories: Capturing precious moments and sharing them with loved ones is a central function of Photo Story 3. Its ease of use allows users to create personalized slideshows showcasing family vacations, weddings, or other significant events.
  • Creating Educational Presentations: Photo Story 3 is a valuable tool for teachers, educators, and students looking to create engaging presentations. Its visual storytelling approach can help bring history, science, or other subjects to life.
  • Sharing Personal Experiences: Photo Story 3 facilitates the sharing of personal stories and experiences, offering a platform to showcase travels, hobbies, or artistic endeavors.
  • Creating Business Presentations: While not as sophisticated as professional video editing software, Photo Story 3 can be used to create basic presentations for business purposes, particularly for showcasing products, services, or company achievements.

FAQs about Photo Story 3 for Windows 10:

Q: Is Photo Story 3 still available for download?

A: Photo Story 3 is no longer officially available for download. Microsoft discontinued the program in 2009, and it is no longer supported. However, users can find older versions of the software through unofficial sources online, but it’s important to exercise caution when downloading software from unknown sources.

Q: What are the system requirements for Photo Story 3?

A: Photo Story 3 requires a Windows operating system, specifically Windows XP, Vista, or Windows 7. It is not compatible with Windows 10 or later versions.

Q: Can I use Photo Story 3 to create videos for social media platforms?

A: While Photo Story 3 allows for exporting videos in WMV format, the output may not be compatible with all social media platforms. Some platforms may require specific video formats or resolutions.

Q: Are there any alternatives to Photo Story 3 for creating slideshows?

A: Yes, there are numerous alternatives to Photo Story 3, both free and paid, available for Windows 10. Some popular options include:

  • Windows Movie Maker: While discontinued, Windows Movie Maker remains a popular option for creating basic slideshows.
  • PowerPoint: Microsoft PowerPoint is a powerful presentation software that can be used to create slideshows with advanced features.
  • Google Photos: Google Photos offers a free and user-friendly platform for creating slideshows directly from your photo library.
  • Adobe Spark: Adobe Spark is a cloud-based design platform that allows users to create slideshows with professional-looking templates and features.

Tips for Using Photo Story 3 Effectively:

  • Choose High-Quality Images: The quality of your images significantly impacts the overall visual appeal of your slideshow. Use high-resolution images for the best results.
  • Keep the Story Concise: Focus on telling a clear and concise story. Avoid overloading the slideshow with too many images or text.
  • Use Effective Transitions: Transitions help to create a smooth flow between images and enhance the visual appeal of the slideshow. Experiment with different transition styles to find what works best for your story.
  • Select Appropriate Music: Background music plays a vital role in setting the tone and enhancing the emotional impact of your slideshow. Choose music that complements the theme and mood of your story.
  • Proofread Carefully: Before exporting your slideshow, carefully proofread all text for errors in spelling and grammar.

Conclusion:

Photo Story 3, while no longer officially supported, remains a valuable tool for creating simple yet engaging slideshows. Its user-friendly interface and intuitive features make it accessible to individuals with varying levels of technical expertise. While alternative options exist with more advanced features, Photo Story 3 continues to offer a streamlined approach to visual storytelling, making it an ideal choice for preserving memories, sharing personal experiences, or creating educational presentations.

Photo Story 3 for Windows - QuanTriMang.com Photo Story 3 for Windows  Other Multimedia Software Create Free Slideshows from Photos with Microsoft Photostory 3
Photo Story 3 For Windows Download Photo Story 3 For Windows Photo Story 3 for Windows - Mrs. Ammons' Tech Help
PPT - Microsoft Photo Story 3 for Windows PowerPoint Presentation, free download - ID:6806569 Photo Story 3 Tutorial

Closure

Thus, we hope this article has provided valuable insights into Photo Story 3 for Windows 10: A Comprehensive Guide to Creating Engaging Visual Narratives. We appreciate your attention to our article. See you in our next article!

The Future Of Productivity: Exploring The Possibilities Of Office 2025

The Future of Productivity: Exploring the Possibilities of Office 2025

Introduction

With enthusiasm, let’s navigate through the intriguing topic related to The Future of Productivity: Exploring the Possibilities of Office 2025. Let’s weave interesting information and offer fresh perspectives to the readers.

The Future of Productivity: Exploring the Possibilities of Office 2025

The Future of Office Productivity, ChatGPT Advanced Robot Typing on a Computer, Generative AI

The world of work is constantly evolving, driven by technological advancements and shifting demands. As we approach 2025, the landscape of productivity tools is expected to be dramatically transformed. While Microsoft has not officially announced a release of "Office 2025," the concept of a future iteration of the suite serves as a valuable starting point for exploring the potential trajectory of office software.

The Evolution of Office Software

Microsoft Office has been a cornerstone of productivity for decades. From its humble beginnings as a suite of desktop applications, it has evolved into a comprehensive ecosystem encompassing cloud-based services, mobile apps, and AI-powered features. This evolution reflects the changing needs of the workforce, which is increasingly mobile, collaborative, and data-driven.

Anticipating the Future of Office Suites

While the specifics of "Office 2025" remain speculative, certain trends suggest the direction of future development:

  • Enhanced Cloud Integration: Cloud-based solutions like Microsoft 365 have become the dominant paradigm, enabling seamless collaboration and access from any device. Future iterations of Office are likely to further strengthen cloud integration, offering real-time co-authoring capabilities, enhanced storage options, and seamless data synchronization.
  • AI-Powered Automation: Artificial intelligence is rapidly transforming various industries, and office software is no exception. Future versions of Office could leverage AI to automate tasks, streamline workflows, and provide intelligent insights. This includes features like automated document summarization, content generation, and data analysis.
  • Immersive User Experiences: The rise of augmented and virtual reality technologies presents opportunities for immersive and interactive office experiences. Future Office suites might incorporate these technologies to enhance collaboration, training, and data visualization.
  • Focus on Security and Privacy: As cyber threats become increasingly sophisticated, security and privacy will remain paramount. Future Office iterations will likely prioritize robust security measures, data encryption, and user-centric privacy controls.

The Potential Benefits of Future Office Suites

The anticipated advancements in Office software hold immense potential for individuals and organizations:

  • Increased Productivity: AI-powered automation and streamlined workflows can significantly enhance productivity, freeing up time for strategic tasks and creative endeavors.
  • Enhanced Collaboration: Real-time collaboration tools and cloud-based platforms can foster seamless teamwork, regardless of location or device.
  • Improved Decision-Making: AI-driven insights and data analysis can provide valuable information to support informed decision-making.
  • Personalized Workflows: Future Office suites could adapt to individual preferences and working styles, creating personalized experiences that optimize productivity.
  • Accessible Work Environments: Innovative technologies like accessibility features and voice-based commands can make Office software more inclusive and accessible for individuals with disabilities.

FAQs about Future Office Software

Q: When will "Office 2025" be released?

A: Microsoft has not announced any specific release plans for a product named "Office 2025." The company continually updates its Office suite with new features and improvements, often released as part of its ongoing Microsoft 365 subscription service.

Q: Will "Office 2025" be available as a standalone download?

A: It is highly likely that future versions of Office will continue to be available through subscription services like Microsoft 365, providing access to the latest features and updates. However, standalone downloads may still be offered for specific versions or legacy applications.

Q: Will "Office 2025" be compatible with older operating systems?

A: Microsoft generally prioritizes compatibility with the latest operating systems. Future versions of Office may require specific system requirements and may not be compatible with older operating systems.

Q: What will be the pricing for "Office 2025"?

A: Pricing for future Office software will likely remain similar to current subscription models or standalone purchase options. Specific pricing details will be announced by Microsoft closer to any potential release.

Tips for Preparing for Future Office Software

  • Stay Informed: Keep abreast of Microsoft’s announcements and updates regarding Office software.
  • Embrace Cloud-Based Solutions: Transition to cloud-based platforms like Microsoft 365 to take advantage of enhanced collaboration and accessibility features.
  • Explore AI-Powered Tools: Familiarize yourself with AI-powered productivity tools and consider how they can augment your workflow.
  • Invest in Training: Stay current with the latest software updates and features by participating in training programs.

Conclusion

While the specifics of "Office 2025" remain uncertain, the trends and possibilities outlined above suggest a future where office software plays a transformative role in shaping productivity and collaboration. By embracing technological advancements and adapting to evolving needs, individuals and organizations can leverage the power of future Office suites to unlock new levels of efficiency and innovation. The future of work is being shaped by the tools we use, and the evolution of Office software is poised to play a pivotal role in this transformation.

PPT - Leading With The Future Of Productivity PowerPoint Presentation, free download - ID:4938605 Start Grasping The Modern Office Productivity Trends & Challenges Today Future shocks: 17 technology predictions for 2025  World Economic Forum
THE FUTURE OF PRODUCTIVITY The Future of Productivity Exploring the Future of Business Productivity with AI-Powered Tools Office of the Future: Productivity Anywhere
PPT - The future of productivity PowerPoint Presentation, free download - ID:6255307 The Future of Workplace Productivity  Twinview

Closure

Thus, we hope this article has provided valuable insights into The Future of Productivity: Exploring the Possibilities of Office 2025. We thank you for taking the time to read this article. See you in our next article!

Upgrading To Windows 11: A Comprehensive Guide

Upgrading to Windows 11: A Comprehensive Guide

Introduction

In this auspicious occasion, we are delighted to delve into the intriguing topic related to Upgrading to Windows 11: A Comprehensive Guide. Let’s weave interesting information and offer fresh perspectives to the readers.

Upgrading to Windows 11: A Comprehensive Guide

Upgrading to Windows 11 Why Wait for Microsoft Step by step - YouTube

Windows 11, the latest iteration of Microsoft’s popular operating system, offers a range of new features and improvements designed to enhance the user experience. Whether you’re a casual user or a tech enthusiast, upgrading to Windows 11 can bring about significant benefits. This guide provides a comprehensive overview of the upgrade process, its advantages, and essential considerations.

Understanding the Upgrade Process

Upgrading to Windows 11 involves replacing your existing operating system with the latest version. This process can be performed in two primary ways:

  • Clean Installation: This method involves erasing your hard drive and installing Windows 11 from scratch. This ensures a fresh system with no leftover files or settings from the previous operating system.
  • In-Place Upgrade: This method allows you to upgrade your existing Windows 10 installation to Windows 11 while retaining your personal files, applications, and settings.

System Requirements and Compatibility

Before attempting an upgrade, it’s crucial to ensure your computer meets the minimum system requirements for Windows 11. These include:

  • Processor: 1 gigahertz (GHz) or faster with 2 or more cores
  • RAM: 4 gigabytes (GB)
  • Storage: 64 GB or larger storage device
  • Graphics Card: Compatible with DirectX 12 or later, WDDM 2.x driver
  • Display: High definition (720p) display with a minimum resolution of 1366 x 768 pixels

Benefits of Upgrading to Windows 11

Upgrading to Windows 11 offers several advantages, including:

  • Enhanced Security: Windows 11 features improved security measures, including enhanced threat protection, hardware-based security features, and regular updates to address vulnerabilities.
  • Improved Performance: Windows 11 is optimized for modern hardware, resulting in faster boot times, improved application performance, and smoother multitasking.
  • New User Interface: Windows 11 boasts a redesigned user interface with a simplified Start menu, rounded corners, and a more modern aesthetic.
  • Enhanced Gaming Experience: Windows 11 includes features specifically designed to enhance gaming performance, such as DirectX 12 Ultimate support, Auto HDR, and Xbox Game Pass integration.
  • Improved Focus and Productivity: Features like Focus Assist and Snap Layouts help users minimize distractions and enhance productivity.

Preparing for the Upgrade

Before initiating the upgrade process, it’s essential to prepare your system to ensure a smooth transition:

  • Back Up Your Data: Create a backup of your important files, including documents, photos, and other essential data. This will safeguard your data in case of any unexpected issues during the upgrade.
  • Check for Compatibility: Verify that your hardware and software are compatible with Windows 11. This can be done by using Microsoft’s PC Health Check app.
  • Update Your Drivers: Ensure that your device drivers are up to date. Outdated drivers can cause compatibility issues during the upgrade process.
  • Uninstall Unnecessary Programs: Remove any unused programs or applications to free up storage space and improve performance.

Upgrading to Windows 11: Step-by-Step Guide

The upgrade process can vary depending on the chosen method. Here’s a general guide for both clean installation and in-place upgrade:

Clean Installation:

  1. Create a Bootable USB Drive: Download the Windows 11 installation media from Microsoft’s website and create a bootable USB drive.
  2. Boot from USB Drive: Restart your computer and boot from the USB drive.
  3. Follow On-Screen Instructions: The installation process will guide you through the steps, including selecting language, region, and partition.
  4. Format the Hard Drive: Choose to format the hard drive to ensure a clean installation.
  5. Install Windows 11: Wait for the installation process to complete.
  6. Configure Windows 11: After installation, configure your settings and personalize your system.

In-Place Upgrade:

  1. Check for Updates: Ensure that your Windows 10 system is up to date by checking for available updates.
  2. Download Windows 11: Download the Windows 11 setup file from Microsoft’s website.
  3. Run the Setup File: Run the setup file and follow the on-screen instructions.
  4. Accept the License Terms: Read and accept the license terms.
  5. Choose the Upgrade Option: Select the option to keep personal files and apps during the upgrade.
  6. Wait for Installation: Allow the upgrade process to complete.

Troubleshooting Common Issues

During the upgrade process, you may encounter some common issues:

  • Insufficient Disk Space: Ensure you have enough free space on your hard drive to accommodate Windows 11.
  • Incompatible Hardware or Software: Check for compatibility issues with your hardware or software and update drivers if necessary.
  • Installation Errors: If you encounter errors during installation, try restarting the process or seeking assistance from Microsoft support.

Frequently Asked Questions

Q: Is it safe to upgrade to Windows 11?

A: Yes, upgrading to Windows 11 is generally safe if you follow the recommended steps and ensure your system meets the minimum requirements.

Q: Will I lose my data during the upgrade?

A: If you choose the in-place upgrade method, you can retain your personal files and applications. However, it’s always recommended to back up your data before upgrading.

Q: Can I downgrade back to Windows 10 after upgrading?

A: Yes, you can downgrade back to Windows 10 within 10 days of upgrading to Windows 11. However, this will erase all data and settings installed on Windows 11.

Q: What are the minimum system requirements for Windows 11?

A: Refer to the system requirements mentioned earlier in this guide.

Q: What if my computer doesn’t meet the minimum requirements?

A: If your computer doesn’t meet the minimum requirements, you may not be able to upgrade to Windows 11. You can consider purchasing a new computer or upgrading your existing hardware.

Tips for a Smooth Upgrade

  • Check for compatibility before upgrading.
  • Back up your data before starting the upgrade process.
  • Ensure you have enough free disk space.
  • Update your drivers to the latest versions.
  • Disable antivirus software during the upgrade process.
  • Restart your computer after the upgrade is complete.

Conclusion

Upgrading to Windows 11 can offer significant benefits, including enhanced security, improved performance, and a modernized user interface. By following the recommended steps and addressing potential issues, you can ensure a smooth and successful upgrade experience. Remember to back up your data, check compatibility, and update drivers before initiating the upgrade process.

How to Install Windows 11 Update or Upgrade  FREE Step by Step - YouTube How to Upgrade Windows 11 HOME to Windows 11 PRO? - YouTube Buy Windows 11 User Guide for Beginners: A Comprehensive Guide to Master Windows 11 Operating
Windows 11 Upgrade From Windows 10 Tutorial How To Upgrade Windows - Riset How To Upgrade To Windows 11 From Windows 10 Microsoft Tutorial - Vrogue A Comprehensive English Guide on Upgrading to Windows 11 - REALM RUSH
How to Upgrade to Windows 11 Right Now - Rondea Windows 11 Upgrade

Closure

Thus, we hope this article has provided valuable insights into Upgrading to Windows 11: A Comprehensive Guide. We hope you find this article informative and beneficial. See you in our next article!

Navigating The Terrain: Panasonic Toughbook CF-54 Drivers For Windows 10

Navigating the Terrain: Panasonic Toughbook CF-54 Drivers for Windows 10

Introduction

With great pleasure, we will explore the intriguing topic related to Navigating the Terrain: Panasonic Toughbook CF-54 Drivers for Windows 10. Let’s weave interesting information and offer fresh perspectives to the readers.

Meet the powerful, portable, semi-rugged CF-54 Windows Toughbook  Panasonic Australia Business Blog

The Panasonic Toughbook CF-54, a ruggedized laptop designed for demanding environments, has earned a reputation for its durability and reliability. However, maximizing its potential requires seamless integration with your chosen operating system. This article delves into the crucial aspect of installing the appropriate drivers for Windows 10 on the CF-54, ensuring optimal performance and functionality.

Understanding the Role of Drivers

Drivers act as the bridge between your hardware and software, enabling communication and proper operation. Think of them as translators, converting the language of your hardware components into instructions your operating system can understand. Without the correct drivers, your CF-54’s components, such as the network card, touchpad, or graphics adapter, may not function properly or at all.

Acquiring the Right Drivers for Your Panasonic Toughbook CF-54

The first step towards a smooth Windows 10 experience with your CF-54 is acquiring the necessary drivers. Panasonic, as the manufacturer, provides comprehensive driver support for its products. Here’s how you can locate and download the correct drivers:

  1. Visit the Panasonic Support Website: Navigate to the Panasonic Toughbook support website. The website is the official source for the latest driver updates and support documentation.

  2. Locate Your CF-54 Model: On the website, utilize the search function to locate your specific CF-54 model. Be precise with the model number to ensure you download the correct drivers.

  3. Access the Drivers Section: Once you’ve located your model, navigate to the "Drivers and Downloads" or "Support" section. This section typically houses all the available drivers and software for your device.

  4. Filter by Operating System: The driver library will likely be categorized by operating system. Select Windows 10 as your operating system to filter for the relevant drivers.

  5. Download the Required Drivers: Identify the specific drivers you need based on the components you wish to install or update. For example, you might require drivers for the network adapter, touchpad, graphics card, and other peripherals.

Installing Drivers on Your Panasonic Toughbook CF-54

Once you’ve downloaded the required drivers, follow these steps to install them on your CF-54:

  1. Extract the Driver Files: The downloaded driver package will likely be in a compressed format (e.g., ZIP). Extract the contents of the package to a convenient location on your computer.

  2. Run the Setup File: Locate the setup file within the extracted driver folder. It will typically be an executable file (e.g., .exe). Double-click the setup file to launch the installation process.

  3. Follow On-Screen Instructions: The installation wizard will guide you through the process. Accept the license agreement and follow the prompts to complete the installation.

  4. Restart Your Computer: After the installation is complete, restart your computer for the changes to take effect.

Troubleshooting Driver Installation Issues

While the driver installation process is generally straightforward, you may encounter some challenges. Here are some common troubleshooting tips:

  • Check for Compatibility: Ensure that the downloaded drivers are compatible with your specific CF-54 model and Windows 10 version. Refer to the Panasonic support website for detailed compatibility information.

  • Run as Administrator: Some driver installations require administrator privileges. Right-click the setup file and select "Run as administrator" to ensure the installation process completes successfully.

  • Disable Antivirus Software: Antivirus software can sometimes interfere with driver installations. Temporarily disable your antivirus software during the installation process.

  • Update Windows 10: Outdated Windows 10 drivers can lead to incompatibility issues. Ensure your Windows 10 operating system is up-to-date.

  • Contact Panasonic Support: If you continue to encounter difficulties, reach out to Panasonic support for assistance. They can provide tailored guidance and support for your specific CF-54 model.

FAQ: Panasonic Toughbook CF-54 Drivers for Windows 10

Q: Are there universal drivers for all CF-54 models?

A: No, drivers are specific to each CF-54 model. Ensure you download the drivers designed for your particular model to avoid compatibility issues.

Q: Can I install drivers from third-party websites?

A: While third-party websites may offer drivers, it’s generally recommended to use drivers provided by Panasonic. Third-party drivers might not be compatible or could contain malware.

Q: Do I need to install all the drivers provided by Panasonic?

A: You only need to install the drivers for the components you intend to use or update. For example, if you don’t use the built-in webcam, you don’t need to install its driver.

Q: How often should I update drivers?

A: Regularly updating drivers is crucial for optimal performance and security. Check for driver updates periodically, especially after major Windows updates or when encountering issues with your CF-54.

Tips for Maintaining Optimal Driver Performance

  • Regularly Check for Updates: Stay informed about driver updates by visiting the Panasonic support website or using the Windows Update feature.

  • Create a System Restore Point: Before installing new drivers, create a system restore point. This allows you to revert to a previous state if the new drivers cause issues.

  • Keep Your Operating System Updated: Ensure your Windows 10 operating system is up-to-date. Windows updates often include driver improvements and security patches.

  • Avoid Unnecessary Driver Installations: Only install drivers for components you intend to use. Installing unnecessary drivers can potentially cause conflicts and performance issues.

Conclusion

Installing the appropriate drivers for your Panasonic Toughbook CF-54 on Windows 10 is essential for optimal functionality and performance. By following the steps outlined in this article and utilizing the provided resources, you can ensure a seamless integration of your CF-54 into your Windows 10 environment. Remember to prioritize driver updates from official sources and troubleshoot any issues promptly for a reliable and efficient computing experience.

Panasonic ToughbookWindows 10 Update  Toughpad Windows 10 Update  M Rugged Mobile CF-54 - Toughbook Semi Ruggedized Notebooks  Panasonic Business Panasonic Toughbook CF-54 (i5-7300U) Rugged Laptop Review - NotebookCheck.net Reviews
Panasonic Toughbook 54, CF-54 MK3, 14-inch FHD, Gloved Multi-Touch, Intel Core i5-7300U @ 2 Panasonic's new slim Toughbook CF-54 is ready for anything  Windows Central Panasonic Toughbook 54 Prime  Panasonic Mobility Solutions
Panasonic ToughBook CF-54 Core i5-5300U 4GB 500GB 14″ WIN 10  CompuPoint Panasonic Toughbook CF-54 - i5-7300U · Intel HD Graphics 620 · 14.0”, HD (1366 x 768), IPS

Closure

Thus, we hope this article has provided valuable insights into Navigating the Terrain: Panasonic Toughbook CF-54 Drivers for Windows 10. We appreciate your attention to our article. See you in our next article!