Archives September 2023

R Pc Windows 10

r pc windows 10

Introduction

With great pleasure, we will explore the intriguing topic related to r pc windows 10. Let’s weave interesting information and offer fresh perspectives to the readers.

It seems you are asking about "R for PC Windows 10." This phrase doesn’t have a direct meaning in the context of technology. "R" is a powerful statistical programming language and environment, and Windows 10 is a popular operating system. However, the combination "R for PC Windows 10" doesn’t represent a specific software or feature.

Installing R on Windows10 - YouTube

It’s likely you’re interested in using R on a Windows 10 PC. If that’s the case, let’s delve into the world of R and its capabilities on Windows 10.

R: A Statistical Programming Language for Data Analysis

R is a free and open-source programming language and software environment specifically designed for statistical computing and graphics. It has become a cornerstone in the field of data science, statistics, and machine learning. Here’s why:

1. Comprehensive Statistical Capabilities: R offers a vast array of packages (libraries) that provide functions for performing statistical analysis, data visualization, and machine learning tasks. From basic descriptive statistics to advanced models like linear regression, time series analysis, and neural networks, R has the tools to handle complex data analysis challenges.

2. Data Manipulation and Visualization: R excels in data manipulation and visualization. Packages like dplyr and tidyr streamline data cleaning, transformation, and reshaping, while packages like ggplot2 offer a powerful and flexible framework for creating informative and visually appealing graphs.

3. Active Community and Resources: R boasts a large and active community of users and developers. This translates into a wealth of online resources, including tutorials, documentation, forums, and packages. The R community actively contributes to the language’s growth and provides support to users at all levels of experience.

4. Reproducible Research: R promotes reproducible research, a fundamental principle in scientific inquiry. By scripting your data analysis workflow, you can ensure that your results are transparent, verifiable, and easily shared with others.

Installing R on Windows 10

Installing R on Windows 10 is straightforward. Follow these steps:

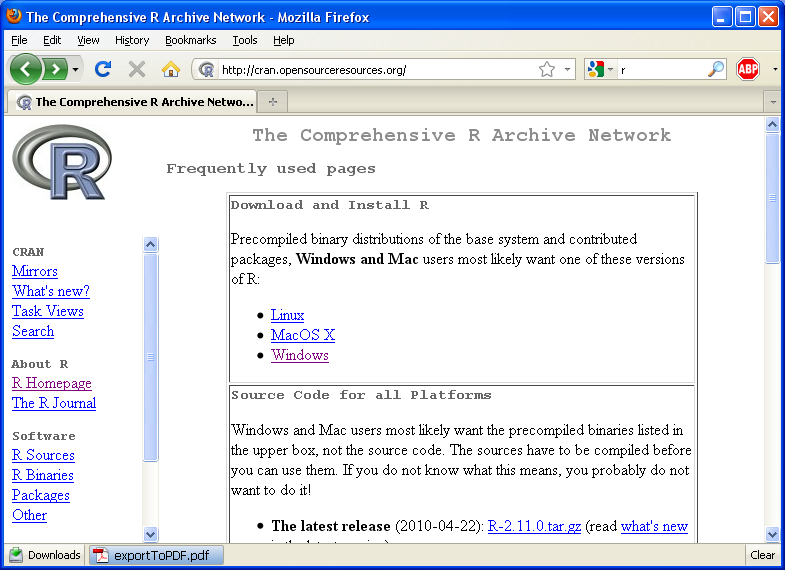
  1. Download R: Visit the official R website (https://cran.r-project.org/) and navigate to the "Download R for Windows" section. Choose the appropriate installer for your system (32-bit or 64-bit).

  2. Run the Installer: Double-click the downloaded installer file and follow the on-screen instructions. The installer will guide you through the process of setting up R on your system.

  3. Verify Installation: After the installation is complete, open the R console by searching for "R" in the Windows Start menu. You should see the R prompt (">").

Using R on Windows 10: A Practical Example

Let’s illustrate the power of R with a simple example:

1. Load the ggplot2 package:

library(ggplot2)

2. Create a sample dataset:

data <- data.frame(
  x = 1:10,
  y = c(2, 4, 6, 8, 10, 12, 14, 16, 18, 20)
)

3. Create a scatter plot:

ggplot(data, aes(x = x, y = y)) +
  geom_point() +
  labs(x = "X-axis", y = "Y-axis", title = "Scatter Plot")

This code snippet loads the ggplot2 package, creates a sample dataset, and then generates a scatter plot. This demonstrates how R can be used to visualize data effectively.

Frequently Asked Questions (FAQs)

1. What are some popular IDEs for R on Windows 10?

There are several Integrated Development Environments (IDEs) that enhance the R experience on Windows 10. Some popular choices include:

  • RStudio: A widely used IDE that provides a comprehensive interface for coding, data visualization, and project management.
  • Visual Studio Code with R extension: A versatile code editor with powerful extensions for R, including syntax highlighting, debugging, and code completion.
  • Rattle: A graphical user interface (GUI) for R that simplifies the process of data analysis and visualization.

2. How do I install R packages on Windows 10?

Installing R packages is straightforward. You can use the install.packages() function in the R console. For example, to install the dplyr package, you would type:

install.packages("dplyr")

3. How do I manage different versions of R on Windows 10?

If you need to work with multiple versions of R, you can use a package manager like Microsoft R Open or Revolution Analytics R to install and manage different versions. These package managers provide a convenient way to switch between versions and ensure compatibility with specific projects.

4. Can I use R with other programming languages on Windows 10?

Yes, R can be integrated with other programming languages like Python, Java, and C++. This allows you to leverage the strengths of different languages for complex data analysis tasks. Packages like reticulate provide tools for interacting with Python from R, enabling seamless data sharing and function calls between the two languages.

Tips for Using R on Windows 10

1. Start with the Basics: Familiarize yourself with fundamental R concepts like data structures, functions, and operators. There are numerous online tutorials and resources available to help you get started.

2. Explore Packages: R’s vast package ecosystem is a treasure trove of functionality. Explore packages relevant to your field of interest and learn how to use them effectively.

3. Practice Regularly: The best way to learn R is by practicing. Work on small projects, analyze real-world datasets, and experiment with different packages.

4. Join the Community: Engage with the R community online. Participate in forums, ask questions, and share your knowledge with others.

5. Stay Updated: R is constantly evolving. Keep up with new releases, package updates, and best practices.

Conclusion

R is a powerful and versatile statistical programming language that is widely used for data analysis, visualization, and machine learning. Installing and using R on Windows 10 is straightforward, and the language offers a rich ecosystem of packages, resources, and community support. By leveraging the capabilities of R, you can gain valuable insights from data, make informed decisions, and contribute to the advancement of knowledge in your field.
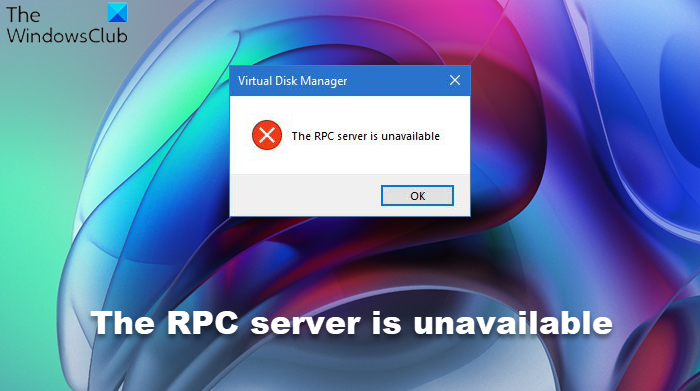
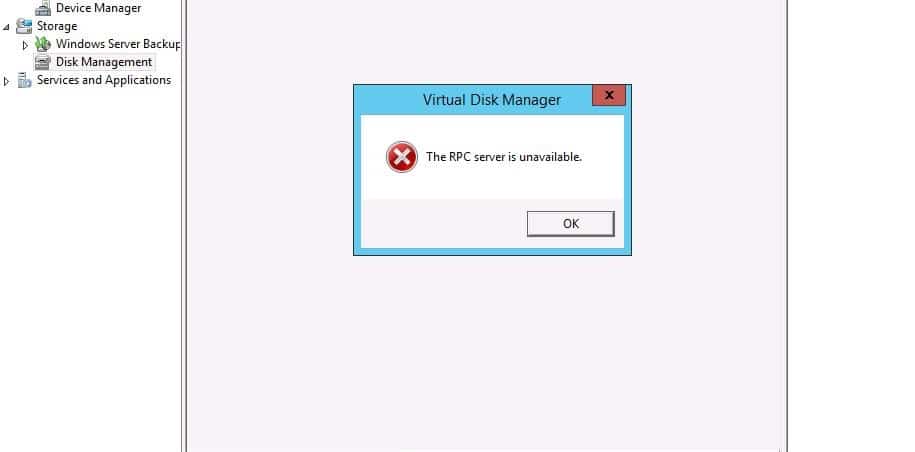
Simple Guide for Installing R on Windows 10 [Fixed] RPC Server Is Unavailable Error in Windows 10 Windows 10에서 RPC 서버를 사용할 수 없음 오류 수정
R for Windows - Windows 10 Download Getting the RPC server is unavailable (0x800706ba) while connecting to the remote device Como alternar o protocolo de conexão RPC entre TCP e Named Pipes no Windows 11 22H2 Network Printing
How To Fix RPC Server Is Unavailable On Windows 10 How to fix RPC server is unavailable (0x800706ba) on windows 10

Closure

Thus, we hope this article has provided valuable insights into r pc windows 10. We appreciate your attention to our article. See you in our next article!

Net Framework 2 0 Download Free Windows 10

net framework 2 0 download free windows 10

Introduction

With great pleasure, we will explore the intriguing topic related to net framework 2 0 download free windows 10. Let’s weave interesting information and offer fresh perspectives to the readers.

Understanding the Legacy of .NET Framework 2.0: A Comprehensive Guide for Windows 10 Users

How to install .NET framework 2.0 in Windows 10? - Microsoft Community

The .NET Framework, a robust software development platform developed by Microsoft, has been a cornerstone of Windows applications for years. While newer versions have emerged, .NET Framework 2.0 remains relevant for specific applications and legacy software. This guide explores the significance of .NET Framework 2.0, its installation process on Windows 10, and its potential benefits for users.

The Significance of .NET Framework 2.0

Released in 2005, .NET Framework 2.0 revolutionized application development with its comprehensive libraries and tools. It offered developers a powerful platform to build rich, interactive applications, fostering a period of significant innovation in Windows software. Many popular applications, particularly those released prior to 2010, rely on .NET Framework 2.0 for their functionality.

Why Install .NET Framework 2.0 on Windows 10?

While Windows 10 natively includes newer versions of .NET Framework, certain applications might require the specific features and compatibility offered by .NET Framework 2.0. This could be due to:

  • Legacy Software Compatibility: Older software, especially those released before 2010, may be designed specifically for .NET Framework 2.0. Attempting to run these applications without the framework can result in errors or complete failure.
  • Specific Feature Requirements: Some applications may leverage specific functionalities or libraries present only in .NET Framework 2.0. This could be due to the application’s design or dependencies on older libraries.
  • Developer Preference: Developers might choose to build their applications on a specific version of the framework due to familiarity, performance optimization, or specific features available in that version.

Installing .NET Framework 2.0 on Windows 10

Installing .NET Framework 2.0 on Windows 10 is a straightforward process. However, it’s crucial to note that Microsoft no longer directly distributes .NET Framework 2.0 installers. Instead, users need to obtain the installer from alternative sources, such as the Microsoft Download Center or third-party websites.

Important Considerations:

  • Verify Source: Only download the installer from reputable sources to ensure its authenticity and safety.
  • System Requirements: Confirm that your Windows 10 system meets the minimum requirements for .NET Framework 2.0.
  • Security Updates: While .NET Framework 2.0 is no longer actively supported by Microsoft, it’s essential to install any available security updates to mitigate potential vulnerabilities.

Steps for Installation:

  1. Download the Installer: Locate the .NET Framework 2.0 installer from a trusted source and download it to your computer.
  2. Run the Installer: Double-click the downloaded installer file to initiate the installation process.
  3. Follow On-Screen Instructions: The installer will guide you through the installation steps. Accept the license agreement and follow the prompts.
  4. Restart Your Computer: After the installation is complete, restart your computer to ensure all changes are applied correctly.

Troubleshooting Installation Issues:

If you encounter errors during installation, consider the following troubleshooting steps:

  • System Requirements: Ensure your system meets the minimum requirements for .NET Framework 2.0.
  • Administrator Privileges: Run the installer as administrator to grant necessary permissions.
  • Antivirus Software: Temporarily disable your antivirus software to avoid potential conflicts.
  • Internet Connection: Verify that you have a stable internet connection during the installation process.
  • Compatibility Mode: If the installer fails, try running it in compatibility mode for an older version of Windows.

FAQs about .NET Framework 2.0 on Windows 10

Q: Is .NET Framework 2.0 still supported by Microsoft?

A: No, Microsoft no longer provides official support for .NET Framework 2.0. This includes security updates and bug fixes.

Q: What are the risks of using .NET Framework 2.0 on Windows 10?

A: Due to the lack of active support, .NET Framework 2.0 might be vulnerable to security exploits. It’s crucial to install any available security updates and exercise caution when running applications built on this framework.

Q: Can I uninstall .NET Framework 2.0 after installing it?

A: Yes, you can uninstall .NET Framework 2.0 from Windows 10. However, this might render applications dependent on it unusable.

Q: Can I install multiple versions of .NET Framework on Windows 10?

A: Yes, you can install multiple versions of .NET Framework on Windows 10, including .NET Framework 2.0. However, it’s recommended to install only the versions required by your applications to avoid potential conflicts.

Tips for Using .NET Framework 2.0 on Windows 10

  • Keep it Updated: While official support has ended, it’s essential to check for and install any available security updates for .NET Framework 2.0.
  • Alternatives: If possible, consider using alternative applications that don’t rely on .NET Framework 2.0.
  • Virtual Machines: For compatibility with legacy applications, consider running them in a virtual machine environment using an older version of Windows that natively supports .NET Framework 2.0.

Conclusion

While .NET Framework 2.0 is a legacy technology, it remains relevant for specific applications and situations. Understanding its significance, installation process, and potential risks is crucial for users who rely on applications built on this framework. By following the guidelines and tips provided in this guide, users can ensure a smooth experience while using .NET Framework 2.0 on their Windows 10 systems. Remember, while .NET Framework 2.0 offers a bridge to the past, it’s essential to be aware of its limitations and to explore alternative solutions when possible.

Net Framework 2 0 Offline Installer Windows 10 32 Bit  Webframes.org Download net framework 2-0 for windows 10 64 bit - gloamela [Windows 10] Installare .NET Framework 2.0/3.0 - YouTube
Net Framework 2 0 Offline Installer Windows 10 64 Bit  Webframes.org Скачать NET Framework 2.0 бесплатно для Windows 10 64 bit Free download -net framework 2-0 for windows 10 - amelapeople
Install .Net Framework 2.0 and 3.5 on Windows 10 - HowPChub How to Download .NET Framework 2.0 and 3.5 in Windows 10 in 2020  Net framework, Windows 10

Closure

Thus, we hope this article has provided valuable insights into net framework 2 0 download free windows 10. We hope you find this article informative and beneficial. See you in our next article!

Unlocking The Silence: Troubleshooting Outlook Notifications On Windows 11

Unlocking the Silence: Troubleshooting Outlook Notifications on Windows 11

Introduction

In this auspicious occasion, we are delighted to delve into the intriguing topic related to Unlocking the Silence: Troubleshooting Outlook Notifications on Windows 11. Let’s weave interesting information and offer fresh perspectives to the readers.

Unlocking the Silence: Troubleshooting Outlook Notifications on Windows 11

How to Silence Notifications in Windows With Focus Assist?

In the dynamic world of communication, timely notifications are paramount. The ability to receive alerts for incoming emails, calendar events, and other crucial updates keeps users informed and connected. However, when Outlook notifications on Windows 11 cease functioning, it disrupts workflow and can lead to missed opportunities. This article delves into the intricacies of this issue, providing a comprehensive understanding of its causes, troubleshooting techniques, and potential solutions.

The Importance of Outlook Notifications

Outlook notifications serve as a vital bridge between users and their digital communication ecosystem. They provide immediate alerts for:

  • New Emails: Promptly notifying users of incoming messages, ensuring prompt responses and efficient communication.
  • Calendar Events: Reminders for meetings, appointments, and deadlines, preventing missed commitments and maintaining productivity.
  • Task Reminders: Alerts for pending tasks, facilitating efficient time management and project completion.
  • Other Critical Updates: Notifications for new messages in shared folders, changes in shared calendars, or other relevant updates.

The absence of these notifications can lead to:

  • Missed Opportunities: Important emails, meeting requests, or task deadlines could be overlooked, resulting in lost business or missed deadlines.
  • Reduced Productivity: Constant checking of email and calendar applications can be disruptive and inefficient, impacting productivity.
  • Communication Breakdown: Delayed responses to emails or missed appointments can strain relationships and create communication gaps.

Common Causes of Outlook Notification Failure

Several factors can contribute to Outlook notifications not working on Windows 11. Understanding these root causes is crucial for effective troubleshooting:

1. System Settings:

  • Notification Permissions: Windows 11 offers granular control over application notifications. If Outlook’s notification permissions are disabled, it will not display alerts.
  • Focus Assist: This feature allows users to silence notifications during specific periods, potentially blocking Outlook notifications.
  • System-Wide Notification Settings: If system-wide notification settings are disabled or configured incorrectly, Outlook notifications may not function.

2. Outlook Settings:

  • Notification Settings: Outlook itself has specific settings for managing notifications. If these settings are incorrectly configured or disabled, notifications will not be displayed.
  • Sound and Visual Alerts: Outlook allows users to customize notification sounds and visual cues. If these are disabled or configured improperly, notifications might not be noticeable.
  • Email Account Settings: Some email accounts may have limitations or specific settings that affect notification delivery.

3. Application Conflicts:

  • Antivirus Software: Some antivirus programs can interfere with Outlook’s notification functionality, blocking alerts or delaying their delivery.
  • Firewall Settings: Firewall rules can sometimes prevent Outlook from sending or receiving notifications.
  • Other Applications: Other applications running on the system might interfere with Outlook’s notification process.

4. System Issues:

  • Outdated Drivers: Outdated or incompatible drivers for network adapters, audio devices, or other components might hinder notification delivery.
  • Software Conflicts: Compatibility issues between Outlook and other software installed on the system can lead to notification failures.
  • Operating System Bugs: Rarely, bugs in the Windows 11 operating system can interfere with Outlook’s notification functionality.

Troubleshooting Strategies

The following troubleshooting steps can help diagnose and resolve Outlook notification issues:

1. Check Notification Permissions:

  • Windows 11 Settings: Navigate to Settings > System > Notifications > Apps & Features. Ensure that Outlook is listed and its notification permissions are enabled.
  • Focus Assist: Review the Focus Assist settings in Settings > System > Focus Assist to ensure that Outlook notifications are not being blocked.

2. Verify Outlook Notification Settings:

  • Outlook Settings: Open Outlook and navigate to File > Options > Mail > Notifications. Review the notification settings and ensure that the desired options are selected and enabled.
  • Sound and Visual Alerts: Within the same settings menu, ensure that sound and visual alerts are enabled and configured appropriately.

3. Troubleshoot Email Account Settings:

  • Email Account Settings: Check the email account settings within Outlook to ensure that notifications are enabled for the specific account.
  • Server Settings: Verify that the email server settings are correct and compatible with the email provider.

4. Temporarily Disable Antivirus and Firewall:

  • Antivirus Software: Temporarily disable the antivirus software to rule out any interference with Outlook notifications.
  • Firewall Settings: Review the firewall settings and ensure that Outlook is allowed to send and receive notifications.

5. Update Drivers and Software:

  • Driver Updates: Check for and install the latest drivers for network adapters, audio devices, and other relevant components.
  • Software Updates: Ensure that Outlook and Windows 11 are updated to the latest versions.

6. Run System Troubleshooting Tools:

  • Windows Troubleshooters: Use the built-in Windows troubleshooters for network and system issues to identify and resolve potential problems.
  • Outlook Repair Tool: Run the Outlook repair tool to fix any corrupted files or settings.

7. Reinstall Outlook:

  • Reinstallation: If all other troubleshooting steps fail, consider reinstalling Outlook to resolve potential conflicts or corrupted files.

8. Contact Support:

  • Microsoft Support: If the issue persists, contact Microsoft support for assistance.

FAQs Regarding Outlook Notifications

Q: Why are my Outlook notifications only working for some emails?

A: This could be due to specific email account settings, email filters, or even sender-specific rules. Check email account settings and any filters or rules that might be blocking notifications for certain senders.

Q: Why are my Outlook notifications delayed or inconsistent?

A: This could be caused by network connectivity issues, server delays, or conflicts with other applications. Check network connectivity, review server settings, and look for any conflicting software.

Q: My Outlook notifications are working, but they are not appearing on my taskbar.

A: Ensure that the "Show notification icons on the taskbar" setting is enabled in Windows 11 settings. You can also check the Outlook notification settings to see if the "Display notification icons in the notification area" option is selected.

Q: Why are my Outlook notifications not showing up on my lock screen?

A: By default, Windows 11 does not display notifications on the lock screen. This setting can be adjusted in Settings > System > Notifications > Lock screen.

Tips for Managing Outlook Notifications

  • Customize Notification Settings: Tailor notification settings to your preferences, adjusting sound and visual cues, and setting specific notification rules for different senders.
  • Use Focus Assist: Utilize Focus Assist to silence notifications during specific periods, such as meetings or work sessions, without completely disabling them.
  • Prioritize Important Notifications: Categorize emails or calendar events as high priority to ensure they receive immediate notification.
  • Regularly Check for Updates: Keep Outlook and Windows 11 up-to-date to benefit from bug fixes and performance enhancements.

Conclusion

The absence of Outlook notifications can significantly disrupt workflow and communication. Understanding the common causes of notification failures, employing effective troubleshooting strategies, and implementing proactive management techniques can ensure that users remain connected and informed within the digital landscape. By addressing these issues proactively, users can regain control over their notifications and optimize their productivity and communication efficiency.

How To Silence Calendar Notifications In Outlook - Gipsy Kaitlin Outlook Notification Settings Windows 11 - Linn Shelli Fix Outlook Notifications Not Working Windows 11 - YouTube
Outlook notifications not working on Windows 11 How to Silence Notifications in Windows With Focus Assist? Outlook notifications not working on Windows 11
How to Silence Notifications in Windows With Focus Assist? How to Silence Notifications in Windows With Focus Assist?

Closure

Thus, we hope this article has provided valuable insights into Unlocking the Silence: Troubleshooting Outlook Notifications on Windows 11. We appreciate your attention to our article. See you in our next article!

Navigating The Modern Landscape: An Exploration Of The ASUS Windows 11 Experience

Navigating the Modern Landscape: An Exploration of the ASUS Windows 11 Experience

Introduction

With enthusiasm, let’s navigate through the intriguing topic related to Navigating the Modern Landscape: An Exploration of the ASUS Windows 11 Experience. Let’s weave interesting information and offer fresh perspectives to the readers.

Windows 11 Landscape Scenery 4K #1300h Wallpaper PC Desktop

The ASUS Windows 11 experience offers a compelling blend of cutting-edge technology and user-centric design, designed to seamlessly integrate into the modern digital landscape. This operating system, built upon the foundation of its predecessor, Windows 10, delivers a refined and intuitive user interface, enhanced security features, and a robust ecosystem of applications.

Unveiling the User Interface: A Symphony of Functionality and Aesthetics

The hallmark of Windows 11 lies in its visually appealing and intuitive user interface. The Start Menu, a central hub for accessing applications and settings, has been redesigned to provide a more streamlined and visually appealing experience. It features a centralized location for pinned applications, a "Recommended" section that intelligently suggests relevant apps based on user behavior, and a dynamic "All Apps" list for easy discovery.

The taskbar, a familiar fixture at the bottom of the screen, has been subtly refined. Icons are now centered, creating a more balanced and modern aesthetic. The taskbar also seamlessly integrates with the "Snap Layouts" feature, allowing users to effortlessly arrange multiple windows on the screen with pre-defined layouts, maximizing screen real estate and promoting efficient multitasking.

Windows 11 introduces a new "Widgets" panel, accessible from the taskbar, which provides quick access to relevant information such as weather updates, news headlines, and calendar appointments. This feature leverages the power of artificial intelligence to curate personalized content, ensuring that users are presented with information that is most relevant to their needs.

Beyond Aesthetics: A Deeper Dive into Functionality

Windows 11 goes beyond aesthetic enhancements, offering a range of functional improvements designed to enhance productivity and user experience.

Enhanced Security: The operating system incorporates advanced security features, including "Windows Hello," which enables biometric authentication using facial recognition or fingerprint scanning. This robust security mechanism significantly reduces the risk of unauthorized access and ensures data privacy.

Seamless Integration: Windows 11 seamlessly integrates with other Microsoft services, including OneDrive, Microsoft 365, and Xbox Game Pass. This integration allows users to easily access and manage their files, documents, and games across multiple devices.

Gaming Prowess: Windows 11 is optimized for gaming, offering features like "Auto HDR" and "DirectStorage" that enhance visual fidelity and reduce loading times. It also supports the latest DirectX 12 Ultimate API, enabling developers to create visually stunning and immersive gaming experiences.

Accessibility: Windows 11 prioritizes accessibility, offering a range of features designed to cater to users with disabilities. These features include text-to-speech, screen readers, and customizable keyboard shortcuts, ensuring that the operating system is accessible to all users.

The Power of Windows Update: Windows 11 utilizes the robust Windows Update system to deliver regular updates, ensuring that users have access to the latest security patches, bug fixes, and performance enhancements. This ongoing update process ensures that the operating system remains secure, stable, and up-to-date.

Beyond the Operating System: The ASUS Advantage

ASUS, a leading manufacturer of consumer electronics, enhances the Windows 11 experience by providing hardware that is optimized for the operating system. ASUS laptops and desktops are equipped with powerful processors, high-resolution displays, and robust graphics cards, ensuring that users can enjoy the full potential of Windows 11.

FAQs: Addressing Common Queries

Q: What are the minimum system requirements for Windows 11?

A: To run Windows 11, your device needs to meet the following minimum system requirements:

  • Processor: 1 gigahertz (GHz) or faster with 2 or more cores
  • RAM: 4 gigabytes (GB)
  • Storage: 64 GB or larger storage device
  • System firmware: UEFI, Secure Boot capable
  • Graphics card: Compatible with DirectX 12 or later with WDDM 2.x driver
  • Display: High Definition (720p) display that is at least 9 inches diagonally

Q: How can I upgrade to Windows 11?

A: To upgrade to Windows 11, you can use the "Windows Update" tool. Check for updates regularly, and if your device meets the system requirements, the upgrade will be offered. You can also download the Windows 11 installation media from Microsoft’s website and perform a clean installation.

Q: What are the benefits of using an ASUS laptop with Windows 11?

A: ASUS laptops are designed to complement the features of Windows 11, offering a seamless and optimized experience. This includes features like:

  • ASUS AI Noise Cancellation: This technology utilizes artificial intelligence to filter out background noise during video calls, ensuring clear and crisp communication.
  • ASUS ScreenPad: This innovative feature transforms the touchpad into a secondary display, offering a more efficient and immersive user experience.
  • ASUS Armoury Crate: This software suite allows users to customize and optimize their laptop’s performance, lighting, and other settings.

Q: How can I personalize my Windows 11 experience?

A: Windows 11 offers a wide range of customization options, allowing users to personalize their experience. You can:

  • Change the theme: Select from a variety of pre-defined themes or create your own custom theme.
  • Customize the Start Menu: Pin your favorite applications, add shortcuts, and adjust the layout of the Start Menu.
  • Personalize the taskbar: Choose the icons that appear on the taskbar, adjust its size, and customize its location.
  • Set up a personalized desktop background: Choose from a library of pre-defined backgrounds or upload your own images.

Tips for Optimizing Your ASUS Windows 11 Experience

  • Keep your system updated: Regularly check for and install Windows updates to ensure that your system is secure, stable, and up-to-date.
  • Utilize the "Snap Layouts" feature: This feature allows you to effortlessly arrange multiple windows on the screen with pre-defined layouts, maximizing screen real estate and promoting efficient multitasking.
  • Explore the "Widgets" panel: This panel provides quick access to relevant information such as weather updates, news headlines, and calendar appointments.
  • Utilize the "Windows Hello" feature: This biometric authentication method enhances security by enabling login using facial recognition or fingerprint scanning.
  • Customize your settings: Take advantage of the wide range of customization options available to personalize your Windows 11 experience.

Conclusion: A Platform for Innovation and Progress

The ASUS Windows 11 experience represents a compelling fusion of innovative technology and user-centric design. This operating system, built upon the foundation of its predecessor, Windows 10, delivers a refined and intuitive user interface, enhanced security features, and a robust ecosystem of applications. With its focus on productivity, security, and user experience, Windows 11 provides a robust platform for individuals and businesses alike to navigate the modern digital landscape.

Windows 11 Landscape Scenery [1920x1080] : r/wallpaper Windows 11 Landscape Scenery 4K #1310h Wallpaper PC Desktop Windows 11 powers a new generation of devices for education’s changing landscape  Windows
Windows 11 Landscape Wallpaper Wallpaper : windows 11, digital art, landscape 3840x2160 - 2908667850 - 2230512 - HD Wallpapers yasadışı ek kuşatma asus windows 11 yükseklik ayrıca Arazi
ASUS reveals lineup of Windows 11 laptops, OLED displays and more aimed at content creators Top 10 Laptops That Can Run Windows 11 - Best Windows 11 Laptops

Closure

Thus, we hope this article has provided valuable insights into Navigating the Modern Landscape: An Exploration of the ASUS Windows 11 Experience. We thank you for taking the time to read this article. See you in our next article!

The Power Of Capture: Understanding Screenshot Tools In Windows 10

The Power of Capture: Understanding Screenshot Tools in Windows 10

Introduction

With enthusiasm, let’s navigate through the intriguing topic related to The Power of Capture: Understanding Screenshot Tools in Windows 10. Let’s weave interesting information and offer fresh perspectives to the readers.

The Power of Capture: Understanding Screenshot Tools in Windows 10

How To Capture Screenshot In Windows 10 - Howto Techno

In the digital age, the ability to capture and share visual information is paramount. Windows 10 offers a range of tools for taking screenshots, enabling users to document, share, and explain information with ease. While the term "prt sc" might be familiar to some, it’s a shorthand for the "Print Screen" key, a fundamental component of these tools. This article delves into the multifaceted world of screenshot capture in Windows 10, exploring its importance, various methods, and applications.

The Print Screen Key: A Gateway to Capture

The Print Screen key, often labeled "PrtSc" or "PrtScr" on keyboards, acts as the primary trigger for capturing the entire screen content. When pressed, the system copies the current display to the clipboard, a temporary storage area for data. This copied image can then be pasted into various applications, such as image editors or word processors, for further manipulation or inclusion in documents.

Beyond the Basics: Exploring Diverse Capture Techniques

While the Print Screen key provides a fundamental method for capturing the entire screen, Windows 10 offers a variety of specialized tools to cater to different capture needs. These tools, often integrated with the operating system or available as third-party applications, enhance the screenshot experience by offering greater control and flexibility.

1. The Windows Key + Print Screen Shortcut: A Quick Capture

Combining the Windows key with the Print Screen key (Win + PrtSc) provides a streamlined method for capturing the entire screen. This shortcut automatically saves the screenshot as a PNG file in the "Pictures" folder, within a subfolder named "Screenshots." This method eliminates the need for pasting the image into an application, streamlining the capture process.

2. The Snipping Tool: Precision and Flexibility

The Snipping Tool, a built-in Windows application, offers a more controlled approach to screenshot capture. It allows users to select specific areas of the screen, known as "snips," providing the flexibility to capture only the desired content. The Snipping Tool also offers options for capturing rectangular areas, freeform shapes, windows, or full-screen captures. The captured snips can be saved in various formats, including PNG, JPEG, and GIF, offering users the flexibility to choose the most suitable option for their needs.

3. The Xbox Game Bar: Capturing Gaming Moments

For gamers, the Xbox Game Bar, accessible through the Windows key + G shortcut, provides a dedicated platform for capturing gameplay moments. It allows users to record videos, take screenshots, and even broadcast gameplay live. This tool empowers gamers to share their experiences, showcase skills, or document their progress in a comprehensive and user-friendly manner.

4. Third-Party Applications: Expanding the Capture Horizon

Beyond the built-in tools, a wide array of third-party applications offer advanced features and customization options for screenshot capture. These applications often provide features such as:

  • Annotation and Editing: Adding text, arrows, and other annotations directly to the captured image, enhancing clarity and communication.
  • Scheduled Capture: Automatically capturing screenshots at specific intervals, ideal for monitoring system activity or documenting changes.
  • Scrolling Capture: Capturing entire web pages or long documents, ensuring all content is captured in a single image.
  • Advanced Settings: Fine-tuning settings like capture format, resolution, and quality, allowing users to tailor the capture process to their specific needs.

The Importance of Screenshots: Applications and Benefits

Screenshots hold significant value in various domains, offering a powerful tool for communication, documentation, and problem-solving. Some key applications of screenshot capture include:

  • Technical Support: Providing visual context to technical issues, enabling efficient troubleshooting and resolution.
  • Education and Training: Demonstrating processes, showcasing examples, and enhancing learning experiences.
  • Product Reviews and Feedback: Sharing visual feedback, highlighting features, and providing comprehensive product evaluations.
  • Social Media and Communication: Sharing experiences, capturing funny moments, and facilitating visual communication.
  • Project Management and Collaboration: Documenting progress, showcasing milestones, and facilitating team communication.

FAQs: Addressing Common Queries

1. Where are screenshots saved by default?

Screenshots taken using the Win + PrtSc shortcut are saved in the "Pictures" folder, within a subfolder named "Screenshots."

2. Can I capture a specific window or area of the screen?

Yes, the Snipping Tool allows you to capture specific windows, rectangular areas, freeform shapes, or the entire screen.

3. How do I annotate or edit a screenshot?

The Snipping Tool offers basic annotation features, while third-party applications provide more advanced editing capabilities.

4. Can I capture a scrolling webpage or document?

Some third-party applications offer scrolling capture functionality, enabling you to capture entire web pages or long documents.

5. What are the differences between PNG, JPEG, and GIF formats?

  • PNG: Offers high-quality image compression without loss, suitable for screenshots with text and sharp details.
  • JPEG: Uses lossy compression, ideal for images with gradients and smooth transitions, but can result in some detail loss.
  • GIF: Supports animation, making it suitable for capturing dynamic elements or creating short animations.

Tips for Effective Screenshot Capture

  • Choose the right tool: Select the appropriate capture method based on your needs, whether it’s a quick full-screen capture or a precise snipping of a specific area.
  • Maximize clarity: Ensure your screen is clean and free of distractions before taking a screenshot.
  • Use annotations strategically: Highlight important areas, add explanatory text, or use arrows to guide the viewer’s attention.
  • Optimize image size: Choose an appropriate file format and resolution based on your intended use, balancing image quality with file size.
  • Explore third-party options: Consider using advanced features offered by third-party applications to enhance your screenshot capture capabilities.

Conclusion: Embracing the Power of Visual Capture

In the digital landscape, screenshots have become an indispensable tool for communication, documentation, and problem-solving. From quick captures of the entire screen to precise snips of specific areas, Windows 10 offers a range of tools to meet diverse capture needs. By understanding the different capture methods and their applications, users can leverage the power of visual capture to enhance their workflow, communicate effectively, and share information with clarity and precision. The ability to capture and share visual information empowers users to document experiences, explain concepts, and connect with others in a meaningful and engaging way.

How To Capture Screenshot In Windows 10 - Howto Techno How To Capture Screenshots In Windows 10  Tools - Device Management Blog How To Capture Windows 10 Image Images
2024 Guide to take Screenhots with Snipping Tool in Windows 10 - YouTube 4 Easy Methods of How to Take a Screenshot on Windows 10 How to Take a Screenshot in Windows 10 (+ Windows 8 and 7)
How to Take Screenshots in Windows 10 8 Fastest Ways To Take Screenshots On Windows 10  Outside The Box Business Center

Closure

Thus, we hope this article has provided valuable insights into The Power of Capture: Understanding Screenshot Tools in Windows 10. We appreciate your attention to our article. See you in our next article!

A Comprehensive Guide To Understanding QBittorrent And Its Legitimate Use On Windows 11

A Comprehensive Guide to Understanding qBittorrent and its Legitimate Use on Windows 11

Introduction

In this auspicious occasion, we are delighted to delve into the intriguing topic related to A Comprehensive Guide to Understanding qBittorrent and its Legitimate Use on Windows 11. Let’s weave interesting information and offer fresh perspectives to the readers.

A Comprehensive Guide to Understanding qBittorrent and its Legitimate Use on Windows 11

Qbittorrent windows - acakit

This article delves into the world of qBittorrent, a popular and free open-source BitTorrent client, and its legitimate usage on Windows 11. We will explore the functionalities, benefits, and potential concerns associated with qBittorrent, emphasizing the importance of ethical and legal downloading practices.

Understanding qBittorrent

qBittorrent is a versatile and feature-rich BitTorrent client designed for users seeking a lightweight, efficient, and customizable solution for downloading files via the BitTorrent protocol. It stands out for its user-friendly interface, extensive functionality, and commitment to user privacy.

Key Features of qBittorrent

  • Open-Source and Free: qBittorrent is developed and maintained by a community of developers, ensuring transparency and accessibility to all users.
  • Lightweight and Resource-Efficient: Unlike some other torrent clients, qBittorrent consumes minimal system resources, making it ideal for users with limited hardware.
  • Cross-Platform Compatibility: qBittorrent is available for various operating systems, including Windows, macOS, Linux, and FreeBSD, providing a consistent user experience across platforms.
  • Built-in Torrent Search: The integrated search functionality allows users to locate torrents directly within the application, eliminating the need for external websites.
  • Advanced Download Management: qBittorrent offers robust download management tools, including scheduling, prioritization, and the ability to pause and resume downloads.
  • User-Friendly Interface: The intuitive and well-designed interface makes qBittorrent easy to use for both beginners and experienced users.
  • Privacy Focused: qBittorrent emphasizes user privacy by avoiding the inclusion of third-party advertising or tracking software.
  • Extensive Plugin Support: The plugin system allows users to extend qBittorrent’s functionality with additional features and integrations.

The Importance of Legal and Ethical Downloads

While qBittorrent is a powerful tool for downloading files, it’s crucial to understand the legal and ethical implications of torrenting. Downloading copyrighted content without proper authorization is illegal and can result in significant penalties.

Understanding Copyright and Intellectual Property

Copyright laws protect the rights of creators to control the distribution and use of their works. Downloading copyrighted content without permission violates these rights and can lead to legal action.

Legitimate Sources for Downloading Content

Always prioritize obtaining content from legitimate sources, such as:

  • Official Websites of Content Creators: Purchase or download content directly from the official websites of artists, musicians, software developers, and other creators.
  • Reputable Online Stores: Utilize platforms like Amazon, iTunes, Google Play, and other authorized online stores to acquire digital content.
  • Free and Open-Source Software Repositories: For software downloads, rely on reputable sources like GitHub, SourceForge, and other open-source repositories.
  • Public Domain Resources: Download content that is in the public domain, meaning its copyright has expired or it was never copyrighted.

The Role of Legal Torrenting

While torrenting is often associated with illegal content, it also plays a legitimate role in:

  • Open-Source Software Distribution: Many open-source projects utilize torrenting for efficient distribution of their software.
  • Academic and Research Data Sharing: Researchers and academic institutions often use torrenting to share large datasets and research materials.
  • Independent Film and Music Distribution: Artists and independent creators can leverage torrenting for distributing their work directly to fans.

The Importance of Using a VPN

When downloading content using torrenting, using a Virtual Private Network (VPN) is highly recommended. A VPN encrypts your internet traffic, masking your IP address and making it more difficult for third parties to track your online activity. This can help protect your privacy and security, especially when downloading from unknown sources.

Benefits of Using qBittorrent Legally

Utilizing qBittorrent for legitimate downloads offers several benefits:

  • Efficient and Fast Downloads: qBittorrent’s optimized engine enables fast and efficient downloads, especially for large files.
  • Control Over Downloads: The comprehensive download management features allow users to prioritize, schedule, and manage their downloads effectively.
  • Enhanced Privacy: qBittorrent’s focus on user privacy makes it a preferred choice for users concerned about their online activity.

FAQs: Addressing Common Concerns

Is qBittorrent safe to use?

qBittorrent itself is a safe and secure application. However, downloading content from unreliable sources can pose security risks. Always prioritize downloading from reputable sources and use a VPN for added protection.

Is qBittorrent legal?

qBittorrent is a legal application. However, using it to download copyrighted content without permission is illegal.

What is the difference between qBittorrent and other torrent clients?

qBittorrent stands out for its open-source nature, lightweight design, user-friendly interface, and focus on privacy. It offers a comprehensive feature set comparable to other popular torrent clients.

Is it necessary to pay for qBittorrent?

qBittorrent is completely free and open-source. There are no paid versions or subscriptions required.

Can I use qBittorrent to download movies and music for free?

Downloading copyrighted content without permission is illegal. Always obtain content from legitimate sources.

Tips for Using qBittorrent Safely and Legally

  • Download from Trusted Sources: Always obtain content from reliable websites and verified creators.
  • Use a VPN: Protect your privacy and security by using a VPN when downloading content through torrents.
  • Understand Copyright Laws: Familiarize yourself with copyright laws and the legal implications of downloading copyrighted content.
  • Be Aware of Malware Risks: Download torrents only from trusted sources and scan downloaded files for malware before opening them.
  • Consider the Ethical Implications: Think about the ethical implications of downloading copyrighted content without permission.

Conclusion

qBittorrent is a powerful and versatile torrent client that can be a valuable tool for legitimate downloads. By understanding the legal and ethical considerations surrounding torrenting, prioritizing trusted sources, and using a VPN for enhanced privacy, users can leverage qBittorrent’s capabilities responsibly and safely. Remember, always prioritize legal and ethical downloading practices to ensure a positive and secure online experience.

Qbittorrent for windows - cclasbrands Download qBittorrent for Windows 11/10/8/7 (Latest version 2023) - Downloads Guru Qbittorrent downloads  Best BitTorrent Clients for Windows 11  Windows Mode
qBitTorrent Review 2024 [Features, Security, Pricing & More] Qbittorrent windows - drrilo How to Use qBittorrent with a VPN or Proxy (A Complete Guide)
Is qBittorrent Safe to Use in 2024? - blog Planet VPN Fluent theme for qBitTorrent (Windows 11 design) : r/qBittorrent

Closure

Thus, we hope this article has provided valuable insights into A Comprehensive Guide to Understanding qBittorrent and its Legitimate Use on Windows 11. We hope you find this article informative and beneficial. See you in our next article!

Rejuvenating Your Windows 11 System: A Guide To Refreshing Without Data Loss

Rejuvenating Your Windows 11 System: A Guide to Refreshing Without Data Loss

Introduction

With great pleasure, we will explore the intriguing topic related to Rejuvenating Your Windows 11 System: A Guide to Refreshing Without Data Loss. Let’s weave interesting information and offer fresh perspectives to the readers.

Rejuvenating Your Windows 11 System: A Guide to Refreshing Without Data Loss

Recovery Settings in Windows 11- Instructions - TeachUcomp, Inc.

Windows 11, like any operating system, can experience performance degradation over time. This can be due to accumulated temporary files, unnecessary programs, or even malware. A fresh install of Windows 11 can revitalize your system, restoring its speed and efficiency. However, the prospect of reinstalling Windows can be daunting, particularly when considering the potential loss of valuable data and programs.

Fortunately, there are methods to perform a clean install of Windows 11 without losing your programs and data. This process, often referred to as a "clean install" or "fresh install," offers several advantages:

Benefits of a Clean Install:

  • Enhanced Performance: A fresh install removes temporary files, cached data, and unnecessary programs that can slow down your system. This results in a smoother and faster operating experience.
  • Improved Stability: A clean install eliminates corrupted files, registry errors, and outdated drivers that can lead to system instability and crashes. This results in a more reliable and stable operating environment.
  • Increased Security: A clean install removes malware, viruses, and other malicious software that can compromise your system’s security. This creates a more secure and protected computing environment.
  • Troubleshooting Issues: A clean install can effectively resolve various system issues that are difficult to fix through conventional troubleshooting methods. This provides a fresh start for addressing persistent problems.

Methods for Reinstalling Windows 11 Without Losing Programs and Data:

1. Using Windows 11’s Reset Feature:

Windows 11 offers a built-in "Reset this PC" feature that allows for a clean install without losing personal files. This method utilizes a factory reset approach, effectively restoring the operating system to its default state while preserving your personal data.

Steps:

  1. Open Settings: Navigate to the "Settings" app by pressing the Windows key + I.
  2. Select System: Click on "System" from the left-hand menu.
  3. Choose Recovery: Click on "Recovery" from the right-hand pane.
  4. Initiate Reset: Under "Reset this PC," click on "Reset PC."
  5. Select Options: Choose "Keep my files" to preserve your personal data.
  6. Confirm Reset: Follow the on-screen prompts to complete the reset process.

2. Creating a System Image Backup:

This method involves creating a backup image of your entire system, including the operating system, programs, and data. This image can then be used to restore your system to its previous state after a clean install.

Steps:

  1. Open File Explorer: Navigate to "This PC" or "My Computer."
  2. Right-click on the drive where Windows is installed: Select "Properties" from the context menu.
  3. Choose Tools: Click on the "Tools" tab.
  4. Initiate Backup: Under "Backup and Restore (Windows 7)", click on "Create a system image."
  5. Select Backup Location: Choose a location to store the system image backup.
  6. Confirm Backup: Follow the on-screen prompts to complete the backup process.

3. Using a Third-Party Imaging Software:

Several third-party imaging software solutions are available, offering advanced features and customization options for creating and restoring system images. These tools often provide more flexibility and control over the backup process.

Steps:

  1. Choose Imaging Software: Select a reputable imaging software, such as Acronis True Image or Macrium Reflect.
  2. Install and Launch: Install the chosen software and launch it.
  3. Create an Image: Follow the software’s instructions to create a system image backup.
  4. Save Image: Choose a location to store the image backup.

4. Utilizing a USB Recovery Drive:

This method involves creating a bootable USB drive containing a clean install of Windows 11. This drive can be used to boot your computer and install a fresh copy of Windows while retaining your data.

Steps:

  1. Download Windows 11 Installation Media: Download the Windows 11 installation media from Microsoft’s website.
  2. Prepare USB Drive: Format a USB drive with at least 8GB of space.
  3. Create Recovery Drive: Use the Windows 11 installation media to create a bootable USB recovery drive.
  4. Boot from USB: Boot your computer from the USB recovery drive.
  5. Install Windows 11: Follow the on-screen instructions to install Windows 11.

5. Performing a Clean Install with Data Transfer:

This method involves performing a clean install of Windows 11 while transferring your data and programs to the new installation. This method requires careful planning and execution to ensure data integrity and program compatibility.

Steps:

  1. Backup Data: Create backups of important data, such as documents, photos, and videos.
  2. Download Windows 11 Installation Media: Download the Windows 11 installation media from Microsoft’s website.
  3. Prepare USB Drive: Format a USB drive with at least 8GB of space.
  4. Create Recovery Drive: Use the Windows 11 installation media to create a bootable USB recovery drive.
  5. Boot from USB: Boot your computer from the USB recovery drive.
  6. Install Windows 11: Follow the on-screen instructions to install Windows 11.
  7. Transfer Data and Programs: After installing Windows 11, transfer your data and programs to the new installation.

FAQs about Reinstalling Windows 11 Without Losing Programs and Data:

Q: What is the best method for reinstalling Windows 11 without losing programs and data?

A: The best method depends on your specific needs and preferences. If you are comfortable with the built-in features of Windows 11, the "Reset this PC" feature with "Keep my files" option is a straightforward approach. For more advanced control and customization, creating a system image backup using a third-party imaging software is recommended.

Q: Will I lose all my programs after reinstalling Windows 11?

A: No, you will not lose all your programs if you choose the "Keep my files" option during the "Reset this PC" process or use a system image backup. However, some programs may require reinstallation after a clean install.

Q: Can I transfer programs from my old Windows 11 installation to the new installation?

A: Yes, you can transfer programs from your old Windows 11 installation to the new installation. However, ensure that the programs are compatible with the new version of Windows 11.

Q: How do I ensure that my data is not lost during the reinstallation process?

A: To ensure data safety, create backups of your important files before reinstalling Windows 11. Utilize external storage devices, cloud storage services, or system image backups for this purpose.

Tips for Reinstalling Windows 11 Without Losing Programs and Data:

  • Create a Backup: Always create a backup of your important data before attempting a clean install.
  • Verify Compatibility: Ensure that your programs are compatible with the new version of Windows 11 before transferring them.
  • Check System Requirements: Verify that your computer meets the minimum system requirements for Windows 11.
  • Use a Reliable Source: Download the Windows 11 installation media from Microsoft’s official website.
  • Follow Instructions Carefully: Pay close attention to the on-screen instructions during the reinstallation process.

Conclusion:

Reinstalling Windows 11 without losing programs and data is a viable option for rejuvenating your system, restoring its performance, and enhancing its stability. By utilizing the methods discussed above, you can effectively refresh your Windows 11 installation while preserving your valuable data and programs. Remember to create backups, verify compatibility, and follow instructions carefully to ensure a smooth and successful reinstallation process.

Buy Windows 11 User Guide for Beginners: A Comprehensive Guide to Master Windows 11 Operating How to Rejuvenate Your Hard Drive in Windows 11, Reformatting the Hard Drive on Win 11 Advanced System Settings on Windows 11: How to Open & Use
How to Get Windows 11 Refresh Option Back in Menu (Working) Repair Windows 11 Using 4 Methods: Step-by-Step Guide (2024) How to Change Display Refresh Rate in Windows 11
How To Update or Refresh Windows 10/11 Without Data Loss 2024 Downgrade Windows 11 22H2 to 21H2  Rollback Windows 11 Update  No Data Loss Tip - YouTube

Closure

Thus, we hope this article has provided valuable insights into Rejuvenating Your Windows 11 System: A Guide to Refreshing Without Data Loss. We thank you for taking the time to read this article. See you in our next article!

Seamless Sharing: Exploring Windows 11’s Nearby Share Functionality

Seamless Sharing: Exploring Windows 11’s Nearby Share Functionality

Introduction

In this auspicious occasion, we are delighted to delve into the intriguing topic related to Seamless Sharing: Exploring Windows 11’s Nearby Share Functionality. Let’s weave interesting information and offer fresh perspectives to the readers.

Seamless Sharing: Exploring Windows 11’s Nearby Share Functionality

How to Use Nearby Sharing on Windows 11

Windows 11, with its focus on enhancing user experience and fostering seamless connectivity, introduces a feature that revolutionizes file sharing: Nearby Share. This innovative tool allows users to transfer files, images, links, and even text effortlessly between Windows devices, mirroring the simplicity and convenience of sharing on Android devices.

Understanding the Mechanics of Nearby Share

At its core, Nearby Share operates on a foundation of Bluetooth and Wi-Fi technologies. It leverages the proximity of devices to establish a direct connection, facilitating the rapid transfer of data. Unlike traditional file-sharing methods that rely on cloud services or external storage, Nearby Share enables sharing directly between devices, eliminating the need for intermediaries.

Benefits of Utilizing Nearby Share

The advantages of Nearby Share are multifaceted, offering users a compelling alternative to traditional sharing methods:

  • Effortless Sharing: The process of sharing files is remarkably simple. Users can select the files they wish to share, choose the recipient device from a list of nearby devices, and initiate the transfer. The entire process is intuitive and user-friendly, eliminating the complexities associated with traditional methods.
  • Speed and Efficiency: Nearby Share leverages direct connections between devices, resulting in significantly faster transfer speeds compared to cloud-based sharing. This efficiency is particularly noticeable when transferring large files, eliminating the need for lengthy uploads and downloads.
  • Enhanced Security: Nearby Share prioritizes security by utilizing Bluetooth and Wi-Fi to establish direct connections between devices. This approach mitigates the risks associated with sharing files through public cloud services or external storage, safeguarding sensitive information.
  • Wide Device Compatibility: Nearby Share is compatible with a wide range of Windows devices, ensuring accessibility for a broad user base. This cross-device compatibility enhances the utility of the feature, allowing users to share files seamlessly across different devices.

Navigating Nearby Share: A Comprehensive Guide

To utilize Nearby Share effectively, users need to understand its functionalities and settings:

1. Enabling Nearby Share:

  • Open the Settings app on your Windows 11 device.
  • Navigate to System > Shared experiences.
  • Ensure the toggle for Nearby Share is enabled.
  • You can customize the visibility of your device to others, choosing between Everyone, Contacts, or Hidden.

2. Sharing Files:

  • Open the File Explorer and locate the file you wish to share.
  • Right-click on the file and select Share.
  • Choose the recipient device from the list of nearby devices.
  • The selected device will receive a notification prompting them to accept the file transfer.

3. Receiving Files:

  • When a nearby device initiates a file transfer, a notification will appear on your device.
  • Select Accept to receive the file.
  • The file will be saved to your Downloads folder.

4. Managing Nearby Share Settings:

  • Access the Nearby Share settings by navigating to Settings > System > Shared experiences.
  • You can adjust the visibility of your device, manage the types of files that can be shared, and choose the preferred network connection (Bluetooth or Wi-Fi).

Frequently Asked Questions (FAQs)

1. What are the requirements for using Nearby Share?

  • To use Nearby Share, your device must be running Windows 11 and have Bluetooth and Wi-Fi enabled.

2. Is Nearby Share secure?

  • Nearby Share uses Bluetooth and Wi-Fi to establish direct connections between devices, enhancing security by eliminating the need for cloud services or external storage.

3. Can I share files with devices running other operating systems?

  • Currently, Nearby Share is only compatible with Windows 11 devices.

4. How do I troubleshoot Nearby Share issues?

  • Ensure Bluetooth and Wi-Fi are enabled on both devices.
  • Check the visibility settings of your device.
  • Restart both devices and try again.
  • If the issue persists, contact Microsoft support for assistance.

Tips for Effective Nearby Share Usage

  • Ensure both devices are within close proximity for optimal performance.
  • Regularly update your device’s operating system to benefit from the latest features and security enhancements.
  • Utilize Nearby Share for sharing large files, images, videos, and documents, maximizing its efficiency.
  • Consider the visibility settings of your device, choosing the appropriate level based on your privacy preferences.

Conclusion

Nearby Share, a feature seamlessly integrated into Windows 11, empowers users to share files effortlessly and securely. Its ease of use, speed, and compatibility across Windows devices position it as a compelling alternative to traditional file-sharing methods. By understanding the mechanics and settings of Nearby Share, users can leverage its benefits to enhance their digital experience and streamline file sharing. As technology continues to evolve, Nearby Share is poised to become an integral part of the modern digital landscape, fostering seamless connectivity and collaboration.

How to Enable Nearby Sharing in Windows 11?  Gear up Windows 11 & 10 How to Use Nearby Sharing on Windows 11?  Gear Up Windows How To Use Nearby Sharing On Windows 11  digisrun
Seamless File Sharing: Google Nearby Share for Windows How to Enable Nearby Sharing in Windows 11?  Gear Up Windows How to Use Nearby Sharing on Windows 11?  Gear Up Windows
How to Use Nearby Sharing on Windows 11 How To Use Nearby Share In Windows 11_best Methods - Rayabaan

Closure

Thus, we hope this article has provided valuable insights into Seamless Sharing: Exploring Windows 11’s Nearby Share Functionality. We hope you find this article informative and beneficial. See you in our next article!

Navigating The World Of C Programming: Online Compilers, GDB, And Windows 10

Navigating the World of C Programming: Online Compilers, GDB, and Windows 10

Introduction

With enthusiasm, let’s navigate through the intriguing topic related to Navigating the World of C Programming: Online Compilers, GDB, and Windows 10. Let’s weave interesting information and offer fresh perspectives to the readers.

Online GDB Tutorial C Free Compiler and Debugger - YouTube

The realm of programming is vast and intricate, demanding a robust toolkit for developers to effectively navigate its complexities. C, a powerful and widely-used programming language, requires a combination of tools for writing, compiling, and debugging code. This article delves into the intricacies of online C compilers, the indispensable GDB debugger, and how these tools seamlessly integrate within the Windows 10 environment.

Understanding the Essentials: C Compilers and the Role of GDB

At its core, a C compiler translates human-readable C code into machine-executable instructions, enabling computers to understand and execute the program. Online C compilers offer a convenient and readily accessible platform for this transformation, eliminating the need for local installations. These platforms provide a user-friendly interface where users can write, compile, and run C code directly within a web browser.

However, even well-written C code can encounter unexpected issues. This is where the power of a debugger, such as GDB, comes into play. GDB is a versatile and powerful tool for debugging C programs. It allows developers to step through the code line by line, inspect the values of variables, and pinpoint the root cause of errors. This meticulous examination is crucial for identifying and resolving bugs, ensuring the program functions as intended.

Exploring the Landscape: Online C Compilers for Windows 10

Windows 10 users have a plethora of online C compiler options at their disposal, each offering a unique set of features and functionalities. Some popular choices include:

  • OnlineGDB: This platform boasts a user-friendly interface and seamless integration with GDB. It provides a comprehensive environment for writing, compiling, and debugging C code, making it an excellent choice for beginners and experienced developers alike.

  • Repl.it: Known for its collaborative features, Repl.it offers a platform where multiple users can work on the same project simultaneously. It supports various programming languages, including C, and provides a built-in compiler and debugger.

  • OneCompiler: This platform stands out for its wide range of compiler options, including support for various C standards. It offers a user-friendly interface and provides features like code highlighting and syntax checking.

  • CodeChef: Primarily known as a platform for competitive programming, CodeChef also offers an online C compiler. It provides a robust environment for writing and testing code, making it suitable for programmers of all levels.

  • JDoodle: This platform offers a minimalist and straightforward approach, focusing on providing a basic compiler environment. It supports various programming languages, including C, and offers features like code highlighting and syntax checking.

The Synergy of GDB and Online Compilers

While online C compilers streamline the compilation process, they often lack the advanced debugging capabilities of a dedicated debugger like GDB. To harness the full power of GDB, users typically need to install it locally on their Windows 10 machine. However, some online compilers, like OnlineGDB, offer seamless integration with GDB, providing a convenient and efficient debugging experience without the need for local installations.

Benefits of Utilizing Online C Compilers and GDB

Combining the convenience of online C compilers with the debugging prowess of GDB offers numerous benefits for C programmers:

  • Accessibility: Online compilers eliminate the need for local installations, making C programming accessible to anyone with an internet connection.

  • Convenience: Online platforms provide a user-friendly interface for writing, compiling, and running C code directly within a web browser, simplifying the development process.

  • Collaboration: Some platforms, like Repl.it, facilitate collaborative development, allowing multiple users to work on the same project simultaneously.

  • Debugging Power: GDB provides a powerful toolset for identifying and resolving bugs, ensuring the program functions as intended.

  • Time Efficiency: Online compilers and GDB streamline the development process, reducing the time required to write, compile, debug, and execute C programs.

FAQs: Addressing Common Questions

Q: Are online C compilers suitable for all C programming tasks?

A: While online compilers offer a convenient platform for basic C programming tasks, they may not be ideal for complex projects requiring advanced features or libraries. For such projects, a local installation of a C compiler and GDB might be more suitable.

Q: Can I use GDB with any online C compiler?

A: Not all online compilers offer seamless integration with GDB. Some platforms may require local installations or specific configurations to utilize GDB. It’s essential to check the platform’s documentation for compatibility details.

Q: What are the limitations of online C compilers?

A: Online compilers may have limitations in terms of available libraries, runtime environments, and debugging capabilities. They may also be subject to network connectivity issues and potential security concerns.

Q: Is it necessary to install GDB on my Windows 10 machine?

A: While some online compilers offer GDB integration, for more advanced debugging scenarios or platforms that lack GDB support, installing GDB locally on your Windows 10 machine might be necessary.

Q: How do I install GDB on Windows 10?

A: GDB can be installed on Windows 10 using a package manager like MinGW-w64 or by downloading the source code and compiling it manually. Detailed installation instructions are available online.

Tips for Effective C Programming Using Online Compilers and GDB

  • Choose the Right Platform: Select an online C compiler that aligns with your specific needs and project requirements.

  • Familiarize Yourself with the Interface: Take time to understand the platform’s interface, including its features and functionalities.

  • Optimize Code: Write clean and efficient code to enhance performance and readability.

  • Utilize GDB Effectively: Master the use of GDB to effectively debug your C programs and identify the root cause of errors.

  • Learn from Errors: Treat errors as learning opportunities, analyzing them to understand the underlying issues and improve your coding practices.

Conclusion

Online C compilers, coupled with the power of GDB, provide a potent combination for C programmers working within the Windows 10 environment. These tools offer a convenient, accessible, and efficient platform for writing, compiling, debugging, and running C programs. By embracing the synergy between online compilers and GDB, developers can streamline their development process, enhance code quality, and navigate the world of C programming with greater confidence and efficiency. As the field of programming continues to evolve, online C compilers and GDB will remain essential tools for developers of all skill levels, empowering them to create innovative and impactful software solutions.

Online GDB Free Compiler for C++  Online Free C++ Compiler  How to Use OnlineGDB C++ GDB online Debugger Compiler Code, Compile, Run, Debug online C, C++ Opera 2021 11 10 23 56 12 Online GDB Compiler By Logicmojo
Online gdb compiler  C Language compiler  Python language compiler - YouTube Run and Debug C program with OnlineGDB.com - YouTube Online GDB Compiler By Logicmojo
Best Compiler for C Programming - javatpoint How To Use Online GDB Compiler?  Free Compiler and Debugger

Closure

Thus, we hope this article has provided valuable insights into Navigating the World of C Programming: Online Compilers, GDB, and Windows 10. We appreciate your attention to our article. See you in our next article!

Transferring Files Between Windows 11 And Android Devices: A Comprehensive Guide

Transferring Files Between Windows 11 and Android Devices: A Comprehensive Guide

Introduction

With enthusiasm, let’s navigate through the intriguing topic related to Transferring Files Between Windows 11 and Android Devices: A Comprehensive Guide. Let’s weave interesting information and offer fresh perspectives to the readers.

Transferring Files Between Windows 11 and Android Devices: A Comprehensive Guide

Transfer Files Between Android & Windows 11 Via Bluetooth - Technipages

The seamless integration of technology has blurred the lines between our various devices, enabling us to move data effortlessly between them. One such integration, often overlooked, is the ability to transfer files between a Windows 11 computer and an Android phone via Bluetooth. This method offers a convenient and readily available solution for sharing various file types, including images, documents, videos, and even audio files.

Understanding Bluetooth and its Function in File Transfer

Bluetooth, a wireless technology operating on short-range radio waves, has become ubiquitous in modern devices, facilitating communication and data exchange between them. While primarily known for connecting headphones and speakers, Bluetooth also provides a reliable and secure channel for transferring files. The process involves establishing a connection between the sending and receiving devices, creating a temporary wireless bridge for data transmission.

Prerequisites for Bluetooth File Transfer

Before embarking on the journey of transferring files between your Windows 11 computer and Android phone, ensure that the following prerequisites are met:

  • Bluetooth Enabled on Both Devices: Both your Windows 11 computer and Android phone must have Bluetooth enabled and activated. This can typically be found in the respective device settings.
  • Bluetooth Drivers Up-to-Date: Ensure that the Bluetooth drivers on your Windows 11 computer are up-to-date. Outdated drivers can lead to compatibility issues and hinder file transfer.
  • Pairing the Devices: The first step involves pairing your Windows 11 computer and Android phone. This process involves making the devices discoverable and establishing a connection. This pairing process only needs to be done once for each device pair, allowing for subsequent file transfers without repeated pairing.

Step-by-Step Guide to Transferring Files

Once the prerequisites are in place, follow these steps to transfer files from your Android phone to your Windows 11 computer via Bluetooth:

  1. Enable Bluetooth and Make Devices Discoverable: On both your Android phone and Windows 11 computer, navigate to the Bluetooth settings and enable the functionality. Additionally, ensure that both devices are set to "discoverable" mode, allowing them to be detected by each other.
  2. Pair the Devices: On your Windows 11 computer, select "Add Bluetooth or other device" from the Bluetooth settings. Your Android phone should appear in the list of available devices. Select your phone and follow the on-screen prompts to complete the pairing process. You may be required to enter a PIN code, which is typically displayed on both devices.
  3. Select Files for Transfer: On your Android phone, locate the files you wish to transfer. This could be images, videos, documents, or any other file type. Open the file and select the "share" option. A list of available sharing methods will appear, including Bluetooth.
  4. Initiate Transfer: Select "Bluetooth" from the sharing options. Your Windows 11 computer should appear in the list of available devices. Select your computer, and the file transfer process will begin.
  5. Confirm File Reception: On your Windows 11 computer, a notification will appear indicating that a file transfer is in progress. Once the transfer is complete, the received files will be saved in a designated folder, usually the "Downloads" folder.

Troubleshooting Common Issues

While Bluetooth file transfer is generally straightforward, occasional issues may arise. Here are some common problems and solutions:

  • Devices Not Discovering Each Other: Ensure that Bluetooth is enabled on both devices and that they are set to "discoverable" mode. Try restarting the Bluetooth service on both devices, and make sure that the devices are within close proximity (approximately 30 feet).
  • Pairing Failure: If the devices fail to pair, ensure that the PIN code is entered correctly. If the issue persists, try deleting the pairing information from both devices and attempting to pair again.
  • Transfer Speed Issues: Bluetooth file transfer speeds can be slower than other methods like Wi-Fi. This is due to the limited bandwidth of the Bluetooth connection. For larger files, consider using alternative methods like USB cable or cloud storage.
  • File Transfer Errors: If the file transfer fails, ensure that the file size is within the acceptable limit for Bluetooth. Large files may exceed the Bluetooth protocol’s capabilities. Try restarting the Bluetooth service on both devices and attempting the transfer again.

Benefits of Bluetooth File Transfer

Utilizing Bluetooth for file transfer offers several advantages:

  • Convenience: It eliminates the need for physical cables or external storage devices, offering a simple and readily available solution.
  • Accessibility: Most modern devices are equipped with Bluetooth capabilities, making it a widely accessible method for file transfer.
  • Security: Bluetooth uses encryption protocols to secure data transfer, reducing the risk of unauthorized access.
  • Portability: Bluetooth operates on short-range radio waves, allowing for file transfer without the need for internet connectivity.

FAQs

Q: What types of files can be transferred via Bluetooth?

A: Bluetooth can transfer various file types, including images, videos, documents, audio files, and even compressed folders. The specific file types supported may vary depending on the operating systems of the devices involved.

Q: What is the maximum file size that can be transferred via Bluetooth?

A: The maximum file size for Bluetooth transfer is not fixed and can vary based on factors like the Bluetooth version, device capabilities, and the available bandwidth. However, generally, transferring large files can be slow and may encounter errors.

Q: Is Bluetooth file transfer secure?

A: Yes, Bluetooth utilizes encryption protocols to secure data transfer. However, it is essential to ensure that your devices are paired correctly and that you are connecting to trusted devices.

Q: What are the limitations of Bluetooth file transfer?

A: Bluetooth file transfer is generally slower than other methods like Wi-Fi or USB cable. The maximum transfer distance is limited to approximately 30 feet. Additionally, the file size may be limited depending on the Bluetooth version and device capabilities.

Tips for Optimizing Bluetooth File Transfer

  • Keep Devices Close: Ensure that both devices are within close proximity (approximately 30 feet) for optimal performance.
  • Reduce Background Activity: Minimize background processes and apps running on both devices during the transfer to maximize available bandwidth.
  • Use a Strong Bluetooth Signal: Avoid transferring files in areas with interference from other wireless devices.
  • Consider Alternative Methods: For larger files or faster transfer speeds, consider using alternative methods like USB cable or cloud storage.

Conclusion

Bluetooth file transfer provides a convenient and readily available solution for sharing files between your Windows 11 computer and Android phone. This method offers a simple, secure, and portable way to transfer various file types, eliminating the need for physical cables or external storage devices. While limitations exist regarding transfer speed and file size, understanding the process and troubleshooting common issues can optimize your Bluetooth file transfer experience. By embracing the versatility of Bluetooth, you can seamlessly integrate your devices and enjoy the convenience of transferring files between them.

How to Wireless Transfer Files from Android to Windows 11? A Guide to Transferring Files Between Windows 11 and Your Phone Using Drag and Drop - Geek Rewind The easiest way to transfer files between Android and Windows
How to transfer files between Android and Windows PC How to Share Files Between Your Android Phone & Windows PC with Bluetooth - Techlicious Five Effective Ways To Transfer Files From Pc Hi Tech Gazette Between And Android Devices Using
A Guide to Transferring Files Between Windows 11 and Your Phone Using Drag and Drop - Geek Rewind How to Transfer File From Android to Windows 11 PC via Bluetooth  Bluetooth, Android, Social

Closure

Thus, we hope this article has provided valuable insights into Transferring Files Between Windows 11 and Android Devices: A Comprehensive Guide. We hope you find this article informative and beneficial. See you in our next article!