Archives September 2023

Troubleshooting Printer Connectivity Issues In Windows 11: A Comprehensive Guide

Troubleshooting Printer Connectivity Issues in Windows 11: A Comprehensive Guide

Introduction

In this auspicious occasion, we are delighted to delve into the intriguing topic related to Troubleshooting Printer Connectivity Issues in Windows 11: A Comprehensive Guide. Let’s weave interesting information and offer fresh perspectives to the readers.

Troubleshooting Printer Connectivity Issues in Windows 11: A Comprehensive Guide

Fix Printer Connection and Printing problems in Windows 11/10

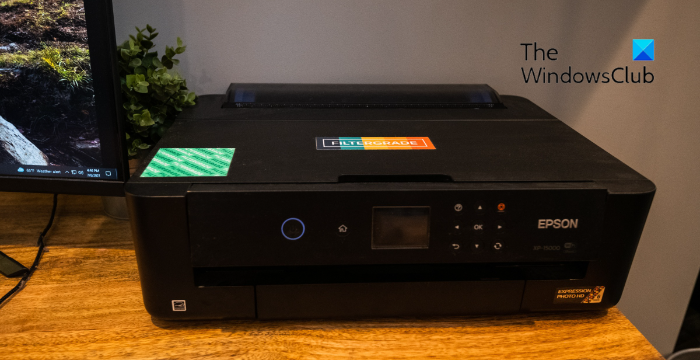
The inability to print from a laptop running Windows 11 can be a frustrating and productivity-hampering experience. This guide delves into the common reasons behind printer connectivity problems and provides a structured approach to troubleshooting and resolving them.

Understanding the Problem:

Printer connectivity issues in Windows 11 can arise from various factors, including:

  • Driver incompatibility: Outdated or incompatible printer drivers can prevent the operating system from recognizing and communicating with the printer.
  • Network connectivity issues: Problems with the network connection, either between the printer and the laptop or within the network itself, can hinder communication.
  • Firewall or security software interference: Security measures may block the printer’s access to the network or the laptop’s access to the printer.
  • Hardware malfunctions: Issues with the printer’s USB port, network card, or other components can lead to connectivity problems.
  • Software glitches: Occasionally, software errors within Windows 11 or the printer’s software can disrupt communication.

Troubleshooting Steps:

  1. Verify the Printer is Powered On and Ready: Begin by ensuring the printer is switched on and ready to print. Check for any error messages on the printer’s display.

  2. Confirm Network Connection: If the printer connects wirelessly, verify that the laptop and printer are on the same network. Check the router’s status lights and ensure a stable connection.

  3. Check the USB Connection (if applicable): If using a USB connection, ensure the cable is securely connected to both the printer and the laptop. Try a different USB port or cable if necessary.

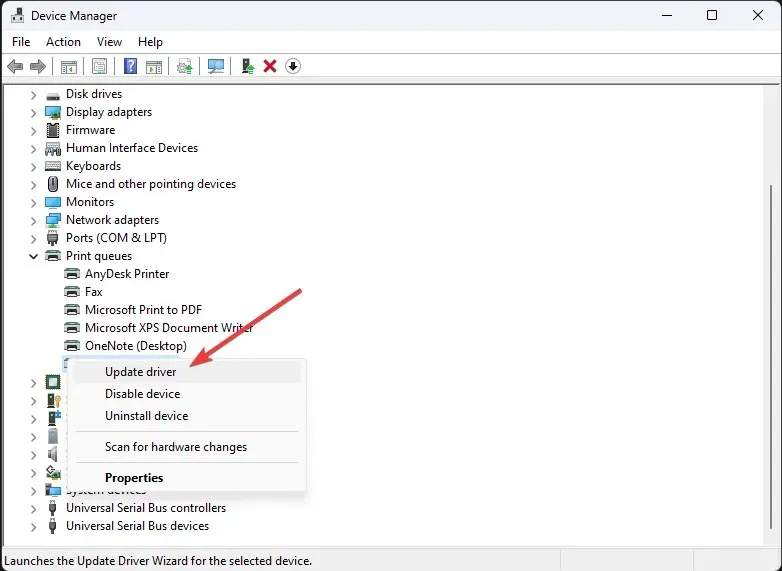
  4. Update Printer Drivers: Outdated drivers can be a significant source of connectivity issues. Visit the printer manufacturer’s website and download the latest drivers for your printer model and Windows 11.

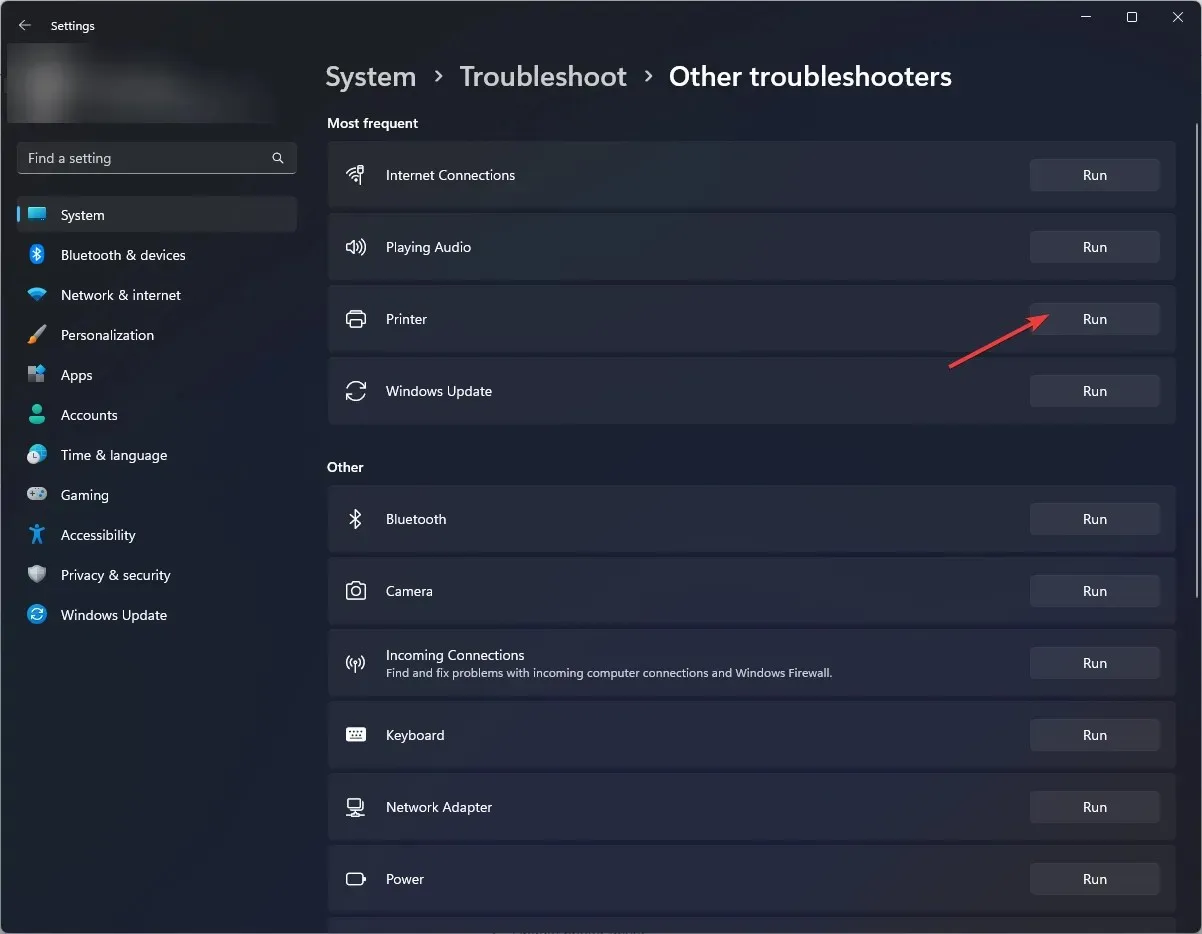
  5. Run the Printer Troubleshooter: Windows 11 includes a built-in troubleshooter that can identify and resolve common printer problems. Access it by searching for "troubleshoot" in the Start menu and selecting "Printer" from the list of options.

  6. Restart the Printer and Laptop: A simple restart can often resolve temporary software glitches affecting connectivity.

  7. Check Firewall and Security Settings: Temporarily disable your firewall or antivirus software to see if it’s interfering with the printer connection. If the issue resolves, adjust the firewall or antivirus settings to allow the printer through.

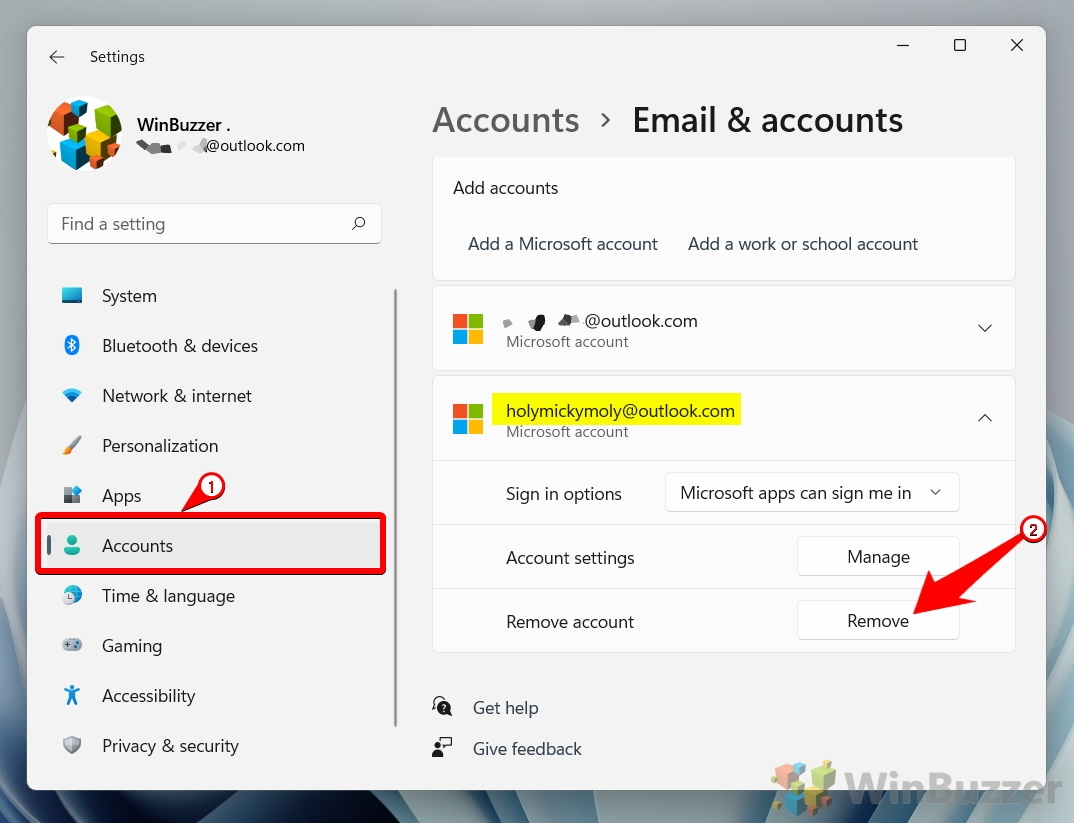
  8. Remove and Re-add the Printer: In the Windows 11 settings, navigate to "Devices" and then "Printers & scanners." Select your printer and choose "Remove device." Then, add the printer again by following the on-screen instructions.

  9. Reset the Printer to Factory Defaults: If the problem persists, resetting the printer to factory defaults can resolve software-related issues. Consult the printer’s manual for instructions on how to perform a factory reset.

  10. Contact Printer Manufacturer Support: If all else fails, contact the printer manufacturer’s technical support for assistance. They may have specific troubleshooting steps or identify a hardware issue requiring repair.

Frequently Asked Questions:

Q: Why is my printer not printing anything?

A: This could be due to various reasons, including paper jams, out-of-ink cartridges, incorrect paper settings, or even a corrupted print queue.

Q: My printer is connected to the network, but my laptop can’t find it. What should I do?

A: Ensure the printer is properly configured for network printing and that the laptop is on the same network. Check the printer’s network settings and restart the printer and router if necessary.

Q: How do I know if my printer driver is compatible with Windows 11?

A: Check the printer manufacturer’s website for compatibility information. Look for drivers specifically designed for Windows 11.

Q: I’ve tried everything, but my printer still won’t connect. What’s next?

A: If you’ve exhausted all troubleshooting steps, consider contacting the printer manufacturer’s support for further assistance. They may have specialized tools or insights to diagnose the issue.

Tips for Preventing Printer Connectivity Issues:

  • Keep drivers updated: Regularly check for updates from the printer manufacturer.
  • Ensure a stable network connection: Maintain a strong and reliable Wi-Fi or Ethernet connection.
  • Periodically restart the printer and router: This can help prevent software glitches.
  • Avoid using outdated software: Keep Windows 11 and all other software up-to-date.

Conclusion:

Printer connectivity issues can be frustrating, but with a systematic approach to troubleshooting, most problems can be resolved. By following the steps outlined in this guide, users can identify the cause of the problem and implement the appropriate solution. Regularly updating drivers, maintaining a stable network connection, and performing periodic restarts can help prevent future connectivity issues and ensure seamless printing experiences in Windows 11.

Mastering Windows 11 Printer Connection Troubleshooting: 8 Easy Methods To Fix The Error Troubleshooting Printer Connectivity Issues in Windows 11 - Click This Blog Brother Confirms Windows 11 Printer Problems โ€“ Hardware Specs
Windows 11 22H2 users suffer from printing issues Troubleshooting Printer Connectivity Issues in Windows 11 - Click This Blog How do I troubleshoot printer connectivity issues? ~ Blogging Pinay
Printer sharing not working in Windows 11? Hereโ€™s what to do! - YouTube How to Troubleshoot Printer Problems on a Windows PC

Closure

Thus, we hope this article has provided valuable insights into Troubleshooting Printer Connectivity Issues in Windows 11: A Comprehensive Guide. We appreciate your attention to our article. See you in our next article!

The Power Of PowerShell On Windows 10: A Comprehensive Guide

The Power of PowerShell on Windows 10: A Comprehensive Guide

Introduction

With great pleasure, we will explore the intriguing topic related to The Power of PowerShell on Windows 10: A Comprehensive Guide. Let’s weave interesting information and offer fresh perspectives to the readers.

The Power of PowerShell on Windows 10: A Comprehensive Guide

PowerShell: A Comprehensive Guide to Windows PowerShell ยป Let Me Read

PowerShell, a powerful scripting language and automation engine, has become an integral part of the Windows operating system. Its versatility extends beyond simple command-line tasks, offering a robust platform for system administration, automation, and even software development. This article delves into the intricacies of PowerShell on Windows 10, exploring its capabilities, benefits, and practical applications.

Understanding PowerShell: A Deeper Dive

PowerShell is not merely a replacement for the traditional command prompt. It is a full-fledged scripting language built on the .NET Framework, allowing for complex operations, object manipulation, and integration with various Windows components. Its core strength lies in its ability to automate repetitive tasks, manage system resources, and interact with software applications.

Key Features of PowerShell on Windows 10:

  • Object-Oriented Approach: PowerShell treats everything as objects, providing a consistent and structured way to interact with system components. This enables complex operations and manipulation of data.
  • Scripting Capabilities: PowerShell scripts allow for automating tasks, simplifying repetitive processes, and ensuring consistency in system management.
  • Remote Execution: PowerShell enables remote administration, allowing users to manage multiple systems from a single location.
  • Extensive Cmdlets: PowerShell comes with a vast library of built-in cmdlets (commands) covering a wide range of functionalities, from basic file management to complex system configuration.
  • Modules and Extensions: PowerShell supports modules and extensions, expanding its capabilities by adding new functionalities and integrating with third-party tools.

The Benefits of Using PowerShell on Windows 10:

  • Increased Efficiency: Automating tasks through PowerShell scripts saves time and reduces human error.
  • Improved System Management: PowerShell provides a powerful toolset for managing system configurations, installing software, and monitoring system health.
  • Centralized Control: PowerShell allows for managing multiple systems from a single location, simplifying administration.
  • Enhanced Security: PowerShell can be used to implement security policies, automate security audits, and manage user accounts.
  • Flexibility and Customization: PowerShell’s scripting capabilities allow for customization and tailoring to specific needs.

Practical Applications of PowerShell on Windows 10:

  • System Administration: Automating system maintenance tasks, managing user accounts, configuring network settings, and deploying software updates.
  • Software Development: Automating build processes, testing, and deployment of applications.
  • Data Management: Managing data in databases, manipulating files, and automating data processing tasks.
  • Security Management: Implementing security policies, automating security audits, and managing security events.
  • Troubleshooting: Diagnosing and resolving system issues, analyzing system logs, and identifying performance bottlenecks.

FAQs about PowerShell on Windows 10:

Q: What is the difference between PowerShell and Command Prompt?

A: PowerShell is a scripting language built on the .NET Framework, offering more advanced features and object-oriented capabilities compared to the traditional Command Prompt.

Q: How do I access PowerShell on Windows 10?

A: PowerShell can be accessed through the Start menu by searching for "PowerShell" or by opening the Windows PowerShell console.

Q: What are some basic PowerShell commands?

A: Some basic commands include Get-ChildItem (lists files and folders), Get-Process (lists running processes), and Stop-Process (stops a process).

Q: Can I use PowerShell to manage remote computers?

A: Yes, PowerShell allows for remote administration through the Invoke-Command cmdlet.

Q: How do I learn more about PowerShell?

A: Microsoft provides extensive documentation, tutorials, and learning resources on the official PowerShell website.

Tips for Using PowerShell on Windows 10:

  • Start with basic commands: Familiarize yourself with fundamental cmdlets before venturing into more complex scripts.
  • Use the Get-Help cmdlet: This cmdlet provides detailed information about specific cmdlets.
  • Experiment with scripts: Create simple scripts to automate tasks and gradually increase complexity.
  • Leverage online resources: Explore online forums, communities, and tutorials for guidance and support.
  • Practice regularly: Consistent practice is key to mastering PowerShell.

Conclusion:

PowerShell on Windows 10 is a powerful tool for system administrators, developers, and anyone seeking to automate tasks and manage systems efficiently. Its object-oriented approach, scripting capabilities, and vast library of cmdlets provide a robust platform for managing various aspects of the Windows environment. By leveraging PowerShell’s capabilities, users can streamline processes, enhance security, and optimize system performance, ultimately increasing productivity and efficiency.

Windows PowerShell Exploring the Power of PowerShell: A Comprehensive Guide - SoftArchive All ways to open PowerShell in Windows 10
Exploring the Power of PowerShell A Comprehensive Guide Windows Powershell and Scripting Made Easy For Sysadmins_ A Comprehensive Beginners Guide To Running Batch Files With Powershell: A Comprehensive Guide
How To Update Windows 10 Using PowerShell Commands - YouTube How to Check the PowerShell Version in Windows 10

Closure

Thus, we hope this article has provided valuable insights into The Power of PowerShell on Windows 10: A Comprehensive Guide. We thank you for taking the time to read this article. See you in our next article!

QBittorrent: A Comprehensive Guide To Torrenting On Windows 11

qBittorrent: A Comprehensive Guide to Torrenting on Windows 11

Introduction

With great pleasure, we will explore the intriguing topic related to qBittorrent: A Comprehensive Guide to Torrenting on Windows 11. Let’s weave interesting information and offer fresh perspectives to the readers.

qBittorrent: A Comprehensive Guide to Torrenting on Windows 11

how to install qbittorrent on windows 11  how to install the qbittorrent on windows 10 - YouTube

In the digital landscape, file sharing plays a crucial role, and torrenting remains a popular method for accessing and distributing large files. While various torrent clients exist, qBittorrent stands out as a robust, free, and open-source option for Windows 11 users. This comprehensive guide delves into the intricacies of qBittorrent, exploring its features, benefits, and how it facilitates a seamless torrenting experience.

Understanding the Fundamentals of Torrenting

Before diving into the specifics of qBittorrent, it’s essential to understand the fundamental principles of torrenting. Torrenting leverages peer-to-peer (P2P) technology, enabling users to download files from multiple sources simultaneously. This decentralized approach enhances download speeds and reduces the burden on a single server.

qBittorrent: A User-Friendly and Feature-Rich Torrent Client

qBittorrent distinguishes itself as a user-friendly torrent client with an intuitive interface and a comprehensive set of features. Its open-source nature guarantees transparency, security, and continuous development. Here’s a breakdown of its key attributes:

1. Intuitive User Interface:

qBittorrent boasts a clean and intuitive interface that caters to both novice and experienced users. Its straightforward layout simplifies navigation, allowing users to easily manage downloads, prioritize tasks, and monitor progress.

2. Comprehensive Feature Set:

qBittorrent is equipped with a range of features that enhance the torrenting experience:

  • Download Scheduling: Users can schedule downloads to occur at specific times, optimizing network usage and minimizing disruptions.
  • Bandwidth Management: qBittorrent offers granular bandwidth control, allowing users to prioritize downloads based on their needs and network conditions.
  • Magnet Link Support: qBittorrent seamlessly integrates with magnet links, facilitating effortless file sharing and download initiation.
  • RSS Feed Support: Users can subscribe to RSS feeds to automatically download new torrents as they become available.
  • Encryption and Security: qBittorrent supports encryption protocols, ensuring the privacy and security of downloads.
  • IP Filtering: Users can configure IP filters to block unwanted connections and enhance security.
  • Remote Control: qBittorrent offers remote control capabilities, allowing users to manage downloads from any device with a web browser.

3. Open-Source and Free:

qBittorrent is an open-source software, meaning its code is freely available for inspection and modification. This transparency fosters trust and security, as users can verify the software’s integrity. Additionally, qBittorrent is completely free to use, eliminating any subscription or licensing fees.

4. Cross-Platform Compatibility:

qBittorrent is available for various operating systems, including Windows, macOS, Linux, and FreeBSD. This cross-platform compatibility ensures a consistent experience across different devices.

5. Active Development and Community Support:

qBittorrent enjoys an active development community, constantly improving the software and addressing user feedback. This ensures ongoing updates, bug fixes, and feature enhancements.

Benefits of Using qBittorrent on Windows 11

qBittorrent offers a compelling set of benefits for Windows 11 users:

1. Enhanced Download Speeds:

qBittorrent’s decentralized P2P technology enables faster downloads by leveraging multiple sources simultaneously. This significantly reduces download times, especially for large files.

2. Enhanced Security and Privacy:

qBittorrent’s open-source nature, encryption protocols, and IP filtering capabilities contribute to a secure and private torrenting experience. Users can confidently download files without compromising their privacy.

3. User-Friendly and Efficient:

qBittorrent’s intuitive interface and comprehensive feature set simplify the torrenting process, making it accessible to users of all levels of experience. Its efficient resource management ensures minimal impact on system performance.

4. Cost-Effective and Free:

qBittorrent is completely free to use, eliminating any subscription or licensing fees. This makes it a cost-effective and accessible option for torrenting on Windows 11.

5. Active Community Support:

qBittorrent’s active development community ensures ongoing updates, bug fixes, and feature enhancements. Users can access support and resources through forums, documentation, and online communities.

FAQs: Addressing Common Questions

1. Is qBittorrent legal to use?

The legality of torrenting depends on the specific content being downloaded. Downloading copyrighted material without permission is illegal in most jurisdictions. However, torrenting itself is not inherently illegal.

2. Is qBittorrent safe to use?

qBittorrent is generally considered safe to use, especially compared to some other torrent clients. Its open-source nature allows for independent verification of its code, and its encryption protocols enhance security.

3. How can I protect my privacy while using qBittorrent?

To protect your privacy, use a VPN service while torrenting. A VPN encrypts your internet traffic, making it difficult for third parties to monitor your activity.

4. What are the best settings for qBittorrent?

The optimal settings for qBittorrent depend on your network conditions and download preferences. Experiment with different settings to find the best configuration for your needs.

5. How do I use qBittorrent on Windows 11?

Downloading and installing qBittorrent on Windows 11 is straightforward. Visit the official website, download the installer, and follow the on-screen instructions.

Tips for Optimizing qBittorrent on Windows 11

1. Prioritize Downloads:

Use qBittorrent’s download prioritization feature to allocate more bandwidth to important downloads.

2. Configure Bandwidth Settings:

Adjust qBittorrent’s bandwidth settings to optimize download speeds based on your network conditions.

3. Use a VPN:

Enhance your privacy and security by using a VPN service while torrenting.

4. Keep qBittorrent Updated:

Regularly update qBittorrent to benefit from new features, security patches, and bug fixes.

5. Explore Advanced Settings:

Experiment with qBittorrent’s advanced settings to fine-tune its performance and customize its behavior.

Conclusion: qBittorrent – A Powerful Tool for Torrenting on Windows 11

qBittorrent emerges as a powerful and user-friendly torrent client for Windows 11 users. Its intuitive interface, comprehensive feature set, and open-source nature make it a reliable and secure choice for downloading files. By leveraging qBittorrent’s capabilities and adhering to best practices, users can enjoy a seamless and efficient torrenting experience on Windows 11. Remember to exercise caution and respect copyright laws while torrenting, ensuring a responsible and ethical approach to file sharing.

10 Best Torrent Clients for Windows 11 Download qBittorrent for Windows 11/10/8/7 (Latest version 2023) - Downloads Guru Qbittorrent windows - acakit
What is Torrenting and How Do Torrents Work? A Comprehensive Guide qBittorrent Free Download for Windows 10, 11, 7 (32 / 64-bit) This will Change Your Way of Using Internet  How To Install qBittorrent On Windows 11/10/8/7
Qbittorrent downloads  Best BitTorrent Clients for Windows 11  Windows Mode qBittorrent Review: A Torrenting Client for the Modern Age

Closure

Thus, we hope this article has provided valuable insights into qBittorrent: A Comprehensive Guide to Torrenting on Windows 11. We hope you find this article informative and beneficial. See you in our next article!

Project IGI 3: A Comprehensive Look At The Elusive Sequel

Project IGI 3: A Comprehensive Look at the Elusive Sequel

Introduction

With enthusiasm, let’s navigate through the intriguing topic related to Project IGI 3: A Comprehensive Look at the Elusive Sequel. Let’s weave interesting information and offer fresh perspectives to the readers.

Project IGI 3: A Comprehensive Look at the Elusive Sequel

ะจัƒั‚ะตั€ ะพั‚ ะฟะตั€ะฒะพะณะพ ะปะธั†ะฐ Project I.G.I. 3 ะฟะพะบะฐะทะฐะปะธ ะฒ ะฝะพะฒะพะผ ะฒะธะดะตะพ ั ะณะตะนะผะฟะปะตะตะผ  Gamebomb.ru

The "Project IGI" series, renowned for its stealth-action gameplay, has captivated gamers for over two decades. While the first two installments, "I.G.I.: I’m Going In" and "I.G.I. 2: Covert Strike," achieved cult status, the anticipation for a third entry, "Project IGI 3," has been a source of both excitement and frustration. Despite persistent rumors and speculation, the official release of a third installment remains elusive, leaving fans to navigate the complexities of unofficial downloads and emulators.

The Legacy of Project IGI: A Look Back

Before delving into the intricacies of "Project IGI 3," it’s essential to understand the franchise’s origins and impact. Developed by Innerloop Studios and published by Codemasters, the first game, "I.G.I.: I’m Going In," debuted in 2000, quickly becoming a critical and commercial success.

The game’s immersive gameplay, featuring a compelling narrative, realistic environments, and innovative stealth mechanics, set a new standard for the genre. Players assumed the role of Agent David Jones, a highly skilled operative tasked with completing covert missions for the Institute for Geotactical Intelligence (IGI). The game’s success was further amplified by its accessibility and intuitive controls, making it appealing to a broad spectrum of gamers.

"I.G.I. 2: Covert Strike," released in 2003, built upon the foundation laid by its predecessor, refining gameplay mechanics and introducing new features. While the sequel faced criticism for its bugs and technical glitches, it retained the essence of the first game, solidifying the "Project IGI" franchise as a significant player in the stealth-action landscape.

The Enigma of Project IGI 3

Despite the popularity of the first two games, the development of "Project IGI 3" has been shrouded in mystery. Rumors of its existence began circulating in the early 2000s, with reports suggesting that Innerloop Studios was working on a third installment. However, the project was met with numerous delays and setbacks, ultimately leading to its cancellation.

Over the years, various unofficial "Project IGI 3" builds and mods have emerged, created by passionate fans attempting to fill the void left by the official game’s absence. These unofficial projects, while offering glimpses into what a third installment could have been, lack the official backing and quality assurance of a legitimate release.

The Quest for Project IGI 3: Navigating the Unofficial Landscape

For those eager to experience the world of "Project IGI 3," the path is fraught with challenges and potential risks. Downloading unofficial builds or mods from untrusted sources exposes users to the possibility of malware, viruses, or other security threats. Additionally, the quality and stability of these unofficial releases vary greatly, often resulting in gameplay issues, bugs, and compatibility problems.

Understanding the Risks and Exploring Alternatives

Before venturing into the realm of unofficial "Project IGI 3" downloads, it’s crucial to prioritize safety and understand the potential risks involved.

  • Malware and Security Threats: Downloading from untrusted sources increases the risk of malware infection, potentially compromising your system’s security.
  • Compatibility Issues: Unofficial builds may not be compatible with your operating system, leading to crashes or performance issues.
  • Quality and Stability: Unofficial releases often lack the polish and stability of official games, leading to bugs, glitches, and gameplay inconsistencies.

Instead of pursuing unofficial downloads, consider exploring alternative options that offer a safer and more enjoyable experience.

  • Revisit the Original Games: "I.G.I.: I’m Going In" and "I.G.I. 2: Covert Strike" remain highly enjoyable experiences, offering the core stealth-action gameplay that defined the series.
  • Explore Similar Games: The gaming landscape is filled with excellent stealth-action titles that capture the spirit of "Project IGI." Games like "Hitman," "Splinter Cell," and "Metal Gear Solid" offer engaging narratives, diverse gameplay mechanics, and immersive environments.

FAQs: Addressing Common Concerns

Q: Is there an official release date for "Project IGI 3"?

A: No, there is no official release date for "Project IGI 3." The project has been cancelled, and there are no current plans for its revival.

Q: Are there any reliable sources for downloading "Project IGI 3"?

A: Downloading "Project IGI 3" from unofficial sources is not recommended due to the risks involved. Stick to official sources for game downloads.

Q: Can I play "Project IGI 3" on Windows 10?

A: The original "Project IGI" games are compatible with Windows 10. However, unofficial "Project IGI 3" builds may or may not be compatible, depending on the source and build.

Q: What are the system requirements for "Project IGI 3"?

A: Since "Project IGI 3" is not officially released, there are no official system requirements. However, unofficial builds likely require a modern PC with adequate processing power and graphics capabilities.

Tips: Staying Safe and Informed

  • Always download from trusted sources: Stick to official game platforms and reputable websites for game downloads.
  • Be cautious of suspicious links: Avoid clicking on links from unknown or untrusted sources, especially those offering free downloads of "Project IGI 3."
  • Use a reputable antivirus software: Ensure your system is protected with a reliable antivirus solution to mitigate the risk of malware infections.
  • Check for reviews and feedback: Before downloading any unofficial "Project IGI 3" builds, research their reputation and read reviews from other users.

Conclusion: A Legacy Lives On

While the official release of "Project IGI 3" remains a distant dream, the legacy of the franchise continues to inspire and entertain. The original games continue to be enjoyed by a dedicated community, and the spirit of stealth-action gameplay lives on in various other titles. By embracing the official releases and exploring the wealth of alternative options available, fans can continue to experience the thrill and excitement of the "Project IGI" universe without compromising their safety or system security.

Project IGI 3 image - IndieDB Project IGI 3 Official PC Game Free Download Here - GDV IGI 3 Wallpapers - Wallpaper Cave
Project IGI 3-Trailer (2018) - YouTube Project IGI Remake Mission 3 [4k] - YouTube Project IGI 3 The Plan PC Game - san gamer
Project IGI 3 image - IndieDB Project IGI 3 PC Game Download Free Full Version ISO Official  Pc games download, Game download

Closure

Thus, we hope this article has provided valuable insights into Project IGI 3: A Comprehensive Look at the Elusive Sequel. We thank you for taking the time to read this article. See you in our next article!

Understanding Open Files In Windows 10: A Comprehensive Guide

Understanding Open Files in Windows 10: A Comprehensive Guide

Introduction

With enthusiasm, let’s navigate through the intriguing topic related to Understanding Open Files in Windows 10: A Comprehensive Guide. Let’s weave interesting information and offer fresh perspectives to the readers.

Understanding Open Files in Windows 10: A Comprehensive Guide

How To Open And Configure Folder Options In Windows 10

Windows 10, like any operating system, relies on files to store and manage data. These files can be documents, images, videos, programs, or any other digital content. When a user interacts with these files, they are essentially "opening" them, allowing the operating system to access and display their content. This process involves the file being loaded into memory, where the computer can process and display it.

Understanding the concept of open files in Windows 10 is crucial for several reasons. It helps users understand how their computer manages resources, troubleshoot potential issues, and optimize their system’s performance. This guide aims to provide a comprehensive overview of open files in Windows 10, exploring their significance, benefits, and management strategies.

The Importance of Open Files

Open files are at the heart of how users interact with their computer. They enable a seamless experience, allowing users to:

  • Access and manipulate data: Users can open documents, edit images, view videos, and run programs.
  • Collaborate and share information: Open files facilitate the sharing of documents and projects with others.
  • Run applications: Programs require access to various files, including executable files, configuration files, and libraries.
  • Save progress: Opening files allows users to save their work and continue it later.

Understanding the File System

Windows 10 utilizes a hierarchical file system, organizing files and folders in a tree-like structure. Each file and folder has a unique path, which is its location within the file system. For example, a document named "report.docx" located in the "Documents" folder on the "C" drive would have the following path: "C:UsersUserNameDocumentsreport.docx".

This hierarchical structure is essential for navigating and managing files effectively. When a user opens a file, Windows 10 locates it using its path and loads it into memory.

Types of Open Files

Windows 10 distinguishes between different types of open files based on their purpose and usage:

  • User-opened files: These are files that users explicitly open through applications or the file explorer.
  • System files: These are files essential for the operating system’s functioning and are often opened automatically during startup.
  • Application files: These are files associated with specific applications and are opened when the application is running.
  • Temporary files: These are temporary files created by applications for temporary storage, often deleted after use.

Managing Open Files

While open files enable seamless user experiences, it is important to manage them effectively to avoid potential issues. Here are some key aspects of open file management:

  • Closing files: When a file is no longer needed, it should be closed to free up resources. This can be done by clicking the "Close" button or using the "File" menu in most applications.
  • Minimizing open files: Opening too many files simultaneously can strain system resources, leading to slow performance. It is advisable to minimize the number of open files, closing those that are not actively used.
  • Monitoring open files: Users can monitor open files using the Task Manager (accessible by pressing Ctrl+Shift+Esc). This provides information about the files currently in use, their associated applications, and their resource consumption.
  • Using file locking mechanisms: Some applications utilize file locking mechanisms to prevent multiple users from modifying the same file simultaneously. This ensures data integrity and avoids conflicts.

Troubleshooting Open File Issues

Occasionally, users may encounter issues with open files, such as:

  • Unable to open a file: This could be due to file corruption, missing dependencies, or insufficient permissions.
  • File access errors: These errors can occur when multiple users try to access the same file simultaneously or when the file is locked by another application.
  • Slow file access: Slow file access can be caused by insufficient RAM, hard drive bottlenecks, or malware infections.

Troubleshooting these issues requires a systematic approach, which might involve:

  • Restarting the computer: This can resolve temporary glitches and free up resources.
  • Checking for file corruption: Using file repair tools can identify and fix corrupted files.
  • Updating drivers: Outdated drivers can cause file access issues.
  • Scanning for malware: Malware can interfere with file access and performance.
  • Adjusting file sharing settings: Ensuring proper file sharing settings can resolve access conflicts.

Tips for Effective File Management

  • Regularly close unused files: Free up system resources by closing files that are not actively used.
  • Organize files into folders: This helps maintain a structured file system and makes finding files easier.
  • Use file compression tools: Compressing files can save disk space and reduce file transfer times.
  • Backup important files: Regularly backing up important files protects data from loss due to hardware failure or software issues.
  • Monitor system resources: Regularly check the Task Manager to monitor open files and their resource consumption.

Conclusion

Open files are an integral part of the Windows 10 operating system, enabling users to interact with their computer and manage digital content effectively. Understanding the concept of open files, their types, and their management strategies is essential for optimizing system performance and troubleshooting potential issues. By implementing best practices for file management and monitoring system resources, users can ensure a smooth and efficient computing experience.

Frequently Asked Questions (FAQs)

Q1: What happens when a file is opened in Windows 10?

A: When a file is opened, the operating system locates the file on the hard drive using its path. The file’s contents are then loaded into memory, where the computer can process and display them. The specific actions taken depend on the file type and the associated application. For example, opening a text document will display the text in a text editor, while opening a video file will launch a media player and play the video.

Q2: How can I see what files are currently open in Windows 10?

A: The Task Manager provides a list of open files and their associated applications. To access the Task Manager, press Ctrl+Shift+Esc. In the "Processes" tab, you can view the applications running and the files they are accessing. You can also use the "Details" tab for a more detailed view of open files and their resource consumption.

Q3: What happens when a file is closed in Windows 10?

A: Closing a file releases the resources it was using, such as memory and CPU time. The file is no longer actively accessed by the computer, and its contents are removed from memory. However, the file itself remains on the hard drive, and users can open it again at any time.

Q4: Can I open multiple files simultaneously in Windows 10?

A: Yes, you can open multiple files simultaneously. This is a common practice, especially when working on multiple documents or projects. However, opening too many files at once can strain system resources and lead to slow performance. It is advisable to close files that are not actively used to free up resources.

Q5: How can I prevent files from being opened by others in Windows 10?

A: You can use file permissions to control who can access and modify files. By default, the owner of a file has full control over it. You can adjust these permissions to grant or deny access to specific users or groups. To change file permissions, right-click the file, select "Properties", and navigate to the "Security" tab.

Q6: What are the potential risks of leaving files open in Windows 10?

A: Leaving files open unnecessarily can lead to several risks:

  • Resource consumption: Open files consume system resources, which can slow down the computer.
  • Data corruption: If the computer crashes or loses power while a file is open, the file may become corrupted.
  • Security risks: Open files can expose sensitive information to unauthorized access if the computer is compromised.

Q7: How can I troubleshoot issues with open files in Windows 10?

A: If you encounter issues with open files, such as being unable to open a file or experiencing file access errors, try the following:

  • Restart the computer: This can resolve temporary glitches and free up resources.
  • Check for file corruption: Use file repair tools to identify and fix corrupted files.
  • Update drivers: Outdated drivers can cause file access issues.
  • Scan for malware: Malware can interfere with file access and performance.
  • Adjust file sharing settings: Ensure proper file sharing settings to resolve access conflicts.

Q8: What are some best practices for managing open files in Windows 10?

A: Here are some best practices for managing open files:

  • Regularly close unused files: Free up system resources by closing files that are not actively used.
  • Organize files into folders: This helps maintain a structured file system and makes finding files easier.
  • Use file compression tools: Compressing files can save disk space and reduce file transfer times.
  • Backup important files: Regularly backing up important files protects data from loss due to hardware failure or software issues.
  • Monitor system resources: Regularly check the Task Manager to monitor open files and their resource consumption.

How to open my files from any device of windows 10 - YouTube How To Zip Files With Windows 10 Comprehensive Guide - vrogue.co How To Open File Explorer Folder Options In Windows 10  winbuzzer
4 Ways to Open File Properties in Windows 10 How to Open Files and Folders with Single Click in Windows 10 - StackHowTo How To Open File Explorer Folder Options In Windows 10  winbuzzer
How To Open File Explorer Folder Options In Windows 10  winbuzzer Enable Single Click To Open Files Windows 10 - Single Click Setting

Closure

Thus, we hope this article has provided valuable insights into Understanding Open Files in Windows 10: A Comprehensive Guide. We thank you for taking the time to read this article. See you in our next article!

Fortifying Your Windows 10 Bastion: A Comprehensive Guide To Malware Protection

Fortifying Your Windows 10 Bastion: A Comprehensive Guide to Malware Protection

Introduction

With great pleasure, we will explore the intriguing topic related to Fortifying Your Windows 10 Bastion: A Comprehensive Guide to Malware Protection. Let’s weave interesting information and offer fresh perspectives to the readers.

Fortifying Your Windows 10 Bastion: A Comprehensive Guide to Malware Protection

How to Use Windows Defender Malware Protection on Windows 10

In the digital landscape, where data flows freely and connectivity is ubiquitous, Windows 10 users face a constant threat: malware. These malicious programs, designed to infiltrate and exploit systems, pose a significant risk to personal and professional data, privacy, and even financial security. This article delves into the multifaceted world of malware protection, providing a comprehensive guide to safeguarding your Windows 10 environment.

Understanding the Malware Landscape

Malware, encompassing viruses, worms, Trojans, ransomware, spyware, and adware, operates through various methods to achieve its nefarious goals. They can:

  • Steal sensitive data: Financial details, login credentials, and personal information are prime targets for malware, potentially leading to identity theft and financial fraud.
  • Disrupt system operations: Malware can crash applications, corrupt files, and render your computer unusable, impacting productivity and causing data loss.
  • Spread to other devices: Malware can propagate through networks, infecting multiple devices and creating a cascading effect.
  • Compromise privacy: Spyware can track your online activities, monitor your keystrokes, and even record your webcam footage, violating your privacy.
  • Hold your data hostage: Ransomware encrypts your files, demanding payment for their decryption, leaving you with no access to your valuable data.

The Importance of Proactive Defense

While the consequences of malware infection are severe, proactive measures can significantly reduce the risk. A multi-layered approach, encompassing software, hardware, and user behavior, is crucial for comprehensive protection.

1. Software Security: The First Line of Defense

  • Windows Defender: Windows 10 comes equipped with Windows Defender, a robust built-in antivirus solution that provides real-time protection against malware threats. Regularly updating Windows Defender ensures access to the latest virus definitions and security patches.
  • Third-party Antivirus Solutions: Complementing Windows Defender with a reputable third-party antivirus software can enhance protection by offering additional features like firewall management, anti-phishing capabilities, and advanced threat detection. Choose a solution known for its effectiveness and low system impact.
  • Anti-malware Software: Dedicated anti-malware software specializes in detecting and removing specific malware types, such as rootkits and ransomware. These tools often employ advanced heuristics and behavioral analysis to identify malicious activity.
  • Firewall: A firewall acts as a barrier between your computer and the internet, controlling incoming and outgoing network traffic. Windows 10’s built-in firewall can be customized to block unauthorized access and prevent malware from entering your system.

2. Hardware Security: A Physical Barrier

  • Secure Boot: This feature ensures that only trusted operating systems and software can boot on your computer, preventing malware from loading before the operating system is fully functional.
  • UEFI BIOS: Modern computers use Unified Extensible Firmware Interface (UEFI) BIOS, which offers enhanced security features, including Secure Boot and improved malware resistance.
  • Hard Drive Encryption: Encrypting your hard drive using tools like BitLocker (for Windows 10) or third-party solutions safeguards your data even if your computer is stolen or compromised.

3. User Behavior: The Human Factor

  • Phishing Awareness: Phishing scams often lure users into clicking malicious links or downloading infected files disguised as legitimate communications. Be wary of suspicious emails, links, and attachments, and verify their authenticity before interacting with them.
  • Strong Passwords: Use strong, unique passwords for all your online accounts, and avoid using the same password across multiple platforms. Consider a password manager to securely store and manage your passwords.
  • Software Updates: Regularly updating your operating system, applications, and security software is essential to patch vulnerabilities and receive the latest security enhancements.
  • Careful Downloading: Download software only from trusted sources, such as official websites or reputable app stores. Avoid downloading from unknown or suspicious websites.
  • Limiting User Permissions: Restricting user permissions can limit the impact of malware. If a user account is compromised, it can only access the files and applications it is authorized to use.
  • Data Backups: Regularly back up your important data to an external drive or cloud storage service. This ensures that you can recover your files even if your computer is infected and data is lost.

4. Additional Security Measures

  • Sandboxing: Use sandboxing software to create isolated environments for running untrusted programs. This prevents malware from accessing your system files and data.
  • Anti-exploit Software: Anti-exploit software identifies and blocks known vulnerabilities that malware exploits to gain access to your system.
  • Two-factor Authentication: Enable two-factor authentication (2FA) for sensitive accounts, requiring an additional verification step beyond a password, such as a code sent to your phone.
  • Anti-ransomware Software: Dedicated anti-ransomware software monitors your system for suspicious behavior and can prevent ransomware from encrypting your files.

FAQs: Addressing Common Concerns

Q: Is Windows Defender enough to protect my computer from malware?

A: While Windows Defender provides a strong baseline of protection, it is recommended to complement it with a reputable third-party antivirus solution for enhanced security.

Q: How often should I update my antivirus software?

A: Antivirus software should be updated regularly, ideally daily, to receive the latest virus definitions and security patches.

Q: What should I do if I suspect my computer is infected with malware?

A: Disconnect your computer from the internet, run a full system scan with your antivirus software, and consider using a dedicated anti-malware tool. If the issue persists, seek help from a professional IT security expert.

Q: How can I avoid phishing scams?

A: Be wary of suspicious emails, links, and attachments, especially those requesting personal information or asking you to click on unfamiliar links. Verify the sender’s identity and the website’s authenticity before interacting with them.

Q: What are some tips for creating strong passwords?

A: Use a combination of uppercase and lowercase letters, numbers, and symbols. Avoid using common words or phrases, and ensure your password is at least 12 characters long. Consider using a password manager to generate and store strong passwords securely.

Tips for Safeguarding Your Windows 10 Environment

  • Stay Informed: Keep abreast of the latest malware threats and security best practices by subscribing to security blogs, newsletters, and online resources.
  • Be Vigilant: Maintain a healthy skepticism when browsing the internet and downloading files. Avoid clicking on suspicious links or opening attachments from unknown senders.
  • Regularly Back Up Your Data: Implement a regular data backup routine to ensure you can recover your files in case of a malware attack or system failure.
  • Use Secure Browsing Practices: Avoid visiting untrusted websites, use a reputable VPN when connecting to public Wi-Fi networks, and keep your browser updated with the latest security patches.
  • Educate Yourself and Others: Share your knowledge about malware threats and security best practices with family, friends, and colleagues to promote a safer online environment.

Conclusion

Protecting your Windows 10 computer from malware requires a comprehensive approach that encompasses software security, hardware security, user behavior, and continuous vigilance. By implementing the strategies outlined in this article, you can significantly reduce your risk of malware infection and safeguard your data, privacy, and online security. Remember, staying informed, practicing caution, and proactively protecting your system are essential for navigating the evolving landscape of cyber threats.

Infographic: How To Prevent Malware - The Security Buddy [How To] Disable Early Launch Anti-Malware Protection In Windows 10 Malware Protection Against Malware Vulnerabilities-InfoGuardTech
How To Prevent Malware Attacks? Best malware protection - canadavse The Five Core Controls of Cyber Essentials - Malware Protection - Iasme
Top Antivirus 2020  Protegent Antivirus  Antivirus protection, Antivirus, Antivirus software Configure Secure RDP using a Windows Bastion Host  Qwiklabs GSP303 - YouTube

Closure

Thus, we hope this article has provided valuable insights into Fortifying Your Windows 10 Bastion: A Comprehensive Guide to Malware Protection. We hope you find this article informative and beneficial. See you in our next article!

Navigating The Visual Landscape: A Comprehensive Guide To Windows 11’s Display Settings

Navigating the Visual Landscape: A Comprehensive Guide to Windows 11’s Display Settings

Introduction

In this auspicious occasion, we are delighted to delve into the intriguing topic related to Navigating the Visual Landscape: A Comprehensive Guide to Windows 11’s Display Settings. Let’s weave interesting information and offer fresh perspectives to the readers.

How To Select Visual Effects Settings That Adjust Windows 11 For Best Performance - YouTube

Windows 11, with its modern design and enhanced user experience, offers a plethora of customization options, including the ability to tailor the display to individual preferences. This comprehensive guide delves into the intricacies of Windows 11’s display settings, exploring their functionality and highlighting their significance in optimizing the visual experience.

Understanding the Display Settings:

The display settings in Windows 11, accessible through the Settings app, provide a central hub for managing various aspects of the visual output on your device. This includes everything from screen resolution and brightness to color calibration and multiple display configurations.

Navigating the Display Settings:

  1. Access the Settings App: Open the Settings app by clicking the Windows key and selecting Settings from the start menu.

  2. Locate the System Section: In the left-hand pane, navigate to System.

  3. Select Display: Click on Display to access the display settings.

Key Features of Windows 11’s Display Settings:

1. Resolution and Scaling:

The resolution determines the sharpness and clarity of the image displayed on your screen. Higher resolutions result in a sharper image, but may require a more powerful graphics card. Windows 11 allows users to select the optimal resolution for their display, taking into account the screen size and device capabilities.

Scaling adjusts the size of text and elements on the screen to improve readability. It is particularly beneficial for high-resolution displays, ensuring elements remain legible without appearing excessively small.

2. Brightness and Night Light:

Brightness controls the overall illumination of the display. This setting allows users to adjust the screen’s brightness to suit their environment and personal preferences.

Night Light filters out blue light emitted from the screen, reducing eye strain and promoting better sleep. This feature is particularly useful during nighttime usage when exposure to blue light can disrupt sleep patterns.

3. Color Profile and Calibration:

Color profiles define the color space and gamma values used for displaying images and videos. Windows 11 provides several pre-defined profiles, including sRGB and DCI-P3, catering to different usage scenarios.

Color calibration allows users to fine-tune the display’s color accuracy, ensuring colors are displayed faithfully. This is particularly important for professional users working with graphics, photography, or video editing.

4. Multiple Display Management:

Windows 11 seamlessly supports multiple displays, allowing users to extend their desktop across multiple monitors. The display settings allow users to configure the arrangement, resolution, and orientation of each connected display. This feature is ideal for productivity, allowing users to work on multiple tasks simultaneously or enjoy a wider viewing area for entertainment.

5. Advanced Display Settings:

Advanced display settings provide further customization options for advanced users. These settings allow users to adjust the refresh rate, color depth, and other parameters, potentially improving the overall visual experience.

6. Accessibility Features:

Windows 11 includes several accessibility features designed to enhance the user experience for individuals with visual impairments. These features include:

  • High Contrast Mode: This mode increases the contrast between text and background colors, improving readability for users with low vision.
  • Magnifier: This feature enlarges a portion of the screen, making it easier to read text and interact with elements.
  • Narrator: This screen reader reads aloud text and other elements on the screen, providing an auditory alternative for visually impaired users.

Benefits of Optimizing Display Settings:

  • Improved User Experience: Properly configured display settings enhance the overall user experience by ensuring optimal readability, clarity, and visual comfort.
  • Enhanced Productivity: By customizing the display settings to suit individual needs, users can improve their productivity by optimizing the visual environment for specific tasks.
  • Reduced Eye Strain: Features like Night Light and high contrast mode can significantly reduce eye strain and fatigue, particularly during extended screen time.
  • Professional Accuracy: For users working with graphics, photography, or video editing, accurate color calibration is crucial for ensuring professional-grade results.

FAQs on Windows 11’s Display Settings:

Q: How do I change the screen resolution in Windows 11?

A: Navigate to Settings > System > Display and select the desired resolution from the dropdown menu under Scale and layout.

Q: Can I use multiple displays with Windows 11?

A: Yes, Windows 11 supports multiple displays. You can configure the arrangement, resolution, and orientation of each display in the Settings > System > Display menu.

Q: How do I enable Night Light in Windows 11?

A: Navigate to Settings > System > Display and toggle the Night Light switch to "On". You can also customize the schedule and color temperature of Night Light.

Q: What are the different color profiles available in Windows 11?

A: Windows 11 offers several pre-defined color profiles, including sRGB, DCI-P3, and custom profiles. You can choose the profile that best suits your usage scenario.

Q: How do I calibrate the display colors in Windows 11?

A: Windows 11 does not have a built-in color calibration tool. However, you can use third-party software to calibrate your display colors for professional accuracy.

Tips for Optimizing Display Settings:

  • Regularly check your display settings: Ensure your display settings are optimized for your current usage scenario and environment.
  • Consider using Night Light during evening hours: This can reduce eye strain and promote better sleep.
  • Experiment with different color profiles: Find the profile that best suits your needs and preferences.
  • Calibrate your display colors for professional accuracy: If you work with graphics, photography, or video editing, consider using a color calibration tool for accurate results.

Conclusion:

Windows 11’s display settings provide a powerful tool for customizing the visual experience, ensuring optimal clarity, readability, and comfort. By understanding and utilizing these settings effectively, users can enhance their productivity, reduce eye strain, and achieve professional-grade results. Whether you are a casual user or a professional, taking the time to explore and configure the display settings can significantly improve your overall experience with Windows 11.

List of All Windows 11 Editions: Mixed Reality Enters the Stage Windows 11 Landscape Scenery [1920x1080] : r/wallpaper Windows 11 will bring multi-monitor improvements - MSPoweruser
Windows 11 Landscape Scenery 4K #1310h Wallpaper PC Desktop Landscape windows 11 lake forest day time Windows 11 Landscape Scenery 4K #1300h Wallpaper PC Desktop
Wallpaper : windows 11, digital art, landscape 3840x2160 - 2908667850 - 2230512 - HD Wallpapers Windows 11 Visual Styles

Closure

Thus, we hope this article has provided valuable insights into Navigating the Visual Landscape: A Comprehensive Guide to Windows 11’s Display Settings. We appreciate your attention to our article. See you in our next article!

Managing User Accounts In Windows 11: A Comprehensive Guide To Removing Accounts

Managing User Accounts in Windows 11: A Comprehensive Guide to Removing Accounts

Introduction

With enthusiasm, let’s navigate through the intriguing topic related to Managing User Accounts in Windows 11: A Comprehensive Guide to Removing Accounts. Let’s weave interesting information and offer fresh perspectives to the readers.

Managing User Accounts in Windows 11: A Comprehensive Guide to Removing Accounts

How To Remove Microsoft Account From Windows 11 Guide  yorketech

Windows 11, like its predecessors, allows users to create multiple accounts, each with its own unique settings, data, and permissions. This can be beneficial for families, shared computers, or even individuals who prefer to separate their work and personal activities. However, circumstances may arise where the need to remove an account from a Windows 11 PC becomes necessary. This could be due to a change in user needs, the departure of a family member, or the desire to streamline the system.

This guide will provide a comprehensive overview of the process of removing user accounts from Windows 11, covering various scenarios and addressing potential challenges. It will delve into the implications of account removal, the different methods available, and the necessary precautions to ensure a smooth transition.

Understanding the Implications of Account Removal

Before embarking on the process of removing an account, it is crucial to understand the consequences. Removing an account from a Windows 11 PC will permanently delete:

  • User data: This includes files, documents, applications, and settings associated with the account.
  • Account settings: Personalized settings, such as desktop themes, language preferences, and notification settings, will be lost.
  • Installed applications: Any software installed specifically for the account will be removed.

It is therefore essential to back up any critical data before proceeding with account removal. This can be done by transferring files to external storage devices, cloud services, or another user account on the same PC.

Methods for Removing User Accounts in Windows 11

Windows 11 offers several methods for removing user accounts, each suited to different scenarios:

1. Removing a Local Account:

  • Through Settings:

    • Open Settings by pressing Windows key + I.
    • Navigate to Accounts > Family & other users.
    • Select the account you wish to remove and click Remove.
    • Confirm your decision in the pop-up window.
  • Using Control Panel:

    • Open Control Panel by searching for it in the Start menu.
    • Go to User Accounts > User Accounts.
    • Choose the account you want to remove and click Manage another account.
    • Select the account again and click Delete the account.
    • Confirm your action in the pop-up window.

2. Removing a Microsoft Account:

  • Through Settings:
    • Open Settings.
    • Go to Accounts > Family & other users.
    • Select the Microsoft account you wish to remove and click Remove.
    • Confirm your decision in the pop-up window.

3. Removing an Administrator Account:

  • Using Command Prompt:
    • Open Command Prompt as administrator by searching for it in the Start menu and right-clicking to select "Run as administrator."
    • Type the following command and press Enter: *net user /delete*. Replace "" with the username of the account you want to remove.
    • Confirm the deletion in the pop-up window.

4. Removing an Account from a Locked PC:

  • Using a bootable USB drive:
    • Create a bootable USB drive with a Windows installation media.
    • Boot the PC from the USB drive.
    • Select "Repair your computer" from the installation options.
    • Choose "Troubleshoot" and then "Advanced options."
    • Select "Command Prompt" and follow the steps for removing an administrator account using the command line.

Important Considerations:

  • Account Ownership: Ensure you have the necessary permissions to remove the account. If you are not the administrator, you may need to contact the administrator for assistance.
  • Data Backup: Always back up important data before removing any account to prevent permanent loss.
  • System Stability: Removing the administrator account can affect system stability and functionality. It is generally advisable to keep at least one administrator account active.
  • Account Recovery: Once an account is removed, it cannot be recovered unless a backup is available.

FAQs

Q: Can I remove my own account from the PC?

A: Yes, you can remove your own account as long as you are the administrator. However, you will need to create a new administrator account before removing your current one to avoid locking yourself out of the system.

Q: What happens to my files after I remove an account?

A: The files associated with the removed account will be deleted permanently. If you need to keep them, you must back them up beforehand.

Q: Can I remove a guest account?

A: Yes, you can remove a guest account using the same methods described above.

Q: What if I forget the password for the account I want to remove?

A: If you forget the password, you will need to reset it before you can remove the account. You can use the built-in password reset feature in Windows 11 or use a third-party password recovery tool.

Tips

  • Check for important data: Before removing an account, carefully review the account’s files and folders to identify any critical information that needs to be backed up.
  • Create a new administrator account: If you are the only administrator and intend to remove your account, create a new administrator account beforehand to avoid losing access to the system.
  • Utilize cloud storage: Consider storing important data in cloud storage services like OneDrive or Google Drive for easy access and backup.
  • Consult a professional: If you are unsure about the process or have concerns about data loss, consult a qualified IT professional for assistance.

Conclusion

Removing a user account from a Windows 11 PC can be a straightforward process, but it requires careful planning and execution to avoid data loss and ensure system stability. By understanding the implications, choosing the appropriate method, and taking necessary precautions, users can effectively manage their accounts and maintain a streamlined computer environment.

How To Remove Microsoft Account From Windows 11 Guide  beebom How to Remove a Microsoft Account from Windows 11 How to manage user account settings on Windows 11  Windows Central
How To Remove Other User Accounts From Windows 11 - YouTube Delete User Account Windows 11 How To Remove User Account In Windows  Images and Photos finder How to remove Work or School account in Windows 11/10
How to Completely Delete a Microsoft Account and Remove It from Windows 11 - WinBuzzer How to remove Microsoft Account from Windows 11 [3 Methods] - DroidWin

Closure

Thus, we hope this article has provided valuable insights into Managing User Accounts in Windows 11: A Comprehensive Guide to Removing Accounts. We appreciate your attention to our article. See you in our next article!

Shielding Your Digital Fortress: A Comprehensive Guide To Ransomware Protection In Windows Security

Shielding Your Digital Fortress: A Comprehensive Guide to Ransomware Protection in Windows Security

Introduction

With enthusiasm, let’s navigate through the intriguing topic related to Shielding Your Digital Fortress: A Comprehensive Guide to Ransomware Protection in Windows Security. Let’s weave interesting information and offer fresh perspectives to the readers.

Shielding Your Digital Fortress: A Comprehensive Guide to Ransomware Protection in Windows Security

Shielding Your Digital Fortress: The Ultimate Guide to Cyber-Security  Jonathan M Taylor

Ransomware, a relentless cyber threat, has become a pervasive concern for individuals and organizations alike. Its insidious nature, holding valuable data hostage and demanding payment for its release, poses a significant risk to digital security and operational continuity. However, Windows security offers a robust arsenal of features designed to mitigate the threat of ransomware attacks, safeguarding your data and systems from the clutches of these digital extortionists. This comprehensive guide will delve into the multifaceted approach Windows security employs to protect against ransomware, exploring its key components, benefits, and best practices for a more secure digital environment.

Understanding the Threat: A Deep Dive into Ransomware

Ransomware, a type of malicious software, is designed to infiltrate computer systems and encrypt user data, rendering it inaccessible. The perpetrators behind these attacks then demand payment, typically in cryptocurrency, for the decryption key, threatening to permanently delete the data if the ransom is not paid.

The impact of ransomware goes beyond data loss. It can disrupt business operations, cripple critical infrastructure, and inflict significant financial damage. The consequences of a successful ransomware attack can be devastating, leading to lost productivity, reputational harm, and potential legal liabilities.

Windows Security: A Multi-Layered Defense Against Ransomware

Windows security offers a comprehensive suite of features that work in tandem to provide a robust defense against ransomware attacks. This multi-layered approach aims to prevent the initial infection, detect suspicious activity, and mitigate the impact of a successful attack.

1. Controlled Folder Access: This feature acts as a digital guardian, limiting the access of potentially malicious applications to sensitive folders, such as Documents, Pictures, Videos, and Desktop. By default, it allows only trusted applications to modify data within these folders, preventing ransomware from encrypting your most valuable files.

2. Exploit Protection: A critical component of Windows security, Exploit Protection safeguards your system against vulnerabilities that attackers might exploit to gain unauthorized access. It employs various techniques, including code integrity checks, memory protections, and data execution prevention, to thwart malicious code from executing on your system.

3. Windows Defender Antivirus: The built-in antivirus solution in Windows, Windows Defender Antivirus, plays a crucial role in preventing ransomware infections. It utilizes real-time protection to identify and block malicious files before they can reach your system. It also employs behavioral analysis, detecting suspicious activities indicative of ransomware behavior.

4. Windows Defender Firewall: Acting as a digital gatekeeper, Windows Defender Firewall blocks unauthorized access to your system from external networks. It can be configured to allow only specific applications to communicate with the internet, limiting the potential entry points for ransomware.

5. Microsoft Defender for Endpoint: This advanced security solution extends the protection provided by Windows Defender Antivirus, offering comprehensive endpoint protection against various threats, including ransomware. It utilizes machine learning and advanced threat detection capabilities to identify and mitigate sophisticated ransomware attacks.

6. Windows Security Center: This central hub provides a consolidated view of your system’s security status, allowing you to easily manage and monitor various security features, including Windows Defender Antivirus, Firewall, and Controlled Folder Access.

Beyond the Built-in Arsenal: Enhancing Ransomware Protection

While Windows security offers a robust foundation for ransomware protection, additional measures can further strengthen your digital defenses. These include:

1. Regular Software Updates: Regularly updating your operating system and applications is crucial. Updates often include security patches that address vulnerabilities that attackers might exploit.

2. Strong Passwords and Multi-Factor Authentication: Employing strong, unique passwords for all your accounts and enabling multi-factor authentication (MFA) adds an extra layer of security, making it significantly harder for attackers to gain access to your system.

3. Backups: Your Digital Lifeline: Regularly backing up your data is essential for recovery in case of a ransomware attack. Consider using multiple backup methods, such as cloud storage and external hard drives, for added redundancy.

4. Security Awareness Training: Educating users about the dangers of ransomware and best practices for preventing infections is crucial. Training should cover topics such as recognizing phishing attempts, avoiding suspicious links and attachments, and understanding the importance of security software.

5. Network Segmentation: Dividing your network into separate segments can limit the spread of ransomware if one system becomes infected. This approach can prevent the malware from spreading to other devices on your network.

6. Threat Intelligence: Staying informed about the latest ransomware threats and attack techniques is crucial for proactive protection. Leverage threat intelligence feeds from reputable security vendors to identify emerging threats and adjust your defenses accordingly.

7. Data Loss Prevention (DLP) Solutions: These solutions can monitor and control the flow of sensitive data, preventing it from leaving your organization’s network without authorization. This can help limit the impact of a ransomware attack by preventing attackers from exfiltrating valuable data.

8. Cybersecurity Insurance: While not a substitute for robust security measures, cybersecurity insurance can provide financial protection in the event of a ransomware attack. It can help cover costs related to data recovery, ransom payments (in some cases), and business interruption.

FAQs: Addressing Common Concerns Regarding Ransomware Protection

Q: What should I do if my computer is infected with ransomware?

A: If you suspect your computer is infected with ransomware, immediately disconnect it from the internet to prevent the malware from spreading to other devices. Do not attempt to pay the ransom, as there is no guarantee that the attackers will provide the decryption key. Contact a cybersecurity professional or a reputable IT support service for assistance in recovering your data and restoring your system.

Q: How can I tell if a file is infected with ransomware?

A: Ransomware often displays warning messages demanding payment. Additionally, you might notice unusual file extensions, such as ".locked" or ".encrypted," appended to your files. The files themselves might become inaccessible, and you may encounter error messages when trying to open them.

Q: Is it safe to pay the ransom?

A: Paying the ransom is generally not recommended. There is no guarantee that the attackers will provide the decryption key, and paying the ransom could encourage further attacks. Moreover, it can inadvertently fund criminal activity.

Q: How can I protect my business from ransomware?

A: Implementing a comprehensive cybersecurity strategy is essential for protecting your business from ransomware. This should include measures like regular software updates, strong passwords, multi-factor authentication, data backups, employee training, and threat intelligence monitoring.

Q: What are the latest ransomware trends?

A: Ransomware attacks are becoming increasingly sophisticated, utilizing techniques such as double extortion (encrypting data and stealing it), targeted attacks on specific organizations, and ransomware-as-a-service (RaaS) models. Staying informed about these trends is crucial for adapting your security measures accordingly.

Tips: Proactive Steps for Enhanced Ransomware Protection

1. Implement a "Zero Trust" Security Model: This approach assumes that no user or device can be trusted by default, requiring strict verification and authorization before granting access to sensitive resources.

2. Regularly Review Security Policies and Procedures: Conduct periodic reviews of your security policies and procedures to ensure they are up-to-date and effective in addressing evolving threats.

3. Implement a Security Information and Event Management (SIEM) System: This system can centralize and analyze security logs from various sources, providing valuable insights into potential threats and enabling timely responses.

4. Conduct Regular Security Audits: Independent security audits can identify vulnerabilities in your system and processes, helping you to address them proactively.

5. Foster a Culture of Cybersecurity Awareness: Encourage employees to report suspicious activities and participate in security training to promote a culture of proactive security awareness.

Conclusion: A Secure Future in the Face of Ransomware

Ransomware poses a significant threat to individuals and organizations, but with the right security measures, you can significantly reduce your risk. Windows security provides a robust foundation for protecting your data and systems, but it’s crucial to complement these features with additional security best practices. By implementing a multi-layered approach that includes regular software updates, strong passwords, data backups, employee training, and proactive threat intelligence monitoring, you can build a more secure digital environment, mitigating the threat of ransomware and safeguarding your valuable data from the clutches of digital extortionists. Remember, a proactive and comprehensive cybersecurity strategy is the key to staying ahead of the ever-evolving ransomware landscape.

Shielding Your Digital Fort: A Comprehensive Guide to Protecting Yourself from Cyber Scams and Shielding Your Digital Fortress: A Practical Guide to Cybersecurity for Business Leaders Gigahertz  Resources  Blog  Fortifying Your Digital Fortress: Ransomware Protection and
5 Best Anti-Ransomware Protection Software: Your Shield Against Ransomware Fortifying your digital fortress: Proactive steps to safeguard against Ransomware - TeCHS How to Protect Yourself from Ransomware
How to Protect and Harden a Computer against Ransomware How to Protect Yourself from Ransomware

Closure

Thus, we hope this article has provided valuable insights into Shielding Your Digital Fortress: A Comprehensive Guide to Ransomware Protection in Windows Security. We hope you find this article informative and beneficial. See you in our next article!

Windows 11: A Comprehensive Look At Its Release Timeline And Significance

Windows 11: A Comprehensive Look at Its Release Timeline and Significance

Introduction

With great pleasure, we will explore the intriguing topic related to Windows 11: A Comprehensive Look at Its Release Timeline and Significance. Let’s weave interesting information and offer fresh perspectives to the readers.

Windows 11: A Comprehensive Look at Its Release Timeline and Significance

As Windows 11 Rolls Out Take A Look At The Past Windo - vrogue.co

Windows 11, the latest iteration of Microsoft’s iconic operating system, was unveiled in June 2021, marking a significant shift in the company’s approach to user experience and design. While the initial announcement generated considerable excitement, the actual rollout of Windows 11 was a phased process, with various release windows catering to different user segments and hardware configurations. Understanding this release timeline is crucial for anyone seeking to grasp the evolution of Windows 11 and its implications for the broader computing landscape.

Phase 1: The Initial Release (October 5, 2021)

The initial release of Windows 11 on October 5, 2021, targeted a select group of users with eligible hardware. This phase focused on ensuring the stability and functionality of the operating system in a controlled environment before wider distribution. Microsoft emphasized that this initial release was for "early adopters" and those willing to participate in the testing and feedback process.

Phase 2: Expansion to Eligible Devices (October 2021 – Ongoing)

Following the initial release, Windows 11 began rolling out to a wider audience. This phase targeted devices meeting the minimum system requirements outlined by Microsoft, including specific processor generations, RAM capacity, and storage space. The rollout was gradual, with Microsoft prioritizing users based on factors such as device type, geographic location, and user activity. This approach allowed Microsoft to monitor system performance, address potential issues, and ensure a smoother transition for the majority of users.

Phase 3: Continued Updates and Feature Enhancements (Ongoing)

Microsoft continues to release updates for Windows 11, addressing bugs, improving performance, and introducing new features. These updates are delivered through the Windows Update service, ensuring that users have access to the latest enhancements and security patches. This ongoing development cycle is a testament to Microsoft’s commitment to maintaining the stability and relevance of Windows 11 in a rapidly evolving technological landscape.

The Significance of the Phased Release

The phased release strategy employed by Microsoft for Windows 11 was driven by several factors:

  • Quality Control and Stability: By releasing Windows 11 to a select group of users initially, Microsoft could gather valuable feedback and identify potential issues before a wider rollout. This approach ensured a smoother transition for the majority of users, minimizing the risk of widespread compatibility problems.
  • Resource Management: A phased rollout allowed Microsoft to manage the demand for Windows 11 effectively, ensuring that server infrastructure could handle the influx of users. This approach also helped prevent overloading the support system and mitigated potential issues related to user experience.
  • Targeted Deployment: The gradual rollout enabled Microsoft to prioritize users based on factors such as device type and user activity. This approach allowed for a more efficient allocation of resources and ensured that users with the most compatible hardware received the update first.

Benefits of Windows 11

Windows 11 offers a range of benefits for users, including:

  • Improved User Interface: Windows 11 features a redesigned user interface with a modern and intuitive design. The new Start menu, taskbar, and file explorer provide a more streamlined and user-friendly experience.
  • Enhanced Security Features: Windows 11 includes advanced security features, such as Windows Hello for biometric authentication and Microsoft Defender for comprehensive protection against malware.
  • Improved Performance: Windows 11 is optimized for modern hardware, delivering faster boot times, improved application performance, and enhanced responsiveness.
  • Integration with Microsoft Services: Windows 11 seamlessly integrates with Microsoft services like OneDrive, Microsoft Teams, and Xbox Game Pass, providing a more unified and connected user experience.
  • Gaming Enhancements: Windows 11 offers features tailored for gaming, such as DirectStorage for faster loading times and Auto HDR for enhanced visuals.

FAQs Regarding Windows 11 Release

1. How do I know if my device is eligible for Windows 11?

Microsoft provides a dedicated tool called the "PC Health Check app" to determine if your device meets the minimum system requirements for Windows 11. You can download this app from the Microsoft Store and run it to check the compatibility of your device.

2. What are the minimum system requirements for Windows 11?

The minimum system requirements for Windows 11 include:

  • Processor: 1 gigahertz (GHz) or faster with 2 or more cores on a compatible 64-bit processor or System on a Chip (SoC).
  • RAM: 4 gigabytes (GB)
  • Storage: 64 GB or larger storage device
  • Graphics Card: Compatible with DirectX 12 or later with WDDM 2.x driver
  • Display: High Definition (720p) display with a minimum resolution of 9 inches diagonally.

3. How do I upgrade to Windows 11?

Once your device meets the minimum system requirements, you can upgrade to Windows 11 through the Windows Update service. You can check for updates by going to "Settings" > "Update & Security" > "Windows Update" and clicking "Check for Updates."

4. What happens to my existing data during the upgrade?

During the upgrade process, your existing data will be preserved. However, it is always recommended to back up your important files before proceeding with the upgrade.

5. Is Windows 11 free?

Yes, Windows 11 is free for users with eligible devices. The upgrade is offered as part of the Windows Update service, and no additional payment is required.

6. What happens if my device doesn’t meet the minimum requirements?

If your device doesn’t meet the minimum system requirements for Windows 11, you will not be able to upgrade through the Windows Update service. You may consider purchasing a new device that meets the requirements or upgrading to a different operating system.

Tips for a Smooth Windows 11 Upgrade

  • Back Up Your Data: Before upgrading to Windows 11, back up all your important files and data to an external drive or cloud storage service. This ensures that you have a copy of your data in case something goes wrong during the upgrade process.
  • Check for Compatibility: Ensure that all your essential software and hardware are compatible with Windows 11. You can check the manufacturer’s websites for compatibility information.
  • Free Up Disk Space: Windows 11 requires a minimum of 64 GB of storage space. Free up disk space by deleting unnecessary files, moving data to external drives, and uninstalling unused applications.
  • Review System Requirements: Make sure your device meets the minimum system requirements for Windows 11 before attempting the upgrade.
  • Update Drivers: Ensure that all your device drivers are up to date before upgrading to Windows 11. You can update drivers through the Device Manager or the manufacturer’s website.
  • Run the PC Health Check App: Use the PC Health Check app to assess your device’s compatibility with Windows 11 before attempting the upgrade.

Conclusion

Windows 11 represents a significant evolution in the Windows operating system, offering a range of benefits for users, including a modern user interface, enhanced security features, improved performance, and seamless integration with Microsoft services. The phased release strategy adopted by Microsoft ensured a smooth rollout, prioritizing quality control, resource management, and targeted deployment. By understanding the release timeline and its implications, users can make informed decisions about upgrading to Windows 11 and leveraging its benefits. As Microsoft continues to release updates and enhancements, Windows 11 is poised to shape the future of computing, offering a more user-friendly, secure, and feature-rich experience for users across the globe.

Microsoft Announces Windows 11 Release Date Today Windows 11 First Look Windows 11 update: All new features, changes & release date  WinCentral
Windows 11 sneak peek: New UI, start menu, and much more Explore the look and feel of Windows 11 - YouTube Windows 11 First Look All Tips And Tricks World - Riset
What Does Windows 11 Look Like? First Leaks! Download A Look at Windows 11  Wallpapers.com

Closure

Thus, we hope this article has provided valuable insights into Windows 11: A Comprehensive Look at Its Release Timeline and Significance. We thank you for taking the time to read this article. See you in our next article!