Archives August 2023

Navigating The Cost Of Windows 10 Pro: A Comprehensive Guide

Navigating the Cost of Windows 10 Pro: A Comprehensive Guide

Introduction

In this auspicious occasion, we are delighted to delve into the intriguing topic related to Navigating the Cost of Windows 10 Pro: A Comprehensive Guide. Let’s weave interesting information and offer fresh perspectives to the readers.

All You Need to Know About Windows 10 Professional: A Comprehensive Guide - Aartisto Web Media

Windows 10 Pro, Microsoft’s flagship operating system for professional and business users, offers a robust suite of features designed to enhance productivity, security, and manageability. While its powerful capabilities are widely recognized, understanding the associated costs is crucial for informed decision-making. This comprehensive guide will explore the various pricing models for Windows 10 Pro, providing clarity on the factors influencing its cost and highlighting its benefits.

Understanding the Pricing Landscape

Windows 10 Pro is available through a variety of channels, each with its own pricing structure:
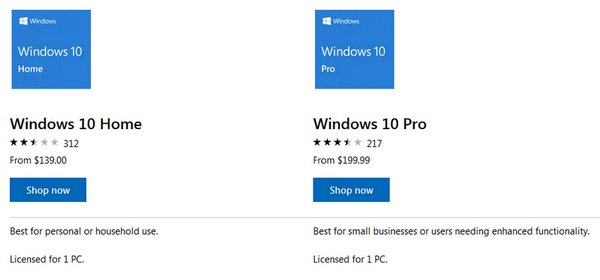
1. Retail Purchase:

  • Full Version: The most common approach involves purchasing a full version of Windows 10 Pro from authorized retailers or online stores. This option provides a perpetual license, meaning you retain the right to use the software indefinitely. Prices for full versions vary depending on the retailer, promotions, and the specific edition (e.g., single-language, multilingual).
  • Upgrade License: If you are upgrading from a previous version of Windows (like Windows 7 or 8), you may be eligible for an upgrade license at a discounted price. However, upgrade licenses typically have specific requirements regarding the previous operating system installed and may not be available in all regions.

2. OEM (Original Equipment Manufacturer) Purchase:

  • Pre-installed on New Devices: Many new computers and laptops come pre-installed with Windows 10 Pro. In these cases, the operating system cost is usually included in the overall device price. However, the specific edition of Windows 10 Pro (e.g., single-language, multilingual) may be determined by the OEM.

3. Volume Licensing:

  • Microsoft Volume Licensing Programs: Businesses and organizations with multiple devices can purchase Windows 10 Pro through Microsoft’s volume licensing programs. These programs offer discounts based on the number of licenses purchased and provide flexible deployment options.
  • Open License Program: This program is designed for smaller organizations and provides a flexible way to purchase Windows 10 Pro licenses. It offers a variety of options, including pay-as-you-go and subscription-based models.
  • Select Plus Program: This program is designed for larger organizations and offers a comprehensive suite of benefits, including volume discounts, software assurance, and access to technical support.

Factors Influencing the Price of Windows 10 Pro:

Several factors contribute to the final price of Windows 10 Pro, including:

  • Edition: Different editions of Windows 10 Pro exist, such as single-language, multilingual, and education editions. Each edition may have a slightly different price based on its specific features and target audience.
  • Purchase Channel: The pricing structure varies depending on the purchase channel, with retailers, OEMs, and volume licensing programs offering different prices.
  • Promotions and Discounts: Microsoft and its partners often offer promotions and discounts, particularly during special events or for specific customer segments.
  • Region: Prices for Windows 10 Pro can vary depending on the region, due to factors like currency exchange rates and local market conditions.

Benefits of Windows 10 Pro:

Windows 10 Pro offers a comprehensive set of features designed for professional and business users, including:

  • Enhanced Security: Windows 10 Pro includes advanced security features like BitLocker drive encryption, Windows Defender Firewall, and Windows Hello for biometric authentication.
  • Improved Management: Features like Group Policy and Windows Update for Business allow organizations to manage and control their Windows 10 Pro deployments effectively.
  • Productivity Tools: Windows 10 Pro includes features like Windows Ink, Cortana, and Microsoft Edge, designed to enhance productivity and streamline workflows.
  • Remote Desktop: Windows 10 Pro enables users to remotely access their computers, facilitating remote work and collaboration.
  • Domain Join: This feature allows organizations to connect their Windows 10 Pro devices to a domain, providing centralized management and security.
  • Hyper-V: This virtualization technology allows users to run multiple operating systems on a single computer, enhancing efficiency and flexibility.

Frequently Asked Questions (FAQs)

Q: Can I upgrade from Windows 10 Home to Windows 10 Pro?

A: Yes, you can upgrade from Windows 10 Home to Windows 10 Pro. You will need to purchase a Windows 10 Pro upgrade license and follow the upgrade process provided by Microsoft.

Q: Is Windows 10 Pro compatible with my existing hardware?

A: Windows 10 Pro has specific hardware requirements. To ensure compatibility, check the official Microsoft website for the minimum system requirements.

Q: How often do I need to pay for Windows 10 Pro?

A: Windows 10 Pro is a perpetual license, meaning you pay for it once and have the right to use it indefinitely. However, you may need to pay for future feature updates or security patches.

Q: What are the differences between Windows 10 Pro and Windows 10 Home?

A: Windows 10 Pro offers advanced features designed for professional and business users, including enhanced security, management tools, and productivity features not available in Windows 10 Home.

Q: Can I use Windows 10 Pro on multiple computers?

A: A single Windows 10 Pro license typically allows you to install and use the software on one computer at a time. However, some volume licensing programs may allow for multiple installations.

Tips for Choosing the Right Windows 10 Pro Option:

  • Assess Your Needs: Consider your specific requirements, including security needs, management capabilities, and productivity tools.
  • Evaluate Pricing Options: Compare prices from different retailers, OEMs, and volume licensing programs to find the best value for your needs.
  • Check for Promotions and Discounts: Explore available promotions and discounts, particularly during special events or for specific customer segments.
  • Consult with Experts: If you are unsure about which option is best for your organization, consult with IT professionals or Microsoft partners for guidance.

Conclusion:

Windows 10 Pro offers a powerful and versatile operating system for professional and business users. Understanding the various pricing models and factors influencing the cost is essential for making informed decisions. By carefully evaluating your needs, comparing prices, and leveraging available resources, you can find the most suitable Windows 10 Pro option for your organization, ensuring a smooth and cost-effective transition to this robust operating system.

All You Need to Know About Windows 10 Professional: A Comprehensive Guide - Aartisto Web Media Buy Windows 10 Pro for Workstations  Digital Delivery  LicenceDeals Microsoft Windows 10 Pro  Major Geeks
Windows 10 Home Vs Pro For Gaming - MiniTool Windows 10 Professional - Download from Licenseking at top price  licenceking.co.uk Windows 10 Price  Windows Pro for Business  Perpetual License
Microsoft Windows 10 Pro  Academy Of Skills Khám Phá Windows 10 Pro Product Key: Phương Pháp Tối Ưu Cho Kích Hoạt

Closure

Thus, we hope this article has provided valuable insights into Navigating the Cost of Windows 10 Pro: A Comprehensive Guide. We thank you for taking the time to read this article. See you in our next article!

Unlocking The Potential: A Comprehensive Guide To Opening 7z Files On Windows 10

Unlocking the Potential: A Comprehensive Guide to Opening 7z Files on Windows 10

Introduction

With enthusiasm, let’s navigate through the intriguing topic related to Unlocking the Potential: A Comprehensive Guide to Opening 7z Files on Windows 10. Let’s weave interesting information and offer fresh perspectives to the readers.

Unlocking the Potential: A Comprehensive Guide to Opening 7z Files on Windows 10

How to Open 7z Files on Windows: A Comprehensive Guide

The 7z format, renowned for its high compression ratio and robust encryption capabilities, has become a popular choice for archiving and sharing data. However, navigating the process of opening these files on Windows 10 can sometimes present a challenge. This article aims to demystify the process, providing a comprehensive guide to unlocking the potential of 7z files on your Windows 10 system.

Understanding the 7z Format

The 7z format, developed by Igor Pavlov, is a powerful archiving format that utilizes a sophisticated compression algorithm to significantly reduce file sizes. This makes it particularly advantageous for storing and sharing large amounts of data, including images, videos, and documents.

Beyond its compression capabilities, 7z offers strong encryption features. This ensures the confidentiality and integrity of your data, making it ideal for sensitive information.

Methods for Opening 7z Files on Windows 10

While Windows 10 doesn’t inherently support 7z files, several readily available solutions enable you to open and extract their contents effortlessly. Here’s a breakdown of the most popular methods:

1. Utilizing Dedicated 7z Archiving Software

The most direct and comprehensive approach is to utilize specialized 7z archiving software. These applications are specifically designed to handle 7z files, offering a wide range of features beyond simple extraction. Some popular options include:

  • 7-Zip: Widely regarded as the gold standard for 7z file management, 7-Zip is a free, open-source program offering exceptional compression and extraction capabilities. It supports a wide array of archive formats, including 7z, ZIP, RAR, and more.
  • WinRAR: Another popular choice, WinRAR is a commercial software with a robust feature set, including advanced compression, password protection, and self-extracting archives. It also supports a vast array of archive formats.
  • PeaZip: A free, open-source alternative, PeaZip provides a user-friendly interface and a comprehensive suite of features, including support for 7z, ZIP, RAR, and numerous other archive formats.

2. Leveraging Windows 10’s Built-in Features

While Windows 10 doesn’t natively support 7z files, you can leverage its built-in capabilities with a few tweaks.

  • Using File Explorer: Windows 10’s File Explorer can be configured to open 7z files using associated programs. To achieve this, right-click on a 7z file, select "Open with," and then choose the desired archiving software from the list. This will set the default program for opening future 7z files.
  • Installing a Third-Party App: Some third-party applications, such as WinRAR or 7-Zip, offer integration with Windows 10’s context menu, allowing you to directly access their features through the right-click menu in File Explorer.

3. Online 7z File Extractors

For occasional 7z file extraction needs, online services provide a convenient and readily accessible solution. These services allow you to upload your 7z file and extract its contents directly in your web browser. However, it’s important to exercise caution when using online services, as they may not offer the same level of security and privacy as dedicated software.

Benefits of Opening 7z Files

Opening and extracting 7z files offers numerous benefits, making them a valuable tool for both personal and professional use:

  • Efficient Data Compression: 7z’s advanced compression algorithm significantly reduces file sizes, saving storage space and minimizing download times.
  • Enhanced Data Security: 7z’s encryption capabilities ensure the confidentiality and integrity of your data, safeguarding it from unauthorized access.
  • Streamlined Data Organization: Archiving files into 7z containers allows for efficient organization and management of large datasets, facilitating easy retrieval and sharing.
  • Cross-Platform Compatibility: While primarily associated with Windows, 7z files can be opened and extracted on various operating systems, including macOS, Linux, and Android, ensuring wide compatibility.

FAQs

Q: Can I open a 7z file without installing any software?

A: While Windows 10 doesn’t natively support 7z files, you can use online extraction services, although they may not offer the same level of security and privacy as dedicated software.

Q: How do I extract a password-protected 7z file?

A: To extract a password-protected 7z file, you’ll need the correct password. Enter the password when prompted by the archiving software, and the file will be extracted.

Q: What are the different types of 7z files?

A: There are two main types of 7z files:

  • Standard 7z files: These are the most common type of 7z file and can be compressed and encrypted.
  • Self-extracting 7z files: These files contain a built-in extractor, allowing you to extract the contents without needing dedicated software.

Q: Can I create 7z files on Windows 10?

A: Yes, you can create 7z files using dedicated archiving software like 7-Zip or WinRAR. These programs allow you to select files and folders, choose compression levels, and even set passwords.

Tips for Opening 7z Files

  • Choose a reputable archiving software: Select a trusted and well-established program like 7-Zip or WinRAR to ensure reliable performance and security.
  • Consider the features you need: If you require advanced features like password protection or self-extracting archives, choose a software that offers those capabilities.
  • Familiarize yourself with the software interface: Take some time to understand the software’s layout and features to maximize its functionality.
  • Backup important files: Before extracting any 7z file, it’s always advisable to back up any critical files, just in case of unforeseen issues.
  • Be cautious with online extraction services: Use reputable services and avoid uploading sensitive information to ensure your data’s safety.

Conclusion

Opening 7z files on Windows 10 is a straightforward process with various readily available solutions. Whether you opt for dedicated archiving software, leverage Windows 10’s built-in features, or utilize online services, unlocking the potential of 7z files empowers you to efficiently manage, compress, and protect your data. By understanding the different methods and their associated benefits, you can seamlessly navigate the world of 7z files and harness their power for your own needs.

How to Open 7z Files on Windows 10 - How to Open 7zip Files - YouTube How to Open 7zip Files in Windows 11/10 - YouTube How to Open 7z Files on Windows: A Comprehensive Guide
Can't Open 7z Extension files? How to extract 7z files on Windows 10 - GUIDE - YouTube How to Open 7z Files on Windows: A Comprehensive Guide How to Open 7z Files on Windows: A Comprehensive Guide
How To Open 7z Files? [Windows 10 / Mac] - YouTube How To Open 7Z Files Comprehensive Guide, 48% OFF

Closure

Thus, we hope this article has provided valuable insights into Unlocking the Potential: A Comprehensive Guide to Opening 7z Files on Windows 10. We thank you for taking the time to read this article. See you in our next article!

Navigating The "Not Administrator" Message: A Guide To Understanding And Resolving Access Restrictions On Your Computer

Navigating the "Not Administrator" Message: A Guide to Understanding and Resolving Access Restrictions on Your Computer

Introduction

In this auspicious occasion, we are delighted to delve into the intriguing topic related to Navigating the "Not Administrator" Message: A Guide to Understanding and Resolving Access Restrictions on Your Computer. Let’s weave interesting information and offer fresh perspectives to the readers.

3 Ways to Fix Operation has Been Cancelled in Device Manager in 2022  Newsletter software

Encountering a message indicating a lack of administrative privileges on your computer can be frustrating and confusing. This message, often accompanied by a denial of permission to perform certain actions, signals that your user account does not possess the necessary authority to modify or manage system settings. This article aims to provide a comprehensive understanding of the "Not Administrator" message, exploring its causes, implications, and potential solutions.

Understanding the Concept of Administrative Privileges

Operating systems, such as Windows, implement a tiered system of user accounts to manage access to system resources and perform critical tasks. These tiers define the level of control and authority granted to each user. The highest level, known as the "Administrator" account, possesses complete control over the computer, including the ability to install software, modify system settings, and manage other user accounts.

In contrast, standard user accounts operate with limited privileges, primarily designed for everyday tasks like browsing the internet, running applications, and accessing personal files. These limitations are intended to protect the system from accidental or malicious changes by users who may not possess the necessary knowledge or expertise.

Causes of the "Not Administrator" Message

The "Not Administrator" message can arise from various scenarios, each requiring a specific approach to resolution.

  • Standard User Account: The most common reason for this message is simply that the user is logged in with a standard account. This is often the case for newly created user profiles or when an administrator intentionally restricts access to certain users.
  • Account Corruption: Occasionally, user account profiles can become corrupted, leading to inconsistencies in access permissions. This can occur due to software malfunctions, system errors, or even malware infections.
  • Group Policy Restrictions: System administrators may implement group policies to enforce specific access restrictions on user accounts. These policies can be applied to individual users or entire groups, restricting access to specific folders, programs, or system settings.
  • Password Protection: Certain system settings and programs may require an administrator password for modification or execution. If the user does not know the password, they will encounter the "Not Administrator" message.

The Importance of Administrative Privileges

While administrative privileges offer significant control over the computer, they also carry a high level of responsibility. Unauthorized modifications or actions by users with administrative access can potentially compromise system security, stability, and data integrity. Therefore, it is crucial to understand the implications of using an administrator account and to exercise caution when performing administrative tasks.

Resolving the "Not Administrator" Message

The solution to the "Not Administrator" message depends on its underlying cause.

  • Switching to an Administrator Account: If the user is logged in with a standard account, the simplest solution is to log in with an administrator account. This will grant access to all system resources and settings.
  • Elevating Privileges (Run as Administrator): For specific tasks, users can temporarily elevate their privileges by right-clicking the program or setting and selecting "Run as administrator." This allows them to execute the desired action with administrator permissions without logging in with an administrator account.
  • Account Recovery: If account corruption is suspected, attempting to repair or reset the user account might resolve the issue. This can be done through system tools or by contacting technical support.
  • Contacting the System Administrator: In cases where group policies or password protection are involved, contacting the system administrator is essential. They can modify the relevant settings or provide the necessary password to grant access.

FAQs on the "Not Administrator" Message

Q: Can I permanently elevate my standard user account to administrator status?

A: While possible, it is generally not recommended. Elevating a standard account to administrator status permanently exposes the system to increased security risks. It is advisable to maintain separate administrator and standard accounts for improved security and system management.

Q: What are the risks of using an administrator account for everyday tasks?

A: Using an administrator account for everyday tasks increases the risk of accidental or malicious changes to the system. If a user with administrator privileges downloads malware or makes unintended changes, the consequences can be severe.

Q: Can I create a new administrator account if I forget my current administrator password?

A: Creating a new administrator account without knowing the current administrator password is generally not possible. It may require advanced technical knowledge or system recovery procedures, which could potentially lead to data loss.

Tips for Managing Administrative Privileges

  • Use Separate Accounts: Maintain separate accounts for standard and administrative tasks. This minimizes the risks associated with using an administrator account for everyday use.
  • Minimize Administrator Use: Only use an administrator account when absolutely necessary. For routine tasks, use a standard user account to limit potential damage.
  • Regularly Update System: Keep your operating system and security software updated to protect against vulnerabilities that could be exploited by malicious actors.
  • Be Cautious with Downloads: Download software only from trusted sources and be wary of suspicious links or attachments.
  • Use Strong Passwords: Create strong and unique passwords for all accounts, especially administrator accounts.

Conclusion

The "Not Administrator" message is a common occurrence that often arises from a lack of understanding of user account privileges. By understanding the reasons behind this message and following the appropriate steps to resolve it, users can regain access to the necessary system settings and perform the desired tasks. It is crucial to prioritize system security and to use administrative privileges responsibly to ensure the stability and integrity of the computer.

Fix Access Denied Error on Windows 11: Quick Solutions to Regain Control - Byte Bite Bit Personal Finance software user guide - Access restrictions Access Restrictions - Magento 2 Advanced Reports Extension User Guide
How Does Resolving Domain to IP Work? – WebNots Your IT Administrator Has Limited Access" Error Fix (2023) Windows – Group Policy Editor restricting the administrator account – Unix Server Solutions
This Operation Has Been Cancelled Due to Restrictions? [Resolved] - MiniTool Partition Wizard Data Privacy Day: Taking Security to the Next Level with Access Control - The Security Camera Blog

Closure

Thus, we hope this article has provided valuable insights into Navigating the "Not Administrator" Message: A Guide to Understanding and Resolving Access Restrictions on Your Computer. We thank you for taking the time to read this article. See you in our next article!

Navigating The Landscape Of Windows 14: A Deep Dive Into Programs And Features Settings

Navigating the Landscape of Windows 14: A Deep Dive into Programs and Features Settings

Introduction

With great pleasure, we will explore the intriguing topic related to Navigating the Landscape of Windows 14: A Deep Dive into Programs and Features Settings. Let’s weave interesting information and offer fresh perspectives to the readers.

Introducing Windows 14 (Concept) - YouTube

The Programs and Features section within Windows 14 serves as a central hub for managing the software installed on your system. This powerful tool allows users to meticulously control the applications present on their computer, providing a gateway to optimize performance, address conflicts, and maintain a streamlined user experience.

Understanding the Programs and Features Settings:

The Programs and Features settings are accessible through the Windows Settings app, typically found by searching for "Programs and Features" in the search bar. This interface presents a comprehensive list of all installed programs, offering a range of functionalities, including:

  • Uninstalling Programs: The primary function of this section is the ability to remove unwanted or unused applications. This process efficiently removes the program’s files, registry entries, and associated data, ensuring a clean and organized system.
  • Viewing Program Details: Each program listing provides essential information, including its name, version, publisher, and installation date. This data aids in identifying specific programs and understanding their origins.
  • Modifying Program Settings: Certain applications offer the option to modify their default settings, allowing users to tailor their behavior to their specific needs. This includes adjusting program defaults, language preferences, and other configuration options.
  • Repairing Programs: In cases where an application encounters errors or malfunctions, the Programs and Features settings provide the option to repair the installation. This process attempts to fix corrupted files or configurations, restoring the program to a functional state.
  • Managing Updates: For programs that offer automatic updates, the Programs and Features settings can be used to manage these updates. Users can choose to disable automatic updates, schedule updates for specific times, or manually check for available updates.

The Importance of Programs and Features Settings:

Maintaining a well-organized and efficient system is paramount for any computer user. The Programs and Features settings play a crucial role in achieving this goal by offering a comprehensive solution for:

  • Optimizing System Performance: By removing unnecessary programs, users can free up valuable disk space and system resources, resulting in improved performance and responsiveness.
  • Resolving Software Conflicts: When multiple programs compete for the same resources or have conflicting configurations, uninstalling or repairing problematic applications can alleviate these conflicts, leading to a more stable system.
  • Enhancing Security: Removing outdated or potentially malicious programs can strengthen system security, reducing the risk of vulnerabilities and malware infections.
  • Managing Storage Space: Regularly reviewing installed programs and removing those no longer in use helps manage storage space, preventing the system from becoming overloaded and ensuring ample room for essential files and applications.
  • Customizing User Experience: By modifying program settings and adjusting program behavior, users can personalize their system to meet their specific needs and preferences.

FAQs Regarding Programs and Features Settings:

Q: How do I uninstall a program in Windows 14?

A: To uninstall a program, open the Programs and Features settings, locate the program you wish to remove, and click "Uninstall." Follow the on-screen instructions to complete the uninstallation process.

Q: What happens when I uninstall a program?

A: Uninstalling a program removes its files, registry entries, and associated data from your system. It effectively removes the program from your computer.

Q: Can I reinstall a program after uninstalling it?

A: Yes, you can reinstall a program after uninstalling it. You can typically download the program’s installer from the original source or from a reputable software repository.

Q: How do I repair a program in Windows 14?

A: To repair a program, open the Programs and Features settings, locate the program, and click "Modify." Choose the "Repair" option from the available choices and follow the on-screen instructions to complete the repair process.

Q: What is the difference between uninstalling and repairing a program?

A: Uninstalling a program completely removes it from your system, while repairing attempts to fix corrupted files or configurations within the existing program installation.

Q: How do I manage program updates in Windows 14?

A: Some programs offer automatic updates. To manage these updates, open the Programs and Features settings, locate the program, and click "Modify." You can then choose to disable automatic updates, schedule updates, or manually check for updates.

Tips for Using Programs and Features Settings:

  • Regularly review installed programs: Periodically check the list of installed programs to identify any unnecessary or outdated applications.
  • Use a reliable uninstaller: Consider using a dedicated uninstaller tool for more thorough program removal, ensuring that all associated files and registry entries are removed.
  • Backup important data: Before uninstalling any program, especially if it is critical to your workflow, create a backup of your important data to ensure its safety.
  • Read program descriptions carefully: Pay attention to the program descriptions and system requirements before installing any new software.
  • Keep your system updated: Regularly update Windows and installed programs to benefit from security patches, bug fixes, and performance enhancements.

Conclusion:

The Programs and Features settings in Windows 14 are an essential tool for managing the software installed on your system. By effectively utilizing these settings, users can optimize system performance, resolve conflicts, enhance security, and customize their user experience. Regular maintenance and careful management of installed programs contribute to a smooth and efficient computing environment.

Introducing Windows 14  Concept - YouTube Deep dive: Logging on to Windows - Microsoft Community Hub Deep dive: Logging on to Windows - Microsoft Community Hub
New 2024 Windows 14 ISO (32/64Bit): Concept & Requirements Exploring The Features Of Windows 11: A Deep Dive Windows programs and features command
Exploring The Features Of Windows 11: A Deep Dive Windows 11 deep dive: Checking out the new Settings app

Closure

Thus, we hope this article has provided valuable insights into Navigating the Landscape of Windows 14: A Deep Dive into Programs and Features Settings. We appreciate your attention to our article. See you in our next article!

The Complexities Of Download Speed Fluctuations: Understanding The Factors Affecting Your PC’s Download Performance

The Complexities of Download Speed Fluctuations: Understanding the Factors Affecting Your PC’s Download Performance

Introduction

In this auspicious occasion, we are delighted to delve into the intriguing topic related to The Complexities of Download Speed Fluctuations: Understanding the Factors Affecting Your PC’s Download Performance. Let’s weave interesting information and offer fresh perspectives to the readers.

The Complexities of Download Speed Fluctuations: Understanding the Factors Affecting Your PC’s Download Performance

What is a good upload download speed - lasopaaddict

In the digital age, where the internet is an integral part of our lives, download speed is paramount. Whether it’s downloading the latest software update, streaming high-definition movies, or engaging in online gaming, a slow download speed can significantly hinder our digital experience. This article delves into the intricacies of download speed fluctuations, exploring the various factors that can impact your PC’s download performance, and offering insights into how to optimize your internet connection for a smoother digital experience.

Understanding the Dynamics of Download Speed

Download speed, measured in megabits per second (Mbps), represents the rate at which data is transferred from a server to your PC. Several factors contribute to the speed you experience, including:

  • Internet Service Provider (ISP): The primary source of your internet connection, your ISP plays a crucial role in determining your maximum download speed. Different ISPs offer varying speeds and service quality, impacting your overall download performance.
  • Network Infrastructure: The physical infrastructure of your internet connection, encompassing cables, routers, and other network devices, can influence download speed. A congested network, outdated equipment, or faulty wiring can lead to bottlenecks and slowdowns.
  • Internet Traffic: The volume of data being transmitted across the internet at any given time affects download speed. During peak hours, when internet usage is high, network congestion can lead to slower download speeds.
  • Website Server Capacity: The server hosting the data you are downloading plays a crucial role. A server with limited capacity or experiencing high traffic can result in slower download speeds.
  • Computer Hardware: The processing power and storage capabilities of your PC can also impact download speed. A slower processor or limited RAM can hinder the download process, leading to longer download times.
  • Software and Applications: Certain software and applications running in the background can consume bandwidth, potentially slowing down downloads. Antivirus software, file-sharing programs, and streaming services can all contribute to bandwidth contention.
  • Wireless Connectivity: Wireless connections, while convenient, are inherently less reliable than wired connections. Signal interference, distance from the router, and network congestion can all affect download speed on a wireless network.

Identifying and Addressing Download Speed Issues

When experiencing slow download speeds, it is essential to identify the underlying cause. Here are some troubleshooting steps:

  • Check Your ISP Service: Contact your ISP to verify that your current plan matches the advertised download speed. They can also check for any network outages or maintenance affecting your connection.
  • Test Your Internet Speed: Utilize online speed tests to measure your actual download speed. This will help you determine if your connection is performing as expected.
  • Optimize Your Network: Ensure your router is properly configured and placed in a central location to minimize signal interference. Consider upgrading to a newer, more powerful router if your current one is outdated.
  • Close Unnecessary Programs: Close any applications or software that are not actively being used, as they can consume bandwidth and slow down downloads.
  • Use a Wired Connection: If possible, switch to a wired connection for a more stable and faster internet connection.
  • Avoid Peak Hours: Try downloading large files during off-peak hours when internet traffic is lighter, leading to faster download speeds.
  • Clear Your Browser Cache: A cluttered browser cache can slow down downloads. Regularly clearing your cache can improve browsing speed and download performance.
  • Update Your Drivers: Ensure your network card drivers are up-to-date. Outdated drivers can lead to compatibility issues and slowdowns.

Optimizing Download Speed for a Smoother Digital Experience

While download speed fluctuations are inevitable, there are ways to optimize your internet connection for a smoother digital experience:

  • Upgrade Your Internet Plan: Consider upgrading to a higher-speed internet plan if your current plan is insufficient for your needs.
  • Use a VPN: A Virtual Private Network (VPN) can encrypt your internet traffic, potentially improving download speed by bypassing network congestion and throttling.
  • Prioritize Bandwidth: Some routers and internet service providers offer features to prioritize bandwidth for specific applications or devices. This can ensure your most important downloads receive priority access to the network.
  • Utilize Download Managers: Download managers are software tools that can manage and optimize downloads. They can prioritize downloads, schedule downloads for off-peak hours, and resume interrupted downloads.
  • Monitor Your Internet Usage: Regularly monitor your internet usage to identify potential bandwidth bottlenecks. This can help you identify applications or devices consuming excessive bandwidth and adjust your usage accordingly.

FAQs: Addressing Common Download Speed Concerns

Q: What is internet throttling, and how does it affect my download speed?

A: Internet throttling occurs when an ISP intentionally slows down your internet connection, often during peak hours or when exceeding a specific data usage limit. This can significantly impact download speed, leading to frustration and a diminished digital experience.

Q: How can I determine if my ISP is throttling my internet connection?

A: It can be challenging to definitively prove throttling, but several indicators can suggest it. If you consistently experience slow download speeds during specific times or after exceeding a data cap, it is worth investigating further. You can run speed tests at different times of day and compare the results. You can also contact your ISP and inquire about their throttling policies.

Q: What can I do to avoid internet throttling?

A: The best way to avoid throttling is to understand your ISP’s policies and usage limits. Consider upgrading to an unlimited data plan or choosing an ISP that does not throttle internet speeds. You can also try using a VPN to encrypt your traffic and potentially bypass throttling mechanisms.

Q: What are the implications of slow download speeds?

A: Slow download speeds can have several negative implications, including:

  • Increased Download Times: Downloading large files, such as software updates or movies, can take significantly longer, impacting your productivity and enjoyment.
  • Streaming Issues: Streaming video and audio can be interrupted or buffer frequently, leading to a frustrating viewing experience.
  • Online Gaming Lag: Slow download speeds can cause lag in online games, making it difficult to compete and enjoy the experience.
  • Reduced Productivity: Slow download speeds can impact productivity, especially when downloading large files or working with cloud-based applications.

Conclusion: Optimizing Your Download Speed for a Seamless Digital Experience

Download speed fluctuations are a common phenomenon, influenced by a multitude of factors. Understanding these factors and implementing appropriate troubleshooting steps can significantly improve your download performance. By optimizing your network, monitoring internet usage, and utilizing tools like download managers and VPNs, you can enhance your digital experience and enjoy faster, more reliable download speeds. Remember, a smooth and efficient internet connection is essential for a fulfilling and productive digital life.

The Difference Between Download And Upload Internet Speeds Understanding What Upload and Download Speeds Are - Phoenix Internet Does CPU Affect Download Speed - Why Your Processor is Key to Fast Internet - Kingston College
Broadband Speed Test Malaysia - On this page you will find a list of isps offering internet Does CPU Affect Download Speed? - Download Speeds Demystified Can a Full Windows Recycling Bin Slow Down Your PC? - Climate Of Our Future
3 main reasons why your internet speed fluctuates wildly - Apps UK �� How to Find the Upload and Download Speed on Your PC: 7 Steps

Closure

Thus, we hope this article has provided valuable insights into The Complexities of Download Speed Fluctuations: Understanding the Factors Affecting Your PC’s Download Performance. We appreciate your attention to our article. See you in our next article!

The Recycle Bin: A Vital Component Of Windows 11

The Recycle Bin: A Vital Component of Windows 11

Introduction

With great pleasure, we will explore the intriguing topic related to The Recycle Bin: A Vital Component of Windows 11. Let’s weave interesting information and offer fresh perspectives to the readers.

The Recycle Bin: A Vital Component of Windows 11

Recycle Bin Windows 11

The Recycle Bin, a familiar icon on Windows desktops for decades, remains an indispensable tool in Windows 11. While it might seem like a simple folder, its function is crucial for managing files and safeguarding against accidental data loss. This article delves into the intricacies of the Recycle Bin in Windows 11, exploring its features, benefits, and best practices for effective file management.

Understanding the Recycle Bin’s Purpose

The Recycle Bin acts as a temporary holding area for deleted files. When a file is deleted, it is not permanently erased from the computer’s storage. Instead, it is moved to the Recycle Bin, offering a safety net for users who might regret their actions. This system allows for the recovery of accidentally deleted files, protecting valuable data from permanent loss.

Exploring the Recycle Bin’s Interface

The Recycle Bin’s interface in Windows 11 is straightforward and user-friendly. It presents a list of all deleted files, categorized by their original location. Users can easily navigate through the list, selecting individual files or entire folders for restoration. The Recycle Bin’s right-click menu offers a range of actions, including:

  • Restore: This option allows users to recover deleted files to their original location.
  • Empty Recycle Bin: This action permanently deletes all files within the Recycle Bin, freeing up disk space.
  • Properties: This option displays information about the Recycle Bin, including its current size and storage capacity.

Key Features and Benefits

The Recycle Bin’s functionality offers several significant benefits for Windows 11 users:

  • Data Recovery: The most prominent benefit is the ability to recover accidentally deleted files. This feature prevents permanent data loss, saving users from potential frustration and inconvenience.
  • Disk Space Management: The Recycle Bin allows for selective deletion of unwanted files, freeing up disk space on the computer. This is particularly helpful when dealing with large files or folders that are no longer needed.
  • Safety Net: The Recycle Bin acts as a safety net for users who may not be confident in their file management skills. It provides a buffer against accidental deletions, ensuring that valuable data remains accessible.
  • Security: The Recycle Bin’s temporary storage of deleted files can be beneficial for security purposes. If a file is deleted accidentally, it remains in the Recycle Bin, making it accessible for recovery in case of data breaches or system malfunctions.

Customization Options

Windows 11 offers several options for customizing the Recycle Bin to suit individual needs:

  • Recycle Bin Size: Users can adjust the maximum size of the Recycle Bin, determining how much disk space it can occupy. This helps balance the need for data recovery with the desire to manage disk space effectively.
  • Empty Recycle Bin on Logoff: This option automatically empties the Recycle Bin when the user logs off, ensuring that deleted files are permanently removed from the system.
  • Bypass Recycle Bin: Advanced users can choose to bypass the Recycle Bin for specific files or folders, deleting them directly from the system without going through the temporary storage stage.

Understanding the Recycle Bin’s Limitations

While the Recycle Bin is a valuable tool, it’s important to understand its limitations:

  • Disk Space: The Recycle Bin requires disk space to store deleted files. If the Recycle Bin becomes full, it will stop accepting new files, potentially leading to data loss.
  • Permanent Deletion: Once the Recycle Bin is emptied, files are permanently deleted and cannot be recovered using standard methods.
  • Security: While the Recycle Bin offers some protection against accidental deletion, it is not a secure storage solution. Sensitive data should be handled with care and disposed of using secure methods.

Best Practices for Effective File Management

To maximize the benefits of the Recycle Bin and ensure effective file management, consider these best practices:

  • Regularly Empty the Recycle Bin: Emptying the Recycle Bin regularly frees up disk space and prevents it from becoming full, potentially leading to data loss.
  • Use the Recycle Bin for Accidental Deletions: The Recycle Bin is intended for accidental deletions. Avoid intentionally deleting files through the Recycle Bin, as it can lead to unnecessary clutter.
  • Backup Important Files: The Recycle Bin is not a replacement for proper data backups. It’s crucial to back up important files regularly to ensure their safekeeping in case of system failure or accidental deletion.
  • Use Secure Deletion Tools: For sensitive data, consider using secure deletion tools that overwrite files multiple times, making them unrecoverable even through advanced data recovery techniques.

FAQs about the Recycle Bin in Windows 11

Q: What happens when the Recycle Bin is full?

A: When the Recycle Bin reaches its maximum size, it will stop accepting new files. Any attempt to delete files will result in an error message indicating that the Recycle Bin is full. To resolve this, you can empty the Recycle Bin or increase its size through the properties settings.

Q: Can I recover deleted files from the Recycle Bin even after emptying it?

A: Once the Recycle Bin is emptied, files are permanently deleted from the system and cannot be recovered using standard methods. However, specialized data recovery software might be able to recover deleted files, though success is not guaranteed.

Q: How can I bypass the Recycle Bin for specific files or folders?

A: You can bypass the Recycle Bin for specific files or folders by using the "Shift + Delete" key combination when deleting them. This will permanently delete the files without moving them to the Recycle Bin.

Q: Is the Recycle Bin secure?

A: The Recycle Bin is not a secure storage solution. While it provides a safety net against accidental deletion, sensitive data should be handled with care and disposed of using secure methods.

Q: What are some alternatives to the Recycle Bin?

A: Some alternatives to the Recycle Bin include cloud storage services that offer version history and file recovery features. These services often provide a more robust solution for data recovery, particularly for sensitive information.

Tips for Utilizing the Recycle Bin Effectively

  • Utilize the Recycle Bin’s Properties: Explore the Recycle Bin’s properties settings to adjust its maximum size and customize its behavior to suit your needs.
  • Empty the Recycle Bin Regularly: Make it a habit to empty the Recycle Bin at least once a week to prevent it from becoming full and potentially blocking file deletions.
  • Use the "Shift + Delete" Shortcut for Permanent Deletion: If you’re certain that you want to permanently delete a file, use the "Shift + Delete" shortcut to bypass the Recycle Bin.
  • Consider Using Secure Deletion Tools: For sensitive data, use secure deletion tools to ensure that files are permanently erased and unrecoverable.

Conclusion

The Recycle Bin remains an essential component of Windows 11, providing a valuable safety net for accidental file deletions. By understanding its features, benefits, and limitations, users can effectively manage files and prevent data loss. Remember to empty the Recycle Bin regularly, utilize its properties settings for customization, and consider using secure deletion tools for sensitive data. With proper knowledge and best practices, the Recycle Bin can be a powerful tool for maintaining data integrity and ensuring a smooth user experience in Windows 11.

How to open Recycle bin in Windows 11 (Easiest ways) How to Hide or Remove Recycle Bin in Windows 11 How to Open Your Recycle Bin On Windows 11 PC (5 Methods)
Recycle Bin Windows 11 How to Open Recycle Bin in Windows 11 How To Hide And Show Recycle Bin In Windows 11 Pc Laptop Techschumz - www.vrogue.co
How to Open Recycle Bin in Windows 11 Change Recycle Bin Settings Windows 11  Recycle Bin Storage Size

Closure

Thus, we hope this article has provided valuable insights into The Recycle Bin: A Vital Component of Windows 11. We hope you find this article informative and beneficial. See you in our next article!

Rejuvenating Your PC: A Comprehensive Guide To Resetting Windows 10

Rejuvenating Your PC: A Comprehensive Guide to Resetting Windows 10

Introduction

With enthusiasm, let’s navigate through the intriguing topic related to Rejuvenating Your PC: A Comprehensive Guide to Resetting Windows 10. Let’s weave interesting information and offer fresh perspectives to the readers.

Rejuvenating Your PC: A Comprehensive Guide to Resetting Windows 10

How to Reset Windows 10 PC [Step by Step Guide]

In the digital age, our personal computers have become indispensable tools for work, entertainment, and communication. Over time, however, these devices can accumulate clutter – unwanted files, outdated software, and lingering remnants of past installations. This buildup can lead to sluggish performance, system instability, and even security vulnerabilities. A fresh start is often the solution, and for Windows 10 users, this means resetting the operating system.

Resetting Windows 10, often referred to as a "clean install," effectively erases the hard drive and reinstalls the operating system from scratch. This process offers a multitude of benefits, making it a valuable tool for both novice and experienced computer users.

Benefits of Resetting Windows 10

  • Enhanced Performance: A clean install removes unnecessary files, programs, and registry entries, resulting in a faster and more responsive system. This can be particularly noticeable on older machines or those with limited storage space.

  • Improved Stability: Accumulated data and software can lead to system instability, causing crashes and errors. Resetting Windows 10 eliminates these issues, providing a stable and reliable computing experience.

  • Security Enhancement: A fresh installation removes potentially malicious software and vulnerabilities that might have accumulated over time. This significantly reduces the risk of malware infections and data breaches.

  • Troubleshooting Solution: Resetting Windows 10 can resolve various system issues that may be resistant to other troubleshooting methods, such as driver conflicts, software incompatibilities, or corrupted system files.

  • Preparation for Upgrades: Before upgrading to a new version of Windows or installing a major update, it is often recommended to perform a clean install to ensure a smooth transition and avoid potential compatibility issues.

Types of Reset Options

Windows 10 offers two primary reset options:

  • Keep My Files: This option reinstalls Windows 10 while preserving personal files, such as documents, pictures, and music. However, it removes all installed applications and settings, requiring a fresh installation of software.

  • Remove Everything: This option performs a complete wipe of the hard drive, deleting all files, applications, and settings. It effectively returns the system to its factory default state.

Understanding the Process

Resetting Windows 10 is a relatively straightforward process, but it requires careful consideration and preparation:

  • Backup Your Data: Before proceeding with any reset option, it is crucial to back up all important data, including documents, pictures, videos, and other files. This can be achieved through external hard drives, cloud storage services, or USB drives.

  • Choose the Appropriate Reset Option: Carefully assess the desired outcome and select the appropriate reset option – "Keep My Files" or "Remove Everything."

  • Prepare for Reinstallation: After the reset process, you will need to reinstall all necessary software, including drivers, applications, and operating system updates.

Performing a Reset

  1. Access Settings: Open the "Settings" app by clicking the Windows icon in the taskbar and selecting "Settings."

  2. Navigate to Update & Security: In the Settings app, click "Update & Security."

  3. Select Recovery: On the left-hand side, choose "Recovery."

  4. Choose Reset This PC: Under the "Recovery" section, click "Reset this PC."

  5. Select the Reset Option: Choose either "Keep my files" or "Remove everything," depending on your needs.

  6. Confirm the Reset: Follow the on-screen instructions and confirm the reset operation.

FAQs about Resetting Windows 10

Q: Will resetting Windows 10 affect my personal files?

A: If you choose the "Keep my files" option, your personal files will be preserved. However, if you select "Remove everything," all files will be deleted.

Q: Do I need to back up my data before resetting?

A: It is highly recommended to back up all important data before resetting Windows 10, regardless of the chosen option.

Q: Will resetting Windows 10 remove all my installed programs?

A: Yes, resetting Windows 10 will remove all installed programs, including system applications.

Q: Will resetting Windows 10 affect my hardware drivers?

A: Resetting Windows 10 will remove existing hardware drivers. You will need to reinstall them after the reset process.

Q: How long does it take to reset Windows 10?

A: The duration of the reset process varies depending on factors such as hard drive size, system performance, and the chosen reset option. It can take anywhere from 30 minutes to several hours.

Tips for Resetting Windows 10

  • Use a bootable USB drive: For a more comprehensive reset, consider creating a bootable USB drive with the Windows 10 installation media. This allows you to perform a clean install from scratch.

  • Check for compatibility: Before reinstalling software, verify that it is compatible with the latest version of Windows 10.

  • Install necessary drivers: After the reset, ensure that all essential hardware drivers are installed correctly.

  • Update Windows: After completing the reset, run Windows Update to download and install the latest security patches and updates.

Conclusion

Resetting Windows 10 is a powerful tool for rejuvenating your PC, restoring its performance, and enhancing its security. It is an effective solution for resolving various system issues, preparing for upgrades, and ensuring a clean and stable computing environment. By understanding the process, choosing the appropriate option, and taking necessary precautions, you can successfully reset your Windows 10 system and enjoy a renewed computing experience.

HOW TO RESET WINDOWS 10 GUIDE! - YouTube How to Reset Your PC in Windows 11, 10 & 8 [Walkthrough] How to reset a Windows 10 PC to factory settings  Windows Central
windows 10 reset pc – reset factory windows 10 – Brapp How To Reset Windows 10 Step By Step Guide - Vrogue Windows 10 tip: Reset your PC completely  ZDNET
How To Reset Your Windows 10 PC  Make Your PC Like New  Factory Reset Windows 10 - YouTube Factory reset pc windows 10 - designguide

Closure

Thus, we hope this article has provided valuable insights into Rejuvenating Your PC: A Comprehensive Guide to Resetting Windows 10. We thank you for taking the time to read this article. See you in our next article!

Windows 10 Home Single Language: A Comprehensive Guide

Windows 10 Home Single Language: A Comprehensive Guide

Introduction

With great pleasure, we will explore the intriguing topic related to Windows 10 Home Single Language: A Comprehensive Guide. Let’s weave interesting information and offer fresh perspectives to the readers.

Windows 10 Home Single Language: A Comprehensive Guide

Windows 10 Home Single Language is a streamlined version of the popular operating system, designed specifically for users who require a single language interface. This version offers a cost-effective solution for individuals and businesses seeking a user-friendly and efficient operating system without the added complexity of multiple language options.

Understanding the Essence of Windows 10 Home Single Language

At its core, Windows 10 Home Single Language is a tailored version of Windows 10 Home designed to deliver a focused user experience. The core functionalities remain identical to the standard Windows 10 Home edition, but the single language interface simplifies navigation and eliminates potential language-related confusion. This streamlined approach makes it particularly appealing for:

  • Users with limited language proficiency: Individuals who are comfortable with a single language will find the interface intuitive and easy to navigate.
  • Businesses with a monolingual workforce: Companies with employees who primarily use a single language can benefit from the consistency and clarity of a unified interface.
  • Educational institutions: Schools and universities that cater to students with a specific language background can ensure a consistent learning environment.

Key Features and Benefits of Windows 10 Home Single Language

While the single language interface distinguishes this version from the standard Windows 10 Home, it retains all the essential features that users have come to expect:

  • User-friendly interface: Windows 10 Home Single Language offers an intuitive and familiar user interface, making it easy to navigate and access various functionalities.
  • Enhanced security: Built-in security features like Windows Defender and SmartScreen protect users from malware and online threats.
  • Seamless integration: The operating system seamlessly integrates with other Microsoft products and services, enhancing productivity and collaboration.
  • Cost-effective solution: Windows 10 Home Single Language provides a budget-friendly alternative to the standard Windows 10 Home edition, making it an attractive option for individuals and organizations with limited budgets.

The Importance of a Product Key

Like all Windows versions, Windows 10 Home Single Language requires a product key for activation. This unique key serves as a digital license that authorizes the use of the operating system on a specific device. It is crucial for ensuring that the software is legitimate and that users have access to all features and updates.

FAQs Regarding Windows 10 Home Single Language

1. Can I upgrade to a different language version after purchasing Windows 10 Home Single Language?

No, upgrading to a multi-language version after purchasing Windows 10 Home Single Language is not possible. You will need to purchase a separate license for the desired language version.

2. What happens if I need to change the language setting on Windows 10 Home Single Language?

Windows 10 Home Single Language does not support language changes after installation. If you require a different language, you will need to purchase a new license for the corresponding language version.

3. Can I use Windows 10 Home Single Language on multiple devices?

No, Windows 10 Home Single Language is licensed for use on a single device only.

4. How can I obtain a legitimate product key for Windows 10 Home Single Language?

Legitimate product keys for Windows 10 Home Single Language can be obtained through authorized retailers, online marketplaces, or directly from Microsoft.

5. What are the system requirements for Windows 10 Home Single Language?

The system requirements for Windows 10 Home Single Language are similar to those for the standard Windows 10 Home edition. You can find the specific requirements on the Microsoft website.

Tips for Using Windows 10 Home Single Language Effectively

  • Familiarize yourself with the operating system: Take some time to explore the interface and learn the basic functionalities.
  • Install necessary software and drivers: Ensure that you have installed the required drivers for your hardware and any essential software applications.
  • Regularly update your system: Keep your operating system and software up-to-date to ensure optimal performance and security.
  • Back up your data: Regularly back up your important files to prevent data loss in case of system failure.

Conclusion

Windows 10 Home Single Language offers a streamlined and cost-effective solution for users who require a single language operating system. Its user-friendly interface, enhanced security features, and seamless integration with other Microsoft products make it a reliable choice for individuals and businesses alike. By understanding the key features, benefits, and requirements of this version, users can maximize their experience and enjoy the advantages of a focused and efficient operating system.


Closure

Thus, we hope this article has provided valuable insights into Windows 10 Home Single Language: A Comprehensive Guide. We appreciate your attention to our article. See you in our next article!

A New Era Of Email: Exploring The Outlook App On Windows 11

A New Era of Email: Exploring the Outlook App on Windows 11

Introduction

With enthusiasm, let’s navigate through the intriguing topic related to A New Era of Email: Exploring the Outlook App on Windows 11. Let’s weave interesting information and offer fresh perspectives to the readers.

A New Era of Email: Exploring the Outlook App on Windows 11

Microsoft releases new Outlook app for Windows 11 (preview) - Pureinfotech

Microsoft’s Outlook, a mainstay in email management, has undergone a significant transformation with the release of Windows 11. The revamped Outlook app, seamlessly integrated into the operating system, offers a fresh approach to email communication, boasting a sleek interface, enhanced features, and a focus on user productivity. This article delves into the key aspects of the new Outlook app, exploring its design, functionality, and the benefits it offers to users.

A Design Revolution: Modernity Meets Functionality

The first impression of the new Outlook app is one of clean, minimalist design. The interface, adhering to the design language of Windows 11, prioritizes visual clarity and intuitive navigation. The app features a streamlined layout, with a focus on email organization and quick access to key functions. The familiar ribbon menu remains, but it has been redesigned to be less cluttered and more user-friendly. The emphasis on visual appeal is not merely aesthetic; it contributes to a more efficient and enjoyable user experience.

Beyond Email: A Hub for Communication and Collaboration

The new Outlook app transcends the traditional email client, evolving into a comprehensive communication and collaboration hub. It seamlessly integrates with other Microsoft services, including Calendar, Contacts, and Teams, providing a unified platform for managing all aspects of professional communication. Users can easily switch between email, calendar appointments, and team chats, streamlining workflows and enhancing productivity.

Enhanced Features for Streamlined Communication

The new Outlook app is packed with features designed to simplify and enhance email management. Some notable additions include:

  • Focused Inbox: This feature intelligently prioritizes important emails, filtering out less urgent messages and ensuring users focus on what matters most.
  • Quick Actions: The app allows for rapid actions on emails, such as marking them as read, flagging them for follow-up, or deleting them, all with a single click.
  • Search Improvements: The search function has been refined, offering more accurate and efficient results, making it easier to find specific emails or attachments.
  • Enhanced Calendar Integration: The integration with Calendar is more robust than ever, allowing users to view and manage appointments directly within the Outlook app.
  • Improved Accessibility: The app incorporates accessibility features, such as high contrast modes and screen reader compatibility, ensuring inclusivity for all users.

Integration with Other Microsoft Services: A Connected Ecosystem

The new Outlook app’s strength lies in its seamless integration with other Microsoft services. Users can access and manage their files stored in OneDrive directly from within the app, making it easy to share documents and collaborate with others. The integration with Teams allows for effortless communication and collaboration within a unified platform, streamlining workflows and enhancing team productivity.

Benefits of the New Outlook App

The redesigned Outlook app offers numerous benefits to users, including:

  • Improved User Experience: The intuitive interface and streamlined design enhance user experience, making email management less cumbersome and more enjoyable.
  • Increased Productivity: The focus on efficiency, with features like Focused Inbox and Quick Actions, helps users stay organized and manage their email effectively, boosting productivity.
  • Enhanced Collaboration: The integration with other Microsoft services, particularly Teams, facilitates seamless collaboration, making it easier to work together on projects and share information.
  • Security and Reliability: The app leverages the security and reliability of Microsoft’s cloud infrastructure, ensuring user data is protected and accessible.

FAQs: Addressing Common Queries

Q: Is the new Outlook app available for all Windows 11 users?

A: The new Outlook app is pre-installed on all Windows 11 devices.

Q: Can I still access my old Outlook emails and data?

A: Yes, your existing emails and data will be seamlessly migrated to the new Outlook app.

Q: Is the new Outlook app compatible with other email providers?

A: Yes, the new Outlook app supports multiple email providers, including Gmail, Yahoo Mail, and others.

Q: Can I customize the appearance of the new Outlook app?

A: Yes, the app offers customization options, allowing users to adjust the theme, font size, and other settings to their preferences.

Q: What are the system requirements for the new Outlook app?

A: The new Outlook app is compatible with all devices running Windows 11.

Tips for Optimizing the New Outlook App

  • Utilize the Focused Inbox: Enable the Focused Inbox feature to prioritize important emails and filter out less urgent messages.
  • Set up Quick Actions: Customize Quick Actions to streamline email management, such as marking emails as read or deleting them with a single click.
  • Explore Keyboard Shortcuts: Leverage keyboard shortcuts for faster navigation and email management.
  • Integrate with Calendar and Teams: Utilize the seamless integration with Calendar and Teams for improved scheduling and collaboration.
  • Customize the Appearance: Adjust the theme, font size, and other settings to personalize the app to your preferences.

Conclusion: A New Era of Email Management

The new Outlook app on Windows 11 represents a significant advancement in email management, offering a user-friendly interface, enhanced features, and seamless integration with other Microsoft services. It empowers users to manage their emails effectively, collaborate seamlessly, and stay organized, ultimately enhancing productivity and streamlining communication. The app’s focus on visual appeal, intuitive navigation, and a range of features makes it a powerful tool for individuals and teams alike. As Microsoft continues to innovate and improve the Outlook app, it is poised to become an indispensable tool in the modern digital landscape.

Closer look at Windows 11's new Outlook email app with Mica design and more Home windows 11's redesigned Outlook app is now rolling out to extra customers - Tech Post logy Windows 11's redesigned Outlook app is now rolling out to more users
Closer look at Windows 11's new Outlook email app with Mica design and more Windows 11's new Outlook app ready for personal accounts - Pureinfotech How to enable new Outlook app UI on Windows 11 - Pureinfotech
Windows 11s New Outlook App Now Supports Gmail Personal Accounts Images One Outlook app preview releases for Windows 11 - Pureinfotech

Closure

Thus, we hope this article has provided valuable insights into A New Era of Email: Exploring the Outlook App on Windows 11. We appreciate your attention to our article. See you in our next article!

Capturing Your Screen: A Comprehensive Guide To Print Screen In Windows 10

Capturing Your Screen: A Comprehensive Guide to Print Screen in Windows 10

Introduction

In this auspicious occasion, we are delighted to delve into the intriguing topic related to Capturing Your Screen: A Comprehensive Guide to Print Screen in Windows 10. Let’s weave interesting information and offer fresh perspectives to the readers.

Capturing Your Screen: A Comprehensive Guide to Print Screen in Windows 10

How To Capture Screenshot In Windows 10 - Howto Techno

In the digital age, the ability to capture and share visual information is paramount. Whether it’s a troubleshooting guide, a captivating screenshot of a game, or a quick visual note for a colleague, the print screen function in Windows 10 provides a simple and efficient way to achieve this.

This article delves into the intricacies of this fundamental feature, exploring its various functionalities, potential applications, and accompanying tools for enhanced screen capture experiences.

Understanding the Print Screen Function: A Gateway to Visual Information

At its core, the print screen function in Windows 10 acts as a digital camera for your computer screen. It captures the entire desktop, including all open windows, the taskbar, and the notification area, and stores it as an image. This image can then be saved, shared, or used in various applications.

The most common way to utilize the print screen function is through its dedicated shortcut key: Print Screen (PrtScn) or Print Screen SysRq. Pressing this key triggers the capture process, silently storing the image in the clipboard. This image is then ready to be pasted into any application that supports image insertion, such as Microsoft Paint, Word, or even email.

Beyond the Basics: Expanding the Scope of Screen Capture

While the standard print screen function captures the entire screen, Windows 10 offers additional options for capturing specific areas or windows:

1. Alt + Print Screen: This combination captures only the active window, providing a focused image of the current application. This is particularly useful when you want to share a specific window without the clutter of other open programs.

2. Windows Key + Print Screen: This shortcut captures the entire screen and automatically saves it as a PNG file in the Pictures folder under a "Screenshots" subfolder. This eliminates the need to manually paste the image into an application, streamlining the capture process.

3. Snipping Tool: A dedicated tool available in Windows 10, the Snipping Tool offers a more interactive approach to screen capture. It allows users to select specific areas of the screen, choose different capture modes (rectangular, free-form, window, full-screen), and even add annotations to the captured image.

4. Xbox Game Bar: For capturing gameplay moments, the Xbox Game Bar, accessible through the Windows key + G shortcut, provides a dedicated screen capture functionality. This allows users to record videos, take screenshots, and even stream their gameplay live.

Utilizing the Power of Print Screen: Applications and Benefits

The print screen function transcends its basic image capture capabilities, offering a multitude of applications across diverse fields:

1. Documentation and Tutorials: Clear and concise visuals are essential for technical documentation and online tutorials. Print screen enables users to capture specific steps, error messages, or program interfaces, providing visual aids for explaining processes or troubleshooting issues.

2. Communication and Collaboration: Sharing screenshots is a highly effective way to convey information visually. Whether it’s highlighting a specific section of a document, demonstrating a feature in an application, or illustrating a problem, print screen facilitates efficient communication and collaboration.

3. Education and Learning: Visual learning is a powerful tool, and print screen plays a crucial role in enhancing the learning process. Students can capture lecture slides, diagrams, or complex equations, creating their own visual library for future reference.

4. Entertainment and Creativity: From capturing memorable gaming moments to creating memes or digital art, print screen empowers users to express themselves creatively. It allows for the extraction of specific elements from images, facilitating artistic manipulation and personalized content creation.

5. Research and Analysis: Researchers and analysts often rely on visual data to draw insights and support their findings. Print screen allows them to capture data visualizations, graphs, or charts, enabling further analysis and interpretation.

Exploring Common FAQs: Addressing User Concerns

1. What happens to the captured image after pressing Print Screen?

The captured image is stored in the clipboard, a temporary storage area for copied data. This image can then be pasted into any application that supports image insertion.

2. How can I save the captured image?

To save the captured image, you can paste it into an image editing application like Microsoft Paint or a document editor like Microsoft Word. You can then save the image in a desired format (e.g., PNG, JPG). Alternatively, using the Windows key + Print Screen shortcut automatically saves the image as a PNG file in your Pictures folder.

3. Can I edit the captured image?

Yes, you can edit the captured image using various image editing applications. These applications allow you to crop, resize, add annotations, adjust colors, and apply various filters.

4. Is there a limit to the number of screenshots I can take?

No, there is no limit to the number of screenshots you can take. However, each screenshot will replace the previous one in the clipboard.

5. How do I capture a specific area of the screen?

You can use the Snipping Tool to capture specific areas of the screen. This tool allows you to select a rectangular, free-form, or window-based area for capture.

Refining Your Screen Capture Skills: Tips and Techniques

1. Experiment with different capture methods: Explore the various screen capture options available in Windows 10, including Alt + Print Screen, Windows key + Print Screen, and the Snipping Tool, to find the most suitable method for your specific needs.

2. Utilize the Snipping Tool’s features: Take advantage of the Snipping Tool’s ability to delay capture, choose different capture modes, and add annotations to your screenshots.

3. Explore third-party screen capture tools: For advanced features like video recording, scheduling captures, or remote screen capture, consider using third-party screen capture tools.

4. Optimize your screenshots for sharing: Ensure your screenshots are clear, legible, and appropriately sized for easy sharing and viewing.

5. Practice and refine your technique: The more you use the print screen function, the more proficient you will become at capturing information efficiently and effectively.

Conclusion: The Versatility of Print Screen in the Digital Landscape

The print screen function in Windows 10 is a versatile tool that empowers users to capture and share visual information effectively. From documenting technical processes to creating engaging visual content, print screen plays a crucial role in enhancing communication, learning, and creativity in the digital world. By mastering its various functionalities and exploring its diverse applications, users can leverage this simple yet powerful feature to unlock a world of visual possibilities.

Print Screen - How to Capture your Desktop Screen (How to take a Screenshot in Windows) - YouTube How to print screen on windows 10 - ITHelpSupport.com How to Print Screen on Windows 10?
How to Print a Screen in Windows: A Comprehensive Guide - The Explanation Express How To Screenshot on PC (Windows 10) - Quick Guide Printscreen Windows 10
How To Print Screen In Windows How to Print Screen (Screenshot) on Windows 10 - YouTube

Closure

Thus, we hope this article has provided valuable insights into Capturing Your Screen: A Comprehensive Guide to Print Screen in Windows 10. We thank you for taking the time to read this article. See you in our next article!